

6
6THGEN_AI4
Guest
I strongly recommend to practice in a used fender before starting the project.
This is not my DIY, I just found it in the web and I thought it was pretty good and helpful even thoght is not a 6th gen Accord. In fact the work is very similar
We printed out a template and used guidelines from this site:
Template and Tips for Side marker cutting
The person on the site mentioned they cut the hole smaller than the template, but we found that the template was an exact fit leaving the notch alone and simply following the lines to cut the holes.

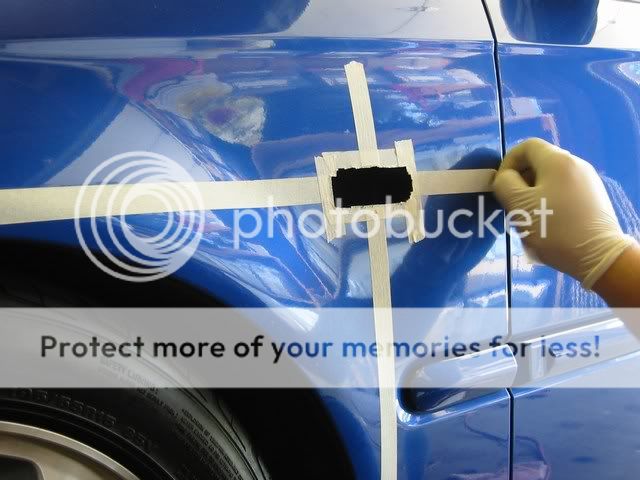
Here is the placement on the fender, 155 mm from the top of the molding to the bottom of the tape and 140 mm from the edge of the door to the edge of the tape.
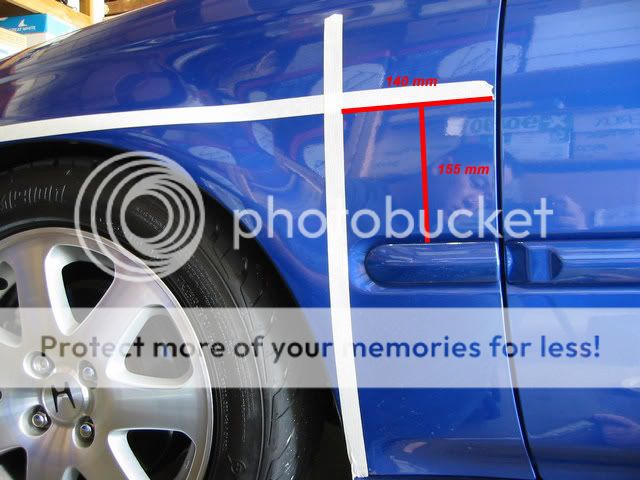
We then found the center of the intersection, which is where the exact center of the side marker:

[font="]We then found the center of the template and lined up the two over each other and taped it down.[/font][font="]

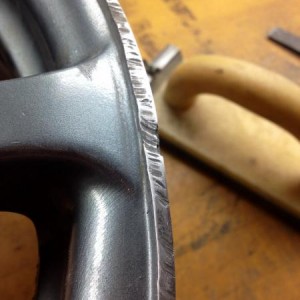
[/font] A drill was used to make the initial hole, and then we used a "Metal Nibbler" from Radio Shack ($12.99)
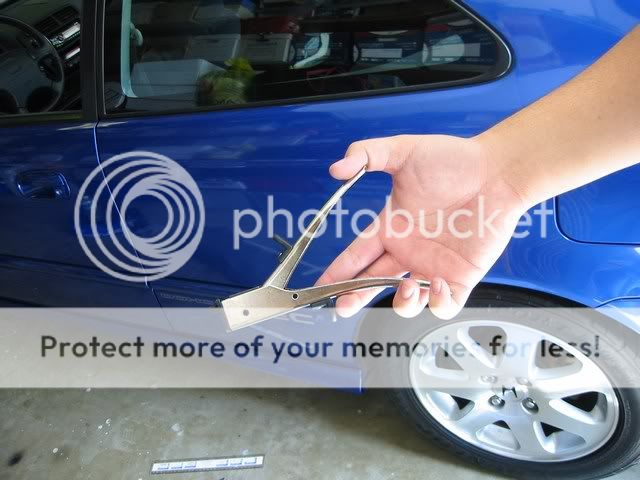
(This thing was awesome, and it cut very precisely, even though it took awhile, probably better than using a dremel.)
Getting started on the fender I look scared in that picture, Poor fender.
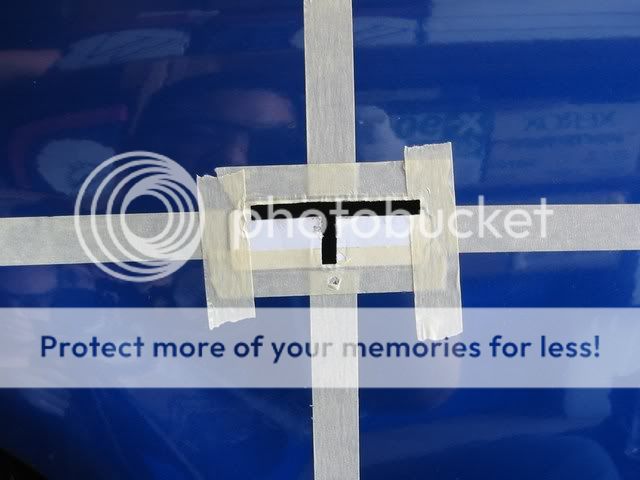
The final Hole
After cutting the hole, add place some touch up paint on the bare metal to help prevent rust. We also plan to get a rubber ring to create a tight seal around the side marker or use plumber's putty to help it.
Wiring Side Markers
Wiring Side Markers
There are two wiring options. USDM Side marker only blinks when turn signal is on or JDM (Side markers stay on and blink alternately with the signal). Pull back the fender liner and remove the corner/parking light. There will be 3 wires going to the bulb. Tap into the corresponding wires for each blinking style.
USDM:
Tap into green (turn signal) and black (ground) wire.
JDM:
Tap into red (parking light) and green (turn signal) wire.


This is not my DIY, I just found it in the web and I thought it was pretty good and helpful even thoght is not a 6th gen Accord. In fact the work is very similar
We printed out a template and used guidelines from this site:
Template and Tips for Side marker cutting
The person on the site mentioned they cut the hole smaller than the template, but we found that the template was an exact fit leaving the notch alone and simply following the lines to cut the holes.
Here is the placement on the fender, 155 mm from the top of the molding to the bottom of the tape and 140 mm from the edge of the door to the edge of the tape.
We then found the center of the intersection, which is where the exact center of the side marker:
[font="]We then found the center of the template and lined up the two over each other and taped it down.[/font][font="]
[/font] A drill was used to make the initial hole, and then we used a "Metal Nibbler" from Radio Shack ($12.99)
(This thing was awesome, and it cut very precisely, even though it took awhile, probably better than using a dremel.)
Getting started on the fender I look scared in that picture, Poor fender.
The final Hole
After cutting the hole, add place some touch up paint on the bare metal to help prevent rust. We also plan to get a rubber ring to create a tight seal around the side marker or use plumber's putty to help it.
Wiring Side Markers
Wiring Side Markers
There are two wiring options. USDM Side marker only blinks when turn signal is on or JDM (Side markers stay on and blink alternately with the signal). Pull back the fender liner and remove the corner/parking light. There will be 3 wires going to the bulb. Tap into the corresponding wires for each blinking style.
USDM:
Tap into green (turn signal) and black (ground) wire.
JDM:
Tap into red (parking light) and green (turn signal) wire.
Last edited by a moderator: