

simon_y
Well-Known Member
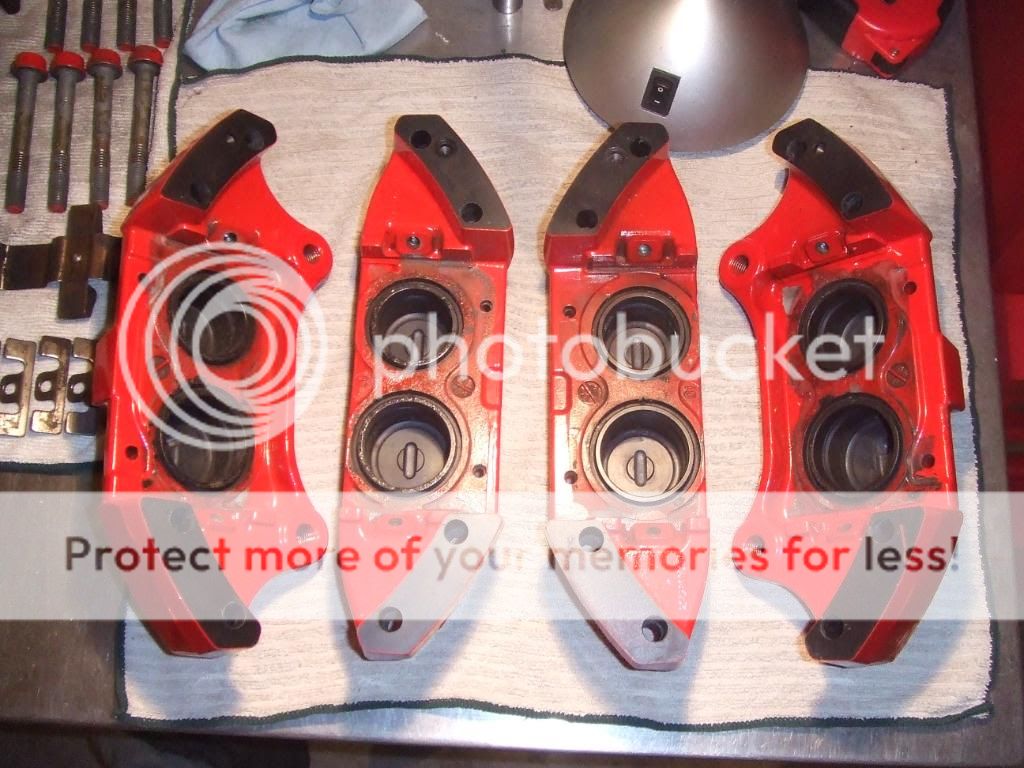
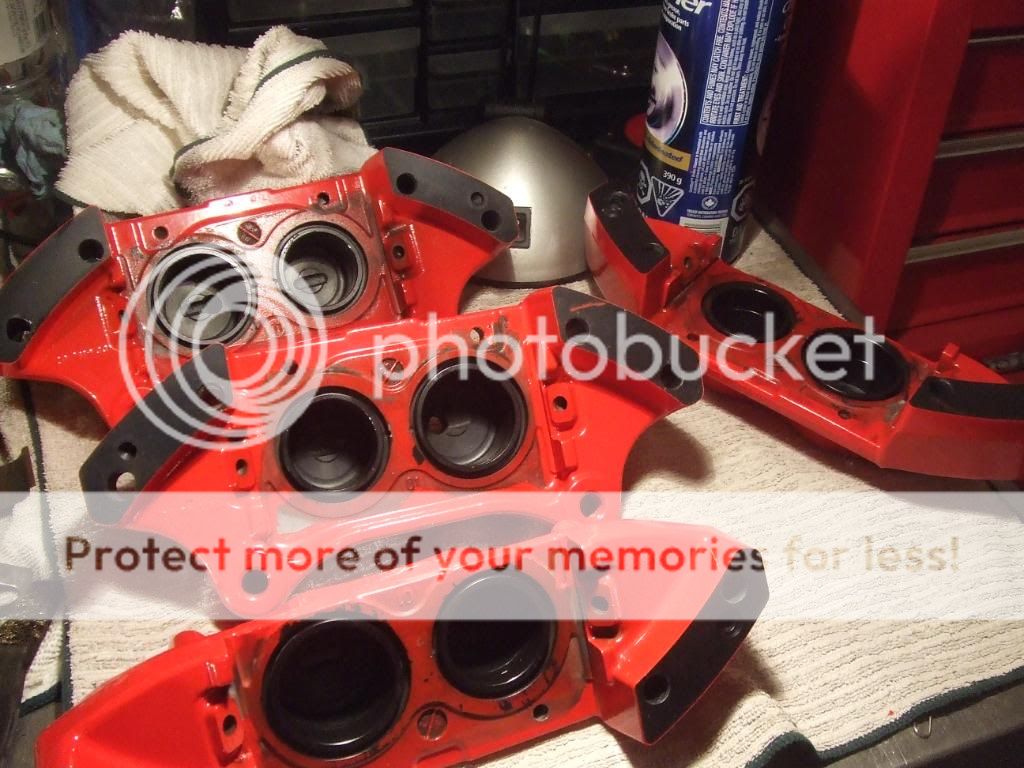
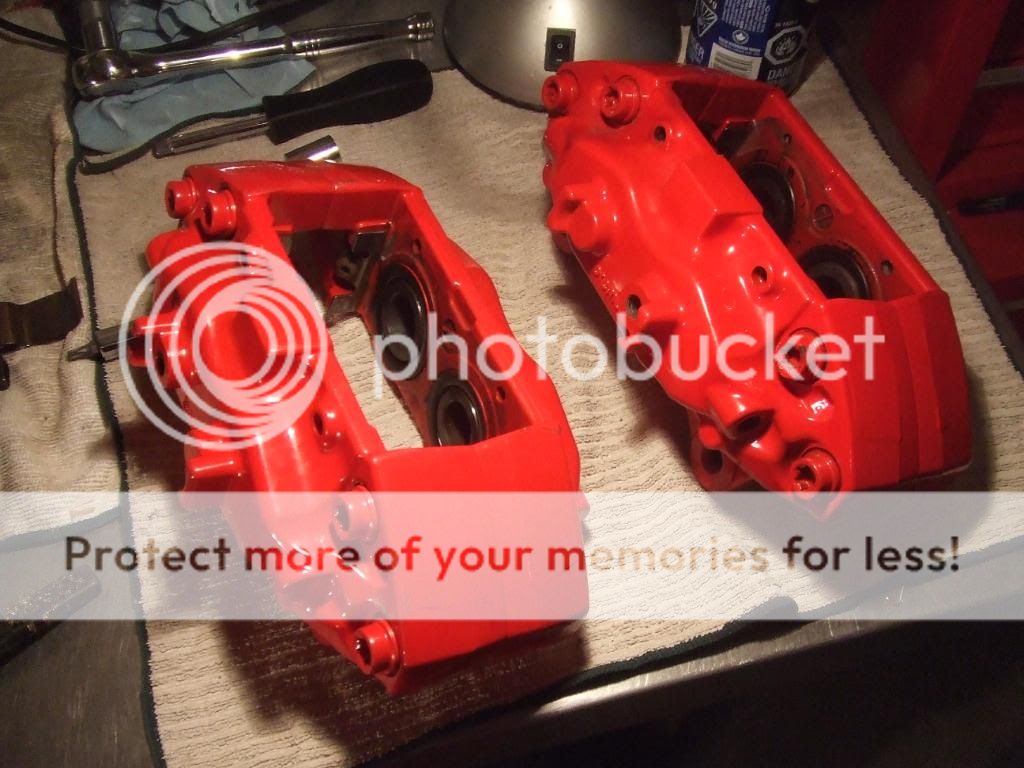
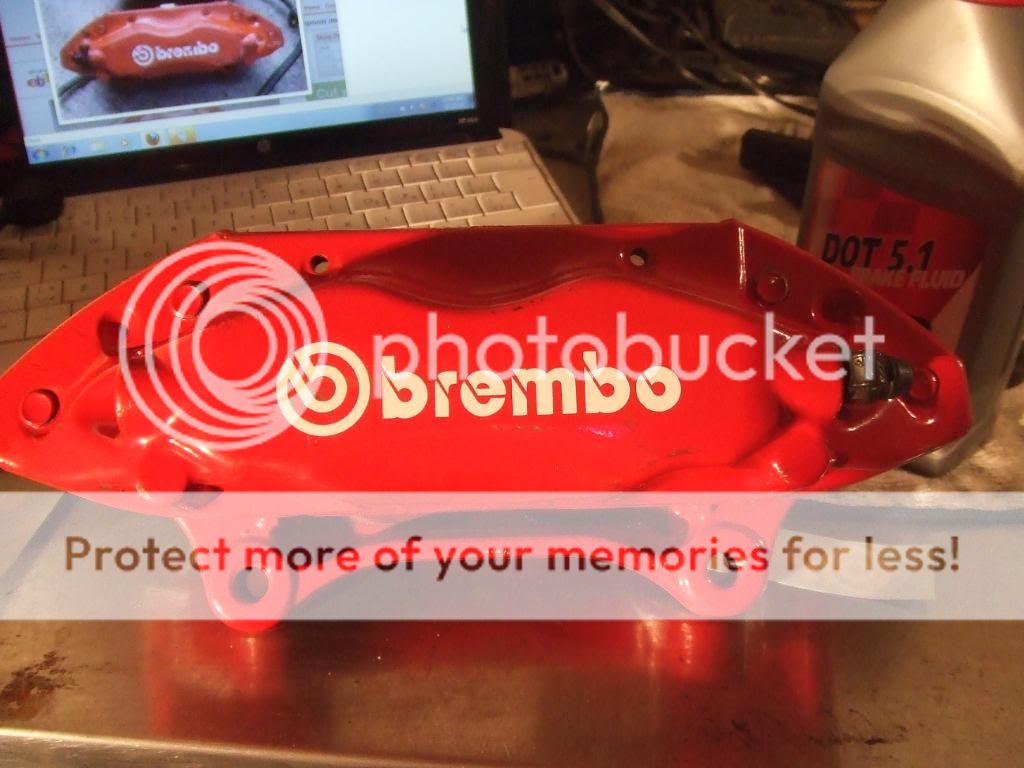
So I picked up some Front DC5r Brembo Calipers locally for a deal I couldn't pass up. Reason being it was really cheap, that was because it had to be built, it was all in pieces. The previous guy I bought it from got it powder coated but never installed it hence why it was in pieces.
Tools and Stuff you will need:
- Impact Wrench
- 3/4 Ratchet
- 19mm Socket
- 17mm Socket
- T-55 Star Bit
- T-05 Star Bit
- Bungee Cord
- 14mm Wrench
- 11mm Wrench
- Steel Brush
- Brake Cleaner
- Clean Towels
- Brake Fluid
- Blue Thread Lock
- Anti-Seize
This is just a guide and may not be in the order you chose to do it. There may be other ways to do it but this is my way of doing it and hold no responsibility for any damage or injuries and occur.
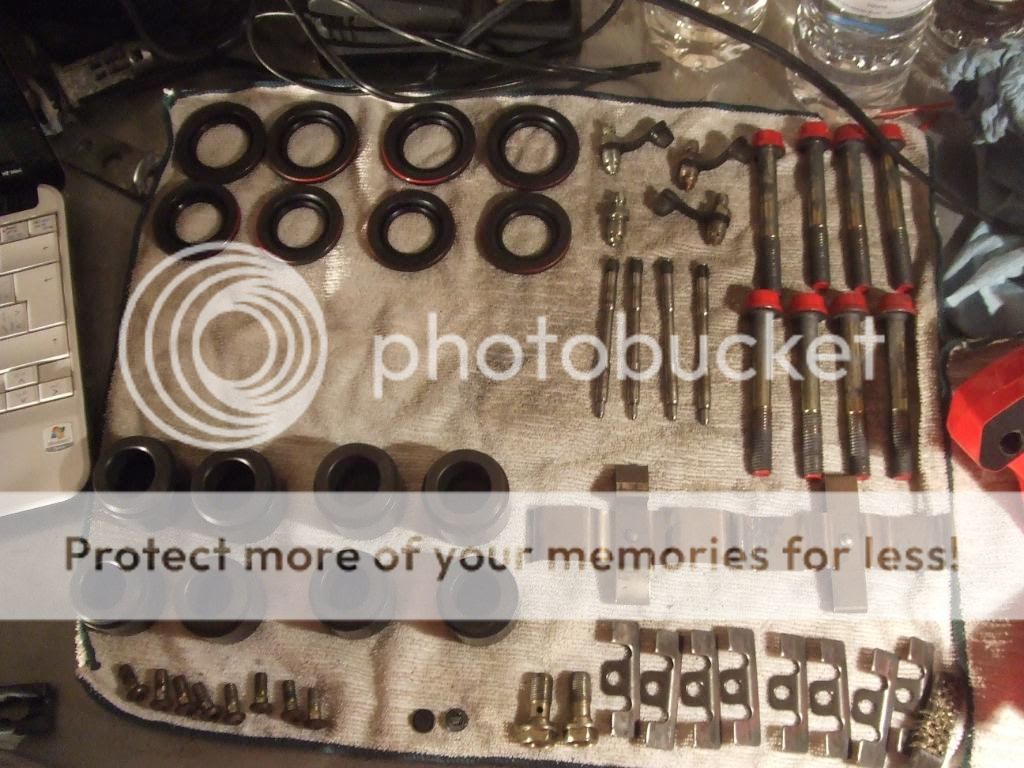
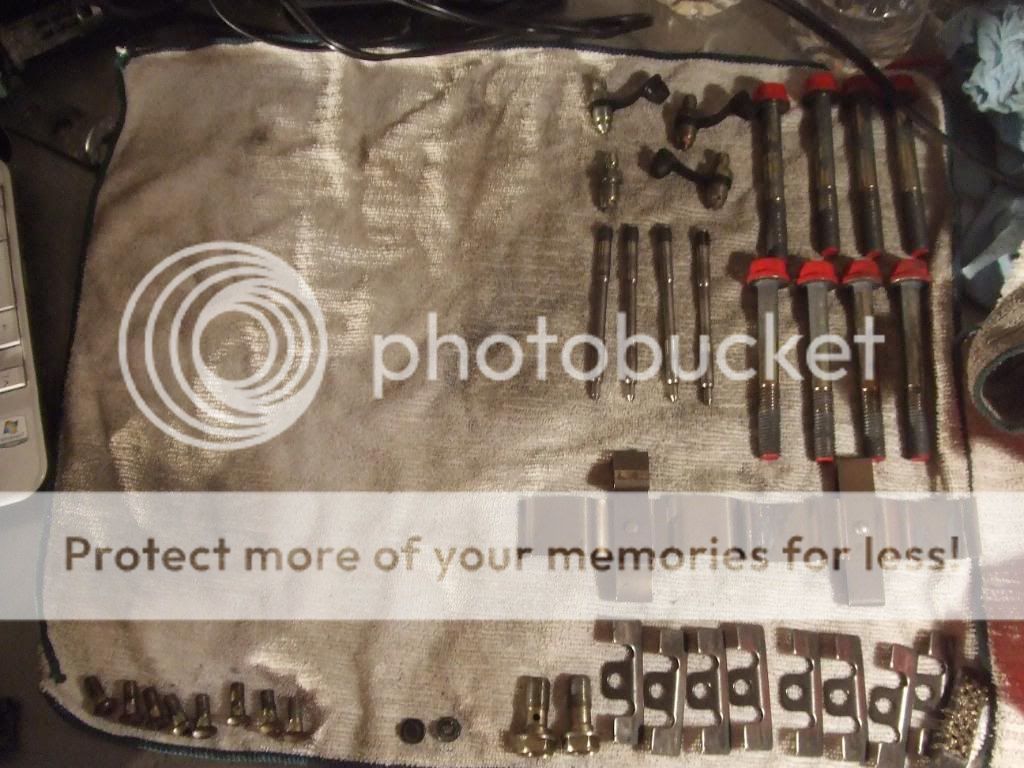
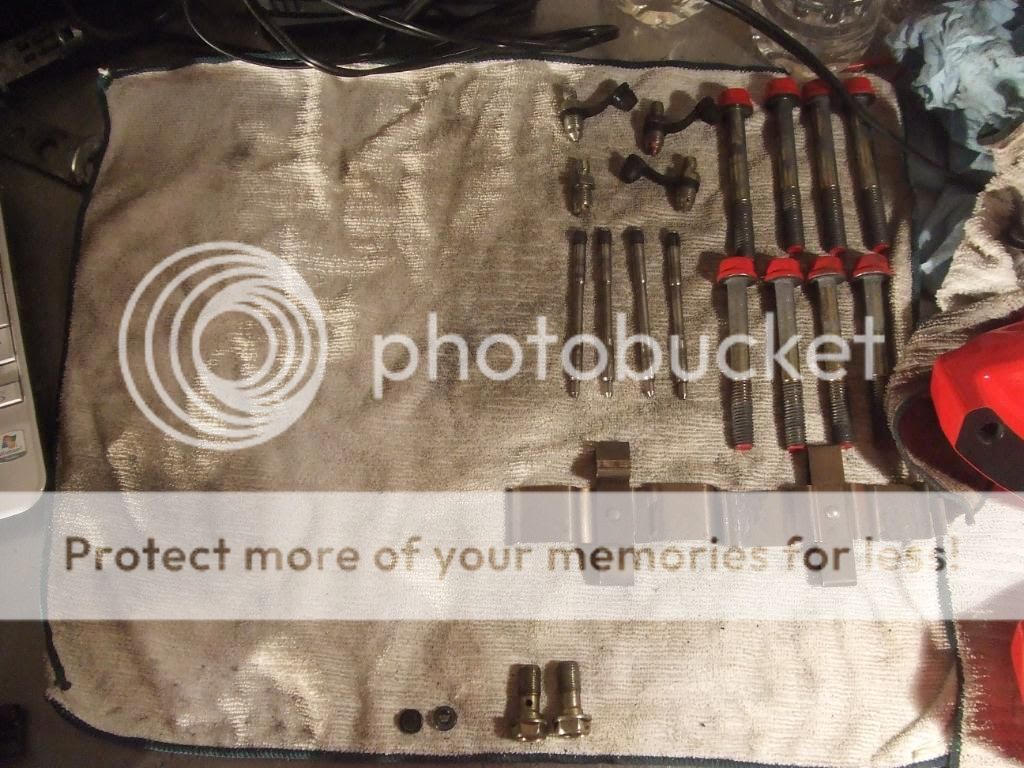
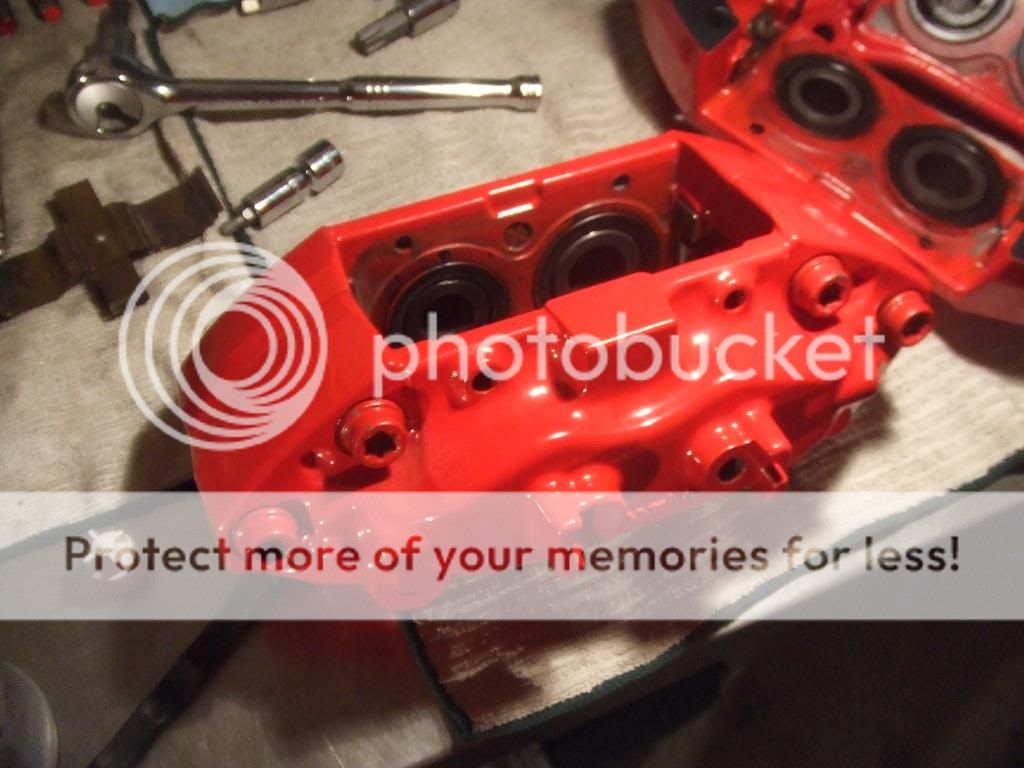
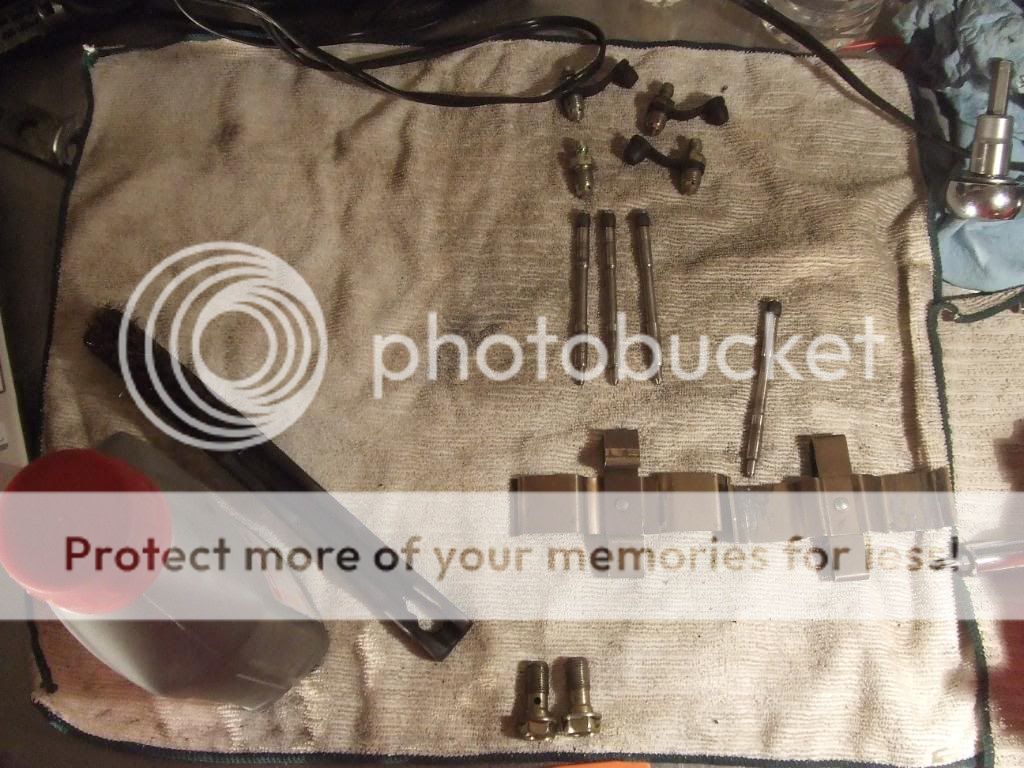
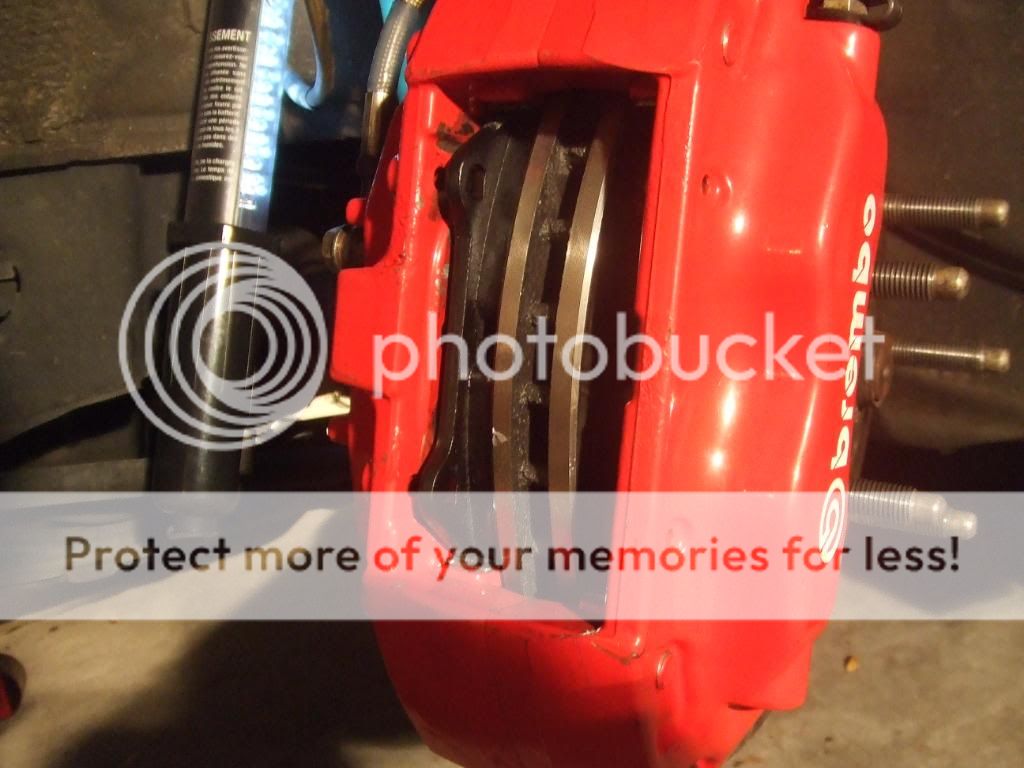
Step 1: Lay out all your caliper parts neatly to see if your missing anything and then proceed to clean everything and remove all the dirt, brake dust, etc.


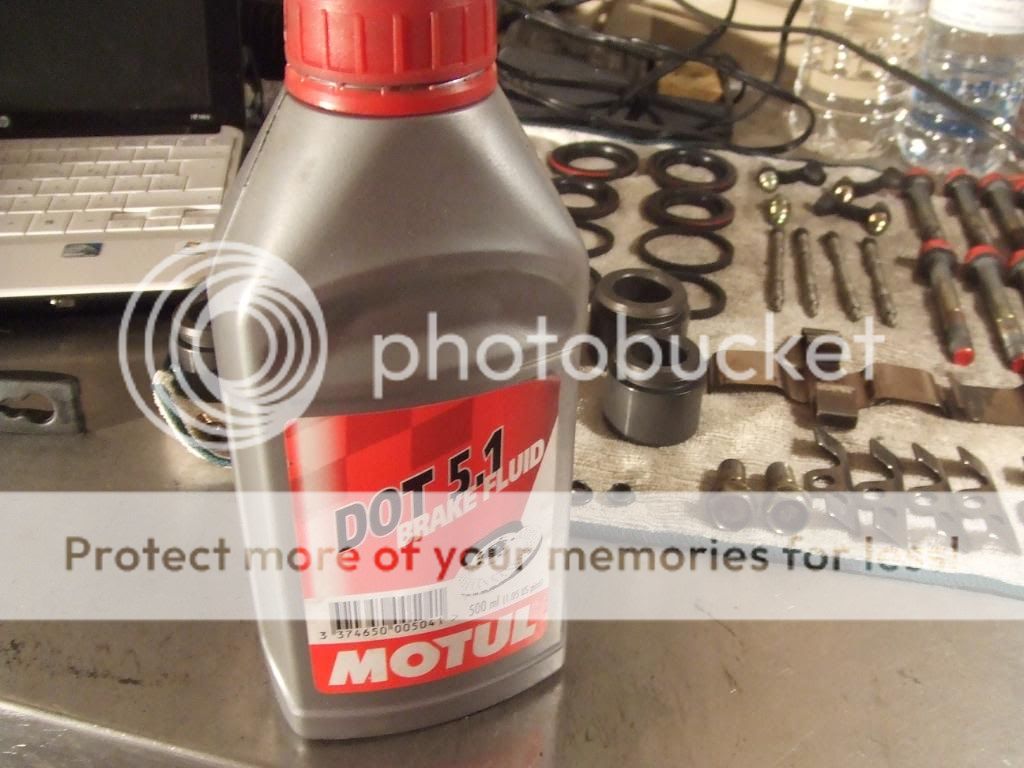
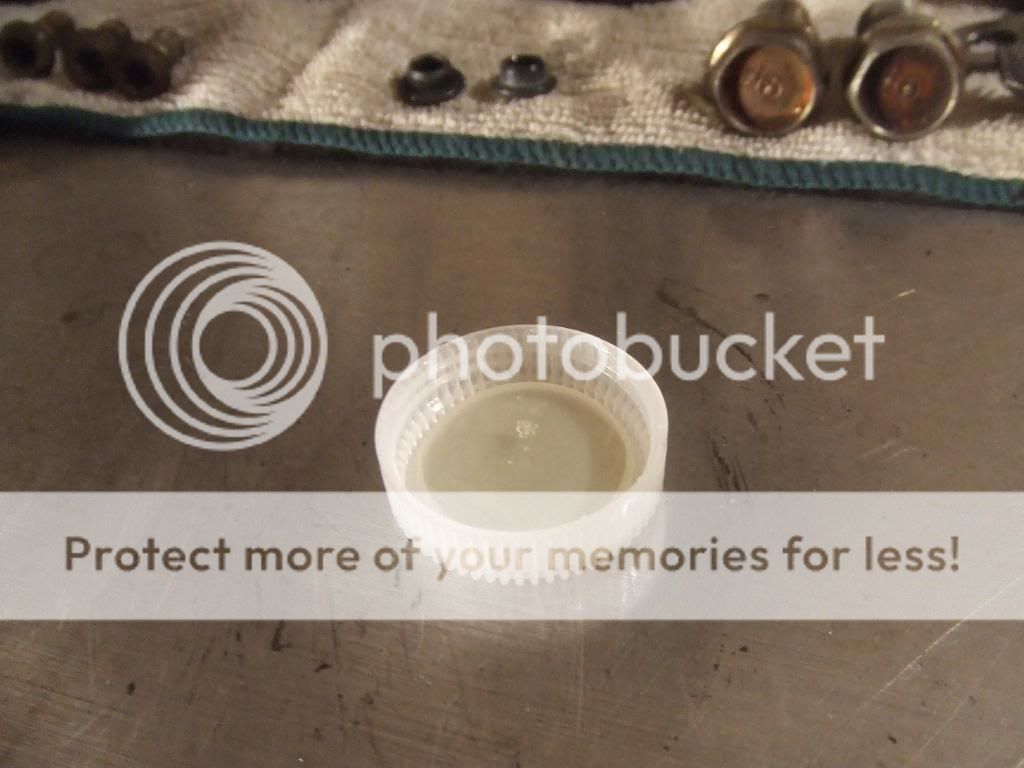
Step 2: Grab a bottle of brake fluid you plan on using in your car or whats already in your car. I used Motul 5.1, and find something small to pour some brake fluid into, I used a bottle cap.
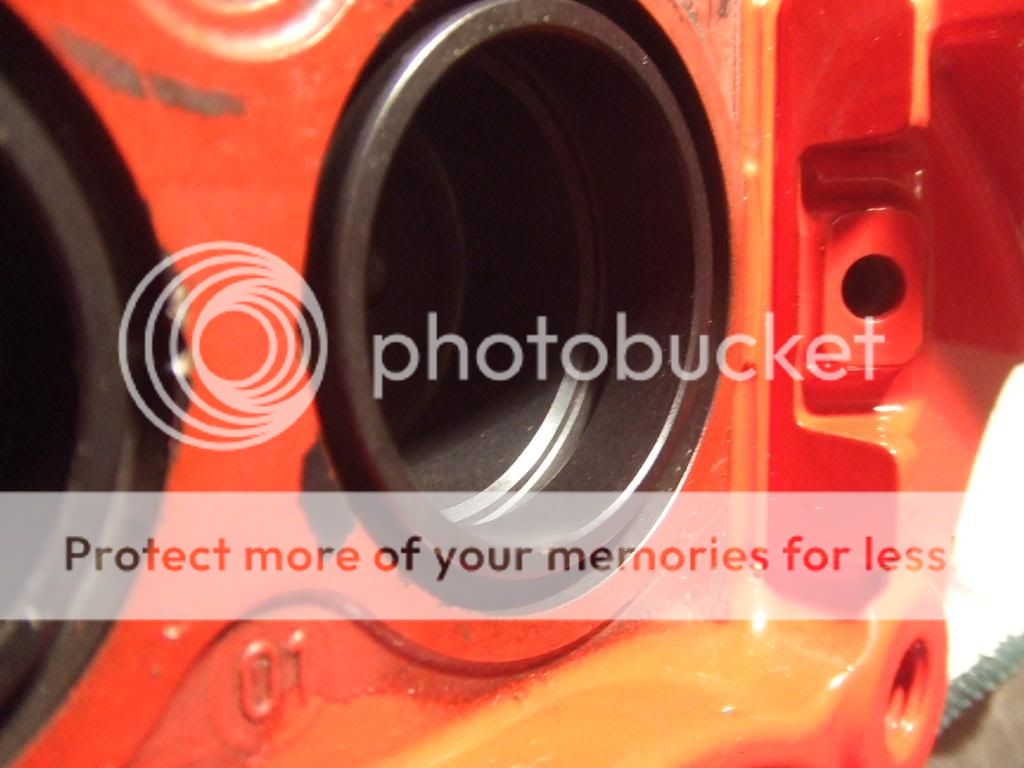
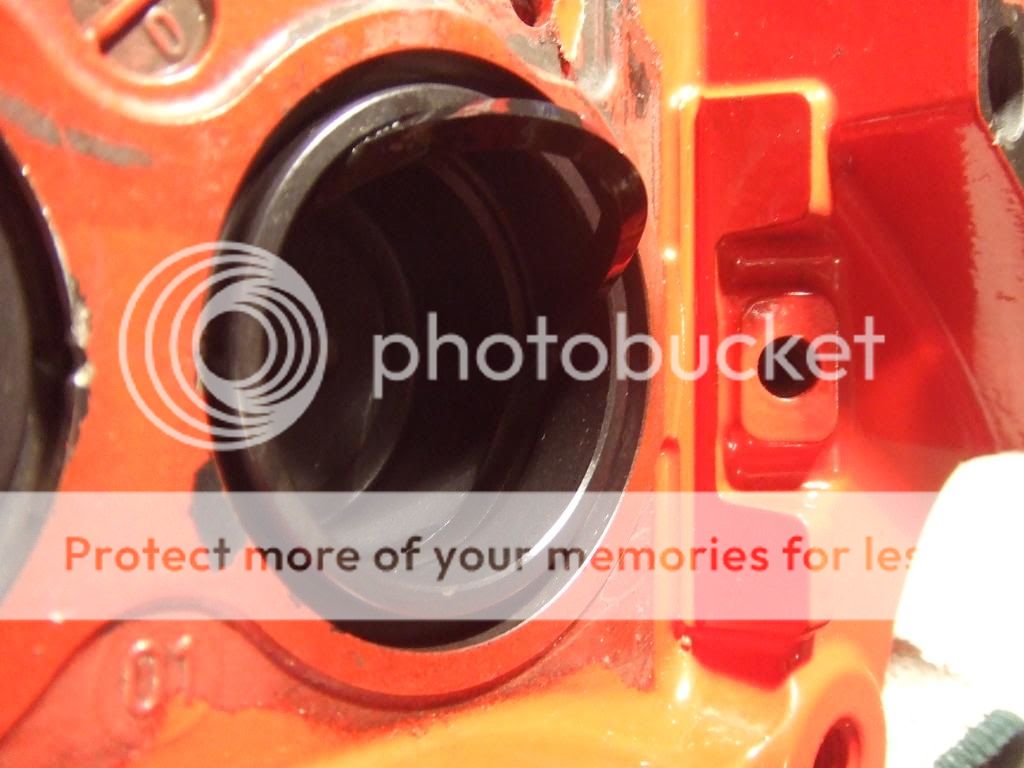
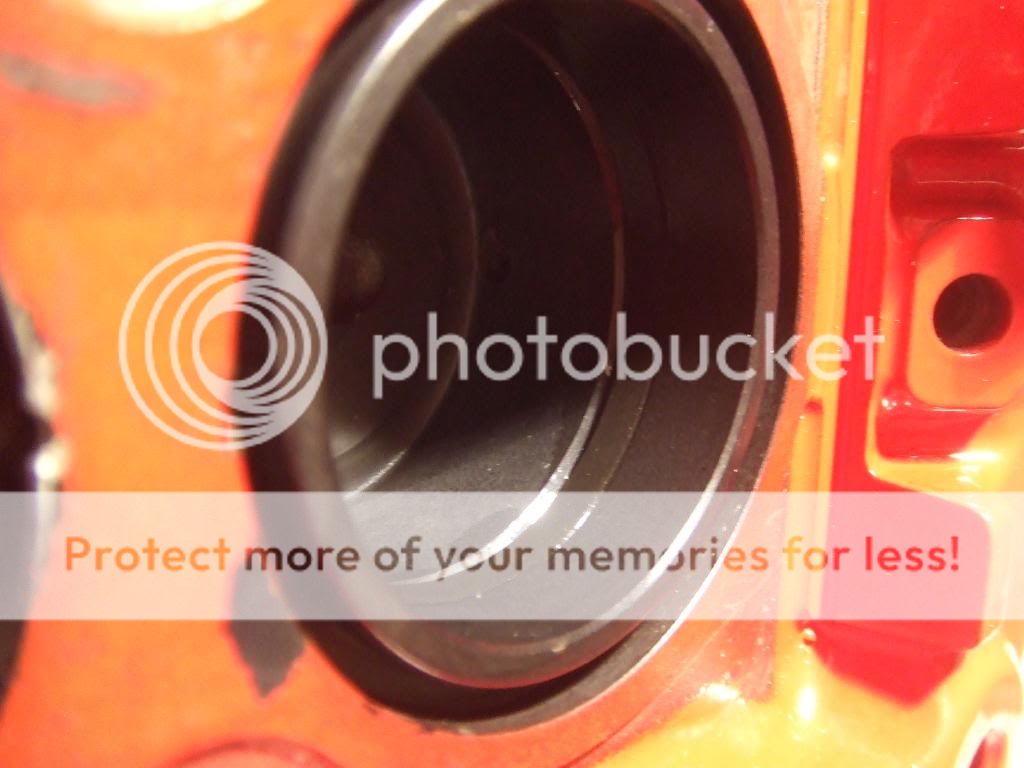
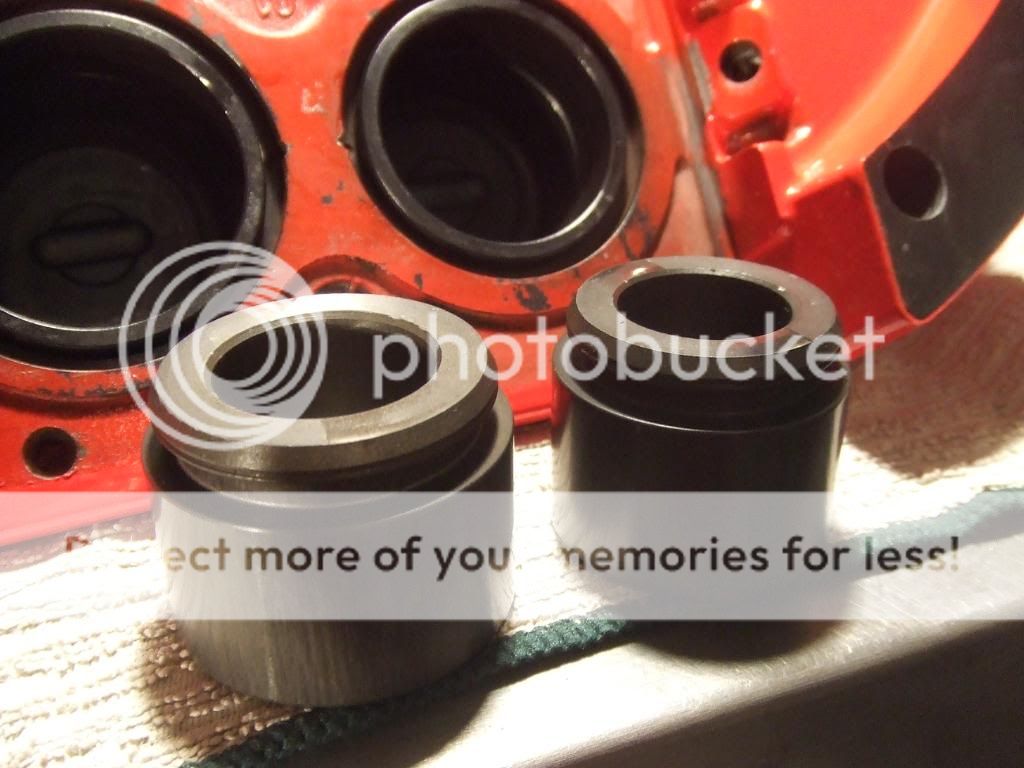
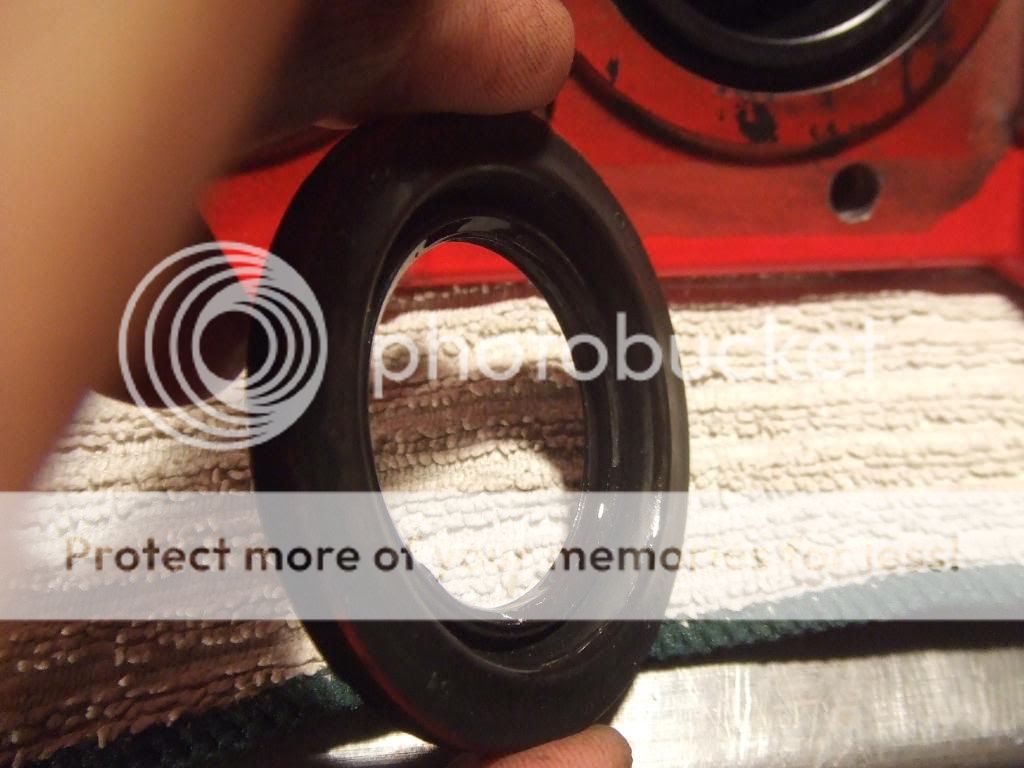
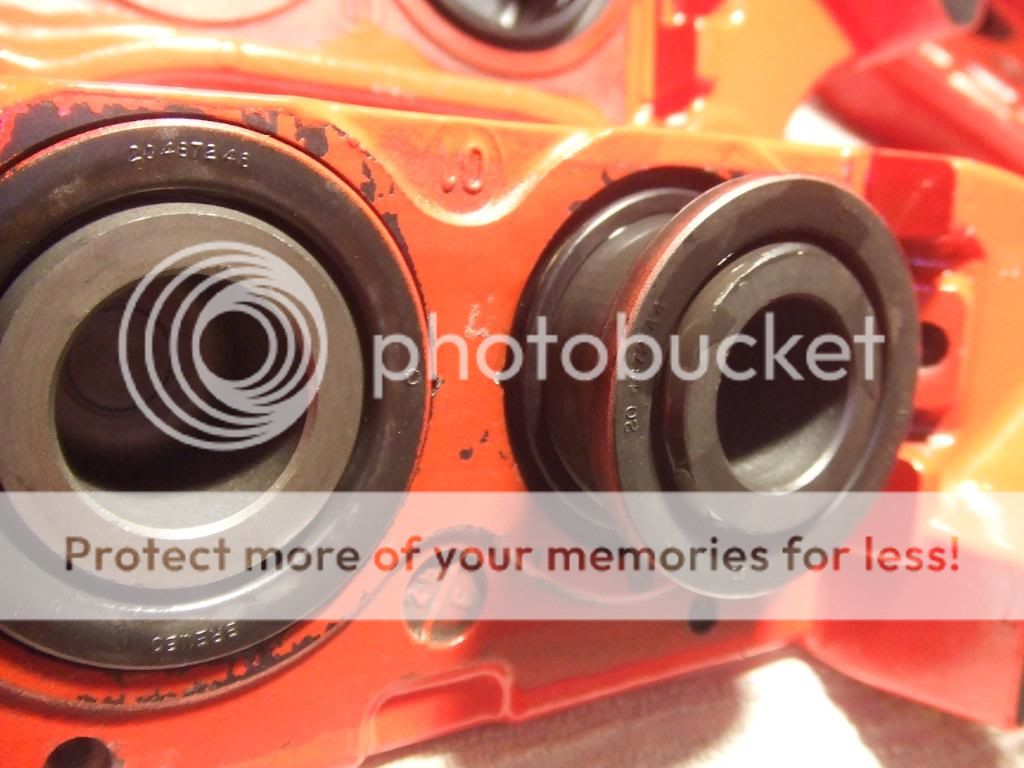
Step 3: Grab one of the O-Rings and lubricate it with some brake fluid. Just put some on your finger and rub it all around the O-Ring. Look inside the piston hole and you will see a little rib, that's where the O-Ring is going to sit.
Note: Notice the O-Rings have 2 Sizes, the large one and the smaller one, then look at the caliper piston hole, notice how 1 piston is larger than the other. Large O-Ring goes in large hole and Small O-Ring goes in small hole.
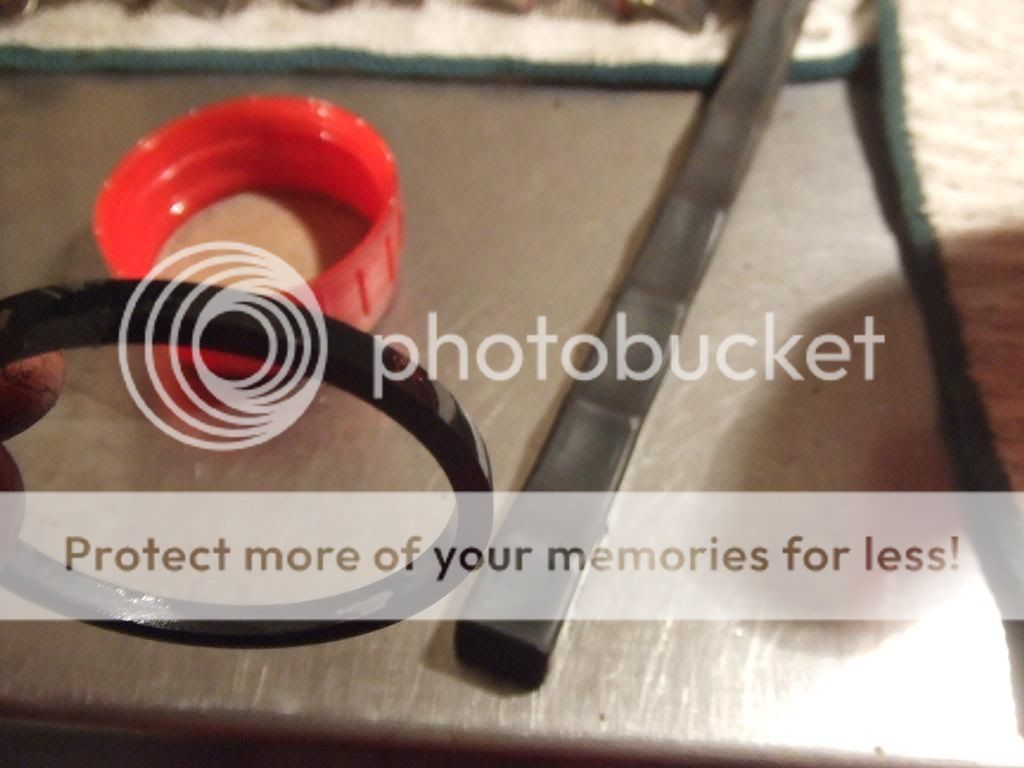
Be careful not to tear or rip or damage the O-Ring in any way
In
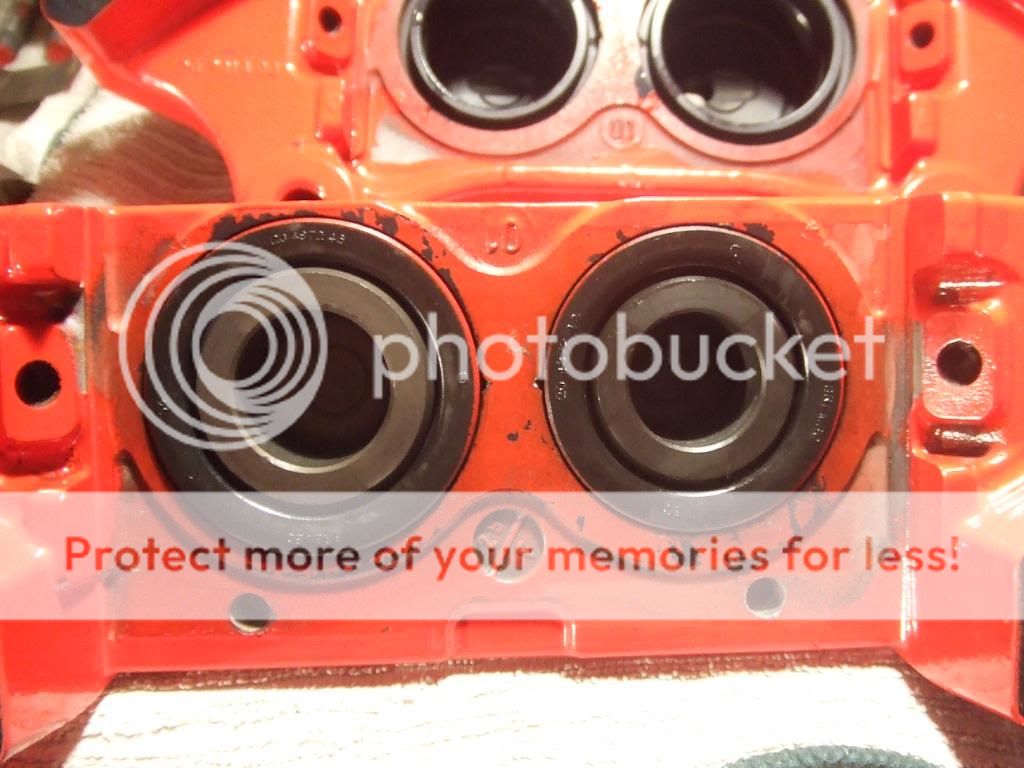
Step 4: Repeat the above step for all 4 halves of the caliper.
Step 5: Time to insert the Pistons into the caliper. Grab a piston and a rubber piston seal. Lubricate the Piston seal with brake fluid and be generous, don't stinge on the brake fluid. Then slowly press the seal onto the piston without over stretching it and doing damage to the seal. Than lubricate the Piston all over and the hole the piston is going into and slowly slide it into the correct hole in the caliper.
Note: Once again notice the difference in sizes of the piston. So use the correct seal for the correct piston size.
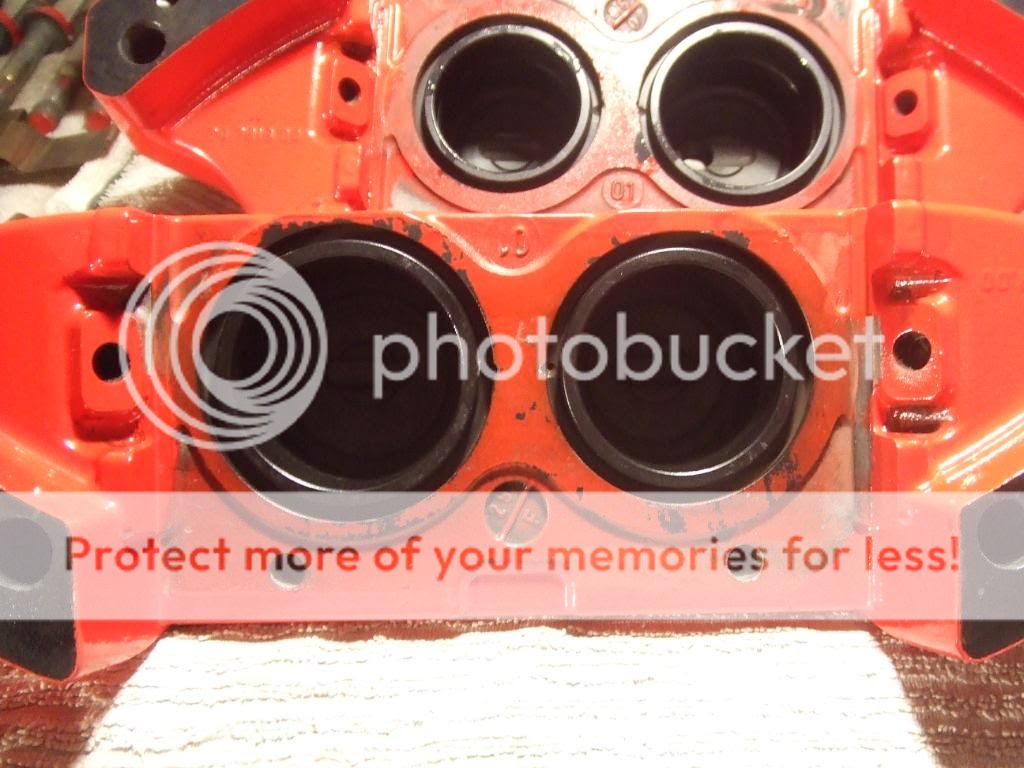
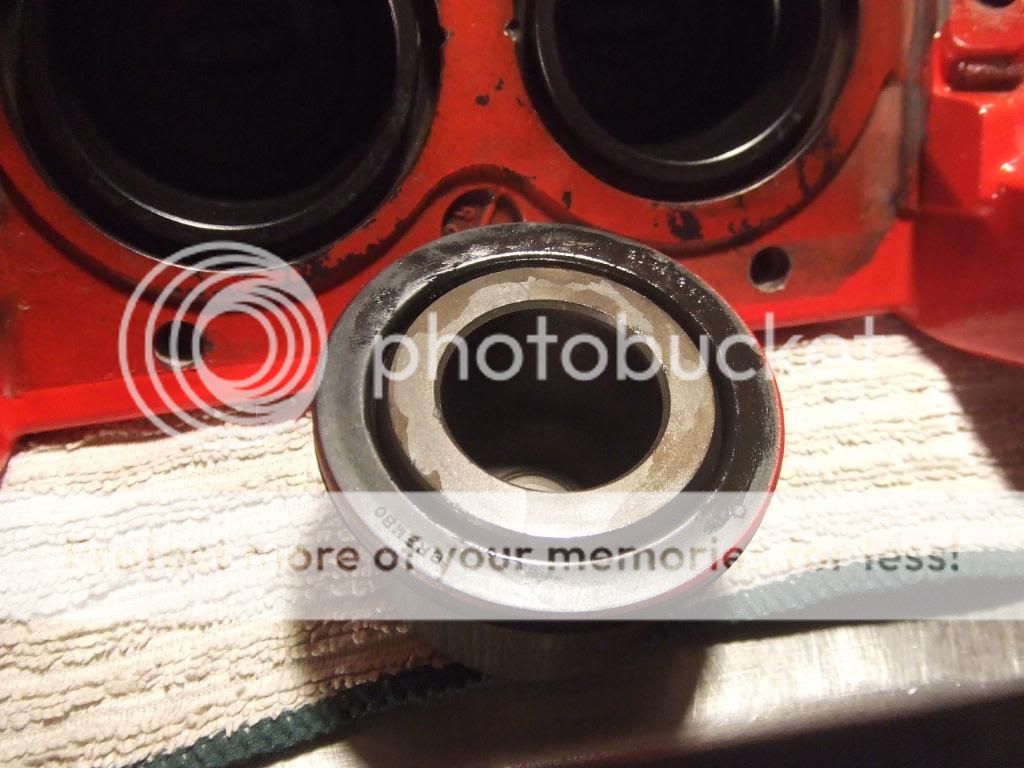
Finished! Now repeat once again for the other pistons.
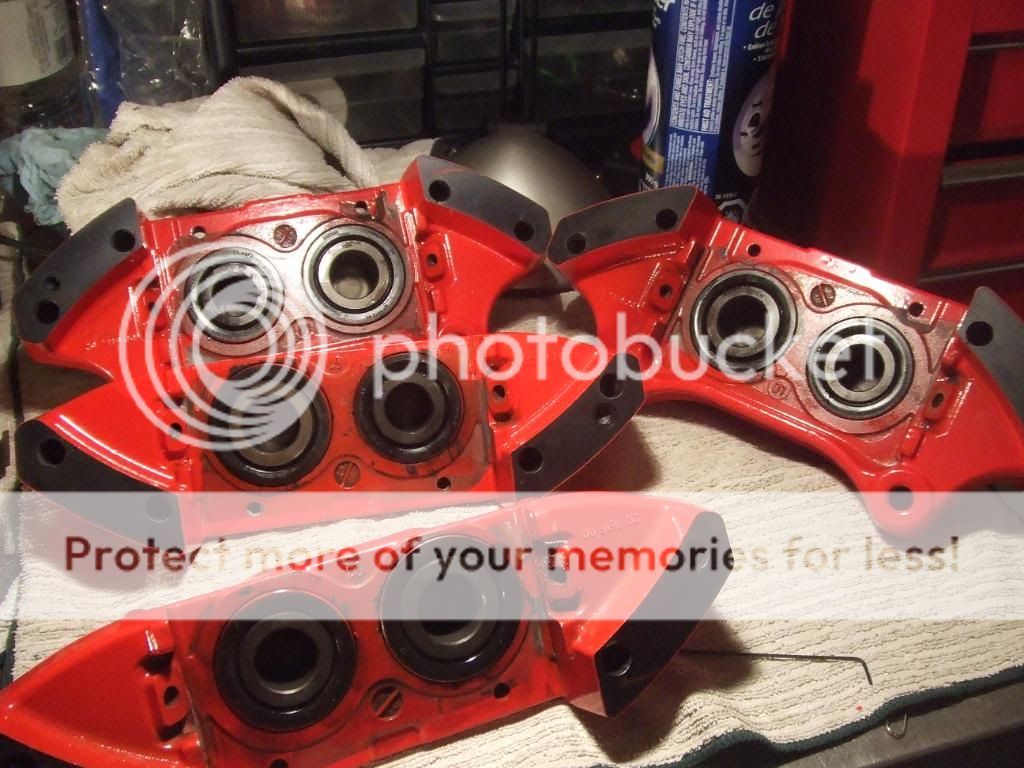
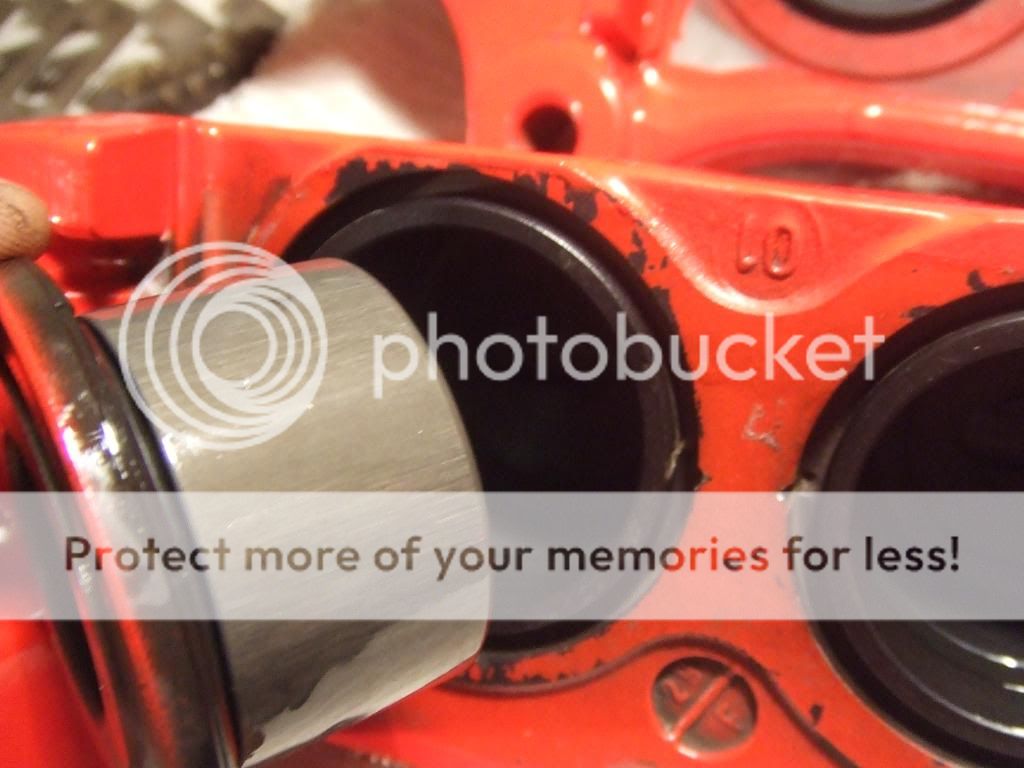
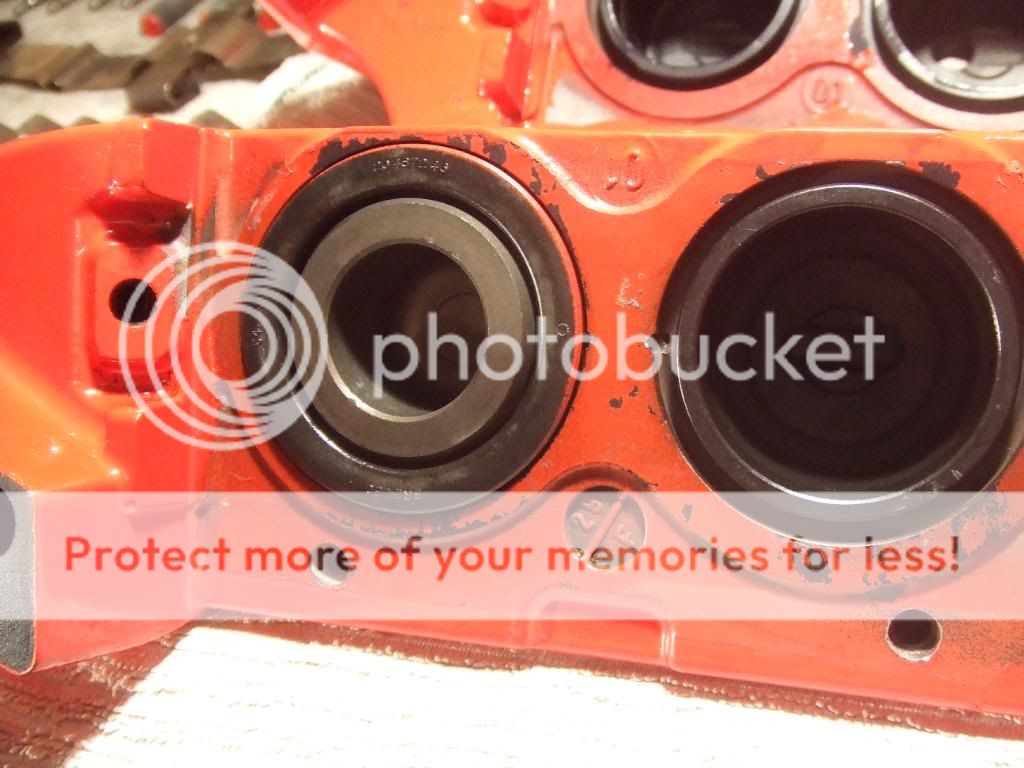
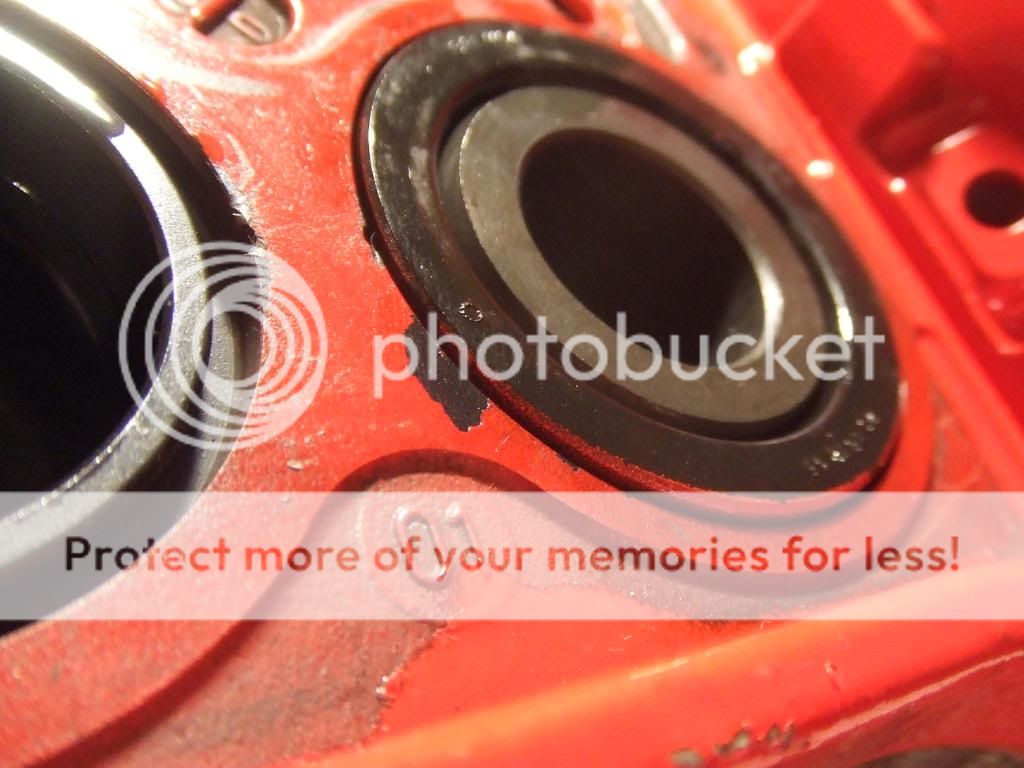
Note: Make sure everything is seating properly!!
Not seated Properly.

Properly seated.
Almost Done!
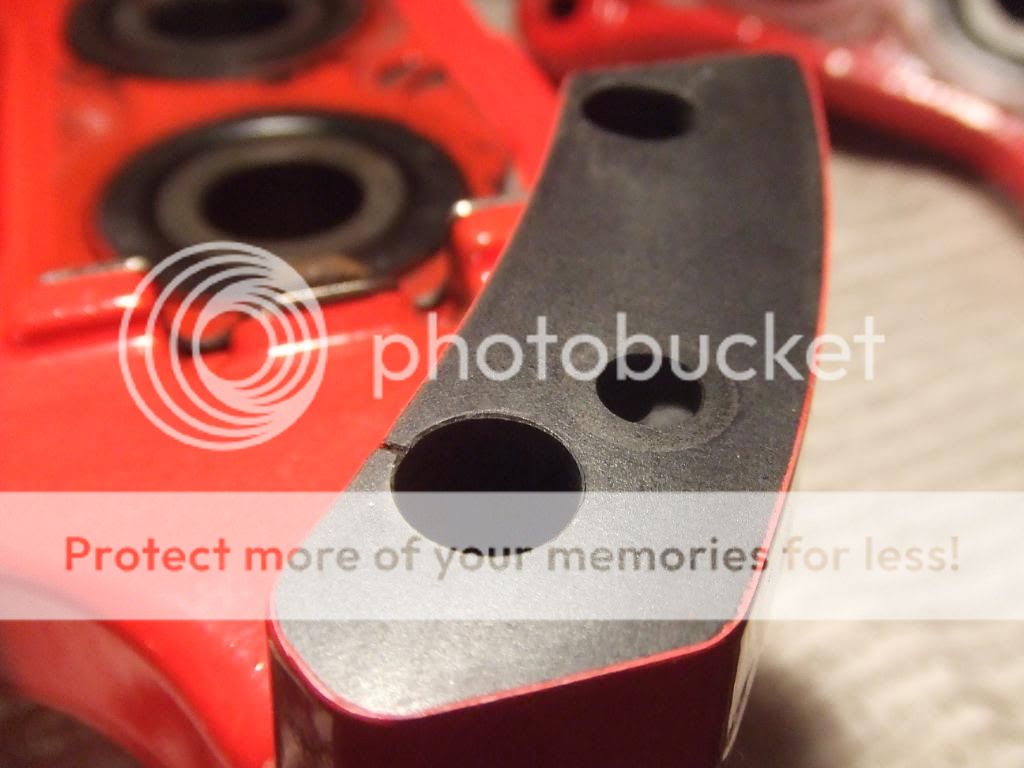
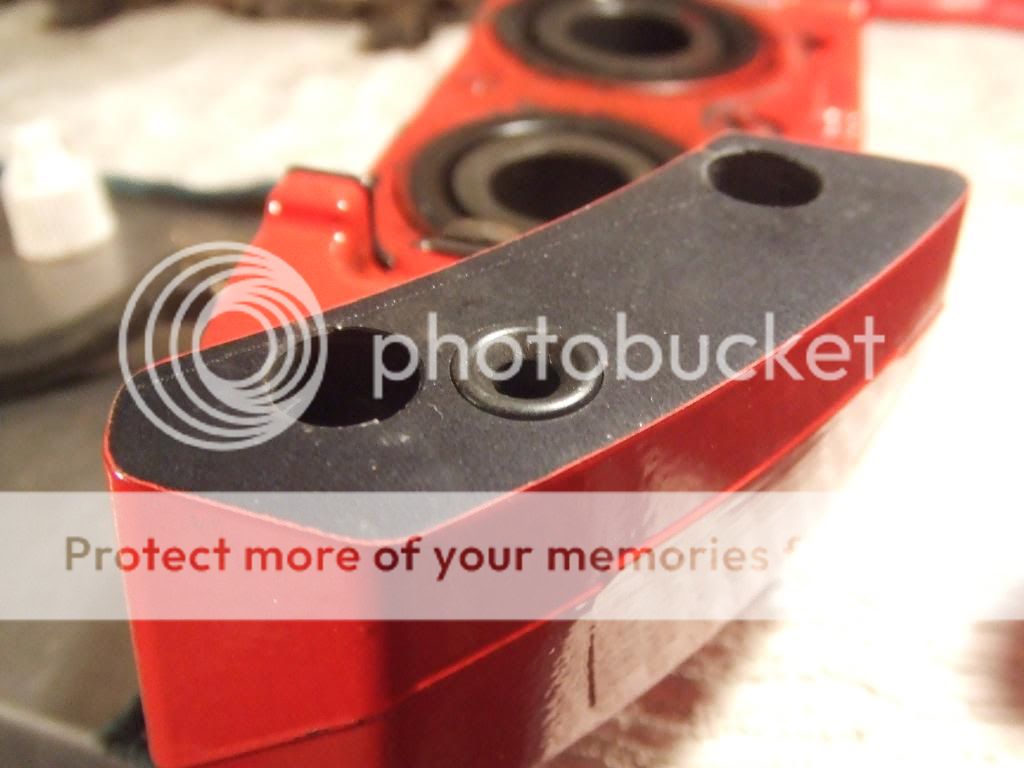
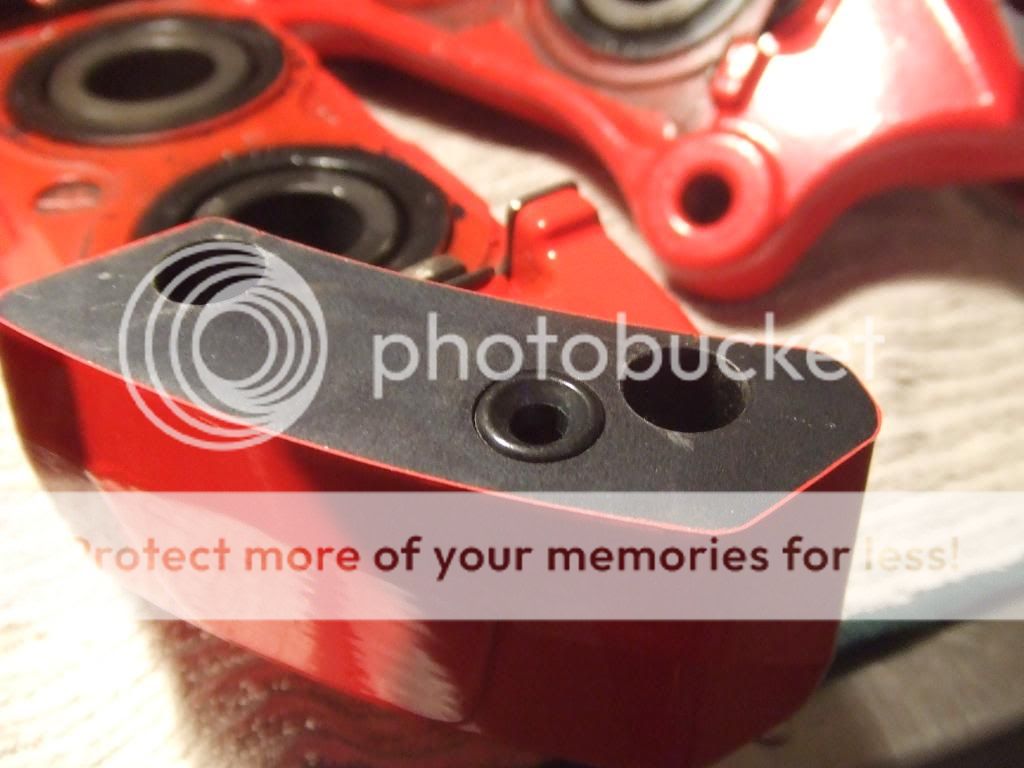
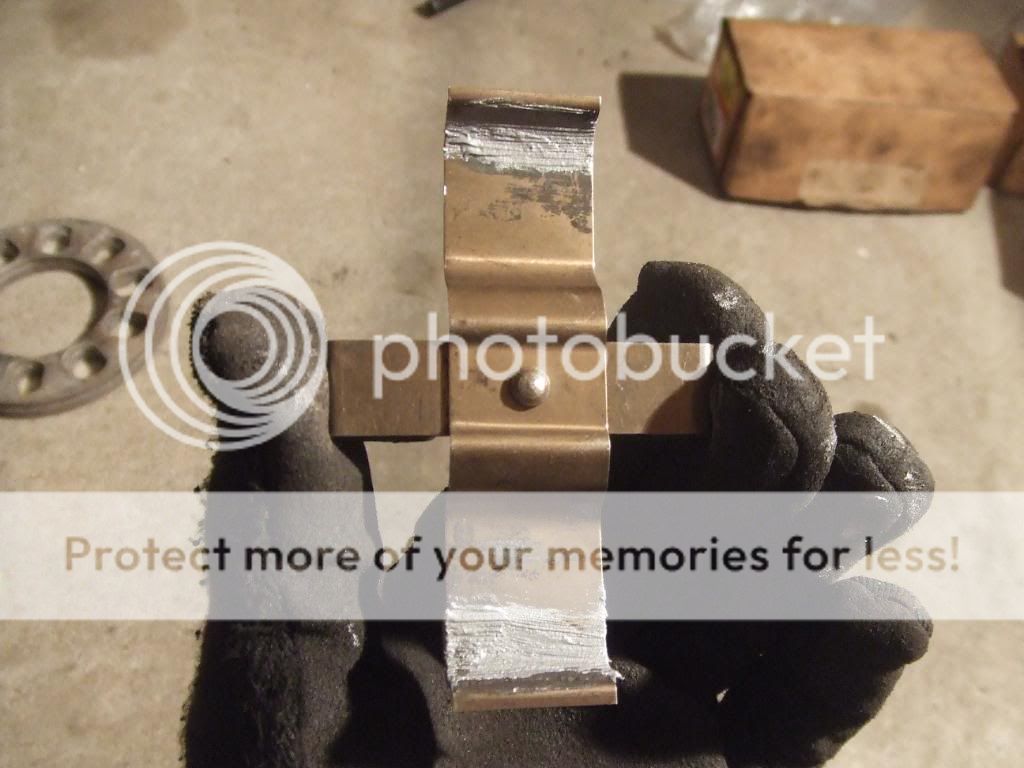
Step 6: Time to install the brake pad sliders now. Grab some blue thread lock and thread lock the screw holding the slider bracket in place.
Finished!

Step 7: Time to install the small o-ring for the fluid passage between the caliper halves. Take a look at both caliper halves,
Notice how one has a small lip to it,

Now take a look at the o-ring,
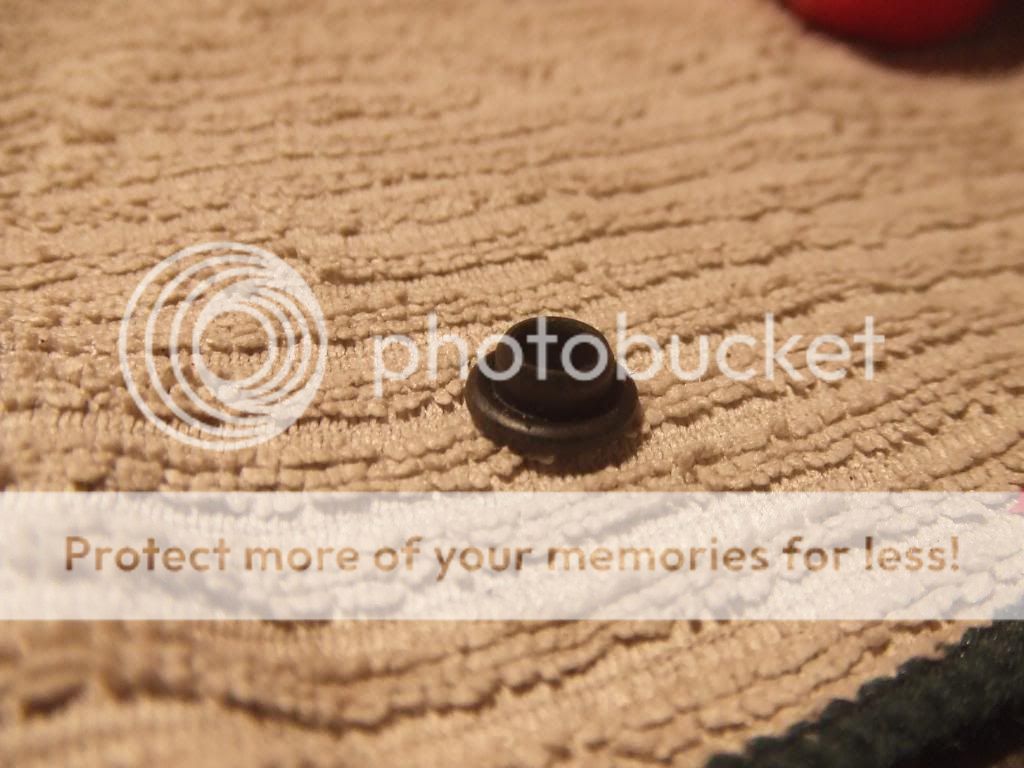
This is how it should go in according to the lip on the caliper halves.
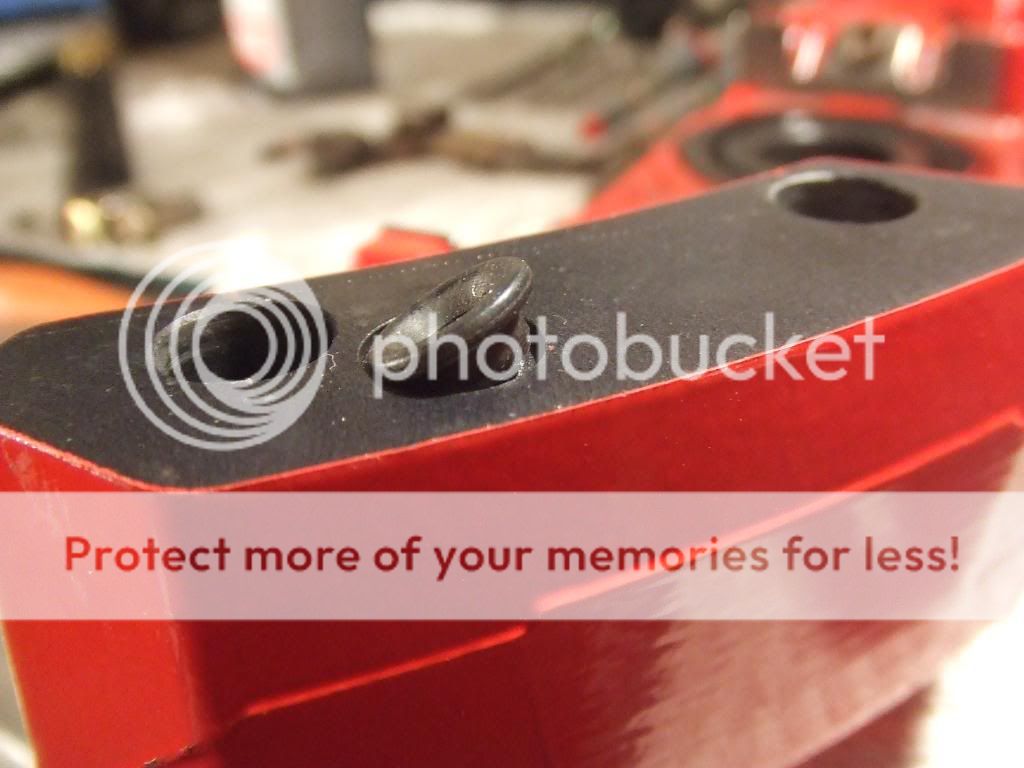
Now do the same to the other side and now your done.
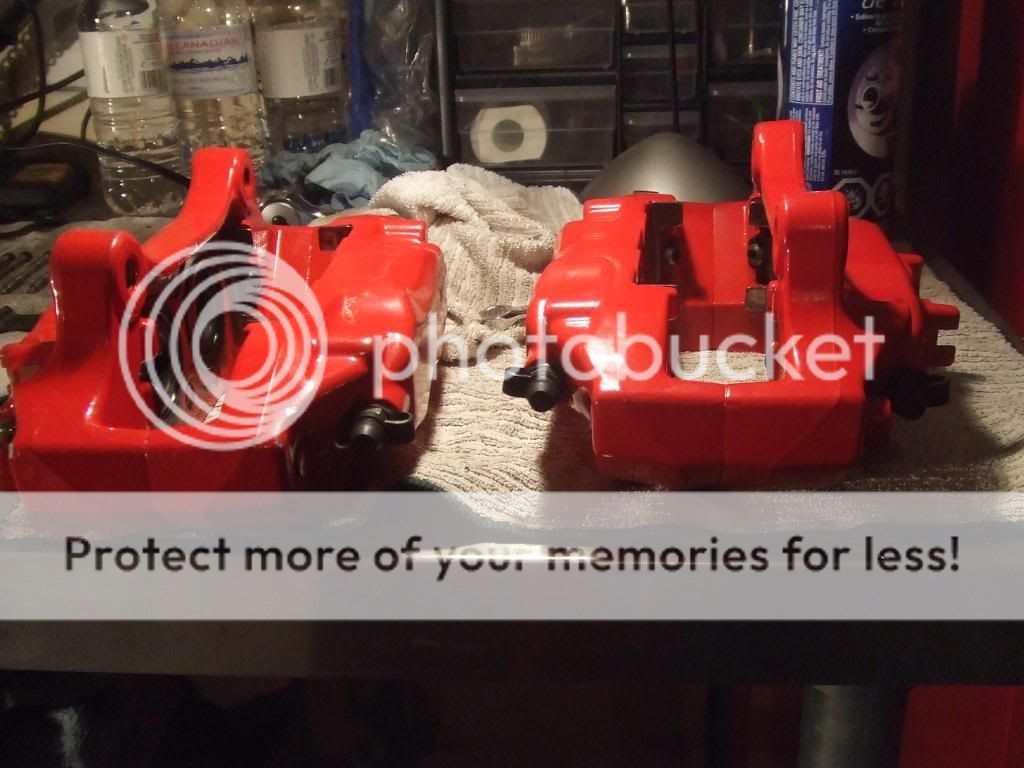
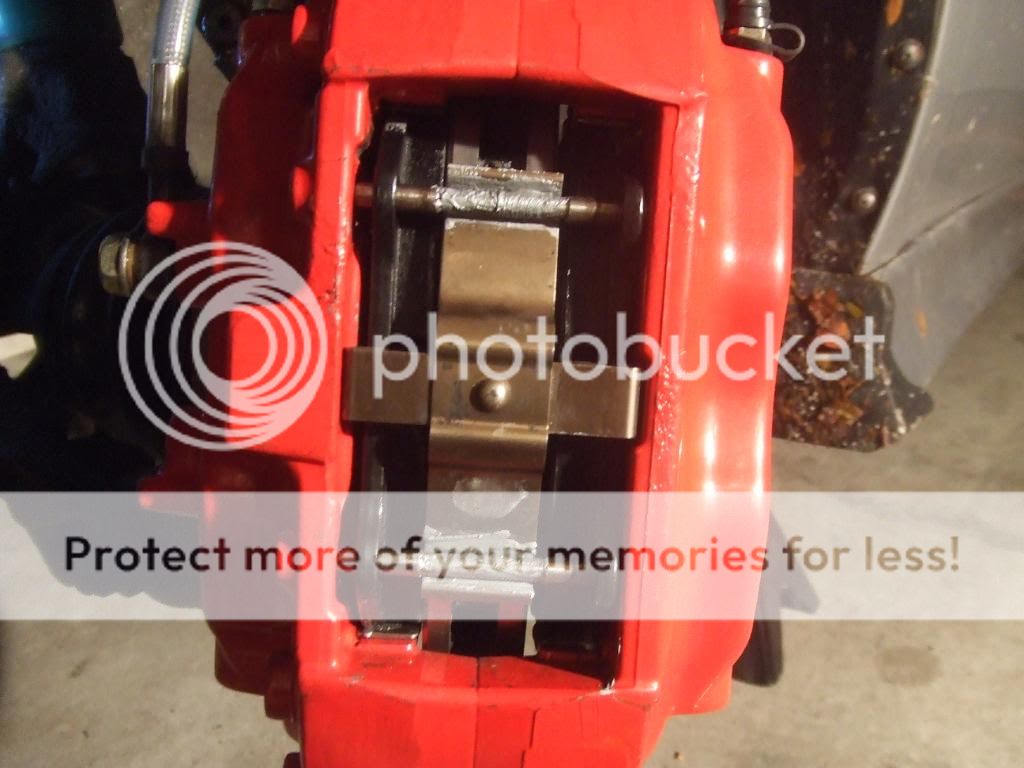
Step 8: Time to assemble the caliper halves, anti-seize the 4 bolts holding the caliper halves together.
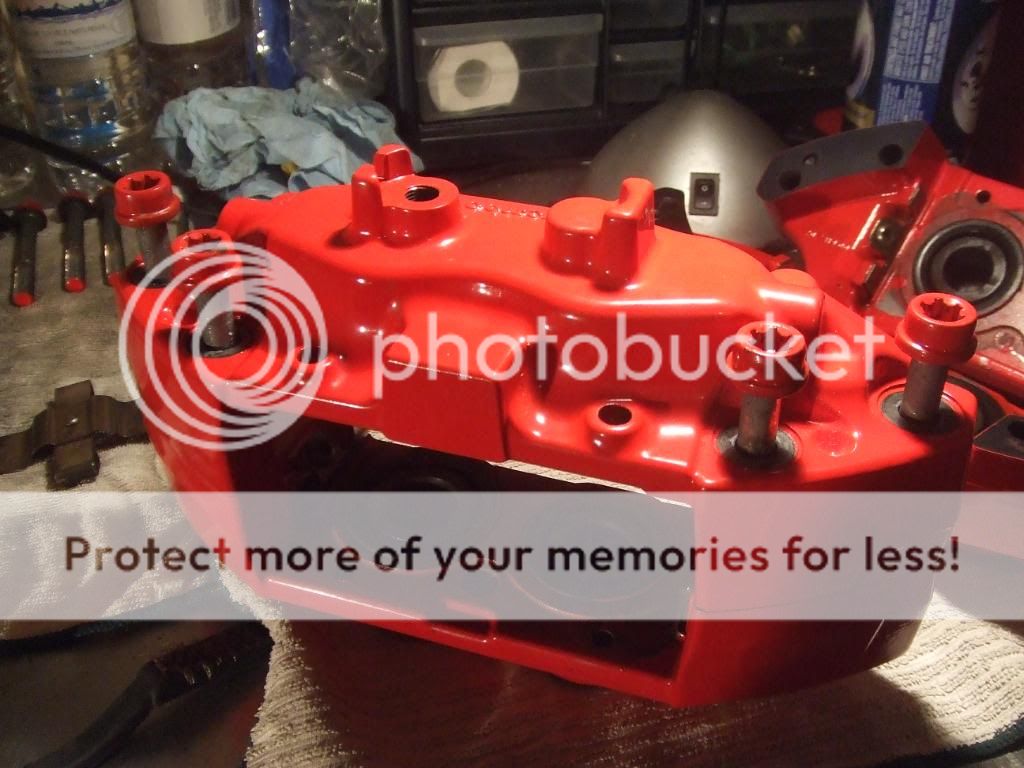
Torque them down by hand with the larger T-55 bit starting from the center outwards.
Repeat for the other 2 halves and then your finished!
Almost!
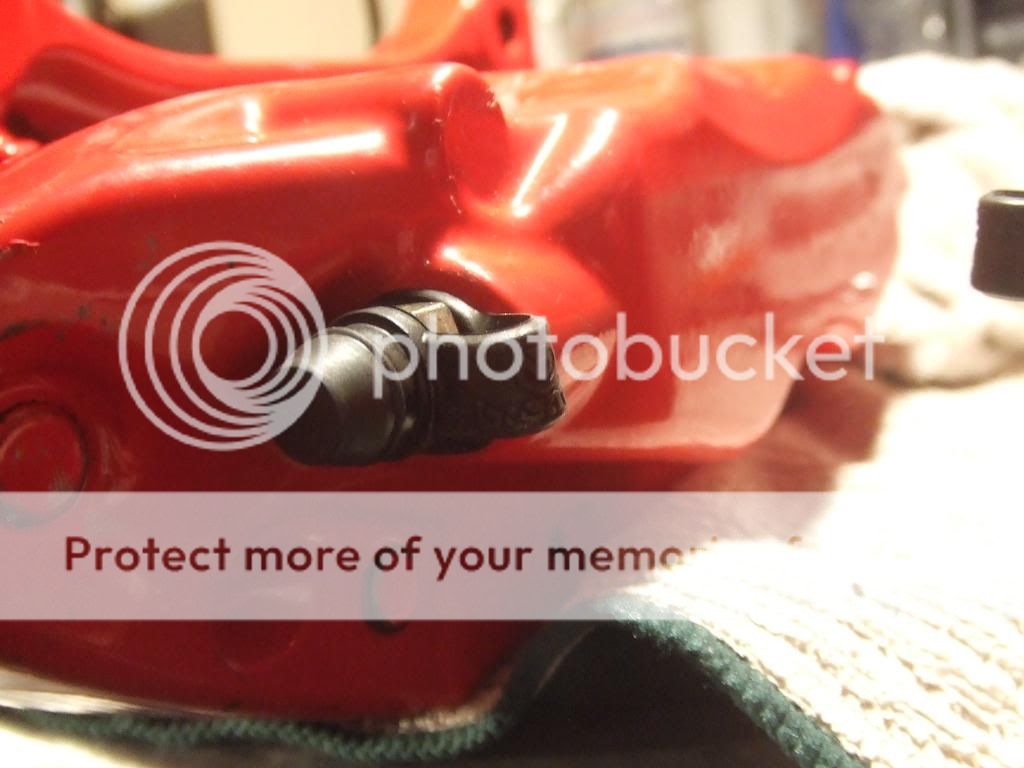
Step 9: Now time to screw on the bleeder screw. Grab a 11mm wrench or long socket and and tighten all 4 of them nice and snug but do not over torque these.

Finished!
Now you really are finished with putting together your DC5r Brembos. Now pray they do not leak. lol.
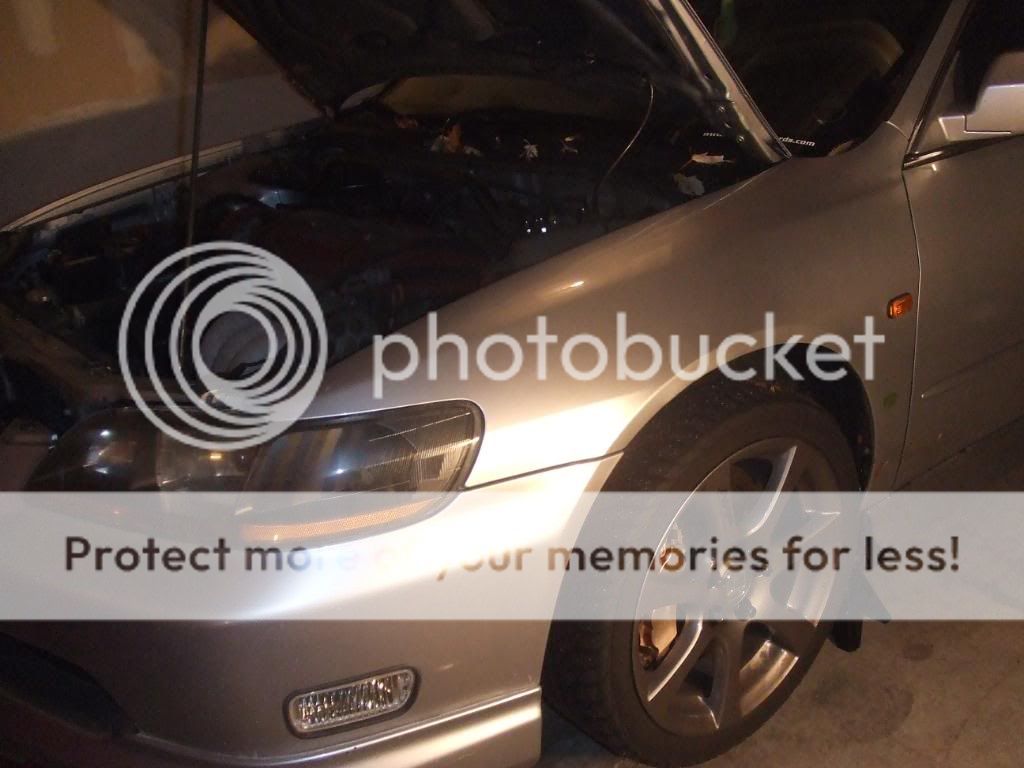
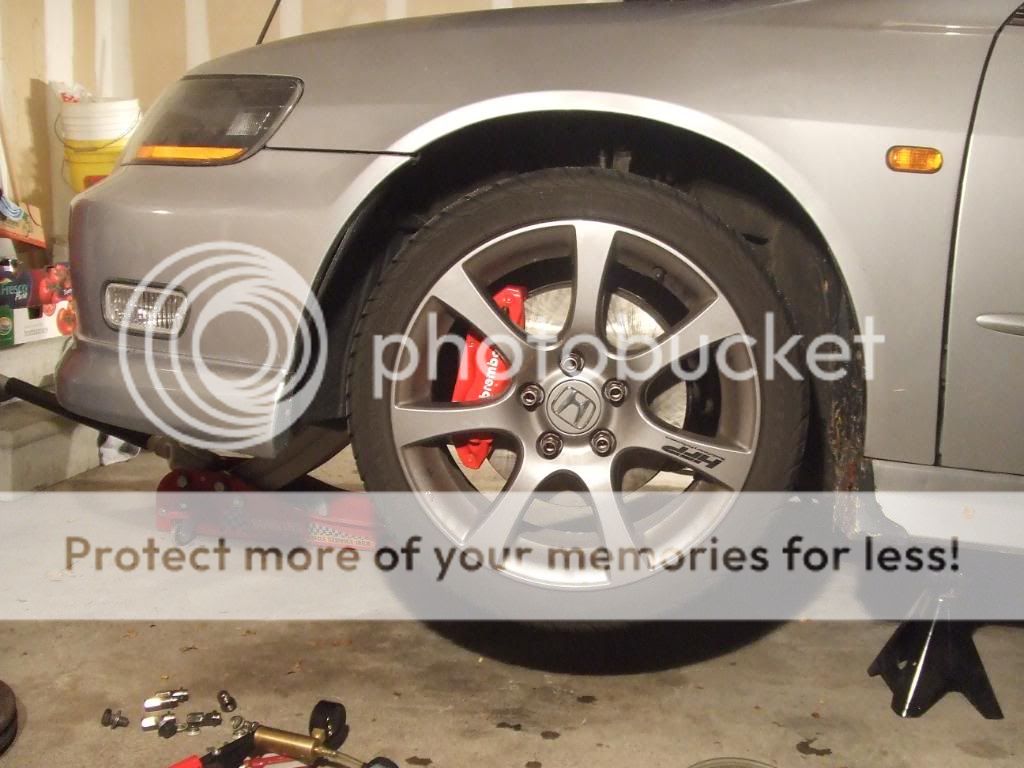
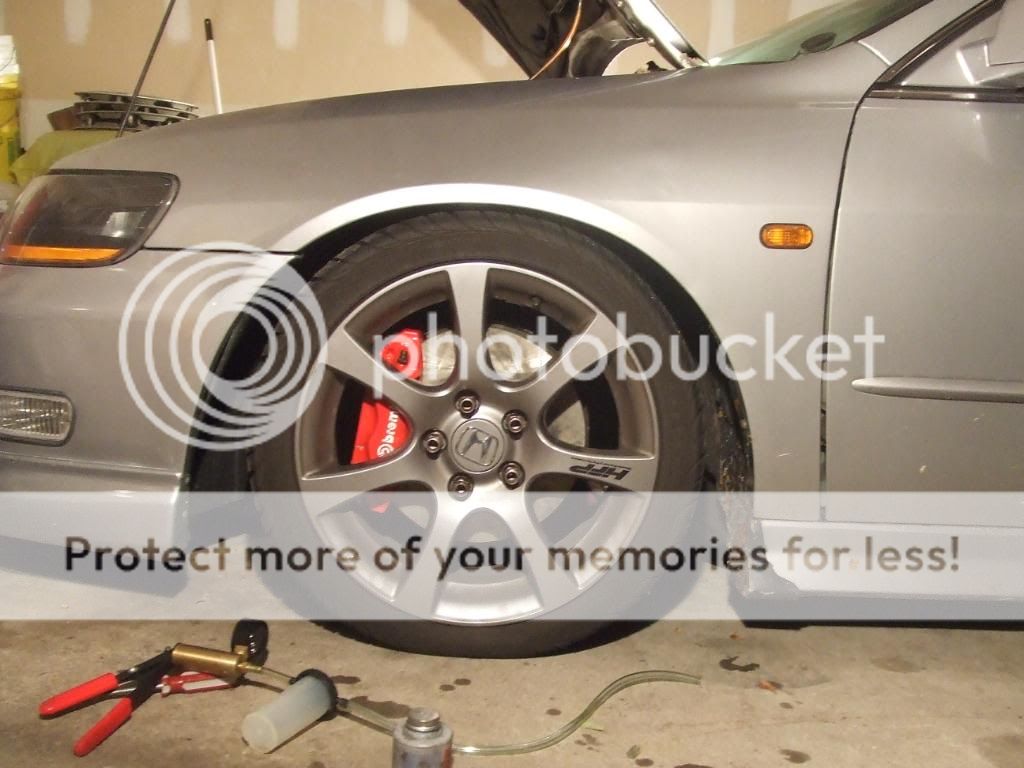
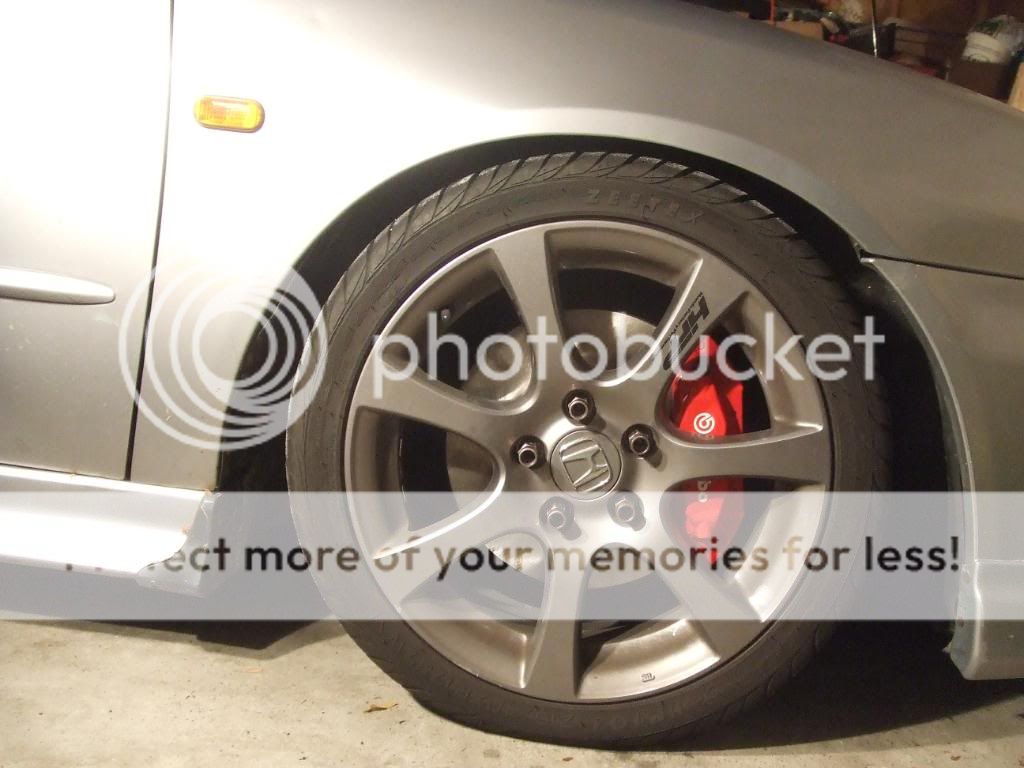
Now to install the DC5r Brembos!!! WOOOOoooo
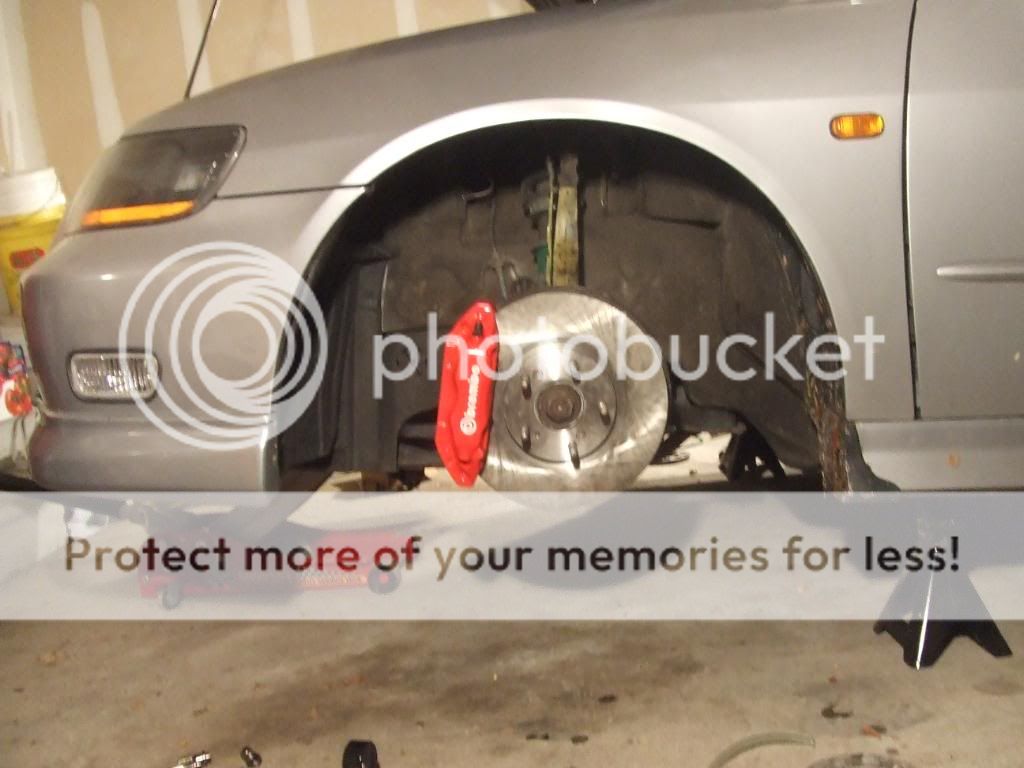
What I'm replacing,
Yes, I know. My tires a little low on air........
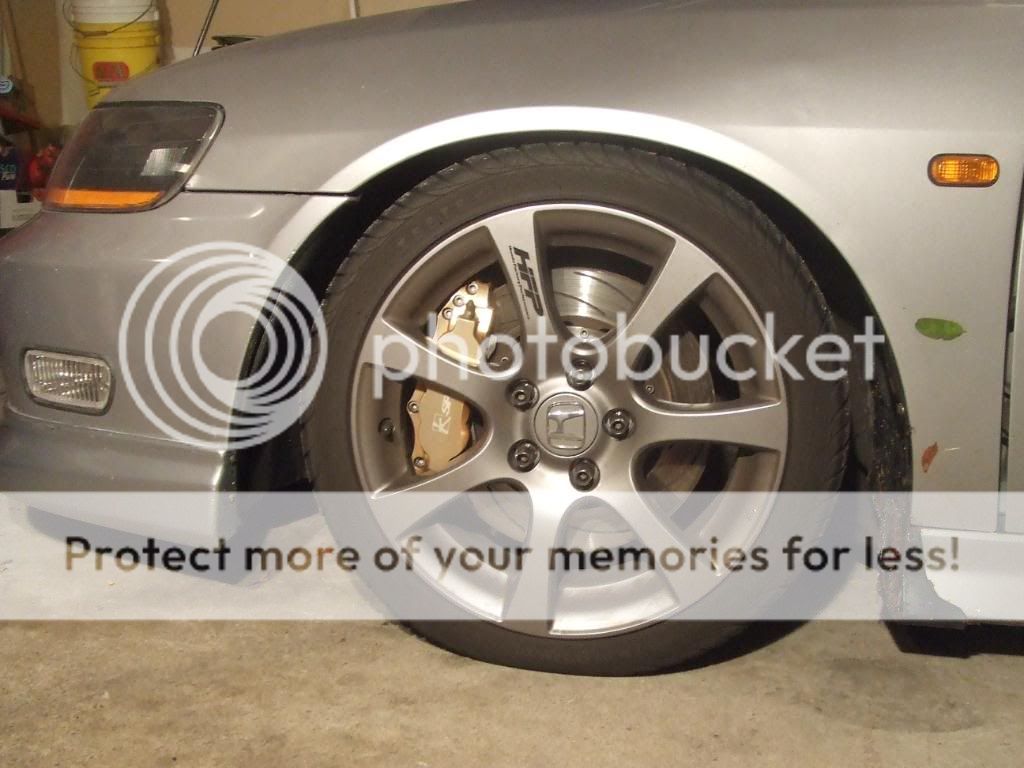
I decided to try something different and wanted something a little more suttle...... ..boy was I wrong.
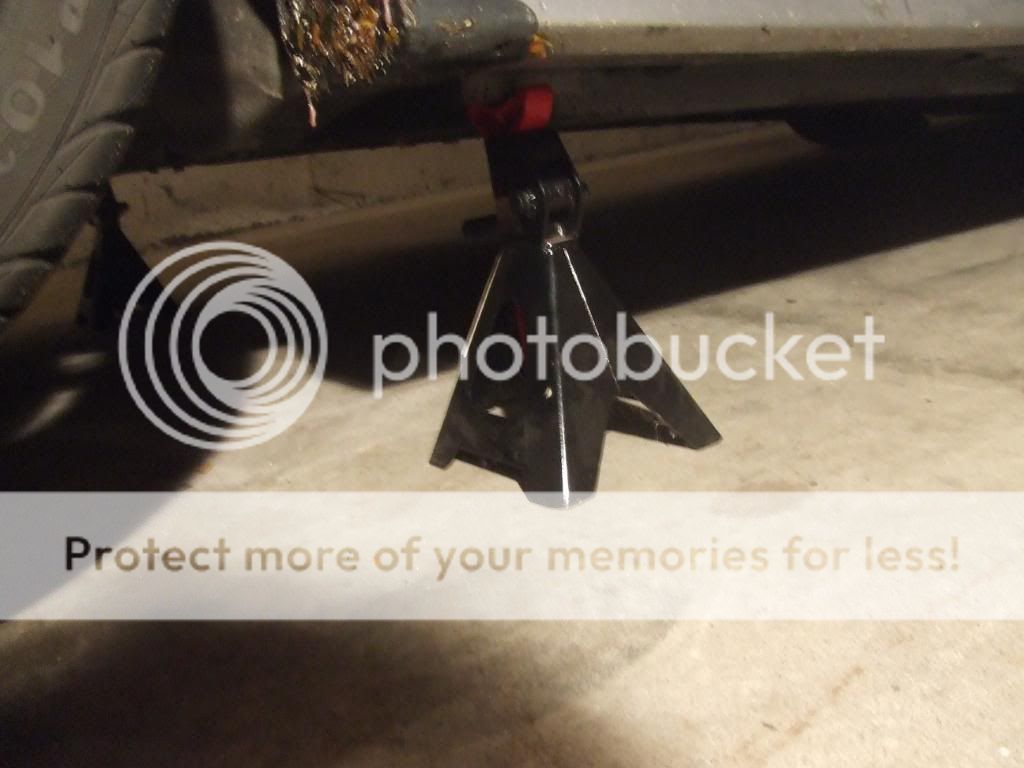
Step 1: Jack up the front of the car and put jack stands under the front jacking points and rest the car on the jack stands.
Note: DO NOT work with just the hydraulic jack only!
Step 2: Remove the 2 front wheels.
Step 3: Grab a 19mm (or 17 mm if your replacing your stock OEM calipers) and undo the upper caliper bracket bolt and then do the same for the lower bolt.

Step 4: Bungee cord the caliper to your upper control arm so you don't put stress on your brake lines by letting it hang.
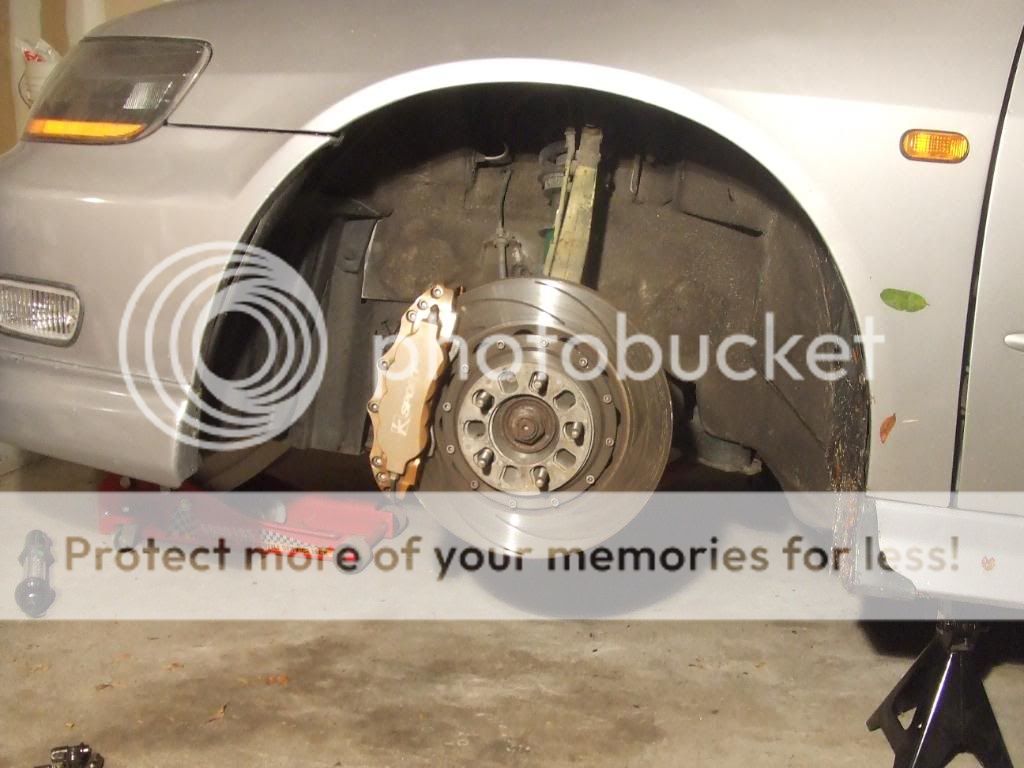
Step 5: Remove your brake rotor and place in safe area where you won't step on it...........
Step 6: Once you remove your brake rotor, inspect the surface of your hub to see if there are any rust on it. If there is, remove it with a steel brush or you can grind it off. But I chose not to use a grinder because it was only a little, so I used a stiff steel brush.
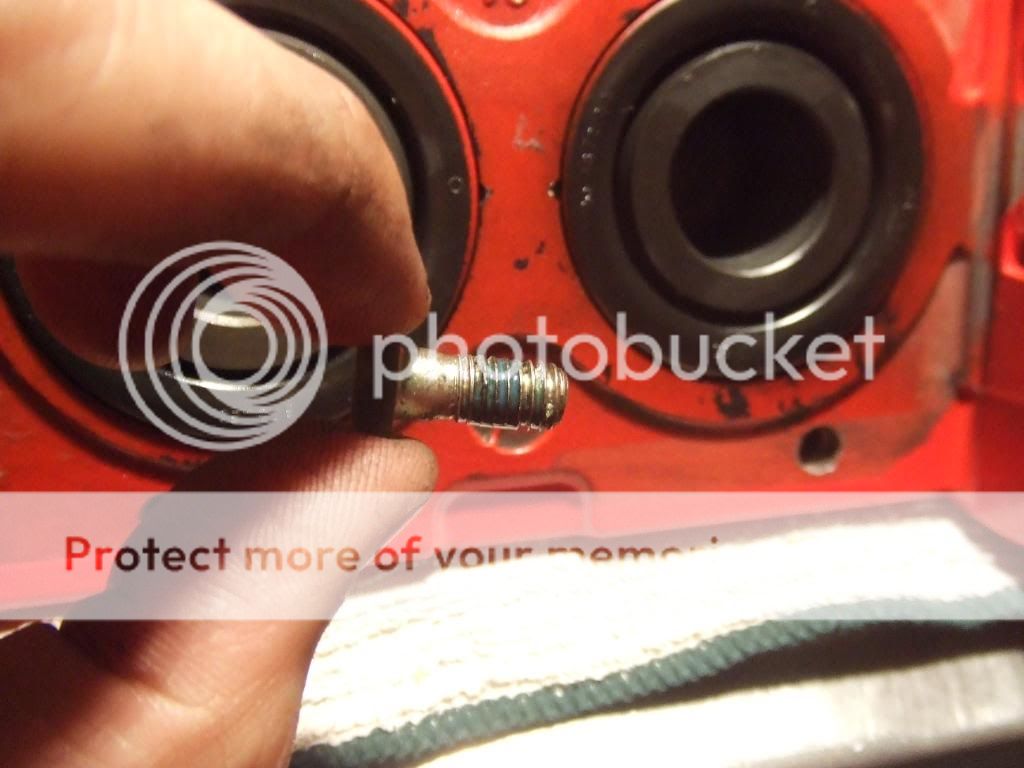
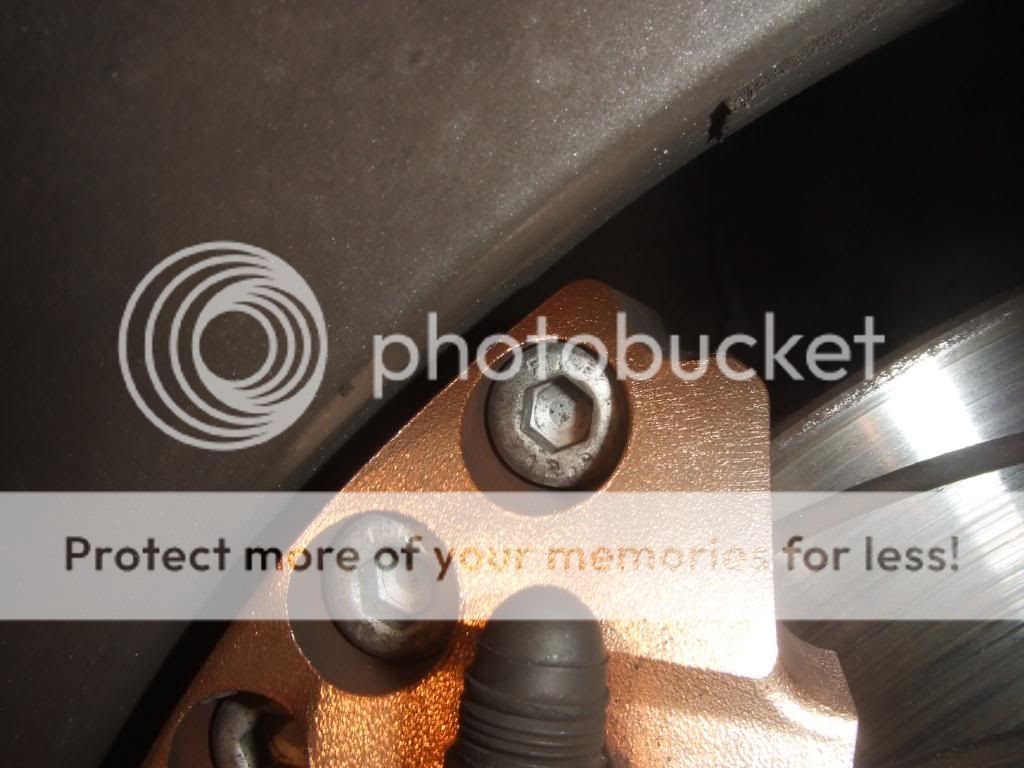
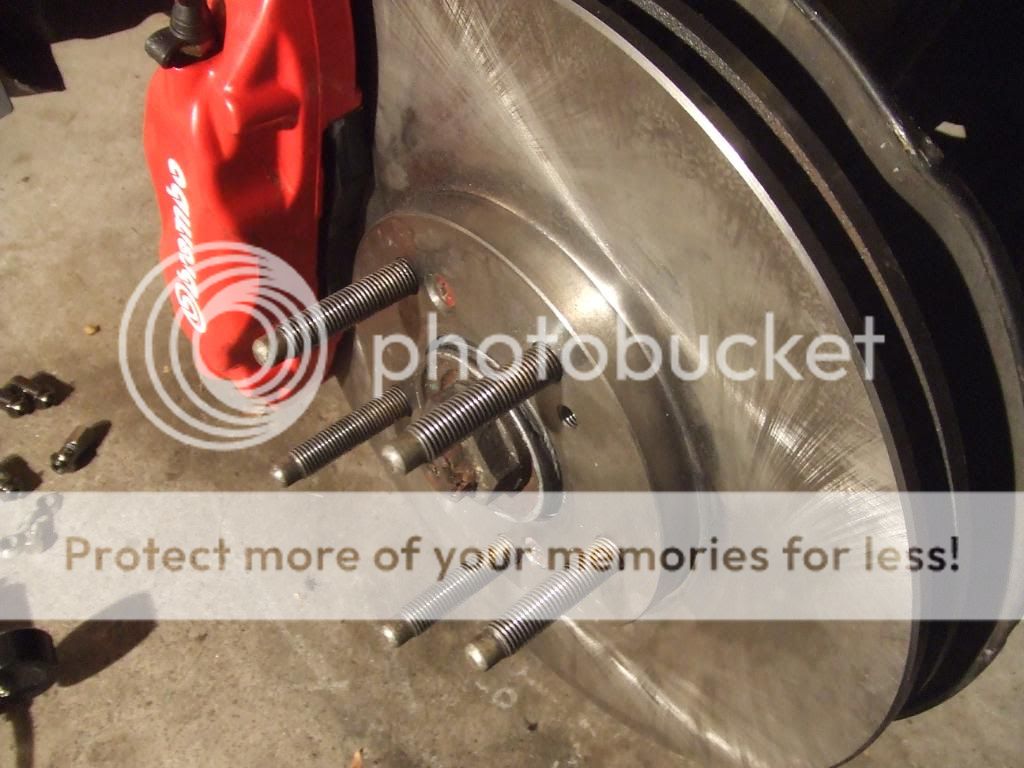
Step 7: Anti-seize the center hub where the center bore of the rotor meets the hub. Put your rotor on and screw on the 2 countersunk screw to hold the rotor in place.
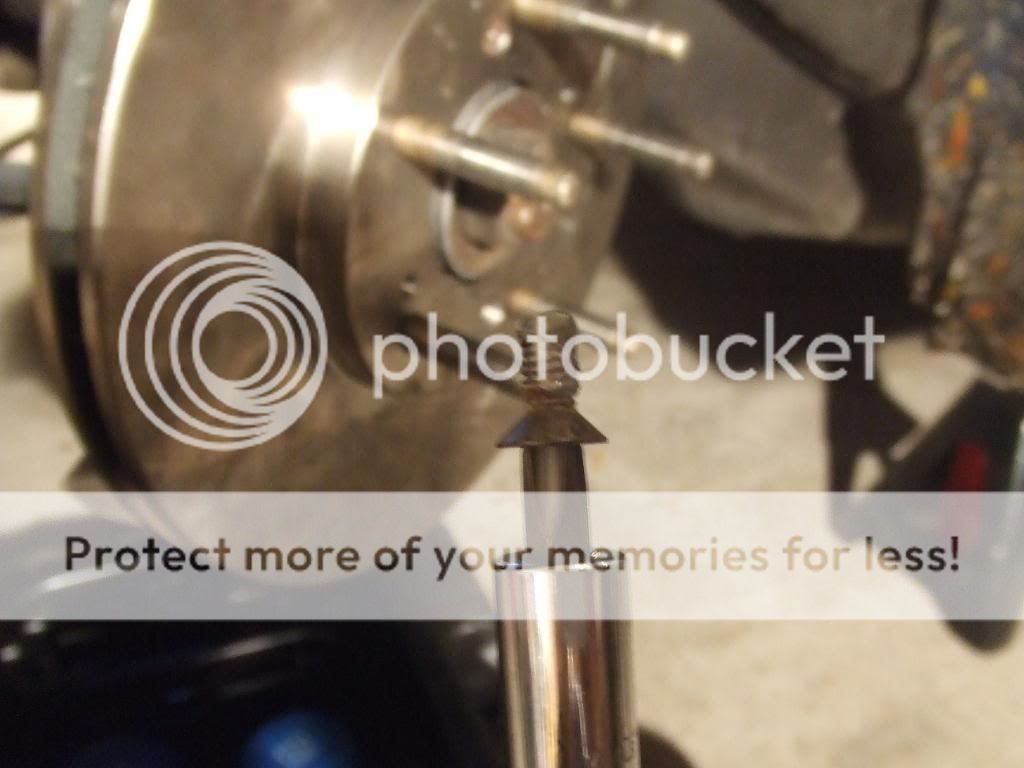
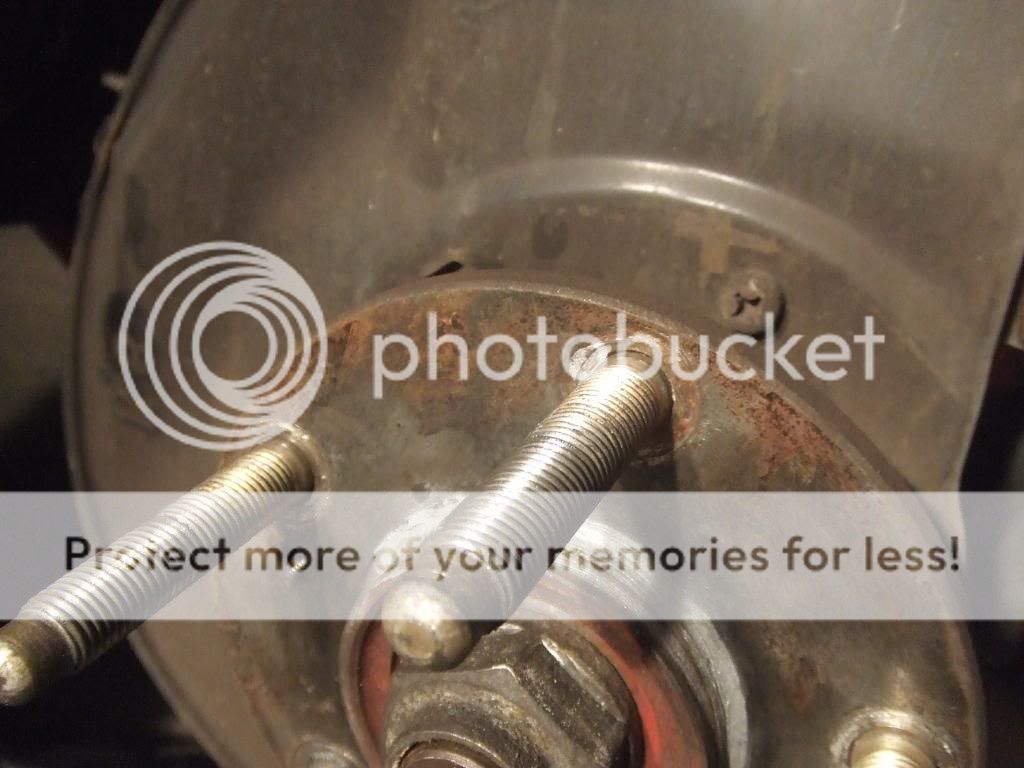
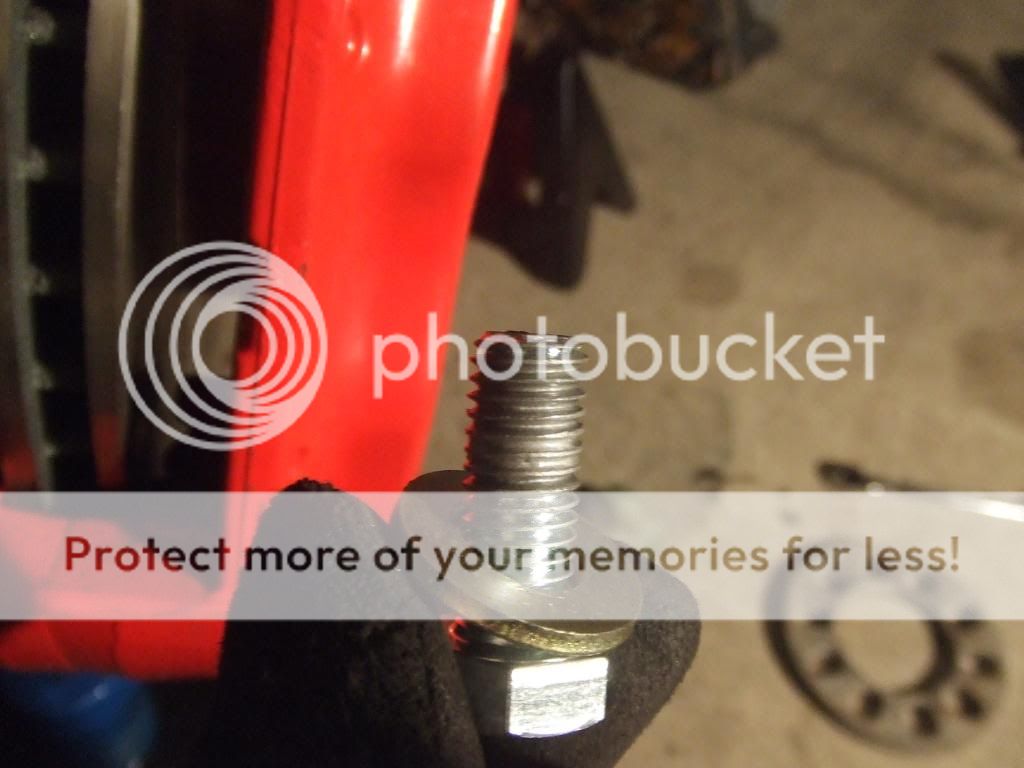
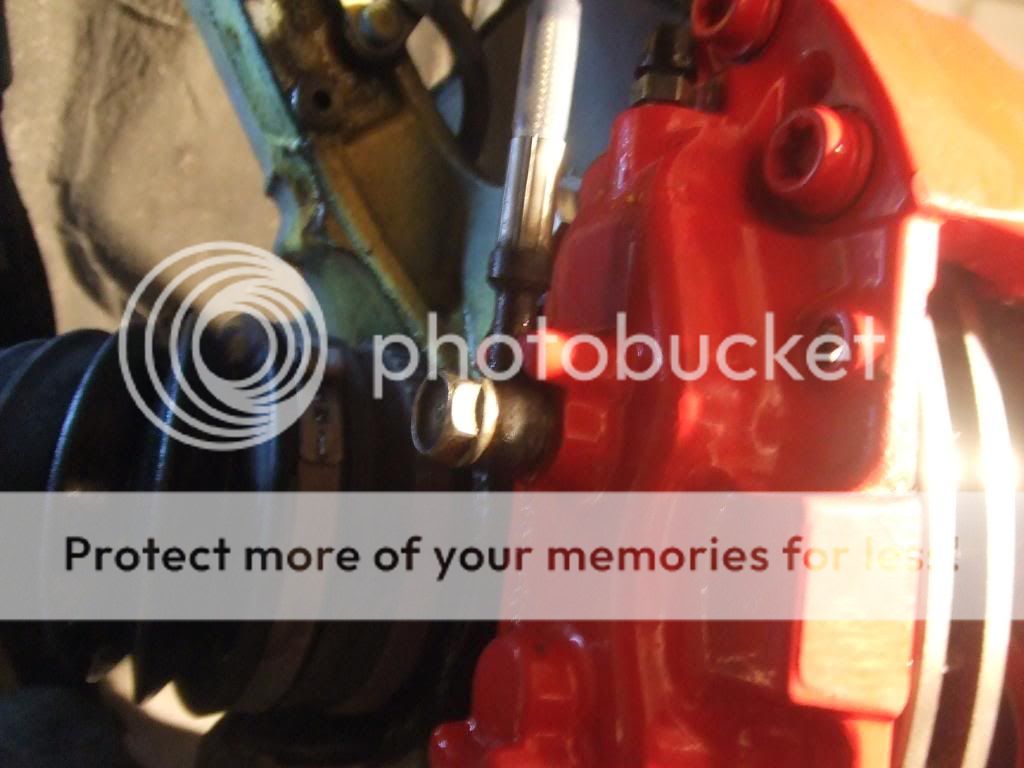
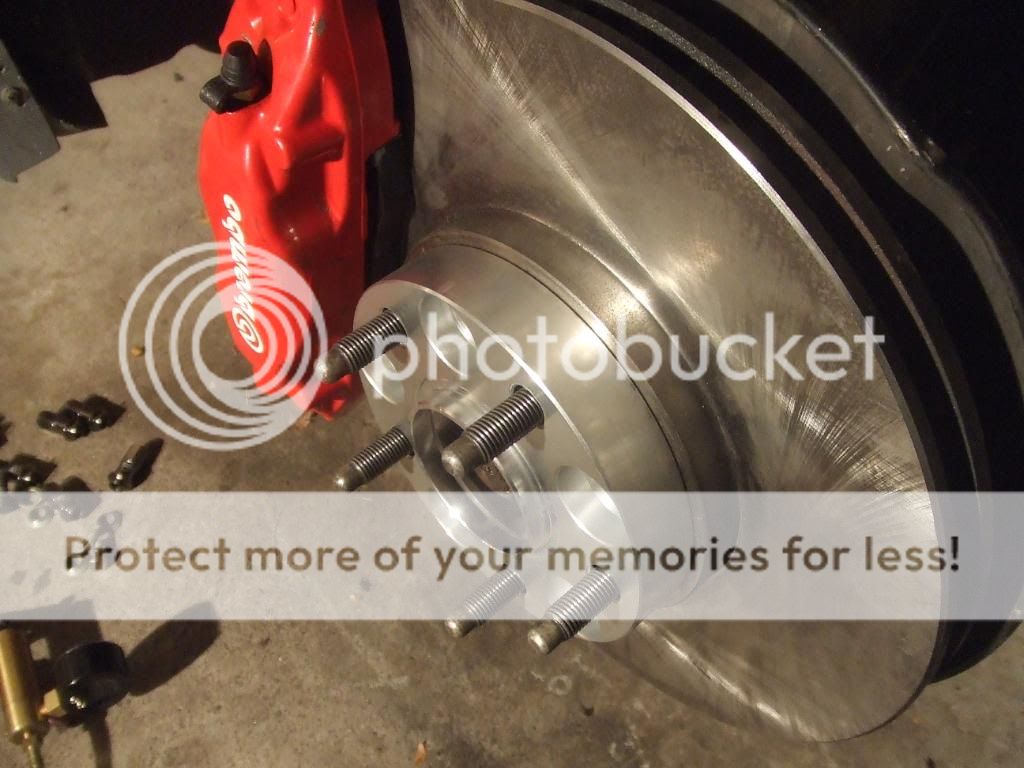
Step 8: place the caliper on your knuckle with the bleeder screws facing up. Grab the 12x1.75 bolts used to hold the caliper onto the knuckle and anti seize the bolt before threading in. Then do the same for the bottom and then torque them.
Note: The OEM Caliper bolts will not fit, I believe they are 12x1.25 so the thread pitch is different. Your going to have to pick up some new bolts which are 12x1.75 which is the same pitch as the Brembo's.
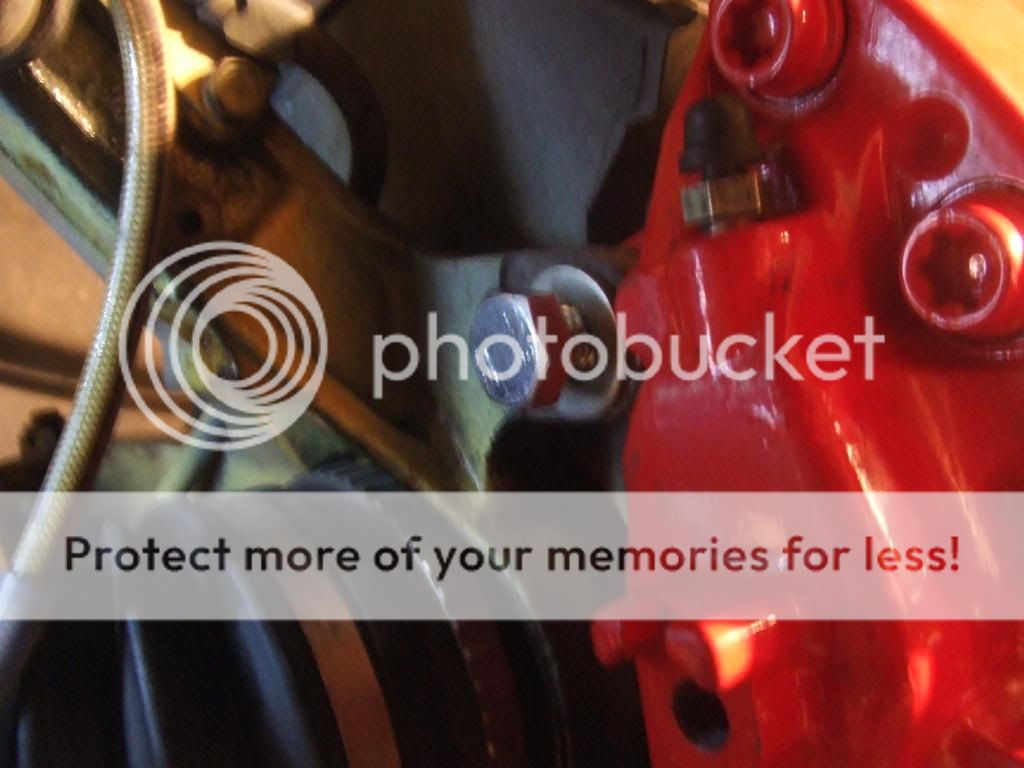

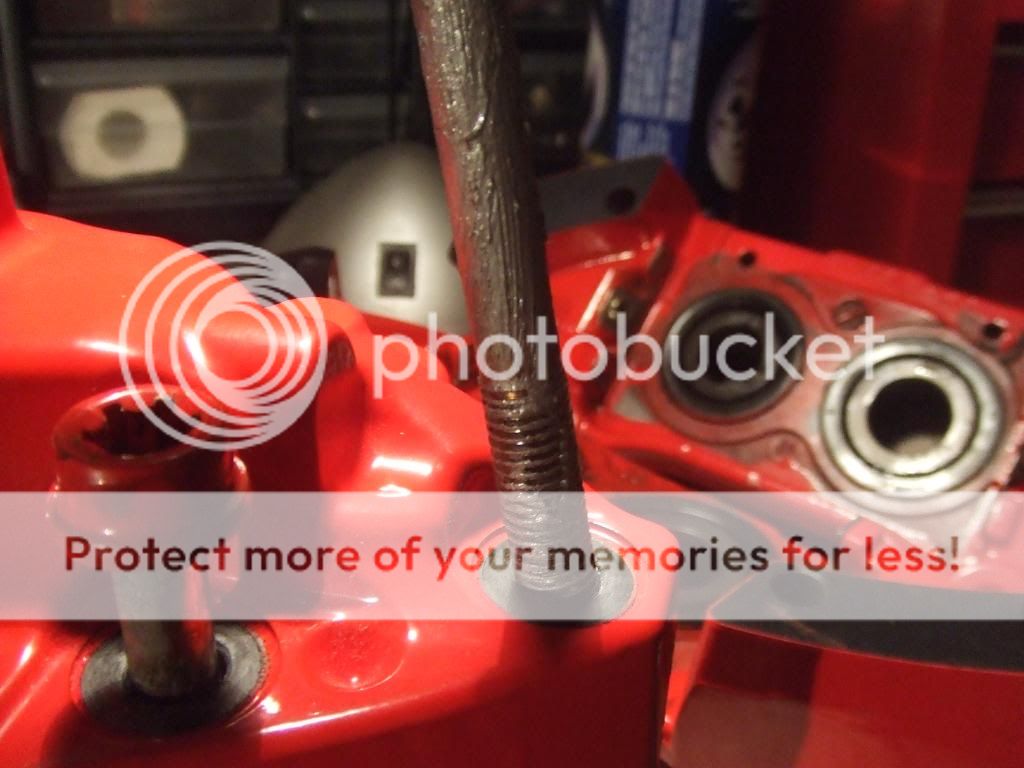
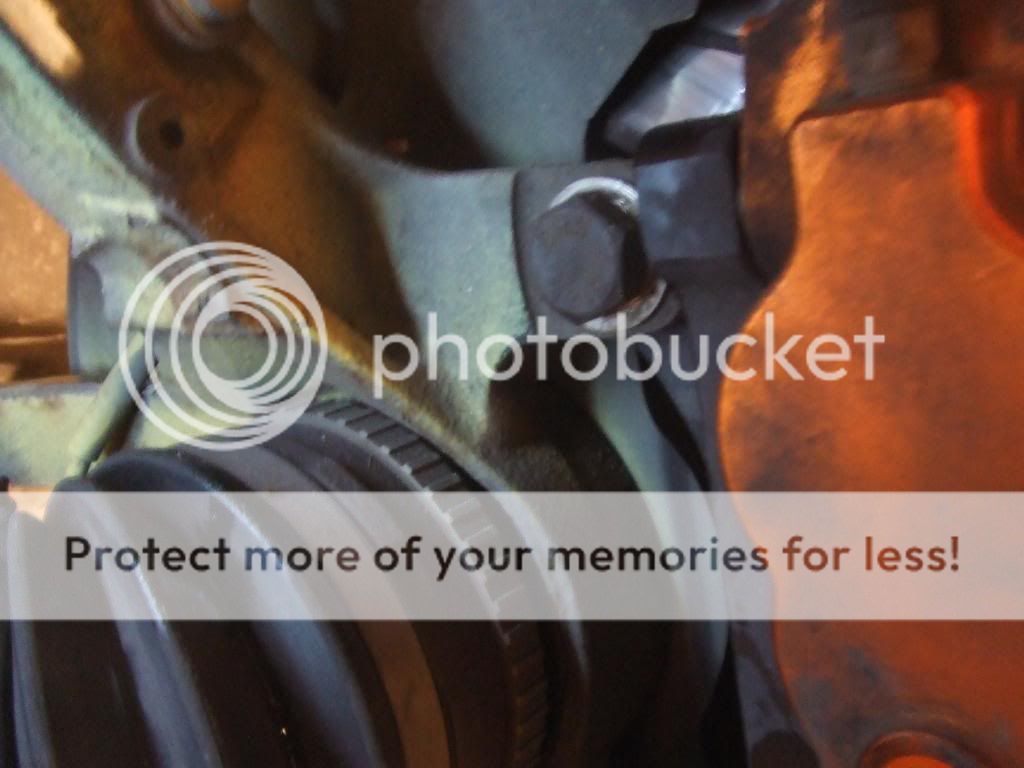
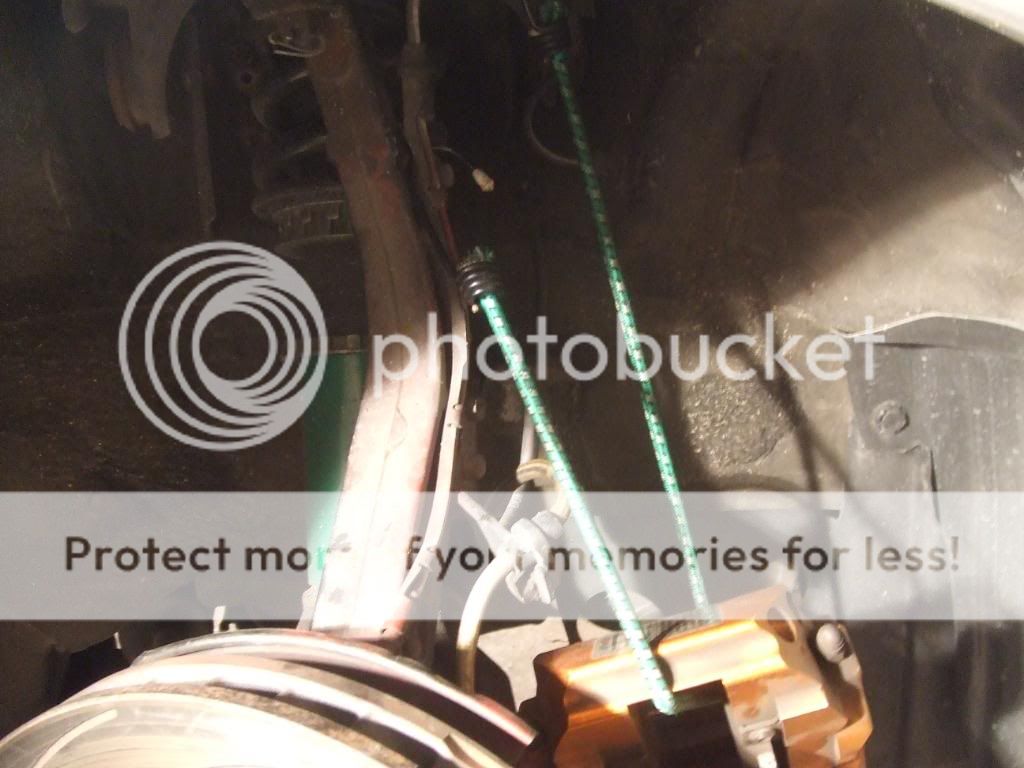
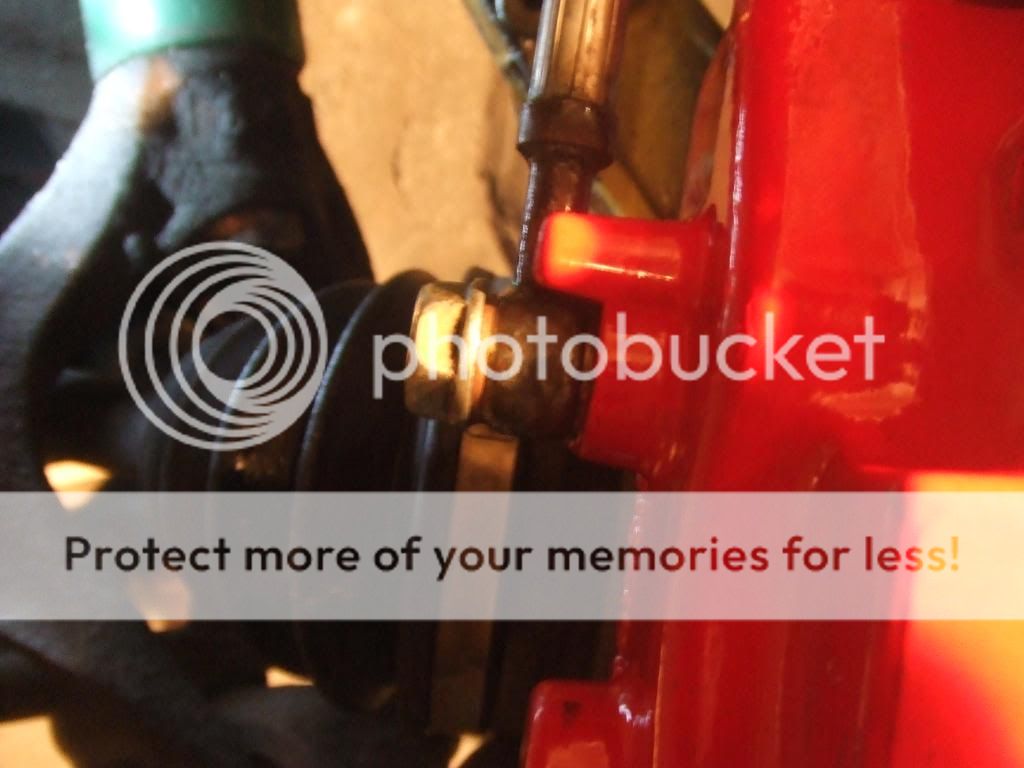
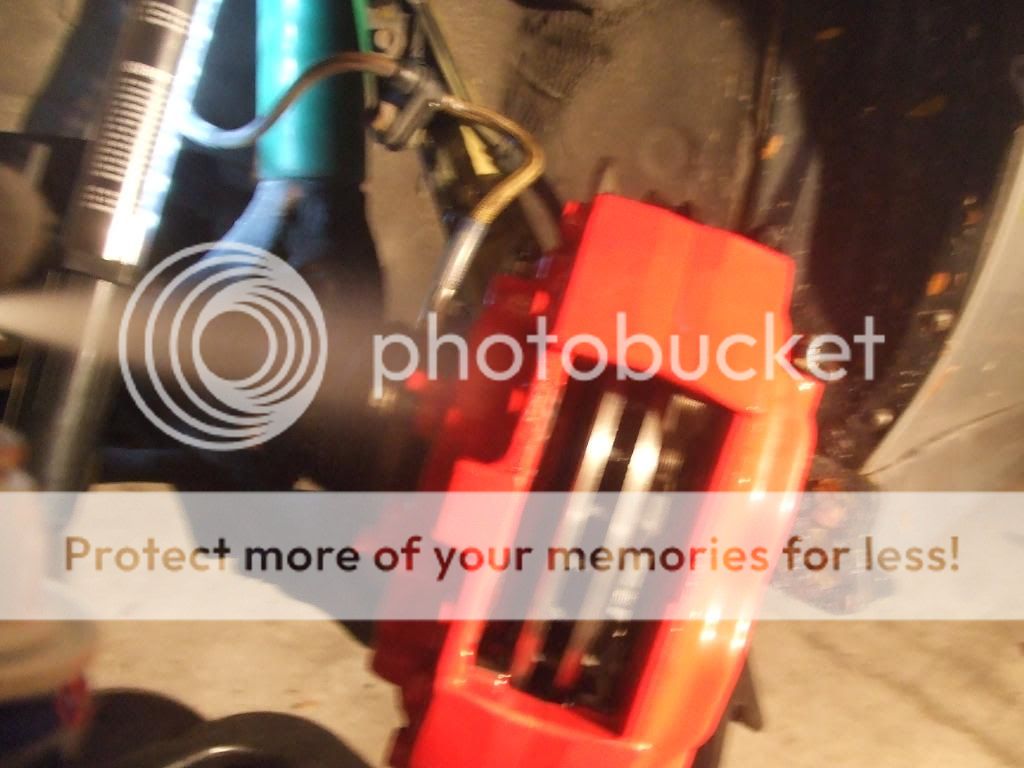
Step 9: Take a 14mm wrench and undo the brake line banjo bolt from the Ksport Caliper which is still bungeed to your control arm and thread into the bolted on Brembo Caliper.
Note: There are 2 washers on the bolt so be careful not to lose them or your brakes will leak from the brake lines. Also when you undo the bolt from the caliper, brake fluid will start dripping out so make sure you have something under to catch it.

Step 10: Brake Cleaner everything to remove any brake fluid that may have got on the caliper.
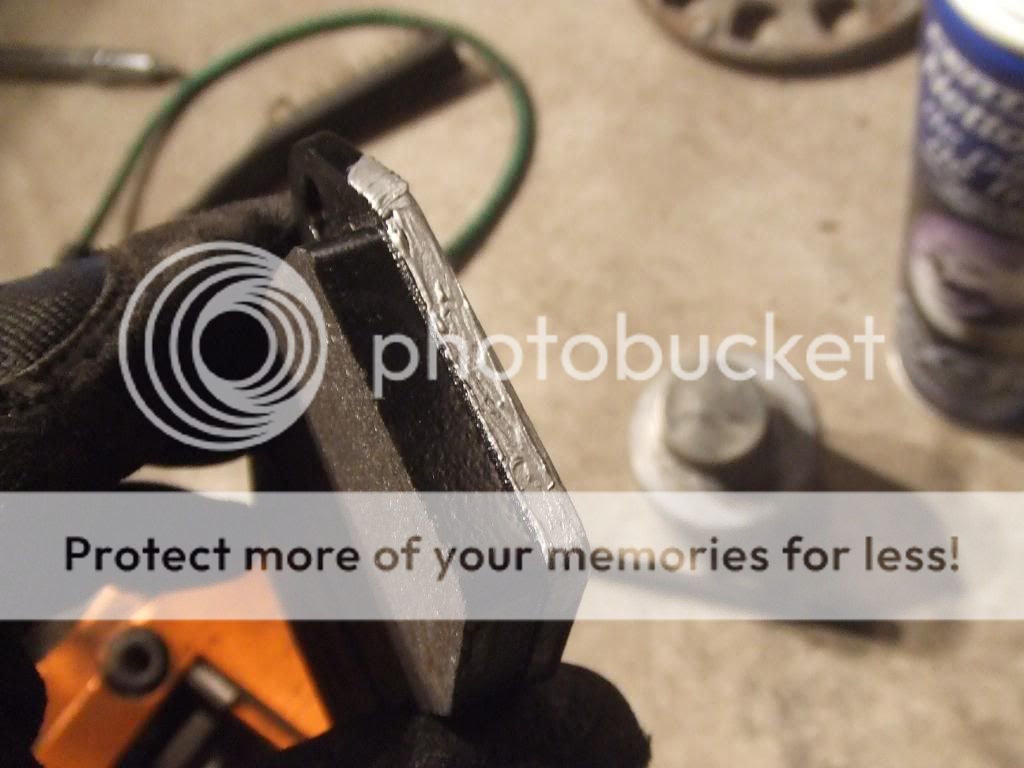
Step 11: Grab your Brake Pads, I'm using Hawk HP Plus. Anti-seize the sides and be sure not to get any on the surface of the brake pad. Anti-seize the rear of the pad also in a figure 8.
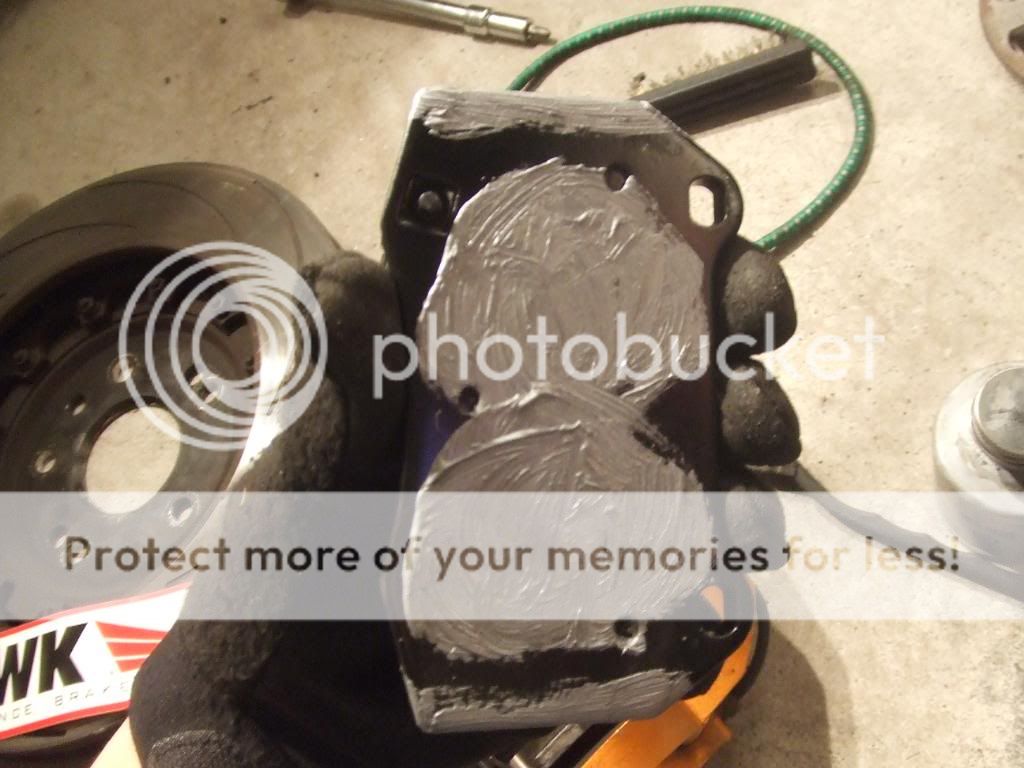
Step 12: Slide the Brake Pads into the Caliper with the Metal Indicator on the inside.
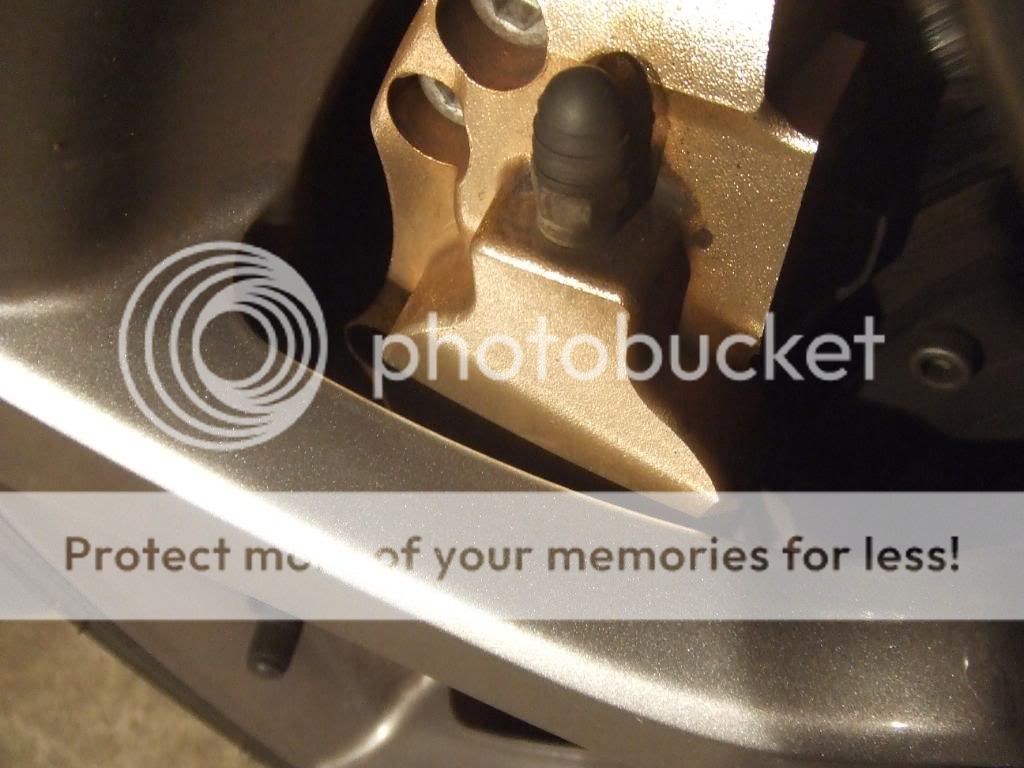
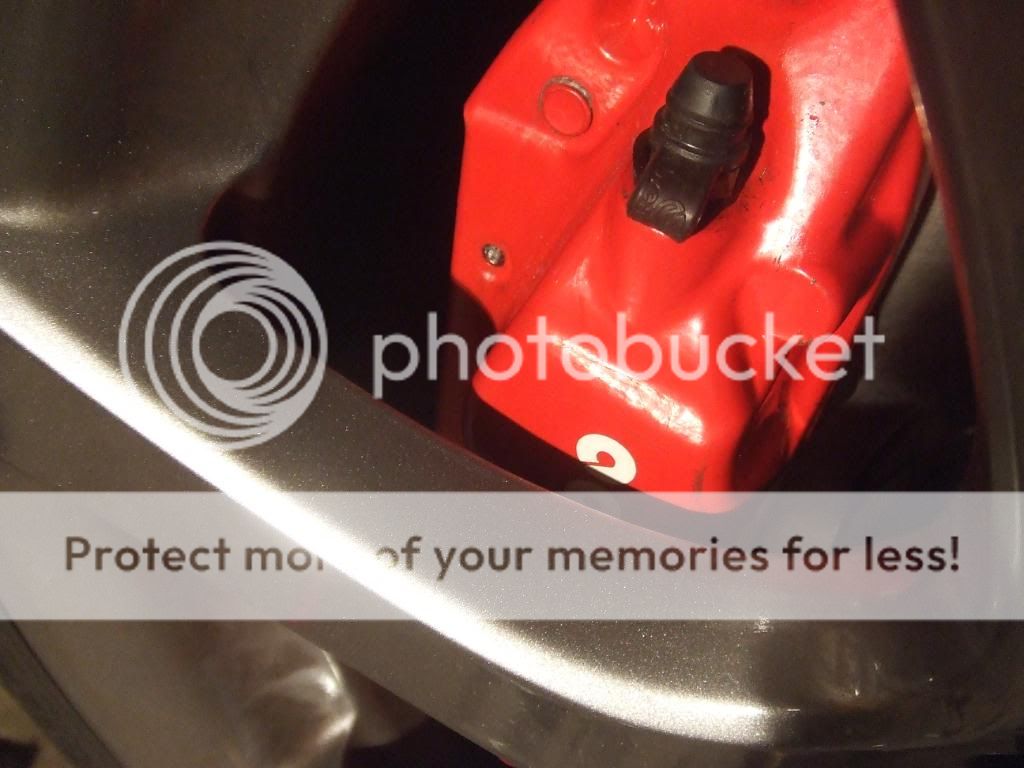
Step 13: Press in one of the holding pins on the top and anti seize the pin.

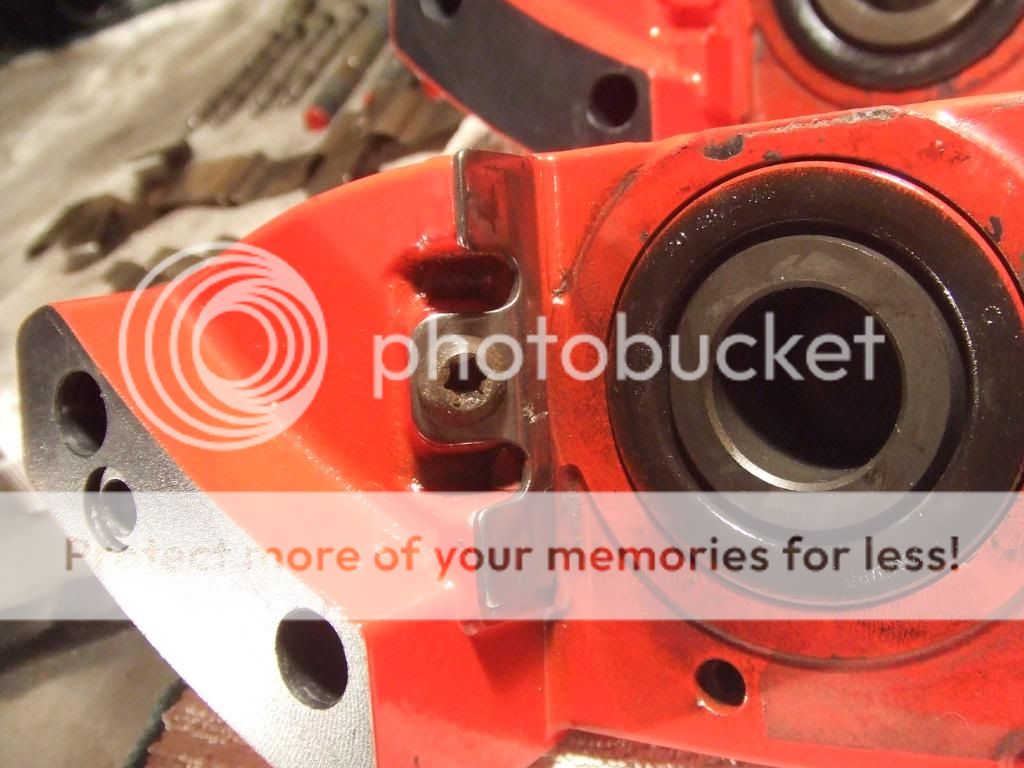
Step 14: Anti-seize the bracket used to hold the brake pads in place. Anti-seize the bracket where the holding pins make contact with the bracket, see picture.
Step 15: Slide the bracket under the top pin and while pressing down and holding pressure on the bracket against the pad and insert the second pin at the bottom and press in place. Repeat on the other side.
Step 16: Now you are done. Bleed your brakes which I'm not going to cover because there are lots all over the interwebs.
Step 17: Add required spacers depending on the offset and spoke design of your wheels.
Step 18: Put your wheels back on and torque them to spec.
The Secret and Parts List for this Swap.
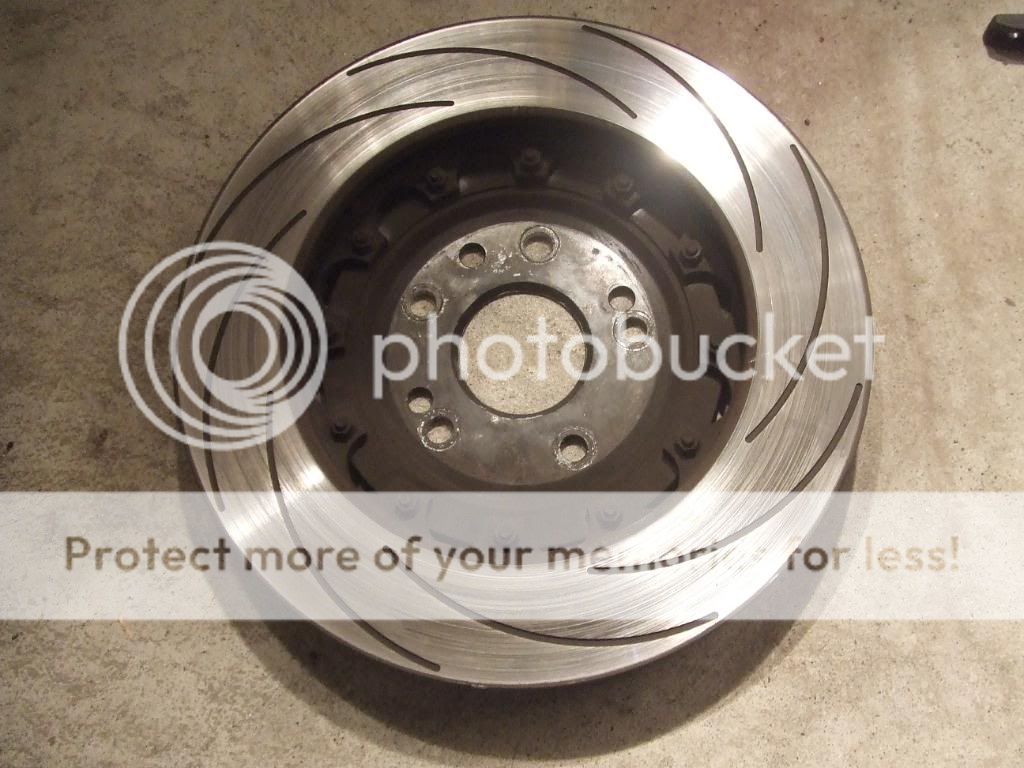
I've spent hours searched the web for information about these caliper and I don't know what everybody was talking about have problems and "this will not fit" and "that will not fit" and "there is no way to do this and that". Although that was for a DC5. The Rotor on the DC5r is different then the USDM DC5 so the caliper will not bolt on without interfering with the rotor. So therefore we will have to find a rotor with a offset that will place the disc perfectly where it should be. Luckily Honda S2000 Rotors will work perfectly. Anybody who decides to do this will have 4 piston from brakes and a larger brake rotor. The stock 4 Cyl rotors are 10.8in and the V6's are 11.1in and the S2000 rotors are 300mm........whatever that equals to in inches, 12.8 I think........
You can order direct from japan and get the OEM DC5r pads for the Brembo's and pay crazy money for it or you can use Nissan 350z Pads. It must be from a 350z with the optional Brembo Track Package.
Parts List:
- (2) Front S2000 rotors (any year will do)
- DC5r Brembo Calipers
- 2005 Nissan 350z (With the optional Brembo Package) Brake Pads.
Tools and Stuff you will need:
- Impact Wrench
- 3/4 Ratchet
- 19mm Socket
- 17mm Socket
- T-55 Star Bit
- T-05 Star Bit
- Bungee Cord
- 14mm Wrench
- 11mm Wrench
- Steel Brush
- Brake Cleaner
- Clean Towels
- Brake Fluid
- Blue Thread Lock
- Anti-Seize
This is just a guide and may not be in the order you chose to do it. There may be other ways to do it but this is my way of doing it and hold no responsibility for any damage or injuries and occur.
Step 1: Lay out all your caliper parts neatly to see if your missing anything and then proceed to clean everything and remove all the dirt, brake dust, etc.
Step 2: Grab a bottle of brake fluid you plan on using in your car or whats already in your car. I used Motul 5.1, and find something small to pour some brake fluid into, I used a bottle cap.
Step 3: Grab one of the O-Rings and lubricate it with some brake fluid. Just put some on your finger and rub it all around the O-Ring. Look inside the piston hole and you will see a little rib, that's where the O-Ring is going to sit.
Note: Notice the O-Rings have 2 Sizes, the large one and the smaller one, then look at the caliper piston hole, notice how 1 piston is larger than the other. Large O-Ring goes in large hole and Small O-Ring goes in small hole.
Be careful not to tear or rip or damage the O-Ring in any way
In
Step 4: Repeat the above step for all 4 halves of the caliper.
Step 5: Time to insert the Pistons into the caliper. Grab a piston and a rubber piston seal. Lubricate the Piston seal with brake fluid and be generous, don't stinge on the brake fluid. Then slowly press the seal onto the piston without over stretching it and doing damage to the seal. Than lubricate the Piston all over and the hole the piston is going into and slowly slide it into the correct hole in the caliper.
Note: Once again notice the difference in sizes of the piston. So use the correct seal for the correct piston size.
Finished! Now repeat once again for the other pistons.
Note: Make sure everything is seating properly!!
Not seated Properly.
Properly seated.
Almost Done!
Step 6: Time to install the brake pad sliders now. Grab some blue thread lock and thread lock the screw holding the slider bracket in place.
Finished!
Step 7: Time to install the small o-ring for the fluid passage between the caliper halves. Take a look at both caliper halves,
Notice how one has a small lip to it,
Now take a look at the o-ring,
This is how it should go in according to the lip on the caliper halves.
Now do the same to the other side and now your done.
Step 8: Time to assemble the caliper halves, anti-seize the 4 bolts holding the caliper halves together.
Torque them down by hand with the larger T-55 bit starting from the center outwards.
Repeat for the other 2 halves and then your finished!
Almost!
Step 9: Now time to screw on the bleeder screw. Grab a 11mm wrench or long socket and and tighten all 4 of them nice and snug but do not over torque these.
Finished!
Now you really are finished with putting together your DC5r Brembos. Now pray they do not leak. lol.
Now to install the DC5r Brembos!!! WOOOOoooo
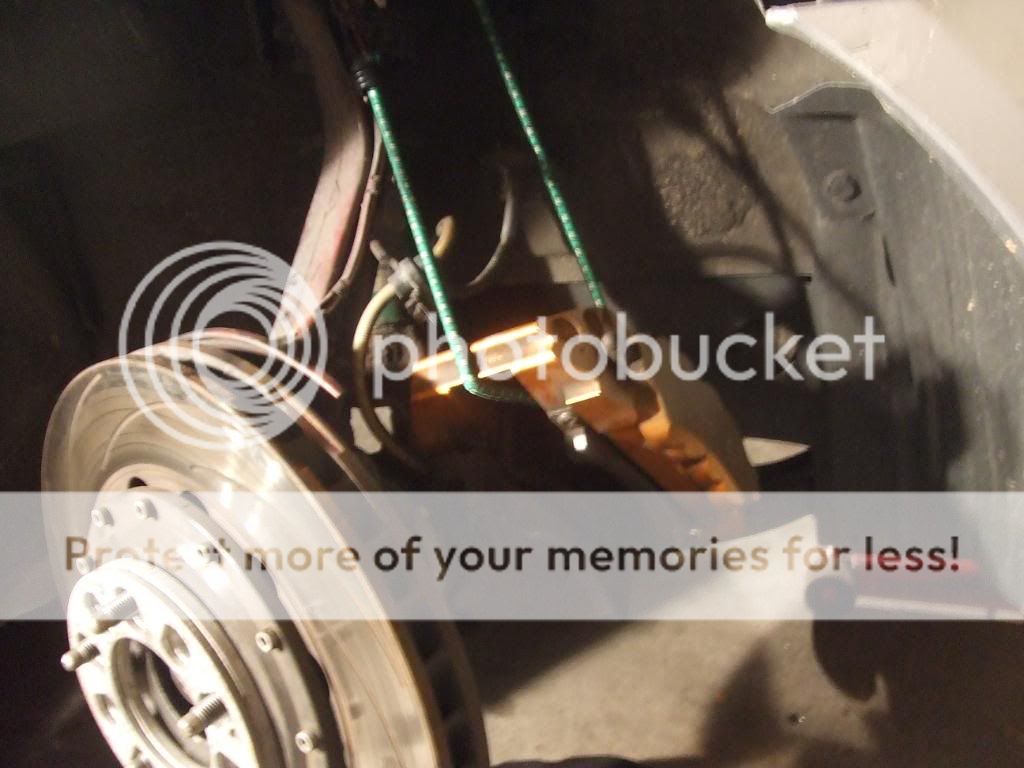
What I'm replacing,
Yes, I know. My tires a little low on air........
I decided to try something different and wanted something a little more suttle...... ..boy was I wrong.
Step 1: Jack up the front of the car and put jack stands under the front jacking points and rest the car on the jack stands.
Note: DO NOT work with just the hydraulic jack only!
Step 2: Remove the 2 front wheels.
Step 3: Grab a 19mm (or 17 mm if your replacing your stock OEM calipers) and undo the upper caliper bracket bolt and then do the same for the lower bolt.
Step 4: Bungee cord the caliper to your upper control arm so you don't put stress on your brake lines by letting it hang.
Step 5: Remove your brake rotor and place in safe area where you won't step on it...........
Step 6: Once you remove your brake rotor, inspect the surface of your hub to see if there are any rust on it. If there is, remove it with a steel brush or you can grind it off. But I chose not to use a grinder because it was only a little, so I used a stiff steel brush.
Step 7: Anti-seize the center hub where the center bore of the rotor meets the hub. Put your rotor on and screw on the 2 countersunk screw to hold the rotor in place.
Step 8: place the caliper on your knuckle with the bleeder screws facing up. Grab the 12x1.75 bolts used to hold the caliper onto the knuckle and anti seize the bolt before threading in. Then do the same for the bottom and then torque them.
Note: The OEM Caliper bolts will not fit, I believe they are 12x1.25 so the thread pitch is different. Your going to have to pick up some new bolts which are 12x1.75 which is the same pitch as the Brembo's.
Step 9: Take a 14mm wrench and undo the brake line banjo bolt from the Ksport Caliper which is still bungeed to your control arm and thread into the bolted on Brembo Caliper.
Note: There are 2 washers on the bolt so be careful not to lose them or your brakes will leak from the brake lines. Also when you undo the bolt from the caliper, brake fluid will start dripping out so make sure you have something under to catch it.
Step 10: Brake Cleaner everything to remove any brake fluid that may have got on the caliper.
Step 11: Grab your Brake Pads, I'm using Hawk HP Plus. Anti-seize the sides and be sure not to get any on the surface of the brake pad. Anti-seize the rear of the pad also in a figure 8.
Step 12: Slide the Brake Pads into the Caliper with the Metal Indicator on the inside.
Step 13: Press in one of the holding pins on the top and anti seize the pin.
Step 14: Anti-seize the bracket used to hold the brake pads in place. Anti-seize the bracket where the holding pins make contact with the bracket, see picture.
Step 15: Slide the bracket under the top pin and while pressing down and holding pressure on the bracket against the pad and insert the second pin at the bottom and press in place. Repeat on the other side.
Step 16: Now you are done. Bleed your brakes which I'm not going to cover because there are lots all over the interwebs.
Step 17: Add required spacers depending on the offset and spoke design of your wheels.
Step 18: Put your wheels back on and torque them to spec.
The Secret and Parts List for this Swap.
I've spent hours searched the web for information about these caliper and I don't know what everybody was talking about have problems and "this will not fit" and "that will not fit" and "there is no way to do this and that". Although that was for a DC5. The Rotor on the DC5r is different then the USDM DC5 so the caliper will not bolt on without interfering with the rotor. So therefore we will have to find a rotor with a offset that will place the disc perfectly where it should be. Luckily Honda S2000 Rotors will work perfectly. Anybody who decides to do this will have 4 piston from brakes and a larger brake rotor. The stock 4 Cyl rotors are 10.8in and the V6's are 11.1in and the S2000 rotors are 300mm........whatever that equals to in inches, 12.8 I think........
You can order direct from japan and get the OEM DC5r pads for the Brembo's and pay crazy money for it or you can use Nissan 350z Pads. It must be from a 350z with the optional Brembo Track Package.
Parts List:
- (2) Front S2000 rotors (any year will do)
- DC5r Brembo Calipers
- 2005 Nissan 350z (With the optional Brembo Package) Brake Pads.
Last edited: