

cantafordaccord
Well-Known Member
- Joined
- Oct 17, 2006
- Posts
- 982
- Reaction score
- 4
I will finish and add more to this as time goes
ok I am going to start this thread off saying that this is not my first time working with carbon fiber. I have been doing work off and on as a hobby not so much lately but I figured that I should share some of my work since I gave back into my hobby again.
First off your going to need to figure out what you want to work with and if the peice is workable. since carbon fabric is fairly stiff it is not allways easy to conform it in the shape you want.
next you will have to gather your supplys
1.painters tape
2.carbon fiber fabric
3.epoxy, for the resin resin I used west systems 105 resin and 207 special hardener with uv protectant
4.latex or similar material gloves
5.sharp scisors
6.a respirator
7.long sleve shirts help keep the fiber slivers out of your arms
8.adequate space that is room temperature and not too humid
9.sand paper 80 grit, 220 grit, 320 grit and 400 grit
10.brushes (something cheap/disposeable)
11.black tint (for epoxy resin)
12.digital scale for weighing resin/hardener
13.mixing sticks and cups
14.whiskey/party favors
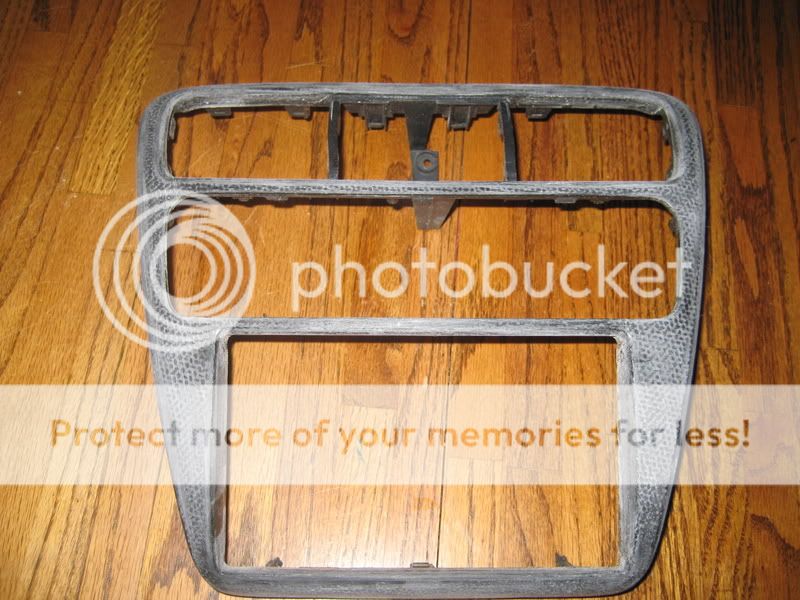
Next you are going to sand the peice with 80 grit preferably because it leaves nice gouges in the surface of your part for the resin to seep into for a great hold. I put roughly 30-45 minutes into sanding the peice below.
Next you will need to wash the part to get rid of any unwanted debris. let the part dry real good, I let this dry over a few days. a few hours in a warm dry place should do however. you want to make shure there is no moisture left on the part before any work continues.
Figure out how much carbon fabric you need for the peice you are re-working. mask the lines you will be cutting with painters tape and cut the fabric right in the middle of the tape. the tape ensures that the weave doesn't distort and make a mess of itself when cut. It also reduces allot of the waste.
Coat the part with resin evenly try not to get it too thick or too thin. Catch any resin build-up spots and thinned out areas, as the resin cures. it will save you lots of unwanted work (aka sanding).
Let the resin cure untill it is very tacky. remember that when the resin is tacky it will cure much faster than it was previously before B stage (tacky).
Once tacky (wear gloves) lay the fabric down how you want it. you pretty much have one shot to enshure a nice weave. you will most likely need to watch the fabric to enshure that it stays where you want it because the fabric will lift in spots.
Once cured for 12-24 hrs depends on the hardeners pot life (cure time) could be longer you lay down a thin layer of epoxy on the whole area where the fabric is epoxyed down and then about a quarter to half an inch overlaped onto the excess carbon that will be trimmed off
let the epoxy cure untill it has been hard for 10 or so hours then trim off the excess carbon with a razorblade you dont want to over do it be careful you could easily cut too much off. you want to leave some excess on there.
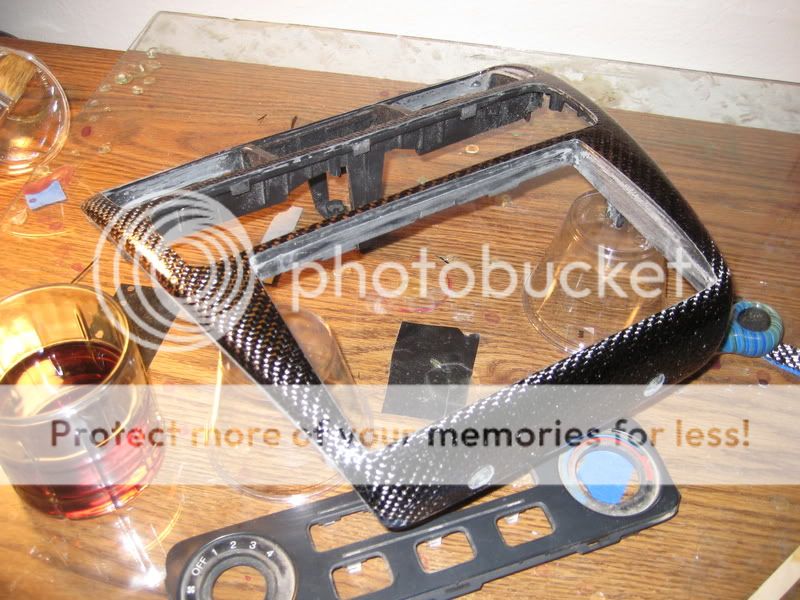
here is what my bezel looked like after being trimmed with the razor
Next you get your 80 grit sandpaper on a sanding block I used a jenga peice it was handy and small enough to work with this peice. sand evenly on the excess carbon untill you have your desired results
Next sand any unwanted excess resin buildup (allways happens)
here is what your peice should look like after sanding the resin buildup and excess carbon.
Next wash the dirtyness off of the peice and let dry for plenty long.
up next mix up 5-10 grams of epoxy resin and the black tint. tint the edges of your carbon peice where you have previously cut
heres an example on where to tint

let the black tint cure for annother 10 hours and throw down annother thin layer of epoxy (no tint) on the carbon fiber very carefully watch for built up epoxy spots and bubbles.
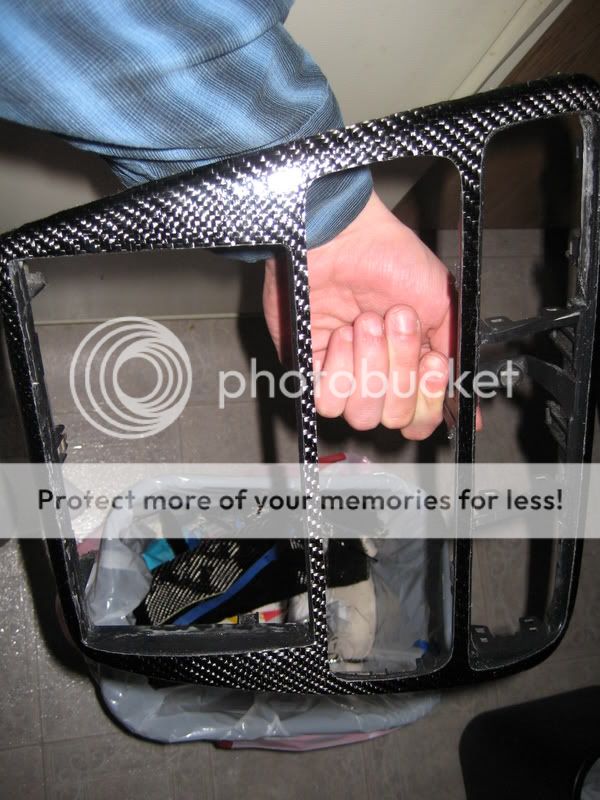
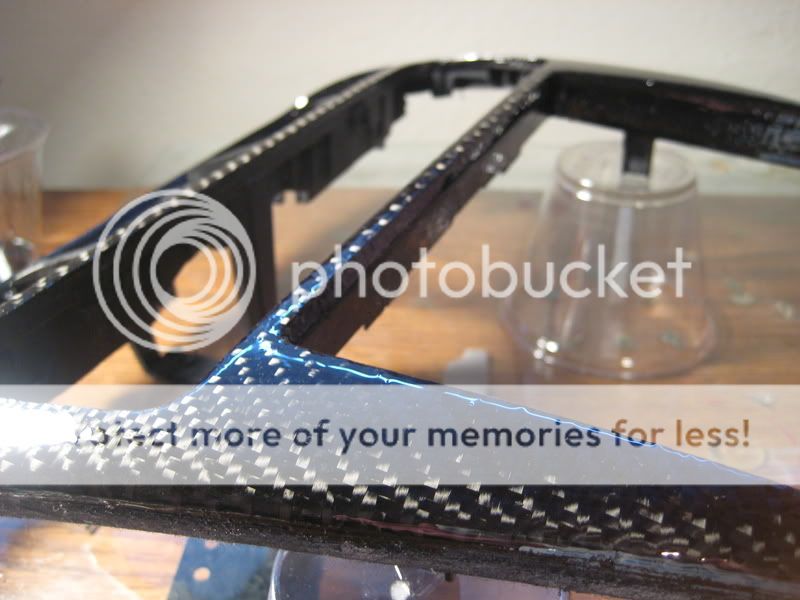
heres what you should have after 2 layers of epoxy and the tinted edges are done twice
next up is one more tint job and annother coat of resin
after your done with that get out your 220 grit sand paper on a sanding block sand the surface untill it is even and smooth. Once that has been finished sand again with 320 grit paper and the sanding block then hit it with the 400 grit and a sanding block again.
while doing these steps be careful not to sand through the carbon it can get ugly.
once completed check out the part and make shure everything looks good if so you should be ready for clear coat. otherwise you can throw down annother very thin layer of epoxy sand it smooth and polish
I have not yet gotten this far into the project however I thought I should write the jist of it for those of you who wonder
I dont have pics for all of these previous steps some of the shots got deleted but ill try my best to get some shots for everything eventually so for now you can check out this guy pukeing in a street cone and into a hat for now

ok I am going to start this thread off saying that this is not my first time working with carbon fiber. I have been doing work off and on as a hobby not so much lately but I figured that I should share some of my work since I gave back into my hobby again.
First off your going to need to figure out what you want to work with and if the peice is workable. since carbon fabric is fairly stiff it is not allways easy to conform it in the shape you want.
next you will have to gather your supplys
1.painters tape
2.carbon fiber fabric
3.epoxy, for the resin resin I used west systems 105 resin and 207 special hardener with uv protectant
4.latex or similar material gloves
5.sharp scisors
6.a respirator
7.long sleve shirts help keep the fiber slivers out of your arms
8.adequate space that is room temperature and not too humid
9.sand paper 80 grit, 220 grit, 320 grit and 400 grit
10.brushes (something cheap/disposeable)
11.black tint (for epoxy resin)
12.digital scale for weighing resin/hardener
13.mixing sticks and cups
14.whiskey/party favors
Next you are going to sand the peice with 80 grit preferably because it leaves nice gouges in the surface of your part for the resin to seep into for a great hold. I put roughly 30-45 minutes into sanding the peice below.
Next you will need to wash the part to get rid of any unwanted debris. let the part dry real good, I let this dry over a few days. a few hours in a warm dry place should do however. you want to make shure there is no moisture left on the part before any work continues.
Figure out how much carbon fabric you need for the peice you are re-working. mask the lines you will be cutting with painters tape and cut the fabric right in the middle of the tape. the tape ensures that the weave doesn't distort and make a mess of itself when cut. It also reduces allot of the waste.
Coat the part with resin evenly try not to get it too thick or too thin. Catch any resin build-up spots and thinned out areas, as the resin cures. it will save you lots of unwanted work (aka sanding).
Let the resin cure untill it is very tacky. remember that when the resin is tacky it will cure much faster than it was previously before B stage (tacky).
Once tacky (wear gloves) lay the fabric down how you want it. you pretty much have one shot to enshure a nice weave. you will most likely need to watch the fabric to enshure that it stays where you want it because the fabric will lift in spots.
Once cured for 12-24 hrs depends on the hardeners pot life (cure time) could be longer you lay down a thin layer of epoxy on the whole area where the fabric is epoxyed down and then about a quarter to half an inch overlaped onto the excess carbon that will be trimmed off
let the epoxy cure untill it has been hard for 10 or so hours then trim off the excess carbon with a razorblade you dont want to over do it be careful you could easily cut too much off. you want to leave some excess on there.
here is what my bezel looked like after being trimmed with the razor
Next you get your 80 grit sandpaper on a sanding block I used a jenga peice it was handy and small enough to work with this peice. sand evenly on the excess carbon untill you have your desired results
Next sand any unwanted excess resin buildup (allways happens)
here is what your peice should look like after sanding the resin buildup and excess carbon.
Next wash the dirtyness off of the peice and let dry for plenty long.
up next mix up 5-10 grams of epoxy resin and the black tint. tint the edges of your carbon peice where you have previously cut
heres an example on where to tint
let the black tint cure for annother 10 hours and throw down annother thin layer of epoxy (no tint) on the carbon fiber very carefully watch for built up epoxy spots and bubbles.
heres what you should have after 2 layers of epoxy and the tinted edges are done twice
next up is one more tint job and annother coat of resin
after your done with that get out your 220 grit sand paper on a sanding block sand the surface untill it is even and smooth. Once that has been finished sand again with 320 grit paper and the sanding block then hit it with the 400 grit and a sanding block again.
while doing these steps be careful not to sand through the carbon it can get ugly.
once completed check out the part and make shure everything looks good if so you should be ready for clear coat. otherwise you can throw down annother very thin layer of epoxy sand it smooth and polish
I have not yet gotten this far into the project however I thought I should write the jist of it for those of you who wonder
I dont have pics for all of these previous steps some of the shots got deleted
but ill try my best to get some shots for everything eventually so for now you can check out this guy pukeing in a street cone and into a hat for now
Last edited: