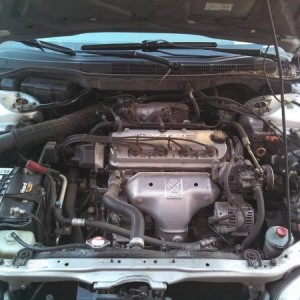
Well, it's been a busy few days here, as I tore the front end out of the Rusty Accord. I'd been gathering the parts to do this job since the end of last month, and finally gathered up what I needed to be able to do it. I'd been hearing some noise up front (hub bearing noise) even before I put the snow tires on it. So, Sunday became the day to tear it apart, as it was still semi warm out (for Michigan it's kind of odd at this time of year). Anyway, First order of business was taking the brakes off, along with removing the big axle nut. Then all of the cotter pins were removed, so the nuts could be taken off (17mm). Next was removing the rotors. Needless to say the screws were rusted solid and had to be drilled out/off, then I had to literally beat the rotors off as they were rusted to the hubs. I wasn't too worried about the old rotors, as I had planned on replacing them (already had them here). Now that that stuff was done, I installed the hub puller and slide hammer tool. I worked that tool for over an hour and a half before the left hub finally came off. Then I moved over to the right side and spent 2 hours on it, and it didn't even budge. Needless to say that tool wasn't working, so I took it back. I had also broke 3 lug studs using that tool, so I won't ever use it again for this kind of work. I stopped by my local Advanced Auto (on my way back from the Zone) and ordered up 4 lug studs to replace those that got snapped off. Once I got back, I looked at the 1 I had off, and tried ti figure out what work to get the other one off, as I had some stuff sitting on the work bench I thought I could use. Then it hit me while looking around, I'll just make an improvised driver out of some odds and ends (see pics below) using a 1" to 3/4" bell reducer, since it fits inside the bearing, and a 3" piece of galvanized pipe slides thru the spines of the hub itself(keeping it aligned). Now I just needed something beefy to hit on. I found that in a sleeve out of an old bushing, and welded it into the 1 inch side of the reducer fitting (gotta love having some plumbing bits laying around). A couple of wacks with the hammer and out it came (less than 10 minutes). Next up was getting the big snap ring out/off. Once that was done it was onto the bearings. I used a "sleeve" I made, as the kit I bought (19 piece) the largest sleeve was 91mm OD, but the inside of it is 87mm, and the bearing is 88. D'oh. So I built 1 out of a 4" coupler and a 1/4 inch plate with a hole in the center of it. The arbor and some of the larger spacers were used, and it pulled those bearings out like a hot knife slices thru butter. At this point I cleaned up and called it a day, while figuring out what my next steps were to be. Needless to say my arms and in particular my right shoulder ( I'm still recovering from that damn torn rotator cuff) were hurting.
Here's some pics of were I stopped Sunday night.
Monday I started out with knocking out the old lower ball joints. These were OE parts, in that there wasn't a snap ring used as a keeper/safety device. I then pressed them in using a tool I borrowed from a friend of mine. I borrowed it to press some bushings and lower ball joints in the Trans Am I'm working on, and just hadn't returned the tool yet, so I figured I'd use it to press in some lower ball joints on my Honda. Worked great for that. Next up was pressing in the hub bearings, which the tool I used for removing the the old bearings with a combination of spacers and the largest sleeve in the kit. They went in easier than they came out, as I froze them in my shop freezer/beer fridge.
")
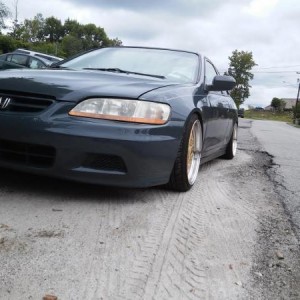
The snap rings went in easier than they came out as well, probably due to the light clean up I gave them. I followed this up with installing the hubs, to finish the spindle assemblies. Next up was removing the strut assembly, so I could replace both upper control arms. Once they were put back together, I installed the assembled spindles, and bolted them up using new cotter pins. Then I removed the tie rods, and replaced them with the new ones I had here. Next I cleaned up the caliper brackets and installed the new ceramic pads and new rotors. At this point, all I had left was putting the tires back on, which I did. Then I did a quick check of the toe in, and called it a day. Sorry I didn't get any pics from Monday's work, but I forgot to bring out my camera. Here's a pick of the left front with the car sitting outside this afternoon.

I did have to reset the toe in, and I put it at 1/16th toe in, then took it for a road test. Man what a difference. No noise from up front, and everything feels nice and tight. At 233K, all of the old parts that I replaced were definitely showing their age.
Here's some pics of the tools I used for the hub bearing swap. Note some were fabricated, and the kit was bought.
This is the driver I made up to drive the hub out of the hub bearing.
These pics show the "sleeve" I made to remove the hub bearing.
Like I said above, the kit I bought didn't have a "sleeve" big enough for the bearing to go into.
I believe the 23 piece one has the larger "sleeve" (101mm OD) that would allow for bearing removal.
I got this kit off e-bay, and the cost of the 4" coupler was 18 bucks plus the plate and welding time.