

I am dropping the project due to some health concerns that i am now dealing with. I could not finish the project and had to get the car cleaned up, so i took it to Maaco for now. Maybe sometime in the future, i can revisit this and do this on another project car.
Introduction This DIY tutorial is intended to be on the cheap, however have great lasting results in the long run. And as with anything, it doesnt always work the same for every one. Temp, humidity, and other variables can affect the outcome. It is hightly reccomended that if you need a paint job, and are not familiar with painting anything at all, dont do it. Take it to maaco or something. This method is useful for rattle-cans, roller jobs and the like.
Initial Notes It is most important to remember that its all about the PREP and having PATIENCE. This will not be done in a matter of a few hours or one day! Keep that in mind. DO NOT RUSH ANYTHING AT ALL!!! If your car is a DD, then follow these steps on one panel at a time. That way you can avoid half-***ing your self and have the same great results. This requires a lot of dedication, prep, work, and making sure you follow directions EXCESSIVELY well. It may be a great idea to print this out and keep it with you while you do this job. Do one step at a time how I have it laid out. Also keep in mind that I may have left a few details out. If you have any questions, or notice a problem, stop where you are and ask or research. Do not leave any of the steps out, even if you know what you are doing. If you have professional paint equipment, or access to one, then take the time and sacrifice and go that route. I personally do not have the time and money to invest in one car, or the space to store the equipment to collect dust. That’s why I am sharing this with you. I know I am not alone. Also, be cognizant of other cars, houses, people or things around you. Just like an HLPV, there will be overspray flying in the air. If you can manage to get your car in a secured open area for ventilation, just to prevent from unexpected issues, which would be ideal. Don’t do this in the parking lot of your condo or apartment complex. If you do not have a choice, see if you can build a small structure to cover your car, and be reasonable about it. But you are better off going somewhere else, where there won’t be much hassle or disturbance. Using this paint method will not involve someone calling the EPA on you or anything. Otherwise, you wouldn’t be able to obtain this stuff on store shelves. But there are dangers, even from sanding. Just as you will take precaution masking your car, mask your self too. Your life is not replaceable… don’t mess it up over a paint job. Get a few cheap masks, or a charcoal/gas mask. And wear it when sanding, removing sand dust, using bondo, and spraying. Also use gloves. It helps with doing the job, and to avoid irritation from extended exposure. Be safe or be sorry in the long run.
Practice makes perfect!!! I highly recommend that you sharpen your rattle can skills on some junk yard glory first. Usually a hood, fender or a door would be more than sufficient for practice, and even that won’t cost you much at all. It’s best to be safe than sorry. And practice makes perfect. You will know what to expect. Don’t practice on your own car.
Items Needed
• Plenty of sand paper 180-2000 grit. Don’t be cheap or shy on this at all
• Water and lots of it
• Dish washing detergent for wet sanding and washing
• Windex spray bottle
• Lint free dry wipes or cloths
• Polishing compound
• The best wax you can get your hands on
• A buffer
• A sander (the cheap walmart sander works too)
• Plastic sheets, garbage or grocery bags
• Masking paper of some sort
• Air duster or air compressor
• Dry sponges to wipe excessive dust
• Painters tape (ideal to avoid residue or having to use goo gone unnecessarily)
• Bondo for dents (tube is ok if it is only minor dents, otherwise get fiberglass and the tub)
• Primer (I used rattle can Krylon primer. Applies very well, and sprays out nicely)
• Paint (AutoZone rattle cans for auto paint about $6 per can. Duplicolor!!! Get 12+ cans)
• Clear (Yes we are treating this as a 2 stage, and double of what you got in color, but same brand – 20-24 cans)
Reason behind extra cans is in case you would need it either durring this process, or for a fender bender. Dont take chances and stock up.
Last Warning and disclosures Now, I cannot stress this more. Make sure you mask off what ever you do not want to get paint/overspray on. You are doing this at your own risk. And you will regret what you paint over accidentally, as you cannot recondition it easily. Lights, trim, badges, and other accessories should be removed. Also, if it is possible to remove the doors, hood and trunk, you can end with better results. This is primarily for a color change/repaint. This may or may not work for spot painting/spot repair. Do this at your own risk. I will not under any circumstances take any responsibility of any kind, whether you do or do not follow this guide. This is the method that I am familiar with and works with me almost flawlessly every time.
Step 1 Wash your car with a degreaser (dish soap, commercial degreaser, whatever... but don’t get too creative or curious) Once done with wash, dry car with a shammy or some sort of lint free cloth. Then wipe down all parts to be painted with WINDEX!!! Spray and wipe. Make sure no dust is left and the car is entirely dry. Do not touch anything that will be sanded and painted.
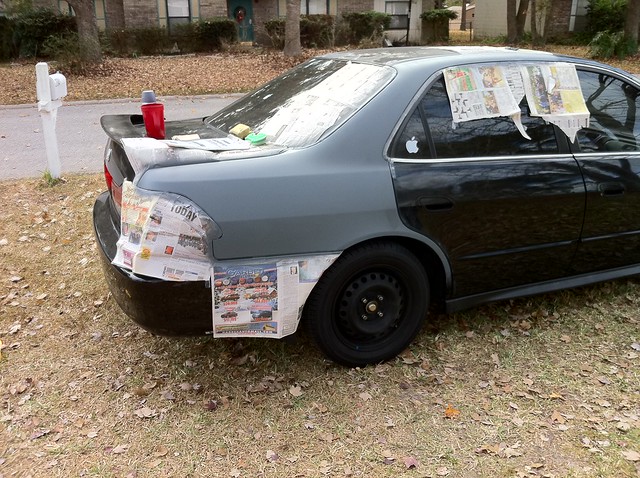
Step 2 Tape and mask what ever you do not want to be painted. DO NOT EVER ASSUME THAT PAINT WILL NOT GET INTO SOMETHING. It will. So mask away, and keep in mind of what will be painted and what will not be painted. A word of advice; use plastic like garbage or grocery bags to be the main mask, and then towards the edges, apply news paper or some other paper over the edges of the plastic and add a 2nd layer of tape over that. This is to ensure nothing seeps or runs through or any overspray does not penetrate at all. It is worth while to take your time at this stage too. Do it right the first time around.
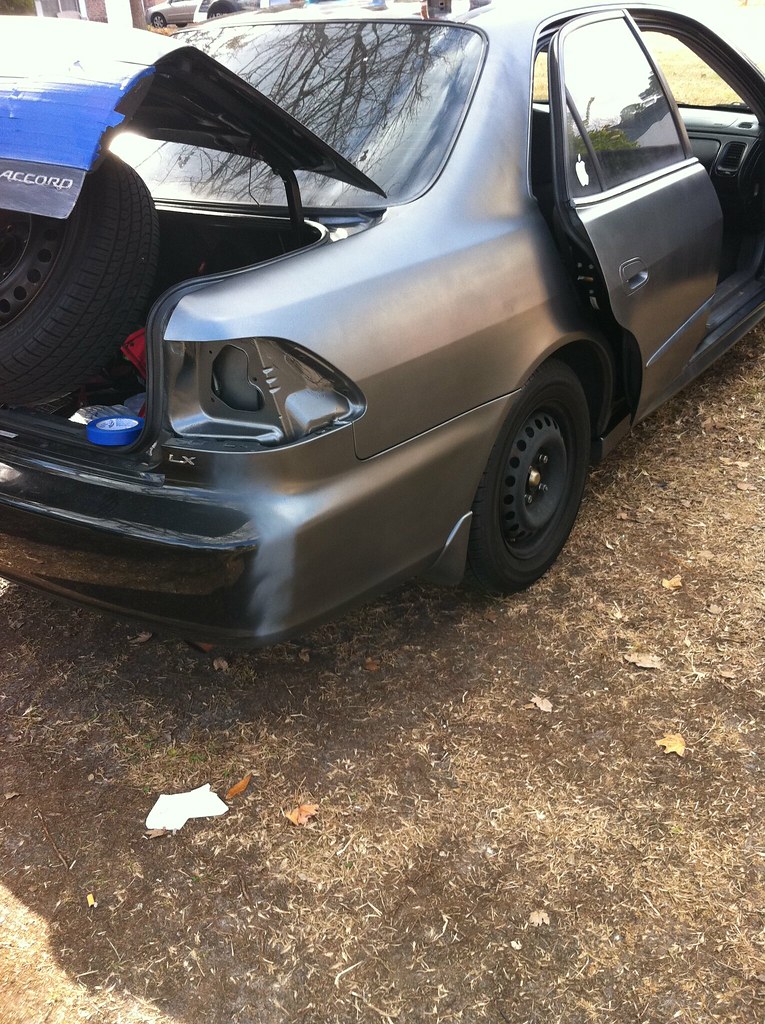
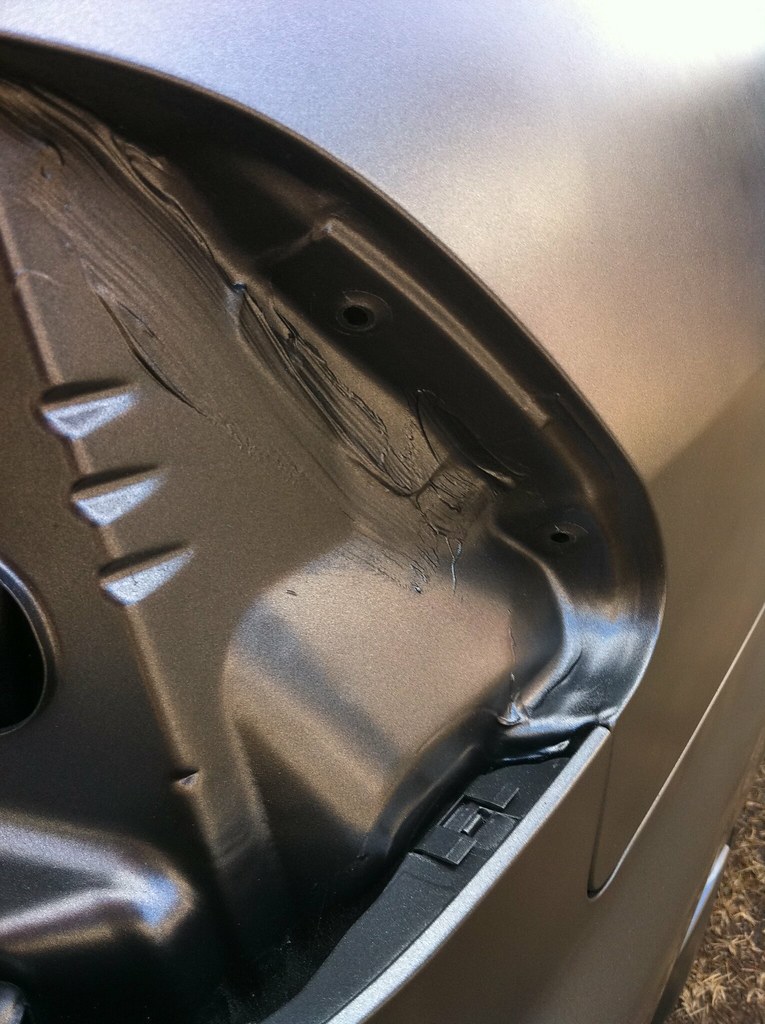
Step 3 Sand everything down just a little bit. You only need to rough up the surface of the existing paint. Start with 120 grit, 300/320, then 400 and stop. If you have to fill dents, do this now. You do not have to sand down to the bare metal if you are not filling dents. It is completely unnecessary unless you are ONLY filling in dents. At that point, you will sand the dent itself down to the metal. This stage of the process is best for you to do all of your filler and/or body repair. I’m not going into how to do the bondo work. There are millions of resources online and every one does it differently.
Step 4 Eliminate all dust!!! Start off with a few dry kitchen sponges, the ones with the green scuff pad and that have an irregular shape. Those usually work best. If you have high pressured air (air duster or a compressor) use that too, and make sure the car is dust and debris free.
Step 5 Make sure your tape is still in tact. And retape anything if necessary or questionable.
Step 6 Check your taping and masking one last time… again! This is where there is no turning back!
Step 7 Grab your rattle cans of primer. Shake them a bit longer than the recommended amount of time indicated on the label. You can never tell how much shelf life these products have.
Step 8 Lightly mist the primer over first on the areas to be painted. Don’t worry about the coverage. You want to make sure that there is a SECURED bonding layer incase you did not sand too well.
Step 9 Reprime to ensure you have good coverage. Don’t over do it, or your final result will not look nice. Keep a reasonable distance from the surface to avoid warps, drips, ect…. Also make sure that anything that is to be painted gets primed.
Step 10 Once the primer fully dries, look for problems before you proceed any further. Aside from common myths, you can leave your car in primer for a week to a month before you paint. But not longer. Any runs, warps or drips are to be smoothed out at this point using 400 grit dry sanding. Once done, then lightly prime over it again.
Step 11 Once it’s all fully dried up. Dry sand with 600 grit so that the surface is nice and smooth for the paint. Do not over sand, or you will have to start over. This is to just smooth out the surface a bit.
Step 12 Remove all of the masking. And remask as aggressively as previously indicated. This is to prevent paint layers and masking removal issues. Also clean out any of the dust from the sanding using a dry method first before you remask.
Step 13 Just like you did with the primer, shake the paint up a lot… And I mean for twice the time you spent shaking the primer. Also make sure that absolutely nothing is on the surface of the areas to be painted other than the retextured primer surface itself. It will show through the clear!!!
NOTE!!! IF YOU ARE PAINTING A METALIC COLOR, OR A COLOR WITH SPARKLE, BE EXTREMELY CAREFUL NOT TO MESS UP AT THIS STAGE. YOU CAN FIX IT, BUT IT’S A HASSLE AND YOU ONLY HAVE 30 MINUTES TIL YOU HAVE TO APPLY CLEAR. DO NOT LET THE PAINT RUN OR YOU WILL HAVE TO SAND IT DOWN WHEN IT TRIES UP, AND START BACK AT THE PRIMER STAGE!!! YOU’VE BEEN WARNED!!!
Step 14 Now, again as you did with the primer, lightly mist the paint/color over the primer. Coverage is not a big concern as you may have to do 2 or 3 full coats of paint. The mist will leave a nice wet sticky surface that bonds even better to the primer. Start with small areas at a time and keep a reasonable distance. Also, when painting, make sure you only overlap half of the previous lines painted. It takes longer but gives better results.
Step 15 Repeat step 14 until paint is even and there are no missed spots. Coverage is the key here.
Step 16 Within 30 minutes of the paint/color being laid down, apply the clear. Avoid runs if possible as the consistency of the clear is thinner than the actual paint and primer. For best results, do 4-5 full coats of clear.
Step 17 This is where the work starts to show. Remove any and all masking on the car COMPLETELY!!! Make sure that all of the clear applied evenly. Allow the clear to fully dry and cure. You will thank me for telling you to apply plenty of coats. Make sure that the clear has fully dried before you go any further. And wait twice as long to be sure. Do not rush as there is still plenty to be done. You are almost there!!!
Step 18 For any runs on the clear, you will grab your 1000, 1500 and 2000 grit sand paper and wet sand the whole car. Don’t be overly aggressive as this is a gentile process. You can also use dishwashing soap to avoid any unexpected clumps ruining your fresh work. Plenty of water while wet sanding and using the 1000 grit, fix the runs, the 1500 grit to kill any orange peel, and 2000 grit to smooth it all out for polishing.
Step 19 Dry off the car and do not let spots remain. You can put your decals back at this point but make sure to control the amount of the adhesive you put. You don’t want to ruin your fresh paint job Get your compound polisher out and a buffer. Make sure you lightly buff. Do not jam the buffer into the paint or you can cause waves. This process takes a lot of time and patience. Its not an easy task sometimes depending on the color. Once all of the swirls are gone, you are done! You can reassemble anything that was removed at this point, including lights, panels, ect.
Step 20 Wax the hell out of the car. Don’t be cheap on this step either. The better the wax and effort, the better the result.
Step 21 Pray/wish that it does not rain, and cruise on your newly painted ride the following day!
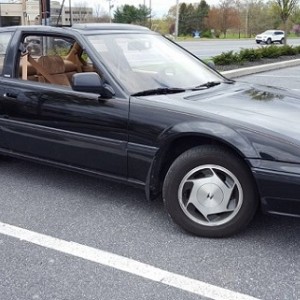
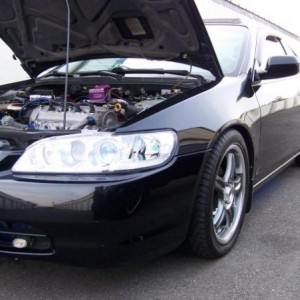
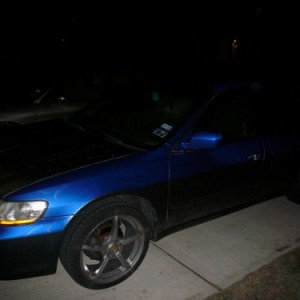
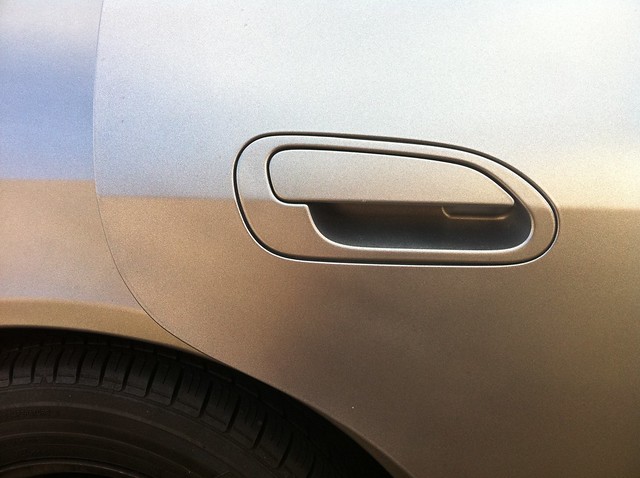
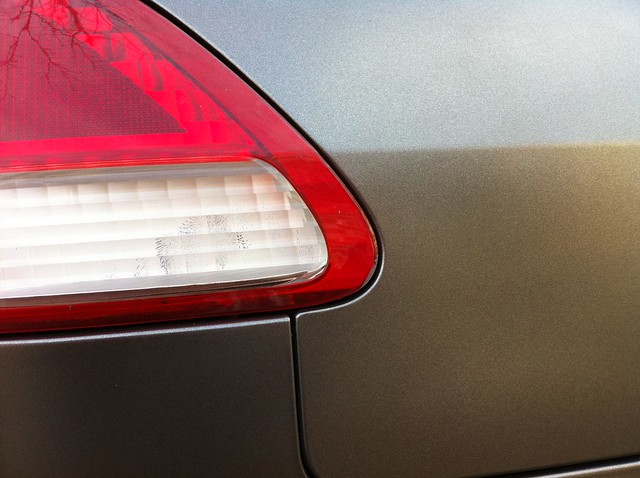
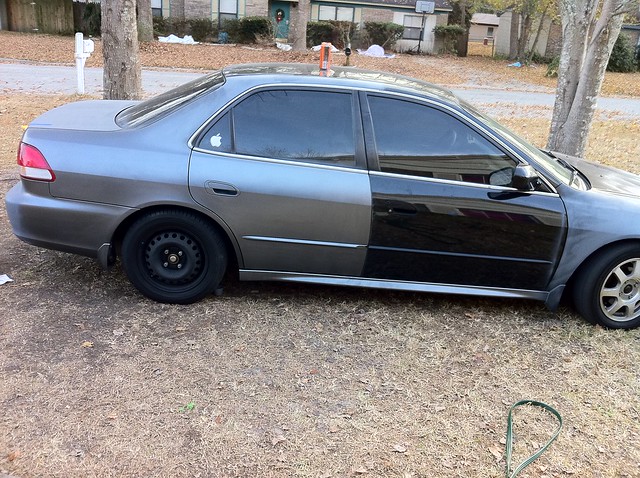
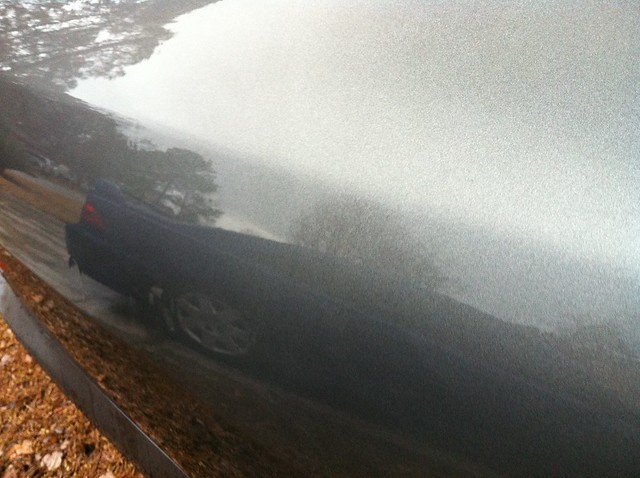
PICS from when i messed with my accord.
1/31/11 - Update:
Latest update... Went with the red color. So far, coming out excellent... scrapped car down to factory primer, then did a "base" coat with roller paint (rustoleum) so that there is a "stained" layer of color... for added color depth. Then bombed it with 2 coats of rattle can... it has not been photographed wetsanded so this is the last shot durring the day. I've already wetsanded quite a bit and going to do last coats tomorrow.


FYI... once all of the work is done, i will reorganize this thread, and rewrite any changes, or better things to do, and things not to do also.
Updated Pics... Went with Krylons "Caramel Moca Satin. No Clear applied just yet as it was only bombed for 2 coats. Still lots of work ahead as you can see. But its coming out much better than expected so far.


PICS ADDED... SOME OF THE PROCESS COVERED SO FAR
I left off on 2nd light coat of the actual paint. I did not go any further. Still needs to be cleared and needs 1 or 2 more coats for better coverage. Im still a bit hung over from last night... haha
UPDATE 2: Looks nice glossy... and wetsanded metallic nicely too

A Little Glossy Clear?.. no not really... but You can tell it will be nice!:
Introduction This DIY tutorial is intended to be on the cheap, however have great lasting results in the long run. And as with anything, it doesnt always work the same for every one. Temp, humidity, and other variables can affect the outcome. It is hightly reccomended that if you need a paint job, and are not familiar with painting anything at all, dont do it. Take it to maaco or something. This method is useful for rattle-cans, roller jobs and the like.
Initial Notes It is most important to remember that its all about the PREP and having PATIENCE. This will not be done in a matter of a few hours or one day! Keep that in mind. DO NOT RUSH ANYTHING AT ALL!!! If your car is a DD, then follow these steps on one panel at a time. That way you can avoid half-***ing your self and have the same great results. This requires a lot of dedication, prep, work, and making sure you follow directions EXCESSIVELY well. It may be a great idea to print this out and keep it with you while you do this job. Do one step at a time how I have it laid out. Also keep in mind that I may have left a few details out. If you have any questions, or notice a problem, stop where you are and ask or research. Do not leave any of the steps out, even if you know what you are doing. If you have professional paint equipment, or access to one, then take the time and sacrifice and go that route. I personally do not have the time and money to invest in one car, or the space to store the equipment to collect dust. That’s why I am sharing this with you. I know I am not alone. Also, be cognizant of other cars, houses, people or things around you. Just like an HLPV, there will be overspray flying in the air. If you can manage to get your car in a secured open area for ventilation, just to prevent from unexpected issues, which would be ideal. Don’t do this in the parking lot of your condo or apartment complex. If you do not have a choice, see if you can build a small structure to cover your car, and be reasonable about it. But you are better off going somewhere else, where there won’t be much hassle or disturbance. Using this paint method will not involve someone calling the EPA on you or anything. Otherwise, you wouldn’t be able to obtain this stuff on store shelves. But there are dangers, even from sanding. Just as you will take precaution masking your car, mask your self too. Your life is not replaceable… don’t mess it up over a paint job. Get a few cheap masks, or a charcoal/gas mask. And wear it when sanding, removing sand dust, using bondo, and spraying. Also use gloves. It helps with doing the job, and to avoid irritation from extended exposure. Be safe or be sorry in the long run.
Practice makes perfect!!! I highly recommend that you sharpen your rattle can skills on some junk yard glory first. Usually a hood, fender or a door would be more than sufficient for practice, and even that won’t cost you much at all. It’s best to be safe than sorry. And practice makes perfect. You will know what to expect. Don’t practice on your own car.
Items Needed
• Plenty of sand paper 180-2000 grit. Don’t be cheap or shy on this at all
• Water and lots of it
• Dish washing detergent for wet sanding and washing
• Windex spray bottle
• Lint free dry wipes or cloths
• Polishing compound
• The best wax you can get your hands on
• A buffer
• A sander (the cheap walmart sander works too)
• Plastic sheets, garbage or grocery bags
• Masking paper of some sort
• Air duster or air compressor
• Dry sponges to wipe excessive dust
• Painters tape (ideal to avoid residue or having to use goo gone unnecessarily)
• Bondo for dents (tube is ok if it is only minor dents, otherwise get fiberglass and the tub)
• Primer (I used rattle can Krylon primer. Applies very well, and sprays out nicely)
• Paint (AutoZone rattle cans for auto paint about $6 per can. Duplicolor!!! Get 12+ cans)
• Clear (Yes we are treating this as a 2 stage, and double of what you got in color, but same brand – 20-24 cans)
Reason behind extra cans is in case you would need it either durring this process, or for a fender bender. Dont take chances and stock up.
Last Warning and disclosures Now, I cannot stress this more. Make sure you mask off what ever you do not want to get paint/overspray on. You are doing this at your own risk. And you will regret what you paint over accidentally, as you cannot recondition it easily. Lights, trim, badges, and other accessories should be removed. Also, if it is possible to remove the doors, hood and trunk, you can end with better results. This is primarily for a color change/repaint. This may or may not work for spot painting/spot repair. Do this at your own risk. I will not under any circumstances take any responsibility of any kind, whether you do or do not follow this guide. This is the method that I am familiar with and works with me almost flawlessly every time.
Step 1 Wash your car with a degreaser (dish soap, commercial degreaser, whatever... but don’t get too creative or curious) Once done with wash, dry car with a shammy or some sort of lint free cloth. Then wipe down all parts to be painted with WINDEX!!! Spray and wipe. Make sure no dust is left and the car is entirely dry. Do not touch anything that will be sanded and painted.
Step 2 Tape and mask what ever you do not want to be painted. DO NOT EVER ASSUME THAT PAINT WILL NOT GET INTO SOMETHING. It will. So mask away, and keep in mind of what will be painted and what will not be painted. A word of advice; use plastic like garbage or grocery bags to be the main mask, and then towards the edges, apply news paper or some other paper over the edges of the plastic and add a 2nd layer of tape over that. This is to ensure nothing seeps or runs through or any overspray does not penetrate at all. It is worth while to take your time at this stage too. Do it right the first time around.
Step 3 Sand everything down just a little bit. You only need to rough up the surface of the existing paint. Start with 120 grit, 300/320, then 400 and stop. If you have to fill dents, do this now. You do not have to sand down to the bare metal if you are not filling dents. It is completely unnecessary unless you are ONLY filling in dents. At that point, you will sand the dent itself down to the metal. This stage of the process is best for you to do all of your filler and/or body repair. I’m not going into how to do the bondo work. There are millions of resources online and every one does it differently.
Step 4 Eliminate all dust!!! Start off with a few dry kitchen sponges, the ones with the green scuff pad and that have an irregular shape. Those usually work best. If you have high pressured air (air duster or a compressor) use that too, and make sure the car is dust and debris free.
Step 5 Make sure your tape is still in tact. And retape anything if necessary or questionable.
Step 6 Check your taping and masking one last time… again! This is where there is no turning back!
Step 7 Grab your rattle cans of primer. Shake them a bit longer than the recommended amount of time indicated on the label. You can never tell how much shelf life these products have.
Step 8 Lightly mist the primer over first on the areas to be painted. Don’t worry about the coverage. You want to make sure that there is a SECURED bonding layer incase you did not sand too well.
Step 9 Reprime to ensure you have good coverage. Don’t over do it, or your final result will not look nice. Keep a reasonable distance from the surface to avoid warps, drips, ect…. Also make sure that anything that is to be painted gets primed.
Step 10 Once the primer fully dries, look for problems before you proceed any further. Aside from common myths, you can leave your car in primer for a week to a month before you paint. But not longer. Any runs, warps or drips are to be smoothed out at this point using 400 grit dry sanding. Once done, then lightly prime over it again.
Step 11 Once it’s all fully dried up. Dry sand with 600 grit so that the surface is nice and smooth for the paint. Do not over sand, or you will have to start over. This is to just smooth out the surface a bit.
Step 12 Remove all of the masking. And remask as aggressively as previously indicated. This is to prevent paint layers and masking removal issues. Also clean out any of the dust from the sanding using a dry method first before you remask.
Step 13 Just like you did with the primer, shake the paint up a lot… And I mean for twice the time you spent shaking the primer. Also make sure that absolutely nothing is on the surface of the areas to be painted other than the retextured primer surface itself. It will show through the clear!!!
NOTE!!! IF YOU ARE PAINTING A METALIC COLOR, OR A COLOR WITH SPARKLE, BE EXTREMELY CAREFUL NOT TO MESS UP AT THIS STAGE. YOU CAN FIX IT, BUT IT’S A HASSLE AND YOU ONLY HAVE 30 MINUTES TIL YOU HAVE TO APPLY CLEAR. DO NOT LET THE PAINT RUN OR YOU WILL HAVE TO SAND IT DOWN WHEN IT TRIES UP, AND START BACK AT THE PRIMER STAGE!!! YOU’VE BEEN WARNED!!!
Step 14 Now, again as you did with the primer, lightly mist the paint/color over the primer. Coverage is not a big concern as you may have to do 2 or 3 full coats of paint. The mist will leave a nice wet sticky surface that bonds even better to the primer. Start with small areas at a time and keep a reasonable distance. Also, when painting, make sure you only overlap half of the previous lines painted. It takes longer but gives better results.
Step 15 Repeat step 14 until paint is even and there are no missed spots. Coverage is the key here.
Step 16 Within 30 minutes of the paint/color being laid down, apply the clear. Avoid runs if possible as the consistency of the clear is thinner than the actual paint and primer. For best results, do 4-5 full coats of clear.
Step 17 This is where the work starts to show. Remove any and all masking on the car COMPLETELY!!! Make sure that all of the clear applied evenly. Allow the clear to fully dry and cure. You will thank me for telling you to apply plenty of coats. Make sure that the clear has fully dried before you go any further. And wait twice as long to be sure. Do not rush as there is still plenty to be done. You are almost there!!!
Step 18 For any runs on the clear, you will grab your 1000, 1500 and 2000 grit sand paper and wet sand the whole car. Don’t be overly aggressive as this is a gentile process. You can also use dishwashing soap to avoid any unexpected clumps ruining your fresh work. Plenty of water while wet sanding and using the 1000 grit, fix the runs, the 1500 grit to kill any orange peel, and 2000 grit to smooth it all out for polishing.
Step 19 Dry off the car and do not let spots remain. You can put your decals back at this point but make sure to control the amount of the adhesive you put. You don’t want to ruin your fresh paint job Get your compound polisher out and a buffer. Make sure you lightly buff. Do not jam the buffer into the paint or you can cause waves. This process takes a lot of time and patience. Its not an easy task sometimes depending on the color. Once all of the swirls are gone, you are done! You can reassemble anything that was removed at this point, including lights, panels, ect.
Step 20 Wax the hell out of the car. Don’t be cheap on this step either. The better the wax and effort, the better the result.
Step 21 Pray/wish that it does not rain, and cruise on your newly painted ride the following day!
PICS from when i messed with my accord.
1/31/11 - Update:
Latest update... Went with the red color. So far, coming out excellent... scrapped car down to factory primer, then did a "base" coat with roller paint (rustoleum) so that there is a "stained" layer of color... for added color depth. Then bombed it with 2 coats of rattle can... it has not been photographed wetsanded so this is the last shot durring the day. I've already wetsanded quite a bit and going to do last coats tomorrow.
FYI... once all of the work is done, i will reorganize this thread, and rewrite any changes, or better things to do, and things not to do also.
Updated Pics... Went with Krylons "Caramel Moca Satin. No Clear applied just yet as it was only bombed for 2 coats. Still lots of work ahead as you can see. But its coming out much better than expected so far.
PICS ADDED... SOME OF THE PROCESS COVERED SO FAR
I left off on 2nd light coat of the actual paint. I did not go any further. Still needs to be cleared and needs 1 or 2 more coats for better coverage. Im still a bit hung over from last night... haha
UPDATE 2: Looks nice glossy... and wetsanded metallic nicely too
A Little Glossy Clear?.. no not really... but You can tell it will be nice!:
Last edited:

")