

schmiddr2
Well-Known Member
Updated to make it more simple to understand.
-----------------------------------------
This is just a guide and you should realize this kind of work has risk of damaging your car or other devices. I do not have any responsibility if you burn your car down or short out something important. You need to know how to do this kind of work before starting and without question you need a Digital Multi-Meter.
-----------------------------------------
The CC switch can not be used by itself to run high power devices. So choose your install type accordingly for you and your cars safety.
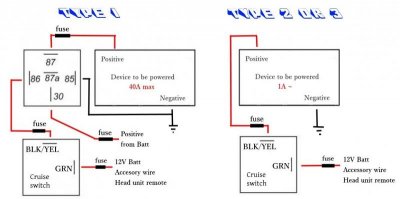
Install type 1. This can power anything up to 500W and is the safest way to switch power.
What you will need.
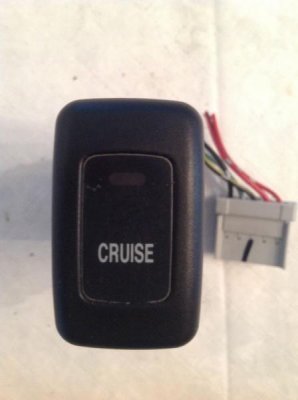
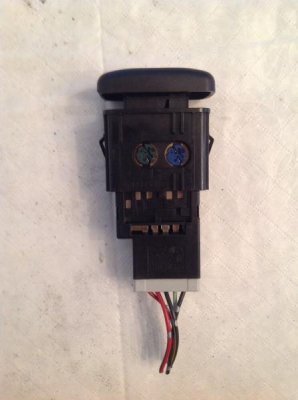
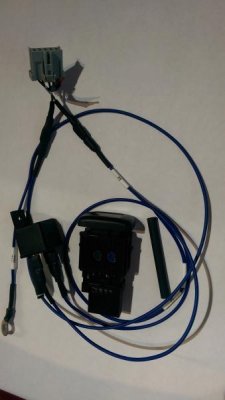
1) CC switch with harness
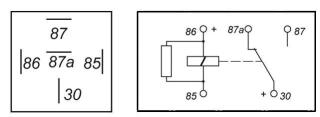
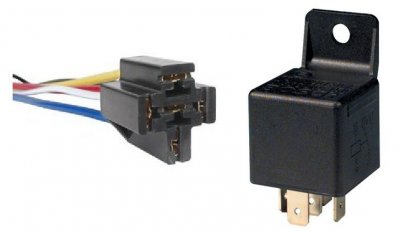
2) 12V relay. Using standard Bosch relay because it's common, simple, and cheap.
3) Wire strippers
4) Wire, size depends on application
5) Terminals and butt connectors and whatever size for the wire you are using for the device you are powering
6) Electrical tape and/or heatshrink tubing
7) Make sure all connections are covered properly (this is important)
8) Finally, something that needs power (the device)
A few more details on type #1.
1) The CC Switch is not designed to carry a large amount of current so I've added a relay in this DIY so it can handle a wide range of devices.
2) The relay in question can be bought just about anywhere with automotive parts or electronics. Here it is at Parts Express: http://www.parts-express.com/12-vdc...source=google&utm_medium=cpc&utm_campaign=pla
3) You can get the optional harness to make things a little easier: http://www.parts-express.com/12-vdc-5-pin-relay-socket-for-bosch-type-relay--330-075
4) This relay will work for anything up to 40A or 500W. If you need more power then you will need a larger relay, which are available.
5) The wire and fusing size depends on current of the device. So for the 40A relay you could use a 40A fuse with 4ga. wire, or if the device only needs 10A then 12ga. with a 10A fuse. You just need to match the wire to the power demand and the fuse to the wire size. http://www.powerstream.com/Wire_Size.htm
6) If you want to have it automatically turn on or off when you turn the ignition key and still have the ability to manually turn it on or off, then find an accessory switched power wire, use that as you positive to the switch GRN.
Install type 2. Remote power for amplifiers.
Install type 3. Powering one SMALL low current fan for cooling amplifiers.
What you will need.
1) CC switch with harness
2) Wire strippers
3) Wire, size depends on application
4) Terminals and butt connectors.
5) Electrical tape and/or heatshrink tubing
6) Make sure all connections are covered properly (this is important)
7) Finally, something that needs power (the device)
Technically you could control it with a temperature controller (technically you would not even need the CC switch but it would be nice to be able to turn it off in some cases), but if anyone wants to do that let me know. Something like this would do it, http://www.amazon.com/12V-Digital-Temperature-Controller-Thermostat/dp/B00C4TEEF2

-----------------------------------------
This is just a guide and you should realize this kind of work has risk of damaging your car or other devices. I do not have any responsibility if you burn your car down or short out something important. You need to know how to do this kind of work before starting and without question you need a Digital Multi-Meter.
-----------------------------------------
The CC switch can not be used by itself to run high power devices. So choose your install type accordingly for you and your cars safety.
Install type 1. This can power anything up to 500W and is the safest way to switch power.
What you will need.
1) CC switch with harness
2) 12V relay. Using standard Bosch relay because it's common, simple, and cheap.
3) Wire strippers
4) Wire, size depends on application
5) Terminals and butt connectors and whatever size for the wire you are using for the device you are powering
6) Electrical tape and/or heatshrink tubing
7) Make sure all connections are covered properly (this is important)
8) Finally, something that needs power (the device)
A few more details on type #1.
1) The CC Switch is not designed to carry a large amount of current so I've added a relay in this DIY so it can handle a wide range of devices.
2) The relay in question can be bought just about anywhere with automotive parts or electronics. Here it is at Parts Express: http://www.parts-express.com/12-vdc...source=google&utm_medium=cpc&utm_campaign=pla
3) You can get the optional harness to make things a little easier: http://www.parts-express.com/12-vdc-5-pin-relay-socket-for-bosch-type-relay--330-075
4) This relay will work for anything up to 40A or 500W. If you need more power then you will need a larger relay, which are available.
5) The wire and fusing size depends on current of the device. So for the 40A relay you could use a 40A fuse with 4ga. wire, or if the device only needs 10A then 12ga. with a 10A fuse. You just need to match the wire to the power demand and the fuse to the wire size. http://www.powerstream.com/Wire_Size.htm
6) If you want to have it automatically turn on or off when you turn the ignition key and still have the ability to manually turn it on or off, then find an accessory switched power wire, use that as you positive to the switch GRN.
Install type 2. Remote power for amplifiers.
Install type 3. Powering one SMALL low current fan for cooling amplifiers.
What you will need.
1) CC switch with harness
2) Wire strippers
3) Wire, size depends on application
4) Terminals and butt connectors.
5) Electrical tape and/or heatshrink tubing
6) Make sure all connections are covered properly (this is important)
7) Finally, something that needs power (the device)
Technically you could control it with a temperature controller (technically you would not even need the CC switch but it would be nice to be able to turn it off in some cases), but if anyone wants to do that let me know. Something like this would do it, http://www.amazon.com/12V-Digital-Temperature-Controller-Thermostat/dp/B00C4TEEF2
Attachments
Last edited:
")