Okay so you want to put a backup cam into your coupe but only see the 4 door one?
Here you go.
Depending on what camera you get, this will cost you anywhere from 25-150$
This is the style camera I bought. 20 beans:
http://www.ebay.ca/itm/CCD-CAR-REAR...=item2326778470&vxp=mtr&_uhb=1#ht_7201wt_1037
And here is the final product:

I started with trying to not take the whole bumper cover off but got annoyed with small spaces and took it off. I would recommend this but it can be avoided.
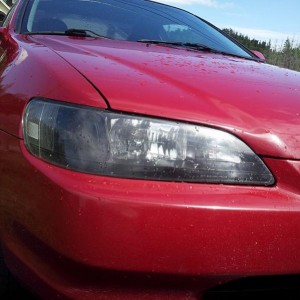
First thing I did was took a flat head screwdriver and stuck it in-between the lights and the bumper. With a little encouragement they will pry off and fall out:

This is the 2001 6.5 gen coupe. The earlier years of 6th gen have 1 light instead of 2. This does not mean much other than you don't have to cut out the middle plastic part.

Then using the flathead screwdriver again, begin taking out the clips that hold the plastic cover liner in your trunk out. They will unscrew first taking the middle out, and then pull the rest of the outside piece out. There are 4 holding it in:

I then stripped off the excess wiring on the 2 wires provided with the back-up camera and on the existing license plate lights:

Plug in the video cable for your rear view camera(included with cam) into the deck or monitor you are going to be using. Labeled rear view camera in:

Run the constant power wire to the deck.
Use a flathead screwdriver to make it easier to push the video and power wires into the cracks of your car(it helped for me). Also if you have power wire for your sub(s) make sure you run the video signal on the opposite side of your power wires for your subs as they may cause interference:

Power wire coming out the back:

Cut the two(one if you have 6th gen) plugs off the wires:

Attach the power wire(red wire) that the camera came with to the one you are running to the deck along with the rca. These are the wires that plugs into the red plug that looks like an rca. This will be the camera power. The second set of wires are for the license plate lights. The black wire gets run through the bumper. I recommend soldering and electrical taping where you are connecting the wires to ensure a proper connection:

Pull the grommet in the middle of your bumper out and push your ground wire for the camera through the hole:

Reach your hand in through the license plate hole and grab the wire:

Twist it together with the other ground(black) wires:

Now twist in the wires for the lights on the camera(the second wire coming straight from the camera). Just remember red with red, black with black:

Now get the yellow and red cables through that hole again in your bumper:

Plug the video cable and power cables, that have already been soldered and hooked up, in:

Push the grommet back into the hole making the best seal you can

Ran the cables along the existing wires and pulled the excess wire to the right:

Pulled the plastic piece back and put the bumper clips back in:

Taped up the wires:

This wire has to be run in the same place you ran the power and video wires to your deck. I ran it all the way to the reverse light and tapped it in. I'm sure you can find the reverse wire in the fuse box but I ran it to the taillights instead. Again, solder and tape it:

All the fun wires for my deck:

This is for taking off your bumper. 5 clips on top:


Behind the wheel, unscrew the bolts:


Under the bumper there are 2 clips to be taken off:


Behind the wheel you need to pull these clips out. squeeze them in from the 2 sides:

Pull off the bumper and then twist the light plugs to the left:


This is the bracket I bought from HomeDepot for 2$ and 12" long it was a perfect fit. I used 6M bolts and put 2 nuts below the bracket to lift the camera slightly and hide it into the bumper and 1 on top. Another 1$ You will most likely have to drill holes in the metal bracket so they fit the original holes:


Camera all wired up:

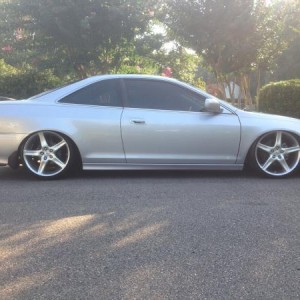
Cant even see the camera from eye level:

Reverse order, put the bumper back on, slide the camera in, screw the corner lights back in and click the bumper back in:

Pull the corner of the bumper down to get it over where the bolts go in:

Push the first piece of the clip in, push the second in:


Screw the bolts into the corners:

Push the final two clips in behind the wheel:

Put the bottom clips in the 2 bottom locations:

Voila!:


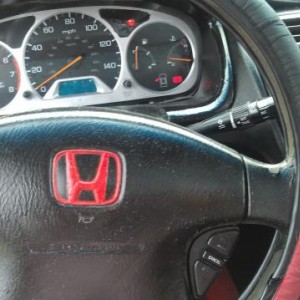
Should look good on the new deck:

Props to Vancouveraccord (my bro) who did this first
Here you go.
Depending on what camera you get, this will cost you anywhere from 25-150$
This is the style camera I bought. 20 beans:
http://www.ebay.ca/itm/CCD-CAR-REAR...=item2326778470&vxp=mtr&_uhb=1#ht_7201wt_1037
And here is the final product:
I started with trying to not take the whole bumper cover off but got annoyed with small spaces and took it off. I would recommend this but it can be avoided.
First thing I did was took a flat head screwdriver and stuck it in-between the lights and the bumper. With a little encouragement they will pry off and fall out:
This is the 2001 6.5 gen coupe. The earlier years of 6th gen have 1 light instead of 2. This does not mean much other than you don't have to cut out the middle plastic part.
Then using the flathead screwdriver again, begin taking out the clips that hold the plastic cover liner in your trunk out. They will unscrew first taking the middle out, and then pull the rest of the outside piece out. There are 4 holding it in:
I then stripped off the excess wiring on the 2 wires provided with the back-up camera and on the existing license plate lights:
Plug in the video cable for your rear view camera(included with cam) into the deck or monitor you are going to be using. Labeled rear view camera in:
Run the constant power wire to the deck.
Use a flathead screwdriver to make it easier to push the video and power wires into the cracks of your car(it helped for me). Also if you have power wire for your sub(s) make sure you run the video signal on the opposite side of your power wires for your subs as they may cause interference:
Power wire coming out the back:
Cut the two(one if you have 6th gen) plugs off the wires:
Attach the power wire(red wire) that the camera came with to the one you are running to the deck along with the rca. These are the wires that plugs into the red plug that looks like an rca. This will be the camera power. The second set of wires are for the license plate lights. The black wire gets run through the bumper. I recommend soldering and electrical taping where you are connecting the wires to ensure a proper connection:
Pull the grommet in the middle of your bumper out and push your ground wire for the camera through the hole:
Reach your hand in through the license plate hole and grab the wire:
Twist it together with the other ground(black) wires:
Now twist in the wires for the lights on the camera(the second wire coming straight from the camera). Just remember red with red, black with black:
Now get the yellow and red cables through that hole again in your bumper:
Plug the video cable and power cables, that have already been soldered and hooked up, in:
Push the grommet back into the hole making the best seal you can
Ran the cables along the existing wires and pulled the excess wire to the right:
Pulled the plastic piece back and put the bumper clips back in:
Taped up the wires:
This wire has to be run in the same place you ran the power and video wires to your deck. I ran it all the way to the reverse light and tapped it in. I'm sure you can find the reverse wire in the fuse box but I ran it to the taillights instead. Again, solder and tape it:
All the fun wires for my deck:
This is for taking off your bumper. 5 clips on top:
Behind the wheel, unscrew the bolts:
Under the bumper there are 2 clips to be taken off:
Behind the wheel you need to pull these clips out. squeeze them in from the 2 sides:
Pull off the bumper and then twist the light plugs to the left:
This is the bracket I bought from HomeDepot for 2$ and 12" long it was a perfect fit. I used 6M bolts and put 2 nuts below the bracket to lift the camera slightly and hide it into the bumper and 1 on top. Another 1$ You will most likely have to drill holes in the metal bracket so they fit the original holes:
Camera all wired up:
Cant even see the camera from eye level:
Reverse order, put the bumper back on, slide the camera in, screw the corner lights back in and click the bumper back in:
Pull the corner of the bumper down to get it over where the bolts go in:
Push the first piece of the clip in, push the second in:
Screw the bolts into the corners:
Push the final two clips in behind the wheel:
Put the bottom clips in the 2 bottom locations:
Voila!:
Should look good on the new deck:
Props to Vancouveraccord (my bro) who did this first
Last edited: