

shavedaccord
Well-Known Member
A lot of people asked me how to create actions as well as border and sign their photographs. So I decided to hit 'em all in one shot. This is pretty basic and doesn't cover things such as text decoration but this should set you on your way.


...but we're not done yet. You need to know how to use this action. It's fairly simple and you may have figured it out by now but for those of you who haven't here you go. You simply open the image you wish to use this action on and select the action and then hit the "Play Selection" button and watch Photoshop do the rest.


You can obviously step this tutorial up a bit and add some effects for the text itself to jazz it up a bit but I'm not going to get that in depth with this tutorial. I'll save that for another tutorial.
- Open Photoshop. I use CS3 but all version should apply to this tutorial.
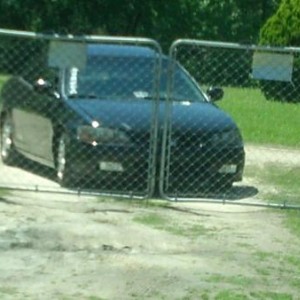
- Open an image of your choice. I choose one I took awhile ago, however I did crop it down since it was RAW and huge.
- Open your "Actions" pallet as seen below.
- Now with the "Actions" pallet open you're going to click on "Create New Action"
- You will notice a dialog box pops up with a few options in it. Once you're done filling out this dialog box hit "Record"
- Name - Choose a name for your action. I choose a simple one that explains the action that way when I need to use it I know exactly what it does.
- Set - Use this to place this action in the group others. I choose to stick this action in the "Default Actions" group. However you can put it in any group you please if available.
- Function Key - This could be fairly handy if you plan on using this action A LOT. What this does is allow you to assign it a simple key stroke.
- Color - All this does is allow you to color code the action making it easier to organize with other like actions.
- You are now recording your first action. So the first thing we're going to do is add a double border around our photograph. Select the entire image by going to "Select > All" or "Ctrl+A". You should now see a selection around your photograph like so
- Once you have your selection you need to create the border. Goto "Edit > Stroke".
- A dialog box will pop up with some options. Once you done choosing your options on this dialog hit "Ok"
- Width - Let's you choose how thick you want the border to be. For this example I used 15 px
- Color - Pretty self explanatory. Allows you to choose the color of the border. I went with black.
- Location - Let's you choose were the border will be draw on the selection. Inside will start the stroke on the inner part of the selection. Center will start the stroke on the center of the selection. Outside will start the selection on the outside of the selection. I find "Center" to be the better of the three choices.
- Blending (Mode) - Typically you'll want to leave this at "Normal" but if you know what blending modes are or just want to try it out go right ahead. I kept mine on "Normal"
- Blending (Opacity) - This let's you choose the transparency of the border. Again typically you will leave this at 100% as I did.
- Preserve Transparency - Works when you choose an opacity of 99% or less. Typically you'll leave this option alone.
- You'll now find that your photograph has a border around it. In my case it's 15 px wide and black.
- Since we're creating a double border just for the sakes of showing how it's done let's more onto the thinner inner border. With the photograph still selected goto "Select > Modify > Contract"
- Once you hit "Contract" a dialog box will pop up with some options. Once you have selected your options correctly for your application go ahead and hit "Ok"
- Contract By - This is where you decide how much you want to contract your current selection by. The rule of thumb here is to divide the width of your main border by two and that will be how much you want to contract by. In my case my main border is 15 px wide so I choose to contract by 7 (I choose seven since you cannot use fractions on this options.)
- You'll now notice that the selection has moved inward to the inside edge of the main border. This is where we'll create the thinner inner border. I'm not going to explain again on how to create the border so just refer to the steps above on how to create a border.
- Now that we have our inner border done let's let people know who took this photograph.
- Click on the "Horizontal Text Tool" in your tool pallet. (TIP - If you do not see the tool pallet goto "Window > Tools")
- Once you have the "Horizontal Text Tool" selected go ahead and click on your photograph to start the text layer. Choose your font, size & color in the top tool menu then enter your desire text.
- I'm not going to go into detail about adding text to your image since it's fairly basic and you should know how to by now.
- Last but not least you need to position your text where you'd like it. So click on the "Move Tool" located on your tools pallet. Once you have the tool selected click on and drag your text to it's desired position.
- Once you have the text position where you wanted it you need to stop recording the action. This is done by hitting the "Stop Playing/Recording" button located on your actions pallet.
- There you have it. You have just created a double bordered image, signed it & made it all in an easy to use time saving action.
...but we're not done yet. You need to know how to use this action. It's fairly simple and you may have figured it out by now but for those of you who haven't here you go. You simply open the image you wish to use this action on and select the action and then hit the "Play Selection" button and watch Photoshop do the rest.
You can obviously step this tutorial up a bit and add some effects for the text itself to jazz it up a bit but I'm not going to get that in depth with this tutorial. I'll save that for another tutorial.
")


 hahahha