

Ghost Ryder
Well-Known Member
*****I screwed up the link to my pics. So I will be correcting this as I get time. Sorry about that. Thanks for-uh, reading?*****
I have already mentioned this project in My Ride Thread (which needs to be updated to coordinate ). But I wanted to go into a little more detail. What is listed is part of my long term goals having to do with the interior over haul. But for now Im just going to mention what is done or close to it.
***UPDATES in Red****
Completed-Done-are in Green
Current Project goals:
-Paint speaker grills semi-gloss black. (All 6)
-Radio/ HVAC controls bezel, paint gloss black.
-Upholstering lower portion of door panels in black carpet (short nap).
-Upholster lower dash covers also with short nap black carpet. Hopefully this will help it feel a little more refined and like the interior wraps around you. Hard to explain.....
-Install 01' Acura, CL Auto Dim rearview mirror.
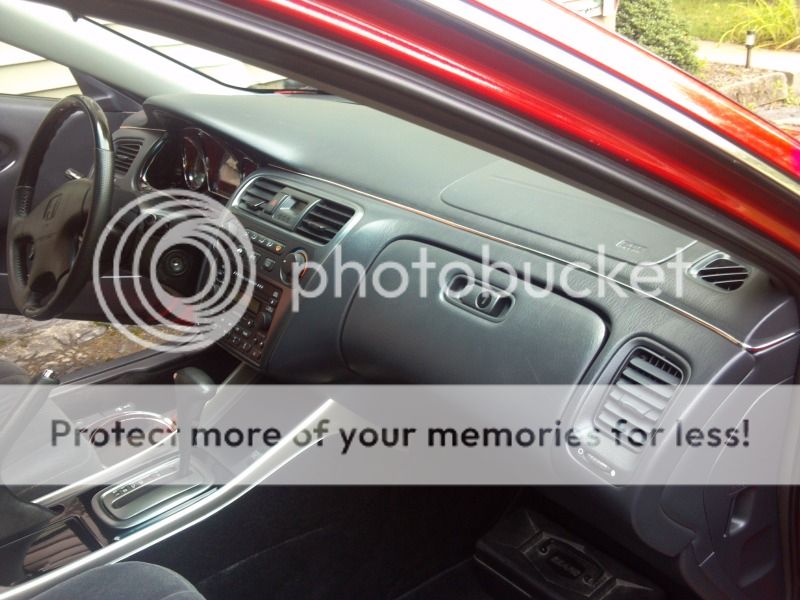
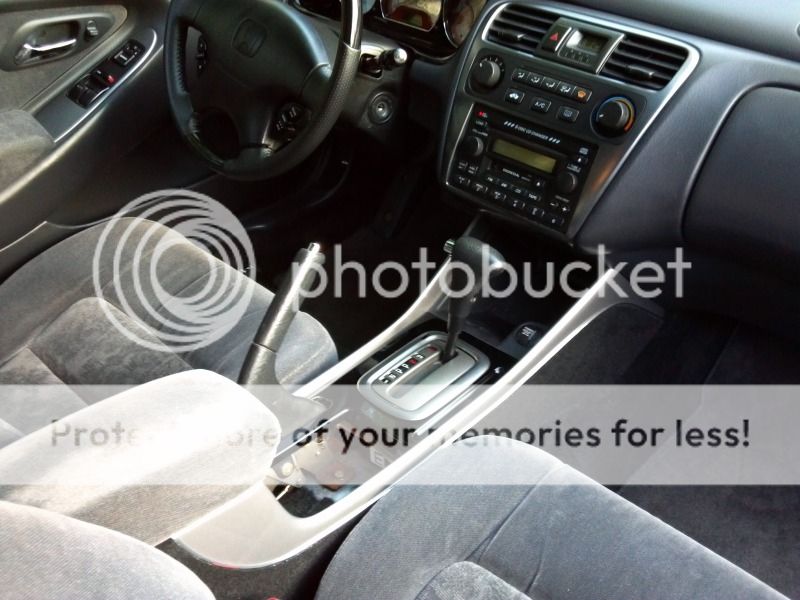
-Add 1/8" chrome trim accross dash board. (Where the top cap meets the middle.) -Done
-Dye Carpet black-Done
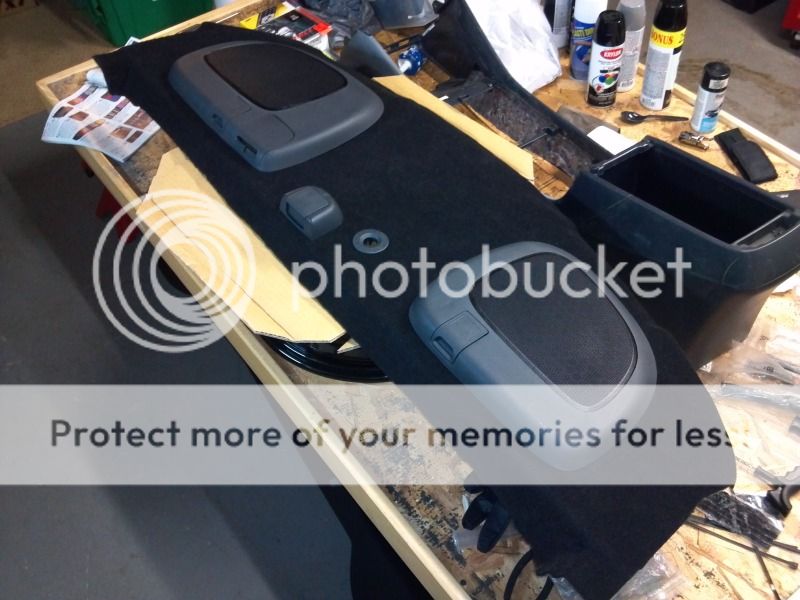
-Reupholster rear window tray with black carpet, and delete 3rd brake light-Done
-Upholster center console, paint silver top edges, gloss black paint the o.e. wood grain. Done, almost-to be continued....
-Bezel around gauges (First one you have to remove to get cluster out) will be gloss black, and match the gloss blacked out area on the APC gauge cluster cover.-Done
-Black out the "wood grain" on an MDX steering wheel.Acura part#08U97-S3V-210.-Done
-O.E. Black Honda floor matts. Part#08P15-S82-110B-Done
****UPDATE 8/7/13*****
Added 1/8" chrome strip accross the dash
Same type I used on the console.Materials included:
The trim.

Big snips and smal hobby ones, used accordingly.

Some stright acetone I picked up, and Qtips.

I also used a heat gun to mildy warm the trim and get the bends I needed. Not pictured though.
I first cleaned the area I wanted the trim on to remove any dressing, grime, ect.

Laying the trim down I believe is pretty self explanatory. Just be sure to remove the tape backing as you go. NOT all at once. The whole process took maybe twenty minutes. Made sure the trim was where I wanted it before pressing it down one section at a time. Anyways...
Before.
 ......I forgot to take a pic. Im sure we all now what the dash looks like anyway.
After.


O.E. Black Honda floor matts: Part#08P15-S82-110B


Installed.


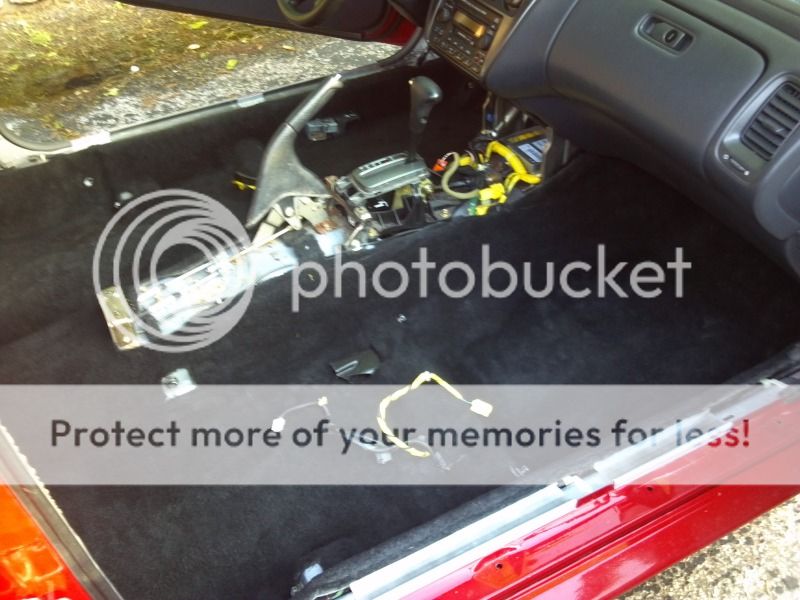
Carpet removal and dye


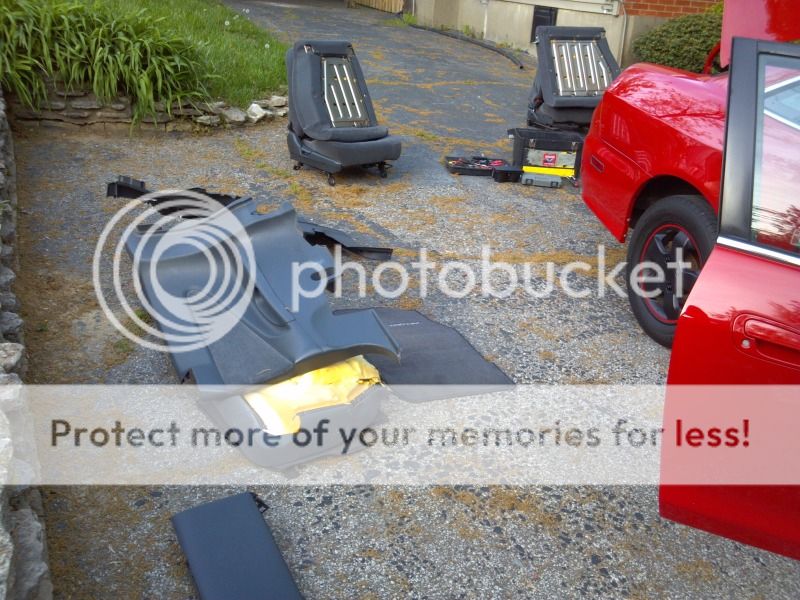
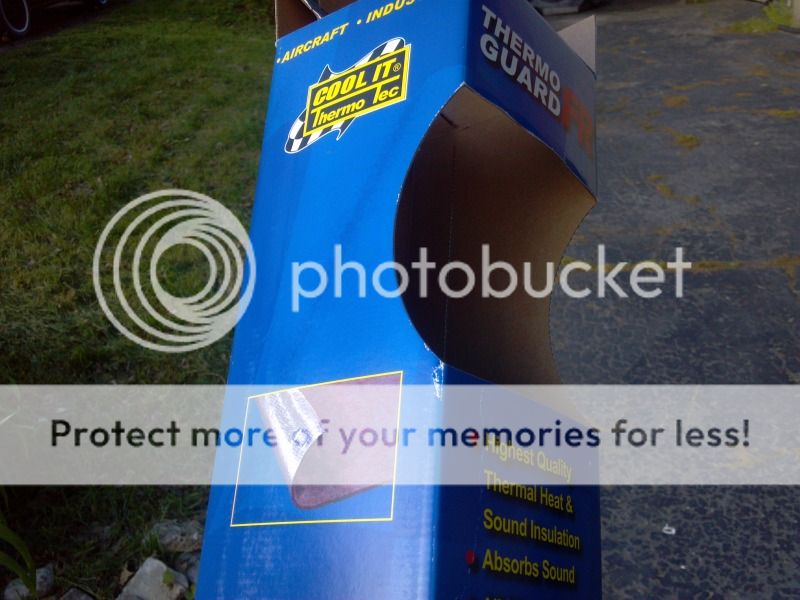
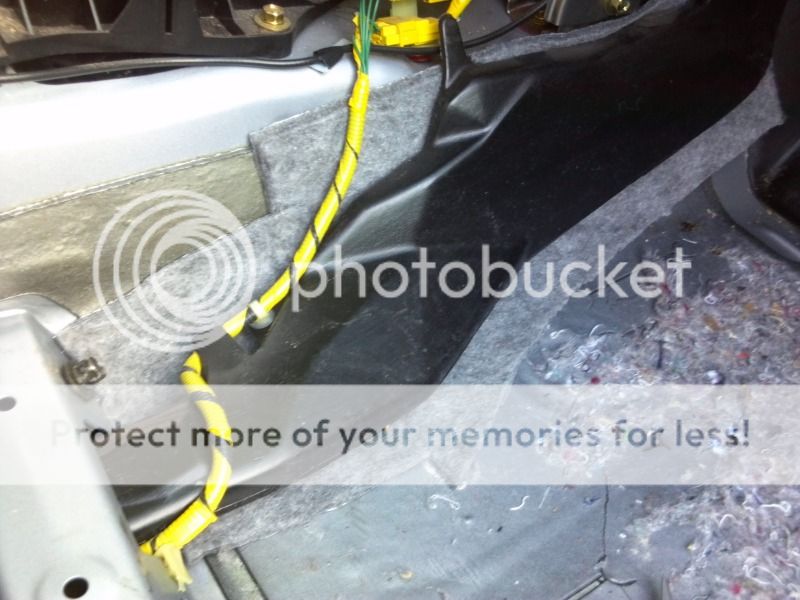
Did some insulating around the floor vents to the rear floor board while I was at it.

Dyed the carpet-uh well, actually painted it with Dupli Color, Semi-Gloss, Acrylic Enamel, Black NAPA# DA1603. I have done this on four cars now, and it seems to hold up the best. The last one I did this to was my 99' AV6 Coupe that had tan carpet. It lasted all six years that I had it, with only minimal touch ups here and there.
Carpet reinstalled.

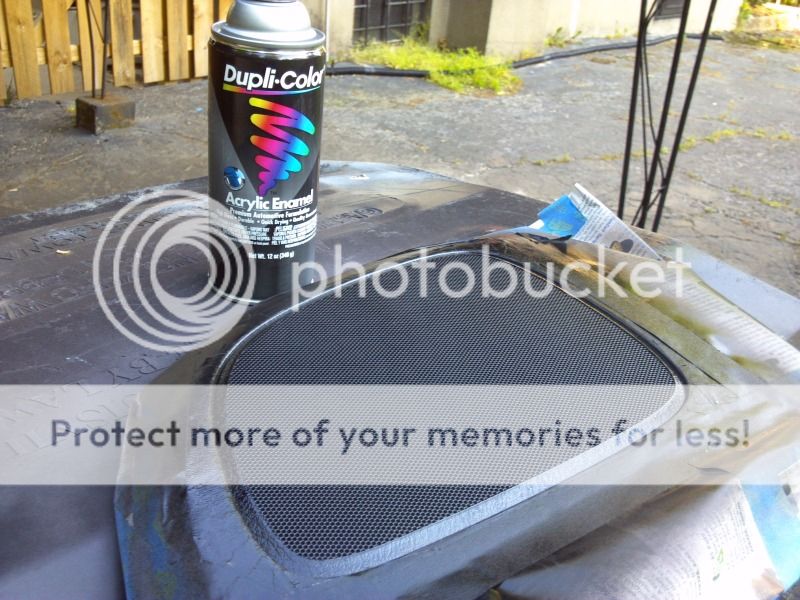
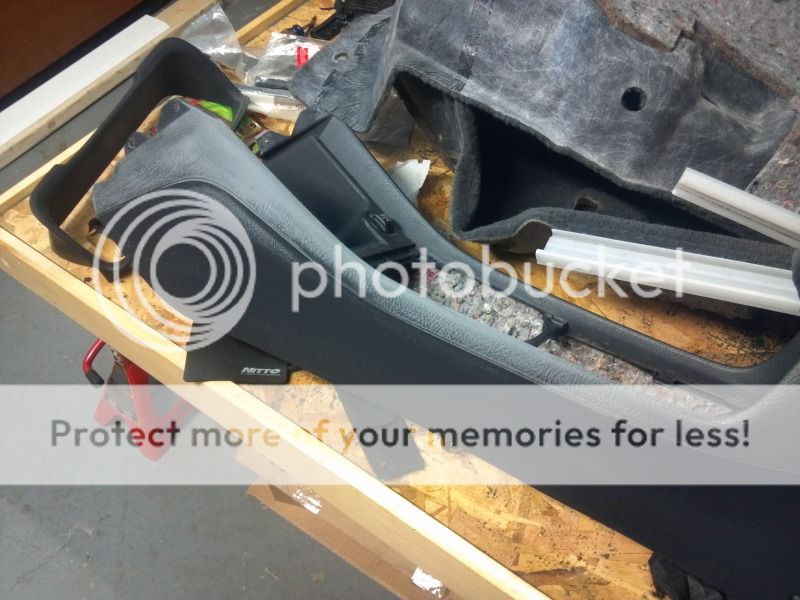
Rear window tray removed and stripped. Used automotive grade, short nap, black carpet, 3M medium strength spray adhesive, Blue house hold painter's tape over third brake light hole (Deleted housing). Used the same Dupli Color, Semi-Gloss, Acrylic Enamel, Black NAPA# DA1603 for speaker grills that was used on carpet. However I did use flexible plastic parts primer (NAPA#MS7225) for the grills. The same primer will also be used on the console and dash parts as well.


The center console is my most current project on the list. My inspiration was the 03' Cl Coupe that I had with black leather/silver trim.
Generic pic for example:
The newer Acura interiors also inspire me, I.E.:

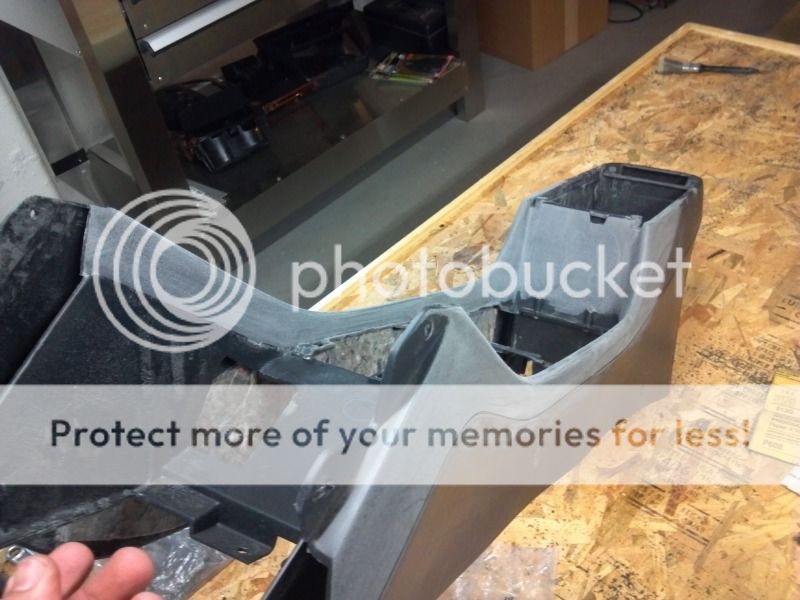
In the pic, what you see sanded down will be a silver color. Below that to the floor will be the same type black carpet that I used on ther rear window tray. A chrome, 1/8" strip will seperate the paint and carpet. This will be easier to show later once I make more headway on it.

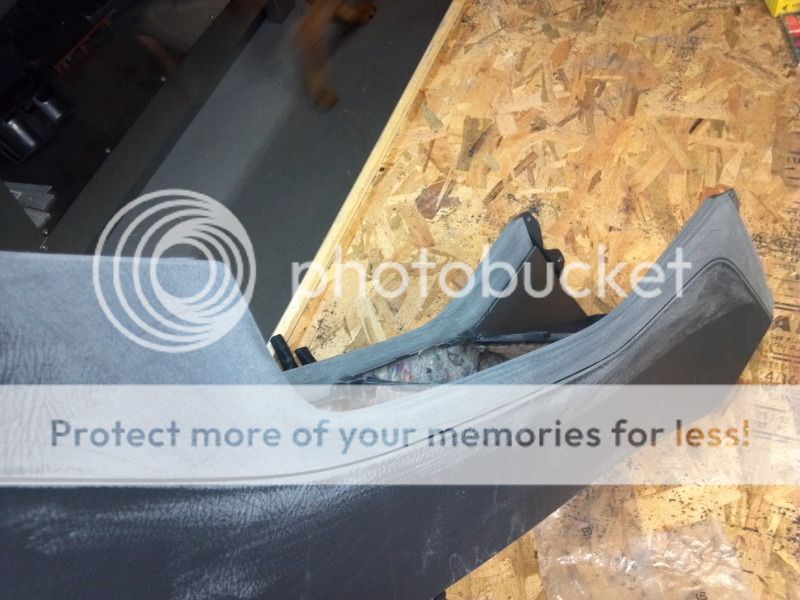
The carpet in this pics shows how the paint will come to an end at the up turn towards the lid. The rest will be carpet around the sides, except for the very back cover.

Almost ready to paint after ALOT of sanding. The plastic parts primer I am using works like a high build/ filler primer. Imperfections show easily. So I had to go back and sand it almost to bare plastic.
Here is a close up right after first coat, no sanding yet.


After first sanding, almost back to bare plastic


The second coat of primer went on. It turned out a lot smoother. Plan on going over it lightly with 1500, 2000, then 4000 grit- before shooting it with a gloss block, then Duplicolor #BGM0478 Medium Marblehead Metallic (03 WA9924).


Laid down almost a whole can of Duplicolor Universal Gloss Black as a base for the silver to follow.


After wet sanding with 6000 paper, the silver was applied.


Sneak peak of what is to come...

I was finally able to wet sand the silver. Starting with 1500, 2000, 6000, then 12000.....that my friends, was alot of dam* sanding. Then buffed.
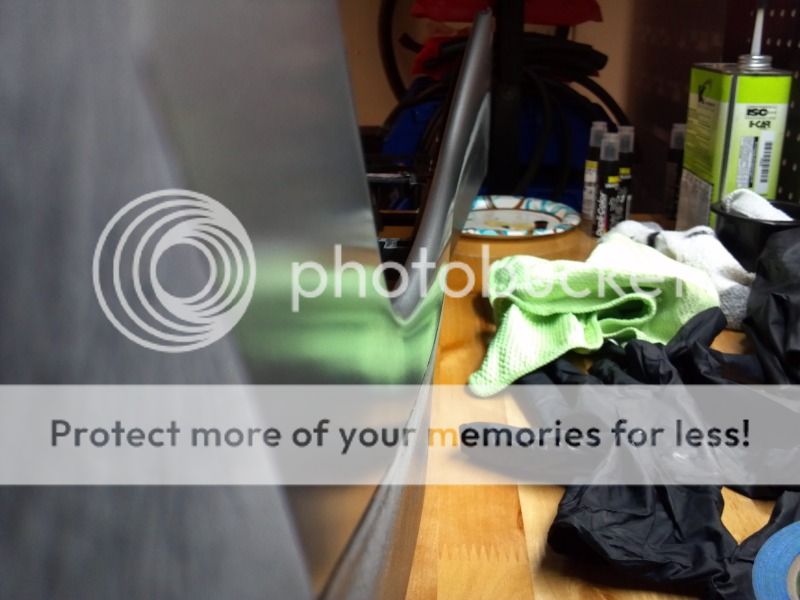


I wanted to protect the paint some what in the high traffic areas. So I made a template with construction paper to get the measurements I need. Transferred those to a piece of 3M Venture shield and applied accordingly.
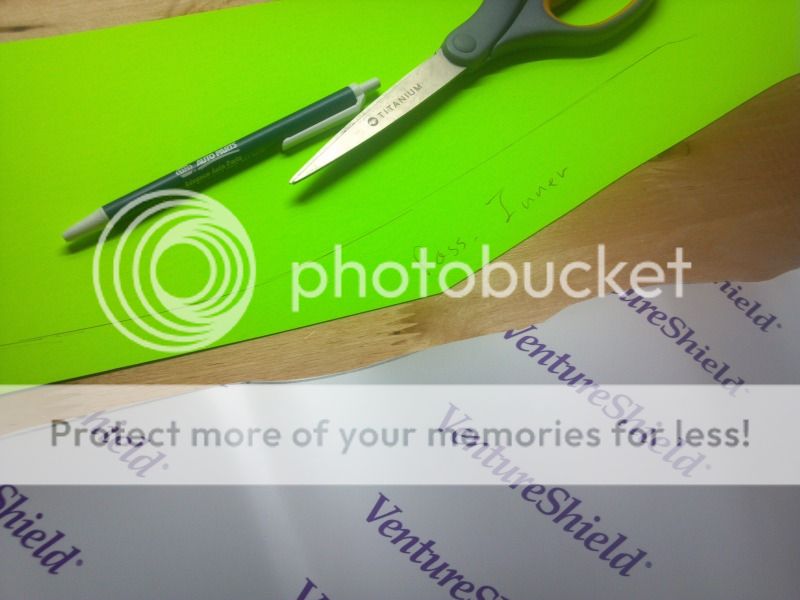

Next I put the 1/8" chrome trim on. This gave me something to tape to instead of the fresh paint when I section off the area that will get 3M Super Strength Adhesive Spray Napa#08090.


Here is a reference to my "short nap" fabric. My finger is in the pic for some idea of scale. (I have medium sized hands, haha.)

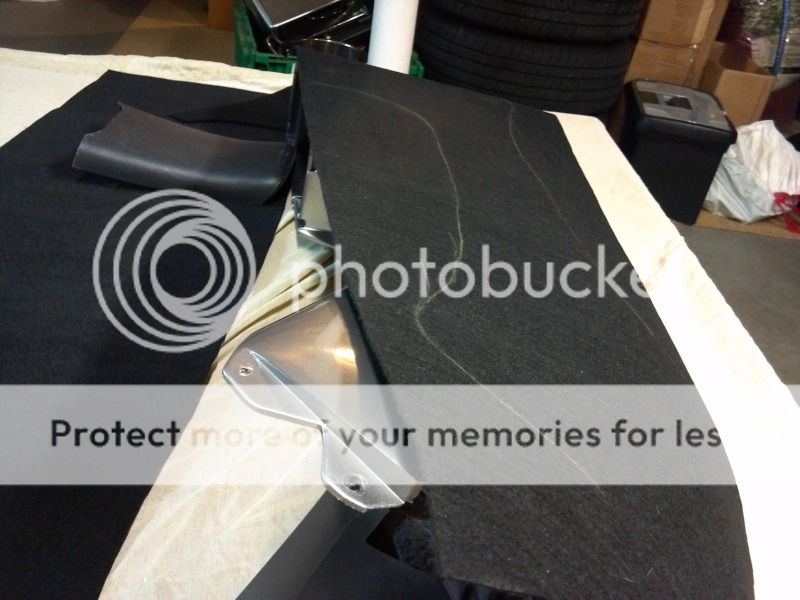
Cut side pieces to approximate size.

Traced out contour lines with a yellow pencil.

Used helpers hands to hold in place while I trimmed it up.


Taped off, ready for fabric adhesive.

First side on.

Trimming.
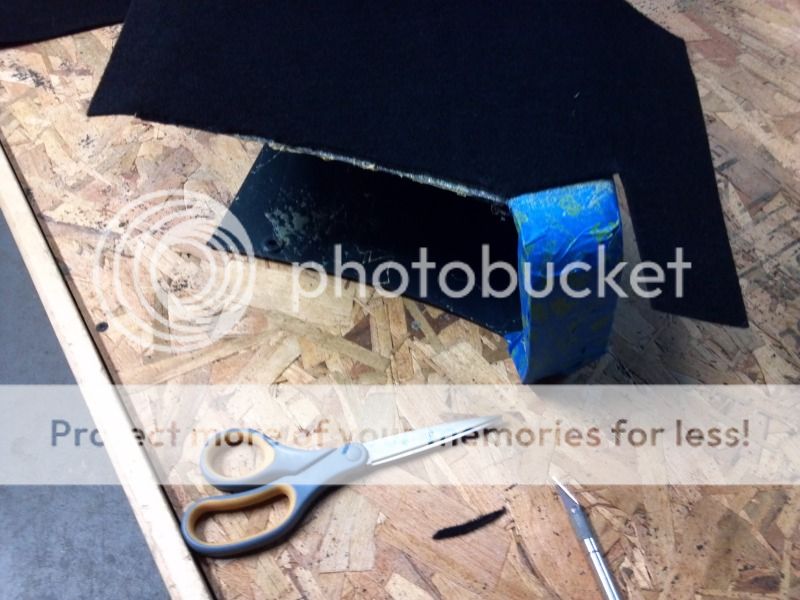

Sprayed trimmed parts to be tucked under.


Tucked.


With the first side done, I had to tape it off again to keep over spray from the application of the last side.

Removed tape.


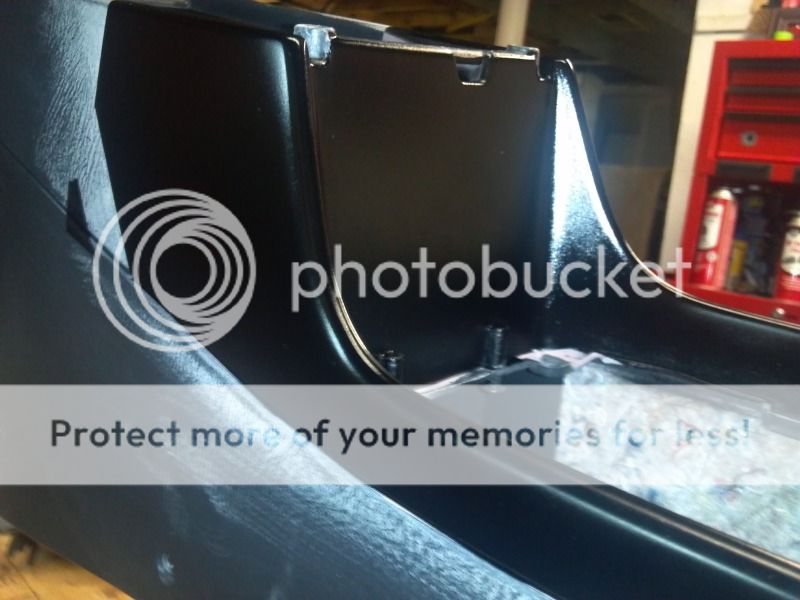
Attached hardware: Forward storage din, inside armrest storage bottom, ect. (P.S. I really dislike that fabric armrest and can't wait to do my leather interior....)


Here is a couple of pics of it installed. I haven't got around to replacing the shifter, making a boot, or installing the chrome 97' Acura shifter trim bezel ring yet. A matching e-brake boot is in the future plans also.(No Cup holder because it was not finished a the time)

I may also go back and wrap the carpet completely around the back side. Not to sure yet.
Wood Grain portion of floor console
All of the center floor console that is wood grain, will be gloss black also. Ths shifter will get a chrome trim shifter bezel that I pulled from a 97' Acura, Cl. I am undecided on the shifter but it will be getting a leather boot on it. Anyways...
Took cup holder apart and wet sanded it and the trim section.

Prime,painted with two coats gloss black, and glossed twice.

So far just the cup holder lid has been sanded. Not real happy with it though. Some of the finer sanding marks are still there. May have another go at cleaning it up.

Final wet sand for center wood grain area.

Then buff.

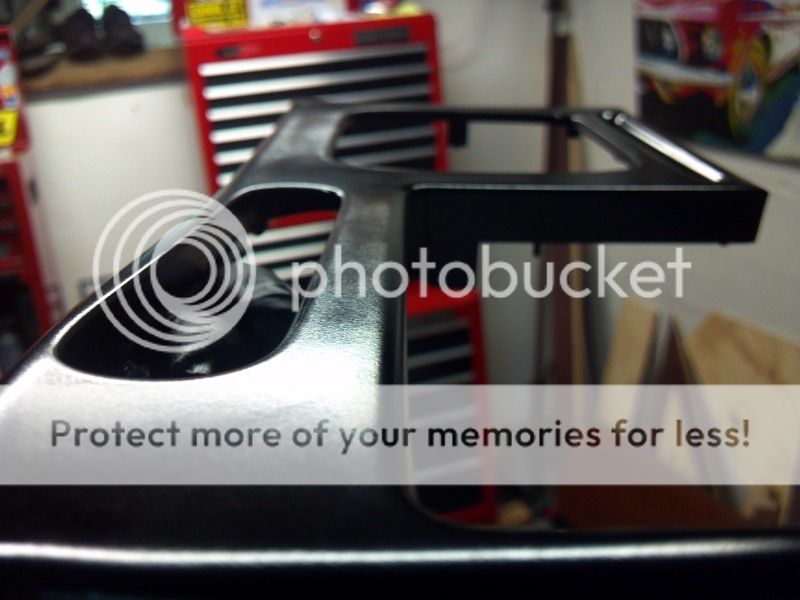
Cluster trim piece(I listed this section in a hurry the fist time, so I cleaned it up a bit.)
After plastic parts primer and first coat of black:

Two more coats of black:

After clear coat:

Basic idea here:

After a ridiculous amount of wet sanding from 4000-12000, then buffing and waxing, the cluster bezel is finished.


Cluster
I was stumped with what to do with this besides leave it red The following is what came about.
As it came out of box (less the gauges):

After thoroughly cleaning (no sanding), I taped off the best way I could think of so I did not cover up the warning/notification light section either side of the top center.


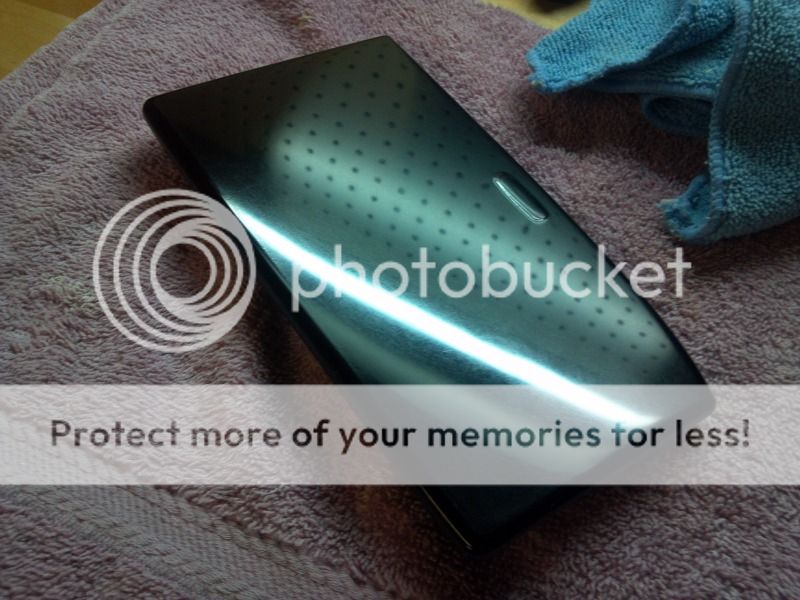
I sprayed it with Dupli Color, Night Shades paint, NAPA part #SP999. Usually used on head lights and tail lights. It needs no primer, no clear coat, and works great on smooth surfaces.This product dries very smooth and glossy with no finish work required. A definite plus given the small area between the gauges.

Sprayed, tape removed

At the last second I added a piece of the 1/8" chrome trim to make it look more refined. IMO the black tape line above the gauges looked...unfinished.


Best night shot I have so far.

Steering Wheel Swap
In light of the fact that I do not favor the after market steering wheels that fit our cars, I opted to try and do something with the 01-02 MDX swap, Acura part#08U97-S3V-210. I chose the wood grain one because I want to attempt a semi-custom wheel. My idea is to incorporate it by gloss black(ing) the parts that are w.g., to match the rest of the gloss black theme in the car.
Here is the before pic:

Finally painted the wood grain using Krylon Plastic Fusion Paint.

I made sure to tape off the leather parts and tuck the edges under the plastic w.g. using a sharp plastic scraper.

I used the Sunday advertisements to wrap the remaining leather and then wrap that in blue tape. Also did the center to keep overspray out of the screws mounting holes.


After four coats.....


Clear coated steering wheel with Krylon Fusion Clear.

Didn't bother to wet sand because this paint is a little different than usual and didn't want to take any chances on screwing up. Still settled pretty smooth. But truthfully I imagine that it will wear smoother from natural use anyways. (Daily Driver )
)

Admittingly I was a little nervous when peeling this section away:

Steering wheel installed.

Will post more up as I go. Thanks for looking and hope you guys enjoy and find something helpful!
So I will be correcting this as I get time. Sorry about that. Thanks for-uh, reading?*****I have already mentioned this project in My Ride Thread (which needs to be updated to coordinate
). But I wanted to go into a little more detail. What is listed is part of my long term goals having to do with the interior over haul. But for now Im just going to mention what is done or close to it.***UPDATES in Red****
Completed-Done-are in Green
Current Project goals:
-Paint speaker grills semi-gloss black. (All 6)
-Radio/ HVAC controls bezel, paint gloss black.
-Upholstering lower portion of door panels in black carpet (short nap).
-Upholster lower dash covers also with short nap black carpet. Hopefully this will help it feel a little more refined and like the interior wraps around you. Hard to explain.....
-Install 01' Acura, CL Auto Dim rearview mirror.
-Add 1/8" chrome trim accross dash board. (Where the top cap meets the middle.) -Done
-Dye Carpet black-Done
-Reupholster rear window tray with black carpet, and delete 3rd brake light-Done
-Upholster center console, paint silver top edges, gloss black paint the o.e. wood grain. Done, almost-to be continued....
-Bezel around gauges (First one you have to remove to get cluster out) will be gloss black, and match the gloss blacked out area on the APC gauge cluster cover.-Done
-Black out the "wood grain" on an MDX steering wheel.Acura part#08U97-S3V-210.-Done
-O.E. Black Honda floor matts. Part#08P15-S82-110B-Done
****UPDATE 8/7/13*****
Added 1/8" chrome strip accross the dash
Same type I used on the console.Materials included:
The trim.

Big snips and smal hobby ones, used accordingly.

Some stright acetone I picked up, and Qtips.

I also used a heat gun to mildy warm the trim and get the bends I needed. Not pictured though.
I first cleaned the area I wanted the trim on to remove any dressing, grime, ect.

Laying the trim down I believe is pretty self explanatory. Just be sure to remove the tape backing as you go. NOT all at once. The whole process took maybe twenty minutes. Made sure the trim was where I wanted it before pressing it down one section at a time. Anyways...
Before.
......I forgot to take a pic. Im sure we all now what the dash looks like anyway.After.


O.E. Black Honda floor matts: Part#08P15-S82-110B


Installed.


Carpet removal and dye


Did some insulating around the floor vents to the rear floor board while I was at it.


Dyed the carpet-uh well, actually painted it with Dupli Color, Semi-Gloss, Acrylic Enamel, Black NAPA# DA1603. I have done this on four cars now, and it seems to hold up the best. The last one I did this to was my 99' AV6 Coupe that had tan carpet. It lasted all six years that I had it, with only minimal touch ups here and there.
Carpet reinstalled.


Rear window tray removed and stripped. Used automotive grade, short nap, black carpet, 3M medium strength spray adhesive, Blue house hold painter's tape over third brake light hole (Deleted housing). Used the same Dupli Color, Semi-Gloss, Acrylic Enamel, Black NAPA# DA1603 for speaker grills that was used on carpet. However I did use flexible plastic parts primer (NAPA#MS7225) for the grills. The same primer will also be used on the console and dash parts as well.


The center console is my most current project on the list. My inspiration was the 03' Cl Coupe that I had with black leather/silver trim.
Generic pic for example:

The newer Acura interiors also inspire me, I.E.:

In the pic, what you see sanded down will be a silver color. Below that to the floor will be the same type black carpet that I used on ther rear window tray. A chrome, 1/8" strip will seperate the paint and carpet. This will be easier to show later once I make more headway on it.


The carpet in this pics shows how the paint will come to an end at the up turn towards the lid. The rest will be carpet around the sides, except for the very back cover.

Almost ready to paint after ALOT of sanding. The plastic parts primer I am using works like a high build/ filler primer. Imperfections show easily. So I had to go back and sand it almost to bare plastic.
Here is a close up right after first coat, no sanding yet.


After first sanding, almost back to bare plastic


The second coat of primer went on. It turned out a lot smoother. Plan on going over it lightly with 1500, 2000, then 4000 grit- before shooting it with a gloss block, then Duplicolor #BGM0478 Medium Marblehead Metallic (03 WA9924).


Laid down almost a whole can of Duplicolor Universal Gloss Black as a base for the silver to follow.


After wet sanding with 6000 paper, the silver was applied.


Sneak peak of what is to come...

I was finally able to wet sand the silver. Starting with 1500, 2000, 6000, then 12000.....that my friends, was alot of dam* sanding.
Then buffed.


I wanted to protect the paint some what in the high traffic areas. So I made a template with construction paper to get the measurements I need. Transferred those to a piece of 3M Venture shield and applied accordingly.


Next I put the 1/8" chrome trim on. This gave me something to tape to instead of the fresh paint when I section off the area that will get 3M Super Strength Adhesive Spray Napa#08090.


Here is a reference to my "short nap" fabric. My finger is in the pic for some idea of scale. (I have medium sized hands, haha.)

Cut side pieces to approximate size.

Traced out contour lines with a yellow pencil.

Used helpers hands to hold in place while I trimmed it up.


Taped off, ready for fabric adhesive.

First side on.

Trimming.


Sprayed trimmed parts to be tucked under.


Tucked.


With the first side done, I had to tape it off again to keep over spray from the application of the last side.

Removed tape.


Attached hardware: Forward storage din, inside armrest storage bottom, ect. (P.S. I really dislike that fabric armrest and can't wait to do my leather interior....)


Here is a couple of pics of it installed. I haven't got around to replacing the shifter, making a boot, or installing the chrome 97' Acura shifter trim bezel ring yet. A matching e-brake boot is in the future plans also.(No Cup holder because it was not finished a the time)


I may also go back and wrap the carpet completely around the back side. Not to sure yet.
Wood Grain portion of floor console
All of the center floor console that is wood grain, will be gloss black also. Ths shifter will get a chrome trim shifter bezel that I pulled from a 97' Acura, Cl. I am undecided on the shifter but it will be getting a leather boot on it. Anyways...
Took cup holder apart and wet sanded it and the trim section.

Prime,painted with two coats gloss black, and glossed twice.


So far just the cup holder lid has been sanded. Not real happy with it though. Some of the finer sanding marks are still there. May have another go at cleaning it up.


Final wet sand for center wood grain area.

Then buff.

Cluster trim piece(I listed this section in a hurry the fist time, so I cleaned it up a bit.)
After plastic parts primer and first coat of black:

Two more coats of black:

After clear coat:

Basic idea here:

After a ridiculous amount of wet sanding from 4000-12000, then buffing and waxing, the cluster bezel is finished.


Cluster
I was stumped with what to do with this besides leave it red
The following is what came about.As it came out of box (less the gauges):

After thoroughly cleaning (no sanding), I taped off the best way I could think of so I did not cover up the warning/notification light section either side of the top center.


I sprayed it with Dupli Color, Night Shades paint, NAPA part #SP999. Usually used on head lights and tail lights. It needs no primer, no clear coat, and works great on smooth surfaces.This product dries very smooth and glossy with no finish work required. A definite plus given the small area between the gauges.

Sprayed, tape removed

At the last second I added a piece of the 1/8" chrome trim to make it look more refined. IMO the black tape line above the gauges looked...unfinished.


Best night shot I have so far.

Steering Wheel Swap
In light of the fact that I do not favor the after market steering wheels that fit our cars, I opted to try and do something with the 01-02 MDX swap, Acura part#08U97-S3V-210. I chose the wood grain one because I want to attempt a semi-custom wheel. My idea is to incorporate it by gloss black(ing) the parts that are w.g., to match the rest of the gloss black theme in the car.
Here is the before pic:

Finally painted the wood grain using Krylon Plastic Fusion Paint.

I made sure to tape off the leather parts and tuck the edges under the plastic w.g. using a sharp plastic scraper.

I used the Sunday advertisements to wrap the remaining leather and then wrap that in blue tape. Also did the center to keep overspray out of the screws mounting holes.


After four coats.....


Clear coated steering wheel with Krylon Fusion Clear.

Didn't bother to wet sand because this paint is a little different than usual and didn't want to take any chances on screwing up. Still settled pretty smooth. But truthfully I imagine that it will wear smoother from natural use anyways. (Daily Driver
)
Admittingly I was a little nervous when peeling this section away:

Steering wheel installed.

Will post more up as I go. Thanks for looking and hope you guys enjoy and find something helpful!
Last edited: