


MikeyMike
Well-Known Member
IM GOING TO GET MORE PICS, IT STARTED RAINING ON ME
Simple DIY for a 98-02 V6 battery relocation to trunk, for Coupe (sedan is relatively same process)
This is good for a number of things. Makes your system Stronger by reducing the power cable. Helps against theft(they pop hood lookin for battery to shut off alarm.) Helps if you or someone you know gets stranded on the highway and needs a jump. No more need to turn the car around on the highway which in itself is a deadly act.
Supplies needed
-Few nuts/bolts
-Electical tape
-Zip ties
-Sockets/rachet for battery, battery bracket etc. (mainly 10,12,13,14 depending on what terminals you currently have)
-Flat head Screw Driver
-Something very good at cutting THICK wire.
-Some sort of vise to clamp ring terminals(bench vise works well. if not take a hammer and just feed the wire into the ring terminal and hammer it on the floor)
-Drill and bits (makes life easier, you'll see in the trunk)
-Sand paper (100grit? something to take the paint off where you are going to ground in the trunk)
-Distribution block. 2-0 Gauge Imput to 4-4 Gauge outputs *recommended(Stinger Pro is a good brand for this.)
Ebay $15-$50 (depending on brand)
-20ft of 0 Gauge sterio Wire (copper core recommended)
Ebay $25-100 (depending on brand)
-1 0 Gauge Ring Terminal (for ground wire)
Sterio Store $1?
**Note I recommend you get a highoutput alternator. Something 180amp to 250. You now how 15ft of cable so stronger recharging helps. Especially if you have a system running off of this battery as well
4alterstart.com has a 180amp Boss High output that I have. Conns- $300 Perks- Lifetime warrenty
**Also a Non-Maintnacable battery. (w/o the vents on it and accessability caps, this will prevent battery fluid from spilling in your trunk) Optima Batterys are the way to go.
Optional Supplies
-Wire insulator for 0 gauge(dynamat works great for this) helps prevent the wire from burning something if it gets too hot)
-Positive Battery Terminal (might as well start off fresh)
-Negative Battery Terminal (might as well start off fresh)
Ebay $35-$50
-Battery Tray(I needed one because my Bypass harness for the 6spd is bolted to the factory one)
Autozone $6.
- 3-6ft of 3/4" Split loom (just for a cleaner/farctory looking job)
1) Disconnect battery, Neg / Pos and then hold the 2 terminals together for 10-15 seconds to competely drain the system of any stored engergy .
a)tape both terminals just as a pre-caution.
2) Disconnect the battery bracket and take battery out.
3) Unbolt the Battery tray from the chassis. ( You could leave it there (just buy an aftermarket one for like $6) its just ugly if you do IMO)
4) Unbolt the Negative cable from the Radiator support, and from the Transmission(you can follow the wire down to it, i think its a 14mm)
I suggest you keep this just incase something ever happens(you never know)
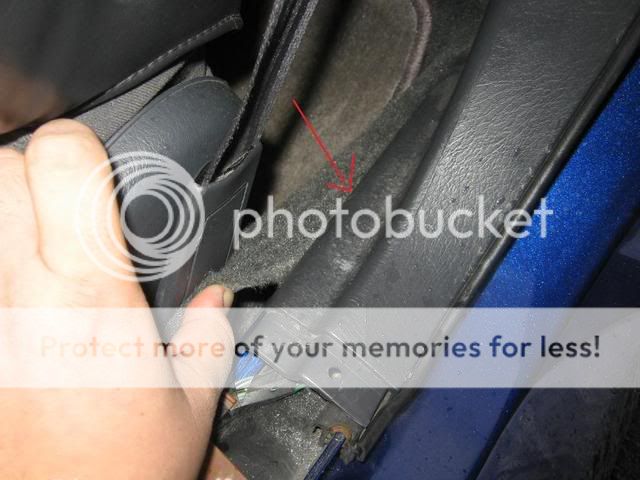
5) Pull up drivers door sill panel (just grab it and yank it, it should just pop right out)
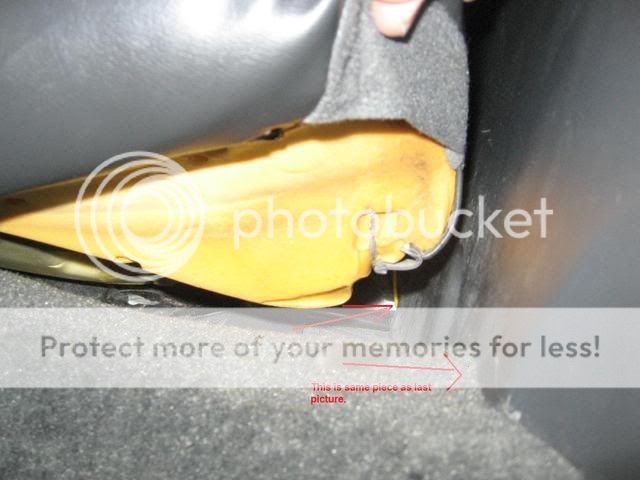
6) Pull back carpet
NOTE* if you have a system and your RCA's are running down this side, switch them to the passenger side. A power cable that size, will send feedback into the RCA and your sterio will start to give you a crackling sound)

7) Pull out carpet from under the trim panel in the back seat.(give it a little tug)
8) Pull up bottom portion of rear seat(give it a nice tug it should come up just enough to feed the wire.)
9) Locate the Grommet on the fire wall in engine bay, (to the right side of the brake booster) and start to feed the 0 gauge wire through, until you have about 4 ft left in the engine bay. Something to slightly lube it will help you feed it through.
This is easier with 2 people, the gauge of the wire is thick so it sometimes snags, having 1 person pull it from the inside helps. Just keep it on the floor of the drivers seat and do the rest of the steps after this.
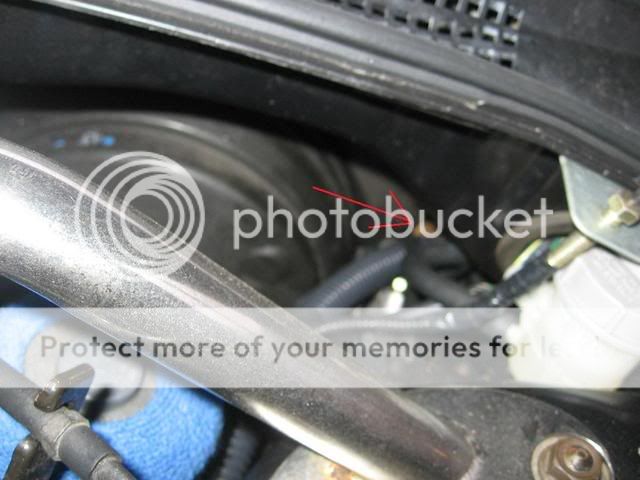
(its up there somewhere lol)
10) Now take the wire, tuck it behind the kick panel where your hood latch is located, and feed it inside the carpet, along the rocker panel
11) Tuck it under the carpet by the interior trim in the back seat and under the rear seat close to the trim panel.
12) Open trunk, remove spare tire cover
13) Pull back the trim pannel, should be 3 or 4 screwed in knobs)
14) Take off trunk latch panel (couple of screw type clips Flathead scredriver will pop them right out.)
15) You could drill a hole in the partition between the trunk and rear seats (the |_\___/_|shape thing) or just feed it around.
16) Feed the wire, under the trunk trim panel and along the boarder of the trunk until you have it where the side compartment would be.
17) Cut the wire so you have enough to attach a terminal and attach it to the +POS side of the battery.
you should have about 6-8ft of wire left at this point. the more the better)
18) Hopefully by this point you have 4 or 5 ft of wire left. On one side connect a ring terminal.
19) Bolt it to the rear body panel after removing the paint on the contact point. A bolt and nut is required here, you can hold the bolt with your finger while you screw it in. MAKE SURE THIS IS TIGHT, this is now your ground and a weak ground will give you TONS of problems
20) Outside of the car, take the Spare tire cover, and mount the battery tray to the drivers side of it( The aftermarket tray is a lot more stable then the OEM due to its shape)
21) Drill to holes big enough to feed the cables through (a clean look)
21) Put the Latch panel back, and then the trunk trim panel.
22) Insert the spare tire cover and feed the wires through the holes. Cut the Negative wire as short as you can, with still enough to feed and attach to the battery. Shorty the ground the stronger the ground
23) Attach the battery terminals, and mount the battery. Attach the battery bracket, but DO NOT Connect the battery.
24) Go back to the engine bay, feed the wire to your liking(this is where the split loom helps with)
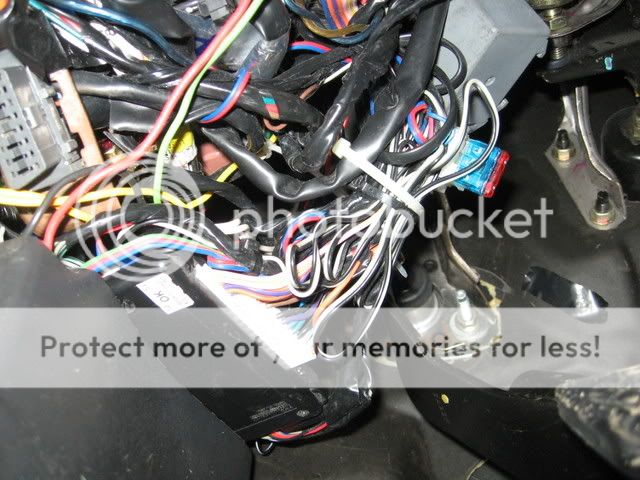
25) Take the distribution block, and attach it to the cable. Then cut or unbolt the old +Pos terminal and attach the wires to the distribution block.(Fuse Box, Starter motor)
26) Mount the distribution block how ever you please.
27) Check over all these steps, and connect the battery.
28) Start the car, if it starts SUCCESS, if not, retrace your steps. Check the distribution block. Make sure everything that is needed is in. then go to the trunk, check the terminals. check the ground.
29) Allow the car to run for a while, to make sure everything is functioning to where it should be.
30) Put the bottom portion of the rear seat back down, should clip in
Carpet back under trim panel
Carpet back on rocker panel
Sill panel back (clips in)
And your done.
Finished Shots
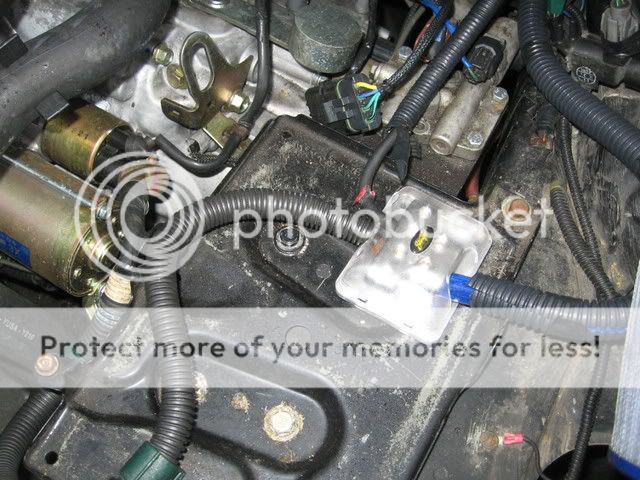
Engine Bay
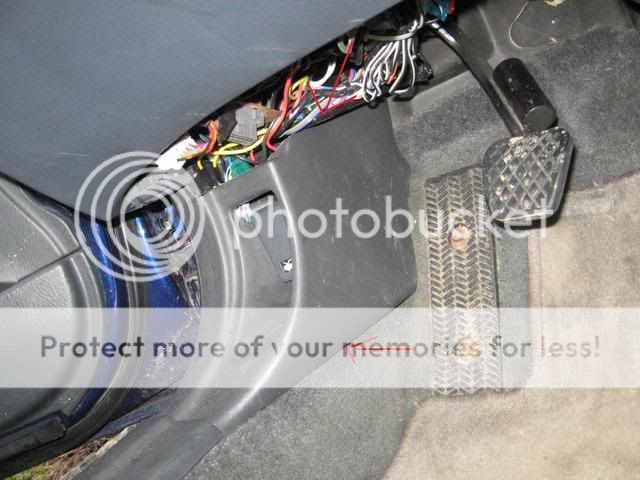
Rear Seat (slightly see wire)

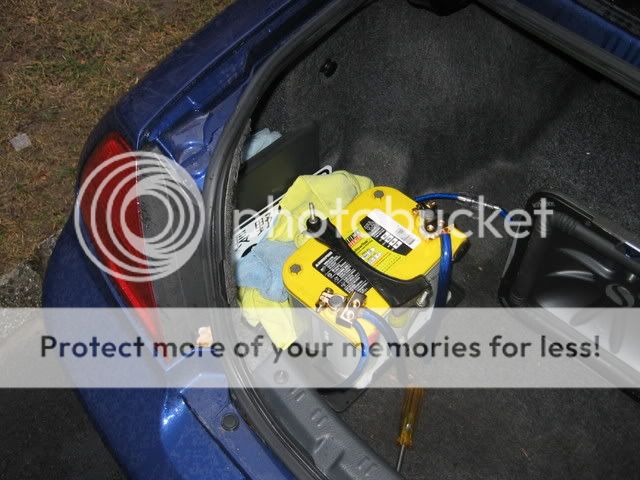
trunk
Simple DIY for a 98-02 V6 battery relocation to trunk, for Coupe (sedan is relatively same process)
This is good for a number of things. Makes your system Stronger by reducing the power cable. Helps against theft(they pop hood lookin for battery to shut off alarm.) Helps if you or someone you know gets stranded on the highway and needs a jump. No more need to turn the car around on the highway which in itself is a deadly act.
Supplies needed
-Few nuts/bolts
-Electical tape
-Zip ties
-Sockets/rachet for battery, battery bracket etc. (mainly 10,12,13,14 depending on what terminals you currently have)
-Flat head Screw Driver
-Something very good at cutting THICK wire.
-Some sort of vise to clamp ring terminals(bench vise works well. if not take a hammer and just feed the wire into the ring terminal and hammer it on the floor)
-Drill and bits (makes life easier, you'll see in the trunk)
-Sand paper (100grit? something to take the paint off where you are going to ground in the trunk)
-Distribution block. 2-0 Gauge Imput to 4-4 Gauge outputs *recommended(Stinger Pro is a good brand for this.)
Ebay $15-$50 (depending on brand)
-20ft of 0 Gauge sterio Wire (copper core recommended)
Ebay $25-100 (depending on brand)
-1 0 Gauge Ring Terminal (for ground wire)
Sterio Store $1?
**Note I recommend you get a highoutput alternator. Something 180amp to 250. You now how 15ft of cable so stronger recharging helps. Especially if you have a system running off of this battery as well
4alterstart.com has a 180amp Boss High output that I have. Conns- $300 Perks- Lifetime warrenty
**Also a Non-Maintnacable battery. (w/o the vents on it and accessability caps, this will prevent battery fluid from spilling in your trunk) Optima Batterys are the way to go.
Optional Supplies
-Wire insulator for 0 gauge(dynamat works great for this) helps prevent the wire from burning something if it gets too hot)
-Positive Battery Terminal (might as well start off fresh)
-Negative Battery Terminal (might as well start off fresh)
Ebay $35-$50
-Battery Tray(I needed one because my Bypass harness for the 6spd is bolted to the factory one)
Autozone $6.
- 3-6ft of 3/4" Split loom (just for a cleaner/farctory looking job)
1) Disconnect battery, Neg / Pos and then hold the 2 terminals together for 10-15 seconds to competely drain the system of any stored engergy .
a)tape both terminals just as a pre-caution.
2) Disconnect the battery bracket and take battery out.
3) Unbolt the Battery tray from the chassis. ( You could leave it there (just buy an aftermarket one for like $6) its just ugly if you do IMO)
4) Unbolt the Negative cable from the Radiator support, and from the Transmission(you can follow the wire down to it, i think its a 14mm)
I suggest you keep this just incase something ever happens(you never know)
5) Pull up drivers door sill panel (just grab it and yank it, it should just pop right out)
6) Pull back carpet
NOTE* if you have a system and your RCA's are running down this side, switch them to the passenger side. A power cable that size, will send feedback into the RCA and your sterio will start to give you a crackling sound)
7) Pull out carpet from under the trim panel in the back seat.(give it a little tug)
8) Pull up bottom portion of rear seat(give it a nice tug it should come up just enough to feed the wire.)
9) Locate the Grommet on the fire wall in engine bay, (to the right side of the brake booster) and start to feed the 0 gauge wire through, until you have about 4 ft left in the engine bay. Something to slightly lube it will help you feed it through.
This is easier with 2 people, the gauge of the wire is thick so it sometimes snags, having 1 person pull it from the inside helps. Just keep it on the floor of the drivers seat and do the rest of the steps after this.
(its up there somewhere lol)
10) Now take the wire, tuck it behind the kick panel where your hood latch is located, and feed it inside the carpet, along the rocker panel
11) Tuck it under the carpet by the interior trim in the back seat and under the rear seat close to the trim panel.
12) Open trunk, remove spare tire cover
13) Pull back the trim pannel, should be 3 or 4 screwed in knobs)
14) Take off trunk latch panel (couple of screw type clips Flathead scredriver will pop them right out.)
15) You could drill a hole in the partition between the trunk and rear seats (the |_\___/_|shape thing) or just feed it around.
16) Feed the wire, under the trunk trim panel and along the boarder of the trunk until you have it where the side compartment would be.
17) Cut the wire so you have enough to attach a terminal and attach it to the +POS side of the battery.
you should have about 6-8ft of wire left at this point. the more the better)
18) Hopefully by this point you have 4 or 5 ft of wire left. On one side connect a ring terminal.
19) Bolt it to the rear body panel after removing the paint on the contact point. A bolt and nut is required here, you can hold the bolt with your finger while you screw it in. MAKE SURE THIS IS TIGHT, this is now your ground and a weak ground will give you TONS of problems
20) Outside of the car, take the Spare tire cover, and mount the battery tray to the drivers side of it( The aftermarket tray is a lot more stable then the OEM due to its shape)
21) Drill to holes big enough to feed the cables through (a clean look)
21) Put the Latch panel back, and then the trunk trim panel.
22) Insert the spare tire cover and feed the wires through the holes. Cut the Negative wire as short as you can, with still enough to feed and attach to the battery. Shorty the ground the stronger the ground
23) Attach the battery terminals, and mount the battery. Attach the battery bracket, but DO NOT Connect the battery.
24) Go back to the engine bay, feed the wire to your liking(this is where the split loom helps with)
25) Take the distribution block, and attach it to the cable. Then cut or unbolt the old +Pos terminal and attach the wires to the distribution block.(Fuse Box, Starter motor)
26) Mount the distribution block how ever you please.
27) Check over all these steps, and connect the battery.
28) Start the car, if it starts SUCCESS, if not, retrace your steps. Check the distribution block. Make sure everything that is needed is in. then go to the trunk, check the terminals. check the ground.
29) Allow the car to run for a while, to make sure everything is functioning to where it should be.
30) Put the bottom portion of the rear seat back down, should clip in
Carpet back under trim panel
Carpet back on rocker panel
Sill panel back (clips in)
And your done.
Finished Shots
Engine Bay
Rear Seat (slightly see wire)
trunk
Last edited: