

This is my Mini Morimoto H1 retrofit project. I used some aftermarket Eagle Eye Brand OEM style headlights because I wanted to save my OEMs if/when I want to go back to stock and I also wanted to have the headlights look like brand spanking new when I was done. This is not a full DIY because I did not take pictures of all the steps involved. Hope you enjoy! 


I wanted a different look from a normal projector HID retrofit so I decided to retrofit some mid-90s Nissan Maxima corner defuser lights, I got the idea after seeing Sakura’s sick headlights. Also I would not even have attempted this if it wasn’t for the other Morimoto retrofits by shavedaccord etc. Thanks!
The projectors were a really tight fit and they actually touch the outer lens, but it does not affect anything. I can still use the alignment tabs at the back of the headlights and the best part about these projectors, is the fact that you do not need to cut or mangle the back of your headlights. You just slip the projector thru the front and lock it in using the supplied nut.
These are the donor Nissan Maxima corners that I cut and transplanted. I picked these up from the junk yard.


I used some of those rubber thingy that people put around their wheel wells to protect the paint from dings. These help give the corners a "finished" look and hides the imperfections.


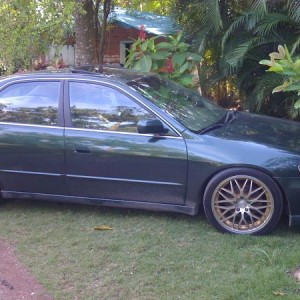
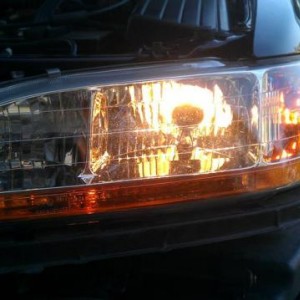
Installed on my car.


If you have any question, comments or criticisms, please post them here.
Kel
I wanted a different look from a normal projector HID retrofit so I decided to retrofit some mid-90s Nissan Maxima corner defuser lights, I got the idea after seeing Sakura’s sick headlights. Also I would not even have attempted this if it wasn’t for the other Morimoto retrofits by shavedaccord etc. Thanks!
The projectors were a really tight fit and they actually touch the outer lens, but it does not affect anything. I can still use the alignment tabs at the back of the headlights and the best part about these projectors, is the fact that you do not need to cut or mangle the back of your headlights. You just slip the projector thru the front and lock it in using the supplied nut.
These are the donor Nissan Maxima corners that I cut and transplanted. I picked these up from the junk yard.
I used some of those rubber thingy that people put around their wheel wells to protect the paint from dings. These help give the corners a "finished" look and hides the imperfections.
Installed on my car.
If you have any question, comments or criticisms, please post them here.
Kel
Last edited:


![IMG_20200828_154932_[1]](/forums/data/xfmg/thumbnail/7/7956-79d6f07e43e197bee9d16d9c00525f78.jpg?1695467889)