

lashlee
Well-Known Member
I know it's not a 6th gen but I thought I'd share my latest install:
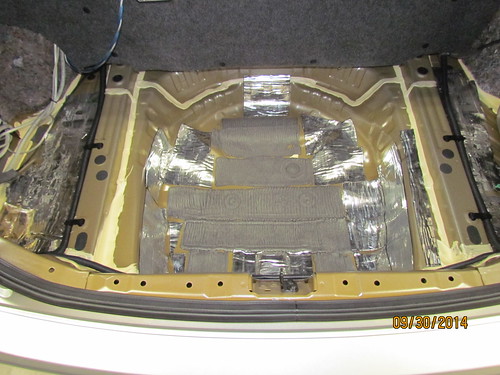
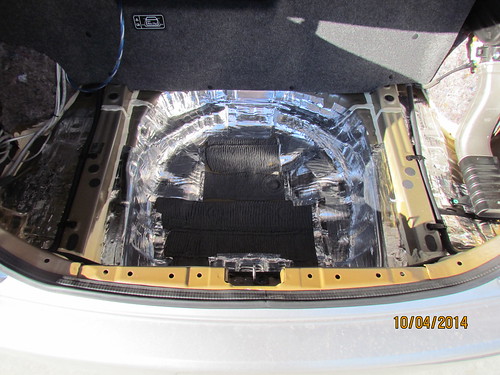
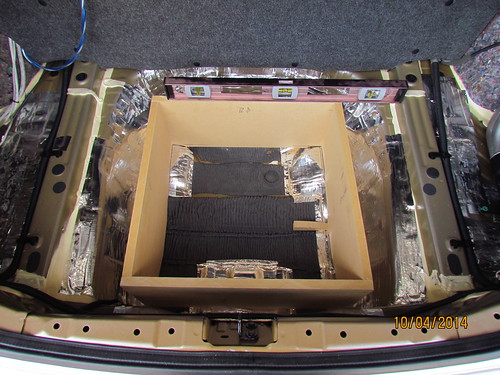
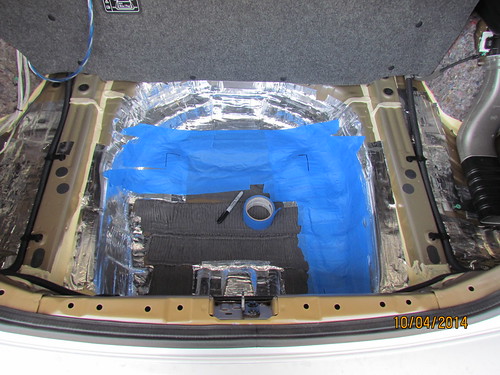
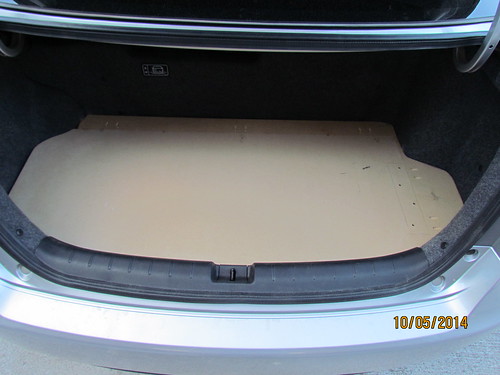
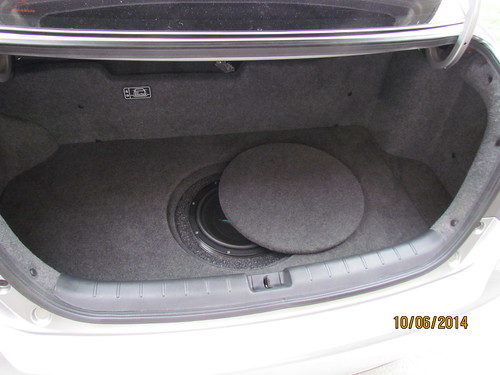
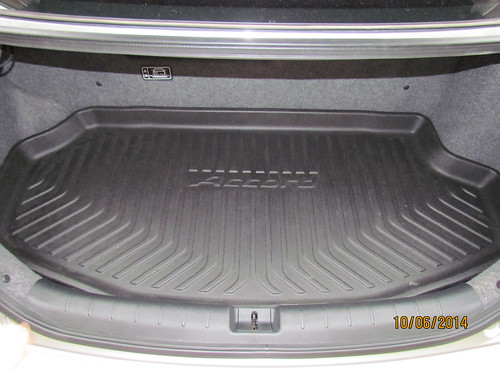
Here is the latest install to come out my garage, my 2014 Honda Accord Hybrid EX-L. I wanted a simple install with a single sub in the spare tire well and the equipment rack under the rear deck. I know the rear deck install has been done in the past but with the car being a Hybrid I’m already short on trunk space. My plan is to use as little space as necessary while keeping the OEM look, including the OEM trunk tray. Here is a list of the equipment I used:
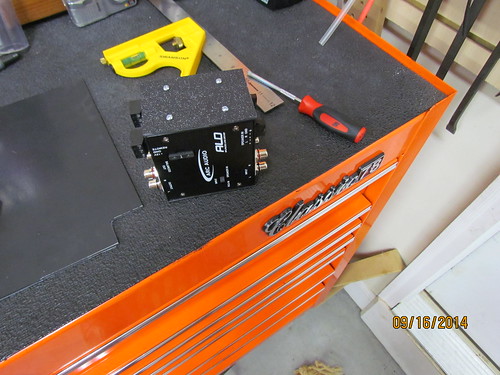
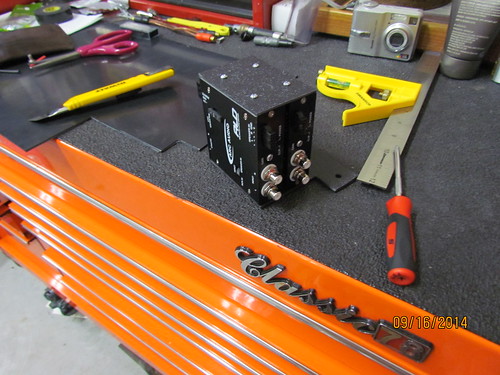
Line drivers: Arc ALD
Processor: Arc PS8
Amplifier: Phoenix Gold Ti21600.5
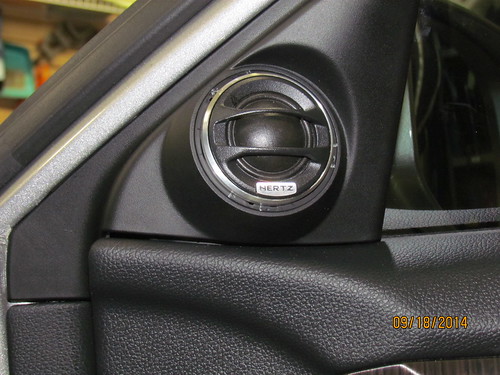
Tweeters: Hertz ML280
Mids: Hertz ML1600
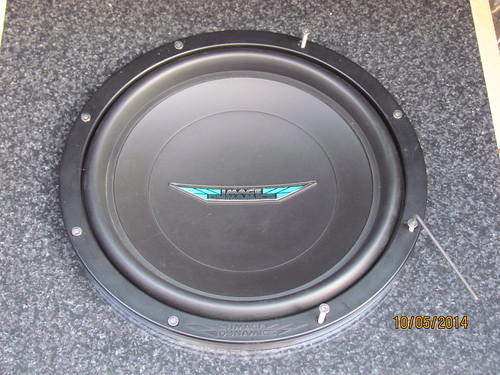
Sub: Image Dynamics IDQ12v3 D4
Power Distribution: Phoenix Gold Zero Point distribution block and Tantrum DD5
Install accessories: Phoenix Gold Zero Point RCA’s, Stinger Expert series power wire and Stinger speaker wire, Raamat BXTII and Ensolite.
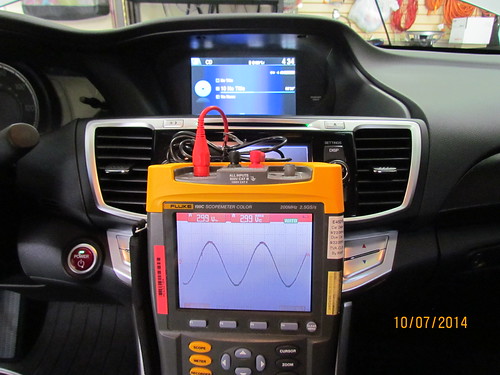
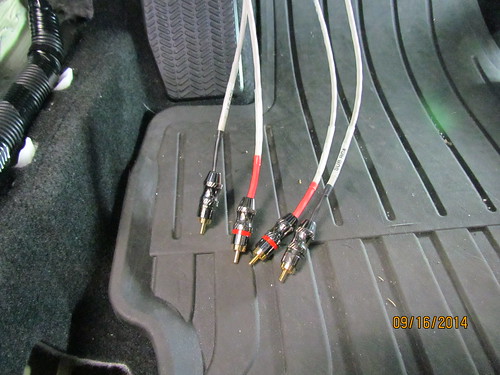
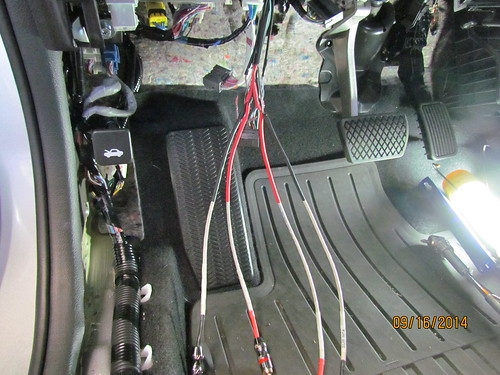
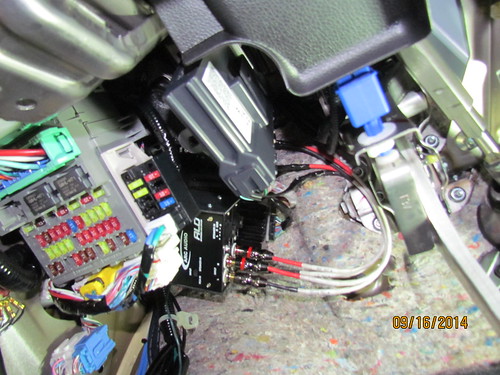
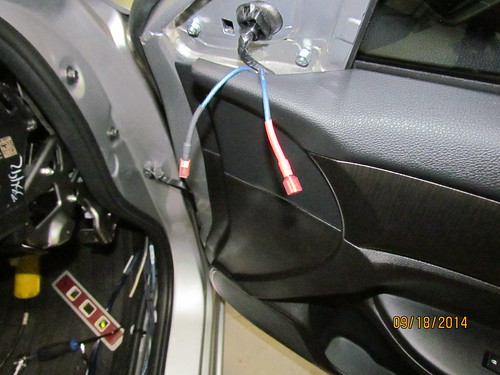
I did some testing found that the OEM touchscreen head unit puts out 3.0V of clean signal at full volume (when pulled before the OEM amp). I started with a set of Arc ALD’s, one for the front channels and one for the subs. I didn’t use one for the rears since I don’t plan one having rear speakers, and the processor will take care of any adjustments I need to make between the mids and tweeters. I found the OEM amp in the Hybrid is in the driver’s side under dash area, above the dead pedal near the firewall. I started with some Belden cable to tie onto the OEM low level signal with Phoenix Gold Zero Point RCA tips. I made a simple bracket to bolt the two ALD’s to the OEM amp mount. I then routed the RCA’s across the firewall and down the passenger side of the car.
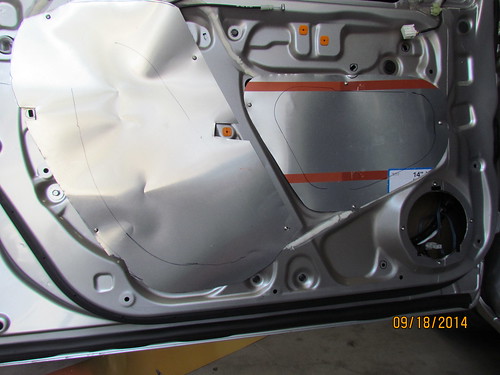
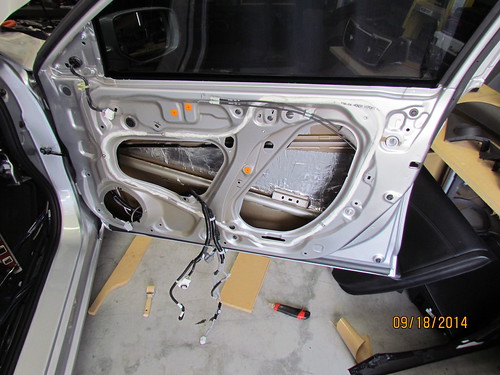
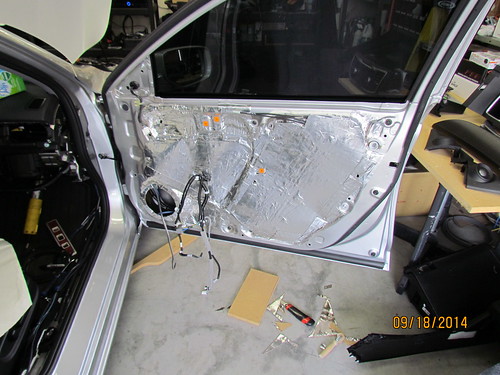
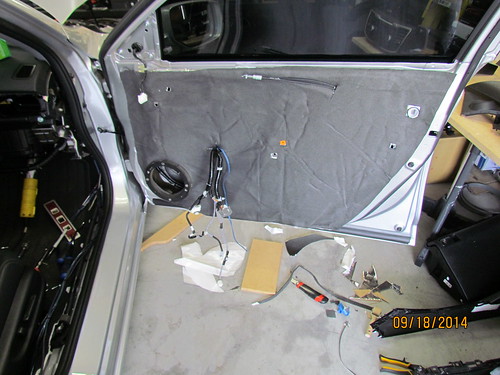
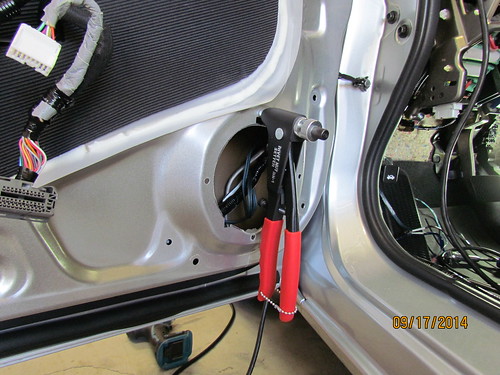
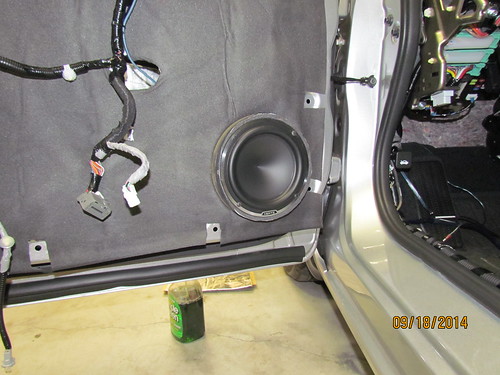
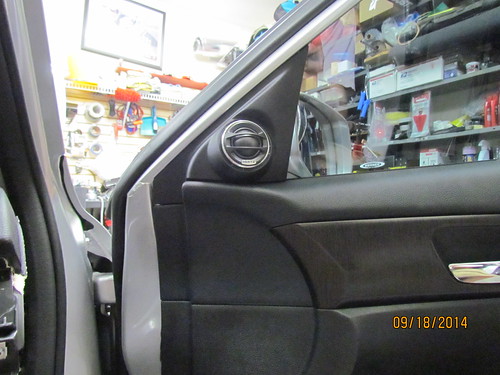
The doors were deadened with the raamat and sealed up with aluminum flashing. I mounted the aluminum panels with some 8-32 rivnuts so that they can removed in the future, if necessary. I put down a layer of ensolite over the entire door. I made the midbass ring to space out the mid by ¾” and mounted the ring to the door with more 8-32 rivnuts. The door panel also received some deadener. I ran the speaker wires into the door through the OEM harness. The tweeter was snapped into the OEM mount with the included hardware. I’ll probably modify the OEM mount in the future to look a little better in the future. The speaker wires were run down each side of the car and up to the rear deck area where the amp will be mounted.


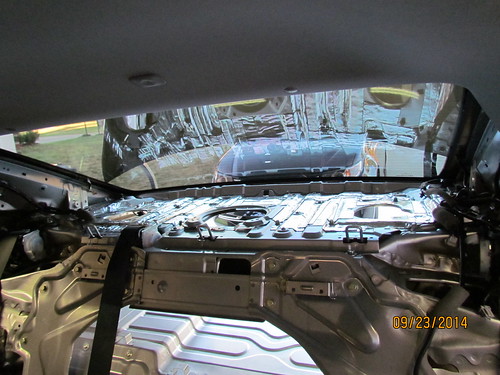
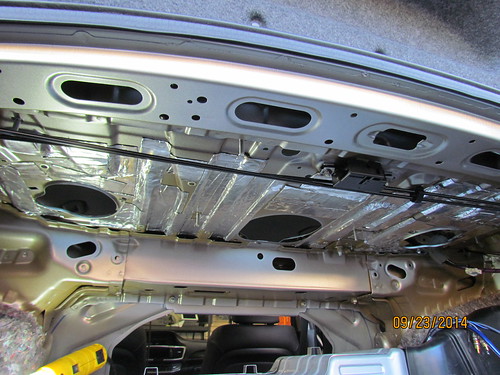
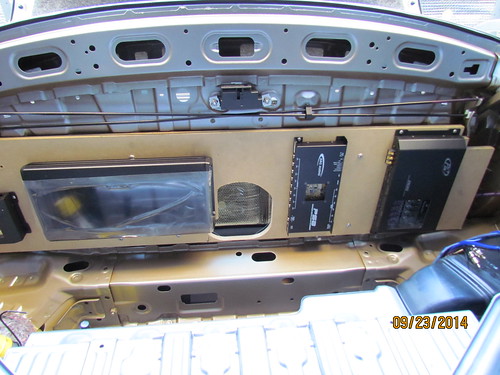
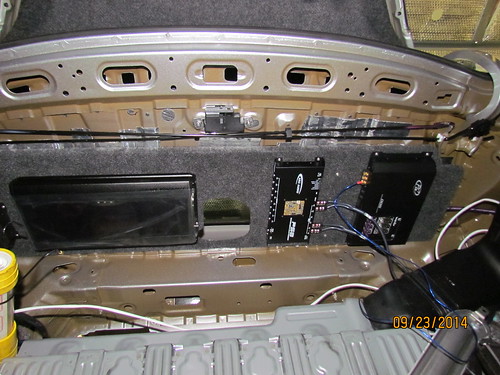
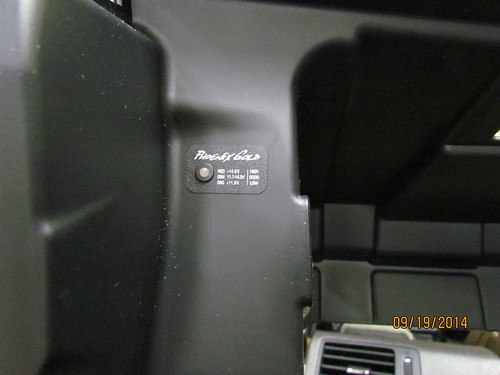
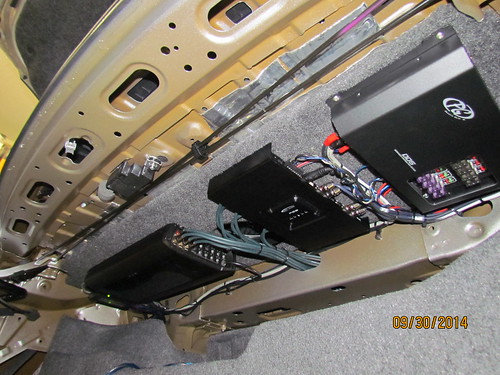
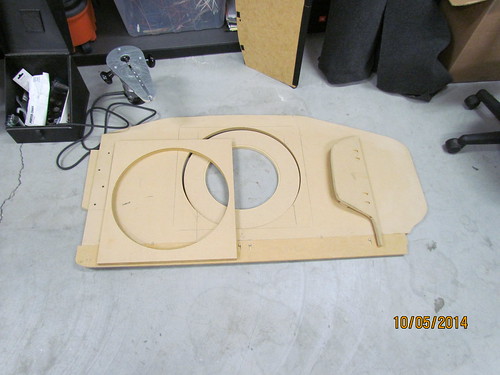
The deck was deadened on both sides and a layer of ensolite was laid down on the top after all the drivers were removed. The amp rack started with a simple piece of ½” MDF trimmed to fit and drilled to mount to the rear deck with some ¼-20 rivnuts. I made the amp rack so that there is a relief in the middle that matches up with the OEM sub grill. I mounted the equipment with hurricane nuts and button head 8-32 allen head screws to keep things from working loose over time. The rack has the Phoenix Gold DD5, the Arc PS8, the Phoenix Gold Ti21600.5 and the Zero Point distribution block. The distribution block has a port for a ZRDT3 that I mounted in the glove box. I mounted the remote gain knob in the lower punch out panel to the right side of the steering wheel.


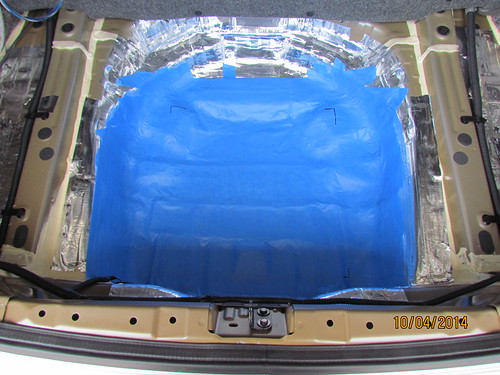
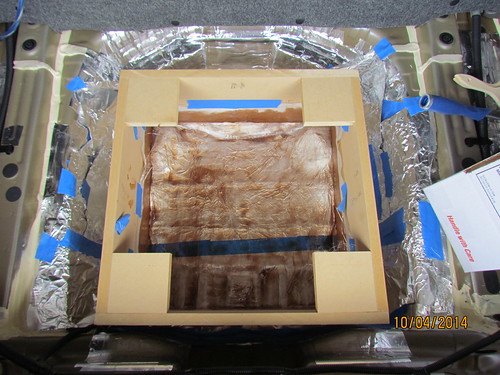
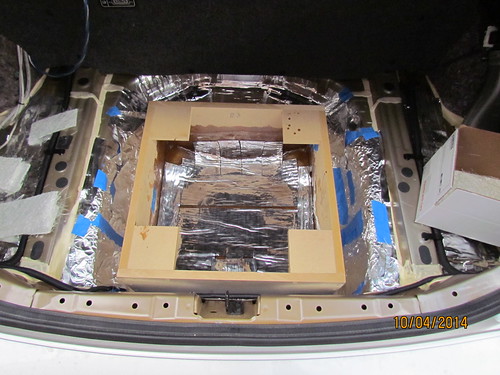
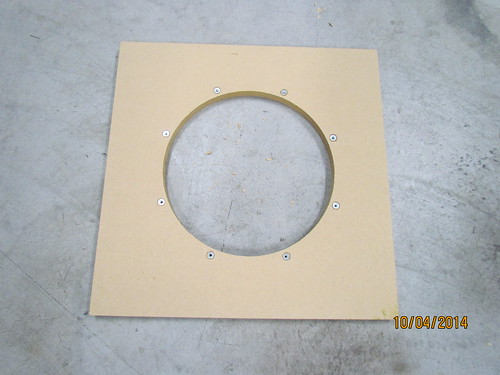
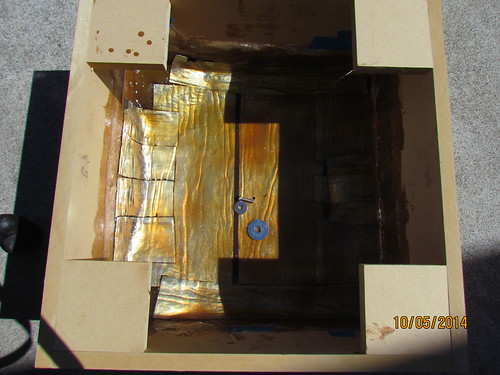
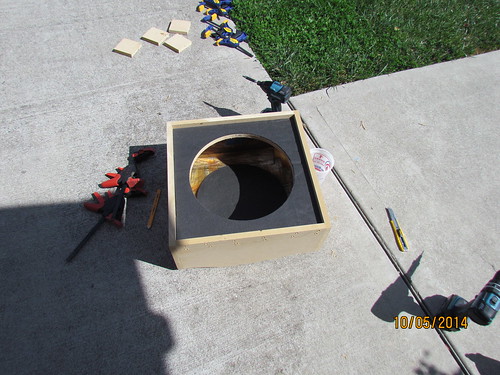
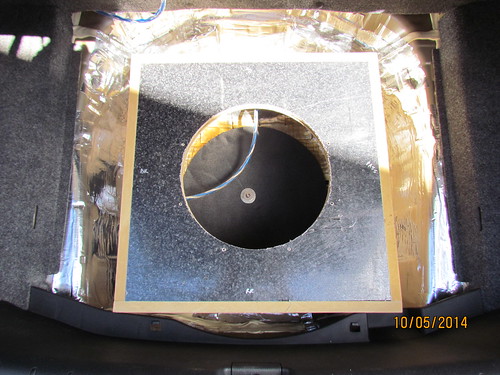
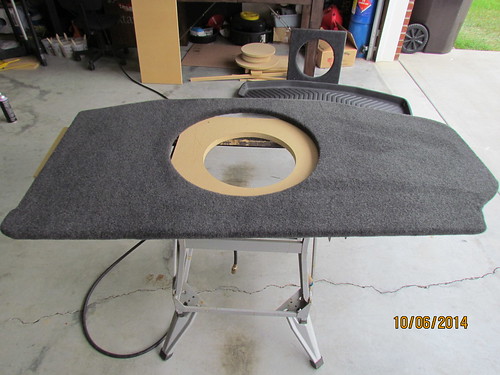
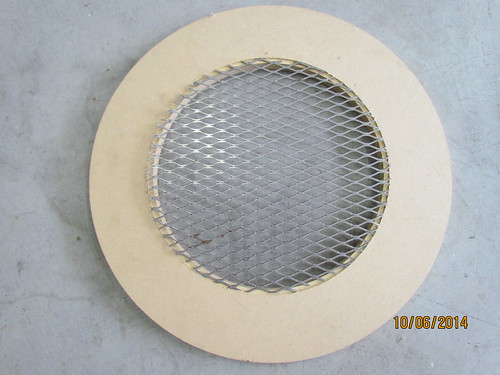
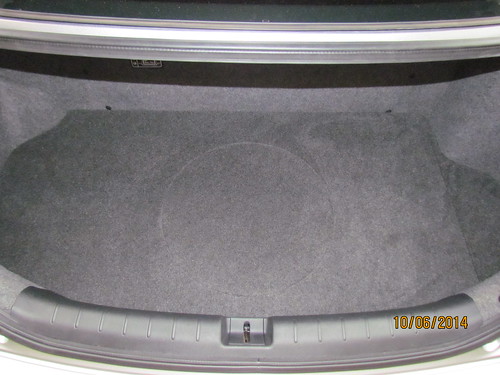
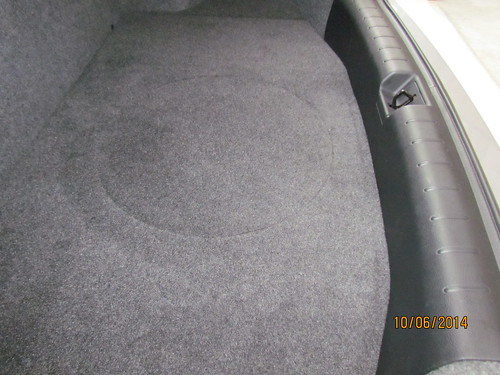
I started the speaker box by first applying a layer of rammat in the floor pan in preparation for the fiberglass bottom of the box. I trimmed the four sides of the box to roughly match the floor. I laid down a layer of woven mat first, followed up by many layers of chop mat and one layer of rammat. I eventually built it up to approximately ½” and secured the box to the floor with a ¼-20 bolt and rivnut. I made the top of the box with a removable top baffle so that I can replace the sub with another that is a different size in the future if necessary. The sub is mounted with the same hurricane nuts and countersunk 8-32 screws as the equipment rack. The sub baffle is a piece of ¾” MDF covered in Formica. I then began on the long process of making the trim panels. I started making as large as a piece as possible that would fit in the opening that matched the outer curves while trimming out the baffle. I made the top panel with a removable grill so that items can still be placed in the trunk without fear of damaging the woofer. The amp rack, trim panels and sub grill were all covered with the same carpet that is similar to the OEM color. The OEM trunk tray fits over the trim panel and keeps everything looking factory.


Thanks for looking and feel free to ask any questions!
Here is the latest install to come out my garage, my 2014 Honda Accord Hybrid EX-L. I wanted a simple install with a single sub in the spare tire well and the equipment rack under the rear deck. I know the rear deck install has been done in the past but with the car being a Hybrid I’m already short on trunk space. My plan is to use as little space as necessary while keeping the OEM look, including the OEM trunk tray. Here is a list of the equipment I used:
Line drivers: Arc ALD
Processor: Arc PS8
Amplifier: Phoenix Gold Ti21600.5
Tweeters: Hertz ML280
Mids: Hertz ML1600
Sub: Image Dynamics IDQ12v3 D4
Power Distribution: Phoenix Gold Zero Point distribution block and Tantrum DD5
Install accessories: Phoenix Gold Zero Point RCA’s, Stinger Expert series power wire and Stinger speaker wire, Raamat BXTII and Ensolite.
I did some testing found that the OEM touchscreen head unit puts out 3.0V of clean signal at full volume (when pulled before the OEM amp). I started with a set of Arc ALD’s, one for the front channels and one for the subs. I didn’t use one for the rears since I don’t plan one having rear speakers, and the processor will take care of any adjustments I need to make between the mids and tweeters. I found the OEM amp in the Hybrid is in the driver’s side under dash area, above the dead pedal near the firewall. I started with some Belden cable to tie onto the OEM low level signal with Phoenix Gold Zero Point RCA tips. I made a simple bracket to bolt the two ALD’s to the OEM amp mount. I then routed the RCA’s across the firewall and down the passenger side of the car.
The doors were deadened with the raamat and sealed up with aluminum flashing. I mounted the aluminum panels with some 8-32 rivnuts so that they can removed in the future, if necessary. I put down a layer of ensolite over the entire door. I made the midbass ring to space out the mid by ¾” and mounted the ring to the door with more 8-32 rivnuts. The door panel also received some deadener. I ran the speaker wires into the door through the OEM harness. The tweeter was snapped into the OEM mount with the included hardware. I’ll probably modify the OEM mount in the future to look a little better in the future. The speaker wires were run down each side of the car and up to the rear deck area where the amp will be mounted.
The deck was deadened on both sides and a layer of ensolite was laid down on the top after all the drivers were removed. The amp rack started with a simple piece of ½” MDF trimmed to fit and drilled to mount to the rear deck with some ¼-20 rivnuts. I made the amp rack so that there is a relief in the middle that matches up with the OEM sub grill. I mounted the equipment with hurricane nuts and button head 8-32 allen head screws to keep things from working loose over time. The rack has the Phoenix Gold DD5, the Arc PS8, the Phoenix Gold Ti21600.5 and the Zero Point distribution block. The distribution block has a port for a ZRDT3 that I mounted in the glove box. I mounted the remote gain knob in the lower punch out panel to the right side of the steering wheel.
I started the speaker box by first applying a layer of rammat in the floor pan in preparation for the fiberglass bottom of the box. I trimmed the four sides of the box to roughly match the floor. I laid down a layer of woven mat first, followed up by many layers of chop mat and one layer of rammat. I eventually built it up to approximately ½” and secured the box to the floor with a ¼-20 bolt and rivnut. I made the top of the box with a removable top baffle so that I can replace the sub with another that is a different size in the future if necessary. The sub is mounted with the same hurricane nuts and countersunk 8-32 screws as the equipment rack. The sub baffle is a piece of ¾” MDF covered in Formica. I then began on the long process of making the trim panels. I started making as large as a piece as possible that would fit in the opening that matched the outer curves while trimming out the baffle. I made the top panel with a removable grill so that items can still be placed in the trunk without fear of damaging the woofer. The amp rack, trim panels and sub grill were all covered with the same carpet that is similar to the OEM color. The OEM trunk tray fits over the trim panel and keeps everything looking factory.
Thanks for looking and feel free to ask any questions!