

Alpha_Onion
Well-Known Member
Here’s the deal. My driver’s power seat slider was kinda loose, so I decided to swap it for a manual one. Not only do I like manual seats better, but it also shaves 17 pounds off the car! I picked up a manual seat from a junkyard for $50, and did the whole project in a few hours. The swap is actually not that hard, and I made a tutorial for anyone interested in undertaking this themselves.
Tools needed:
Ratchet w/ small extension
14mm socket
12mm socket
Flathead screwdriver
Medium-size Phillips screwdriver
Wire snips
Needlenose pliers
Step 1: Seat Removal
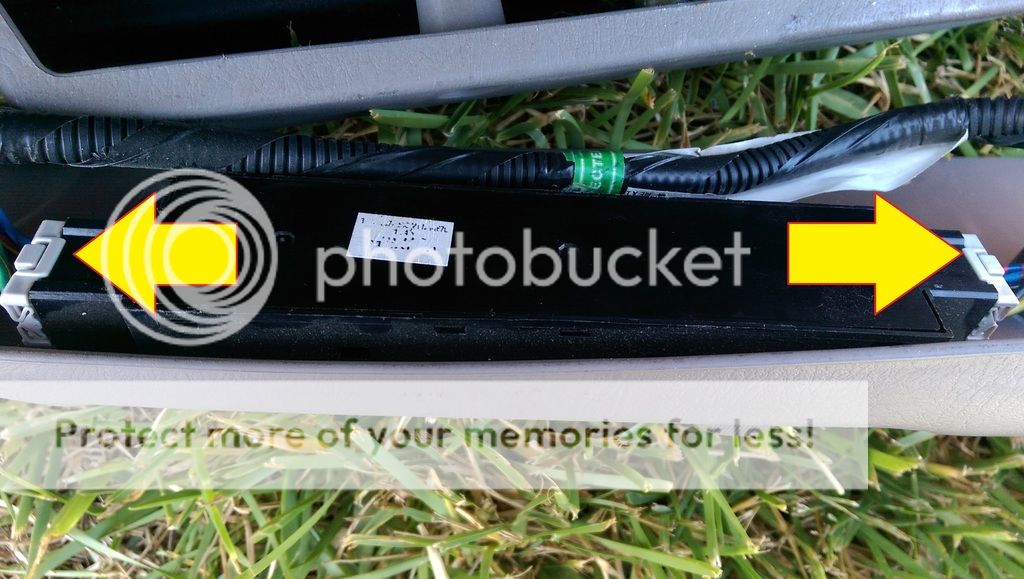
Start by taking out the two 14mm bolts on the front of the slider, which anchor it to the chassis. Slide the seat all the way forward and use your flathead to remove the plastic covers over the rear bolts. You just spent all this time getting to them, so you should definitely remove those rear bolts.
Tilt the seatback all the way forward, and slide the seat all the way back. Remove the headrest. Lift the seat up and unplug the yellow SRS connector and the main wiring connector. Remove the aforementioned seat.
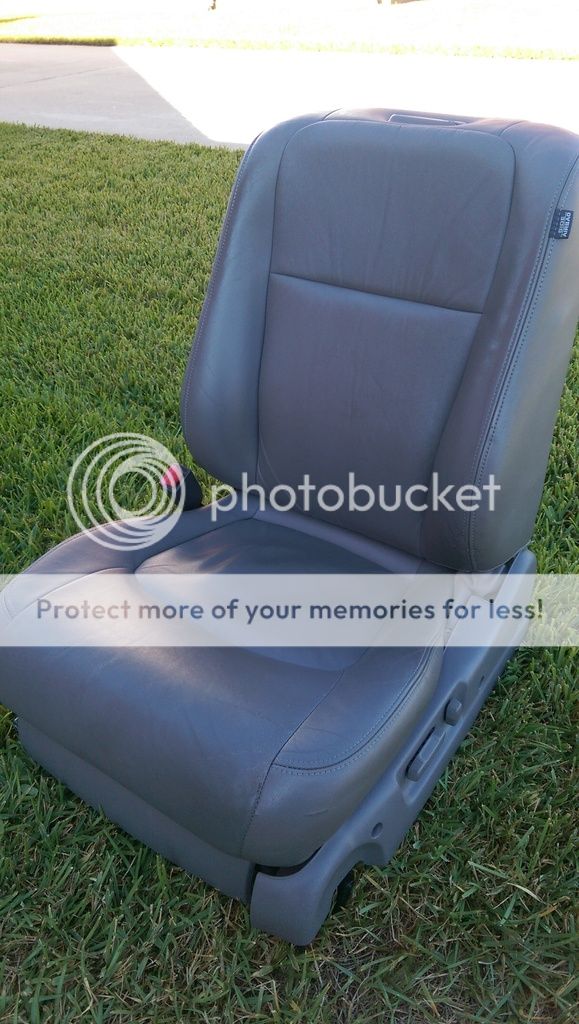
Here’s my seat out of the car:
Step 2: Disassembly
The manual seat disassembly is the same as the power seat, except there is a clip in the back of each height adjustment knob, which needs to be removed in order to slide the knobs out. Also, the four bolts holding the bottom cushion to the slider are 12mm instead of 14mm.
To disassemble your power seat, start by removing the three screws from the panel on the left side. Then just pop the panel off, and unplug the connectors on both sides of the seat controls.
There’s a cloth cover over the hinge on this side. It has a Phillips screw on the top, located here:

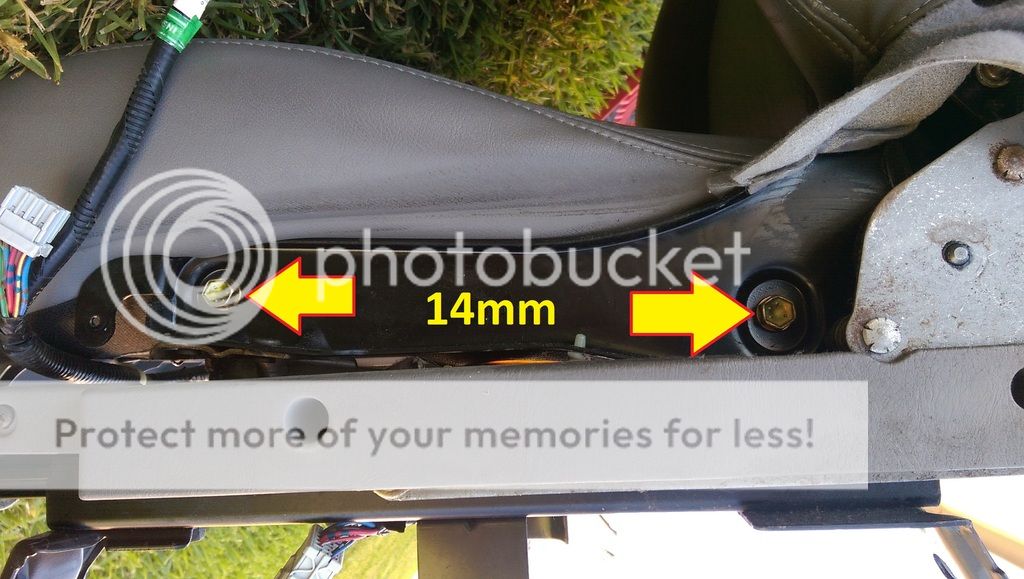
Remove the two 14mm bolts on this side, shown here:
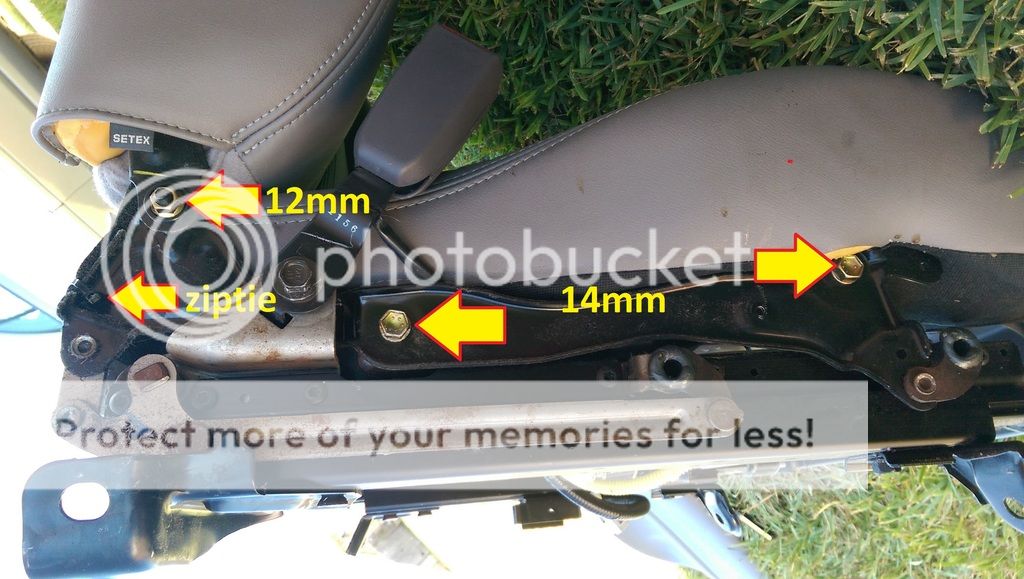
Remove the plastic cover from the other side of the seat. On this side, there are another two 14mm bolts just begging to be taken out. There’s also a ziptie that you should snip now, and a 12mm nut on the hinge that you’ll remove later.
There’s a plastic cover on the front of the seat held on by 4 Phillips screws. You know what to do.
Remove three clips holding the yellow SRS wire to the power slider. Careful, these will be reused.
Remove the 14mm bolt holding the seatbelt buckle, and the clip on the wire (this will also be reused) and swap the buckles between the seats.
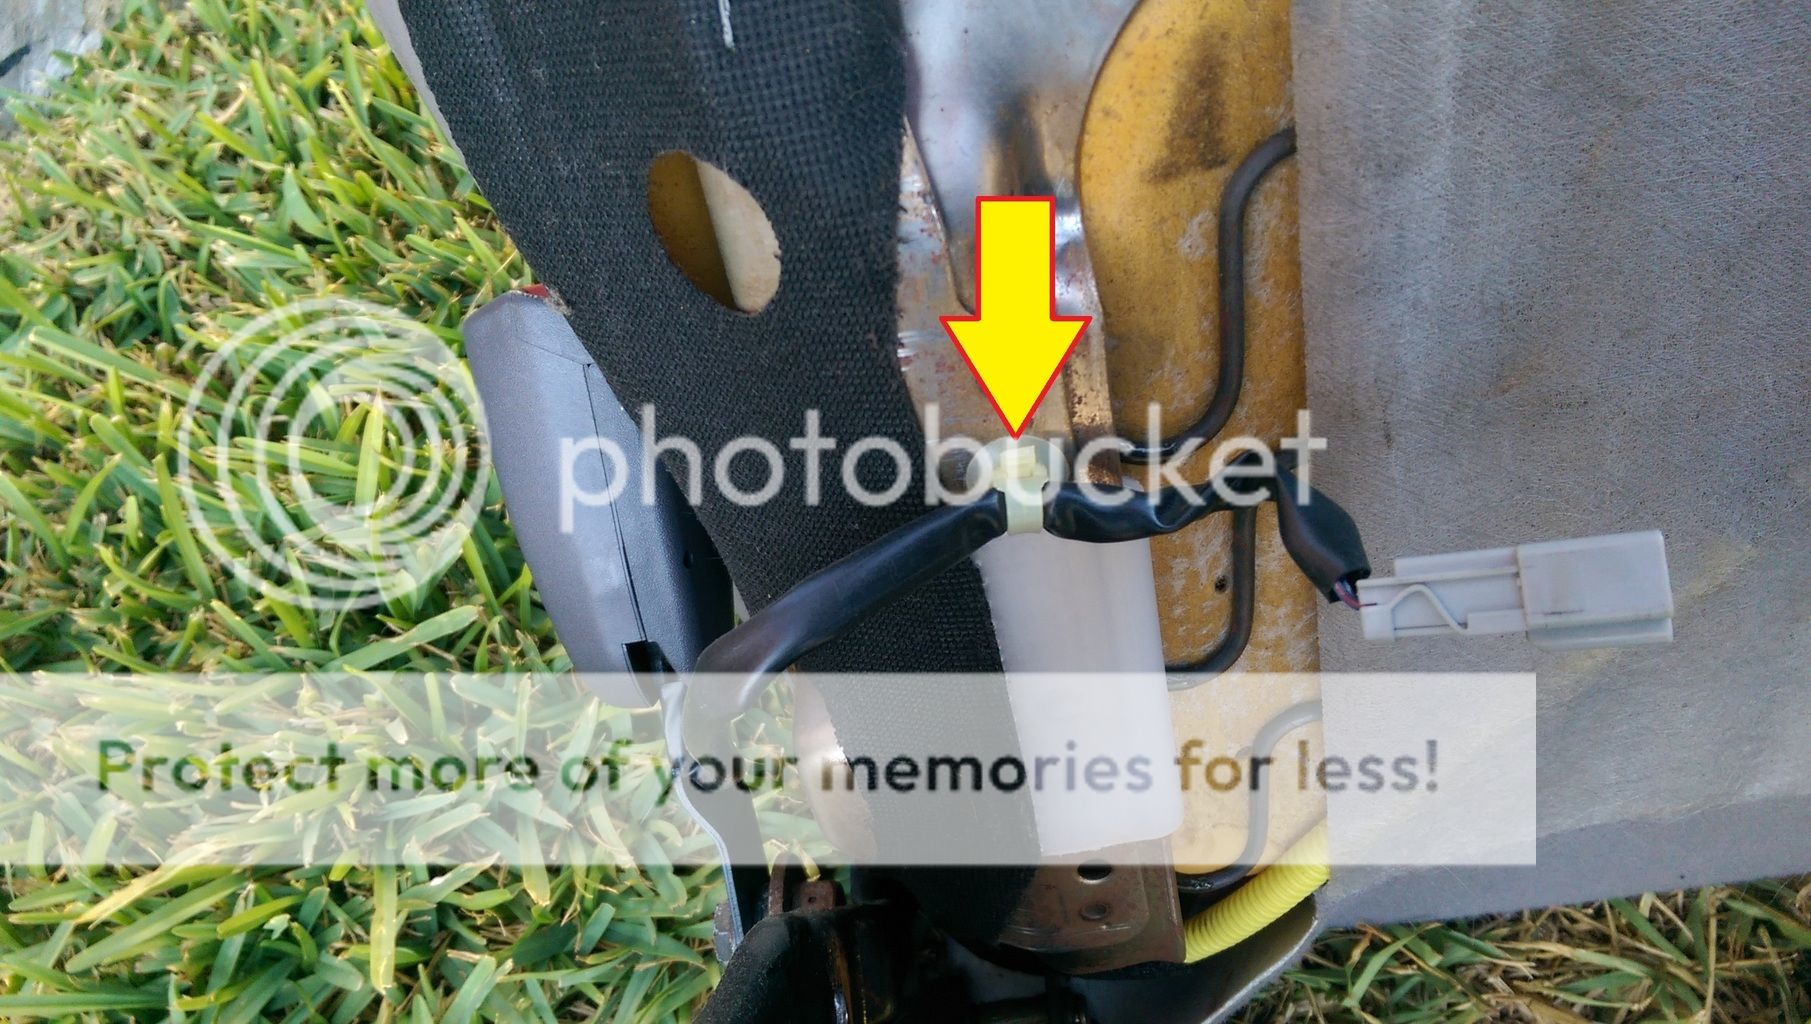
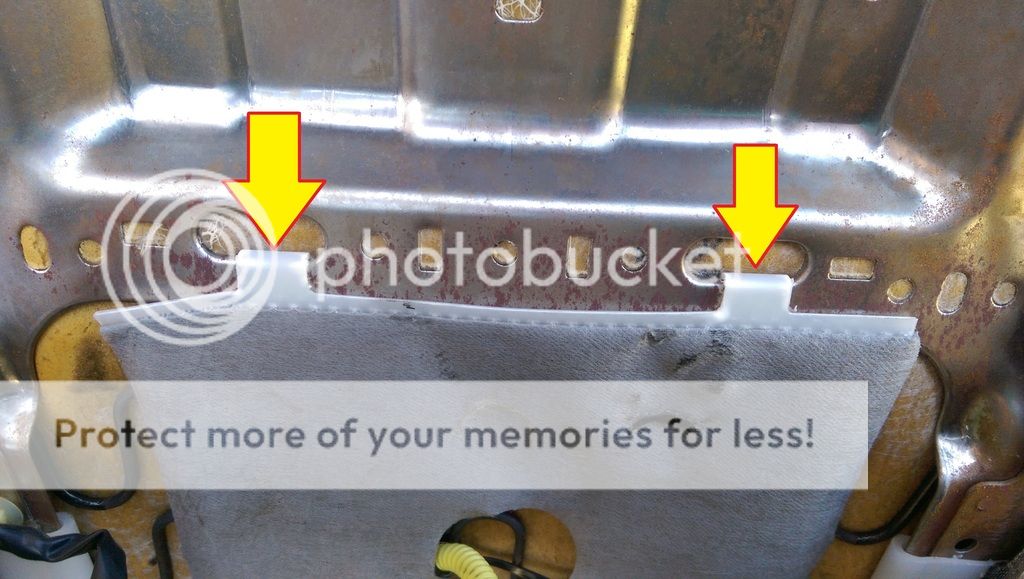
There are two plastic hooks on the bottom of the seat cushion. To remove these, press inward and upward. A flathead also helps.
At this point, you should be able to remove the bottom cushion from the rest of the seat. Do it.
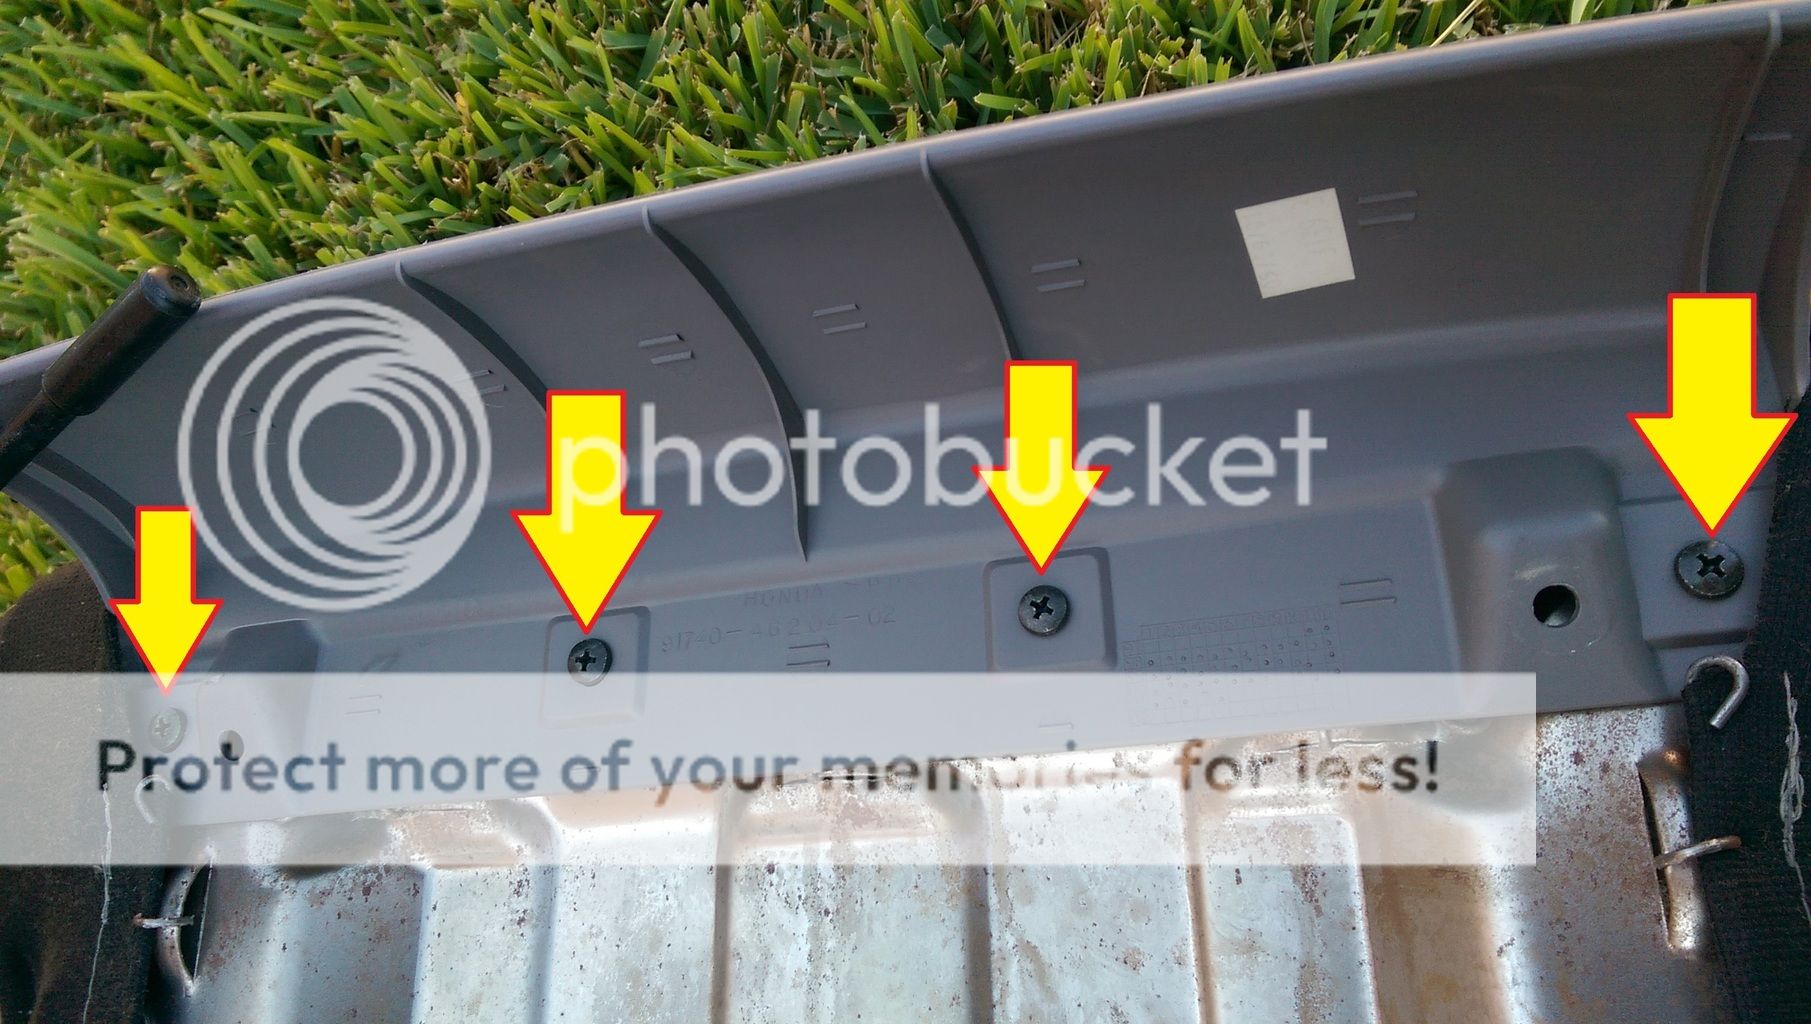
Remove the large panel from the back of the seat. Pull the bottom corners outward until the clips pop out, then pull the panel down and out.

You should see three hooks on the back of the driver’s side. Put your bra-removal skills to use.
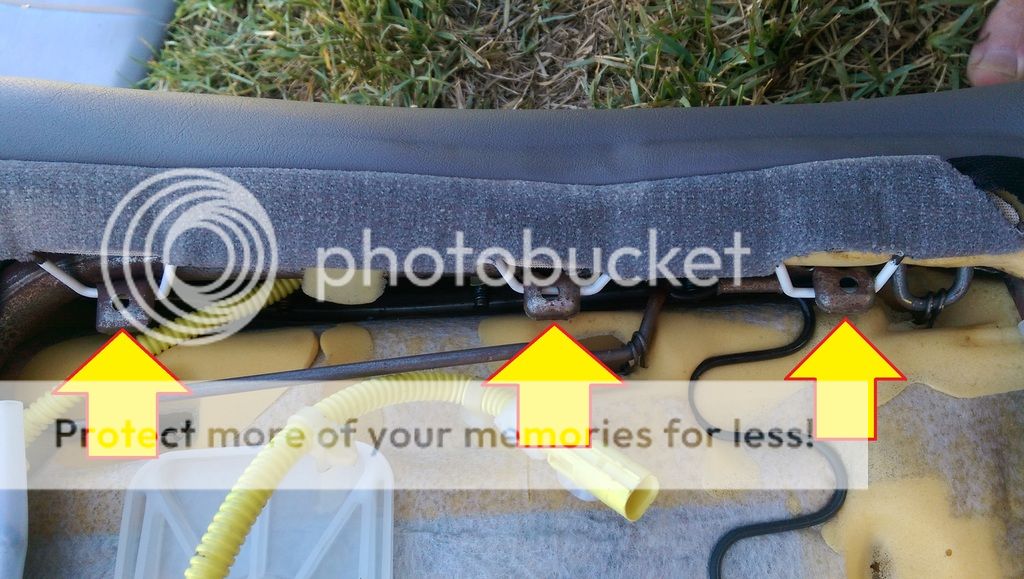
Peel back the leather and foam on this corner to expose two 14mm bolts, one of which is not so easy to access. Access it anyway.

Once these are out, go back and remove that 12mm nut on the other side. The seatback should come off the slider now.
Now if you don’t really need the height adjustment, just reassemble in the reverse order on the manual slider. However, if you want the seat to look legit (and work properly), there are a few more steps.
The bottom cushion is different between the power and manual seats (aside from leather vs cloth). The manual bottom cushion has rods built into the metal tray, which attach to the height-adjustment knobs on the side, while the power bottom cushion does not. You’ll need to remove the skins from both cushions and swap them.
There are 7 metal rings and 2 plastic hooks to remove on the bottom of the cushion:
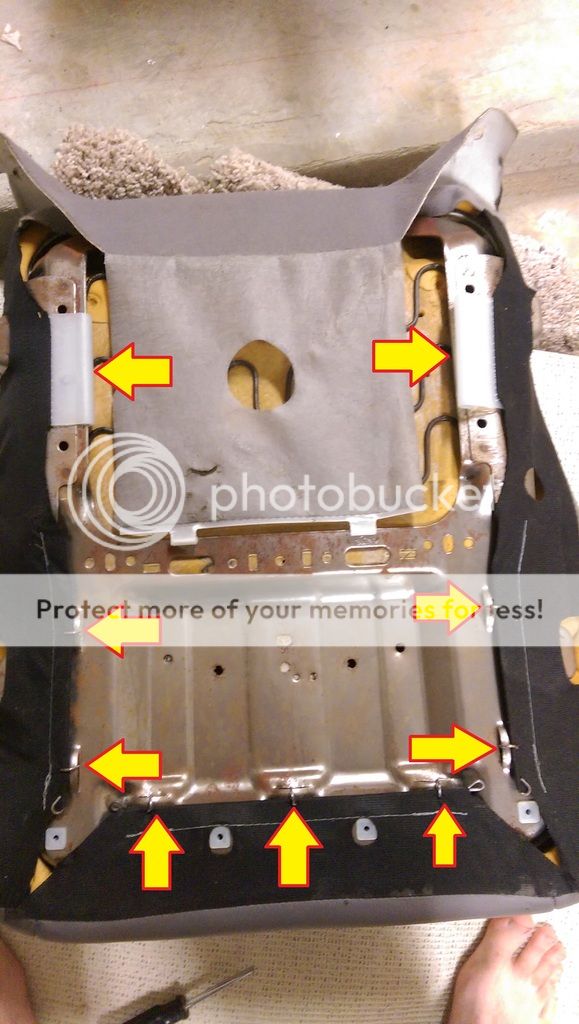
There are more of these rings holding the skin to the top of the cushion. Swap the leather skin onto the manual cushion and reattach all hooks. You will need to cut out some holes for the height adjustment rods to poke through, but be careful for the nearby stitching.
Now all that’s left is to reassemble your leather cushions onto the manual track, install the plastic plates and knobs on both sides and slap that seat back in the car.
The finished result: a custom lightweight manual seat that retains your leather and lumbar support:

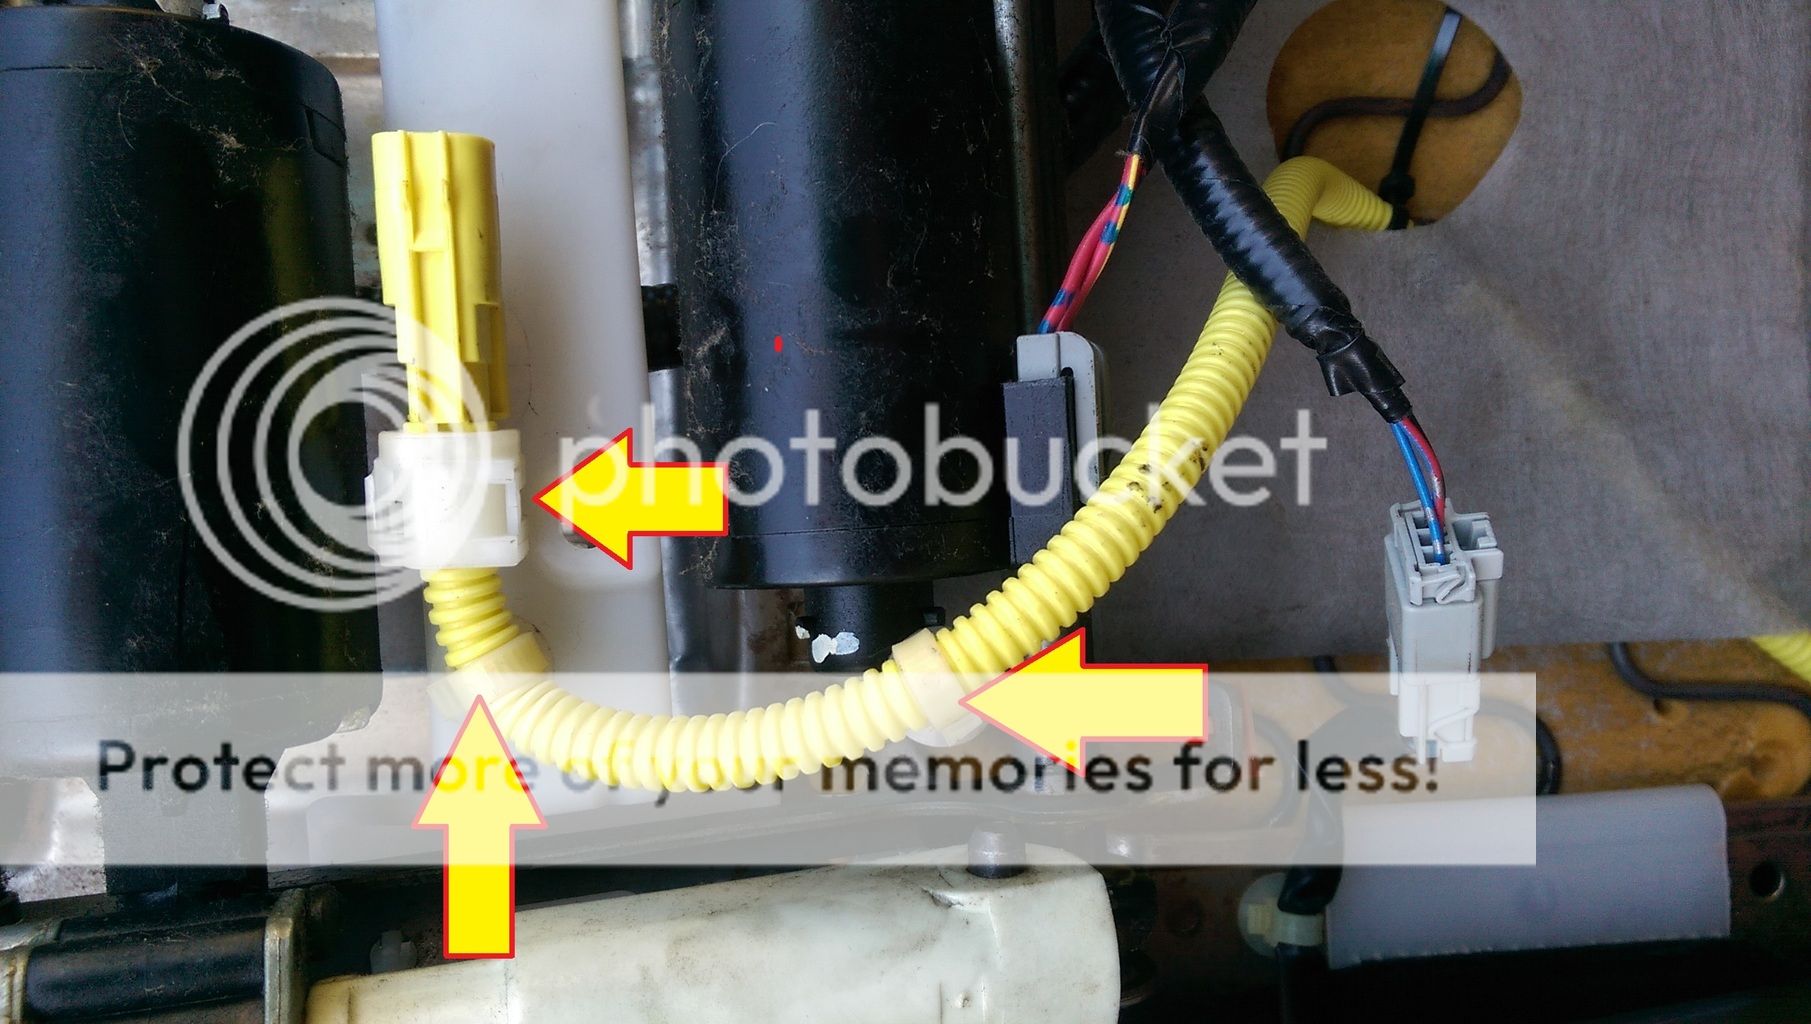
Something I also discovered is that not only does the power seat have a large wiring harness while the manual one does not, but the wires running into the floor under the seats are also different. Unfortunately this means that in order to plug in the seatbelt buckle, the power seat's main harness must be modified and reused. I will post an update once I figure out this last step.
Tools needed:
Ratchet w/ small extension
14mm socket
12mm socket
Flathead screwdriver
Medium-size Phillips screwdriver
Wire snips
Needlenose pliers
Step 1: Seat Removal
Start by taking out the two 14mm bolts on the front of the slider, which anchor it to the chassis. Slide the seat all the way forward and use your flathead to remove the plastic covers over the rear bolts. You just spent all this time getting to them, so you should definitely remove those rear bolts.
Tilt the seatback all the way forward, and slide the seat all the way back. Remove the headrest. Lift the seat up and unplug the yellow SRS connector and the main wiring connector. Remove the aforementioned seat.
Here’s my seat out of the car:
Step 2: Disassembly
The manual seat disassembly is the same as the power seat, except there is a clip in the back of each height adjustment knob, which needs to be removed in order to slide the knobs out. Also, the four bolts holding the bottom cushion to the slider are 12mm instead of 14mm.
To disassemble your power seat, start by removing the three screws from the panel on the left side. Then just pop the panel off, and unplug the connectors on both sides of the seat controls.
There’s a cloth cover over the hinge on this side. It has a Phillips screw on the top, located here:
Remove the two 14mm bolts on this side, shown here:
Remove the plastic cover from the other side of the seat. On this side, there are another two 14mm bolts just begging to be taken out. There’s also a ziptie that you should snip now, and a 12mm nut on the hinge that you’ll remove later.
There’s a plastic cover on the front of the seat held on by 4 Phillips screws. You know what to do.
Remove three clips holding the yellow SRS wire to the power slider. Careful, these will be reused.
Remove the 14mm bolt holding the seatbelt buckle, and the clip on the wire (this will also be reused) and swap the buckles between the seats.
There are two plastic hooks on the bottom of the seat cushion. To remove these, press inward and upward. A flathead also helps.
At this point, you should be able to remove the bottom cushion from the rest of the seat. Do it.
Remove the large panel from the back of the seat. Pull the bottom corners outward until the clips pop out, then pull the panel down and out.
You should see three hooks on the back of the driver’s side. Put your bra-removal skills to use.
Peel back the leather and foam on this corner to expose two 14mm bolts, one of which is not so easy to access. Access it anyway.
Once these are out, go back and remove that 12mm nut on the other side. The seatback should come off the slider now.
Now if you don’t really need the height adjustment, just reassemble in the reverse order on the manual slider. However, if you want the seat to look legit (and work properly), there are a few more steps.
The bottom cushion is different between the power and manual seats (aside from leather vs cloth). The manual bottom cushion has rods built into the metal tray, which attach to the height-adjustment knobs on the side, while the power bottom cushion does not. You’ll need to remove the skins from both cushions and swap them.
There are 7 metal rings and 2 plastic hooks to remove on the bottom of the cushion:
There are more of these rings holding the skin to the top of the cushion. Swap the leather skin onto the manual cushion and reattach all hooks. You will need to cut out some holes for the height adjustment rods to poke through, but be careful for the nearby stitching.
Now all that’s left is to reassemble your leather cushions onto the manual track, install the plastic plates and knobs on both sides and slap that seat back in the car.
The finished result: a custom lightweight manual seat that retains your leather and lumbar support:
Something I also discovered is that not only does the power seat have a large wiring harness while the manual one does not, but the wires running into the floor under the seats are also different. Unfortunately this means that in order to plug in the seatbelt buckle, the power seat's main harness must be modified and reused. I will post an update once I figure out this last step.