This is a write-up of how to cut the fender using a dremel. I bought an JDM EK sidemarkers directly from Japan. I didn't get the flushmounted JDM accord sidemarkers because it look kinda plain to me. Well, after cutting one side of my fender, i find it easier to cut it mid-way then work your way inside to get a deeper cut. Here's how i did it. On one side, i used 5-6 blades because it broke all the blakdes. On the other side, after i found a new technique to cut it, i used 2-3 blades. My blades didn't even break this time. It was worn out and got smaller. Remember, for whatever done wrong to your car, it is your responsibility.
Safety: This procedure was done with goggles, mask, gloves, and ear plugs. Goggles and mask will protect your face and eyes. And ear plugs will help because when cutting sheet metal, it is very loud! When cutting, make sure no one is on your right side. Because when cutting, the blades might break and it will fly to the right.
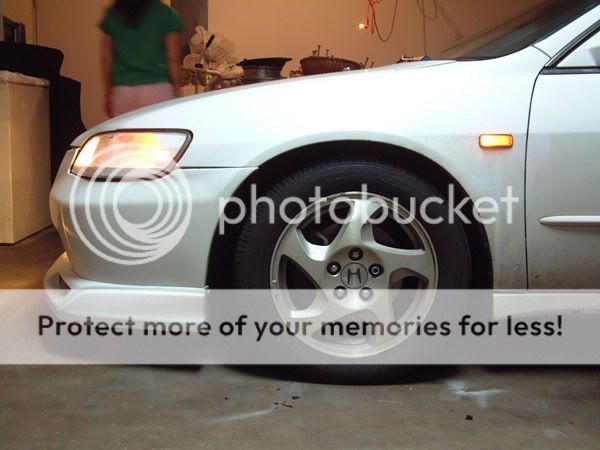
Step 1: Line-up the template. The template i made was a simple square. There is a template for EK side markers but since i'm using a dremel, it would be hard to do the edges. Make sure you make your template SMALLER than the original size. You will use a dremel bit to cut further because you do not want to cut too big. But this is how you suppose to line up your sidemarkers. Think of it this way, the actually wheel well is a square. On the corner of that square, that's where your suppose to put your sidemarkers. Here's an example.

Step 2: Tape the template. Some people would outline the template with a marker or tape them like mad crazy but i just did a simple horizontal line tape. Now, this is where you start cutting. Here's a picture of how you suppose to cut it.

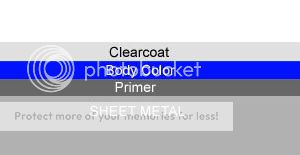
Step 3: To cut it, you should cut it as a horizontal line. DO NOT cut too deep just yet. If you do, you will end up breaking your blades. The picture below shows you how the paint is sticking to the sheet metal. First, cut through the clear coat and the body color. Cut it as a line and then work your way deeper and deeper.
Step 4: If your right hand, put your right hand on top of the dremel while left hand on the bottom of the dremel. This way, the right hand will hold stiffly to move the dremel from left to right. The left hand, which is on the bottom of the dremel, will make the cut deeper by pulling it upward. Your hand must have a strong grip or else the dremel will jerk and the blade will break. Here is a picture of the top part has finished cutting while the bottom only has a small cut.

Step 5: When your done cutting the top and the bottom line, cut the sides. By doing this, make sure your dremel (top), where the dremel bit is at, is facing to the left of your body. This way, if you do end up breaking the blade, it will shoot up rather than down. This will help you NOT getting injure. When your done cutting, use a flathead screw driver and try to peel off the corners. After that, cut the other side and use a hammer, or mallet preferrable, to take the whole piece off.
Step 6: Use a dremel bit that could sand off the sides, and test fit the side markers. If the hole is small, use that bit and sand off extra portion of the side until it fits.
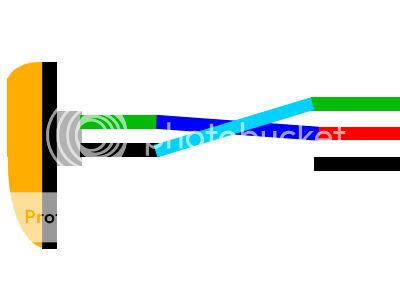
After that, you just wired it up to the corners. Since the side markers only has 2 wires (positive and negative), you can either wire it to BLINK or IDLE, OR both. If you plan to do both, here's how it works. The green wire should be wired to the red wire from the corner bulb. And the black wire from the sidemarkers goes to the green wire of the corner bulbs. Basically, when you turn on your headlight, your idle will be on. And the ground of the sidmarkers will get power from the blinkers. So here's a diagram of how you should do it.
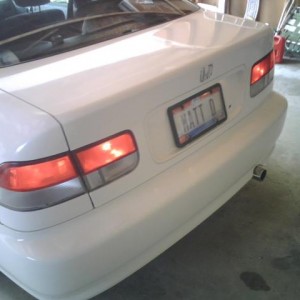
That's it! When you turn your headlight on, your sidemarkers should be on. Then, when you signal, your side markers should blink. Special thanks to JMillerF23A1 for his nice write-up!

Safety: This procedure was done with goggles, mask, gloves, and ear plugs. Goggles and mask will protect your face and eyes. And ear plugs will help because when cutting sheet metal, it is very loud! When cutting, make sure no one is on your right side. Because when cutting, the blades might break and it will fly to the right.
Step 1: Line-up the template. The template i made was a simple square. There is a template for EK side markers but since i'm using a dremel, it would be hard to do the edges. Make sure you make your template SMALLER than the original size. You will use a dremel bit to cut further because you do not want to cut too big. But this is how you suppose to line up your sidemarkers. Think of it this way, the actually wheel well is a square. On the corner of that square, that's where your suppose to put your sidemarkers. Here's an example.
Step 2: Tape the template. Some people would outline the template with a marker or tape them like mad crazy but i just did a simple horizontal line tape. Now, this is where you start cutting. Here's a picture of how you suppose to cut it.
Step 3: To cut it, you should cut it as a horizontal line. DO NOT cut too deep just yet. If you do, you will end up breaking your blades. The picture below shows you how the paint is sticking to the sheet metal. First, cut through the clear coat and the body color. Cut it as a line and then work your way deeper and deeper.
Step 4: If your right hand, put your right hand on top of the dremel while left hand on the bottom of the dremel. This way, the right hand will hold stiffly to move the dremel from left to right. The left hand, which is on the bottom of the dremel, will make the cut deeper by pulling it upward. Your hand must have a strong grip or else the dremel will jerk and the blade will break. Here is a picture of the top part has finished cutting while the bottom only has a small cut.
Step 5: When your done cutting the top and the bottom line, cut the sides. By doing this, make sure your dremel (top), where the dremel bit is at, is facing to the left of your body. This way, if you do end up breaking the blade, it will shoot up rather than down. This will help you NOT getting injure. When your done cutting, use a flathead screw driver and try to peel off the corners. After that, cut the other side and use a hammer, or mallet preferrable, to take the whole piece off.
Step 6: Use a dremel bit that could sand off the sides, and test fit the side markers. If the hole is small, use that bit and sand off extra portion of the side until it fits.
After that, you just wired it up to the corners. Since the side markers only has 2 wires (positive and negative), you can either wire it to BLINK or IDLE, OR both. If you plan to do both, here's how it works. The green wire should be wired to the red wire from the corner bulb. And the black wire from the sidemarkers goes to the green wire of the corner bulbs. Basically, when you turn on your headlight, your idle will be on. And the ground of the sidmarkers will get power from the blinkers. So here's a diagram of how you should do it.
That's it! When you turn your headlight on, your sidemarkers should be on. Then, when you signal, your side markers should blink. Special thanks to JMillerF23A1 for his nice write-up!
Last edited: