

Well, as previously promised, here is my DIY for installing 11" Rotors, ITR/V6 Calipers, and SS lines up front.
Here is all my new stuff:
ITR Calipers (Same as Prelude, Accord V6)
Brembo Rotors from a 92-96 Prelude
Russel SS Lines
Hawk HP+ Pads

Here is a "before shot"

So, we remove the wheel, turn the steering wheel to the side we are working on, and we begin:


Loosen the Caliper Pins (2 x 17 mm):

Remove Caliper: It might be a bit tight, don't be affraid to use some force, and if needed, a small prybar to get it off.


Just let the Caliper hang there, or if you are reusing the lines, zip-tie it to the spring or some part of the suspension so you don't street the line unecessarily.
Now, clamp the line with a vice-grip so as not to lose brake fluid, and remove the brake line from the caliper: (1 x 14 mm)

Next we want to remove the Caliper Bracket (2 x 17mm bolts):

Just be careful not to let the bracket fall on your foot or something when you are removing the bolts.

Now You want to remove the Disc. If you have the small screws holding it in place, chances are they are siezed. Use LOTS of heat, spray some water, heat again, cool it off, this will break the rust bond and make it MUCH easier to remove rather than stripping the head. Also, an impact screw driver doesn't hurt. Personnally, I don't use the screws, cuz they just piss me off when I go to do my brakes next time! Also, there is a chance that your disc will be rusted to the hub. Don't be affraid to hit it from behind with a hammer, rotating the disc after every smack. Use force here, no problems!

Now you'll want to buff that hub off, get all the excess surface rust off there!

Now we are ready to start putting things back together! But first, a few comparison shots:
Discs:


Pads:

Calipers:


Caliper Bracket:

OK...SO, back to putting things back together.
Caliper Bracket Prep:
Clean the shims where the pads come in contact with them and slide. Coat all contacts with anti-sieze.

Grease up the caliper pins:

Now, set the brackets aside, and Antisieze the hub up so you have less of a hard time with the disc next time!

Now Put the disc back on, and bolt up the new caliper bracket. Fits like a glove!!


Now insert the pads into the caliper bracket (remember to coat the edges that slide in the shims, and the parts of the pad that will be in contact with the caliper and piston) What I like to do is coat the inside pad where the piston will be in contact:

Then for the outside pad, just coat the contacts for the shims (I coat the caliper for this side, looks cleaner once installed):


Next, just pop the caliper over the pads, align with the caliper pins, and bolt it all up! (2 x 14mm) (Remember to push the piston in all the way with a big set of pliers before trying to put it over the pads.)


Spray some brake cleaner on a rag, and clean the disc off. You can also clean any excess anti-sieze or lub or whatever you use from the caliper, etc.
Now if you are reusing the stock break line, just bolt it up to the new caliper, gravity bleed, then pressure bleed (starting with the passenger side, then drivers), and call it a day.
If you are gonna be going SS lines, continue on.
Now unfortunately, I don't have many pics of the SS lines, I was getting tired and wanted to actually go for a drive and stop taking so many damn pictures

It is VERY simple to do though.
Connect the SS line to the caliper first. Tighten the 14mm banjo bolt on the caliper, and leave the bleeder valve open.
Then, you want to loosen the soft line from the hard line using a 10mm. Once its loose, get your SS line ready near by. Remove the soft line, replace it with the SS line asap, and tighten the 10 mm to the SS line. Now just wait till you see brake fluid coming out of your bleeder valve, with very few, if any, air bubbles. This way, your caliper is already gravity blead, ready to be pressure blead.

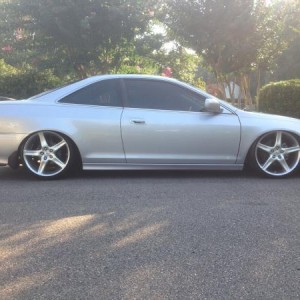
Finished:

After/Before:
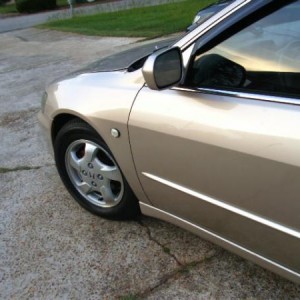
I did my best to try to get the same distance for the pics, but yeah, You can tell that the new rotors fill up the wheel much better, and the braking is WAY better...(thanks mostly to the pads though...but yeah.)

Notes:
Don't forget to always keep a tab on your brake fluid level. Make sure you don't let the reservoir empty, cuz then you will have to bleed the whole system. Just check it from time to time before, while, and after any lines might be open.
Here is all my new stuff:
ITR Calipers (Same as Prelude, Accord V6)
Brembo Rotors from a 92-96 Prelude
Russel SS Lines
Hawk HP+ Pads
Here is a "before shot"
So, we remove the wheel, turn the steering wheel to the side we are working on, and we begin:
Loosen the Caliper Pins (2 x 17 mm):
Remove Caliper: It might be a bit tight, don't be affraid to use some force, and if needed, a small prybar to get it off.
Just let the Caliper hang there, or if you are reusing the lines, zip-tie it to the spring or some part of the suspension so you don't street the line unecessarily.
Now, clamp the line with a vice-grip so as not to lose brake fluid, and remove the brake line from the caliper: (1 x 14 mm)
Next we want to remove the Caliper Bracket (2 x 17mm bolts):
Just be careful not to let the bracket fall on your foot or something when you are removing the bolts.
Now You want to remove the Disc. If you have the small screws holding it in place, chances are they are siezed. Use LOTS of heat, spray some water, heat again, cool it off, this will break the rust bond and make it MUCH easier to remove rather than stripping the head. Also, an impact screw driver doesn't hurt. Personnally, I don't use the screws, cuz they just piss me off when I go to do my brakes next time! Also, there is a chance that your disc will be rusted to the hub. Don't be affraid to hit it from behind with a hammer, rotating the disc after every smack. Use force here, no problems!
Now you'll want to buff that hub off, get all the excess surface rust off there!
Now we are ready to start putting things back together! But first, a few comparison shots:
Discs:
Pads:
Calipers:
Caliper Bracket:
OK...SO, back to putting things back together.
Caliper Bracket Prep:
Clean the shims where the pads come in contact with them and slide. Coat all contacts with anti-sieze.
Grease up the caliper pins:
Now, set the brackets aside, and Antisieze the hub up so you have less of a hard time with the disc next time!
Now Put the disc back on, and bolt up the new caliper bracket. Fits like a glove!!
Now insert the pads into the caliper bracket (remember to coat the edges that slide in the shims, and the parts of the pad that will be in contact with the caliper and piston) What I like to do is coat the inside pad where the piston will be in contact:
Then for the outside pad, just coat the contacts for the shims (I coat the caliper for this side, looks cleaner once installed):
Next, just pop the caliper over the pads, align with the caliper pins, and bolt it all up! (2 x 14mm) (Remember to push the piston in all the way with a big set of pliers before trying to put it over the pads.)
Spray some brake cleaner on a rag, and clean the disc off. You can also clean any excess anti-sieze or lub or whatever you use from the caliper, etc.
Now if you are reusing the stock break line, just bolt it up to the new caliper, gravity bleed, then pressure bleed (starting with the passenger side, then drivers), and call it a day.
If you are gonna be going SS lines, continue on.
Now unfortunately, I don't have many pics of the SS lines, I was getting tired and wanted to actually go for a drive and stop taking so many damn pictures
It is VERY simple to do though.
Connect the SS line to the caliper first. Tighten the 14mm banjo bolt on the caliper, and leave the bleeder valve open.
Then, you want to loosen the soft line from the hard line using a 10mm. Once its loose, get your SS line ready near by. Remove the soft line, replace it with the SS line asap, and tighten the 10 mm to the SS line. Now just wait till you see brake fluid coming out of your bleeder valve, with very few, if any, air bubbles. This way, your caliper is already gravity blead, ready to be pressure blead.
Finished:
After/Before:
I did my best to try to get the same distance for the pics, but yeah, You can tell that the new rotors fill up the wheel much better, and the braking is WAY better...(thanks mostly to the pads though...but yeah.)
Notes:
Don't forget to always keep a tab on your brake fluid level. Make sure you don't let the reservoir empty, cuz then you will have to bleed the whole system. Just check it from time to time before, while, and after any lines might be open.
Last edited: