F23A1 Bisimoto Level 2 Camshaft Independent Test

AFAccord

Well-Known Member
Joined
Jan 18, 2007
Posts
1,911
Reaction score
33
Location
Spangdahlem, Germany
Well, I've posted this on H-T, but many people here are allergic to the attitudes of H-T members (now you know where I get it from), so I'll post it here as well...

So the time has come to get retune the Accord with a few new mods, including my new Bisimoto Level 2 Camshaft. I have already installed the cam and checked for clearance issues that I was concerned about, but everything looks good now.

I would normally be fine with just a street tune to touch everything up because it's much cheaper than dyno time, but the uprising against Bisi's credibility has me motivated to get some actual numbers up for comparison. My tuner J. Davis, is working on getting some cheap dyno time scheduled for me. I'm confident he can bring out the best of this all-motor setup, despite the fact that he's much more partial to high-boost setups.

Without any more rambling, here's the setup for testing:

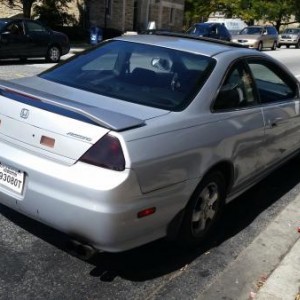
2000 Accord EX Coupe

* F23A1 Engine, stock bottom end with ~62k miles

* Mild port work on the head

* Milled head (.030", calculates to ~9.9-10.0cr)

* Bisimoto Level 2 Cam

* Bisimoto Pro Valve Springs

* Bisimoto Pro Retainers

* Cam Gear with grade 8 bolts

* H23 Intake Manifold with Adapter Plate

* P61 ECU (92-93 GSR) chipped and tuned with eCtune

* CAI (hacked up)

* eBay 4-2-1 header with 2.5" collector mod

* 2.5" Mandrel bent exhaust

* Vibrant Flat Black muffler

* Vibrant Ultra Quiet Resonator

* 12lb Lightened OE Flywheel

* LSD Motorsports 6-puckClutch

* Custom geared M2S4 5-speed transmission

* Energy Suspension Poly motor mount inserts

* ARP Head studs

* Bisimoto Licence plate frame!


That's all I can think of right now. The car has made from 169whp to 186whp depending on the dyno, location and weather conditions, which is why I plan to reinstall the stock camshaft and dyno a baseline run before swapping in the Bisi cam and tuning that. I'll post up details and a date as soon as I know something.
 
Last edited:

AFAccord

Well-Known Member
Joined
Jan 18, 2007
Posts
1,911
Reaction score
33
Location
Spangdahlem, Germany
I don't know what dyno I'll be tuning on just yet. A local legend in the area (Jason Goforth) just purchased it and took delivery about a month ago. Evidently he has some interest in the odd-ball F23 setup so he might be willing to cut me a break just to see how the F23 does. I'll try to find out.

Here's his car on the homepage of one of the local race shops. "Fastest Import to ever appear on "Pinks All Out!"

http://www.phoenixmotorsportsonline.com/
 

AFAccord

Well-Known Member
Joined
Jan 18, 2007
Posts
1,911
Reaction score
33
Location
Spangdahlem, Germany
I've received some PM's asking about parts fitment for the ARP studs and how I checked P2V clearance with a VTEC head. I'll address them here so everyone will know.

For the studs, H23 head studs are a direct fit. Plain and simple.

For the P2V clearance, I was very concerned since my head is milled quite a bit. The CORRECT way to do this is to pull the head off and place modeling clay in the valve reliefs, reinstall the head and rotate the engine assembly, then pull it back off and use a precision ruler to measure the thickness of the clay where it was crushed. This gives you an exact measurement of your piston to valve clearance.

I didn't have time to remove this head, so I just did a preliminary test. If done correctly, this will tell you whether you have clearance at all between the piston and the valve, but it is risky, and could ruin your engine if you don't do it right, or even if you miss-shift.

The first thing to do is to lock the VTEC rockers while you have the valve train off to install the cam. I only did this with cylinder number 1 since the others SHOULD be the same unless you have some serious rod stretch or bearing issues. You do this by reversing the 'dowel's' that run within the rockers. Just pull the VTEC rocker up and one of the two dowels in the primary rockers should pop out. Line up the VTEC rocker with the rocker that no longer has the dowel, and insert the shorter dowel into the open end of the VTEC rocker. This should push the longer dowel (from the VTEC rocker) partly into the primary rocker, and the shorter dowel you just inserted will hold it in place. Then, holding those dowels in place, line up the third rocker so they all stay in place. This locks the VTEC rocker to one of the primary rockers which pushes down the intake valve. Once this is done you can carefully reinstall the new cam and valve train along with the timing belt. Be sure not to let the rockers deviate from each other or you could drop some dowels down the oil passages!

The valves should still be lashed to stock specs at this point. I rotated the engine by hand, feeling for any binding and listening for sounds of any parts interfering with another. Everything was smooth, so I lashed both the intake and exhaust valves down until the set screw was flush with the retaining nut, and rotated again slowly. Luckily, nothing clicked, hit, or hung up for me. You have to pull the valve train back off to replace the rocker dowels into the correct position, then reinstall it. After that, I lashed the valves to stock specs and and double checked everything. Started her up and everything is running fine ever since. Like I said, this is a risky test, but at least at normal RPMs, I know I won't have any issues. Heaven forbid I miss a gear, then I might not be so lucky.
 

mraw112

Well-Known Member
Joined
Sep 9, 2008
Posts
422
Reaction score
7
Location
Powder Springs, Ga
are you one the stock valve springs are not? Also about claying the motor. If your claying the motor and you have new head bolts that are tty and a new head gasket. You would have to replace both of those after you clay the motor. Could you just not torque the head down completely, so the head gasket is not completely crushed, and the bolts are not strained past their yield point. I know if you have arp studs and a used head gasket your fine, but ive always wondered this. Also i know that it would not give 100% percent accuracy, but if your in a certain range you should know your fine.
 

AFAccord

Well-Known Member
Joined
Jan 18, 2007
Posts
1,911
Reaction score
33
Location
Spangdahlem, Germany
100% stock valve train right now.

I figure you'll always have a used gasket if you're doing this. As for the OE bolts, I think you'd be safe just torquing them down to the first set and claying it that way. When you torque down the head, you're supposed to torque all the bolts to 30-40ft/lbs first, then final torque down to ~71ft/lbs IIRC, then re-torque after some mileage. So if I didn't have any option but to use the OE bolts, I'd only torque to around 30ft/lbs to clay it.

EDIT: After seeing how my setup has gone (milled head, 'semi-aggressive' cam, 7200rpm, and cam adjustments), I can't imagine anyone having real P2V issues unless you're going to a level 3 hardweld.
 
Last edited:

AFAccord

Well-Known Member
Joined
Jan 18, 2007
Posts
1,911
Reaction score
33
Location
Spangdahlem, Germany
186 hp... hmm... NOT bad at all

Yeah. It helped that the dyno was outside in 35 degree weather, at sea level, and naturally reads higher. I don't plan on using that one anymore since the numbers seemed so inflated, even after correction.

On the other hand, I've been on another dyno that I KNOW reads low since I ran a 15.7 1/4 mile only two days after making just 146whp on it.
 
Back
Top