the acclude's face lift 98-00 coupe front swap and paint

98acclude

Well-Known Member
Joined
Jul 29, 2008
Posts
635
Reaction score
0
Location
Joplin Missouri
I've never actually done one of these before so Im not sure how to go about this. lol alright well I'll tell you guys what Im doing and then I'll start posting progress shots as I go! im currently in auto body school and I work full time at a local auto body shop and we now get to work on our own cars in class! :D

Alright what Im trying to accomplish by the end of school is Im swapping my front end for the 98-00 coupe front with a type r style grill and OE style lip, ek9/bb6 sidemarkers, 01-02 rocker moldings, roof spoiler and a lip spoiler. Im ditching my gold rear emblem for another chrome one and I want to integrate the vtec emblem in the grill. Im also tryin my hand at some custom work and Im gonna attempt to go for a boser hood! I've only seen us do it once and once or twice on photoshop... after that's all said and done it will have all the dents n things repaired and full paint!... so it's going to be interesting... stay tuned! :p anyway if you have any questions about anything feel free to ask and I can take better pictures of whatever you want me to, like I said I've never done a build thread or anything before so I dunno what Im doing! haha

now some progress pics of what's going on:

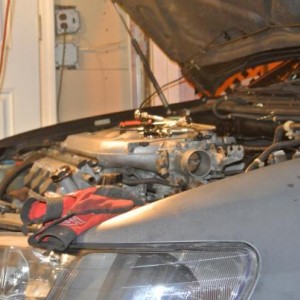
Clean up before heading to the shop
2yxf34j.jpg


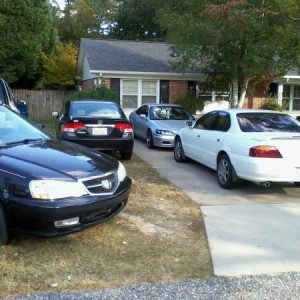
Made it to the shop
15x24b8.jpg

28m82q.jpg


Now for the ugly and what needs fixed... poor car... you used to be kinda pretty... lol
5eip0p.jpg

(alright real quick question... has anyone else with a sedan had a hell of a time with this damn inner tail light filling with water? I've replaced this housing twice... Im about to again this time but does this just happen due to ****ty design with the whole key hole in the tail light?)

j98rbb.jpg

v4bfyg.jpg

2nh3k1y.jpg

aew0tl.jpg

20793c2.jpg


with love from the ex gf
34s5nup.jpg

dw53jr.jpg


alright enough bad... lets move on to progress:

This is the new door getting taped up to be jammed
300qryb.jpg


inside painted
2cpvx2u.jpg


testfitting the coupe bumper... I dont have pics or good pics but I also deleted the license plate bracket tabs.. you may notice them in these

28ldspd.jpg

70e3wm.jpg

8x7i55.jpg


anyway... that's all I have for now! I'll try to update as often as I can! and Im no photographer so if you need better reference pictures of anything just let me know and I'll snap pics when Im in class! thanx for checkin out the build and progress! hopefully it turns out well but we'll find out! :p
 

capsidx

Well-Known Member
Joined
Aug 21, 2016
Posts
476
Reaction score
21
Location
Florida
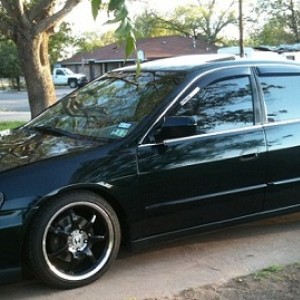
Yeeaaaaa, Im going to need info on those wheels and tires. Now. IMMEDIATELY, NOW!!! :Jedi: lol
 

KONG

Active Member
Joined
Sep 10, 2017
Posts
39
Reaction score
5
Location
So. Cal
5eip0p.jpg

(alright real quick question... has anyone else with a sedan had a hell of a time with this damn inner tail light filling with water? I've replaced this housing twice... Im about to again this time but does this just happen due to ****ty design with the whole key hole in the tail light?)

I have the same aftermarket tail lights, I don't have a problem with water getting in them.

Looking forward to seeing your car finished.
 

DarkSideAccord

nadeshiko fobz ftw..
Joined
Sep 19, 2005
Posts
22,336
Reaction score
153
Location
CA
i had issues with those tails before, but it doesn't rain much in socal.. i still have the inner pieces if u want them haha... just pay for shipping

looking forward to how your project comes out :beer:
 

98acclude

Well-Known Member
Joined
Jul 29, 2008
Posts
635
Reaction score
0
Location
Joplin Missouri
Yeeaaaaa, Im going to need info on those wheels and tires. Now. IMMEDIATELY, NOW!!! :Jedi: lol

they arent anything super special... they are xxr 531 17x8.5 +20 4x114.3 platinum finish! :D the tires are ****ty but they are getting replaced... they are 215 40 17... Im gonna go with some nittos when it gets done here.

i had issues with those tails before, but it doesn't rain much in socal.. i still have the inner pieces if u want them haha... just pay for shipping

looking forward to how your project comes out :beer:

I would've taken you up on that if I hadnt already bought another inner set!

but thank you guys for the support! I got some new progress pics to add! I hope you guys enjoy..

alright before I get started Im gonna give a little info on this hood... I got the idea when I saw a couple pics floating around on here a while back. One picture of it acutally done on a white 01-02 coupe (poor bumper fitment but I'll get into that in a bit) and one picture that was photshopped of a silver coupe with the headlight areas and the middle filled in. So I have 2 reference pictures and an idea... this is all experimental with help from my teacher who has been and still does autobody today for the past 30 years but I think it's going to turn out pretty nice. Im try to make everything look as factory done as possilbe, if that makes since... Im not only paying attention the the top where you can see but Im addressing the underside of the hood. If you are going threw this much trouble then why not try to build it to last? Im new to welding but I've learned everything else I know about vehicles on this car over the years I've owned it.

Anyway back to the poor bumper fitment, because mine I feel like sags a bit in the front middle. Some one made a comment about that on that thread with the white 01-02 coupe boser style hood about how the bumper fit poorly.. that leads me to believe that it may be a front end swap on a sedan rather than a coupe. While doing this swap I learned that not only do the bumper and hood need to match but you also need the upper grill bumper bracket thing from the coupe as well because the coupe bumper will not mount up with the sedan upper bumper grill backet thing, they are different. and I mean you can put the bumper on fine without that bracket but it causes the front middle to sag because there is nothing for the top of the bumper and the grill the mount to, only the tabs under the headlights and the bolts in the fenders hold the bumper on without that piece. so I suggest anyone that does the coupe front end swap also invest in the upper bumper grill bracket also to have proper fitment... sorry I had to throw that in there..

anyway lets get to some pictures shall we? :p

the pieces Im using are pieces I cut out of 2 other hoods... the center section is the side of a hyundai hood and the sides are out of another hyundai hood that we had laying around.

We started with the center section (this was actually the easiest of the pieces to get fitted well and welded up!

2i6tcj.jpg

6ftjzs.jpg


after getting the center welded in and grinded down, we test fitted it back on the car and Im decided how I wanted the spot to run over the headlights to look.

avnfk2.jpg

t8198n.jpg

2nresrm.jpg


here's pics of that side tacked on and test fitted to make sure it doesnt smash the headlight everytime it closes.. it needs to sit just ever so slightly above so you dont tear up the headlights opening and closing the hood.

r1wgmw.jpg

24w56y8.jpg

2v34lsn.jpg


Here we started addressing the underside of the hood.. we are fabbing the underside of the panels around the headlights, because hoods are normally comprised of 2 panels and the upper panel is rolled over top of the bottom one and then is usually welded and a seam sealer is added for rust prevention n such... so this is basically a few pics of that going down. just the fabbing of the piece and then sealing it all up. I would've taken more pictures but I get sucked into what Im doing and forget to take pictures of everything. lol

23svehs.jpg

2433vv6.jpg


the tape is used to boarder where I want the sealer, that way after you apply it, you can smooth it out and let it tack up a bit then pull the tape and you'll have a nice uniform sealed spot rather than a bunch of crap all over the place.

fa9d2v.jpg

2up2xd1.jpg


Now Im letting the sealer dry over night so when I go in tomorrow I can finish welding up the top and then get to body work... unfortunately the damn hood I got for this project is full of hail dents which I couldnt see when I picked it up cause it was dirty and the paint is faded but I will address those when I get the rest of this custom stuff out of the way! if there is anything you want to know that I didnt mention or dont have pictures of just ask and I'll try my best to explain and get a reference picture if you need! thanx for looking there is more to come! :D
 
Last edited:

Mikey

Well-Known Member
Joined
Jul 24, 2010
Posts
3,369
Reaction score
29
Location
Middle America
Lookin good! Check your PMs, we’ll have to kick it some time and I can give you a hand with some of this. I’ve not done it either but an extra set of hands doesn’t hurt and plus you’re doing side markers and I need to see/experience that so I can mine, lol.
 

98acclude

Well-Known Member
Joined
Jul 29, 2008
Posts
635
Reaction score
0
Location
Joplin Missouri
Lookin good! Check your PMs, we’ll have to kick it some time and I can give you a hand with some of this. I’ve not done it either but an extra set of hands doesn’t hurt and plus you’re doing side markers and I need to see/experience that so I can mine, lol. ��

back at you my dude! :D and I appreciate it!
 

Rusty Accord

Well-Known Member
Joined
Feb 27, 2017
Posts
434
Reaction score
3
Location
USA
Now that is looking good.
I thought I read in 1 of the forums on here about the coupe nose having a spacer/filler block on the topside of the bumper to lift it up. Maybe it was a bracket. I'm not sure, but it was something like that.
I do like the shaved square block of what would be the license plate (I still haven't figured out what it's for since the plate attaches to a bracket). That little mod really cleans up the nose of the car.
 
Back
Top