
cfox28
Well-Known Member
Hey guys, Just wanted to share what I did with the strut tower bar off the tl that I found at the junkyard. As a precursor, I know this probably has been done before, and the strut tower bar of the tl is not new news. I wanted to show people the results of the process I used.
Goal: to have a naked metal, and perhaps polished look
Materials:
Aircraft Paint remover specifically and safety gear

Wire Brush

drill

clamps (these quick release ones are handy as you will be moving them around)

Process:
1 -Wash of any main dirt. it does not need to be pristine
the purpose is to allow the next steps stripper to be most effective
2 - Pour aircraft paint remover into a disposable container (follow directions on back)
- apply the paint remover on thick, especially in creases
- allow 15 or more minutes, you will see something like this

- the bubbling/crinkling is what you want
- you can then scrap it off with something, I used an old giftcard.
- you will notice not all comes off

- some will say it is more effective to wrap the object with seran wrap to contain the remover after it has been applied,
- i just repeated to the process twice more.
3 - now its time to remove the small amount left, and reveal some of the metal.
- you will noticed, after it is stripped it is a sort of dull grey metalic. This step rejuvenates if you will the look of the metal
- take the wire brush and put it into your drill. I used a corded one with a handle allowing me both power and leverage
- clamp the bar to the work table.
- be mindful of the clamp, I used scraps of mdf on either end to prevent any damage to the STB, scraps also distribute the force
- now start on one side trying to remove as much left as you can
- this requires some elbow grease, so push down hard.
- as you finish up removing anything thats left, you will notice the welds
- the welds aren't pretty, use the brush bit and work them hard. tip I used either my side, or holding the handle to the table for leverage
- finishing pass. in the end I started at one end and applied even pressure across the bar and went back for another pass (like mowing the lawn
4 - use a microfiber cloth and wipe the bar down. you could also use rubbing alcohol to clean it if you wanted to
- apply a thin coat of clear, wait, and then two more thicker coats

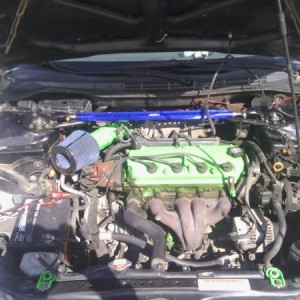
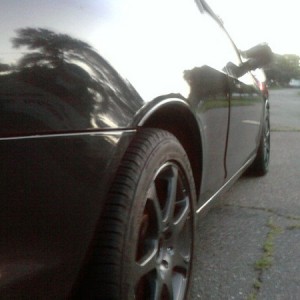
placing it where it will go to see what it will look like

Goal: to have a naked metal, and perhaps polished look
Materials:
Aircraft Paint remover specifically and safety gear
Wire Brush
drill
clamps (these quick release ones are handy as you will be moving them around)
Process:
1 -Wash of any main dirt. it does not need to be pristine
the purpose is to allow the next steps stripper to be most effective
2 - Pour aircraft paint remover into a disposable container (follow directions on back)
- apply the paint remover on thick, especially in creases
- allow 15 or more minutes, you will see something like this
- the bubbling/crinkling is what you want
- you can then scrap it off with something, I used an old giftcard.
- you will notice not all comes off
- some will say it is more effective to wrap the object with seran wrap to contain the remover after it has been applied,
- i just repeated to the process twice more.
3 - now its time to remove the small amount left, and reveal some of the metal.
- you will noticed, after it is stripped it is a sort of dull grey metalic. This step rejuvenates if you will the look of the metal
- take the wire brush and put it into your drill. I used a corded one with a handle allowing me both power and leverage
- clamp the bar to the work table.
- be mindful of the clamp, I used scraps of mdf on either end to prevent any damage to the STB, scraps also distribute the force
- now start on one side trying to remove as much left as you can
- this requires some elbow grease, so push down hard.
- as you finish up removing anything thats left, you will notice the welds
- the welds aren't pretty, use the brush bit and work them hard. tip I used either my side, or holding the handle to the table for leverage
- finishing pass. in the end I started at one end and applied even pressure across the bar and went back for another pass (like mowing the lawn
4 - use a microfiber cloth and wipe the bar down. you could also use rubbing alcohol to clean it if you wanted to
- apply a thin coat of clear, wait, and then two more thicker coats
placing it where it will go to see what it will look like
Last edited: