finch13
Well-Known Member
DISCLAIMER: This work belongs to PhotosGuy, member and moderator on the Canon POTN forums.
Link to original thread can be found here.
Mods, could we sticky this? I was going to add it into the "Photoshoot tips" thread, but this deals specifically with lighting the car.
Link to original thread can be found here.
As in anything else, there's no one way to take a good looking shot of a car. Some guys like grungy garage pics. Others put it in 20% of the frame in what looks more like a landscape shot. Neither are "Wrong" if you get the results that you want.
What I'm going to address here is mostly using the natural light that everyone has access to to make the car itself look as good as possible, without having to buy extra equipment for lighting. Results like these aren't all that difficult. Here's how to get them.

NOTE: In most of these examples, read through the whole thread. In many cases, there are some things that I didn't put in the first post.
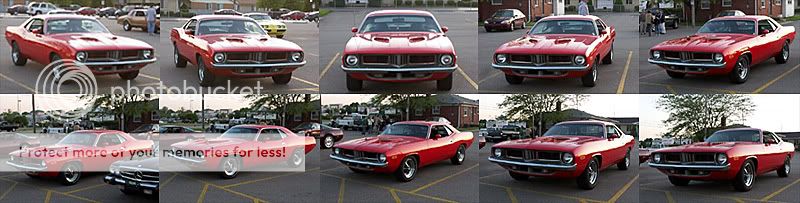
Cars are huge, curved mirrors that reflect everything in sight including you, the pole/tree behind you, & the people in the white t-shirts walking by 50 feet away. But reflections help to define the contour of the body & the sky is your friend if you don’t have the opportunity to get them in a studio where you can light with flats. Check out the studio here:
http://www.1880studios.com/
Note the rolling flat in image #3 used to bounce some light into the front. Without a studio, I might use a convenient building to do that.
2007 Chevy HHR
We used huge 15' X 30' frames (on casters) covered with cloth to reflect into the sides of the car. Some were hung as overhead flats. These were lit with 20K watt lights. Smaller, highlighting reflections were lit with 750's.
Maybe a bit of direct light was used on just the tires to bring the tread up to the overall level of light, or we’d put a bit into the wheels/hubcaps to give them a little “pop”. Hint: don't clean the tread - the dust helps here. Other than that, we almost never used direct light on the car.
This is why I keep telling you guys to rethink lighting cars in garages. This gives you an idea of what you have to do inside to even start to make a car look good, & it's why I keep telling you to take it outside & wait for the right light on them.
ProPhotoLife Video - '57 Chevy in a small studio.
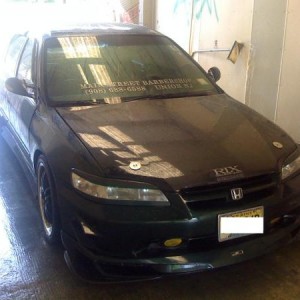
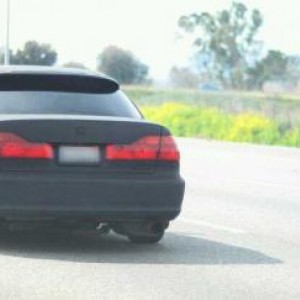
In our case where we're shooting cars at meets in parking lots and we usually can't move it, wait for the late light, WALK AROUND & LOOK at what the light is doing! (I shouldn't have to say that, right?)Here's an example of what I usually have to work with:
Image #2
LOOK at what is growing out of the body! Poles, signs, heads...
LOOK at what is reflecting in the body! Trees, people, other cars, buildings... (I shouldn't have to say those either, right?)
More on this here where I had the option of moving my Malibu: MOVE YOUR FEET! A <rant> of sorts.
& in Post #41 on page 2 of this thread.
Advantages to "Wait for the late light":
The car will look it's best. Use the reflections in the body to show off the contours of the design.
Need more drama? Try later light: Malibu in the snow.
NOTE: I prefer to not use a CP (Circular Polarizer) for these. More here.
Disadvantages:
The perfect light may only last for 5 minutes, & usually comes after you've put the cam away. So keep shooting!
The good light may only last for 10-15 minutes.
Acceptable light may last for an hour, & sometimes like in this series A "GREAT car": '69 Plymouth Road Runner 440, a building will shade the hot light off the car so you can shoot earlier than you expect.
Sadly, sometimes you just have to shoot before the light is right. If you can't move the car, then move yourself & try some different angles. Here, the late, but not late enough (for me) sunlit ones look pretty good.
'40 Fords - Three of 'em!
"Hot" Sunlight: Cars in sunlight don't have to look terrible (to me), but it helps if you can move it to promote the reflections that you want to see in it. Sometimes you don't have a choice, & here you can see that some angles work better than others.
'65 Mustang "Best of Show"!
Silver cars in sunlight look good almost anytime: Post #52
Sometimes we have to shoot even though the sun is shining, & we have the option to move the car. If you can find the shade of a building, hopefully one painted white, it will act like a white flat. Some of these were shot that way.
2007 Chevy HHR
Another in the shade example: '33 Ford Pro-Street 3 Window Coupe 454
The alternative to the studio, but not my first choice, would be to shoot outside if it's overcast & the sky becomes an overhead flat. The problem with cloudy days is that the clouds can make uneven reflections in the car. See the hood in this one: Patrick's Camaro
My personal favorite is just after sunset with a clear, blue sky, as I like the warm, low contrast quality of the light. Just before sunset works best if there are some low laying clouds or haze to filter the direct sunlight. It works well without the "cloud filter" too, but the highlights in the body are stronger. Sometimes a distant low building will give the same effect of filtering/blocking the hot sun, but still keeping the brighter sky to reflect in the body.
Sunrise gives similar results to "late light", except that the car will be cold & you’ll have condensation problems, so you’ll need a lot of towels!
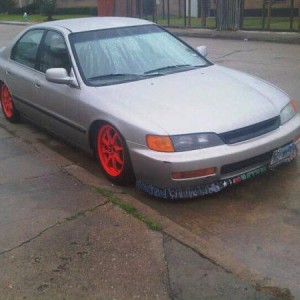
Preferably, you'll have a BIG, uncluttered area like a BIG parking lot behind you to minimize crap reflecting into the car. That wasn’t the case in the 1st pic below. It was a parking lot, but we’d get 100+ cars all parked together & they’d reflect into each other. So, after sunset worked well here, cause hopefully the cars on either side of the one you wanted to shoot might have left.
Image #3 was taken at 8:10 PM on August 26, 2004
300D, RAW, Kit lens @ 37mm, f/11, 1/10 sec., ISO 100.
The final PS shows it with some of the reflections in the side & hood cleaned up.

What seems to be the hardest part of the changes to the 1st pic would be the selection of the car before removing the background. It doesn’t have to be. Try out the “Selecting areas in PhotoShop” example I put here.
http://photography-on-the.net/forum/...ad.php?t=39994
These were all shot in a parking lot:
Patrick's Camaro
Jammin' Jerry's '67 Mustang. - 1st shots/thread.
Mike's '55 Chevy proof
Blown '37 Willys - A Beauty with a Beast!
Sweet Chopper
Some shots of Jim's '68 AMX: See post #39 for other background ideas and some minor retouching.
Turning the lights on can add visual interest:
2007 Chevy HHR
Links to Black cars, Red cars, + a sliver car in sunlight example: Silver cars in sunlight look good almost anytime: Post #52
Note: This link is duplicated in the "Hot" Sunlight topic above.
===============================================
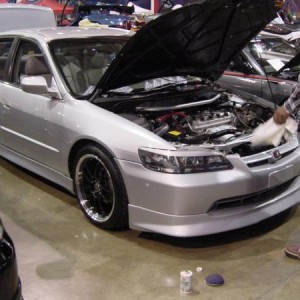
Image #4 was shot in a studio on 4” X 5” film, but there’s no reason that you can’t do a similar shot outside. The main lighting was light bounced on a white painted 4’ X 6’ sheet of plywood at the tripod angled toward the front of the bumper. This could be simulated by a white building behind you. Or even late light from the sky.
The cove background could be white paper extended horizontally & taped to a wall. Or a garage door.
Google Search: photography "background paper" for a lot of links.

Try a few shots with the cars lights on for part of the exposure. Use a tripod & don’t be afraid of long exposures. It makes it easier to get the proper partial exposure of the lights.
Malibu in the snow.
If you're doing interiors, start with some light bounced off the headliner. We would put a 30” X 40” white card up there & hold it in place with those "S" hooks they use for hanging curtains. Maybe put a card against the seat back to reflect some light into the dash. Art board with gray on one side & white on the other side gives you options for the amount of light you're bouncing in.
OTOH, in the Malibu link above, I just let the automatic interior lights fade out during the shot.
I you’re doing a side shot (profile), you might place a 30” X 40” white card on the ground to reflect into the wheels. Be careful that it doesn’t reflect into the sides. That can be controlled by putting a black card over part of the white card. It's easier to try the Layer Mask work in PS in the link below, & it's much easier to control. I usually use a longer focal length lens for these when I have the room.
Rear shots, especially of cars with huge tires, look awful with a wide angle lens. Try to get back as far as possible.
Finally, if you can, shoot RAW. It makes post processing SO much easier if you're working the highest quality file. And it can save your butt if you screw up!
Why I love RAW - '53 Ford Sunliner
This should be enough to get you started. For more ideas, go to your local auto dealer & pick up some brochures, or check out the Ad's in the better car magazines.
Cropping/framing: Keep in mind that they often use a crop that doesn't make the car shot look good, because they need space for text. They also crop tighter to fit a small image on a page. Some examples of crops are in this thread: MOVE YOUR FEET! A <rant> of sorts.
If you want your car shot to look good, try to leave more room at the front for it to "move into."
Have fun, & let us see your results.
Film "tricks" for exposure: A few other things I learned relating to exposure
I don't want the cam to do anything I didn't tell it to do, & I don't trust the programming geek at Canon to set the exposure where I want it. Here's what started out as one reason to use manual settings & I learned how highlights affect digital metering:
Gray card: Why your meter may be lying to you! I started out to check one thing & learned about another. See how Auto WB (White Balance) is something I don't use in the gray card last example of the 2nd image.
The quick answer is in "How the subject affects the exposure & why manual keeps me worry free:" Post #47
Here's a good starting point for exposure. Pick the aperture and shutter speed you want & set them in "M". Then you only need to adjust the ISO to get the exposure that you need.
Need an exposure crutch?
EDIT: White balance
Reality isn't everything. Would we try to make a sunset neutral? The "Correct" WB may not be the "Right" WB for a image. Remember, you're the judge of your own image. We used to use gels to add "romance" to our car shots for ad agencies.
More in post #12.
Gray Card…White Paper. What’s best?
EDIT: Take a look at this thread for how to use a Layer Mask to selectivly lighten/darken part of a pic: Airport runway shoot
More here: You can level out the exposure using a selection & a Layer mask. See post #9; PS Elements in Post # 14
A question about sky
EDIT:
In the middle of this thread I posted the Layers Palette showing the "workflow"that I used in PS7.
'48 Chevy
EDIT:
I've added a workflow using Layer Masks to replace a background here:
Need to remove a background from something?
EDIT: Red's question on Studio Car Shots.
There's a lot of good info in Car Photography for Dummies. Be sure to check out his Catching the Eye of an Editor links. too.
EDIT: Lambocars offered up 16 good tutorials here.
Car Photography Tutorials - OVERVIEW
EDIT: I don't agree with everything he says in here, but I'm posting the link if you want another opinion for info:
Popular Hot Rodding - Car pic tips.
Garage shots: See post #40
Adding a feeling of motion when shooting moving cars at night: The 2008 Woodward Dream Cruise threads:
Post #51
EDIT: There's a comparison of two shots of a '34 Coupe in late, & even later light, added a few posts below.
I hope that it helps you out.
Mods, could we sticky this? I was going to add it into the "Photoshoot tips" thread, but this deals specifically with lighting the car.