

OneLoud00Accord
Well-Known Member
So I have been tossing up the idea of painting these for a long time now, I like the look of them stock so much, but i figured its time for something fresh so I built up the desire and went for it...
First of all, I had to get inspired, and I wanted to know if it would look good... time for microsoft paint at 4 am!

Well I think that looked awesome so I went for it. I didnt take enough pics and im not good enough to make a DIY so im posting in here... All pics are on my cell phone so they arent the best
Have to clean the rims:

Nice and shiny:

Taped off:

Good enough paint for the backside:

The back...I sanded it with 100 grit to help remove road debris then 320 before spraying:

Front stock vs primer... I sanded some major scuffs with 100 grit then the whole thing with 320:

Now for the good stuff:

Getting black! I used a light coat then 3 heavier coats in 10-15 min intervals, followed by 3 coats of clear, before the last coat I put the valve stem cap back on and the center cap in place:

Haha so I just though this looked awesome after I sprayed:

Finished product! After I peeled the tape I used a razor to fine tune the black/polished edge and gave the whole thing another coat of clear to protect that edge:

New next to old... Its weird I think the black makes them look smaller:

Two wheels done, two to go:

On the second rim I tried peeling the tape before clearing it, since I wanted to spray clear on the black/polished edge anyway, and the paint had tiny little chips come up(almost not noticeable but i want these as perfect as possible) so I think im going to stick to the way I did it on the first rim. It was raining all day and I didnt get to take pics of them on the car but they look sick. Im painting the other two tomorrow and probably my drums and calipers just because I can so more pics then. So far I have $18 invested in this project but it isnt looking like the paint will make it through 2 more rims. It sucks to have to buy two more cans though just to only need like 1/4 out of each can, but oh well that makes $30 for basically brand new rims. Let me know what you all think!
First of all, I had to get inspired, and I wanted to know if it would look good... time for microsoft paint at 4 am!
Well I think that looked awesome so I went for it. I didnt take enough pics and im not good enough to make a DIY so im posting in here... All pics are on my cell phone so they arent the best
Have to clean the rims:
Nice and shiny:
Taped off:
Good enough paint for the backside:
The back...I sanded it with 100 grit to help remove road debris then 320 before spraying:
Front stock vs primer... I sanded some major scuffs with 100 grit then the whole thing with 320:
Now for the good stuff:
Getting black! I used a light coat then 3 heavier coats in 10-15 min intervals, followed by 3 coats of clear, before the last coat I put the valve stem cap back on and the center cap in place:
Haha so I just though this looked awesome after I sprayed:
Finished product! After I peeled the tape I used a razor to fine tune the black/polished edge and gave the whole thing another coat of clear to protect that edge:
New next to old... Its weird I think the black makes them look smaller:
Two wheels done, two to go:
On the second rim I tried peeling the tape before clearing it, since I wanted to spray clear on the black/polished edge anyway, and the paint had tiny little chips come up(almost not noticeable but i want these as perfect as possible) so I think im going to stick to the way I did it on the first rim. It was raining all day and I didnt get to take pics of them on the car but they look sick. Im painting the other two tomorrow and probably my drums and calipers just because I can so more pics then. So far I have $18 invested in this project but it isnt looking like the paint will make it through 2 more rims. It sucks to have to buy two more cans though just to only need like 1/4 out of each can, but oh well that makes $30 for basically brand new rims. Let me know what you all think!

")
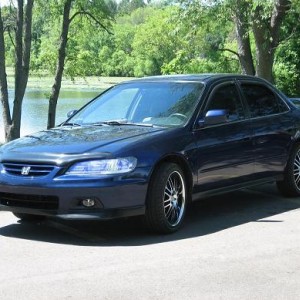
 I want some of these in either 17 or 18