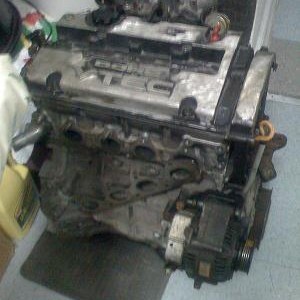


My girl is coming up on 196,000 miles and I haven't replaced any bushings, etc to date. So I figured I'd start with the leading and trailing arms in the rear. Given that the TL (2004) is a close cousin, I figured I'd try these parts. I thought they might be thicker (they're not) but at least they're cheaper from the dealer than our parts.
Of course, it should be said that any work you perform on your vehicle is your own responsibility. The information presented here is what I found worked for me.
The trailing arm (driver's side) to be replaced:
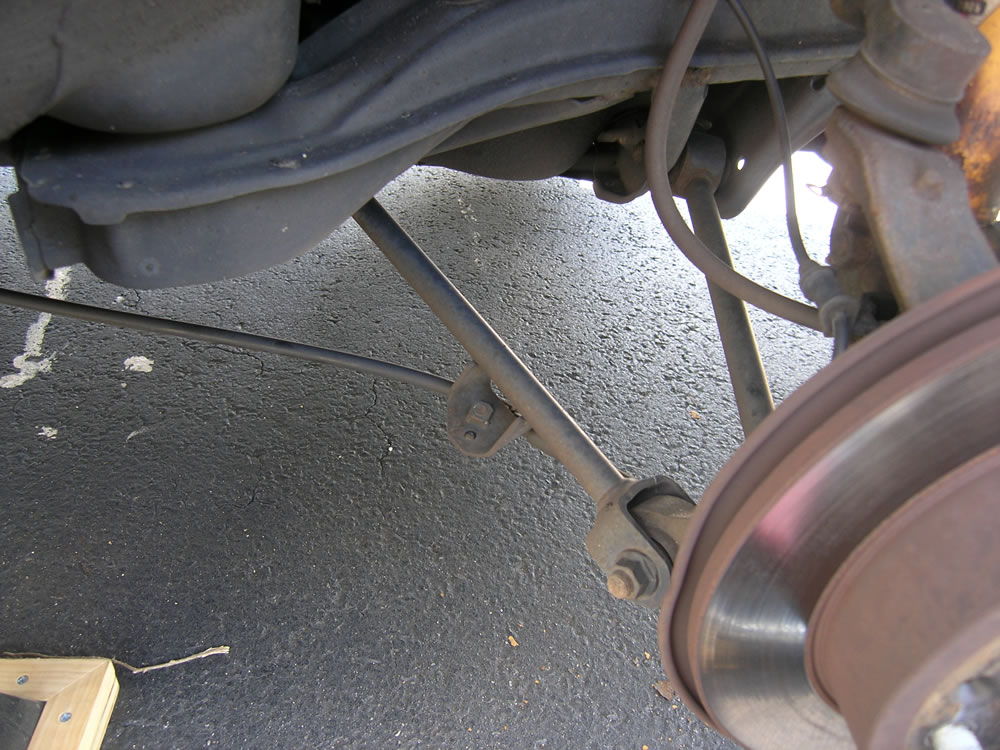
The leading arm (driver's side) to be replaced (note the cracked bushing on the right side of picture; the trailing arm is similar):
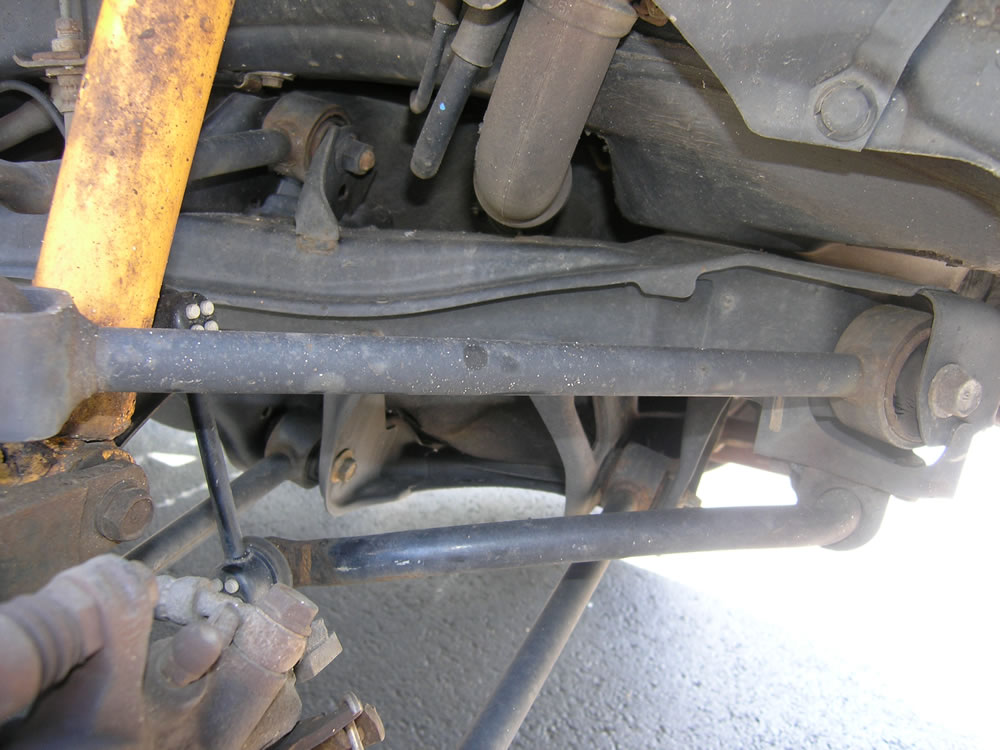
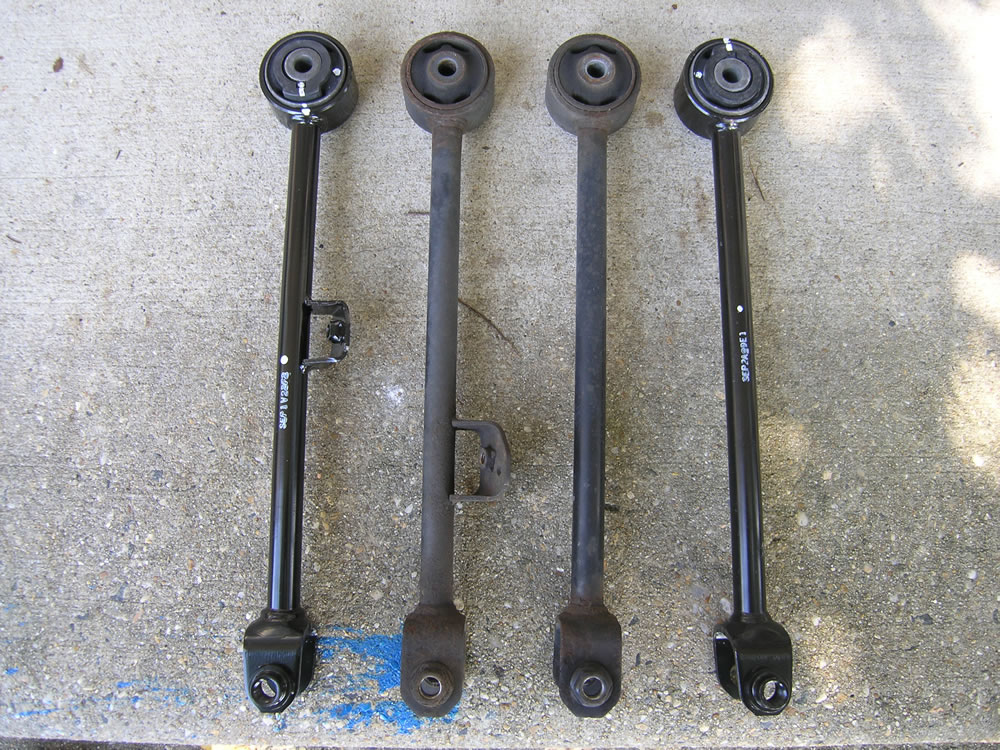
The TL arms (outside) next to the old arms I removed. The only difference is the standoff for the parking brake cable. I just bent the clip and moved it a few inches and it seems to be fine.
I was able to replace 3 of 4 arms without issue. The bolt near the knuckle on the driver's side trailing arm, however, was stuck to the point that while loosening the bolt, I sheared the rubber in the bushing.
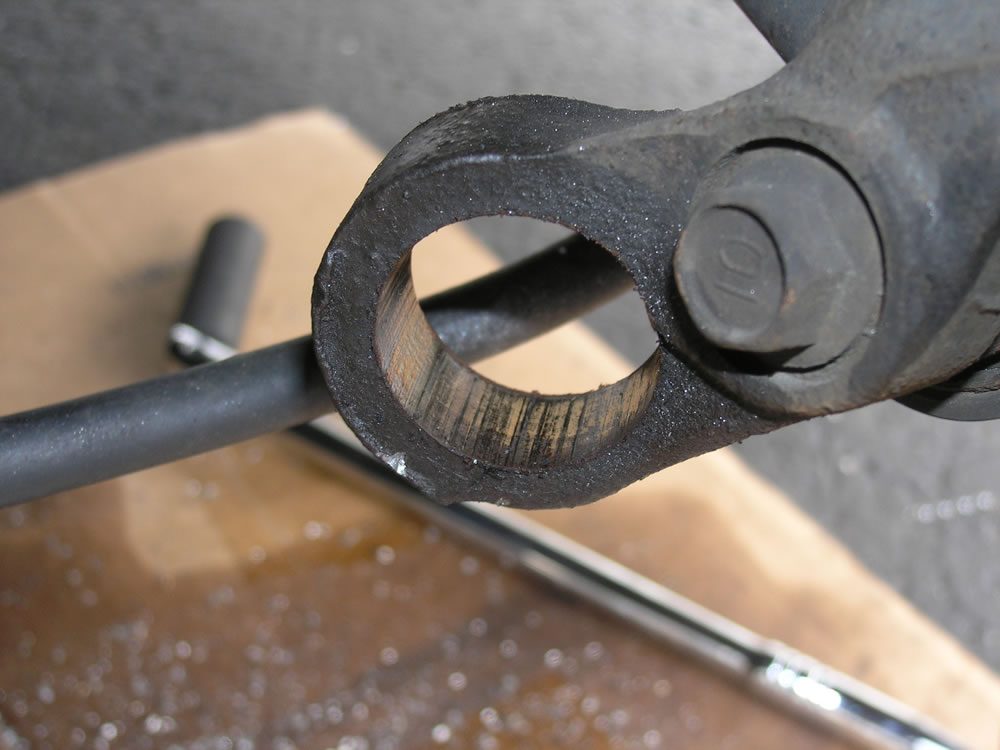
Good thing the arms are made of relatively soft material because the only way I could remove the driver's side trailing arm was by drilling it out and bending it until it broke off:

Which brings me to how I replaced the bushings without a press.
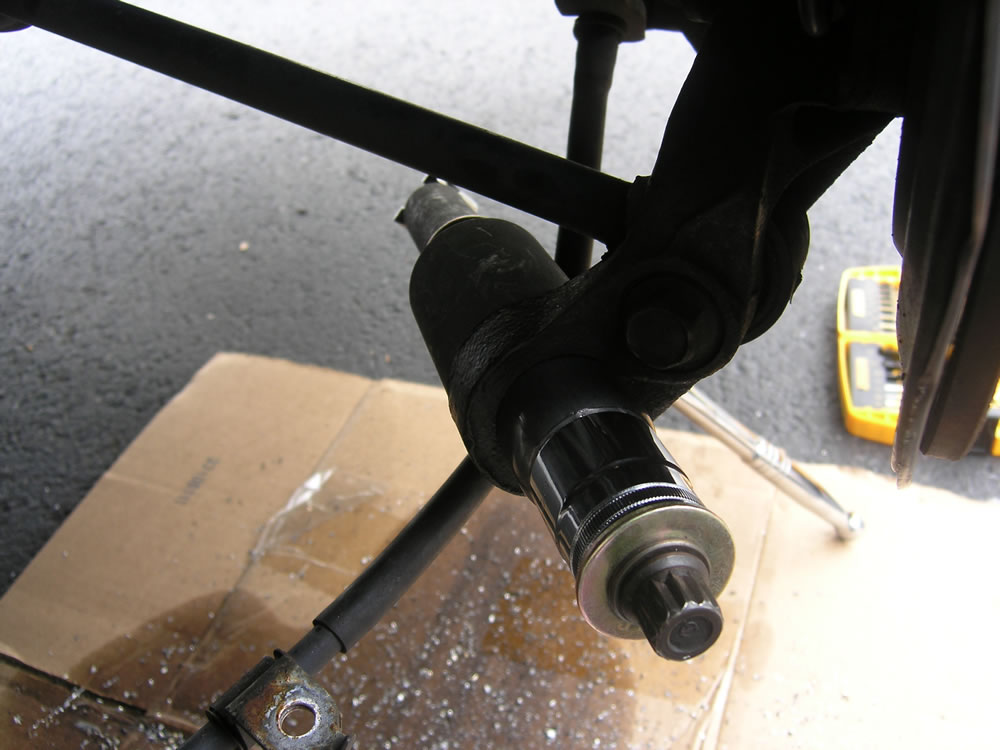
This is the "tool" I used to remove the old bushing and seat the new bushings. It is essentially a cylinder head bolt (one of the long ones), a nut, a couple of washers, and two sockets. The 25mm socket pushes the bushing in (or out) and the 36mm 12 point axle socket "receives" the bushing on removal. The idea being to tighten the bolt to the point that the bushing has no choice but to come out of the knuckle. The axle socket needs to be 12 point as the bushing does not fit inside a 6 point socket. The 25mm socket is a GearWrench socket; make sure whatever size you use is large enough to push the edge of the bushing but not large enough that it gets stuck in the knuckle.
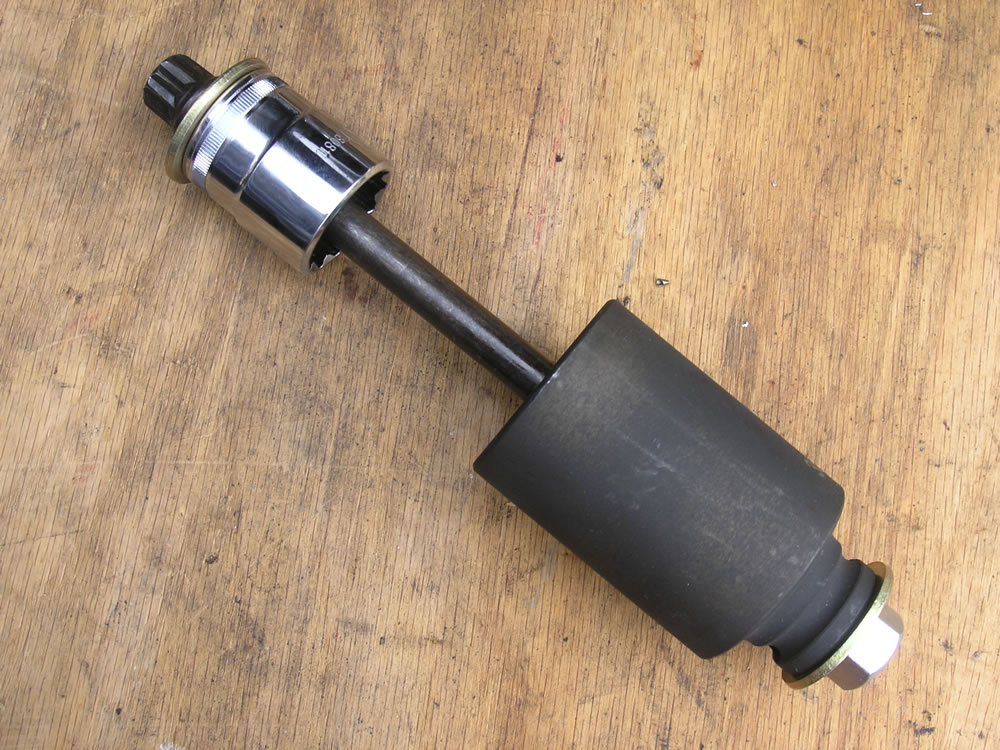
You will need a couple of breaker bars to tighten the bolt. The bar on the back end will need an extra deep socket to hold the nut. Just put it in such a way that tightening it presses the handle against the ground.
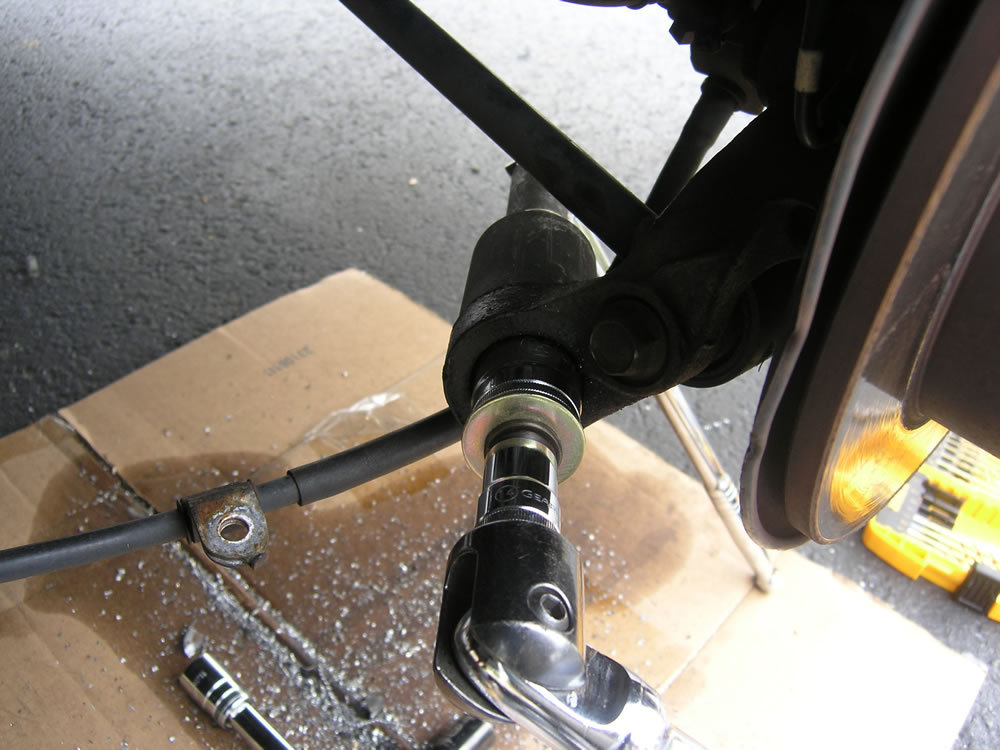
Then tighten the bolt until you have this:
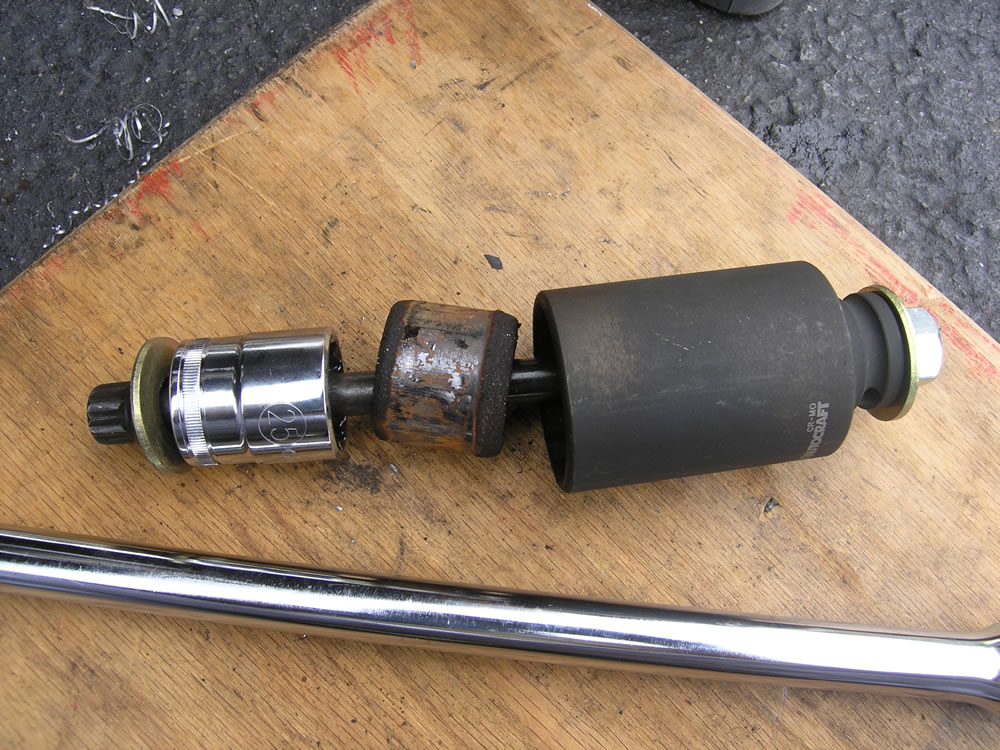
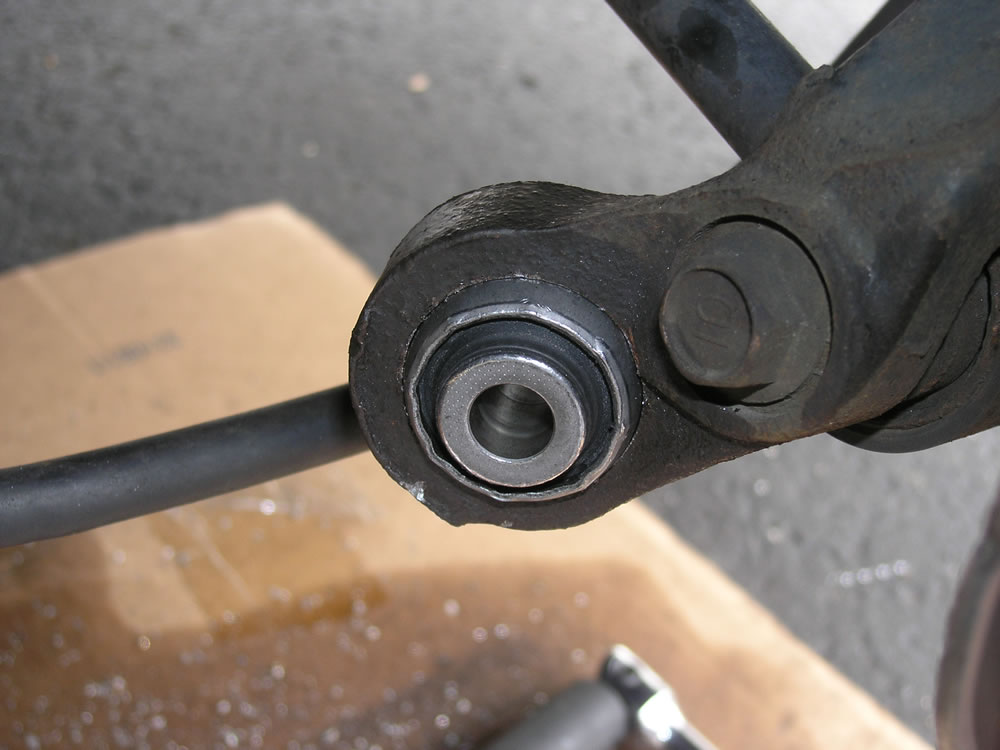
Setup for installation is pretty much the same. Put the new bushing on the "pusher" side, tighten bolt until it's seated. I pretty much eyeballed what was even on both sides. I don't know how critical it really is as the bushings from the factory are clearly not centered.
End result:
Note that there is only enough room to perform this while the knuckle is on the car for the trailing arm bushings. In order to remove the leading arm bushings, the knuckle would need to be removed.
I hope this proves helpful to someone. I can't claim to have come up with this method as there are "universal" kits available that work essentially the same way. Of course, they are around $500 versus the cost of two sockets, a couple of washers, a nut and a long bolt.
Of course, it should be said that any work you perform on your vehicle is your own responsibility. The information presented here is what I found worked for me.
The trailing arm (driver's side) to be replaced:
The leading arm (driver's side) to be replaced (note the cracked bushing on the right side of picture; the trailing arm is similar):
The TL arms (outside) next to the old arms I removed. The only difference is the standoff for the parking brake cable. I just bent the clip and moved it a few inches and it seems to be fine.
I was able to replace 3 of 4 arms without issue. The bolt near the knuckle on the driver's side trailing arm, however, was stuck to the point that while loosening the bolt, I sheared the rubber in the bushing.
Good thing the arms are made of relatively soft material because the only way I could remove the driver's side trailing arm was by drilling it out and bending it until it broke off:
Which brings me to how I replaced the bushings without a press.
This is the "tool" I used to remove the old bushing and seat the new bushings. It is essentially a cylinder head bolt (one of the long ones), a nut, a couple of washers, and two sockets. The 25mm socket pushes the bushing in (or out) and the 36mm 12 point axle socket "receives" the bushing on removal. The idea being to tighten the bolt to the point that the bushing has no choice but to come out of the knuckle. The axle socket needs to be 12 point as the bushing does not fit inside a 6 point socket. The 25mm socket is a GearWrench socket; make sure whatever size you use is large enough to push the edge of the bushing but not large enough that it gets stuck in the knuckle.
You will need a couple of breaker bars to tighten the bolt. The bar on the back end will need an extra deep socket to hold the nut. Just put it in such a way that tightening it presses the handle against the ground.
Then tighten the bolt until you have this:
Setup for installation is pretty much the same. Put the new bushing on the "pusher" side, tighten bolt until it's seated. I pretty much eyeballed what was even on both sides. I don't know how critical it really is as the bushings from the factory are clearly not centered.
End result:
Note that there is only enough room to perform this while the knuckle is on the car for the trailing arm bushings. In order to remove the leading arm bushings, the knuckle would need to be removed.
I hope this proves helpful to someone. I can't claim to have come up with this method as there are "universal" kits available that work essentially the same way. Of course, they are around $500 versus the cost of two sockets, a couple of washers, a nut and a long bolt.