CBO
Member
In my opinion the strut replacement link in the "DIY master list" sticky is missing key information necessary to actually remove and replace the strut. Here is a FULL write up for the i4 sedan.
::: Caution, wear gloves, use eye protection, and make sure vehicle is firmly supported when wrenching. :::
(Step 1) fold down rear seat.
(Step 2) Remove the side cushion by removing the bolt at the bottom inside the crease. You have to pull the seat back to access it. Use a socket extension or 2.
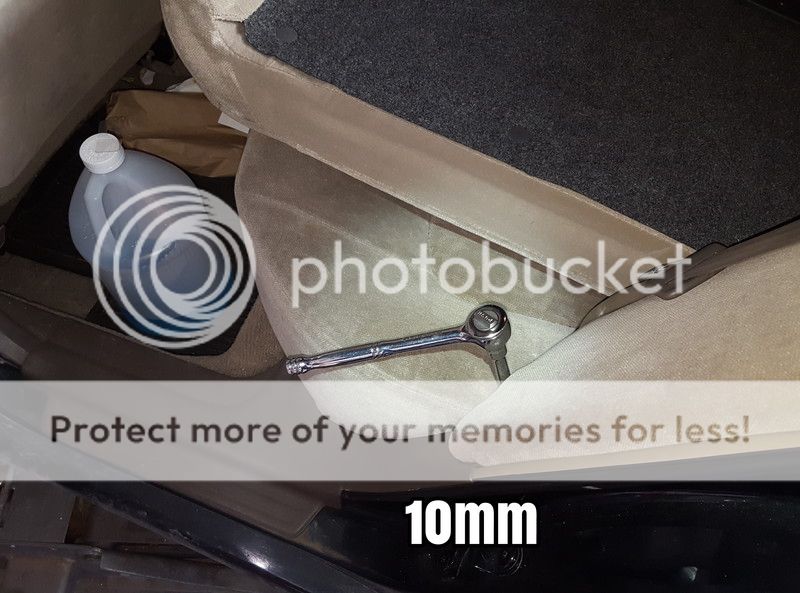
Once the bolt is out push upward. It will come off.
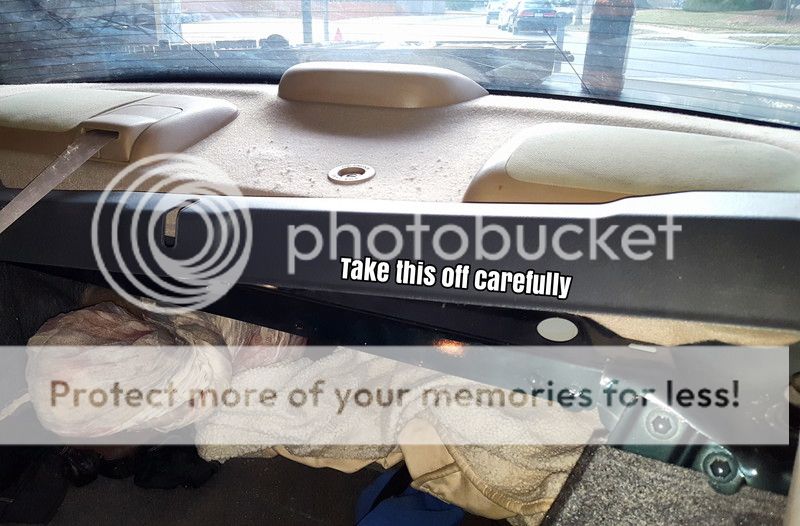
(Step 3) remove the plastic trim piece running along the top. It has 2 pins that you push on from inside the trunk area. Just reach your hand around in there and push them out. If you just pull on it it will break.
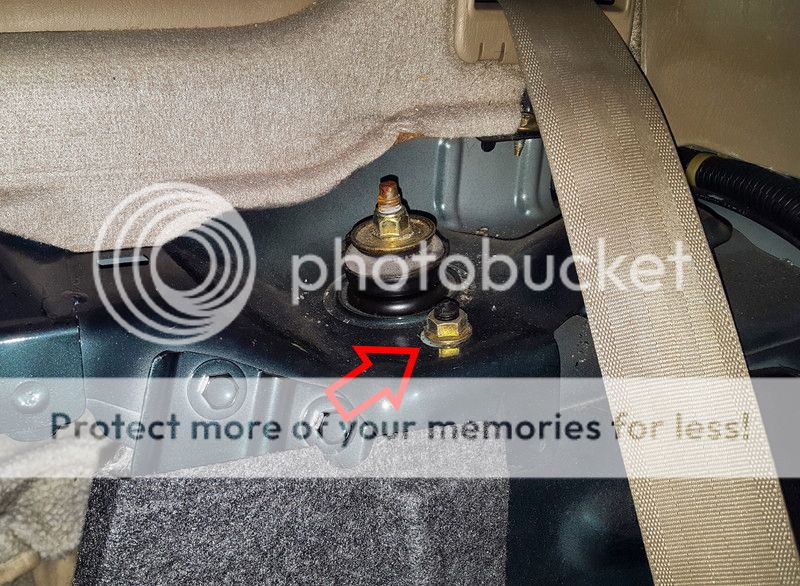
(Step 4) Loosen the nuts on the top of the shock. The one in front and behind. Not the middle taller one. These can vary in nut size. I took off 14s and my struts came with 15s. Take off the rear one completely. Leave the front one just barely still on to hold up the strut when you undo the bottom bolt.
(Step 5) loosen wheel lug nuts.
(Step 6) jack up the corner of the vehicle until tire comes off the ground. Put car on jackstands for safety.
(Step 7) obviously remove the tire/rim and set aside.
(Step 8) Remove the bolt holding the lower shock on. I sprayed it with penetrating oil and use an impact.
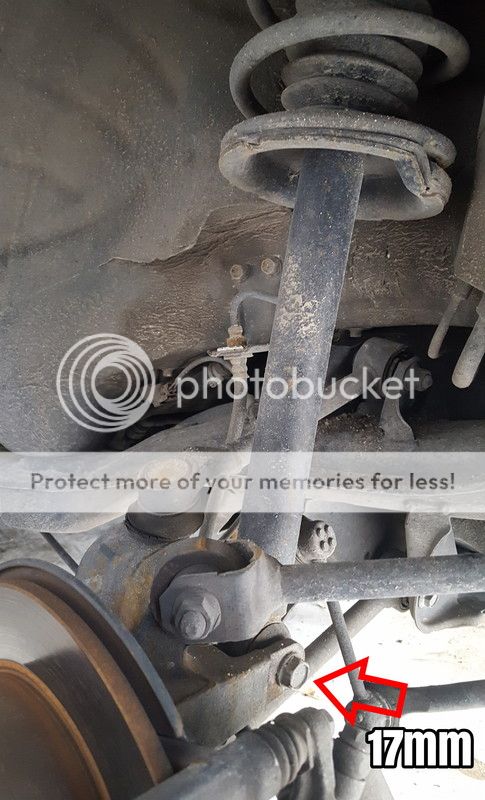
You will need to use a drift or punch to get the bolt out. Don't use a smaller bolt it will get stuck inside. Wrestle the shock out of the mount. The strut assembly will now be hanging from that top nut we left slightly on.
heres where the other write up left out key info. If you were to undo the top remaining nut and try to maneuver the strut out.. well you wont be able to. So we need to do these next few steps to be able to remove the assembly.
(Step 9) Remove sway bar bushing mount bolts.
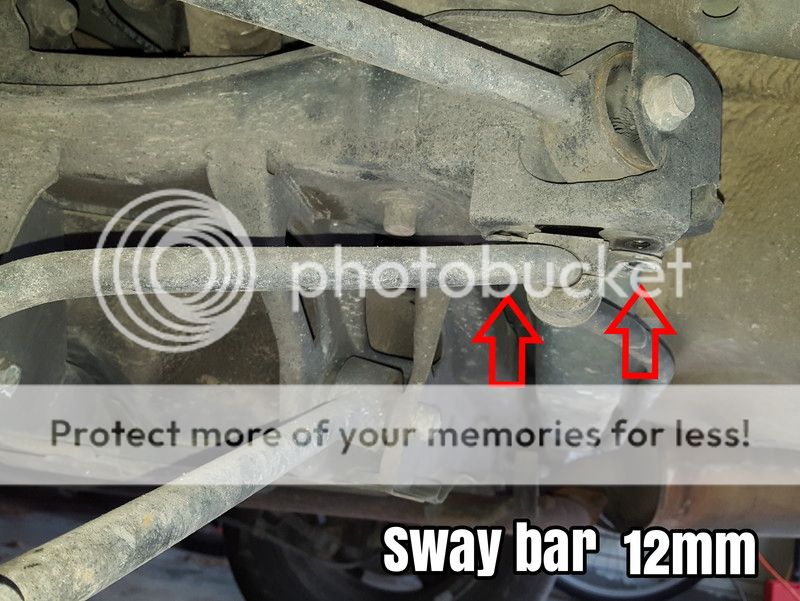
This is easy on the drivers side. More difficult on passenger side as the exhaust is in the way. But I used a ratcheting crescent wrench for the tedious job. If you're V6.. i feel sorry for you.
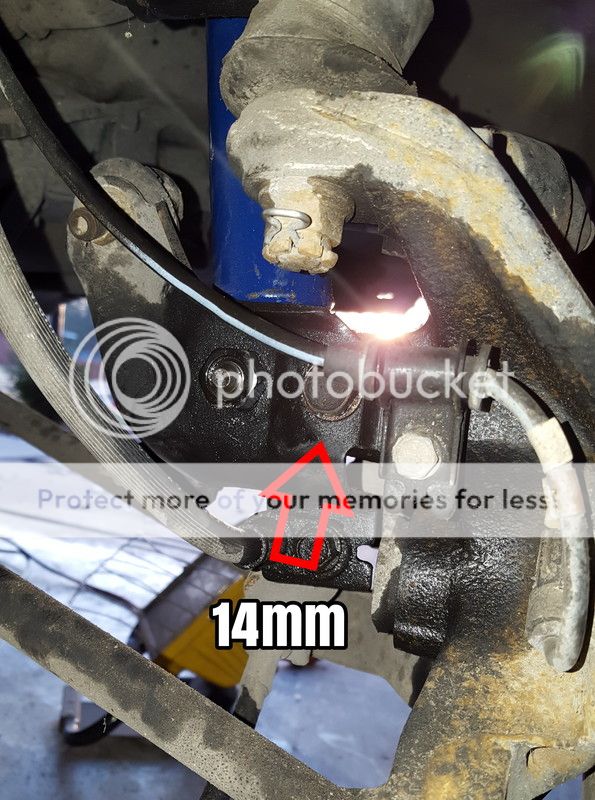
(Step 10) remove the bolt holding on the shock mounting bracket. The sway bar also connects to this. Once the bracket comes loose we can push the sway bar out of the way.
(Step 11) remove the top nut holding up the strut assembly. In order to get the strut out you must use a foot or arm to push the knuckle downward. It can be a pain but you can slide it out.
(Step 12) slide your new strut assembly in and push the top bolts up through the holes in the vehicle. I was able to hold the strut with one hand and reach up to fasten a nut on the top of the tower. Or use a helper.
(Step 13) is basically just reassembly. I put the shock mount bracket on loosely, then had someone push down on the knuckle while I lined up the bottom shock mount to slide the bolt in. Then I fully tightened the lower shock bolt and mount bracket bolt. Then put the sway bar bushing bolts back in. Next you can tighten the 2 upper strut bolts. Throw the tire on. Lower the car down. And I double checked the upper bolts again.
(Step 14) Go repeat steps for the other side, or reassemble your seat and test drive it. You're done.
I hope this write up makes it easier on people. Because following the other write up I had a helluva time and had to figure out the need for sway bar removal myself. Good luck, be safe, have fun.
-CBO
::: Caution, wear gloves, use eye protection, and make sure vehicle is firmly supported when wrenching. :::
(Step 1) fold down rear seat.
(Step 2) Remove the side cushion by removing the bolt at the bottom inside the crease. You have to pull the seat back to access it. Use a socket extension or 2.
Once the bolt is out push upward. It will come off.
(Step 3) remove the plastic trim piece running along the top. It has 2 pins that you push on from inside the trunk area. Just reach your hand around in there and push them out. If you just pull on it it will break.
(Step 4) Loosen the nuts on the top of the shock. The one in front and behind. Not the middle taller one. These can vary in nut size. I took off 14s and my struts came with 15s. Take off the rear one completely. Leave the front one just barely still on to hold up the strut when you undo the bottom bolt.
(Step 5) loosen wheel lug nuts.
(Step 6) jack up the corner of the vehicle until tire comes off the ground. Put car on jackstands for safety.
(Step 7) obviously remove the tire/rim and set aside.
(Step 8) Remove the bolt holding the lower shock on. I sprayed it with penetrating oil and use an impact.
You will need to use a drift or punch to get the bolt out. Don't use a smaller bolt it will get stuck inside. Wrestle the shock out of the mount. The strut assembly will now be hanging from that top nut we left slightly on.
heres where the other write up left out key info. If you were to undo the top remaining nut and try to maneuver the strut out.. well you wont be able to. So we need to do these next few steps to be able to remove the assembly.
(Step 9) Remove sway bar bushing mount bolts.
This is easy on the drivers side. More difficult on passenger side as the exhaust is in the way. But I used a ratcheting crescent wrench for the tedious job. If you're V6.. i feel sorry for you.
(Step 10) remove the bolt holding on the shock mounting bracket. The sway bar also connects to this. Once the bracket comes loose we can push the sway bar out of the way.
(Step 11) remove the top nut holding up the strut assembly. In order to get the strut out you must use a foot or arm to push the knuckle downward. It can be a pain but you can slide it out.
(Step 12) slide your new strut assembly in and push the top bolts up through the holes in the vehicle. I was able to hold the strut with one hand and reach up to fasten a nut on the top of the tower. Or use a helper.
(Step 13) is basically just reassembly. I put the shock mount bracket on loosely, then had someone push down on the knuckle while I lined up the bottom shock mount to slide the bolt in. Then I fully tightened the lower shock bolt and mount bracket bolt. Then put the sway bar bushing bolts back in. Next you can tighten the 2 upper strut bolts. Throw the tire on. Lower the car down. And I double checked the upper bolts again.
(Step 14) Go repeat steps for the other side, or reassemble your seat and test drive it. You're done.
I hope this write up makes it easier on people. Because following the other write up I had a helluva time and had to figure out the need for sway bar removal myself. Good luck, be safe, have fun.
-CBO
")