

It was time to do the clutch again so I decided to do a write up. Feel free to let me know if anything is missing.
Things you'll need:
- Wrenches
- Ratchets and sockets (1/4, 3/8 and 1/2" drives are all useful)
- Breaker bar(s)
- Torque Wrenches
- Jack
- Jack Stands
- Crankshaft pulley tool
- Chisel or Pickle Fork and Sledge
- Pry Bars
- Rubber or Wood Blocks
- Oil Drain Pan
- Cotter Pins
- Rubber Mallet
- Funnel (with hose attachment will DEF help)
- Wire or twine
- Rags
I also decided to do the crankshaft seal while I was in there so I decided to include the steps for the oil change as well. Each picture includes the torque specs to the bolts/nuts.
1. Raise the car from the lift point on the sub-frame.
2. Place jack stands under pinch rails.
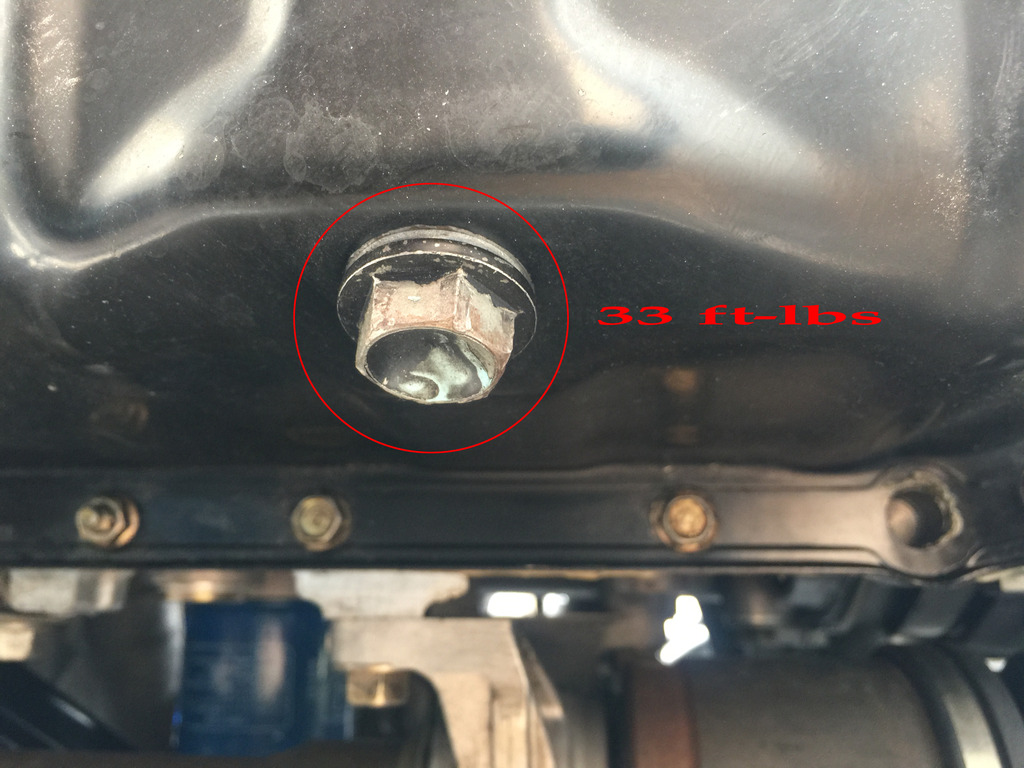
3. Drain oil. Install new washer and reinstall drain plug.
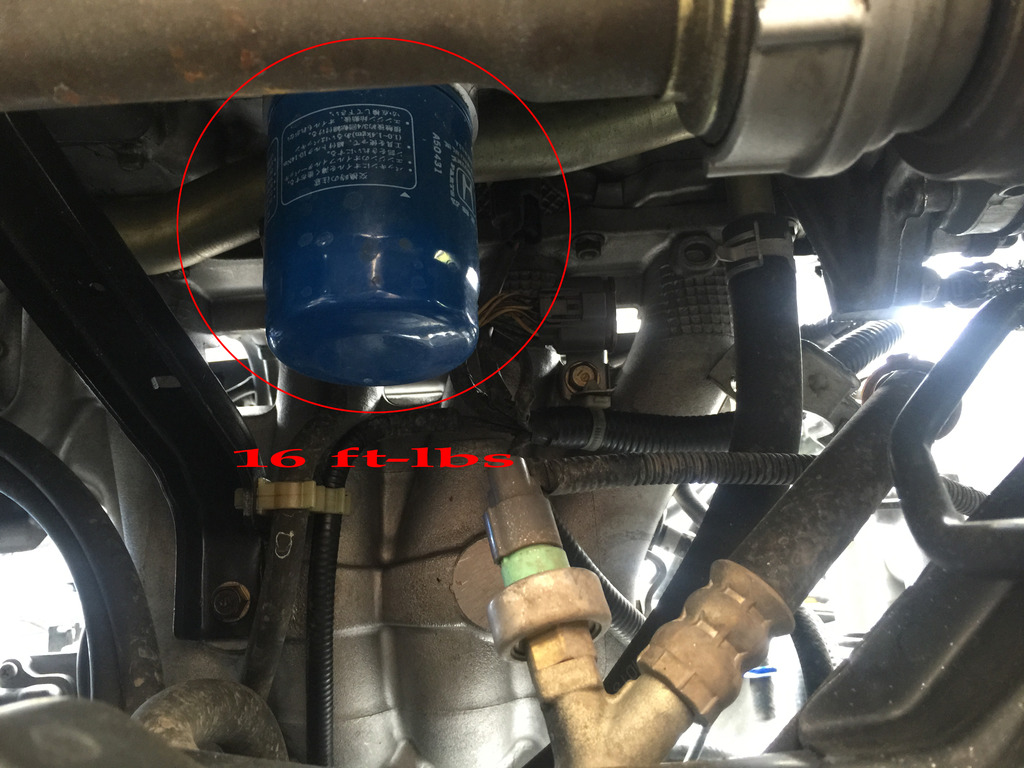
4. Remove oil filter. Coat gasket on new filter with oil and reinstall.
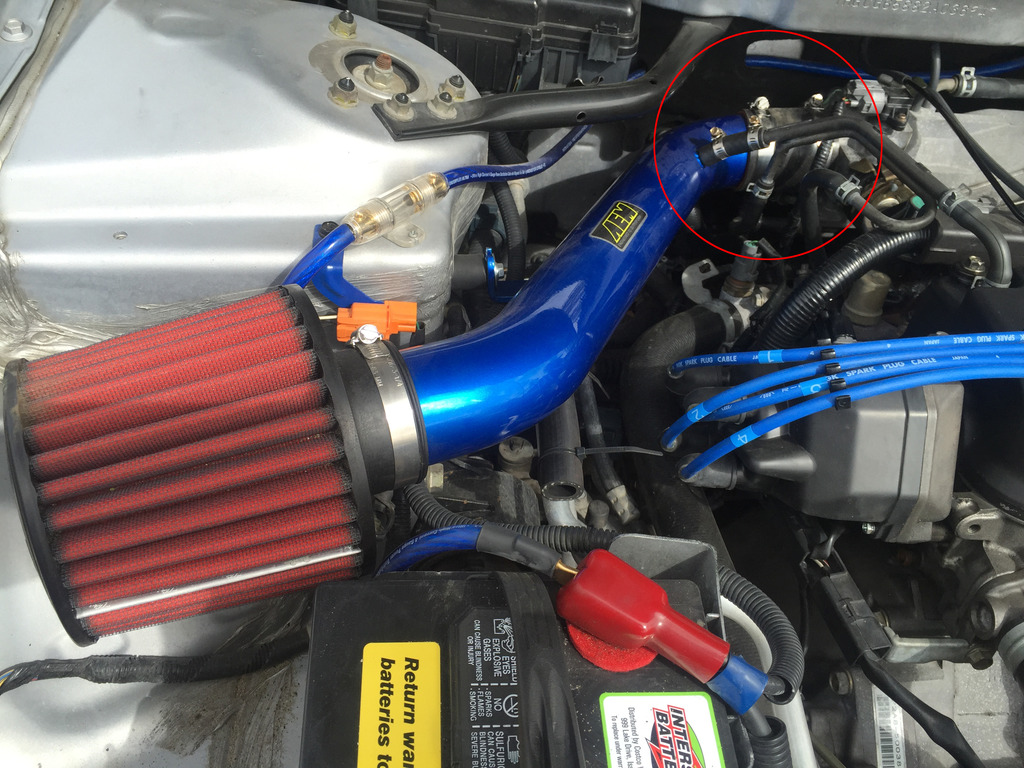
5. Remove intake.
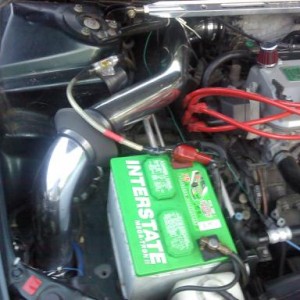
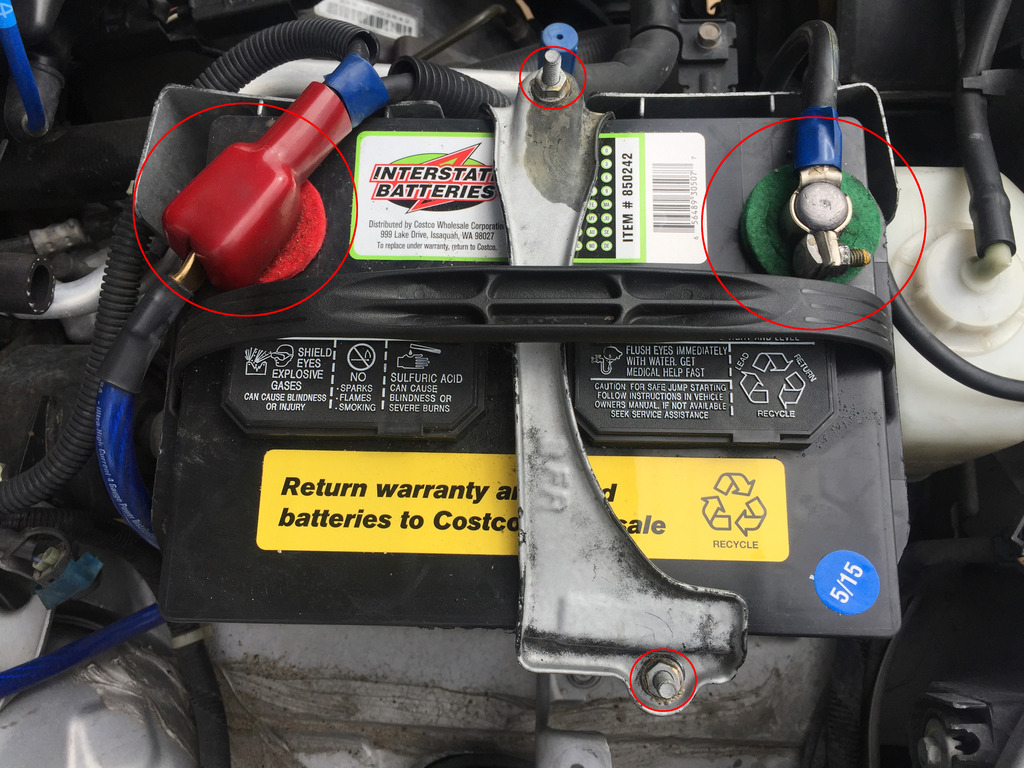
6. Remove battery.
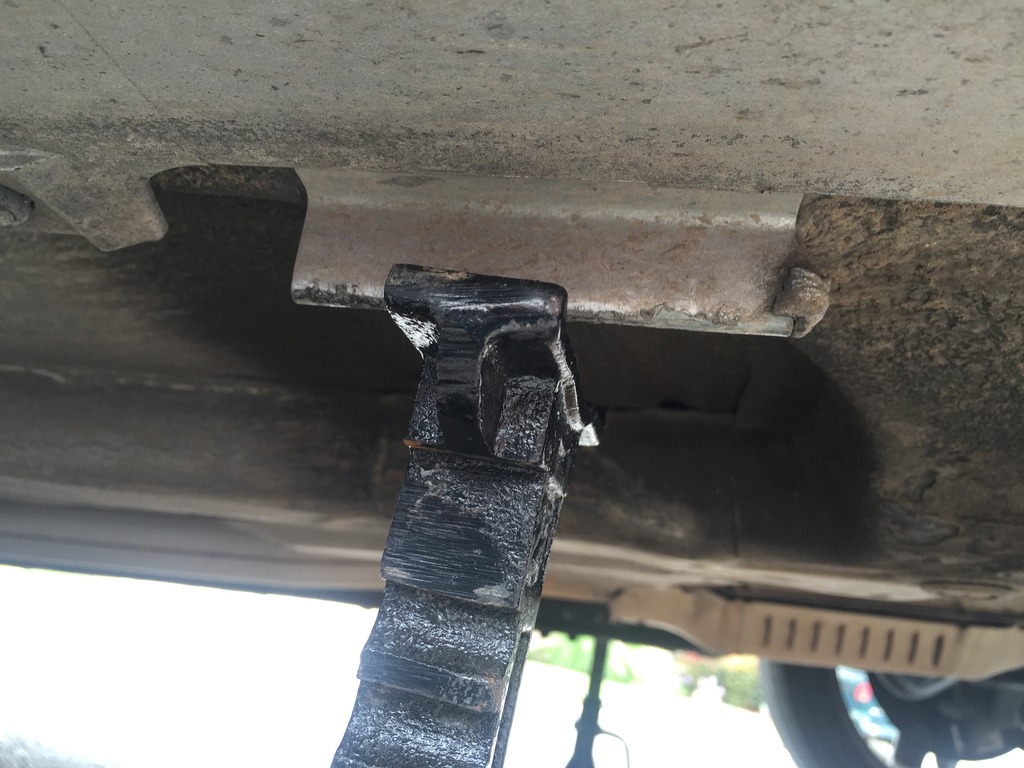
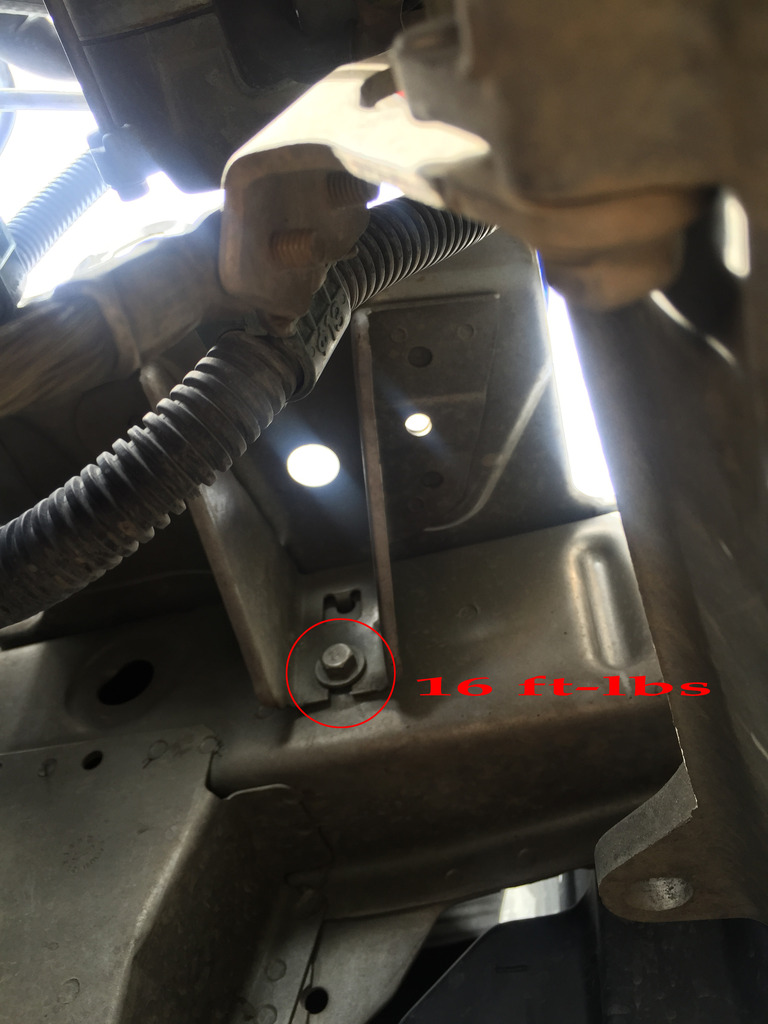
7. Remove battery tray. There is one bolt under the tray in this picture.

This is the bolt which is out of view in previous picture.
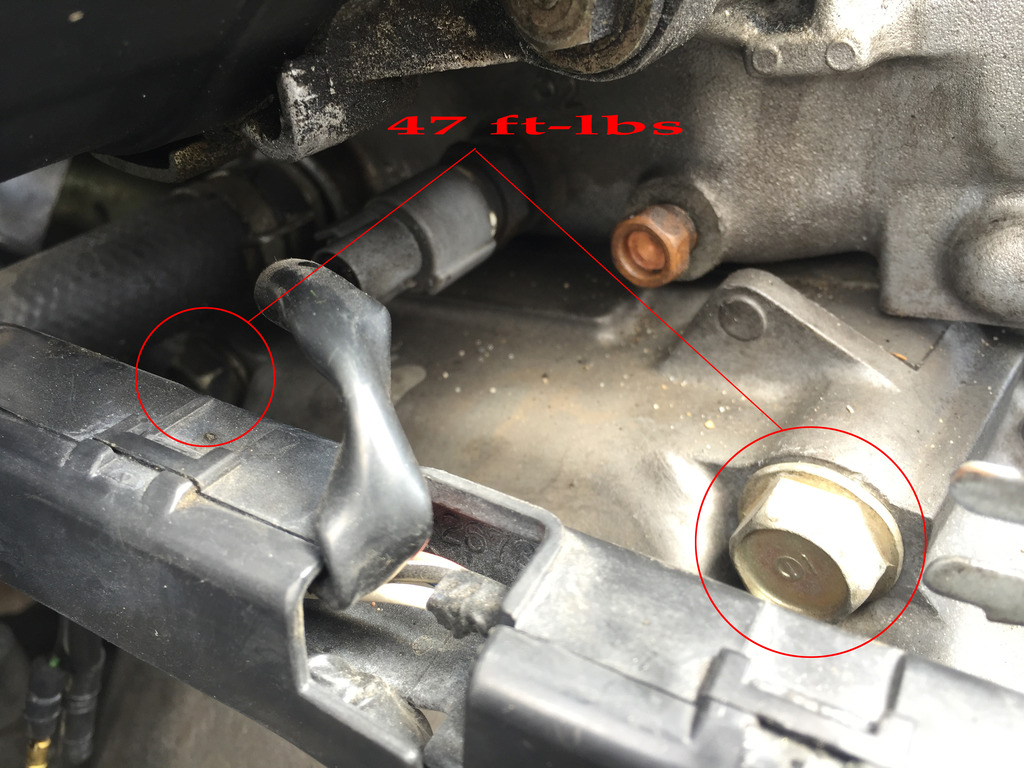
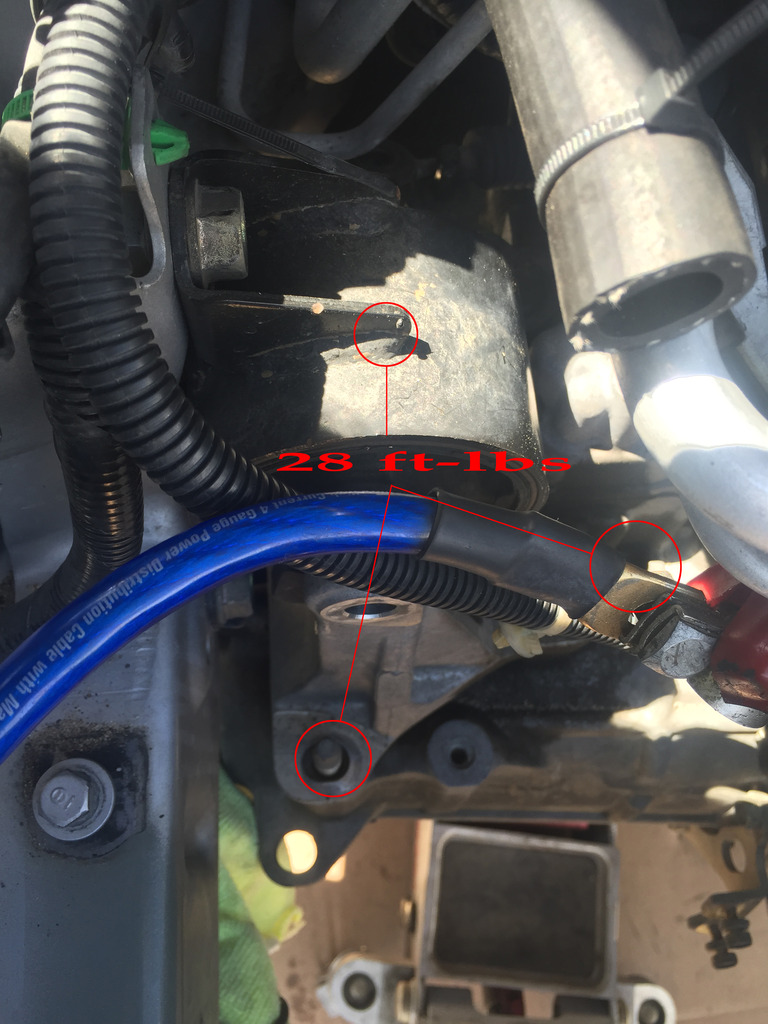
8. Remove harness clamp and clutch line clamp.
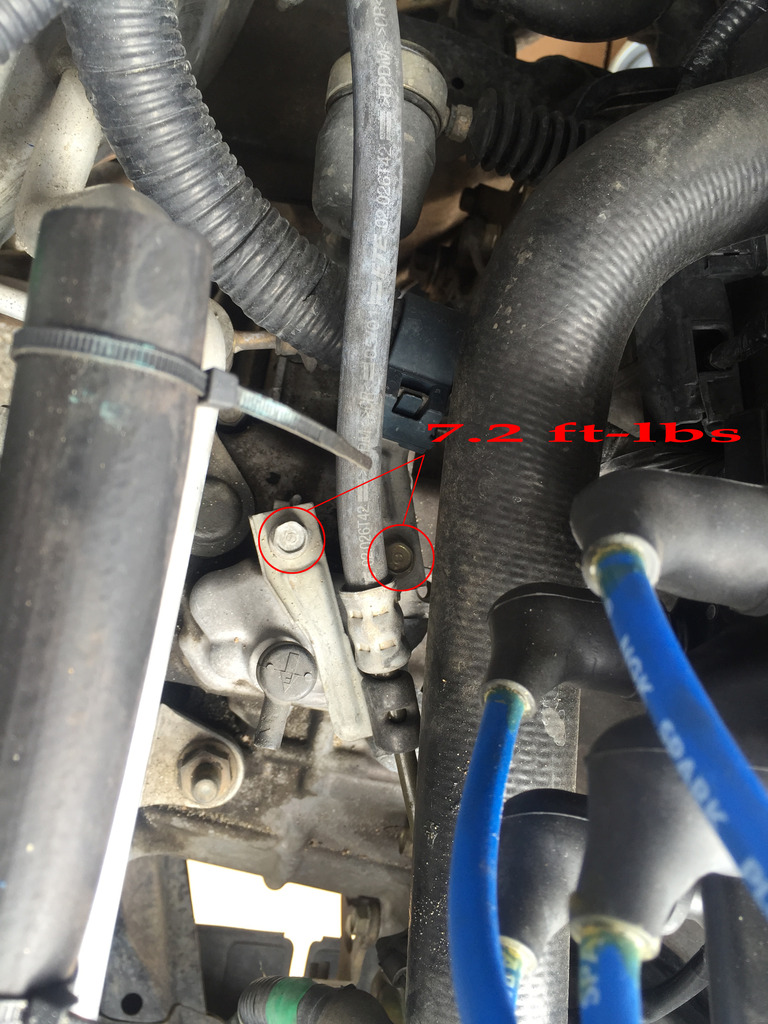
9. Remove clutch slave cylinder.
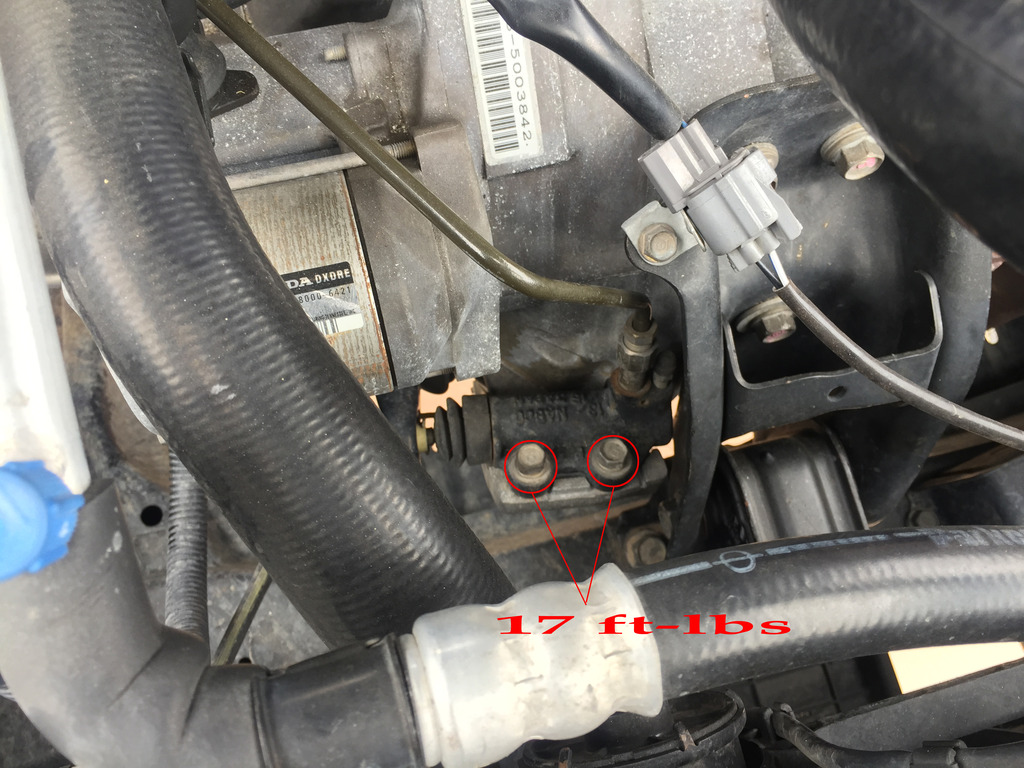
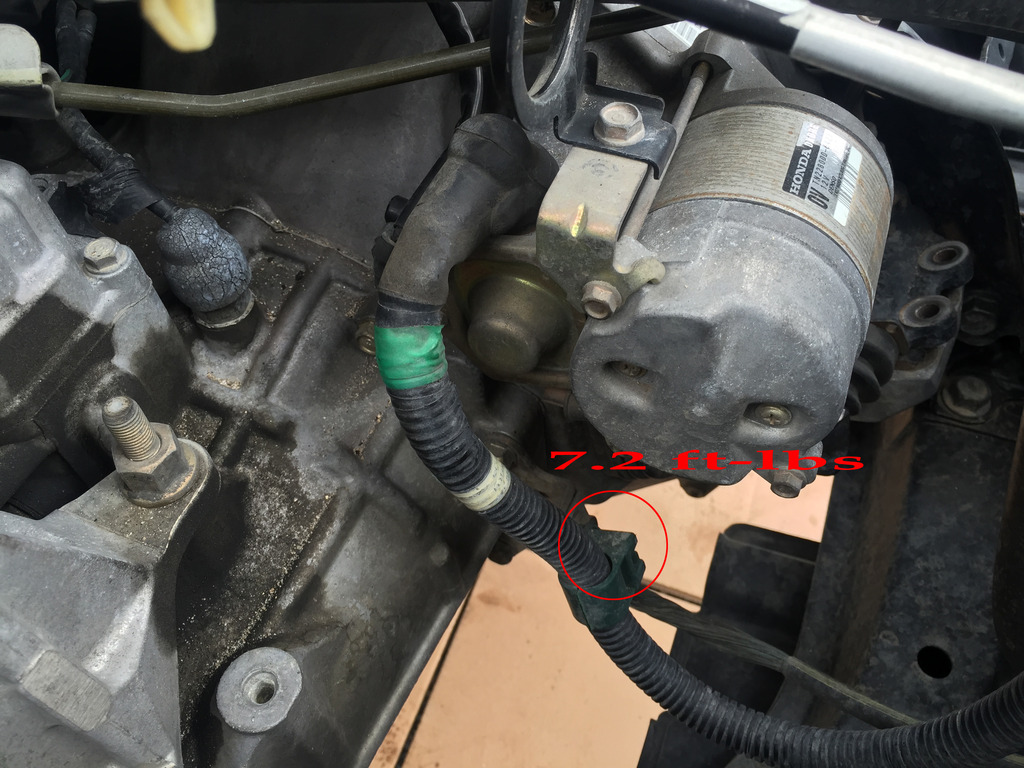
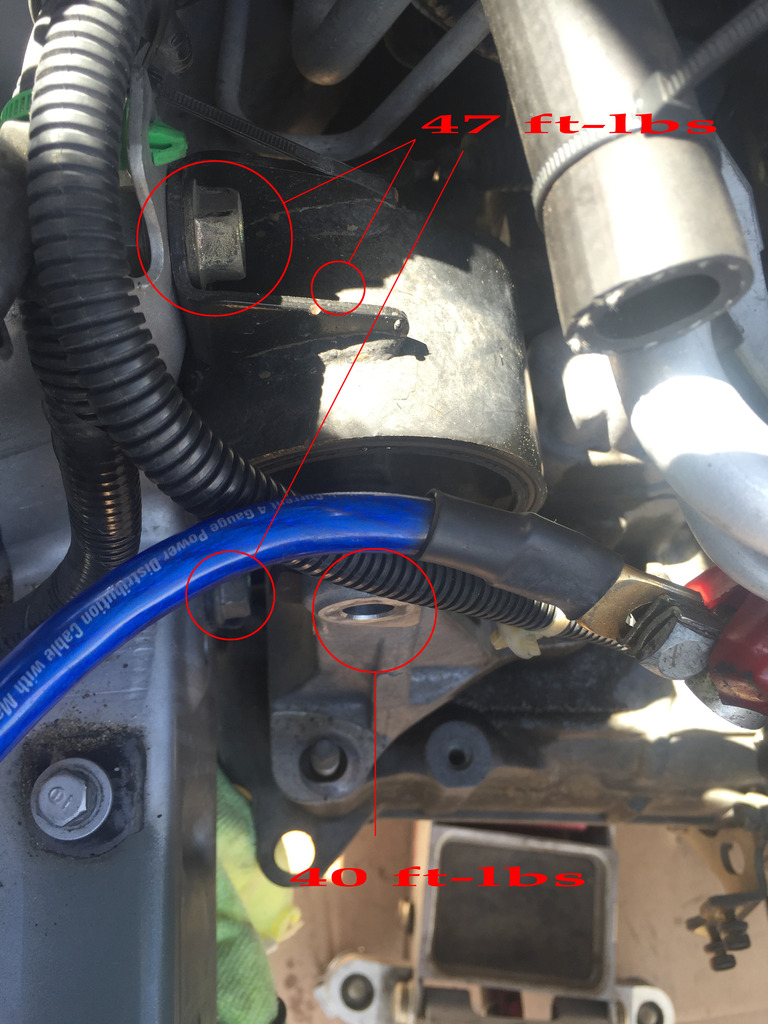
10. Remove transmission ground cable and starter cable clamp.
11. Remove starter cable and starter mounting bolts. Then remove starter. There is one cable (out of view) which just plugs in behind the starter cable.
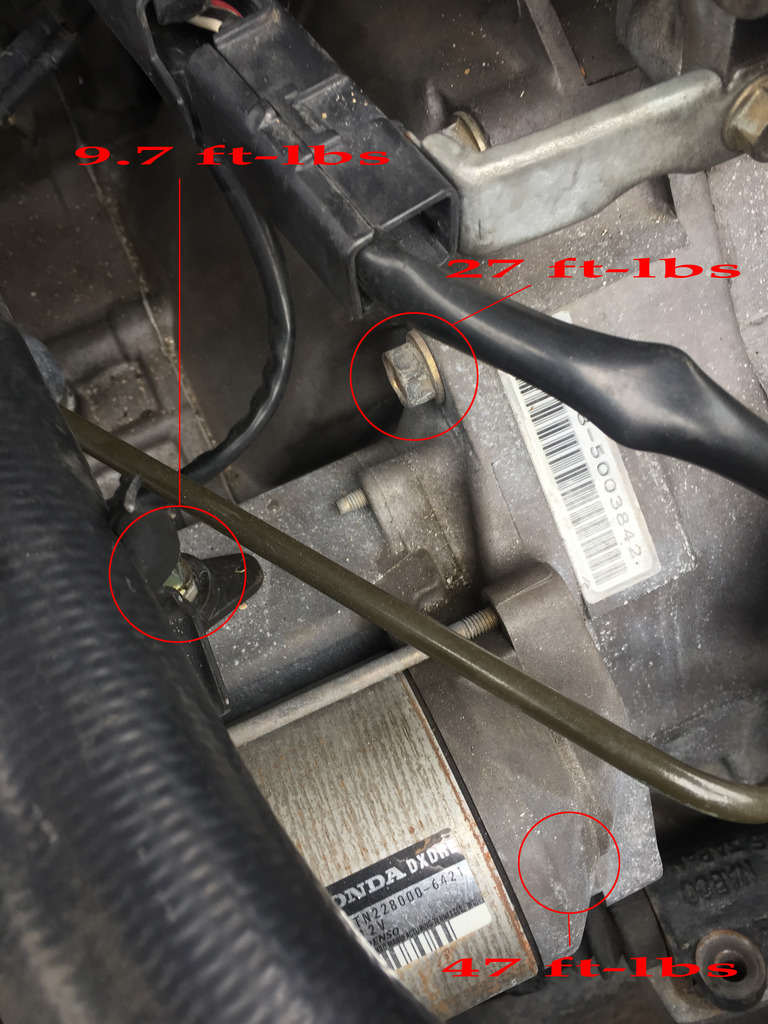
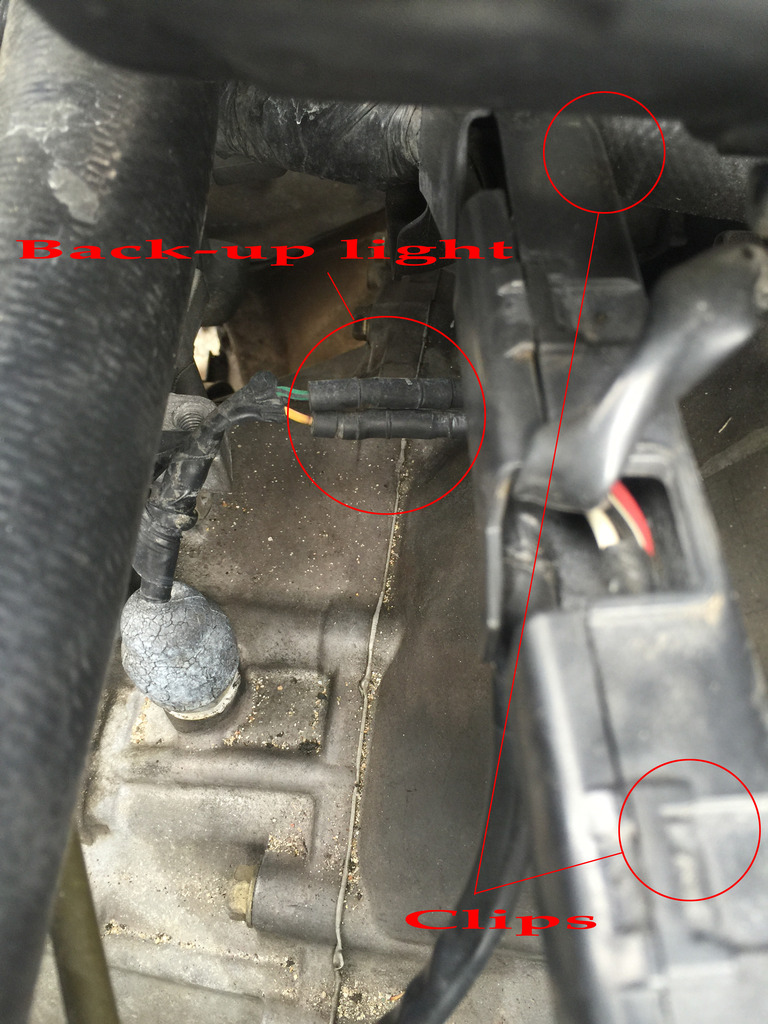
12. Disconnect back-up light connectors and unclip the wire harness.
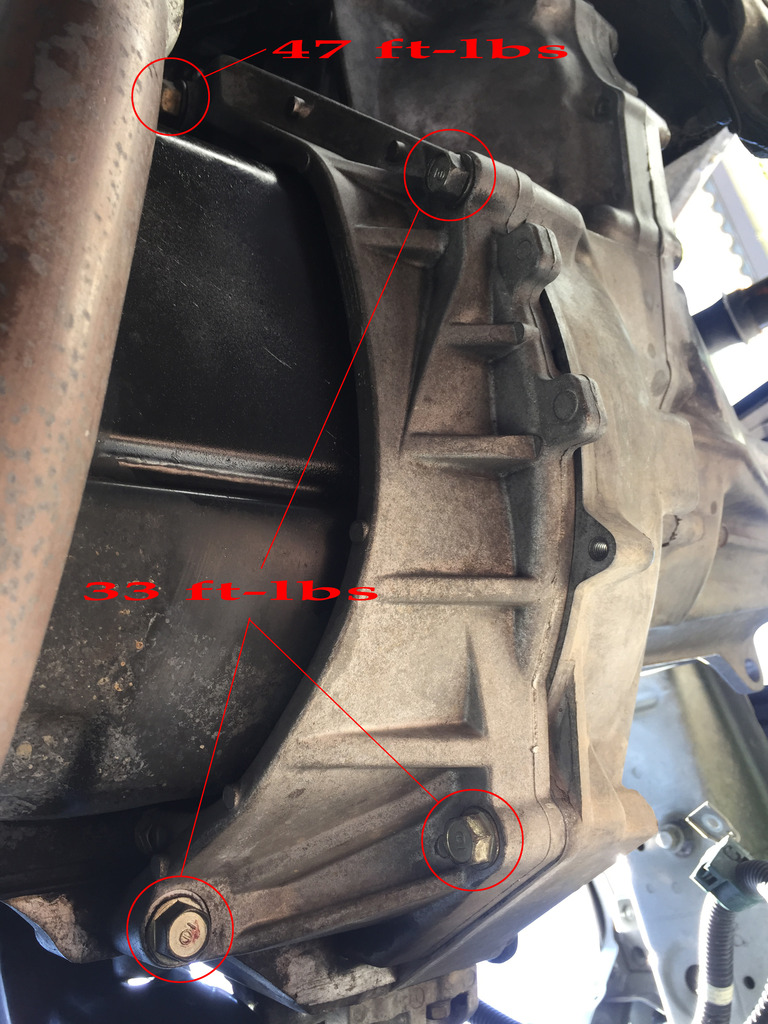
13. Remove shift cable bracket. One bolt is not visible in picture.
14. Remove cotter pins and disconnect the shift cables.
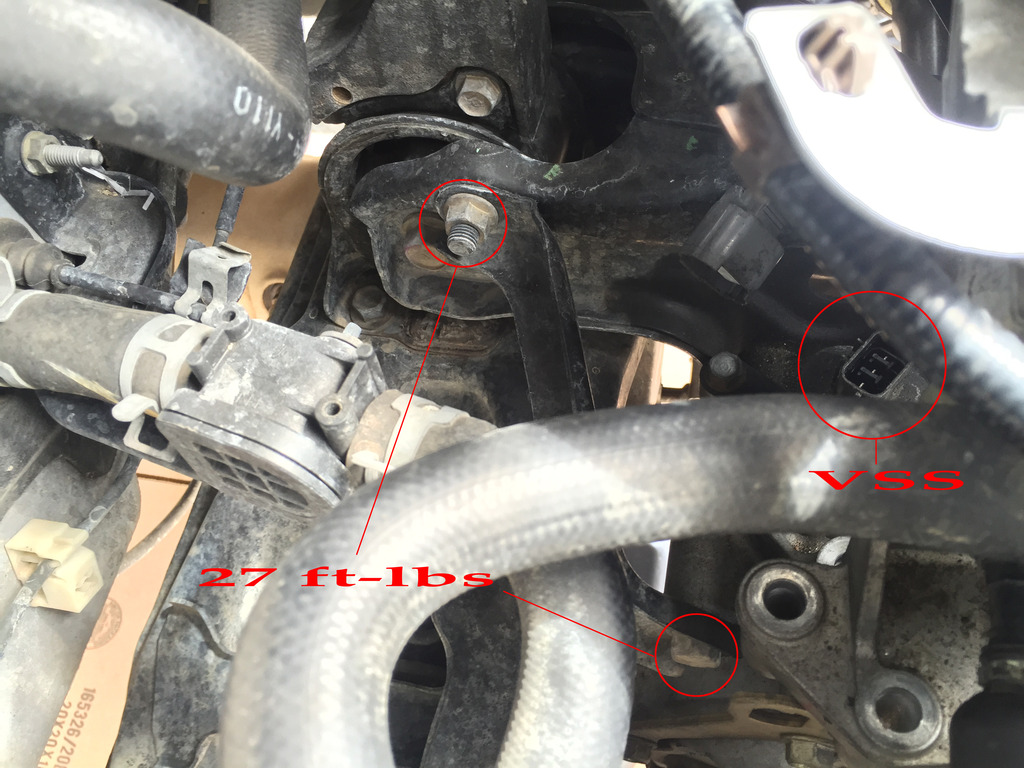
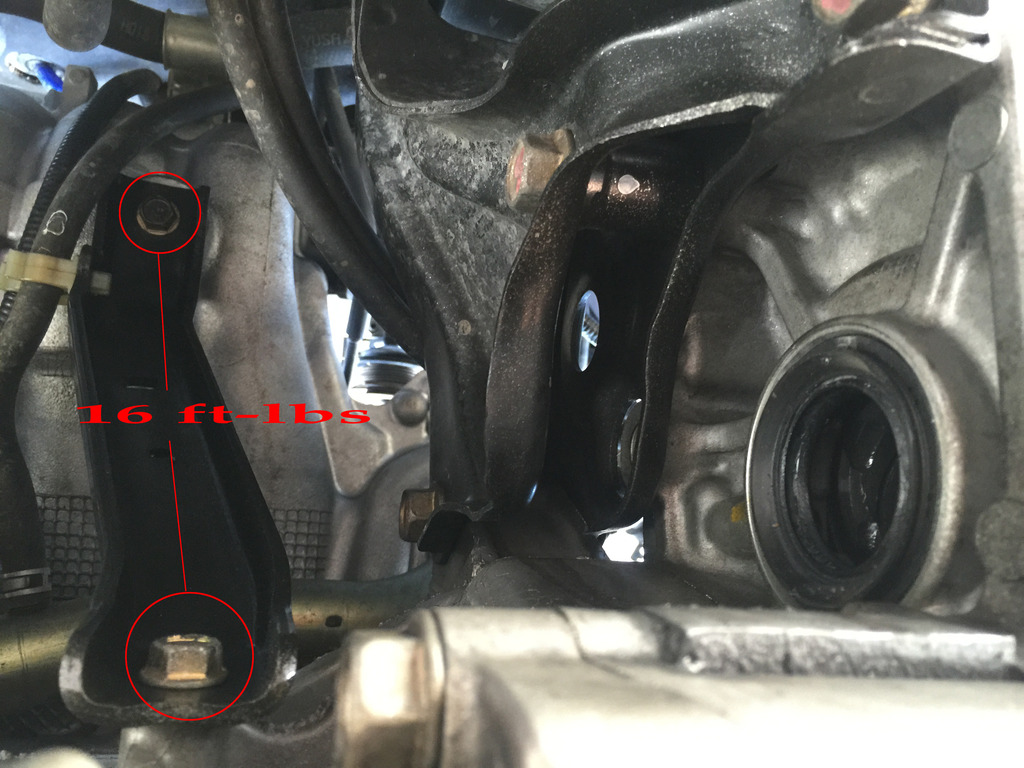
15. Disconnect vehicle speed sensor and remove rear engine mount bracket.
16. Remove both upper transmission bolts.
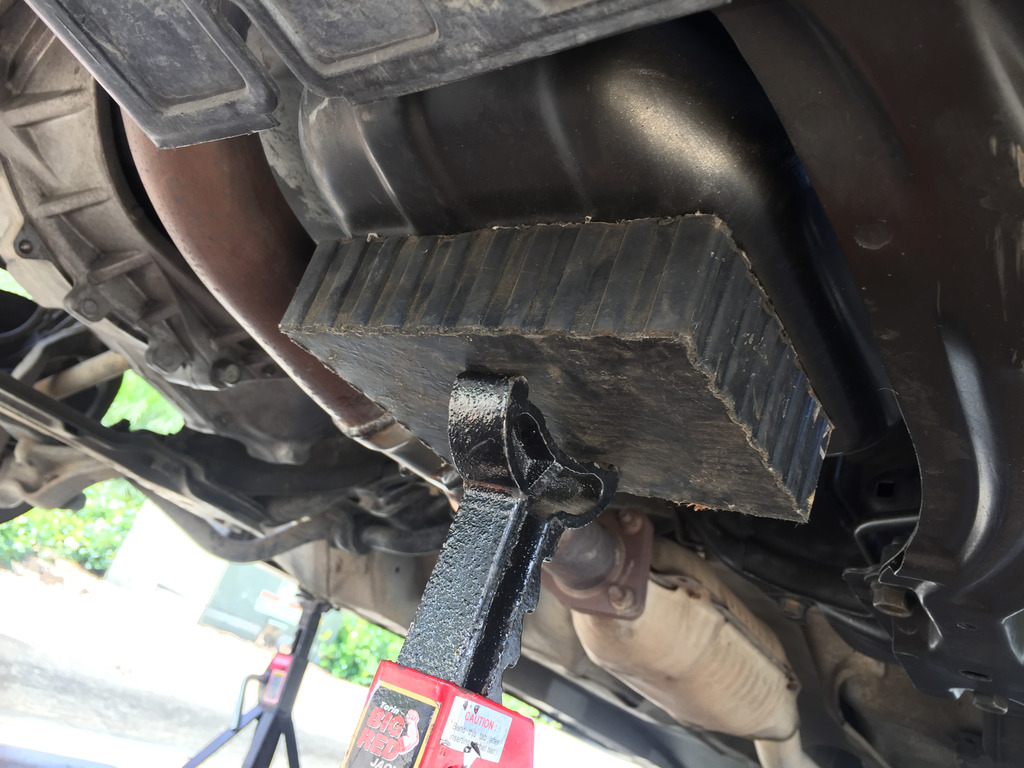
17. Raise car slightly and slide a jack stand WITH rubber block under oil pan. IT IS VERY IMPORTANT TO USE A RUBBER OR WOOD BLOCK. The weight should be very slight on the jack stand.
18. Unclip the A/F sensor harness from bracket and remove front engine mount bolts.

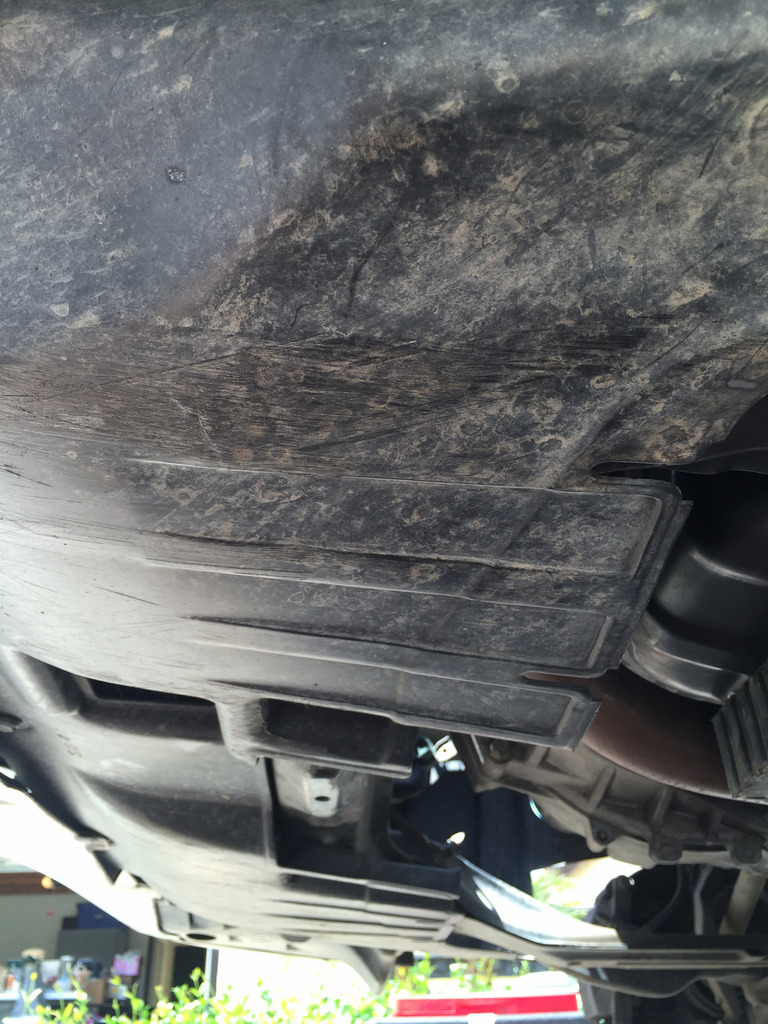
19. Remove splash shield.
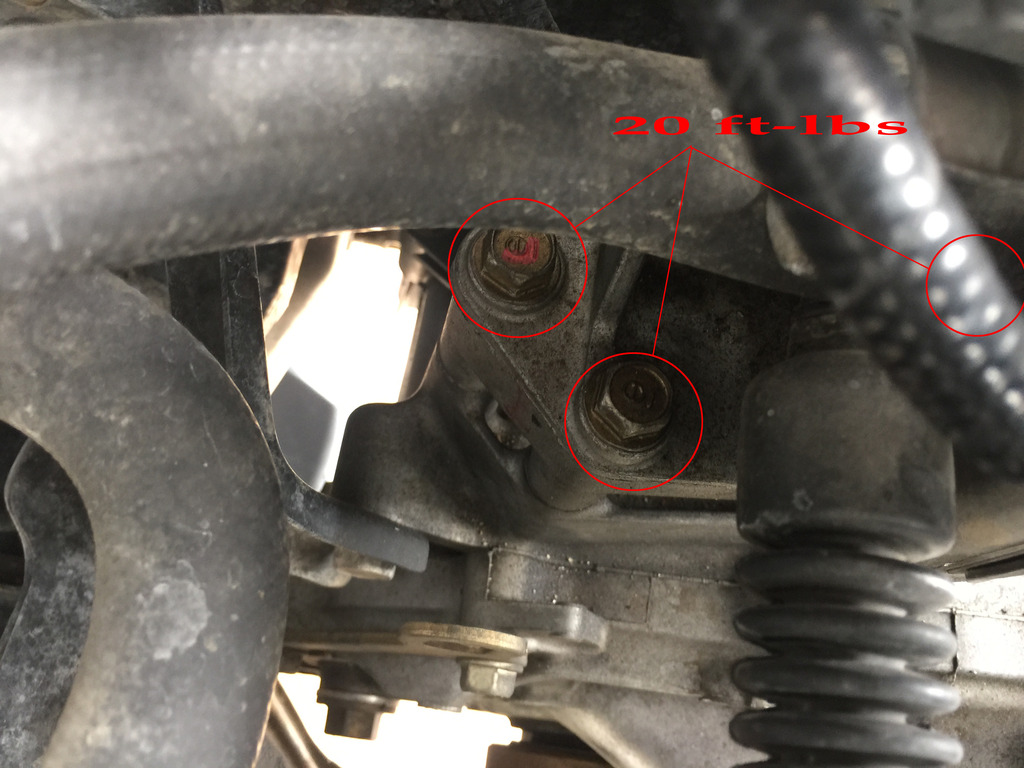
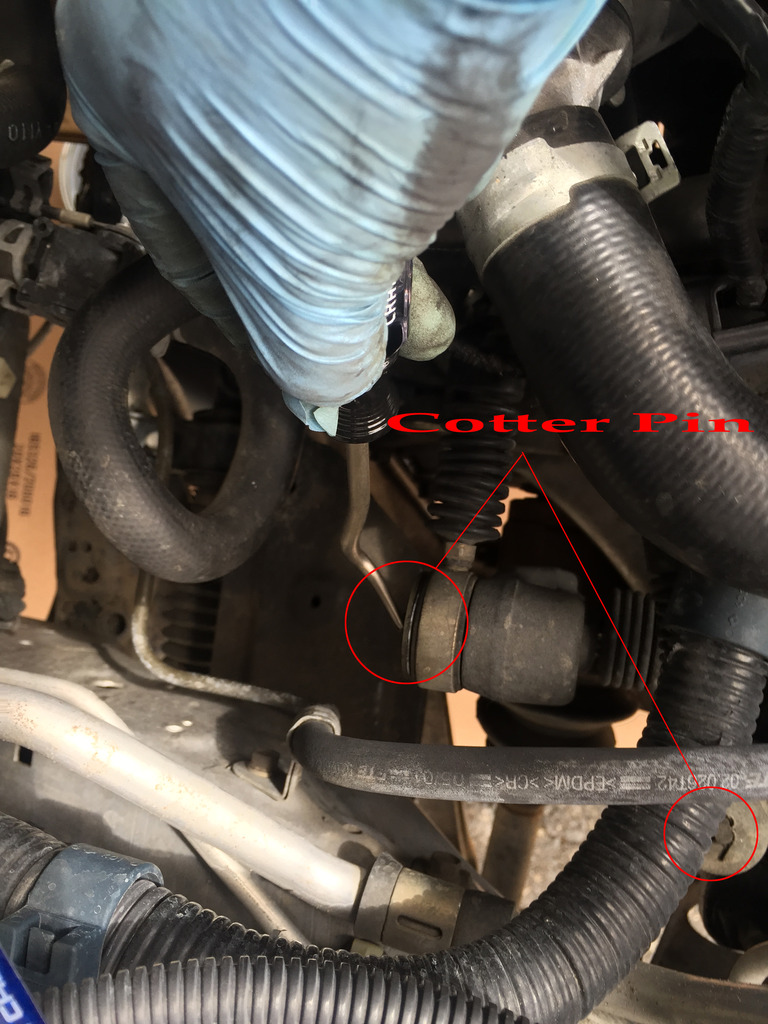
20. Remove cotter pins and castle nuts. Loosen bolts on damper forks.
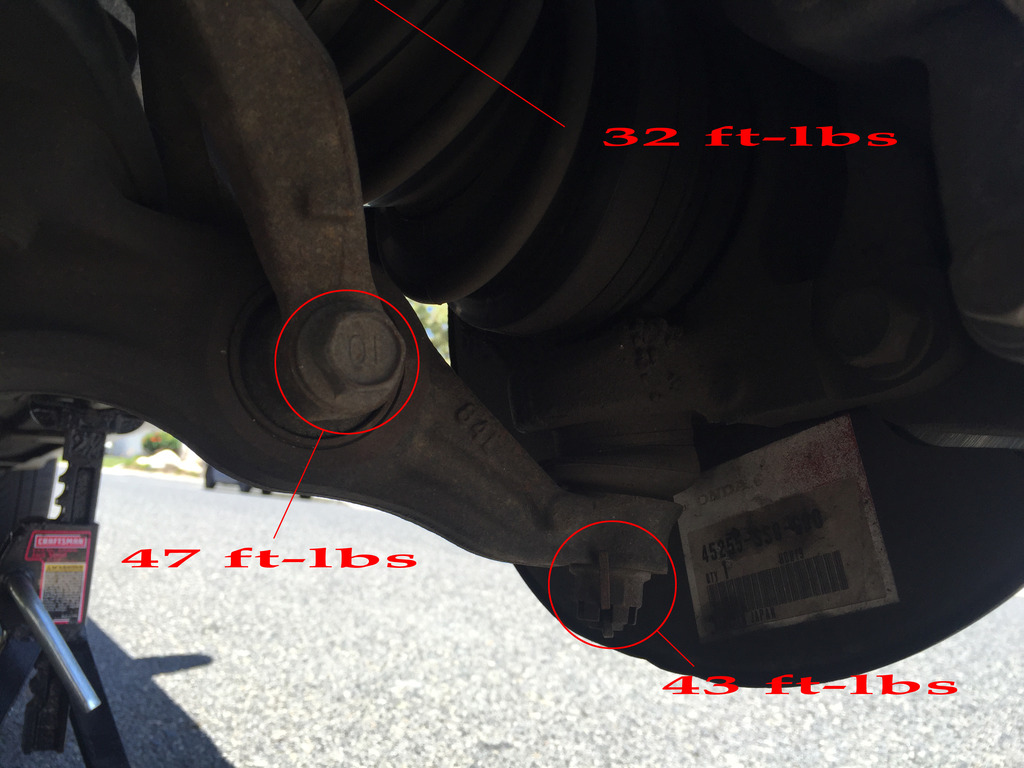
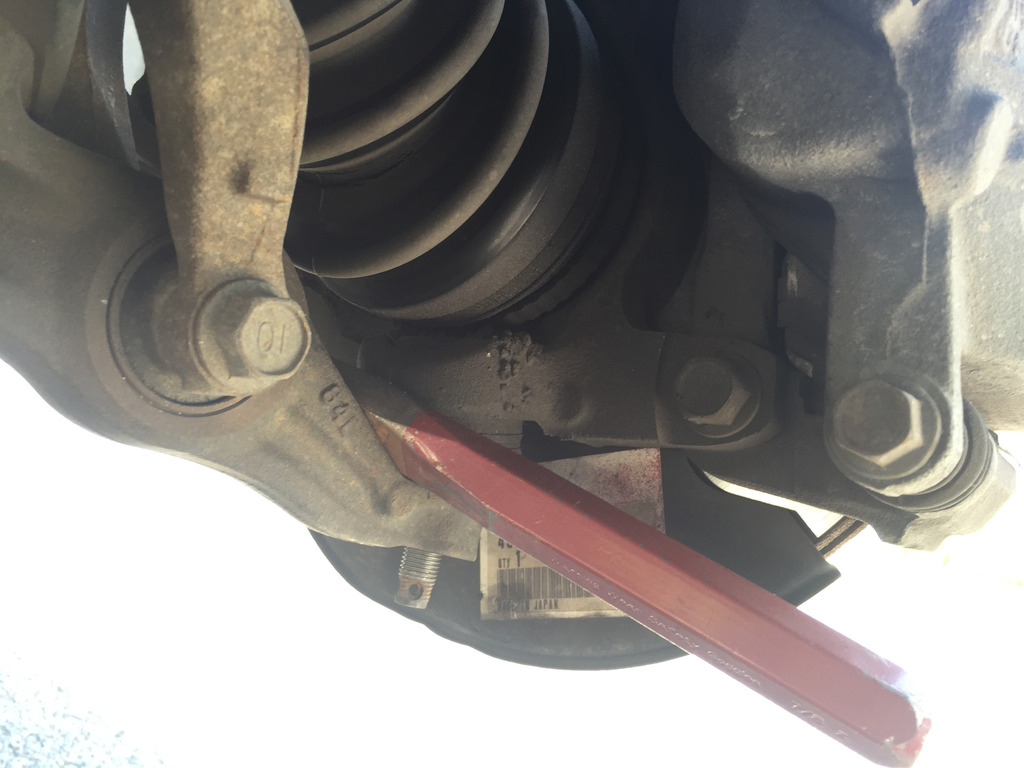
21. Use chisel or pickle fork to separate ball joints from lower arms. Be careful not to damage ball joints.
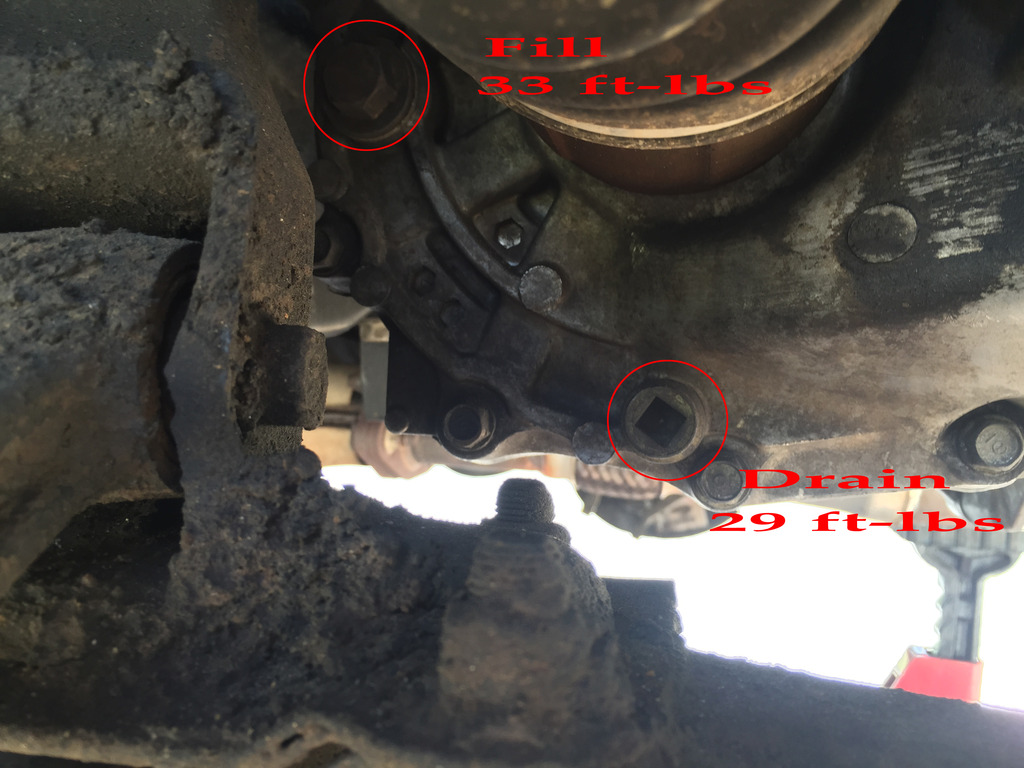
22. Loosen drain bolt on transmission and drain transmission fluid. Once drained, install new washer and reinstall drain plug.
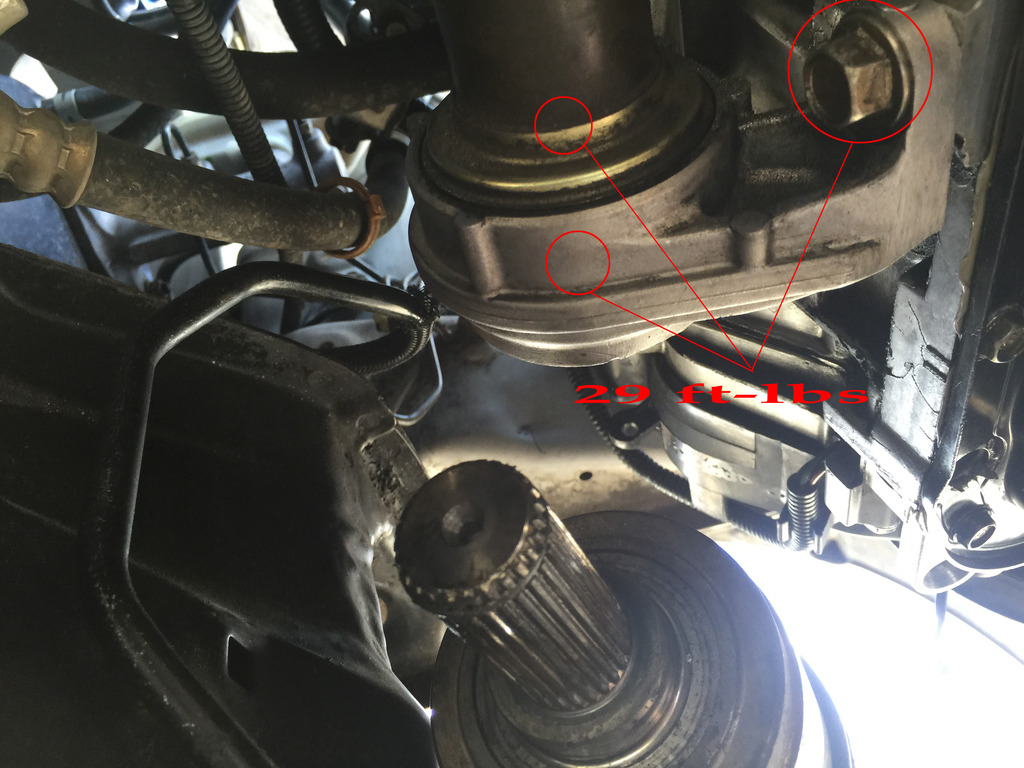
23. Pry out axles from transmission and from intermediate shaft. Use the wire/twine to hang ends of axles in the air. Cover ends with rags.
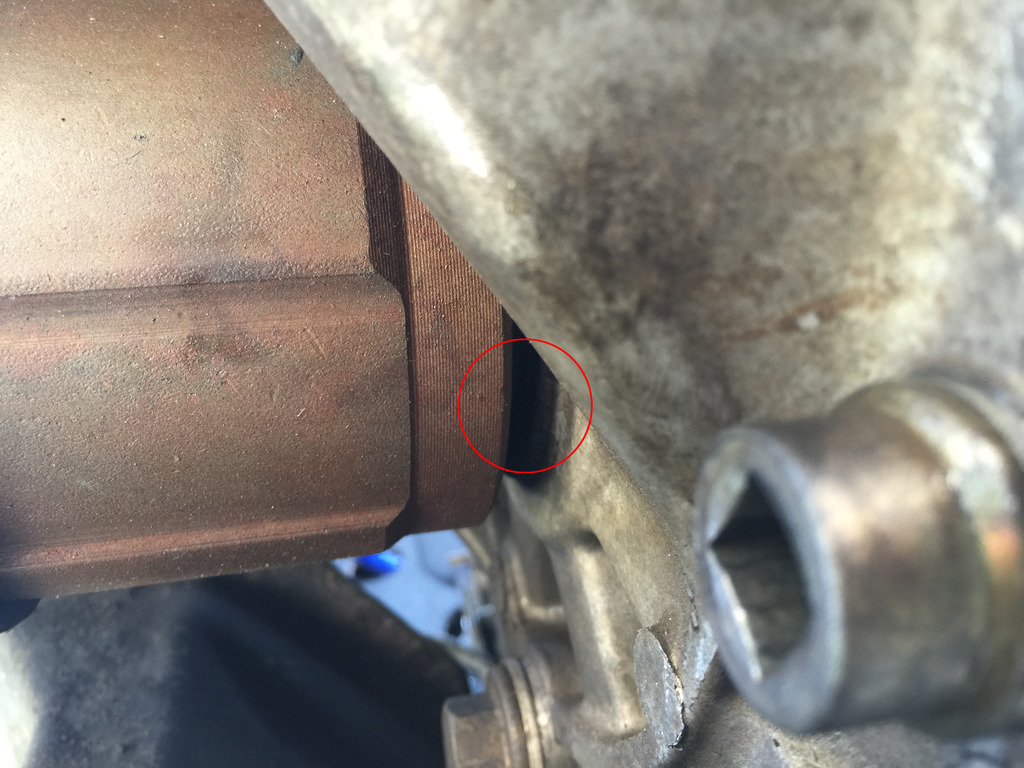
24. Remove intermediate shaft.
25. Remove engine stiffener.
26. Remove intake manifold bracket.
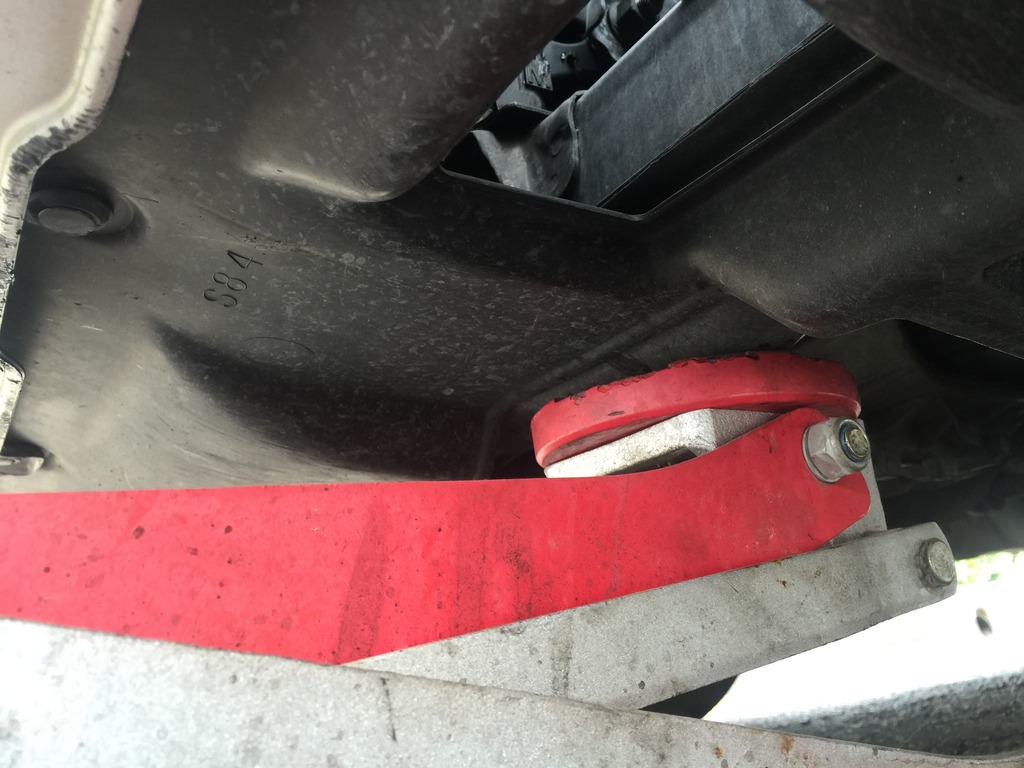
27. Remove radius rod bolts from lower arm. (Not pictured) The radius rods come out from the sub-frame and connect to lower arms. 2 bolts on each arm. Torque Specs: 119 ft-lbs
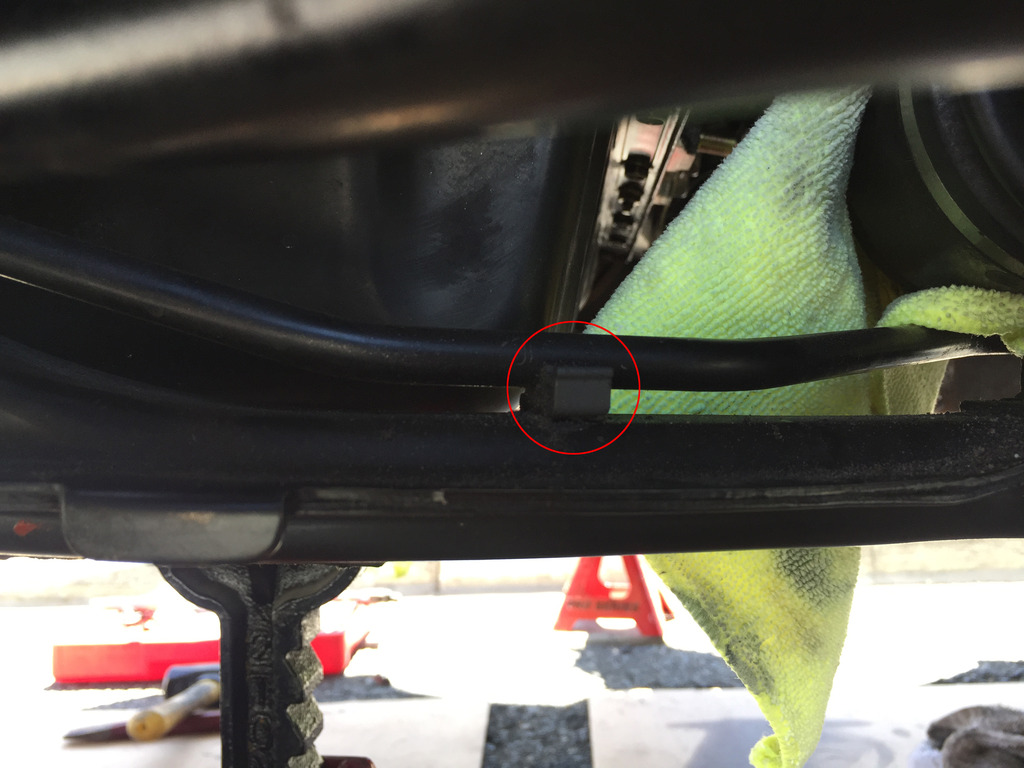
28. Unclip power steering line from sub-frame. There are two clips, there is one towards the front of the car as well as the one pictured.
29. Make reference marks on sub-frame rear beam. Then remove three bolts on each side.

30. Remove front sub-frame bolts. Carefully lower sub-frame and move it out of the way.
31. Remove nuts on transmission mounting bracket.
32. Remove transmission mount bolts and remove mount.
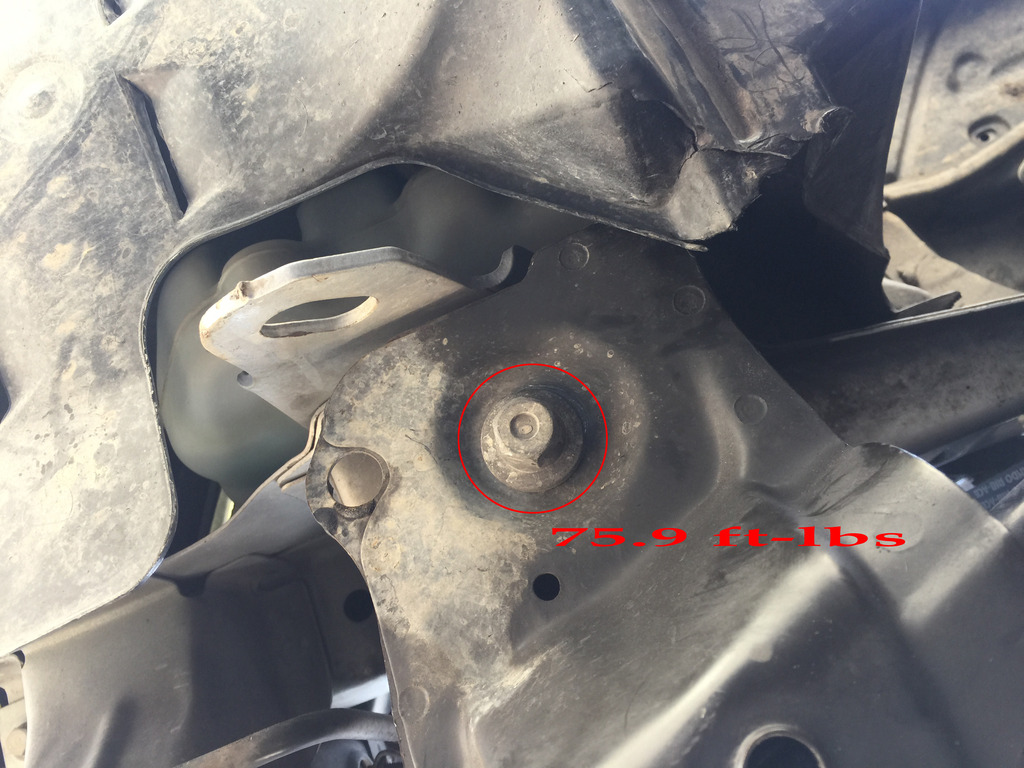
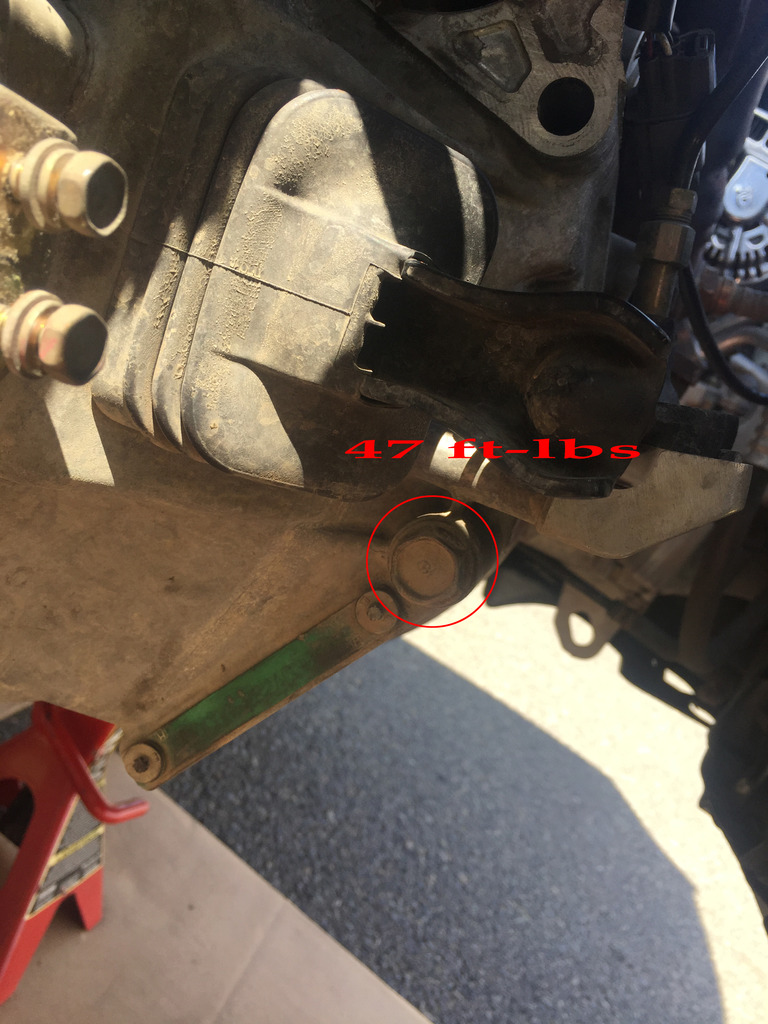
33. Remove rear engine mount bracket mounting bolts. One is out of view in this picture.
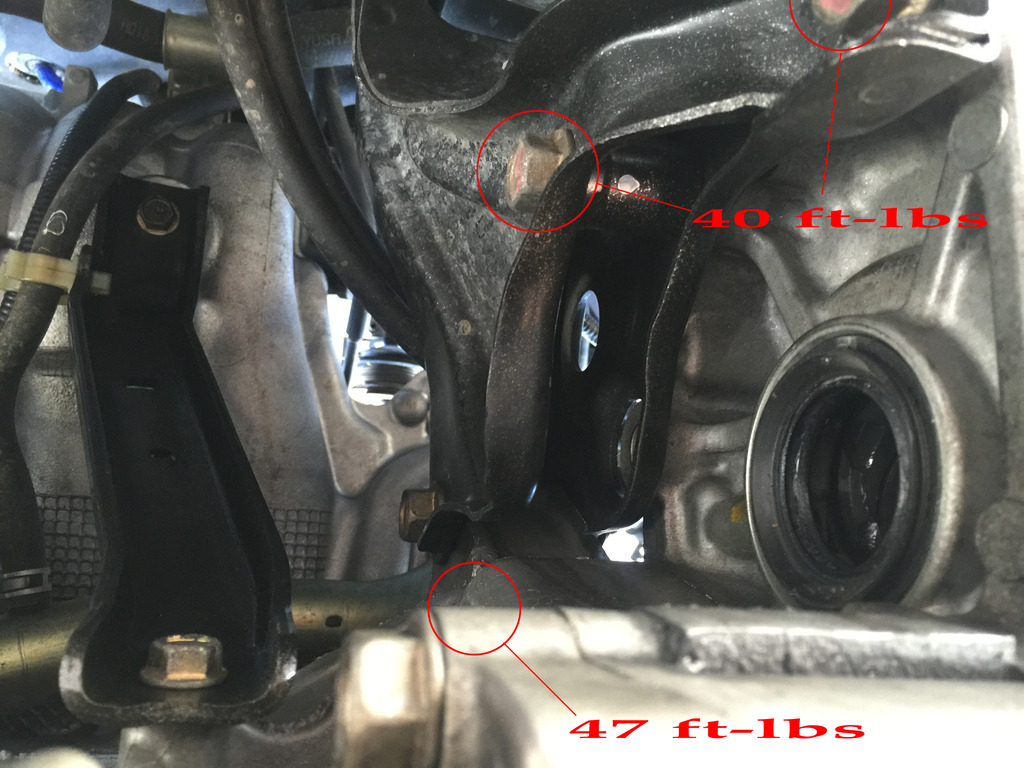
This is the third bolt which is out of view in previous picture.
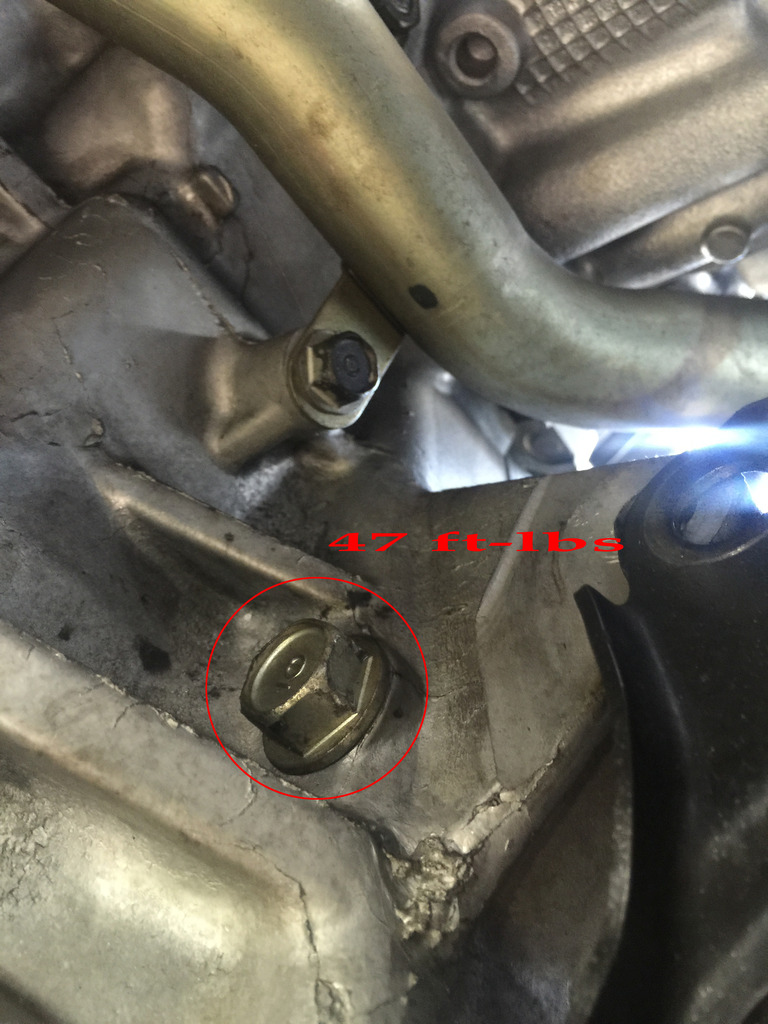
34. Remove front transmission mounting bolt.
35. CAREFULLY pull transmission away from the engine while supporting transmission with jack. Once the shaft is fully out, carefully lower transmission and pull away from car. (Not pictured)
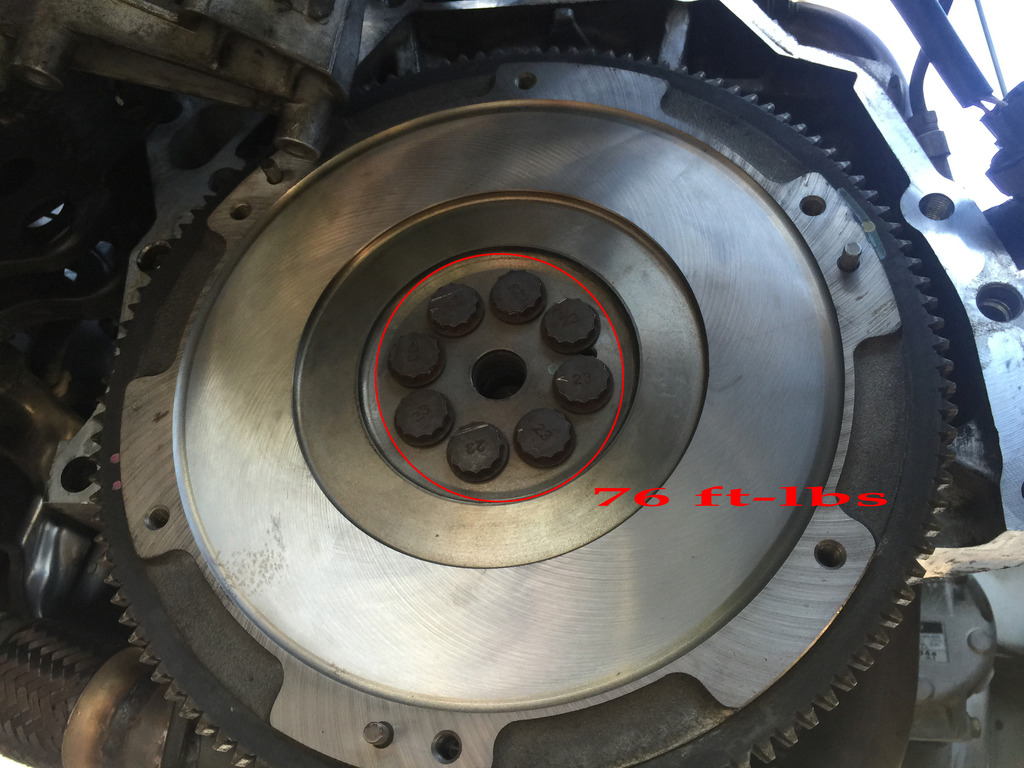
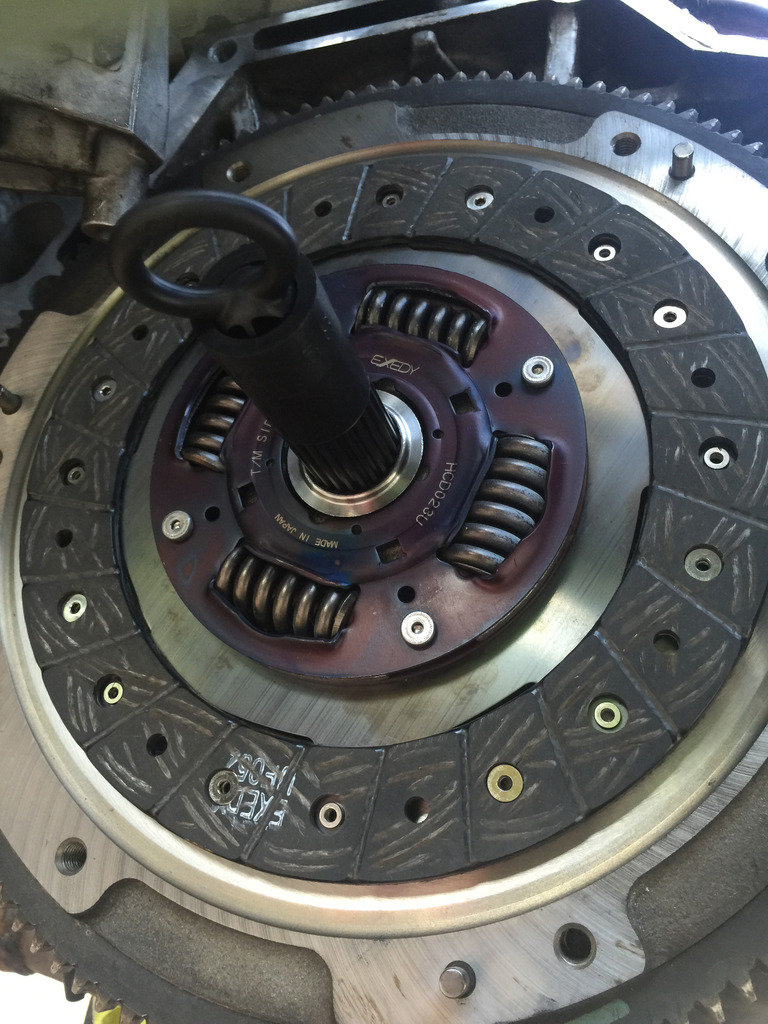
36. Remove bolts holding pressure place onto flywheel. Remove pressure plate and clutch. Pressure Plate Torque Specs: 19 ft-lbs. (Not pictured) When tightening pressure plate, tighten bolts in crisscross pattern in small movements.
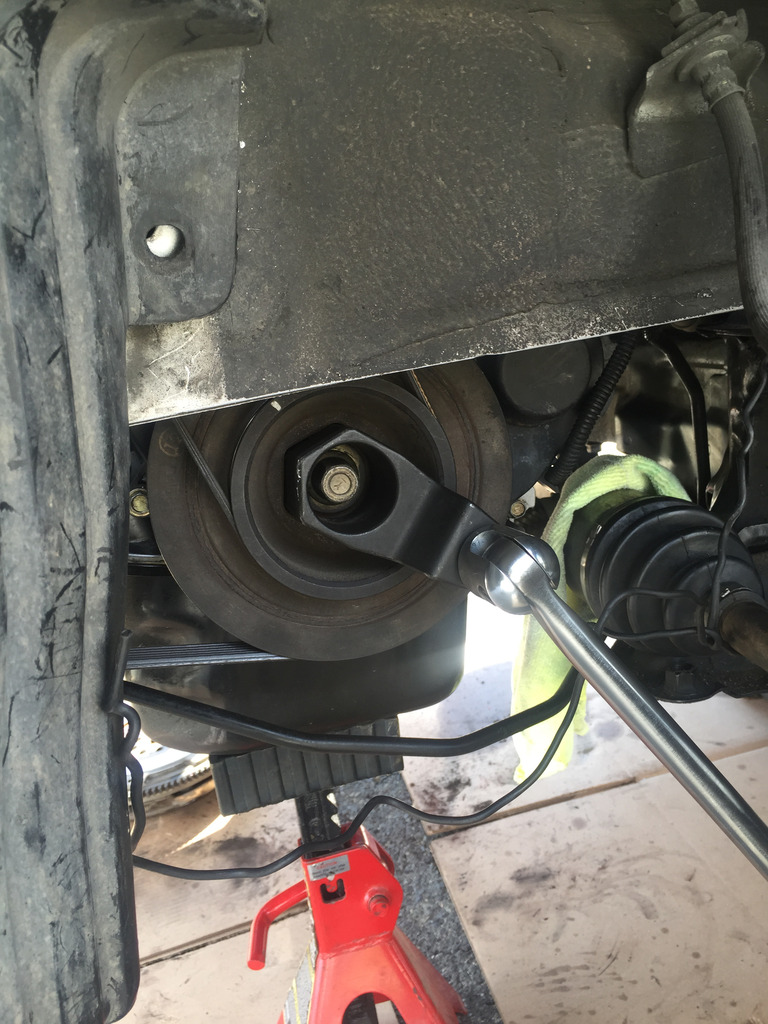
37. Install crankshaft pulley tool and hold crankshaft while removing flywheel bolts.
38. Remove flywheel bolts, and remove flywheel. When installing flywheel, tighten bolts in crisscross pattern.
39. Get flywheel resurfaced. (Not pictured)
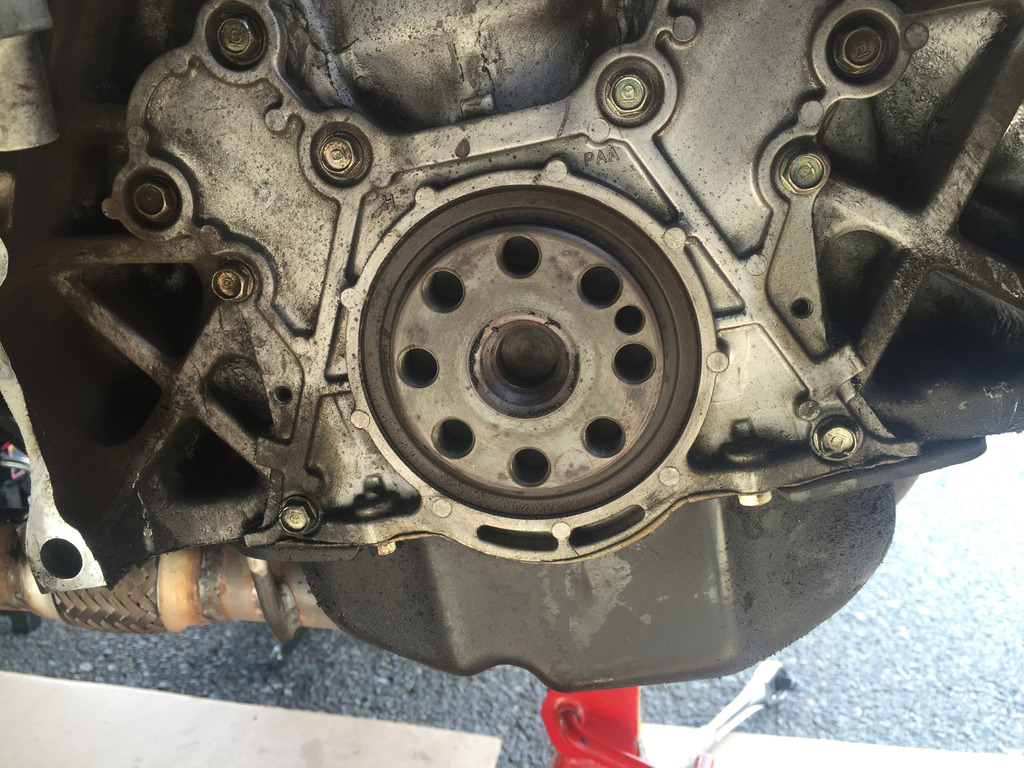
40. This is the crankshaft seal. Remove the housing and replace seal. When reinstalling, apply honda-bond on mating surface and on the tip of mounting bolts and reinstall. Mounting Bolts Torque Specs: 104 in-lbs.
41. Reinstall flywheel.
42. Use clutch alignment tool to hold clutch in place.
43. Install new pressure plate.
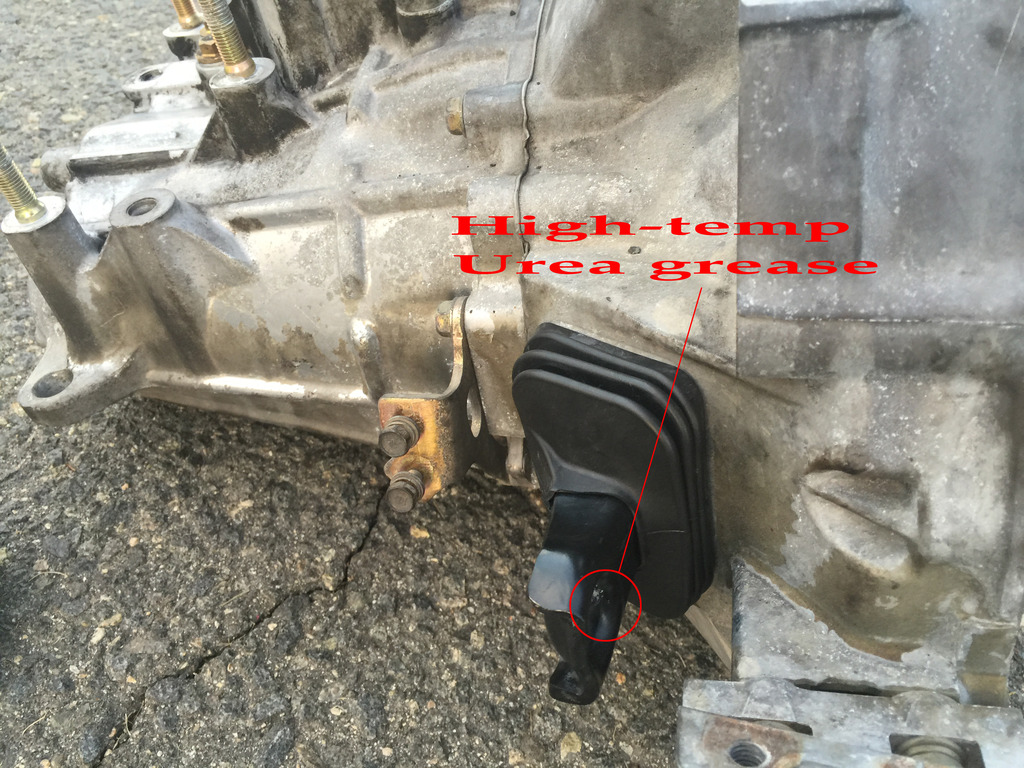
44. Apply urea grease to release bearing guide, shaft splines and release fork.
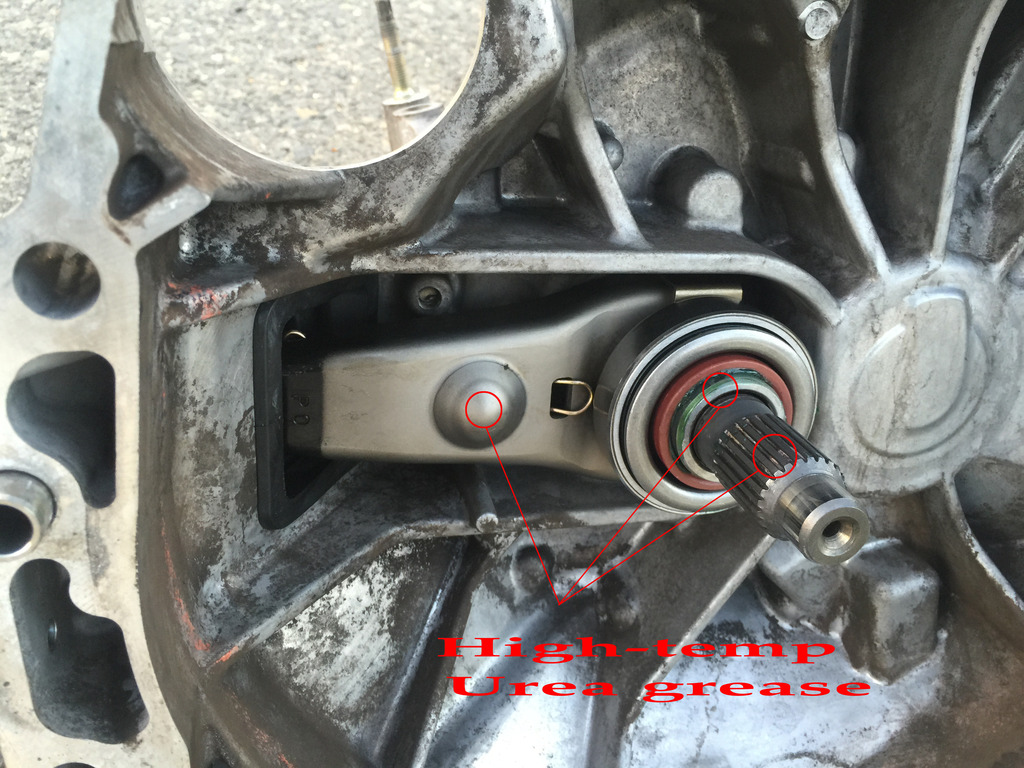
45. Apply urea grease to pivot point on release fork.
Installation is reverse of removal.
Once everything has been installed. Fill transmission through fill hole until fluid starts to run out (approx. 1.9 qts)
Refill engine oil (approx. 4.5 qts)
Things you'll need:
- Wrenches
- Ratchets and sockets (1/4, 3/8 and 1/2" drives are all useful)
- Breaker bar(s)
- Torque Wrenches
- Jack
- Jack Stands
- Crankshaft pulley tool
- Chisel or Pickle Fork and Sledge
- Pry Bars
- Rubber or Wood Blocks
- Oil Drain Pan
- Cotter Pins
- Rubber Mallet
- Funnel (with hose attachment will DEF help)
- Wire or twine
- Rags
I also decided to do the crankshaft seal while I was in there so I decided to include the steps for the oil change as well. Each picture includes the torque specs to the bolts/nuts.
1. Raise the car from the lift point on the sub-frame.
2. Place jack stands under pinch rails.
3. Drain oil. Install new washer and reinstall drain plug.
4. Remove oil filter. Coat gasket on new filter with oil and reinstall.
5. Remove intake.
6. Remove battery.
7. Remove battery tray. There is one bolt under the tray in this picture.
This is the bolt which is out of view in previous picture.
8. Remove harness clamp and clutch line clamp.
9. Remove clutch slave cylinder.
10. Remove transmission ground cable and starter cable clamp.
11. Remove starter cable and starter mounting bolts. Then remove starter. There is one cable (out of view) which just plugs in behind the starter cable.
12. Disconnect back-up light connectors and unclip the wire harness.
13. Remove shift cable bracket. One bolt is not visible in picture.
14. Remove cotter pins and disconnect the shift cables.
15. Disconnect vehicle speed sensor and remove rear engine mount bracket.
16. Remove both upper transmission bolts.
17. Raise car slightly and slide a jack stand WITH rubber block under oil pan. IT IS VERY IMPORTANT TO USE A RUBBER OR WOOD BLOCK. The weight should be very slight on the jack stand.
18. Unclip the A/F sensor harness from bracket and remove front engine mount bolts.
19. Remove splash shield.
20. Remove cotter pins and castle nuts. Loosen bolts on damper forks.
21. Use chisel or pickle fork to separate ball joints from lower arms. Be careful not to damage ball joints.
22. Loosen drain bolt on transmission and drain transmission fluid. Once drained, install new washer and reinstall drain plug.
23. Pry out axles from transmission and from intermediate shaft. Use the wire/twine to hang ends of axles in the air. Cover ends with rags.
24. Remove intermediate shaft.
25. Remove engine stiffener.
26. Remove intake manifold bracket.
27. Remove radius rod bolts from lower arm. (Not pictured) The radius rods come out from the sub-frame and connect to lower arms. 2 bolts on each arm. Torque Specs: 119 ft-lbs
28. Unclip power steering line from sub-frame. There are two clips, there is one towards the front of the car as well as the one pictured.
29. Make reference marks on sub-frame rear beam. Then remove three bolts on each side.
30. Remove front sub-frame bolts. Carefully lower sub-frame and move it out of the way.
31. Remove nuts on transmission mounting bracket.
32. Remove transmission mount bolts and remove mount.
33. Remove rear engine mount bracket mounting bolts. One is out of view in this picture.
This is the third bolt which is out of view in previous picture.
34. Remove front transmission mounting bolt.
35. CAREFULLY pull transmission away from the engine while supporting transmission with jack. Once the shaft is fully out, carefully lower transmission and pull away from car. (Not pictured)
36. Remove bolts holding pressure place onto flywheel. Remove pressure plate and clutch. Pressure Plate Torque Specs: 19 ft-lbs. (Not pictured) When tightening pressure plate, tighten bolts in crisscross pattern in small movements.
37. Install crankshaft pulley tool and hold crankshaft while removing flywheel bolts.
38. Remove flywheel bolts, and remove flywheel. When installing flywheel, tighten bolts in crisscross pattern.
39. Get flywheel resurfaced. (Not pictured)
40. This is the crankshaft seal. Remove the housing and replace seal. When reinstalling, apply honda-bond on mating surface and on the tip of mounting bolts and reinstall. Mounting Bolts Torque Specs: 104 in-lbs.
41. Reinstall flywheel.
42. Use clutch alignment tool to hold clutch in place.
43. Install new pressure plate.
44. Apply urea grease to release bearing guide, shaft splines and release fork.
45. Apply urea grease to pivot point on release fork.
Installation is reverse of removal.
Once everything has been installed. Fill transmission through fill hole until fluid starts to run out (approx. 1.9 qts)
Refill engine oil (approx. 4.5 qts)
Last edited: