racerzedge
Well-Known Member
Hi guys,
I know this project has been done to death by lots of members on this forum as well as other Honda forums, but there's still a lot of questions regarding bulbs specs. So here's my LED gauge cluster project.
First off, I want to thank talontsiawd for his great write-up on this issue (http://www.6thgenaccord.com/forums/showthread.php?t=2642). His thread gave me the inspiration to do mine.
First off, bulbs! Can't do LED conversion without LED bulbs, right? I got mine from Superbrightleds.com. Their website is easy to navigate and simple to use.
I ordered 3 #194 wedge base bulbs in cool white with 120 degree beam, non-polarized, 12v DC:
- WLED-x-x: 1 LED wedge base bulb-WLED-W120 ($1.39 each)
I ordered 3 #74 standard 5mm twist lock bulbs in cool white with 120 degree beam, 12v DC:
- T1.5-x: 5mm LED instrument twist lock lamp-T1.5-CW ($1.79 each)
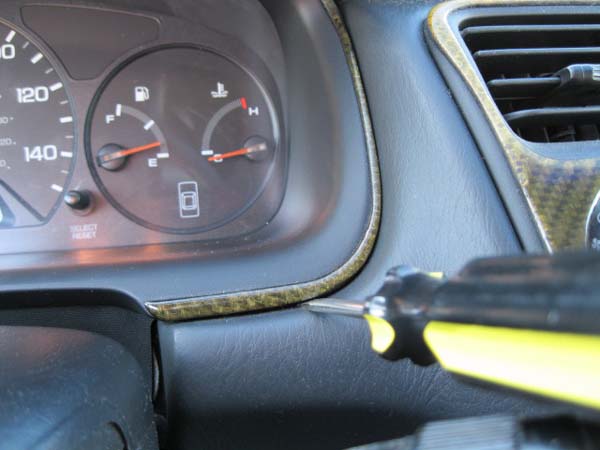
Once they arrived, I removed the instrument cluster. The hardest part for me was the plastic trim piece.
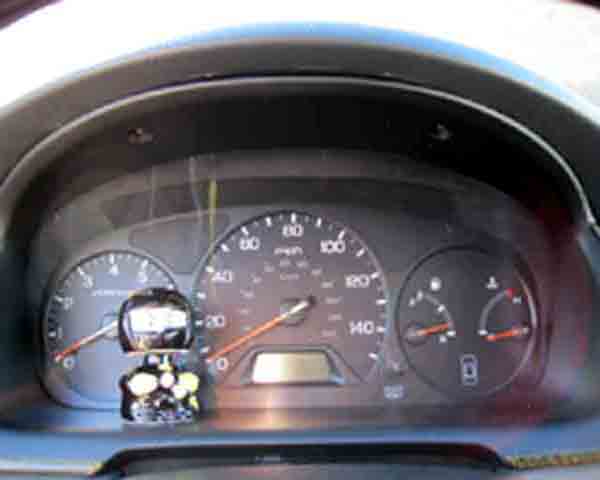
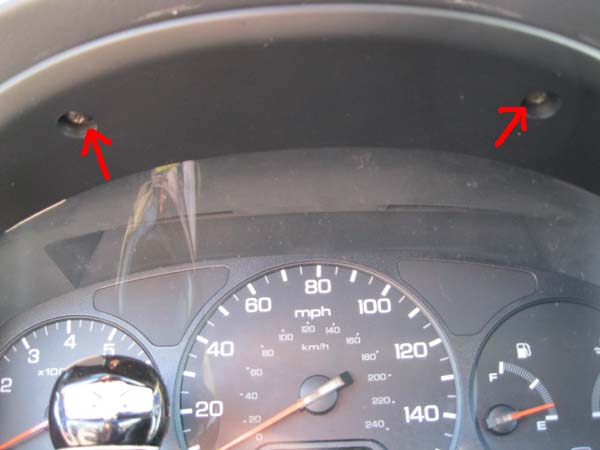
After you remove the 2 screws on top, use a flat head screw driver (if you want to be careful, make sure to wrap the screw driver head in tape) and GENTLY insert to unlatch the 2 clips. I was impatient and broke my right one
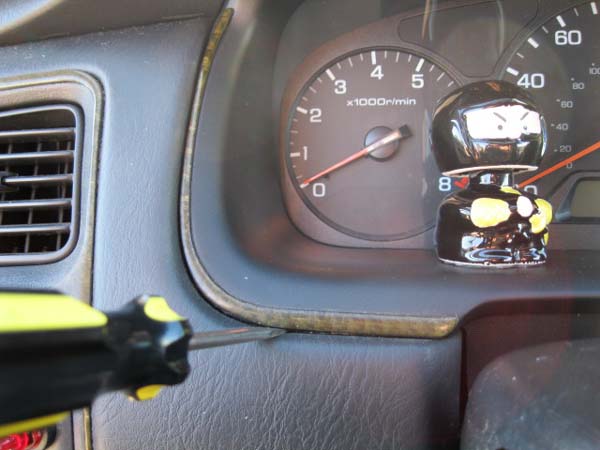
Once the plastic trim piece is out, then everything else is cake. The following picture lets you know that you need to remove 4 screws that hold the instrument cluster in place. Once the screws are removed, unplug the 3 connectors located at the top.
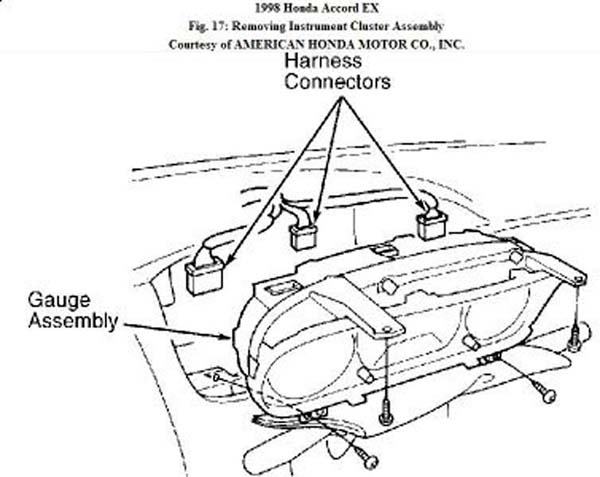
The back of the cluster should look like this. The image is from a 98 EX (mine is a 98 LX MT), so there are some variations, but the bulbs that you need to remove are pretty much the same (I'm not sure about AT, can anyone verify?)
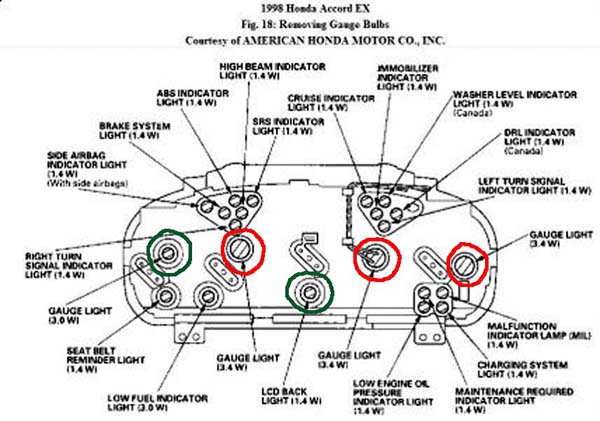
Remove the bulb holders circled red in the diagram above. Do this one at a time. Turn the bulb holder counter-clockwise to unlock and gently pull out to remove. Wear gloves or use a soft napkin to remove the bulbs as to not leave oily residues on these bulbs (just in case you want to reuse them later). Insert the LED #194 wedge bulbs into the holder. (They're non-polarized so no worries about how you put them in the holder.) Place the bulb holder back in and twist clockwise to lock.
Next, remove the bulb holder circled green on the left of the diagram. Same thing, twist counter-clockwise and gently pull out to remove. You won't be removing the bulbs from the holder for this one. Insert the LED #74 (which is the T1.5 twist lock lamp) into the receptacle and twist clockwise to lock. It's important to remember that these are polarized, so if they don't light up when you plug everything back in, you will need to unplug everything and take this lamp back out. This happened to me, so I learned from experience.
If you want to change out the LCD lamp, then remove the bulb holder circled green on the bottom of the diagram.
Put everything back together, turn on the lights, adjust your brightness and enjoy. Have fun, guys.
Ok, finally have time to take pictures of my finished product.
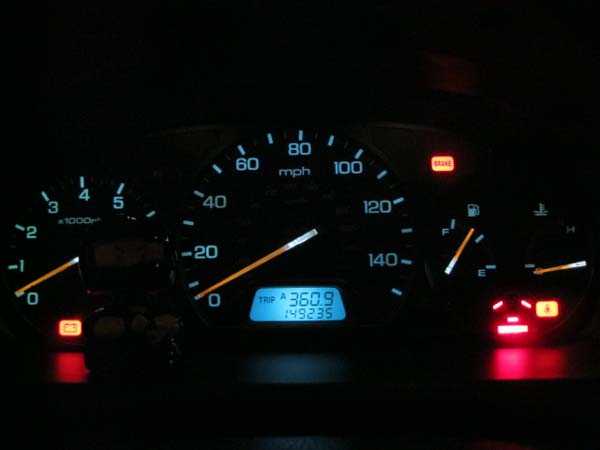
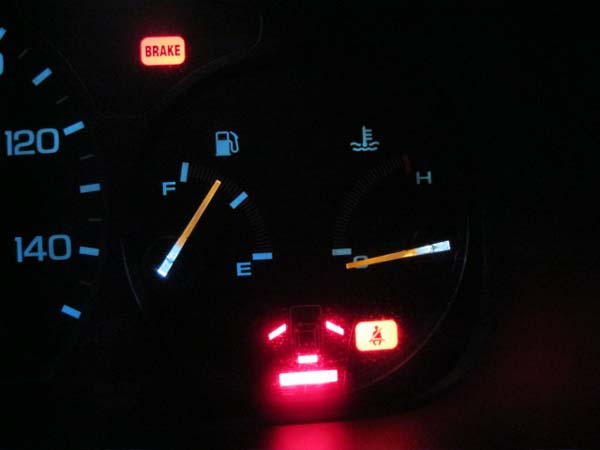
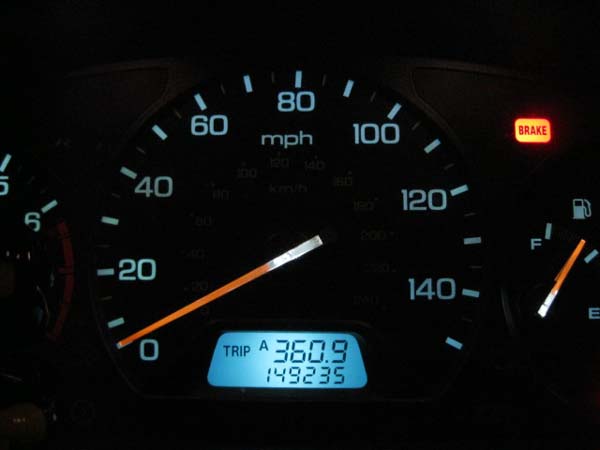
There's a bit of a hotspot on the LCD screen. Nothing too noticeable.
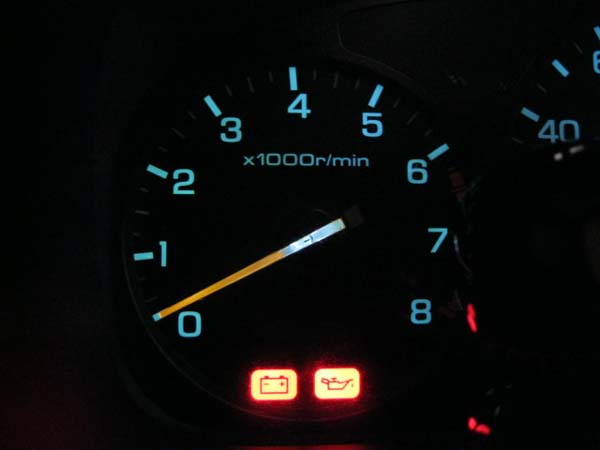
I know this project has been done to death by lots of members on this forum as well as other Honda forums, but there's still a lot of questions regarding bulbs specs. So here's my LED gauge cluster project.
First off, I want to thank talontsiawd for his great write-up on this issue (http://www.6thgenaccord.com/forums/showthread.php?t=2642). His thread gave me the inspiration to do mine.
First off, bulbs! Can't do LED conversion without LED bulbs, right? I got mine from Superbrightleds.com. Their website is easy to navigate and simple to use.
I ordered 3 #194 wedge base bulbs in cool white with 120 degree beam, non-polarized, 12v DC:
- WLED-x-x: 1 LED wedge base bulb-WLED-W120 ($1.39 each)
I ordered 3 #74 standard 5mm twist lock bulbs in cool white with 120 degree beam, 12v DC:
- T1.5-x: 5mm LED instrument twist lock lamp-T1.5-CW ($1.79 each)
Once they arrived, I removed the instrument cluster. The hardest part for me was the plastic trim piece.
After you remove the 2 screws on top, use a flat head screw driver (if you want to be careful, make sure to wrap the screw driver head in tape) and GENTLY insert to unlatch the 2 clips. I was impatient and broke my right one

Once the plastic trim piece is out, then everything else is cake. The following picture lets you know that you need to remove 4 screws that hold the instrument cluster in place. Once the screws are removed, unplug the 3 connectors located at the top.
The back of the cluster should look like this. The image is from a 98 EX (mine is a 98 LX MT), so there are some variations, but the bulbs that you need to remove are pretty much the same (I'm not sure about AT, can anyone verify?)
Remove the bulb holders circled red in the diagram above. Do this one at a time. Turn the bulb holder counter-clockwise to unlock and gently pull out to remove. Wear gloves or use a soft napkin to remove the bulbs as to not leave oily residues on these bulbs (just in case you want to reuse them later). Insert the LED #194 wedge bulbs into the holder. (They're non-polarized so no worries about how you put them in the holder.) Place the bulb holder back in and twist clockwise to lock.
Next, remove the bulb holder circled green on the left of the diagram. Same thing, twist counter-clockwise and gently pull out to remove. You won't be removing the bulbs from the holder for this one. Insert the LED #74 (which is the T1.5 twist lock lamp) into the receptacle and twist clockwise to lock. It's important to remember that these are polarized, so if they don't light up when you plug everything back in, you will need to unplug everything and take this lamp back out. This happened to me, so I learned from experience.
If you want to change out the LCD lamp, then remove the bulb holder circled green on the bottom of the diagram.
Put everything back together, turn on the lights, adjust your brightness and enjoy. Have fun, guys.
Ok, finally have time to take pictures of my finished product.
There's a bit of a hotspot on the LCD screen. Nothing too noticeable.
Last edited:


 thanks...very good write up...


