

Mikey
Well-Known Member
Alright folks! I know there was/is a thread floating around here or V6P about a switchblade key but last I knew it didn't look like a Honda fob, was expensive, time consuming and rather frustrating. The parts for this cost less than $20 and depending on your local dealer, getting the keys cut and programmed shouldn't cost more that $25.
As always; PERFORM AT YOUR OWN RISK. If you have multiple keys/fobs and can afford to cut them up, then go ahead. If you have only one key/fob, I highly suggest buying a spare key from the link(s) provided or from the dealer. Even if you have only one fob, this is virtually reversible so if you choose to go back all you have to do is keep your old fob and put it back together later.
The switchblade. I suggest ordering from AutoAftermarket.....
http://www.amazon.com/Keyless-Buttons-Folding-Insight-2000-2003/dp/B00K117FME/ref=sr_1_1?ie=UTF8&qid=1419239868&sr=8-1&keywords=Keyless+Entry+Switch+Modify+4+Buttons+Folding+Flip+Remote+Fob+Key+Shell+Case+for+Honda
The key blank w/chip.....(It has to be a T5. That is CRUCIAL!)
http://www.amazon.com/Ignition-Transponder-Blank-Chip-T5-Honda/dp/B006FSUFX8/ref=sr_1_1?ie=UTF8&qid=1419240059&sr=8-1&keywords=New+Ignition+Transponder+Key+Blank+Chip-T5+For+Honda
V--------TOOLS--------V
1. Small Philips head screwdriver. The key blank comes with one but it kinda sucked, lol.
2. Scissors, razor blade, exact-o knife, etc--some sort of small cutting device.
3. Pliers or snips.
4. Small flathead screwdriver or prying tool.--OPTIONAL.
V--------STEPS--------V
1. Buy above parts. You don't NEED the spare key but I only have the one and I wasn't about go chopping up my only key. Plus, it's cheap.
(Don't mind the cuts, I forgot to get a pic before cutting, lol.)
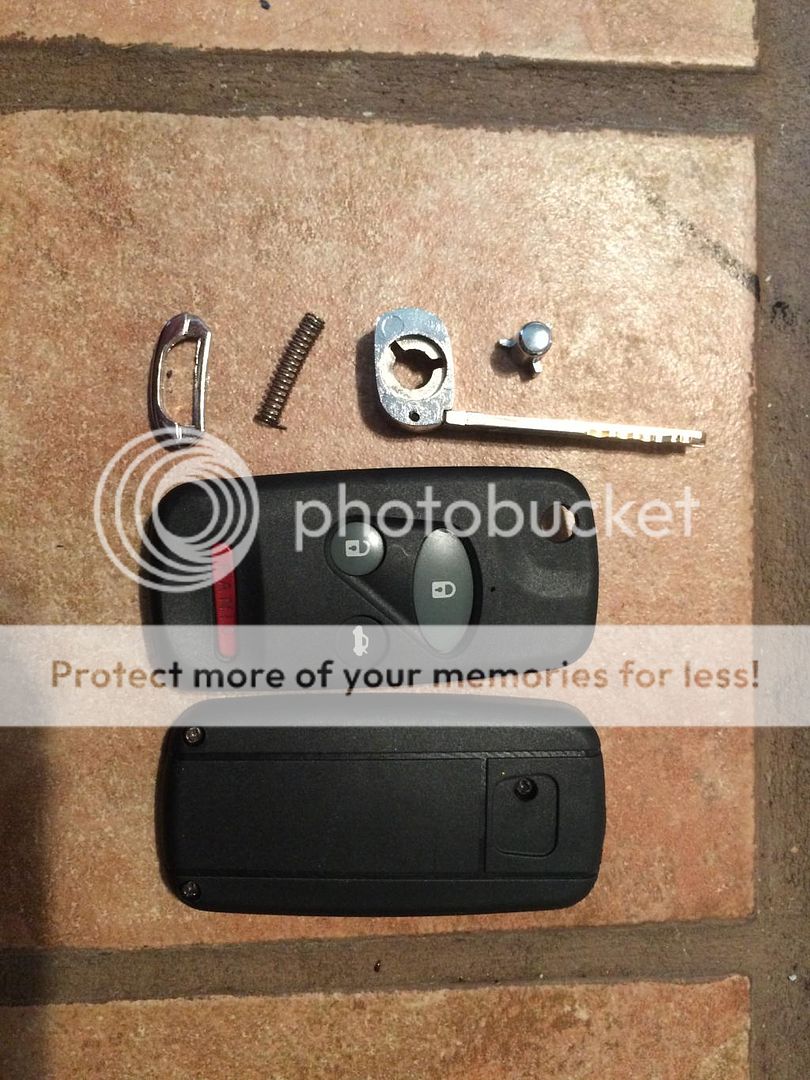
2. Take apart the switchblade. Remove the 3 little screws on the back. Be careful not to lose anything as there are a couple of small parts inside.
3. --TAKE BLANK KEY (before cutting open) AND SWITCHBLADE KEY TO DEALER-- I got lucky and my dealer didn't charge me anything. Parts guy told me that buying a blank T5 key from them gets you a free program and that he usually doesn't charge anything to physically cut the key(s). He went ahead and cut both the blanks and programmed the chip.
3b. Id say make sure they fit your car/locks before leaving as mine were a little rough. It fit and they work but they required a little finesse at first.
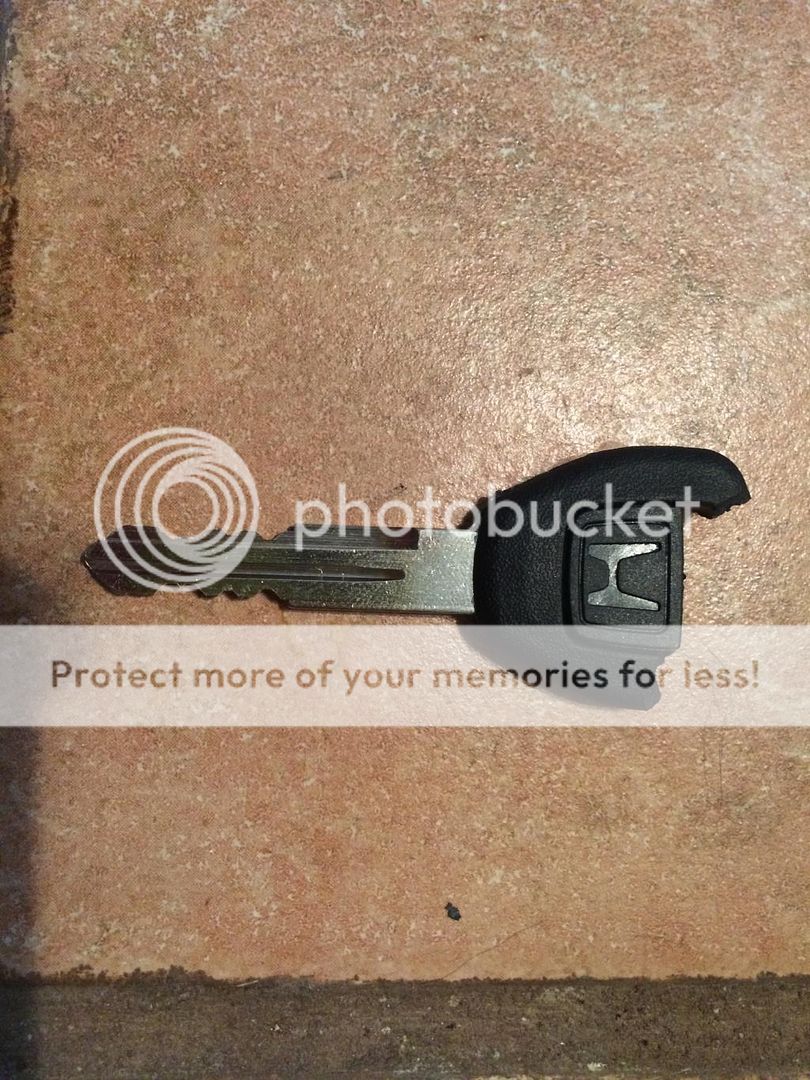
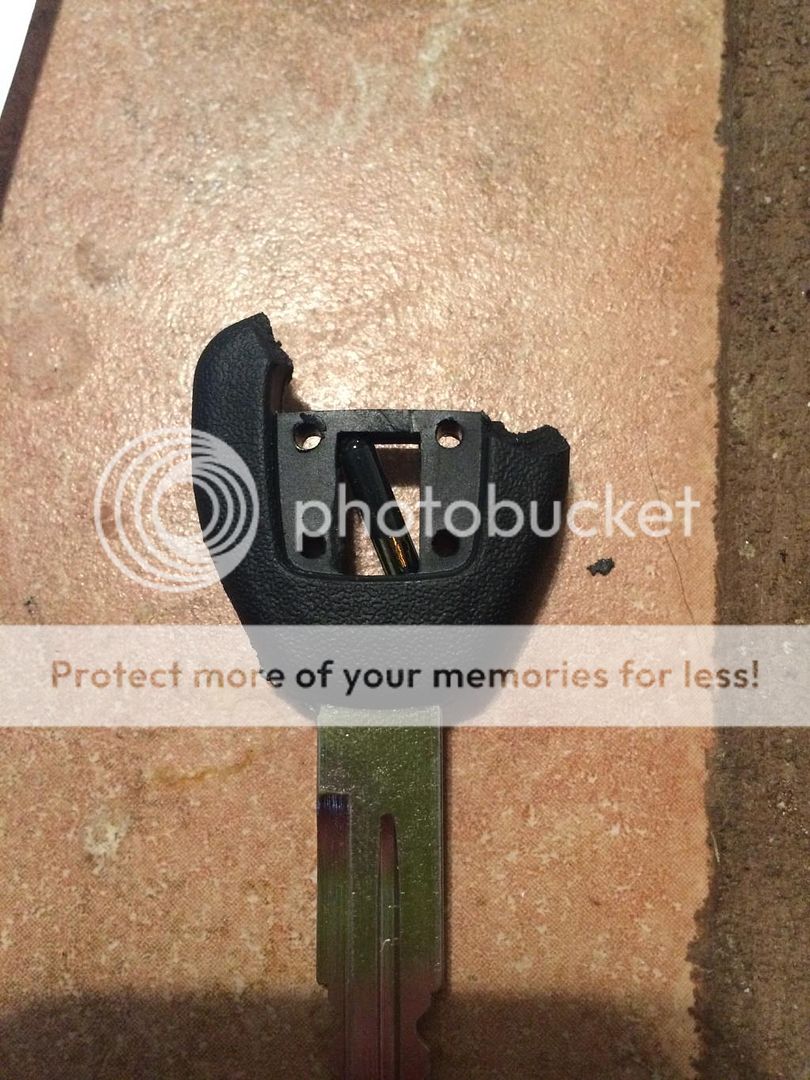
4. Let's go ahead and get the chip out of the key. Snip the end of the plastic part of the key. Mine popped off and the 2 little H's were actually covers for the empty space that housed the chip. Removing those covers allowed the chip to all but fall out.
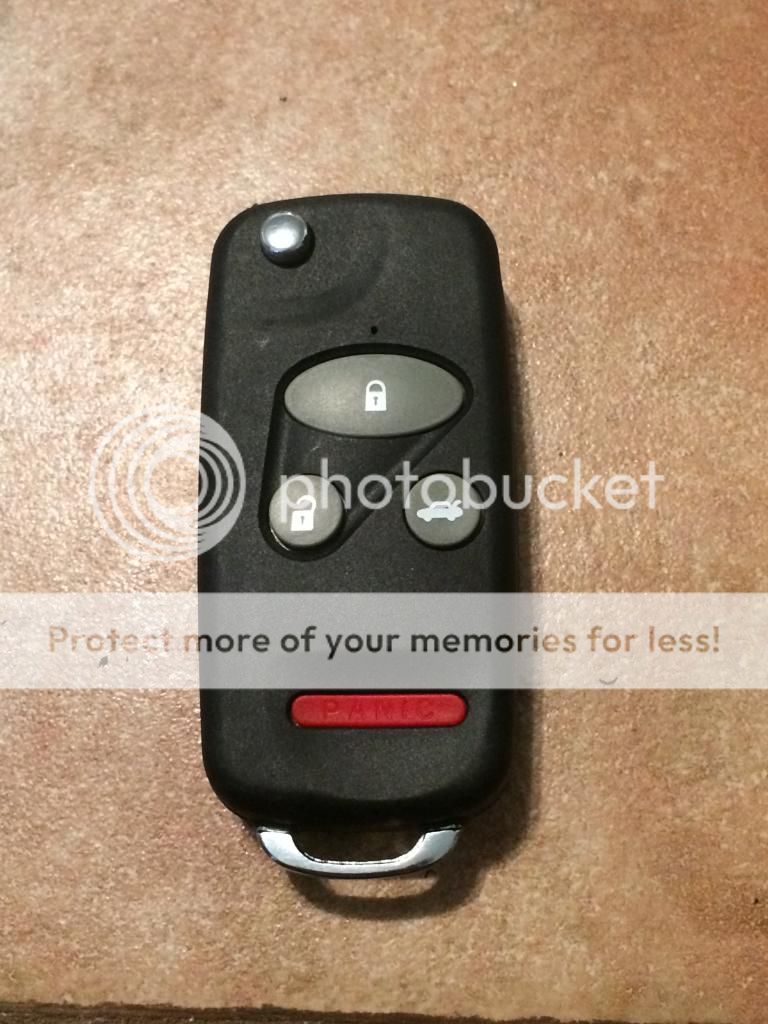
5. Over to the switchblade fob. It came with buttons, I found them to be clunky and kinda cheap so I ended up using the button pad out of my OEM fob. I just had to trim a bit off the bottom and the sides to fit. Nothing that effected how it fits in the original fob.

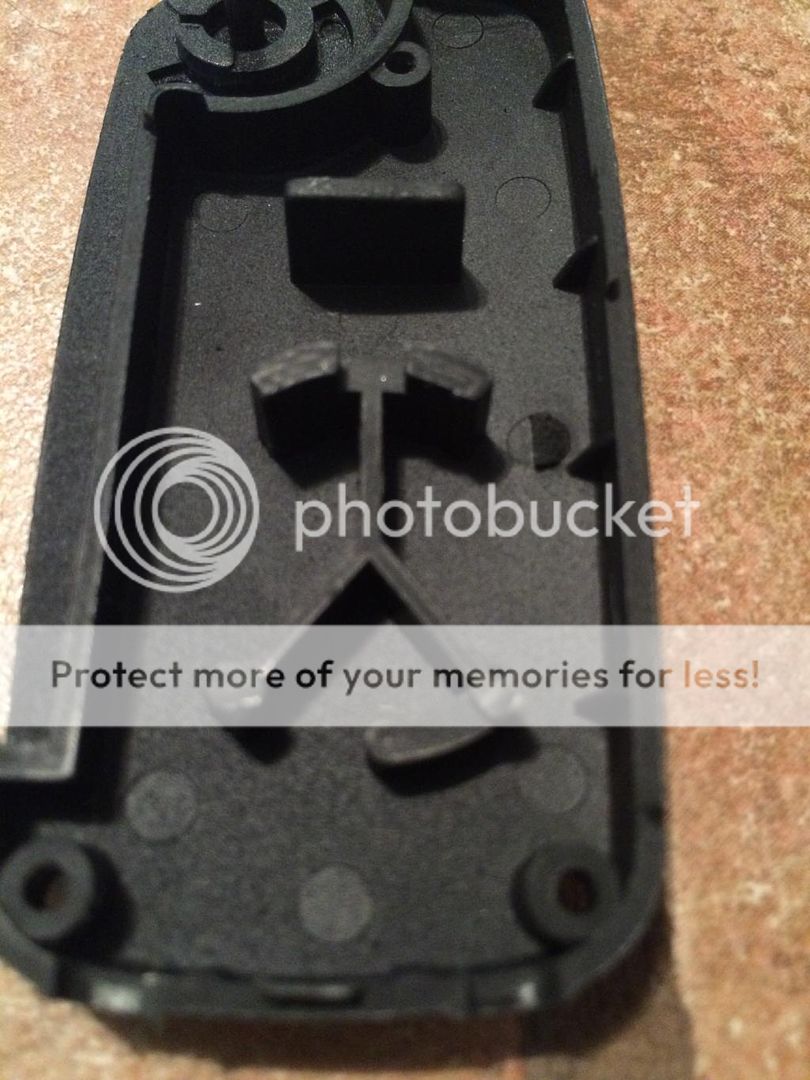
5b. Inside the BACK of the body you'll see what looks like a brace or "holder" for the battery/back of the remote board. I had to trim the bottom 2 pieces accordingly so that everything would fit.
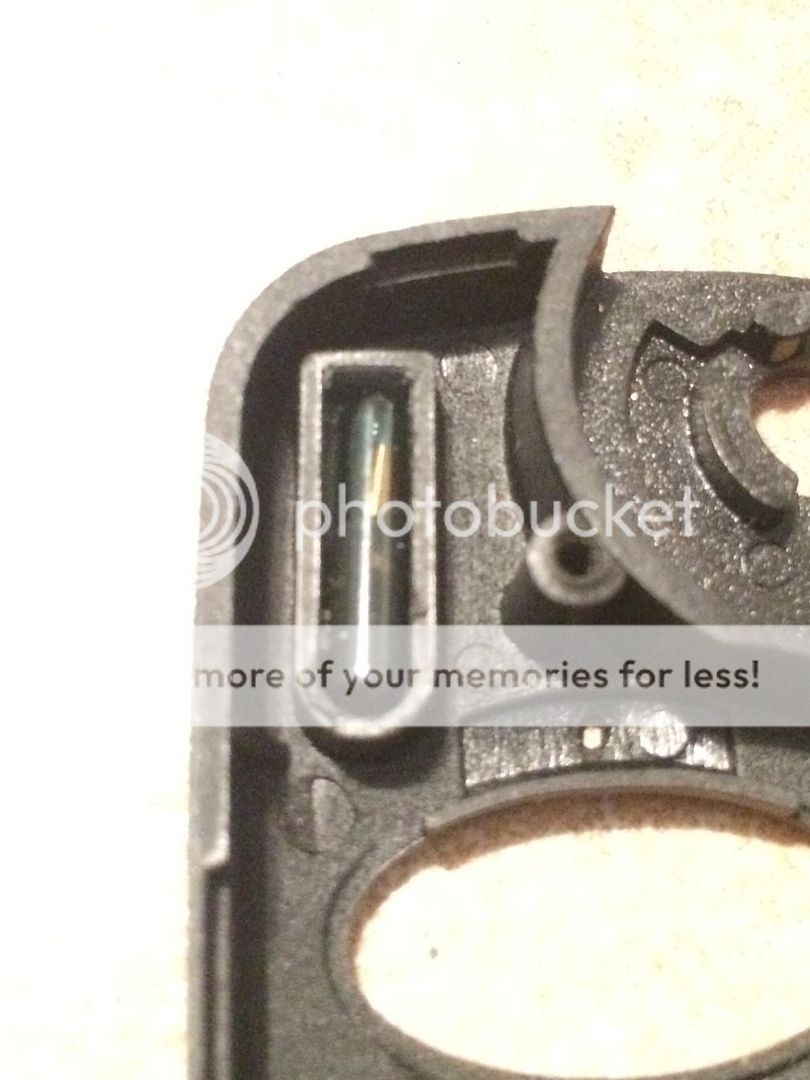
5c. At the top of the fob is the space for the chip. It didn't quite fit so I had to shave/scrape it out with a knife so that the chip fit snug. You want it to fit SNUG--you don't want it to be loose and fall out.
6. Place your buttons inside the fob, put the chip in the space for it(I chose to place a small piece of the provided foam over it but its not necessary).....
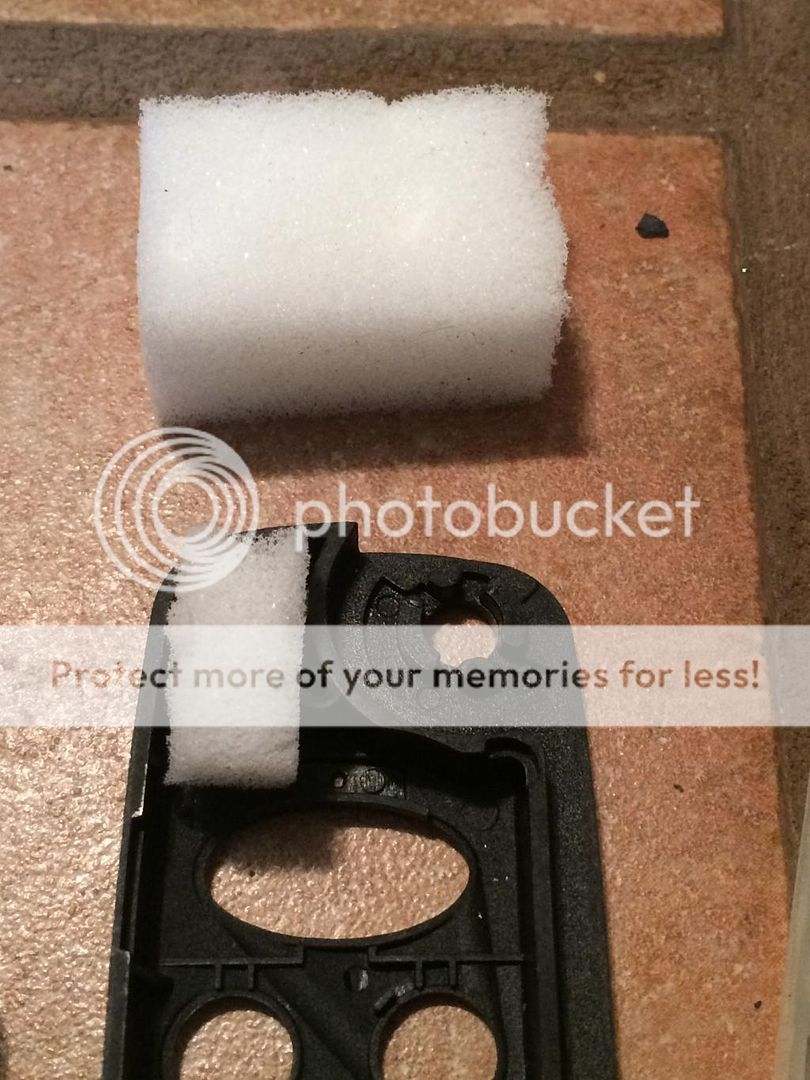
...place the remote board in, put the key and spring in place and re-attach everything.
^^^ I found this to be the hardest part of the whole thing. Trying not to push the buttons, trying to hold everything in, keeping the key ring at the bottom in place and winding the backing plate into the spring and twisting it around and into place. This is where a bit of patience comes in handy, lol.
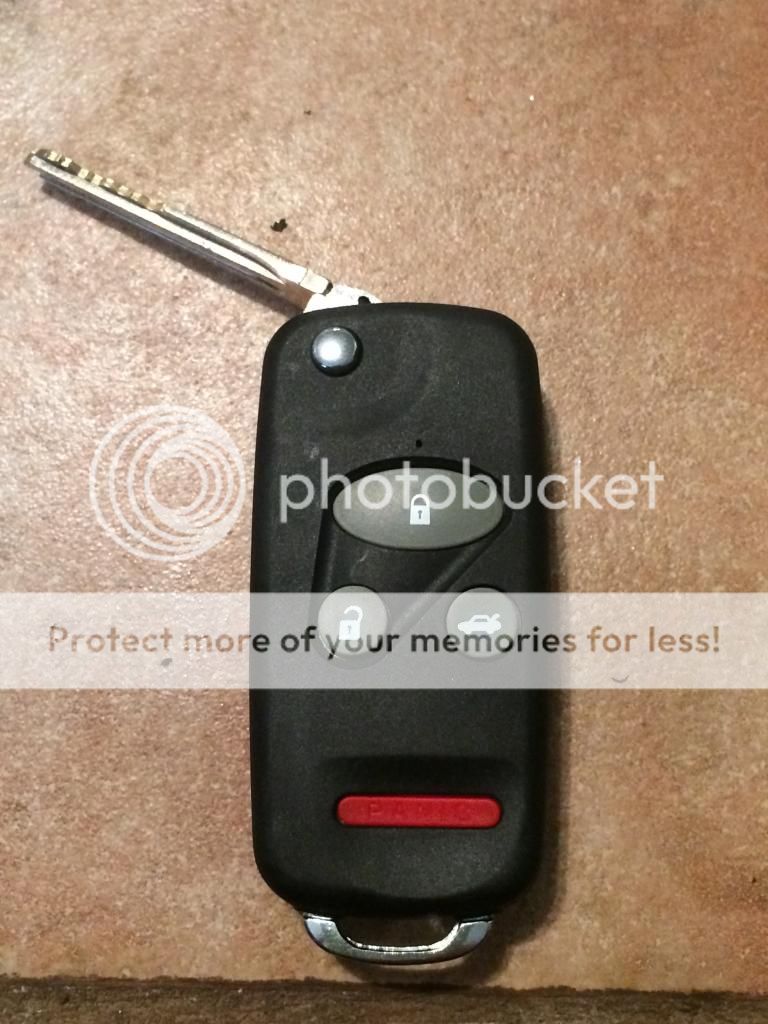
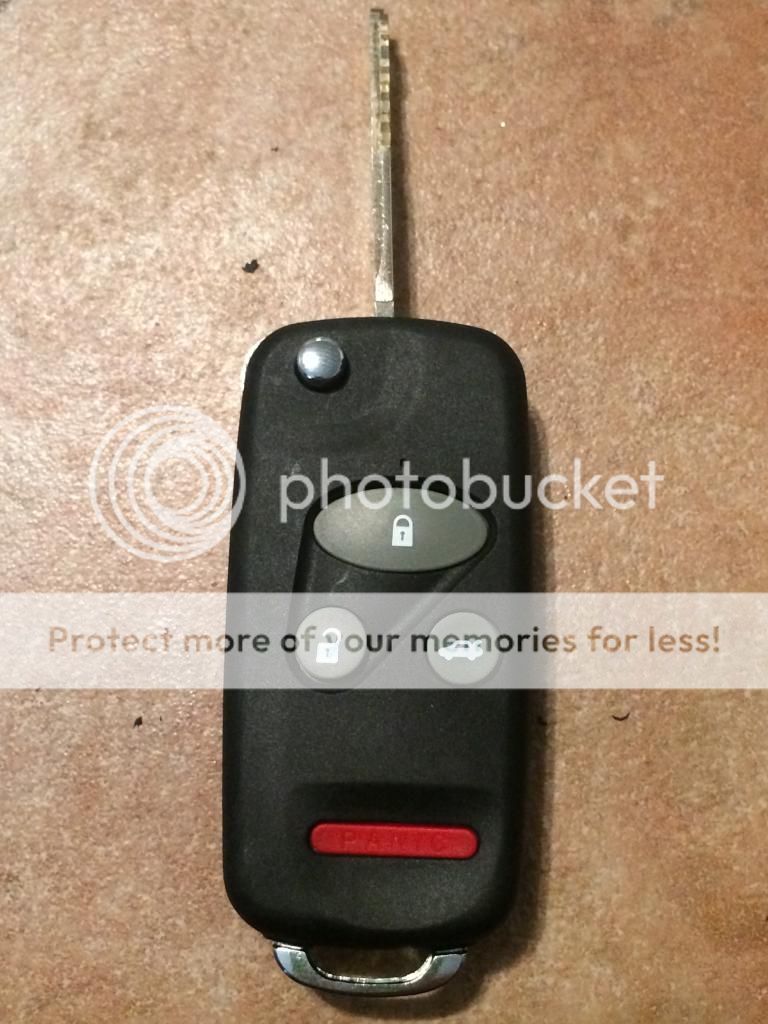
And there you have it. Your brand new, switchblade key.
The key ring at the bottom is optional and can possibly even be trimmed to accommodate rings better. My key ring fits but its too big to fold over like I want it to so that may just be the key ring itself. If you have any questions feel free to post or ask.
And as always, have fun!
As always; PERFORM AT YOUR OWN RISK. If you have multiple keys/fobs and can afford to cut them up, then go ahead. If you have only one key/fob, I highly suggest buying a spare key from the link(s) provided or from the dealer. Even if you have only one fob, this is virtually reversible so if you choose to go back all you have to do is keep your old fob and put it back together later.
V--------PARTS--------V
The switchblade. I suggest ordering from AutoAftermarket.....
http://www.amazon.com/Keyless-Buttons-Folding-Insight-2000-2003/dp/B00K117FME/ref=sr_1_1?ie=UTF8&qid=1419239868&sr=8-1&keywords=Keyless+Entry+Switch+Modify+4+Buttons+Folding+Flip+Remote+Fob+Key+Shell+Case+for+Honda
The key blank w/chip.....(It has to be a T5. That is CRUCIAL!)
http://www.amazon.com/Ignition-Transponder-Blank-Chip-T5-Honda/dp/B006FSUFX8/ref=sr_1_1?ie=UTF8&qid=1419240059&sr=8-1&keywords=New+Ignition+Transponder+Key+Blank+Chip-T5+For+Honda
V--------TOOLS--------V
1. Small Philips head screwdriver. The key blank comes with one but it kinda sucked, lol.
2. Scissors, razor blade, exact-o knife, etc--some sort of small cutting device.
3. Pliers or snips.
4. Small flathead screwdriver or prying tool.--OPTIONAL.
V--------STEPS--------V
1. Buy above parts. You don't NEED the spare key but I only have the one and I wasn't about go chopping up my only key. Plus, it's cheap.
(Don't mind the cuts, I forgot to get a pic before cutting, lol.)
2. Take apart the switchblade. Remove the 3 little screws on the back. Be careful not to lose anything as there are a couple of small parts inside.
3. --TAKE BLANK KEY (before cutting open) AND SWITCHBLADE KEY TO DEALER-- I got lucky and my dealer didn't charge me anything. Parts guy told me that buying a blank T5 key from them gets you a free program and that he usually doesn't charge anything to physically cut the key(s). He went ahead and cut both the blanks and programmed the chip.
3b. Id say make sure they fit your car/locks before leaving as mine were a little rough. It fit and they work but they required a little finesse at first.
4. Let's go ahead and get the chip out of the key. Snip the end of the plastic part of the key. Mine popped off and the 2 little H's were actually covers for the empty space that housed the chip. Removing those covers allowed the chip to all but fall out.
5. Over to the switchblade fob. It came with buttons, I found them to be clunky and kinda cheap so I ended up using the button pad out of my OEM fob. I just had to trim a bit off the bottom and the sides to fit. Nothing that effected how it fits in the original fob.
5b. Inside the BACK of the body you'll see what looks like a brace or "holder" for the battery/back of the remote board. I had to trim the bottom 2 pieces accordingly so that everything would fit.
5c. At the top of the fob is the space for the chip. It didn't quite fit so I had to shave/scrape it out with a knife so that the chip fit snug. You want it to fit SNUG--you don't want it to be loose and fall out.
6. Place your buttons inside the fob, put the chip in the space for it(I chose to place a small piece of the provided foam over it but its not necessary).....
...place the remote board in, put the key and spring in place and re-attach everything.
^^^ I found this to be the hardest part of the whole thing. Trying not to push the buttons, trying to hold everything in, keeping the key ring at the bottom in place and winding the backing plate into the spring and twisting it around and into place. This is where a bit of patience comes in handy, lol.
And there you have it. Your brand new, switchblade key.
The key ring at the bottom is optional and can possibly even be trimmed to accommodate rings better. My key ring fits but its too big to fold over like I want it to so that may just be the key ring itself. If you have any questions feel free to post or ask.
And as always, have fun!

 what type of battery does that thing take?