

Hello all, I know that there is a tutorial on this on filtsai, but I couldn't find one on 6GA, so I figured I'd make one!
Time Needed:
15 min-2 hrs for valve cover removal (I took 1 hr 15 min)
1-5 hrs to paint
10-45 min to reinstall
Tools and materials:
Ratchet and 10mm socket
Pliers
ScotchBrite pads or high grit sandpaper
Paper towels
Cleaner/Degreaser (I used engine cleaner)
Hose
Painters Tape
Small containers (for raised letters)
High temp paint (I used the Metalcast system)

Let's get started!
Removal:
1: Open the hood and break out the 10mm socket. Remove the two bolts on the spark plug holders

2: Slowly and carefully pull out the spark plugs and set them aside in a safe spot

3: Next use your pliers to move the clamp on the left hose up and pull the breather tube out.

4: Next pull the PCV valve (thing on the right) straight out of the hole.

5: Remove the PCV valve gasket/grommet thing.

6: Next, grab your 10mm ratchet and remove the 5 bolts. They are quite long, but are not threaded very much. There are 3 in the back and 2 in the front. Then pull the bolts straight up and they should come out.

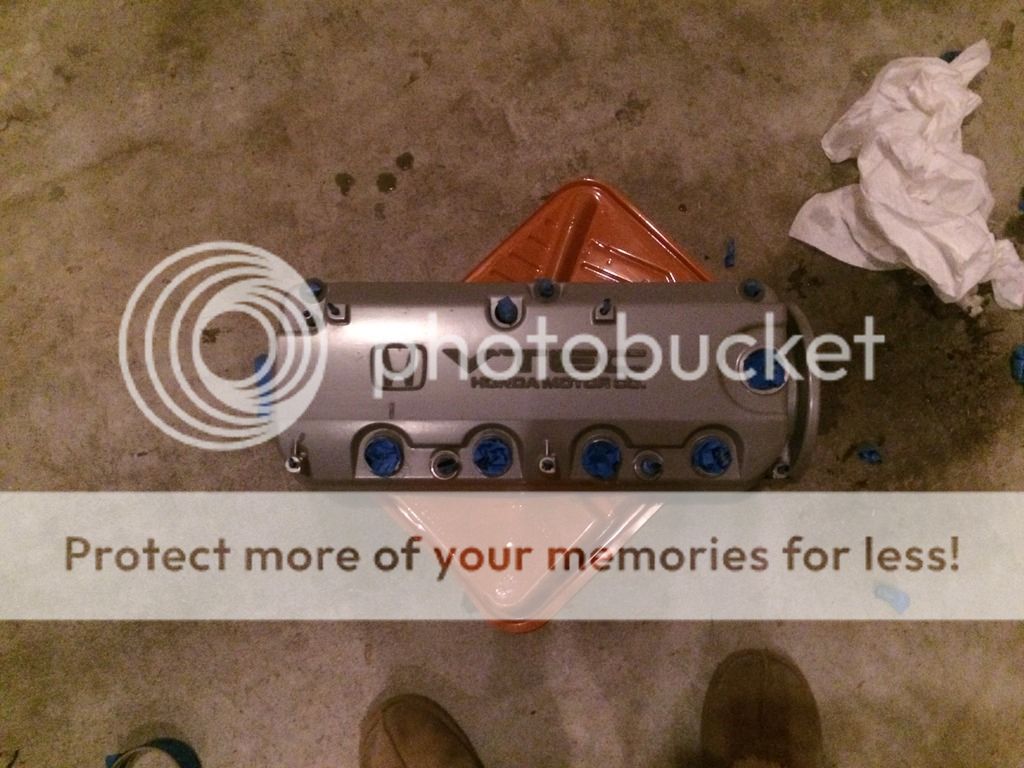
7: Remove the oil cap")

8: Now, pull the valve up and towards you to release it and clear the tubes for the spark plugs. This can be difficult if the valve cover hasn't been removed in a while. Just pull, don't pry on anything. Then, close your hood most of the way/cover the engine with aluminum foil to avoid getting anything in the engine. It is insanely bad to get ANYTHING in there.

Painting:
1: Put the valve cover on something and mask it up so nothing can get inside. (Don't forget the sides)

2: Spray on your cleaner/degreaser and follow the instructions on the package.

3: Rinse off/Clean off the cleaner as specified on the instructions and dry it off.

4: Make sure it is dry and re-mask it to ensure a good seal.
5: Once it is dry and taped up, follow the instructions for the paint. Make sure you use some sort of primer or base coat. I did Metalcast ground coat and Metalcast Blue.

6: Once the paint is dry (MAKE SURE IT IS), mask it off as shown if you choose to paint the letters.

7: Then, take a paper towel and roll it up as tightly as you can. Next, fold the towel in have and tape the two sides together. Then grab your small container.

8: Next, take the spray paint you want to use (I used the Metalcast ground coat) in the corner of your container until you create a puddle. Then, quickly grab your paper towel and dip it in the puddle and brush off excess. Next, LIGHTLY brush the paint overtop in one direction. Then add more coats until you receive the desired effect.
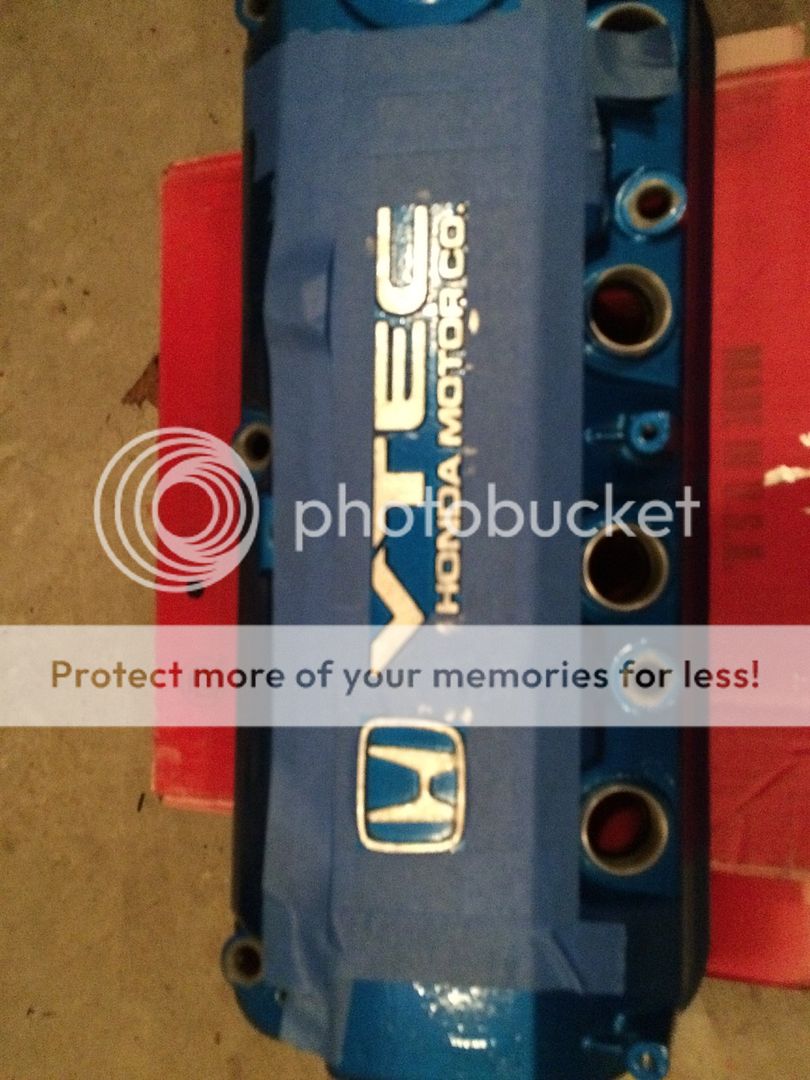
9: Then peel off your masking ASAP. (My paint wasn't dry and it pulled off a big chunk of paint, but I wasn't going to redo it again)

Reinstall:
1: Make 100% SURE there is nothing in the engine or valve cover, then set the valve cover on the engine the same way you removed it so there is no gap between it and the heads.

2: Install the 5 bolts back in. (Shorter ones go in front)
3: Reinstall the PCV valve gasket/grommet thing (This may be easier for you with the calve cover off the car)

4: Put the PCV valve back in the grommet.

5: Next, put the breather tube back on the tube and put the clamp back.

6: Pull your spark plug wires back over the valve cover and put the spark plugs back in their tubes.

7: Put the 2 bolts for the spark plug wire holders back in and put the oil cap back on, and your done!!

Enjoy!!
Time Needed:
15 min-2 hrs for valve cover removal (I took 1 hr 15 min)
1-5 hrs to paint
10-45 min to reinstall
Tools and materials:
Ratchet and 10mm socket
Pliers
ScotchBrite pads or high grit sandpaper
Paper towels
Cleaner/Degreaser (I used engine cleaner)
Hose
Painters Tape
Small containers (for raised letters)
High temp paint (I used the Metalcast system)

Let's get started!
Removal:
1: Open the hood and break out the 10mm socket. Remove the two bolts on the spark plug holders

2: Slowly and carefully pull out the spark plugs and set them aside in a safe spot

3: Next use your pliers to move the clamp on the left hose up and pull the breather tube out.

4: Next pull the PCV valve (thing on the right) straight out of the hole.

5: Remove the PCV valve gasket/grommet thing.

6: Next, grab your 10mm ratchet and remove the 5 bolts. They are quite long, but are not threaded very much. There are 3 in the back and 2 in the front. Then pull the bolts straight up and they should come out.

7: Remove the oil cap

8: Now, pull the valve up and towards you to release it and clear the tubes for the spark plugs. This can be difficult if the valve cover hasn't been removed in a while. Just pull, don't pry on anything. Then, close your hood most of the way/cover the engine with aluminum foil to avoid getting anything in the engine. It is insanely bad to get ANYTHING in there.

Painting:
1: Put the valve cover on something and mask it up so nothing can get inside. (Don't forget the sides)

2: Spray on your cleaner/degreaser and follow the instructions on the package.

3: Rinse off/Clean off the cleaner as specified on the instructions and dry it off.

4: Make sure it is dry and re-mask it to ensure a good seal.

5: Once it is dry and taped up, follow the instructions for the paint. Make sure you use some sort of primer or base coat. I did Metalcast ground coat and Metalcast Blue.

6: Once the paint is dry (MAKE SURE IT IS), mask it off as shown if you choose to paint the letters.

7: Then, take a paper towel and roll it up as tightly as you can. Next, fold the towel in have and tape the two sides together. Then grab your small container.

8: Next, take the spray paint you want to use (I used the Metalcast ground coat) in the corner of your container until you create a puddle. Then, quickly grab your paper towel and dip it in the puddle and brush off excess. Next, LIGHTLY brush the paint overtop in one direction. Then add more coats until you receive the desired effect.

9: Then peel off your masking ASAP. (My paint wasn't dry and it pulled off a big chunk of paint, but I wasn't going to redo it again)

Reinstall:
1: Make 100% SURE there is nothing in the engine or valve cover, then set the valve cover on the engine the same way you removed it so there is no gap between it and the heads.

2: Install the 5 bolts back in. (Shorter ones go in front)
3: Reinstall the PCV valve gasket/grommet thing (This may be easier for you with the calve cover off the car)

4: Put the PCV valve back in the grommet.

5: Next, put the breather tube back on the tube and put the clamp back.

6: Pull your spark plug wires back over the valve cover and put the spark plugs back in their tubes.

7: Put the 2 bolts for the spark plug wire holders back in and put the oil cap back on, and your done!!

Enjoy!!