You are using an out of date browser. It may not display this or other websites correctly.
You should upgrade or use an alternative browser.
You should upgrade or use an alternative browser.
Apexcone or DDM?
- Thread starter sweagle02
- Start date
sweagle02
Well-Known Member
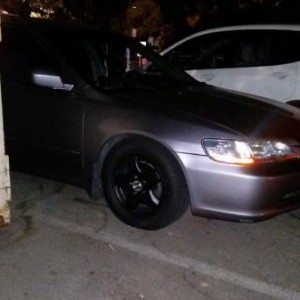
i gots aftermarket headlights.
are they projector or retrofit or same style as oem. You have a link of where u bought them?
yee having a harness will help in the long run from preventing ur stock wiring from melting or fck it up.
what he says is truee!
search my friend! but im a nice guy. my aftermarket is same style as oem. was put on wen i had my front fix

sweagle02
Well-Known Member
what he says is truee!
search my friend! but im a nice guy. my aftermarket is same style as oem. was put on wen i had my front fix
how do you put that blue and yellow in ur headlights? i've seen it often but don't know how to explain what i'm asking.
rwong410
Well-Known Member
Save yourself more than a couple of bucks by buying the Raptor kit. Made by DDM but for almost half the price and it's just as good. Here is a link to a forum with the owner of DDM Tuning discussing Raptor HIDs.
http://forums.bimmerforums.com/forum/showthread.php?t=1127948
http://forums.bimmerforums.com/forum/showthread.php?t=1127948
sweagle02
Well-Known Member
Save yourself more than a couple of bucks by buying the Raptor kit. Made by DDM but for almost half the price and it's just as good. Here is a link to a forum with the owner of DDM Tuning discussing Raptor HIDs.
http://forums.bimmerforums.com/forum/showthread.php?t=1127948
unfortunately that thread is not opening up =/
vorin
Well-Known Member
it seems like their site is having some troubles, here's a cached version of the original post from google
you can see the cached version here http://tinyurl.com/aehs2lThis week we reintroduced the Raptor brand name into HIDs. This is a totally new ballast just coming on the market. It looks like the regular DDM ballast but its new from the ground up.
We've put some money into this company as a long term growth project for DDM. Testing has shown the ballasts are solid. But, we are always open with you guys, the ballasts are just making their introduction and we don't have a lot of time on them yet. The bulbs used with these ballasts are our regular Apexcone Brand that you know well and that we stand behind.
Our purpose in introducing these ballasts is many fold. One, we have the long term goal to bring the manufacturing of all of our ballasts back to the USA. There's no reason to be sending your dollars offshore long term.
Second, its vastly cheaper for us not to pay profits to others even now. That's why we can drop these prices. Our goal is to use this ballast next year to sell HID kits for as little as $17.00 per kit. I'm not kidding. We'll see how this goes. Goal #3 will have an effect on that.
Third, besides obviously making money from selling kits that we import, one of our long term goals is to let all of our competition buy this ballast in many flavors overseas and use their money to help us achieve this goal.
Nothing beats having your competition pay to lower your price.
So, we hope to see lots of these kits sold here and in Europe in the coming year. We're helping make the price aggressive overseas so lots of vendors will be using these units and filling our piggybank. All the better for our friends here.
If you buy one of these, please call us from time to time over the following months to let us know how they are working. We always want to get feedback. Now that HIDs are only $39.95, my fear is that they will be treated as disposables and if one fails, people will just buy another. Please don't do this. We give it a strong warranty so you never have to pay twice.
Jim
jcanni
Well-Known Member
I have the DDM 55W 4500k Slim Ballast Hid kit. I personally love it. I hate the really blue kits. IMO it makes the car seem really cheap. So, the 4500k is perfect for me. DDM was having a holiday sale, i got mine for 88 shipped. Just be aware that if you do get a 55W kit the light is going to be whiter.
jcanni
Well-Known Member
This is a write up I did.
I am not responsible for any damages that may occur during install. Procede at your own risk.
Tools Needed:
Utility Knife
Assorted Screw Drivers
Drill
Wire Cutters
Shrink Wrap
Lighter
Band Saw
Additional Supplies:
9006 Headlight Bulb Connectors
Lexan
Weather Stripping
Step 1
Remove from box and remove the plastic wrap around the headlights. I left the plastic on the lens to help prevent scratches. Next cut the zip tie that is securing the housing.
Step 2
Use a knife and cut the square for the oem ballast. Be careful, the plastic is actually a lot thinner than you think. Watch the blade so it doesn't hit anything inside either.


Step 3 (Skip if you are not using auto levelers)
Next, I would remove the Packing screw for the auto levelers. The packing screws on the depos are different than the valeo white ones. The depos are black and have a flat head screw and a black plastic cap. Turn the screw clockwise a few turns. Then get your pliers and turn the cap clockwise. Then you will have to unhook the end. I just wiggled it out but a small screw driver could help.
Now remove the levelers from your stock housings.

(Picture is borrowed from AudiWorld)
Now reinstall them into your depos. If you find the auto leveler is too short to reattach adjust your height screw so the housing comes closer to the back of the headlight. This will give you ample room to slide it in.


The auto levelers are a p-i-t-a to install. If I were to do another set I would leave them out. I also think it would be beneficial to install the levelers now since all the wiring is out of the way.
Step 4
Take your 9006 plug and strip the ends of the wires.

Locate the wiring harness. Now cut off the low beam H7 connector.

Now connect your 9006 connector to the new harness. I MESSED UP AND MIXED UP THE WIRES IN THESE PICTURES. BLACK GOES TO RED AND YELLOW GOES TO BROWN!


Step 5
Place the wiring inside of the housing. Pull the 9006 plug through the hole you cut for the ballast.

Step 6
Connect your ballast and mount it to the housing. I placed mine as shown.

Now put some screws to mount the ballast.

Step 7
Measure the size of the ballast opening. Mark it on the piece of lexan.

Now cut the pieces to size. (I used a band saw)

Step 8
I used clear lexan so I just peeled off the paper. Marked the holes and drilled them. Then applied weather stripping on the edges and screwed it in.

Step 9
Cut off all of the garbage on the bulb.


Connect the bulbs and install them in the housings. This is how I arranged all the wires.

Step 10
Put on all the caps and install the remaining bulbs. I just cut off one of the prongs on the blinkers and pushed it into the housing. It took some wiggling.
Finished Product


I am not responsible for any damages that may occur during install. Procede at your own risk.
Tools Needed:
Utility Knife
Assorted Screw Drivers
Drill
Wire Cutters
Shrink Wrap
Lighter
Band Saw
Additional Supplies:
9006 Headlight Bulb Connectors
Lexan
Weather Stripping
Step 1
Remove from box and remove the plastic wrap around the headlights. I left the plastic on the lens to help prevent scratches. Next cut the zip tie that is securing the housing.
Step 2
Use a knife and cut the square for the oem ballast. Be careful, the plastic is actually a lot thinner than you think. Watch the blade so it doesn't hit anything inside either.


Step 3 (Skip if you are not using auto levelers)
Next, I would remove the Packing screw for the auto levelers. The packing screws on the depos are different than the valeo white ones. The depos are black and have a flat head screw and a black plastic cap. Turn the screw clockwise a few turns. Then get your pliers and turn the cap clockwise. Then you will have to unhook the end. I just wiggled it out but a small screw driver could help.
Now remove the levelers from your stock housings.

(Picture is borrowed from AudiWorld)
Now reinstall them into your depos. If you find the auto leveler is too short to reattach adjust your height screw so the housing comes closer to the back of the headlight. This will give you ample room to slide it in.


The auto levelers are a p-i-t-a to install. If I were to do another set I would leave them out. I also think it would be beneficial to install the levelers now since all the wiring is out of the way.
Step 4
Take your 9006 plug and strip the ends of the wires.

Locate the wiring harness. Now cut off the low beam H7 connector.

Now connect your 9006 connector to the new harness. I MESSED UP AND MIXED UP THE WIRES IN THESE PICTURES. BLACK GOES TO RED AND YELLOW GOES TO BROWN!


Step 5
Place the wiring inside of the housing. Pull the 9006 plug through the hole you cut for the ballast.

Step 6
Connect your ballast and mount it to the housing. I placed mine as shown.

Now put some screws to mount the ballast.

Step 7
Measure the size of the ballast opening. Mark it on the piece of lexan.

Now cut the pieces to size. (I used a band saw)

Step 8
I used clear lexan so I just peeled off the paper. Marked the holes and drilled them. Then applied weather stripping on the edges and screwed it in.

Step 9
Cut off all of the garbage on the bulb.


Connect the bulbs and install them in the housings. This is how I arranged all the wires.

Step 10
Put on all the caps and install the remaining bulbs. I just cut off one of the prongs on the blinkers and pushed it into the housing. It took some wiggling.
Finished Product


Last edited:
jcanni
Well-Known Member


