
JMillerUA6
Grillin' rape steaks
I left my camera at work so no pic's sorry.
But I'm going to take you step by step as I do this.
Before doing this I picked up two 2.8oz tubes of automotive silicone sealant, and a roll of double sided tape. You'll also need a flat head screwdriver to pry the headlight lens from the housing.
1) Preheat Oven to 250*
2) Put headlight in oven for approx 8 min to soften sealant around headlight.
3) Pry headlight apart using flat head screwdriver
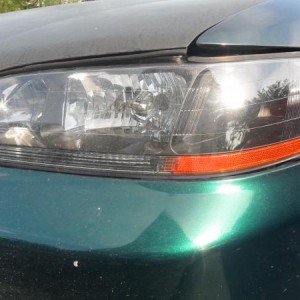
4) Now, once the headlight is apart, set aside the housing and turn the lens so your looking at the back of it. Down where the amber strip is there is a reflector that is held on by two screws. Remove the screws and reflector.
5) Now you will notice on both sides where the reflector was there are two square shaped tabs on each side. It looks like the CCFL would fit in there perfect, but you can slide them in because the tube are a bit too long. Take a knife and cut the top of the tab closest to the blinker off. This will allow you to slide the tube in there for a snug fit.
6) Once the tube is installed, thread the CCFL wire through the hole in the reflector and screw the reflector back in.
7) At this point I recommend that you think of any other things that you would like to do to your headlights while you have them apart.
In my case, the headlight aiming screws were ****ed up, so I'm going to fix them.
8) Put your headlights together, thread the wire for the CCFL through the bulb socket and stick them back in the oven.
9) Take them out of the oven and press them back together and put a bead of silicone around the seam.
10) Cut the sheath back on the wires for the bulb that goes in the amber strip (1 Black Wire -, 1 Red Wire +) and wire up your transformers according to color.
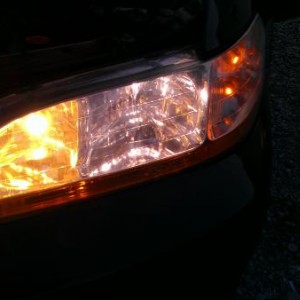
11) Plug the wires for the CCFL into the transformer and turn your parking lights on to test.
12) Provided everything is working, put your front end back together.
But I'm going to take you step by step as I do this.
Before doing this I picked up two 2.8oz tubes of automotive silicone sealant, and a roll of double sided tape. You'll also need a flat head screwdriver to pry the headlight lens from the housing.
1) Preheat Oven to 250*
2) Put headlight in oven for approx 8 min to soften sealant around headlight.
3) Pry headlight apart using flat head screwdriver
4) Now, once the headlight is apart, set aside the housing and turn the lens so your looking at the back of it. Down where the amber strip is there is a reflector that is held on by two screws. Remove the screws and reflector.
5) Now you will notice on both sides where the reflector was there are two square shaped tabs on each side. It looks like the CCFL would fit in there perfect, but you can slide them in because the tube are a bit too long. Take a knife and cut the top of the tab closest to the blinker off. This will allow you to slide the tube in there for a snug fit.
6) Once the tube is installed, thread the CCFL wire through the hole in the reflector and screw the reflector back in.
7) At this point I recommend that you think of any other things that you would like to do to your headlights while you have them apart.
In my case, the headlight aiming screws were ****ed up, so I'm going to fix them.
8) Put your headlights together, thread the wire for the CCFL through the bulb socket and stick them back in the oven.
9) Take them out of the oven and press them back together and put a bead of silicone around the seam.
10) Cut the sheath back on the wires for the bulb that goes in the amber strip (1 Black Wire -, 1 Red Wire +) and wire up your transformers according to color.
11) Plug the wires for the CCFL into the transformer and turn your parking lights on to test.
12) Provided everything is working, put your front end back together.
Last edited: