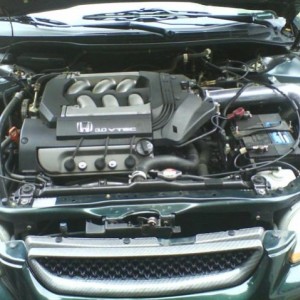
The good news…GC coils are soo much smaller than Sportline springs, you could literally fit them inside a Sportline…so this makes the new assembly a LOT easier to reinstall. And after driving the car some last night and this morning, the new rates are not too firm…with the yellows on their softest dampening setting, the car takes bumps/rough roads better than before – so dampening has a lot to do with ride quality I’ve realized. And adjustment is easy, you only need the spanner wrench for the upper 1/3 of the sleeve since it’s tight – but once you get the adjustment collar below that portion, you can turn it by hand with the car jacked up. I'm going to hate firming up the dampening again to run my wheel setup.
The bad news….I only got 3 corners installed. And I’ve decided I hate Moog endlinks. This is the second time the nut next to the grease joint has stripped on me, and I was using the proper tools, technique, and patience to remove it. Yes they’re better than OEM, but there’s got to be something better than Moog with **** that's made out of cheese. So now I have to get this worthless endlink off, replace it, then install the last assembly. The car does feel unbalanced in the rear due to having GC’s on one side and Sportlines on the other. lol?
Important notes:
1) If you have Yellows – for the fronts, you only need (in order from top to bottom)…the two nuts, the bowl washer, the OEM top hat (take out the big under-insert), the urethane hat that comes with the GC, washer, then the shock with the coil/sleeve/collar on it. For the rear, add the bump stop on top of the shock body but under the washer, otherwise it’s the same order. If you use the OEM bump stop, cut it in half so you have two rings. Also, if your yellows came with the little shroud that captures the snap ring, you don’t need that as the bottom of the sleeve is notched and fits over the snap ring (about ¼”).
2) For the rears, do yourself a favor and buy a long steel pipe to leverage the suspension downward. I went to Home Depot and bought a 4ft long steel pipe in the plumbing aisle, this thing saved my life. I’ve never had an easier time inserting a foot bolt through the bottom of a shock. I should have used this in the front too. I could sit on it, right near the wheel well, and still reach in and do what I needed to do.
3) For the rear, take off the top end link nut and swing the link out of the way, otherwise it is difficult or maybe impossible to get the shock out. Also, if you have a Progress RSB, disconnect both top endlink nuts and swing the bar down to get it out of the way. Since this bar has two holes for adjustment, the ends are big and get in the way when trying to remove the shock.
4) Make sure to include the large metal washers, they are KEY….as I found out haha. Also, when doing the job be sure to turn the yellows to their softest dampening setting, and install the GC’s with the spring having some room to make compressing things easier. Also be sure your OEM top hat has the small rubber inserts on top and bottom, sometimes they fall out when you’re taking stuff apart.
5) Most of you know this probably, but when doing the fronts turn the wheel in the direction of the side you are working on. i.e. if you’re working on the driver side, turn the wheel to the left. Then pull the shock assembly out toward the front of the car.
6) Prepare for your body to feel beaten the next day(s), not unlike a 2 cent *****. Should have worn my mechanics gloves more than I did.
I was not able to do a DIY due to the fact that I had two days to install everything and I ran into more snags than I had a right to, lol. But I will post my photos and this info in the OP for anyone to reference. Perhaps I can make a DIY for the rear when I put it on sometime this week.
Chris, please let us know how you found the rates that you chose. I'm driving an i4 so will be a difference in the spring rates that I end up choosing. Your feedback will help me determine what the rates will be

Will do, once I get the last one installed. But I can say I know I didn’t go too stiff. Shock dampening makes a huge difference, the ride with GC’s w/softest damper setting on the shock is a softer ride than the Sportlines with 1.5 turns of dampening (total turns is 2). The car takes bumps so much better…I’m going to have a hard time firming up the yellows again lol. No pun intended.
I called Eibach and they informed me that the stock sportline spring rates are 231 max front and 137 max rear. Eibach recommended that I stay within 100 lbs/ft difference from front to back when choosing the GC rates. For the v6, I believe you posted that it was a 150 lbs/ft difference from front to rear.
Just for people that reference this thread later, those rates Eibach told you were for 4cyl Sportlines.
And yeah my fronts are 600 and rears are 450, so 150 lb difference. Which is consistent given that the difference with my V6 Sportlines was 143 lbs (314-171).