
Editing and Designing 101 #1
OKAY! So here is a simple tutorial which some of you guys wanted to learn. This is one of my favorite tutorial just for a signature which i'm sure some of you guys might seen it before. But some don't. So here it is.
So here is my sample picture we're going to edit. Which is my other vehicle, a Toyota 4runner.

First! Use either a Elliptical Marquee Tool (row 1; column 1) OR a Lasso Tool (row 2; column 1) on the toolbar. Select the rim only. You could select the whole wheel (rims and tires) but it wouldn't look as good.

Next is to make the blur. While the selection STILL SELECTED, on the menu bar, press Filter>Blur>Radial Blur. As the picture below is shown, set the blur amount to whichever you want. Remember to set the Blur Method: Spin and Quality: Good. After that, you will see that the car is spinning like spinners. LOL

Now to make the car looks like it's actually driving, you must cutout the outline of the car. I used Polygonal tool which i think is easier than Lasso. Unless your a perfectionist, you should use Lasso Tool. After you cutout the entire car, you must inverse the selection meaning you will select everything from the cutout line to the outside. To do this, either press Shift+Ctrl+I or Select>Inverse (Alt+S+I).

Finally, you will add the blur by press Filter>Blur>Motion Blur. As shown on the picture, i used 65 px but you can set it however you want. Remember to keep the angle 0 because a car is flat. After that, press OK. So now you are done!

And always at every end of a picture, add a border. So select the ENTIRE picture by press Ctrl+A. Go to Edit>Stroke. Change the color to whatever theme color it is (for mine is black because there's more black color in the picture overall). I used Width: 5px; Color: black; Location: Inside; Blending: Mode Normal; Opacity: 100%. And now you just have to save it and your done!

I hope i didn't confused anyone. If i did, let me know so i could explain it clearer. If anyone wants to learn from how i did it through Photoshop CS, here's the .psd file i used to edit the picture. Good luck! http://www.idreams.org/images/tutorial/blur-effect/example.psd
OKAY! So here is a simple tutorial which some of you guys wanted to learn. This is one of my favorite tutorial just for a signature which i'm sure some of you guys might seen it before. But some don't. So here it is.
So here is my sample picture we're going to edit. Which is my other vehicle, a Toyota 4runner.
First! Use either a Elliptical Marquee Tool (row 1; column 1) OR a Lasso Tool (row 2; column 1) on the toolbar. Select the rim only. You could select the whole wheel (rims and tires) but it wouldn't look as good.
Next is to make the blur. While the selection STILL SELECTED, on the menu bar, press Filter>Blur>Radial Blur. As the picture below is shown, set the blur amount to whichever you want. Remember to set the Blur Method: Spin and Quality: Good. After that, you will see that the car is spinning like spinners. LOL
Now to make the car looks like it's actually driving, you must cutout the outline of the car. I used Polygonal tool which i think is easier than Lasso. Unless your a perfectionist, you should use Lasso Tool. After you cutout the entire car, you must inverse the selection meaning you will select everything from the cutout line to the outside. To do this, either press Shift+Ctrl+I or Select>Inverse (Alt+S+I).
Finally, you will add the blur by press Filter>Blur>Motion Blur. As shown on the picture, i used 65 px but you can set it however you want. Remember to keep the angle 0 because a car is flat. After that, press OK. So now you are done!
And always at every end of a picture, add a border. So select the ENTIRE picture by press Ctrl+A. Go to Edit>Stroke. Change the color to whatever theme color it is (for mine is black because there's more black color in the picture overall). I used Width: 5px; Color: black; Location: Inside; Blending: Mode Normal; Opacity: 100%. And now you just have to save it and your done!
I hope i didn't confused anyone. If i did, let me know so i could explain it clearer. If anyone wants to learn from how i did it through Photoshop CS, here's the .psd file i used to edit the picture. Good luck! http://www.idreams.org/images/tutorial/blur-effect/example.psd


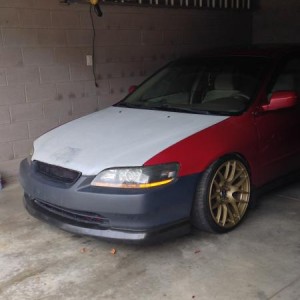
") i painted it inside
i painted it inside