What did you do today Auto Detailing related?

CG6Lemon

Detailing Enthusiast
Joined
Jun 6, 2008
Posts
7,715
Reaction score
45
Location
S.F Bay Area, CA
Cleaned my leather yesterday. Huge difference, here is a 50/50 shot I did midway through.
Meguiars leather cleaner&conditioner with a boars hair brush:
zu4dErB.jpg


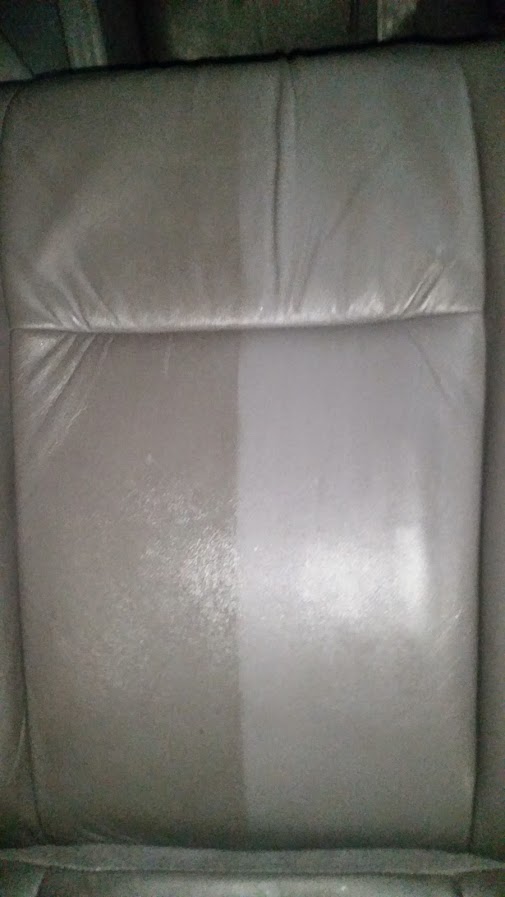
Big difference in the color of the leather. I may need to pick up that product for less high end work.


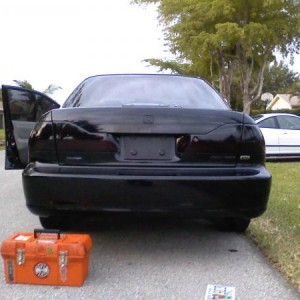
Did some interior detailing, nothing too fancy just soapy water and a toothbrush and rags. Tomorrow I'll probably clean the carpets and cloth seats with Folex. That stuff works wonders.


Glad you have good results with Folex. It is one of my GO TO products in my arsenal.
 

CG6Lemon

Detailing Enthusiast
Joined
Jun 6, 2008
Posts
7,715
Reaction score
45
Location
S.F Bay Area, CA
An aunt recently came over to my house for a Christmas lunch party, and heard I do detailing work. She asked if anything could be done about some scrapes and damage on her cars front bumper. She texted some pics and I told her only option was to touch it up. Otherwise it will require a respray at the body shop. She dropped off the car, and I started inspecting and assessing the damage which was worse than what I imagined in my head.


Starting point for driver side


Zoomed in at the corner. Upon inspected I see some paint transfer.


Applied some paint thinner on a towel and took the paint transfer off.


Went to the dealer and grabbed a bottle of touch up. I applied 3 thin coats on this area to achieve the results.


-Tip: Use a brush with soft bristles. Preferably a small size brush as well like the one that comes with the touch up bottle. I don't like the brush that comes with the touch up bottle because I can't do fine lines without it getting blobby.

-Tip: Use thin coats, but don't be cheap.

-Tip: Use a hairdryer to blow each coat, but do it from 1 feet away on lowest setting with heat for a couple mins.


Now I start working on the bigger damaged area. Upon inspection, I did not need to polish or use thinner for this area. My main concern were the 3 big black gashes up top. Because silver is a lighter color, it takes more coats to hide the black from showing.


Turned out better than expected after I was done.


-Tip: If the area that requires touch up have a deep gash try to fill it up as much as possible to get a flat result overtime with each layer of touch up.

-Tip: Be patient on the finer marks or it will not come out good.


Before and After


Now for the other side which is easily 5 times as bad.....


Close up revealed some scuffs that can be polished off.


Taken care of.


After doing 5 coats with a lot of patience and not going crazy..... I am happy with the outcome, and so was my aunt.


Total time spent: 3 hr 30 mins
 

CG6Lemon

Detailing Enthusiast
Joined
Jun 6, 2008
Posts
7,715
Reaction score
45
Location
S.F Bay Area, CA
Cleaned up the headlights as well.


Driver side


Test spot turned out good in the center


Completed


Passenger side


Completed


Products used


Both completed


Process:

Wiped down headlights
Clayed with medium grade
Menz FG400 with Cyan pad @ speed 5
Menz 203 with white pad @ speed 4
Sealed with Blackfire crystal seal paint sealant
 

itzcharlie

Well-Known Member
Joined
Oct 13, 2008
Posts
1,540
Reaction score
0
Location
Baton Rouge, LA
Light paint correction on a brand new RC-F and coated it with Modesta BC-03
10891455_801030713301343_3151397029445308871_n_zpsda3ea3bd.jpg

sneak peak of my car in the background as well :)

10431536_801030646634683_6164293192297803321_n_zps895a1541.jpg
 

CG6Lemon

Detailing Enthusiast
Joined
Jun 6, 2008
Posts
7,715
Reaction score
45
Location
S.F Bay Area, CA
A friend came over and wanted to learn how to take care of his car's paint. At the same time I showed him the ropes of using the machine to polish his headlights.


Claying the paint and headlights


Trying the machine on headlights. 1st attempt.


Applied Wolfgang Fuzion sealant. Beading pic.


CG6Lemon

Detailing Enthusiast
Joined
Jun 6, 2008
Posts
7,715
Reaction score
45
Location
S.F Bay Area, CA
How to store your claybar after use so it doesn't harden


Grab any storage container with a lid and fill it with warm water. Doing so will keep the claybar moisturized and prevent it from hardening with next use.


CG6Lemon

Detailing Enthusiast
Joined
Jun 6, 2008
Posts
7,715
Reaction score
45
Location
S.F Bay Area, CA
What type of claybars are now available, and how to claybar your car


Starting off with the traditional claybar


Clay Sponges. Fine grade(Blue) and Medium grade(Red). Works the same as a regular claybar, but fine grade is slightly more aggressive than a regular fine grade claybar which will cause micro marring. Pros are faster work time, each sponge can do over 10 cars, and can reuse after dropping it.


Clay Mitts. Works the same as the sponge. Also covers more surface area at once due to size. I don't own one so I borrowed a pic from online for demonstration purposes.


Clay foam pad. Works the same as the sponge and mitt, but only works on a machine. I recommend using speed 2 on the machine.


Attached to a machine


Two methods of claying a car


First method is claying one panel at a time with quick detailer spray used as lubrication for the claybar. Saturate the panel and claybar and proceed with up and down motion, or left to right. Wipe off the residue on the clay alternatives after each small section. After each panel is completed use a microfiber towel to wipe up the residue. No washing required afterwards.


The second method is to clay right after washing your car, but before you dry it off. After the wash and rinse stage, take your wash mitt and some soap from your bucket and slather it onto the section you want to clay. Proceed to clay the car while using the car soap as lubrication. Repeat as necessary until each section is done. When whole car is completed rinse the car with water. Then dry the car. This method will cut down on the time due to not drying the car off twice. Avoid the sun, and avoid letting the car soap dry up. Rinse each section if you have to keep it wet.


Last edited:
Back
Top