

This DIY is for those of you who want to eliminate noises, rattles, and squeaks in your interior caused by the audio speaker distortions and road-noises. Not only that, but this project will also improve the performance of your audio speakers drastically.
・DISCLAIMER・
Please perform at your own risk. By performing this DIY, you are agreed to pursue at your own risk; Failure of accomplishment, injuries, or damages to your vehicle cannot be blamed. This is only to help you getting the job done, as cleanly & neatly as possible, based on my experience.
Things you'll need for this DIY:
・Fabric loop-side Velcro tape Velcros have better adhesibility, compared to those generic felt sheets from a crafts store, which I've later discovered.
・Scissors
・Straight slot screwdriver
・Cross slot screwdriver
・Pencil / marker
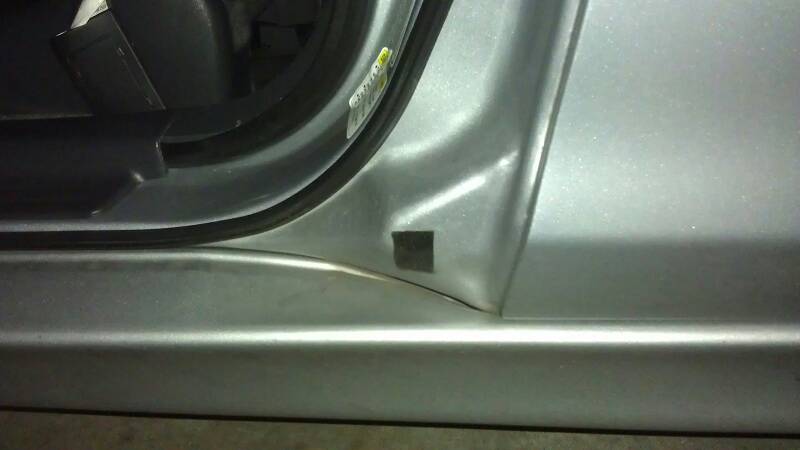
1. Outline your desired area on your metal panel with a pencil before removing your door panel linings. This will help you figure out where to apply Velcro tape on the metal panel.
↓
↓
2. Remove the door panel linings. (Please visit my other DIY thread, DIY: Plasti-Dipping Side Window Chrome Trimmings, and follow the steps #1 ~ #12.)
3. Cut out Velcro tape in pieces of a thin strip shape, and apply them a little to the inside of your outlined markings.
↓
↓
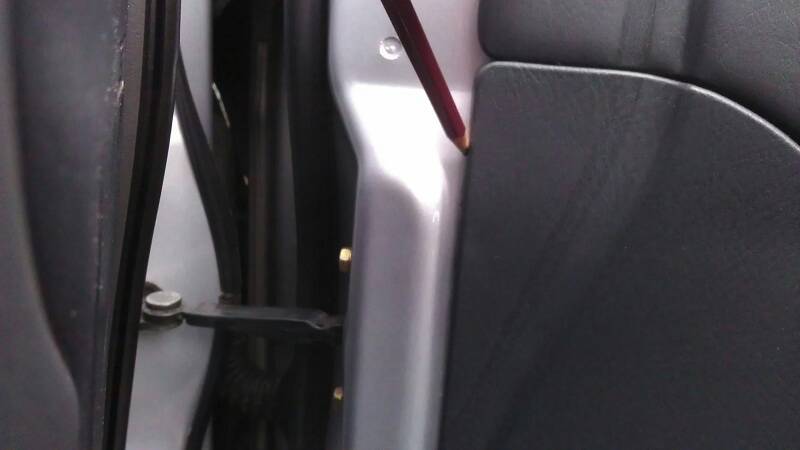
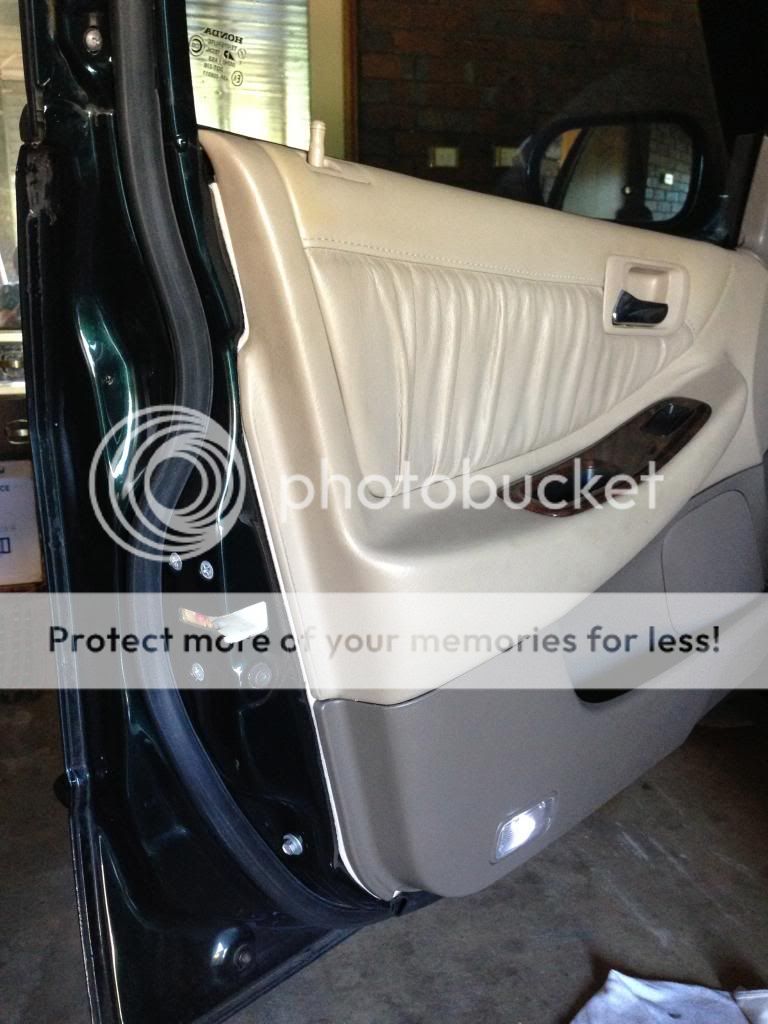
How it looks, when the lining meets the panel.
↓
↓
4. Apply thin strips of Velcro tape on the bottom portions of the door panel linings.
↓
↓

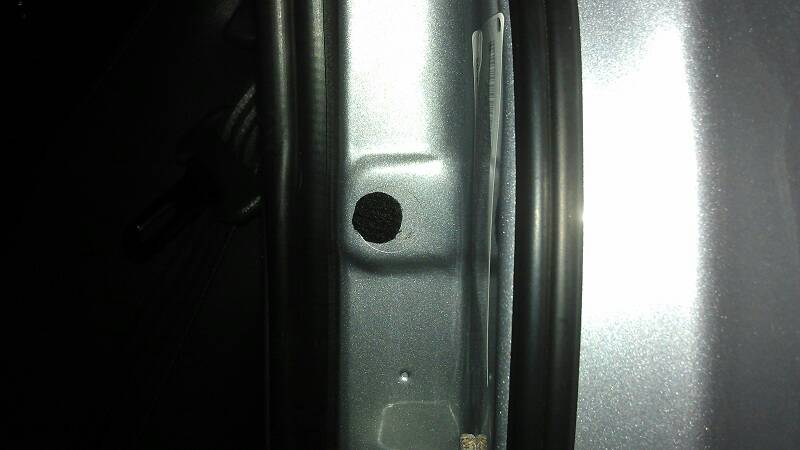
5. Back of the door panel linings are partially covered by the factory felt tapes, but I replaced them because they were too thin and unevenly applied.
↓
↓
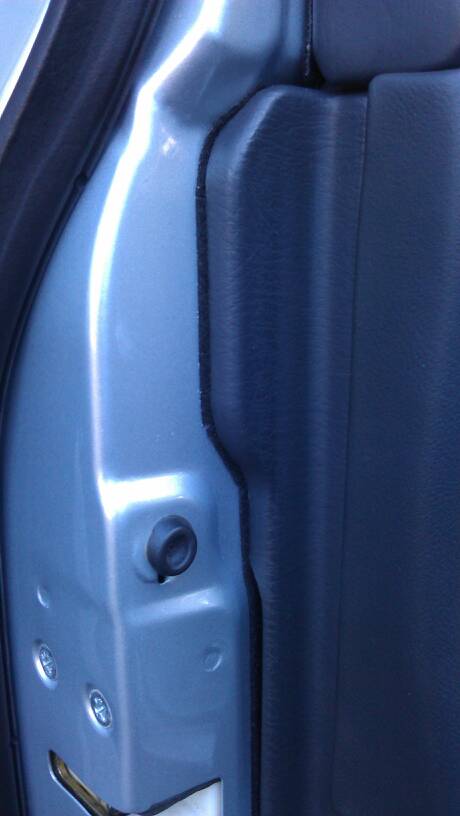
6. These are some additional sections I applied, where the door panel guards meet the metal frame. (Optional)
↓
↓
Basically, you want to use Velcro on anywhere that the lining is making a direct contact with the door panel. When you tap on your linings, while they're installed, and if you hear a rattle from the lining behind, that's where you want to deaden that sound.
Things you'll need for this DIY:
・12 sq ft Dynamat Extreme (For coupe)
・2 pieces of Dynaxorb (Optional)
・Dynaliner (Optional)
・Razor blade
・Scissors
・Marker (i.e. Sharpie)
・Under lay mat / cardboards
・Cross slot screwdriver
・Damp cloth / kitchen paper
・Cotton work gloves, when pressing on the applied Dynamat (Optional)
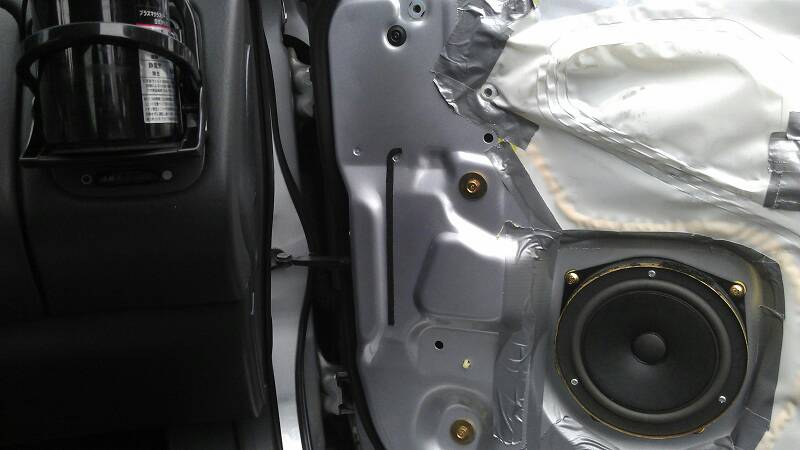
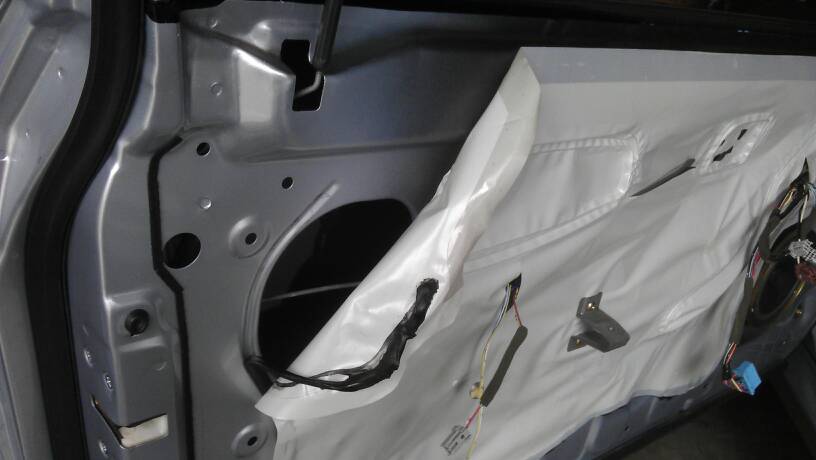
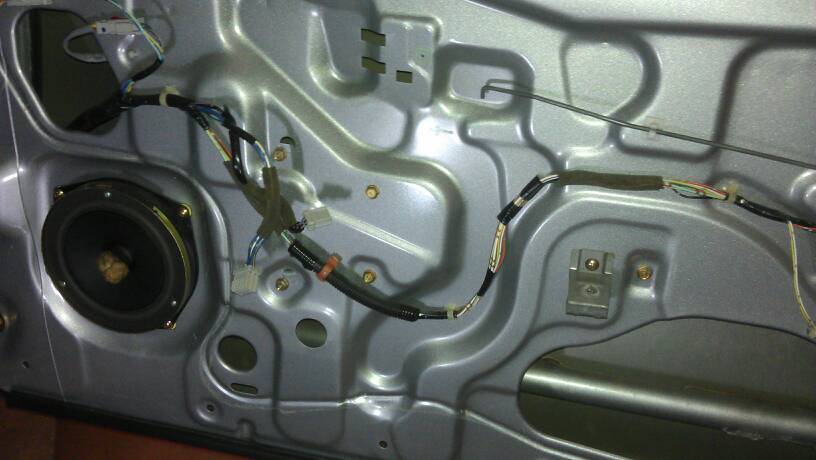
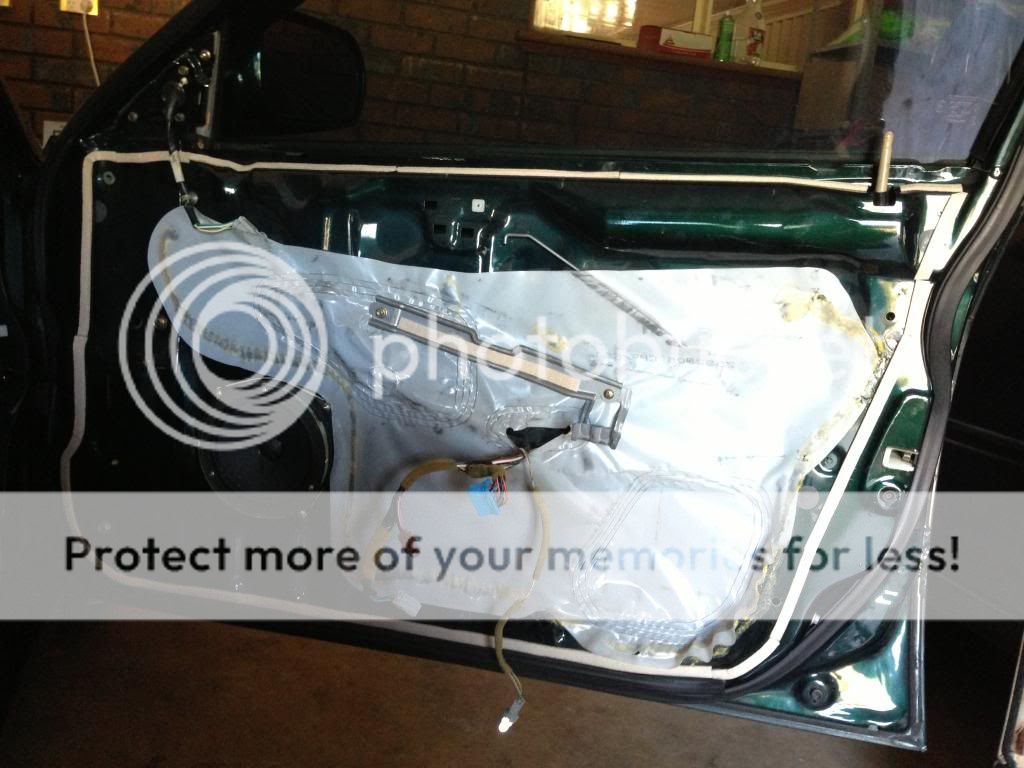
1. Remove the OEM wet-proof vinyl cover. (Don't worry. Your panel won't get wet, even w/o them, because you'll be replacing them entirely w/ Dynamat.)
↓
↓
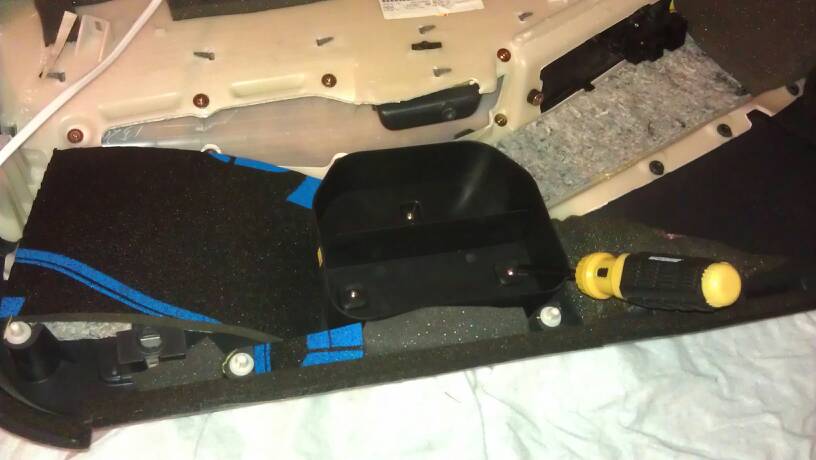
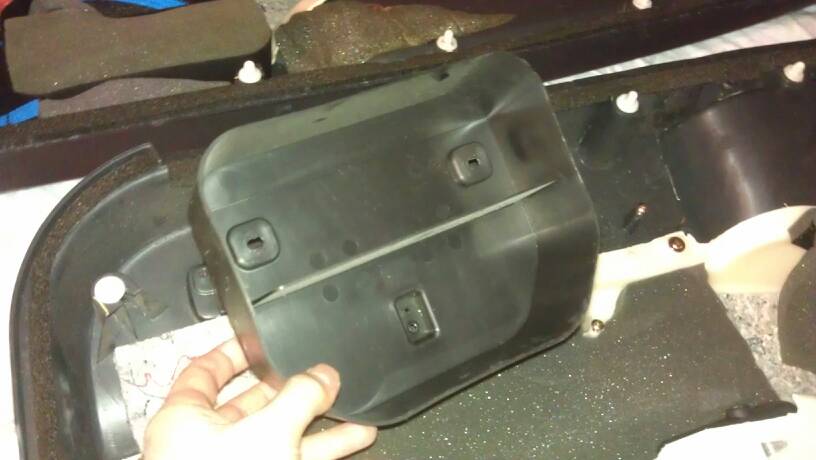
2. Mean while, remove the bracket for the arm rest. (It will be easier to apply the Dynamat later on.)
↓
↓
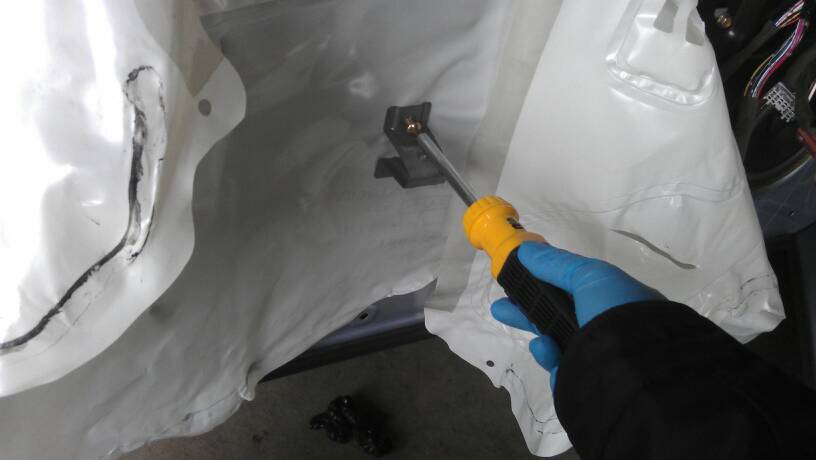
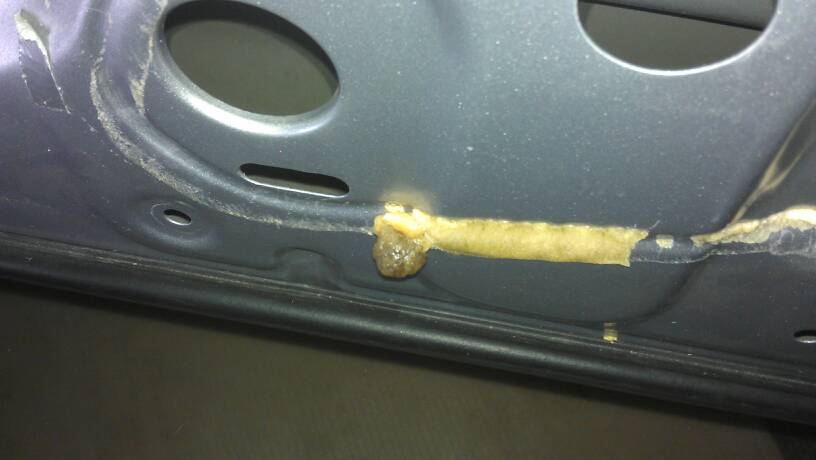
My driver side panel was replaced 2 yrs ago, so the butyl rubber adhesives (black stuff in the 1st pic) were still fresh & easy to be removed. Usually, this stuff is very hard to remove as the car ages. (They usually end up remained on the panel surface quite a bit, when you remove the vinyl sheets.) However, there is a way to remove them w/o using any chemical remover.
↓
↓
↑
↑
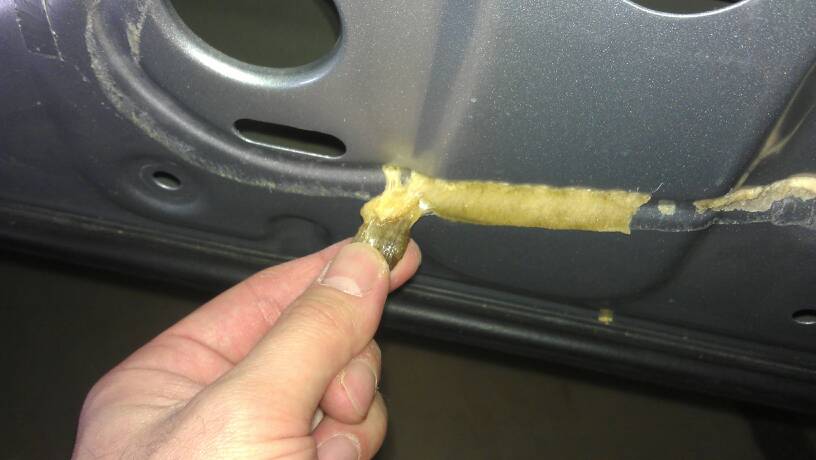
Stick a chunk of the butyl rubber adhesive you have collected, and press it hard on a remaining section.
↑
↑
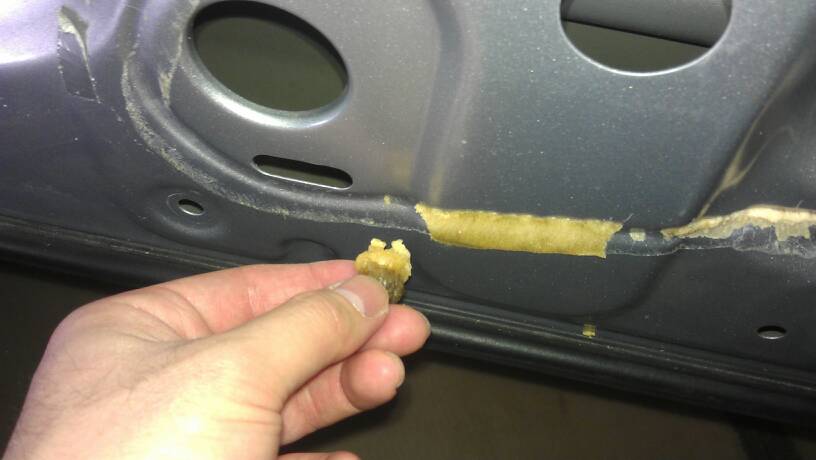
Pull it off instantly and rapidly!
↑
↑
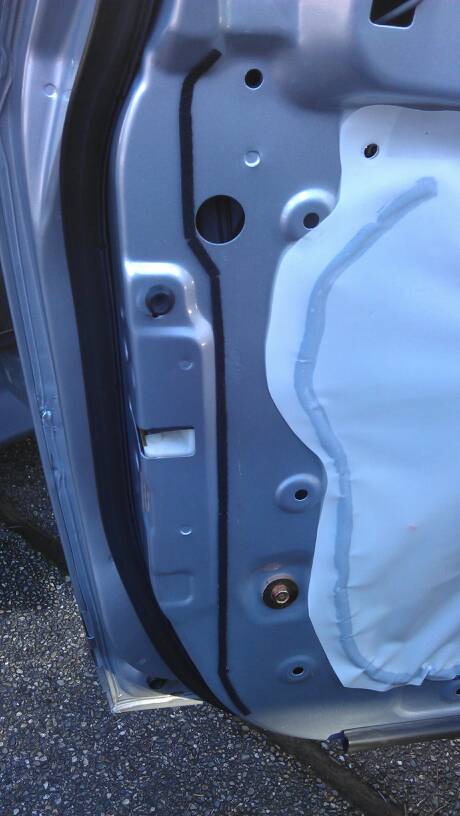
It should come off like this. Repeat this sequence, and you should be able to remove it all without any mess on the panel.
Here is the result. No chemical removers were used. Just by hand.
↓
↓
3. Remove the door speaker. (Precisely speaking, remove the speaker adaptor, where it's mounted on the door panel.) Leave the speaker itself on the adaptor. Unplug the cable connector.
4. Clean and wipe off the entire door panel w/ a damp cloth or kitchen papers + mild soap.
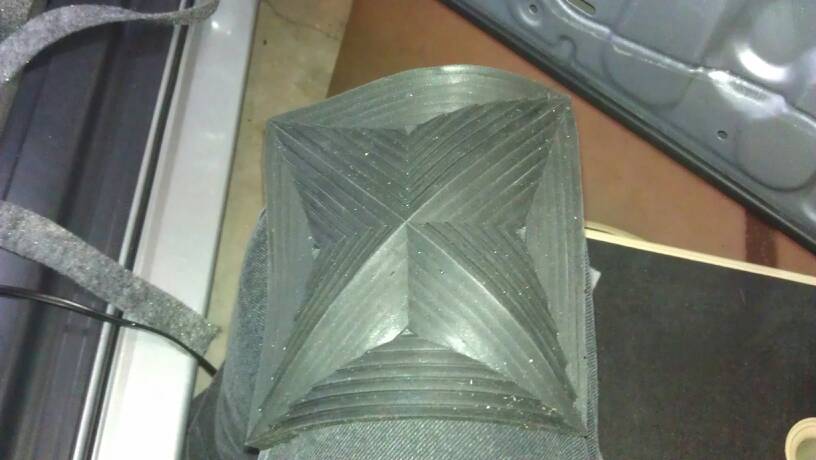
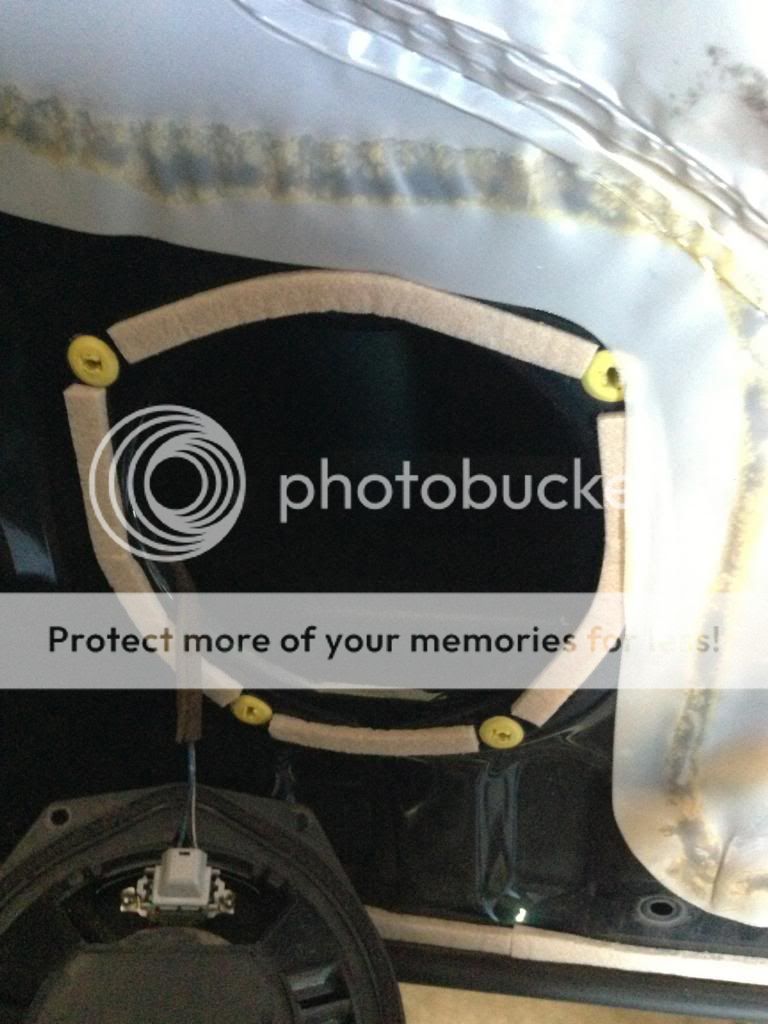
5. (Optional) This is what the Dynaxorb looks like. It's made by some kind of rubber / gel type of material, and it's very soft and flexible. It gets applied on the outer door panel right behind the speaker. The purpose of this thing is to eliminate the unnecessary sound frequencies, which is the sound that's bounced back from the outer door panel, coming from behind the speaker. For more information, check out the link below:
http://www.dynamat.com/products_car_audio_dynaxorb.html
↓
↓
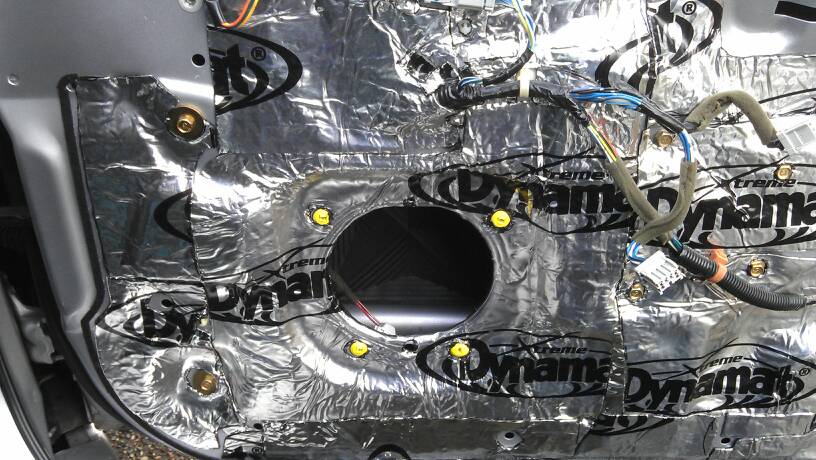
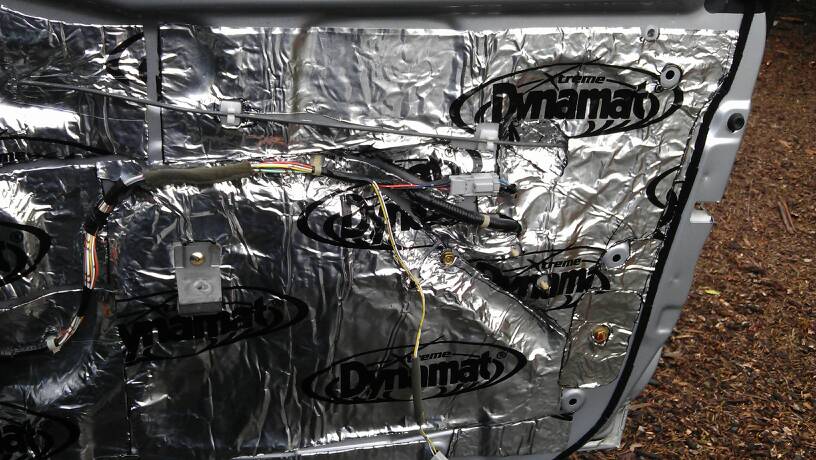
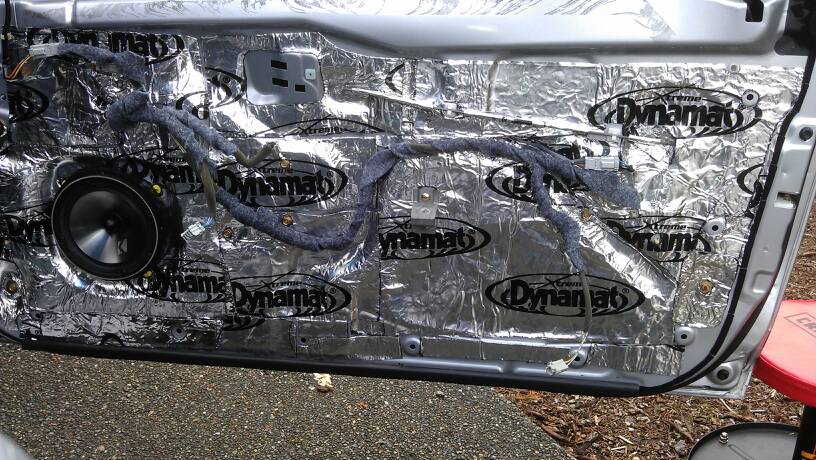
6. Here is the fun part. Cut out the Dynamat in pieces & apply them on the desired sections of the door panel.
ーーーーーーーーーー
IMPORTANT: You want to fill out those holes on the panel (from small Ping-Pong-sized holes to large wholes completely) However, #1. Do not fill out those holes that your door panel linings & the arm rest brackets are going into. #2. Do not fill out those screw holes that your speakers / speaker adapters are going into. #3. Do not fill out those screw holes that the arm rest brackets are going into.
ーーーーーーーーーー
Some people choose to apply Dynamat entirely, except for those aforementioned sections. I decided to let the wirings & those 10mm lugs visible, in case there will be any repair / work gets involved in the future.
Sorry, I was too into this step, and forgot to take a picture... But here is how I did:
All area
A) Measure the length & width of the desired area for the application.
B) Cut out the Dynamat accordingly.
C) If you want to leave those 10mm lugs visible, you need to:
・・・Place the Dynamat on the desired area
・・・Push the Dynamat where the lugs are located
・・・Draw a marking on those popped out sections
・・・Cut out the marked section w/ a razor blade
Otherwise:
D) Apply the Dynamat onto the desired area.
E) Make sure to press it firmly, leaving no air trapped underneath. (Pressing it down 'n spreading it out w/ cotton work gloves really helps, and they also prevent from getting cuts 'n scratches from the Dynamat on your hand.)
----------------------------------------
Speaker area
A) Measure the length & the width of the desired area for the application.
B) Cut out the Dynamat accordingly.
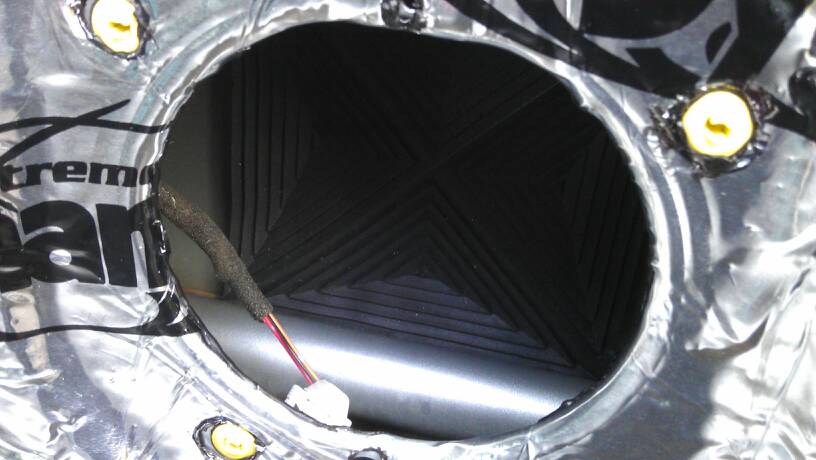
C) Apply the Dynamat to cover the entire speaker hole.
D) Press the inner edge of a speaker hole on the applied Dynamat to create a circular indentation.
E) Draw a circle w/ a marker about a little smaller than the indentation.
F) Cut out the marked section w/ a razor blade.
(Note: Marking & cutting a little smaller than the indentation will give you a good margin of the Dynamat to cover the speaker hole, which it will be tucked in, and prevents from your speaker being glued down to the Dynamat.)
↓
↓
7. Mount your speakers & the armrest brackets back.
Here is the result.
↓
↓
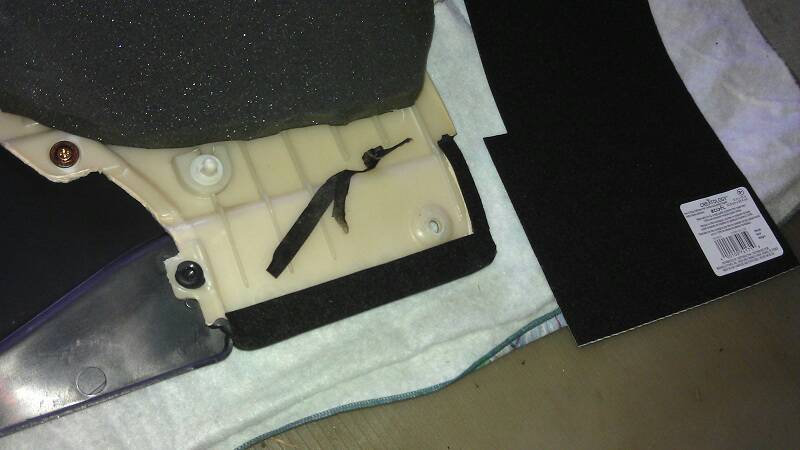
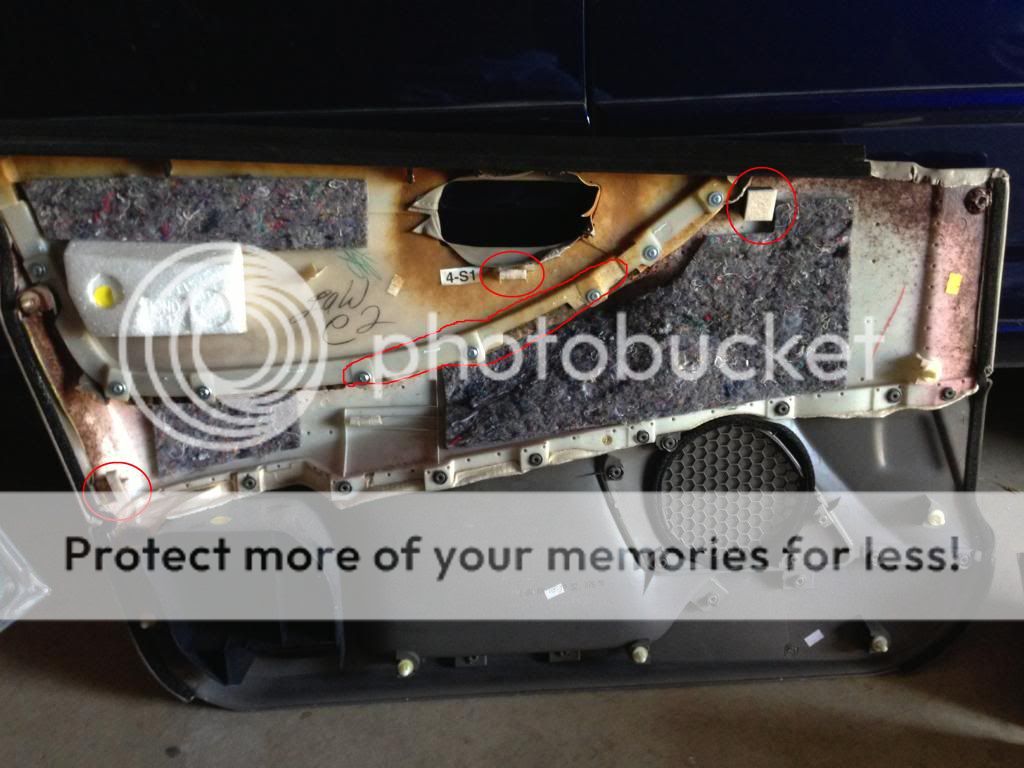
8. Before putting your door linings back, remove those factory sound deadeners, because these won't let you mount your linings on the door panel, since you filled out all of the holes on the panel. The foamy looking material w/ the blue marking is Dynaliner, which is used for insulating noise and heat (optional).
↓
↓
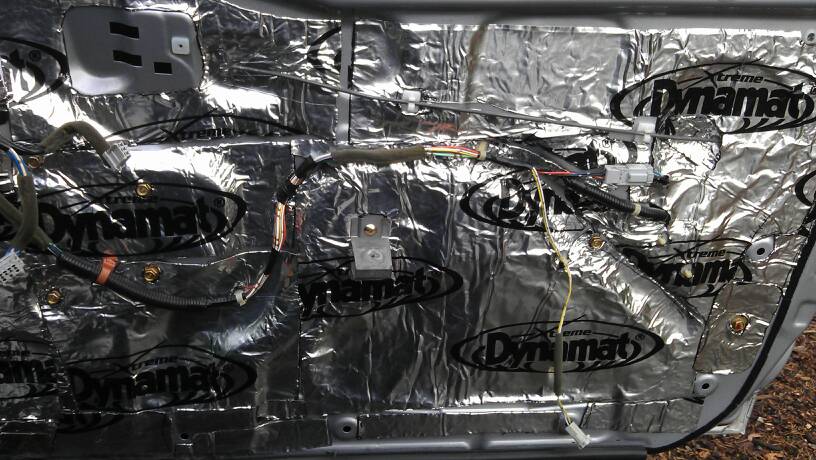
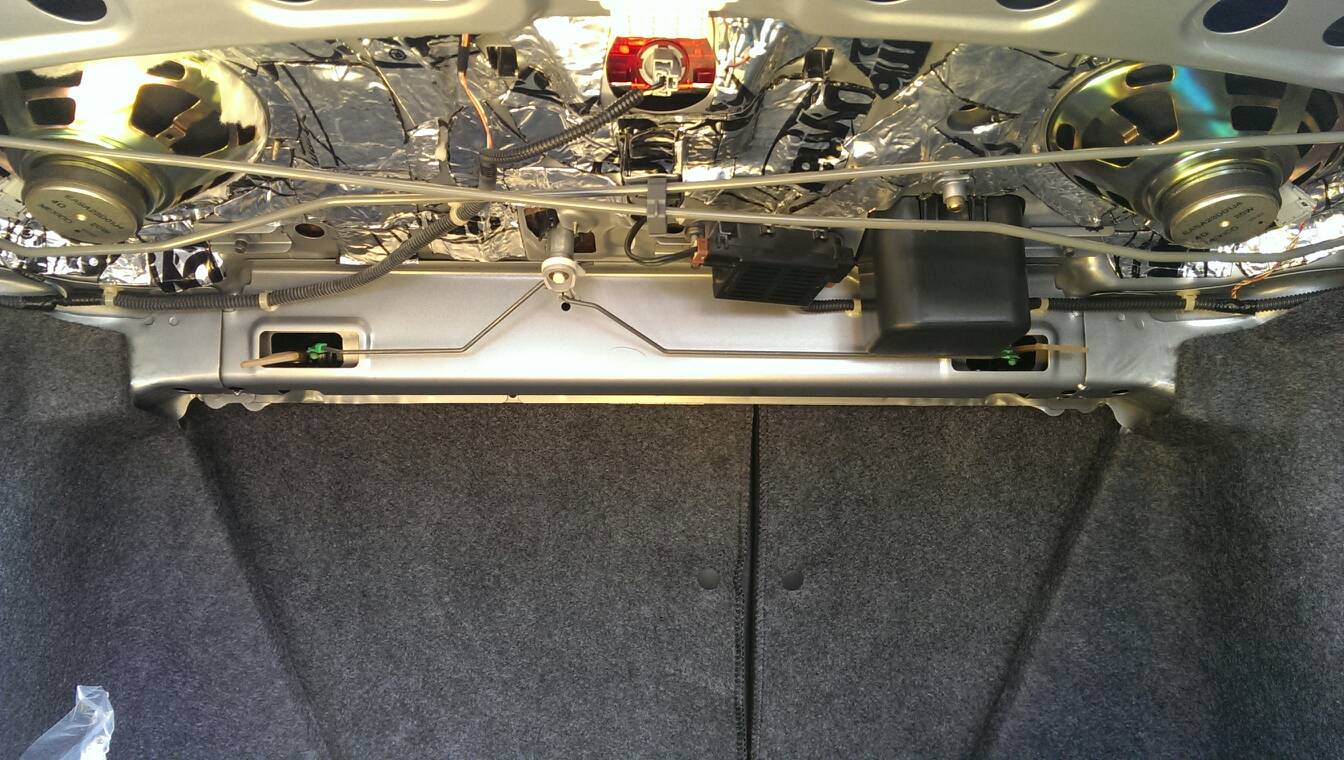
9. Applying Dynamat underneath the rear speaker deck panel. This procedure is quite simple; Just cut it out in pieces 'n apply them where you can / want to. It's better to knock on the section to figure out where it really rattles before you apply.
↓
↓
No pic, but I also applied them around the rear speakers by removing the speaker cover. (Unscrewing the bottom screws underneath the speaker cover.)
Here are the videos I recorded, showing the difference in sound before & after. (NOTE: Those videos were both set to play w/ max bass, lowest treble, and same volume.)
↓
↓
AND
Unfortunately, the sound quality of my smart phone wasn't that great, but if you listen & compare those two clips carefully, you can tell that the guitar base is louder & deeper on the second clip.
Over all, in my own hearing, there is a significant improvement in mid-base, and drum base became a lot tighter & more clear. Although they're stock speakers, it feels like I can turn up the volume all the way to 80%+, w/o having any distortions from the speakers.
With Dynamat, some people will feel like they don't need to upgrade their door speakers. Here is why:
1) Making your door panel as a sealed speaker box as much as possible.
2) Eliminating rattles and unnecessary sound distortions that travel through the metal panels.
This procedure will give you the FULL POTENTIOAL of what your speakers can perform.
Thus, this is by far one of the most efficient ways of spending money & efforts to obtain high quality sound. Imo, spending $100 on Dynamat with factory speakers is far more effective than spending $100 on aftermarket speakers only themselves. If you have already upgraded your speakers, YOU WILL BE AMAZED how your upgraded speakers can really perform better than before w/ this procedure.
Things you'll need for this DIY:
・Dynamat Extreme
・Frost King E/O 1-1/4 in. x 17 ft. Nail-On Felt Weatherseal (from Home Depot)
・Scissors
1. Cut out Dynamat Extreme into a desirable shape to cover the door lever wire.
2. Apply them onto the lever. (Note: You want to leave some extra spaces between Dynamat & the lever brackets. Otherwise, the lever won't be sliding completely when you open / close the door.)
3. Cut out the felt strip into a desirable length.
4. Wrap those felt strips around the electrical wirings. Incise the both ends of the strip and tie them together so they don't become loose. (What you see is not a factory speaker anymore; I had a pair of old Kicker RS6, collecting dusts for years, and I finally got a chance to put these on my Accord!) FYI, those video clips were both played through stock speakers to show you the difference.
By completing phase I. ~ III., you will be most likely to have absolutely no squeaks, rattles, vibrations, or any kind of unpleasant noises whatsoever. And you will be able to hear powerful yet clear sound from your speakers.
Thanks for looking!
And, if it's cool, a rep point is much appreciated.
・DISCLAIMER・
Please perform at your own risk. By performing this DIY, you are agreed to pursue at your own risk; Failure of accomplishment, injuries, or damages to your vehicle cannot be blamed. This is only to help you getting the job done, as cleanly & neatly as possible, based on my experience.
---Phase I. Sound deadening door panel⇔door panel lining contact---
Things you'll need for this DIY:
・Fabric loop-side Velcro tape Velcros have better adhesibility, compared to those generic felt sheets from a crafts store, which I've later discovered.
・Scissors
・Straight slot screwdriver
・Cross slot screwdriver
・Pencil / marker
1. Outline your desired area on your metal panel with a pencil before removing your door panel linings. This will help you figure out where to apply Velcro tape on the metal panel.
↓
↓
2. Remove the door panel linings. (Please visit my other DIY thread, DIY: Plasti-Dipping Side Window Chrome Trimmings, and follow the steps #1 ~ #12.)
3. Cut out Velcro tape in pieces of a thin strip shape, and apply them a little to the inside of your outlined markings.
↓
↓
How it looks, when the lining meets the panel.
↓
↓
4. Apply thin strips of Velcro tape on the bottom portions of the door panel linings.
↓
↓
5. Back of the door panel linings are partially covered by the factory felt tapes, but I replaced them because they were too thin and unevenly applied.
↓
↓
6. These are some additional sections I applied, where the door panel guards meet the metal frame. (Optional)
↓
↓
Basically, you want to use Velcro on anywhere that the lining is making a direct contact with the door panel. When you tap on your linings, while they're installed, and if you hear a rattle from the lining behind, that's where you want to deaden that sound.
---------------------------------------------------------------------------------------
---Phase II. Sound deadening the whole inner door panels & the rear speaker panel (Gaining Great Deal of Improvements on your Audio Quality)---
Things you'll need for this DIY:
・12 sq ft Dynamat Extreme (For coupe)
・2 pieces of Dynaxorb (Optional)
・Dynaliner (Optional)
・Razor blade
・Scissors
・Marker (i.e. Sharpie)
・Under lay mat / cardboards
・Cross slot screwdriver
・Damp cloth / kitchen paper
・Cotton work gloves, when pressing on the applied Dynamat (Optional)
1. Remove the OEM wet-proof vinyl cover. (Don't worry. Your panel won't get wet, even w/o them, because you'll be replacing them entirely w/ Dynamat.)
↓
↓
2. Mean while, remove the bracket for the arm rest. (It will be easier to apply the Dynamat later on.)
↓
↓
My driver side panel was replaced 2 yrs ago, so the butyl rubber adhesives (black stuff in the 1st pic) were still fresh & easy to be removed. Usually, this stuff is very hard to remove as the car ages. (They usually end up remained on the panel surface quite a bit, when you remove the vinyl sheets.) However, there is a way to remove them w/o using any chemical remover.
↓
↓
↑
↑
Stick a chunk of the butyl rubber adhesive you have collected, and press it hard on a remaining section.
↑
↑
Pull it off instantly and rapidly!
↑
↑
It should come off like this. Repeat this sequence, and you should be able to remove it all without any mess on the panel.
Here is the result. No chemical removers were used. Just by hand.
↓
↓
3. Remove the door speaker. (Precisely speaking, remove the speaker adaptor, where it's mounted on the door panel.) Leave the speaker itself on the adaptor. Unplug the cable connector.
4. Clean and wipe off the entire door panel w/ a damp cloth or kitchen papers + mild soap.
5. (Optional) This is what the Dynaxorb looks like. It's made by some kind of rubber / gel type of material, and it's very soft and flexible. It gets applied on the outer door panel right behind the speaker. The purpose of this thing is to eliminate the unnecessary sound frequencies, which is the sound that's bounced back from the outer door panel, coming from behind the speaker. For more information, check out the link below:
http://www.dynamat.com/products_car_audio_dynaxorb.html
↓
↓
6. Here is the fun part. Cut out the Dynamat in pieces & apply them on the desired sections of the door panel.
ーーーーーーーーーー
IMPORTANT: You want to fill out those holes on the panel (from small Ping-Pong-sized holes to large wholes completely) However, #1. Do not fill out those holes that your door panel linings & the arm rest brackets are going into. #2. Do not fill out those screw holes that your speakers / speaker adapters are going into. #3. Do not fill out those screw holes that the arm rest brackets are going into.
ーーーーーーーーーー
Some people choose to apply Dynamat entirely, except for those aforementioned sections. I decided to let the wirings & those 10mm lugs visible, in case there will be any repair / work gets involved in the future.
Sorry, I was too into this step, and forgot to take a picture... But here is how I did:
All area
A) Measure the length & width of the desired area for the application.
B) Cut out the Dynamat accordingly.
C) If you want to leave those 10mm lugs visible, you need to:
・・・Place the Dynamat on the desired area
・・・Push the Dynamat where the lugs are located
・・・Draw a marking on those popped out sections
・・・Cut out the marked section w/ a razor blade
Otherwise:
D) Apply the Dynamat onto the desired area.
E) Make sure to press it firmly, leaving no air trapped underneath. (Pressing it down 'n spreading it out w/ cotton work gloves really helps, and they also prevent from getting cuts 'n scratches from the Dynamat on your hand.)
----------------------------------------
Speaker area
A) Measure the length & the width of the desired area for the application.
B) Cut out the Dynamat accordingly.
C) Apply the Dynamat to cover the entire speaker hole.
D) Press the inner edge of a speaker hole on the applied Dynamat to create a circular indentation.
E) Draw a circle w/ a marker about a little smaller than the indentation.
F) Cut out the marked section w/ a razor blade.
(Note: Marking & cutting a little smaller than the indentation will give you a good margin of the Dynamat to cover the speaker hole, which it will be tucked in, and prevents from your speaker being glued down to the Dynamat.)
↓
↓
7. Mount your speakers & the armrest brackets back.
Here is the result.
↓
↓
8. Before putting your door linings back, remove those factory sound deadeners, because these won't let you mount your linings on the door panel, since you filled out all of the holes on the panel. The foamy looking material w/ the blue marking is Dynaliner, which is used for insulating noise and heat (optional).
↓
↓
9. Applying Dynamat underneath the rear speaker deck panel. This procedure is quite simple; Just cut it out in pieces 'n apply them where you can / want to. It's better to knock on the section to figure out where it really rattles before you apply.
↓
↓
No pic, but I also applied them around the rear speakers by removing the speaker cover. (Unscrewing the bottom screws underneath the speaker cover.)
Here are the videos I recorded, showing the difference in sound before & after. (NOTE: Those videos were both set to play w/ max bass, lowest treble, and same volume.)
↓
↓
AND
Unfortunately, the sound quality of my smart phone wasn't that great, but if you listen & compare those two clips carefully, you can tell that the guitar base is louder & deeper on the second clip.
Over all, in my own hearing, there is a significant improvement in mid-base, and drum base became a lot tighter & more clear. Although they're stock speakers, it feels like I can turn up the volume all the way to 80%+, w/o having any distortions from the speakers.
With Dynamat, some people will feel like they don't need to upgrade their door speakers. Here is why:
1) Making your door panel as a sealed speaker box as much as possible.
2) Eliminating rattles and unnecessary sound distortions that travel through the metal panels.
This procedure will give you the FULL POTENTIOAL of what your speakers can perform.
Thus, this is by far one of the most efficient ways of spending money & efforts to obtain high quality sound. Imo, spending $100 on Dynamat with factory speakers is far more effective than spending $100 on aftermarket speakers only themselves. If you have already upgraded your speakers, YOU WILL BE AMAZED how your upgraded speakers can really perform better than before w/ this procedure.
---------------------------------------------------------------------------------------
---Phase III. Sound deadening door lever wires & electrical wirings---
Things you'll need for this DIY:
・Dynamat Extreme
・Frost King E/O 1-1/4 in. x 17 ft. Nail-On Felt Weatherseal (from Home Depot)
・Scissors
1. Cut out Dynamat Extreme into a desirable shape to cover the door lever wire.
2. Apply them onto the lever. (Note: You want to leave some extra spaces between Dynamat & the lever brackets. Otherwise, the lever won't be sliding completely when you open / close the door.)
3. Cut out the felt strip into a desirable length.
4. Wrap those felt strips around the electrical wirings. Incise the both ends of the strip and tie them together so they don't become loose. (What you see is not a factory speaker anymore; I had a pair of old Kicker RS6, collecting dusts for years, and I finally got a chance to put these on my Accord!) FYI, those video clips were both played through stock speakers to show you the difference.
By completing phase I. ~ III., you will be most likely to have absolutely no squeaks, rattles, vibrations, or any kind of unpleasant noises whatsoever. And you will be able to hear powerful yet clear sound from your speakers.
Thanks for looking!
And, if it's cool, a rep point is much appreciated.
Last edited:


 But the results are awesome. Thanks again, Richard