

Note: If you own a 98-00 model, You will need to replace the whole system. It has been updated with the 6.5 gen and the old parts are now discontinued. If such is the case, refer to this video for help. It is basically the same, except the fittings are different.
I am not responsible for any damage you may do to your car.
Parts you'll need:
# 5 slave cylinder 46930-S84-A06
# 4 pin connector 46925-S84-A01 (or try to save it...)

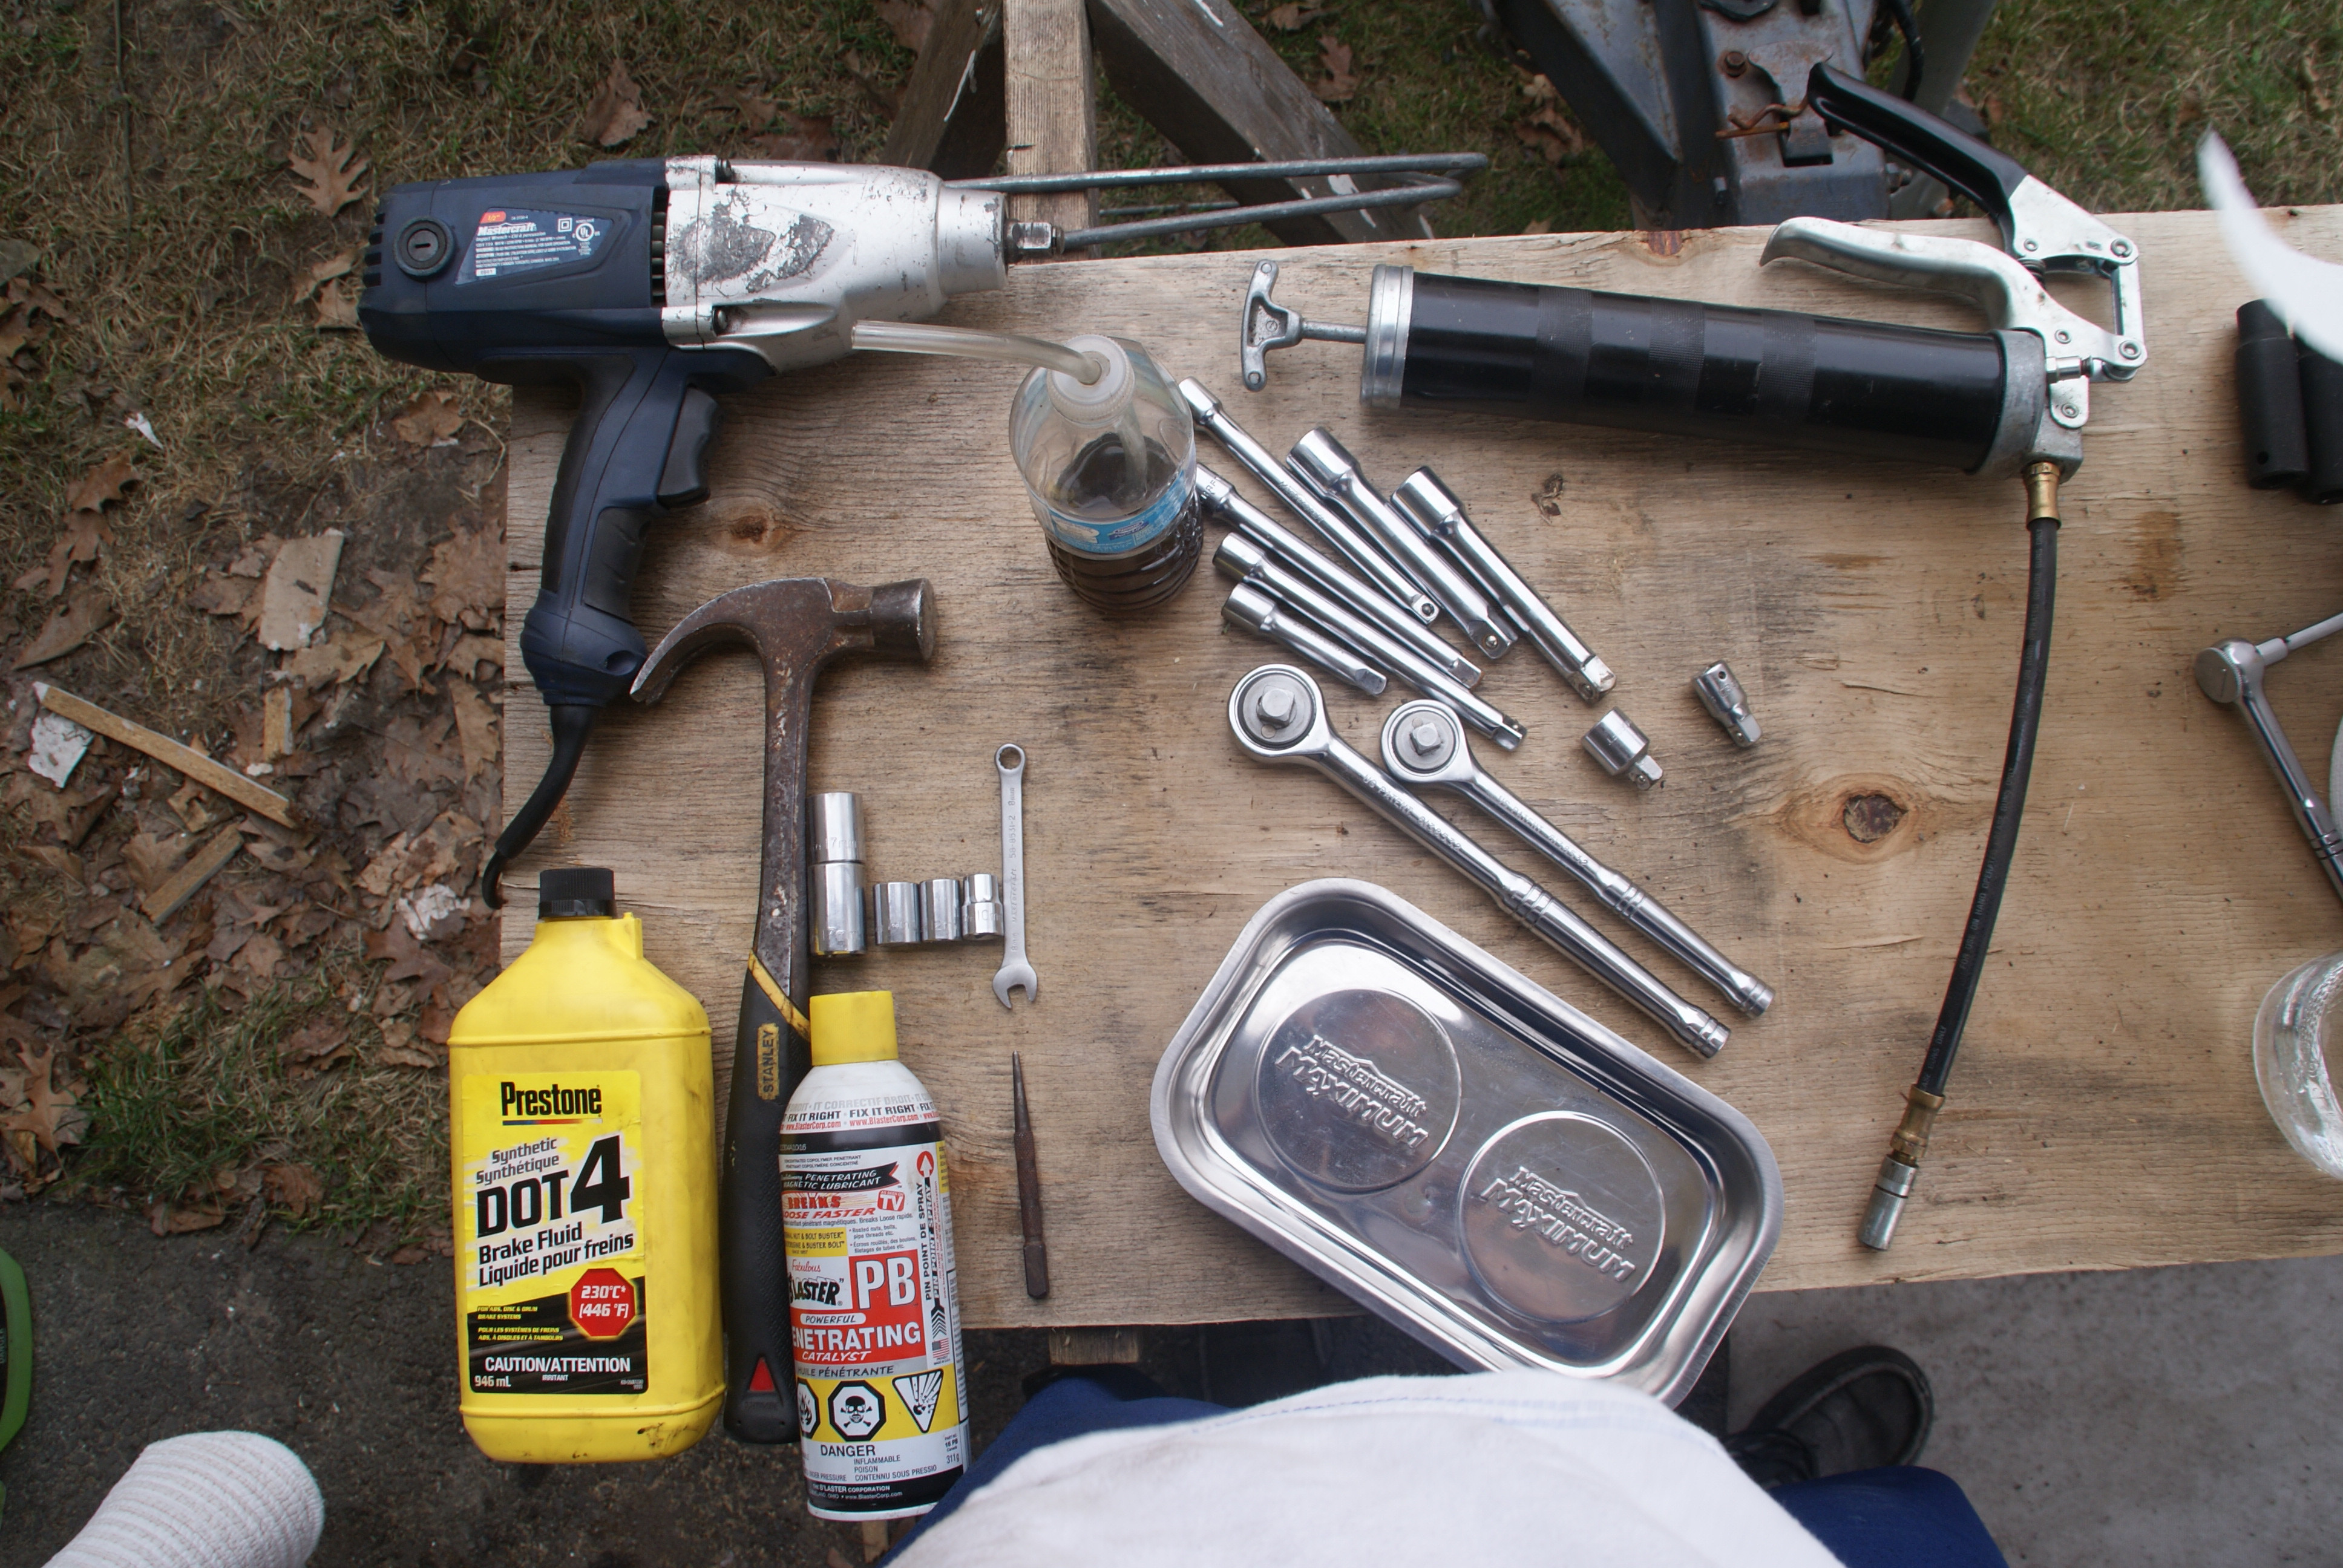
Tools you will need:
10 mm socket
12 mm socket
14 mm socket
17 mm socket
Lots of extensions
3/8 ratchet
1/2 ratchet
hammer
punch
Dot 3 or 4 brake fluid
8 mm wrench
bleed bottle
Optional tools:
penetrating oil (recommanded)
funnel (recommanded)
brake line wrench
impact gun (recommanded)
synthetic grease
magnetized container
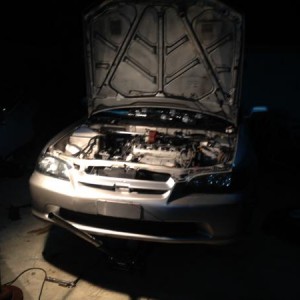
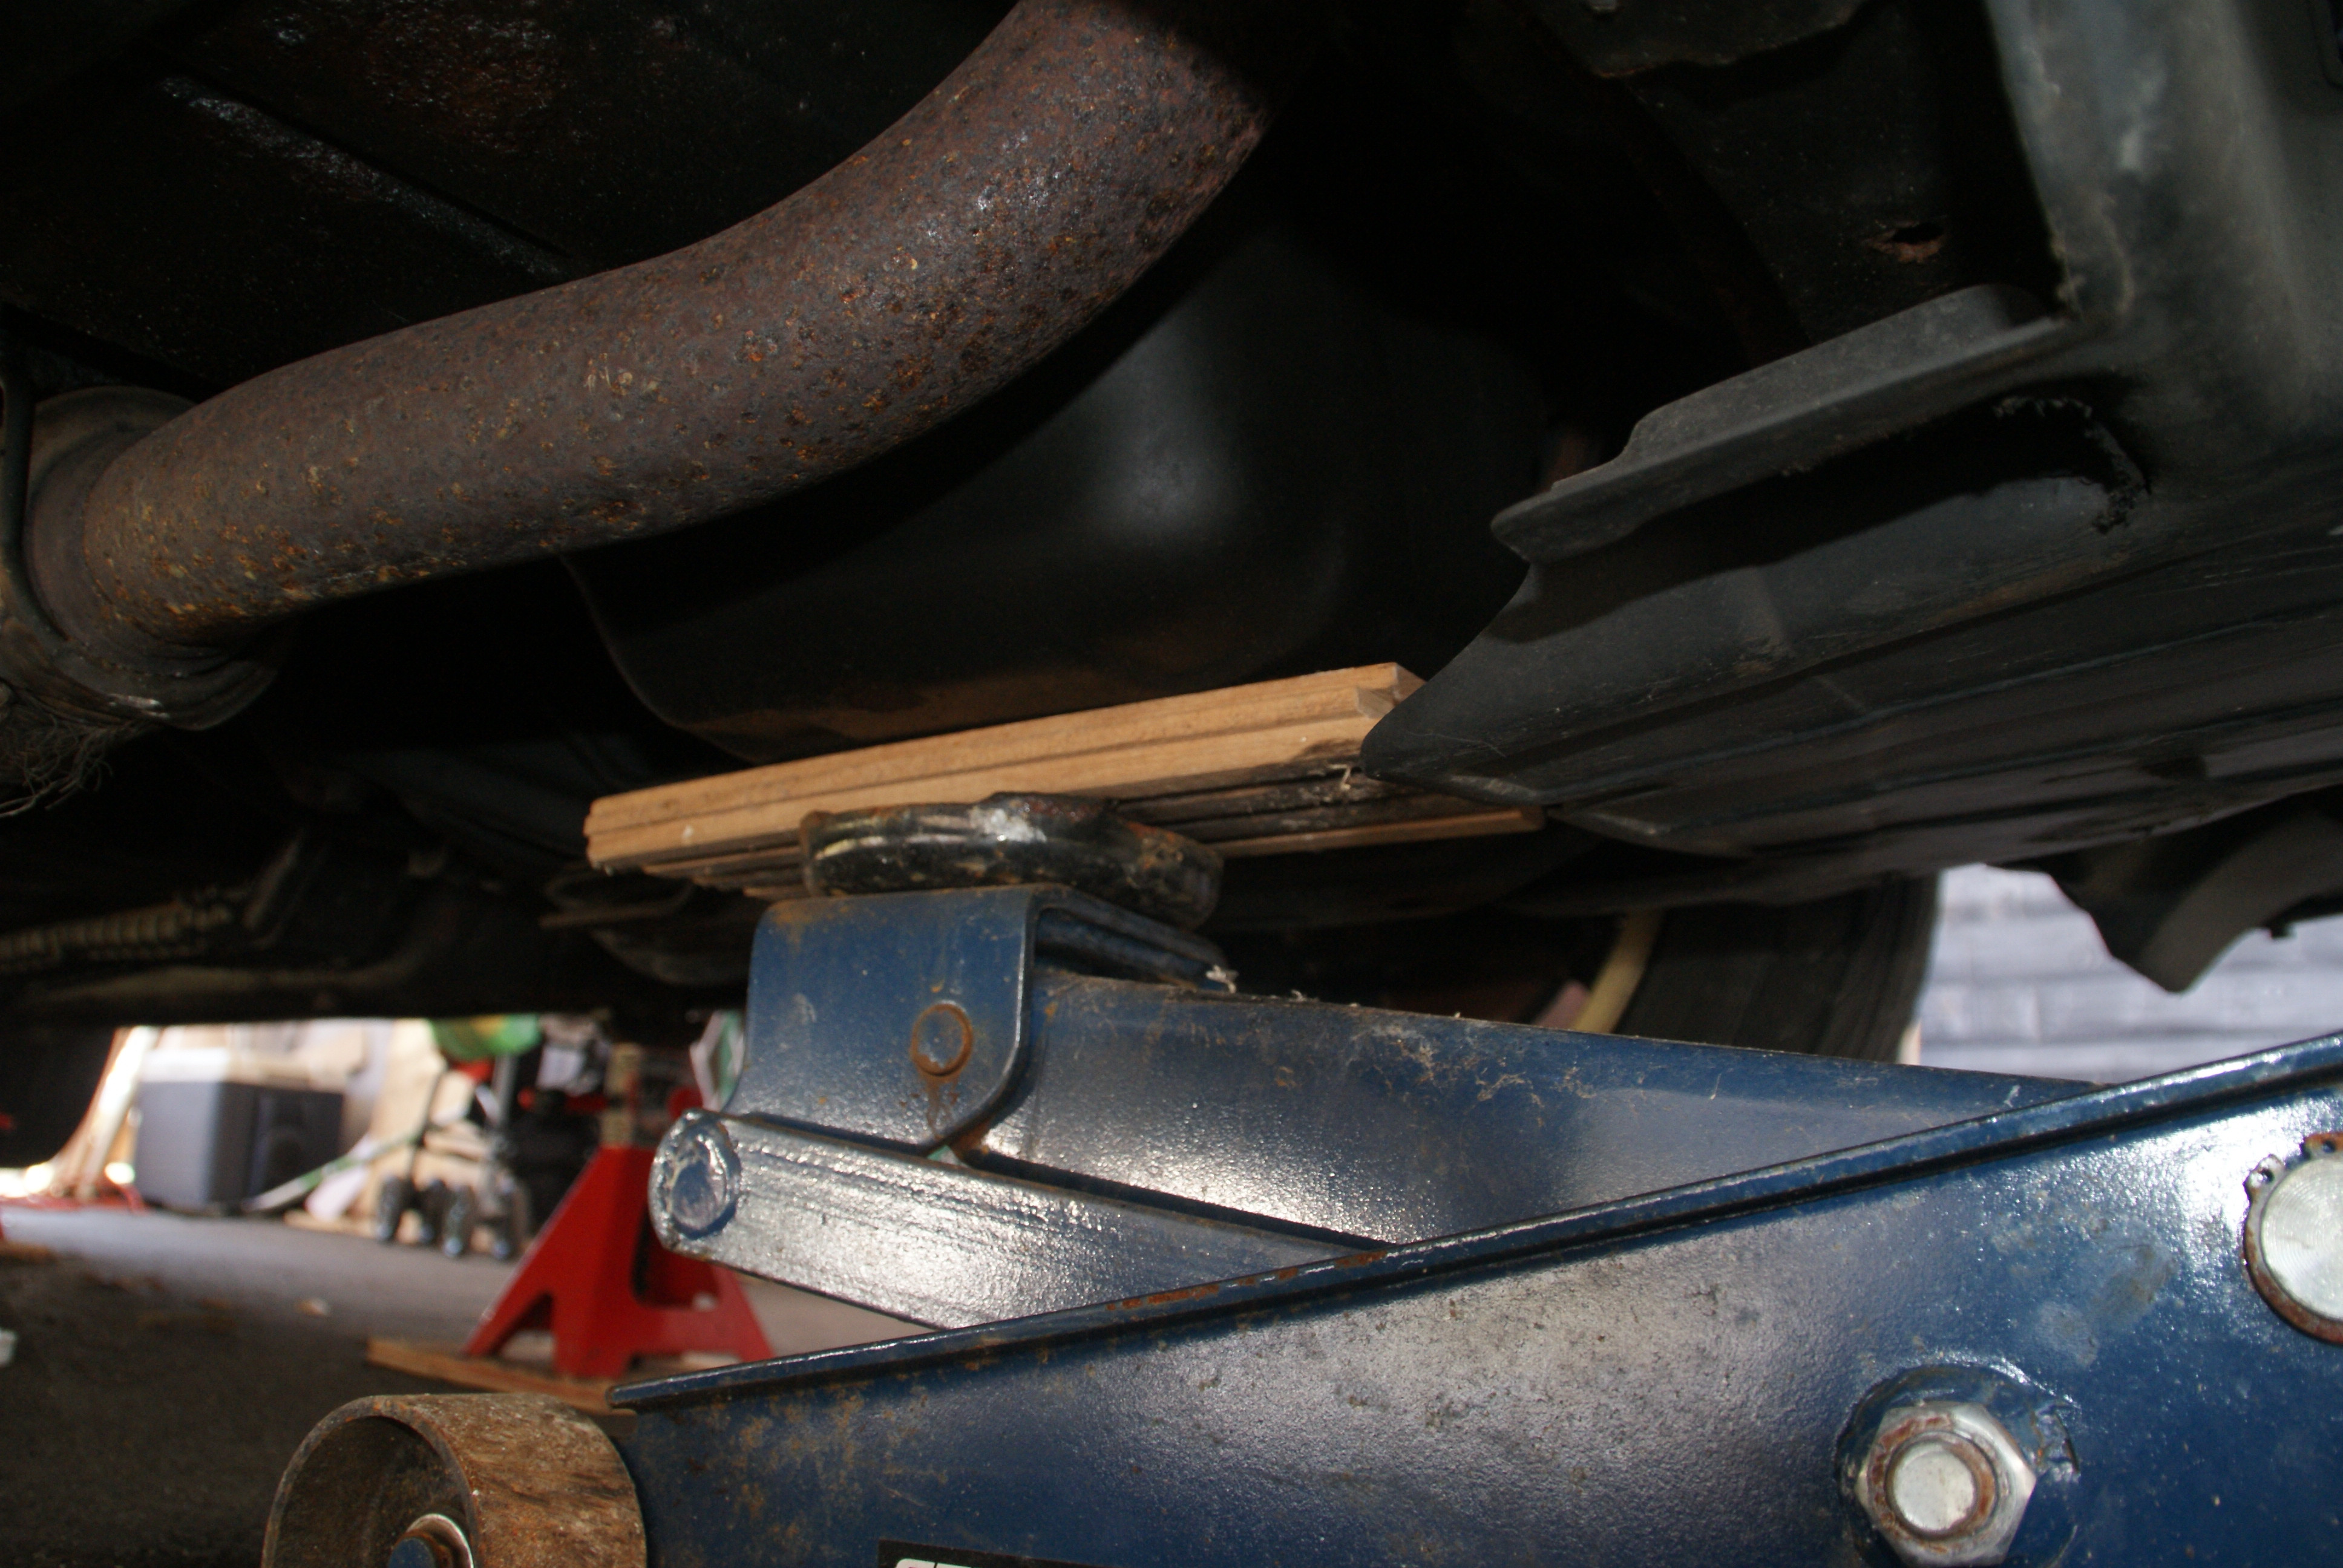
Support the engine with a jack and a piece of wood under the oil pan. You don't need to put the car on jack stands. Mine was already like this...
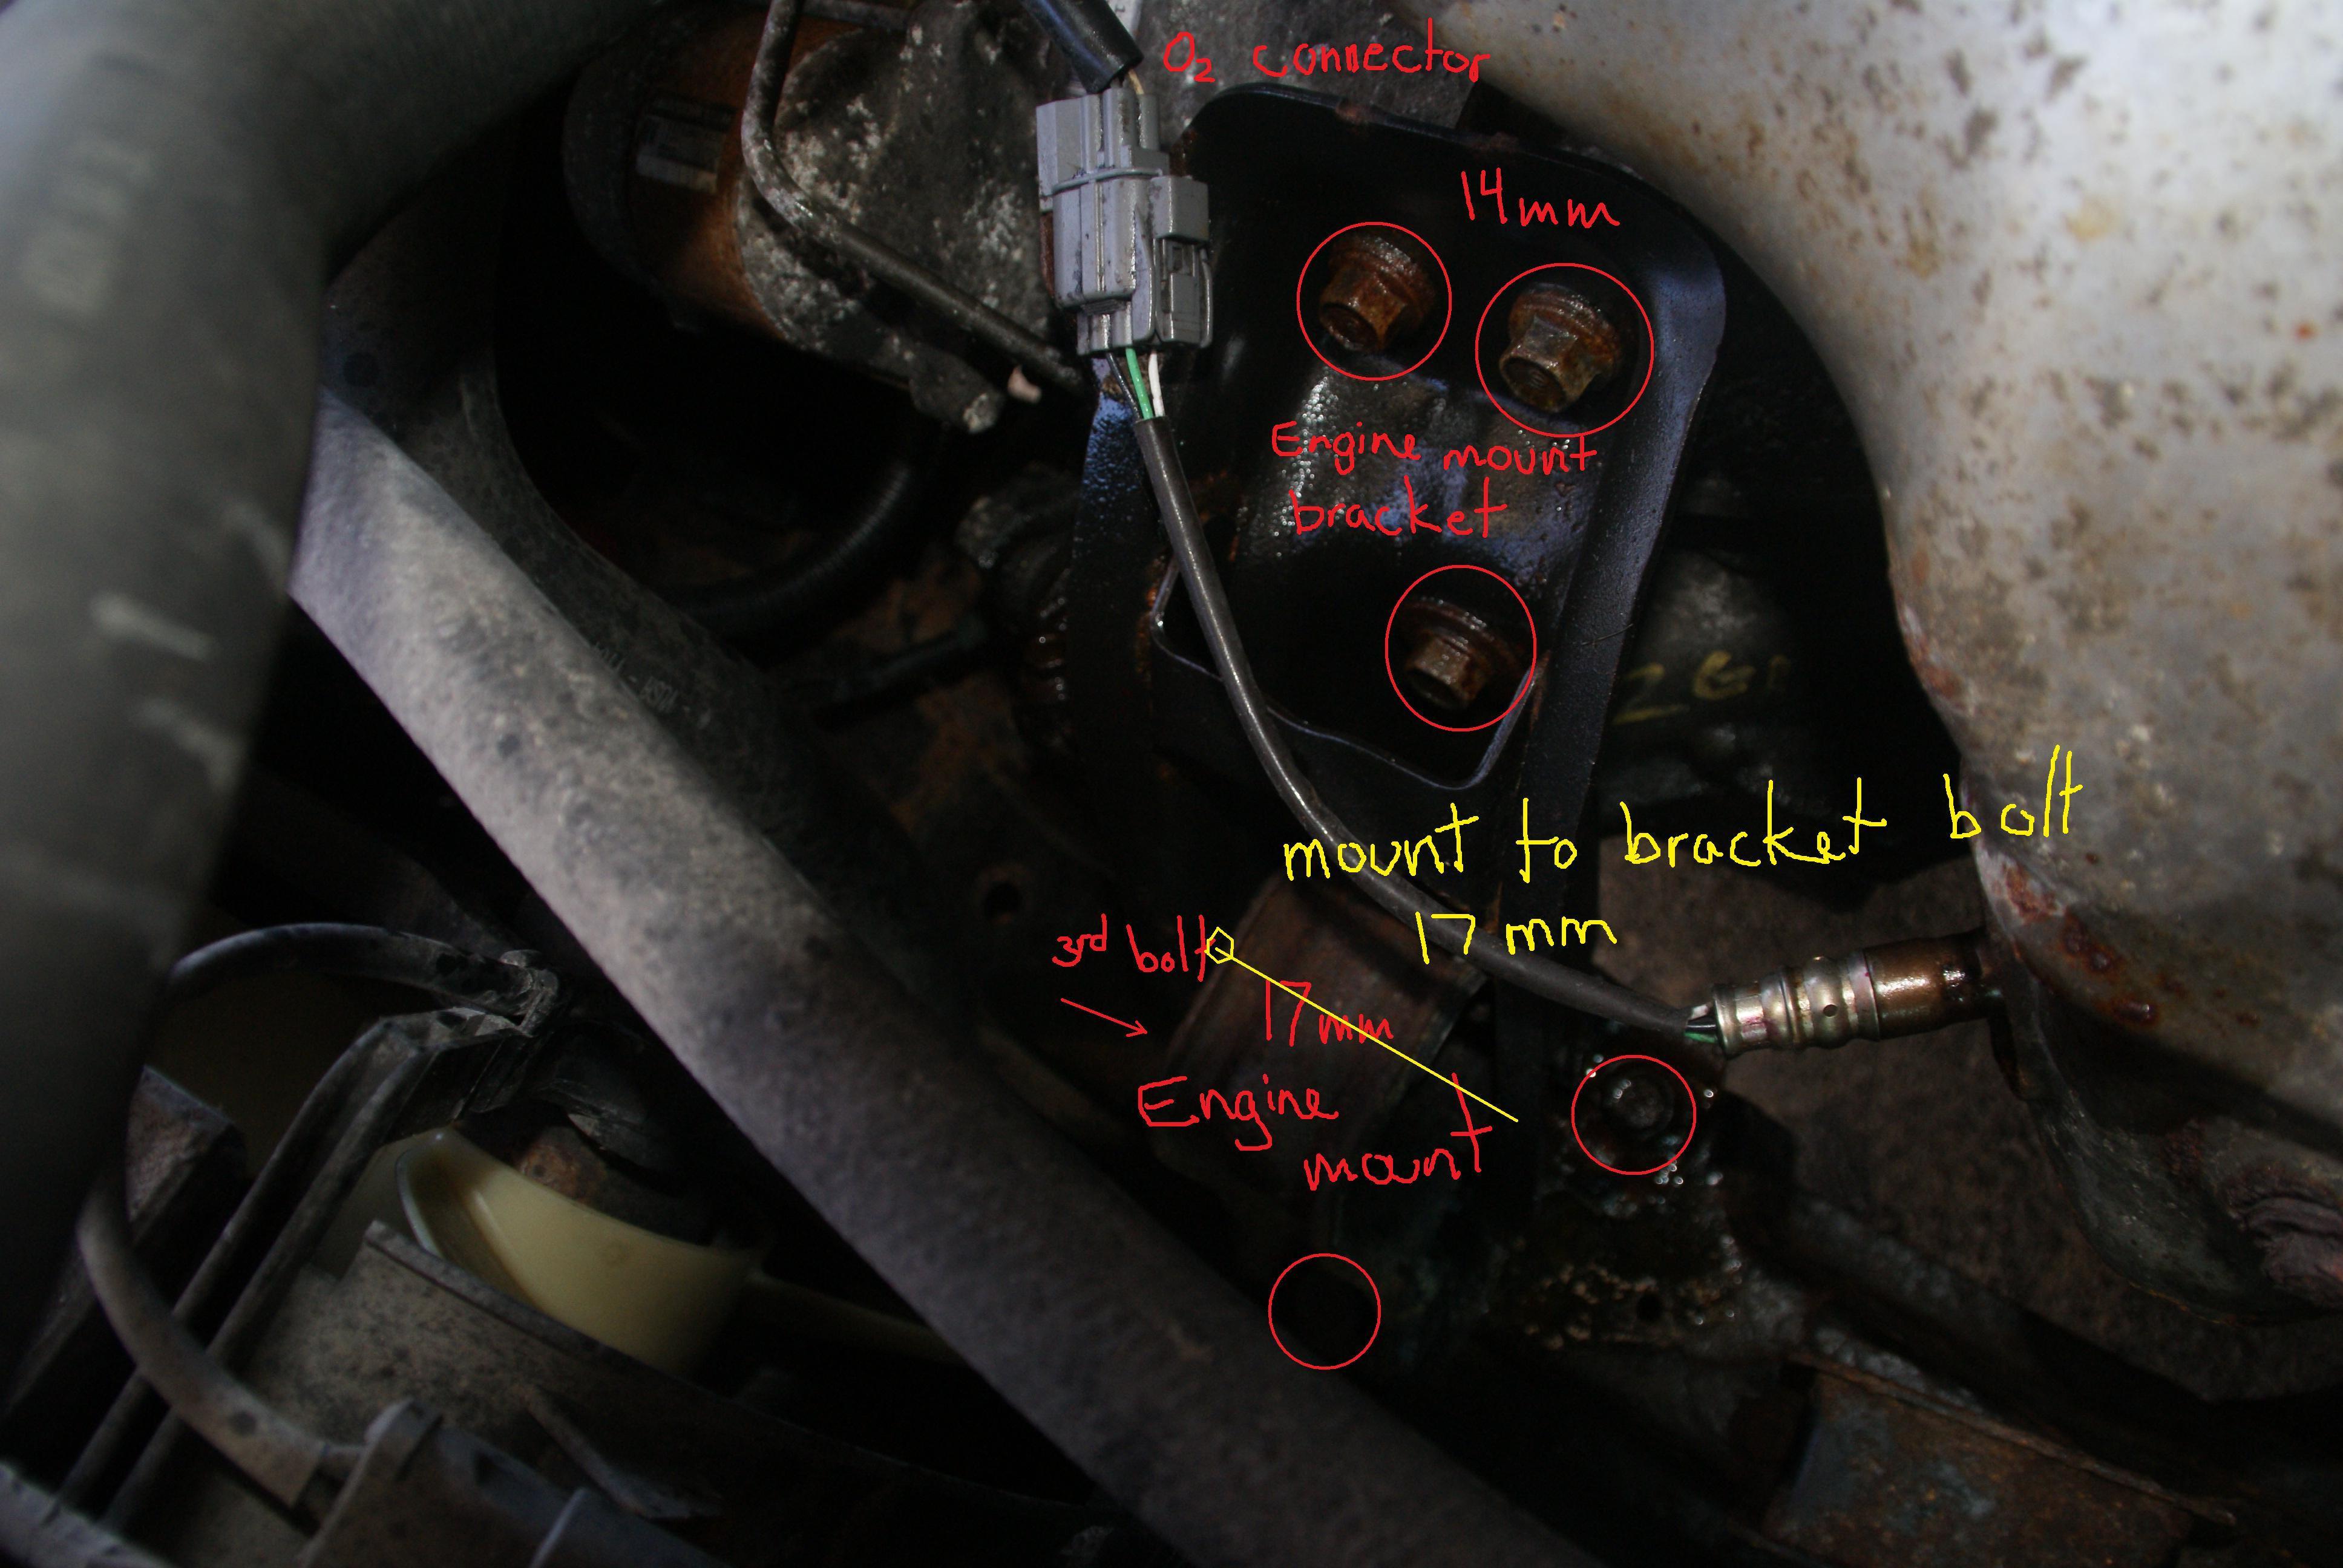
Spray some penetrating oil on all 12 bolts. Wait a bit. The long (yellow) bolt that goes through the mount is bolted in the bracket so only spray there the bolt thread comes out. (driver side for 01-02. passenger side for 98-00).
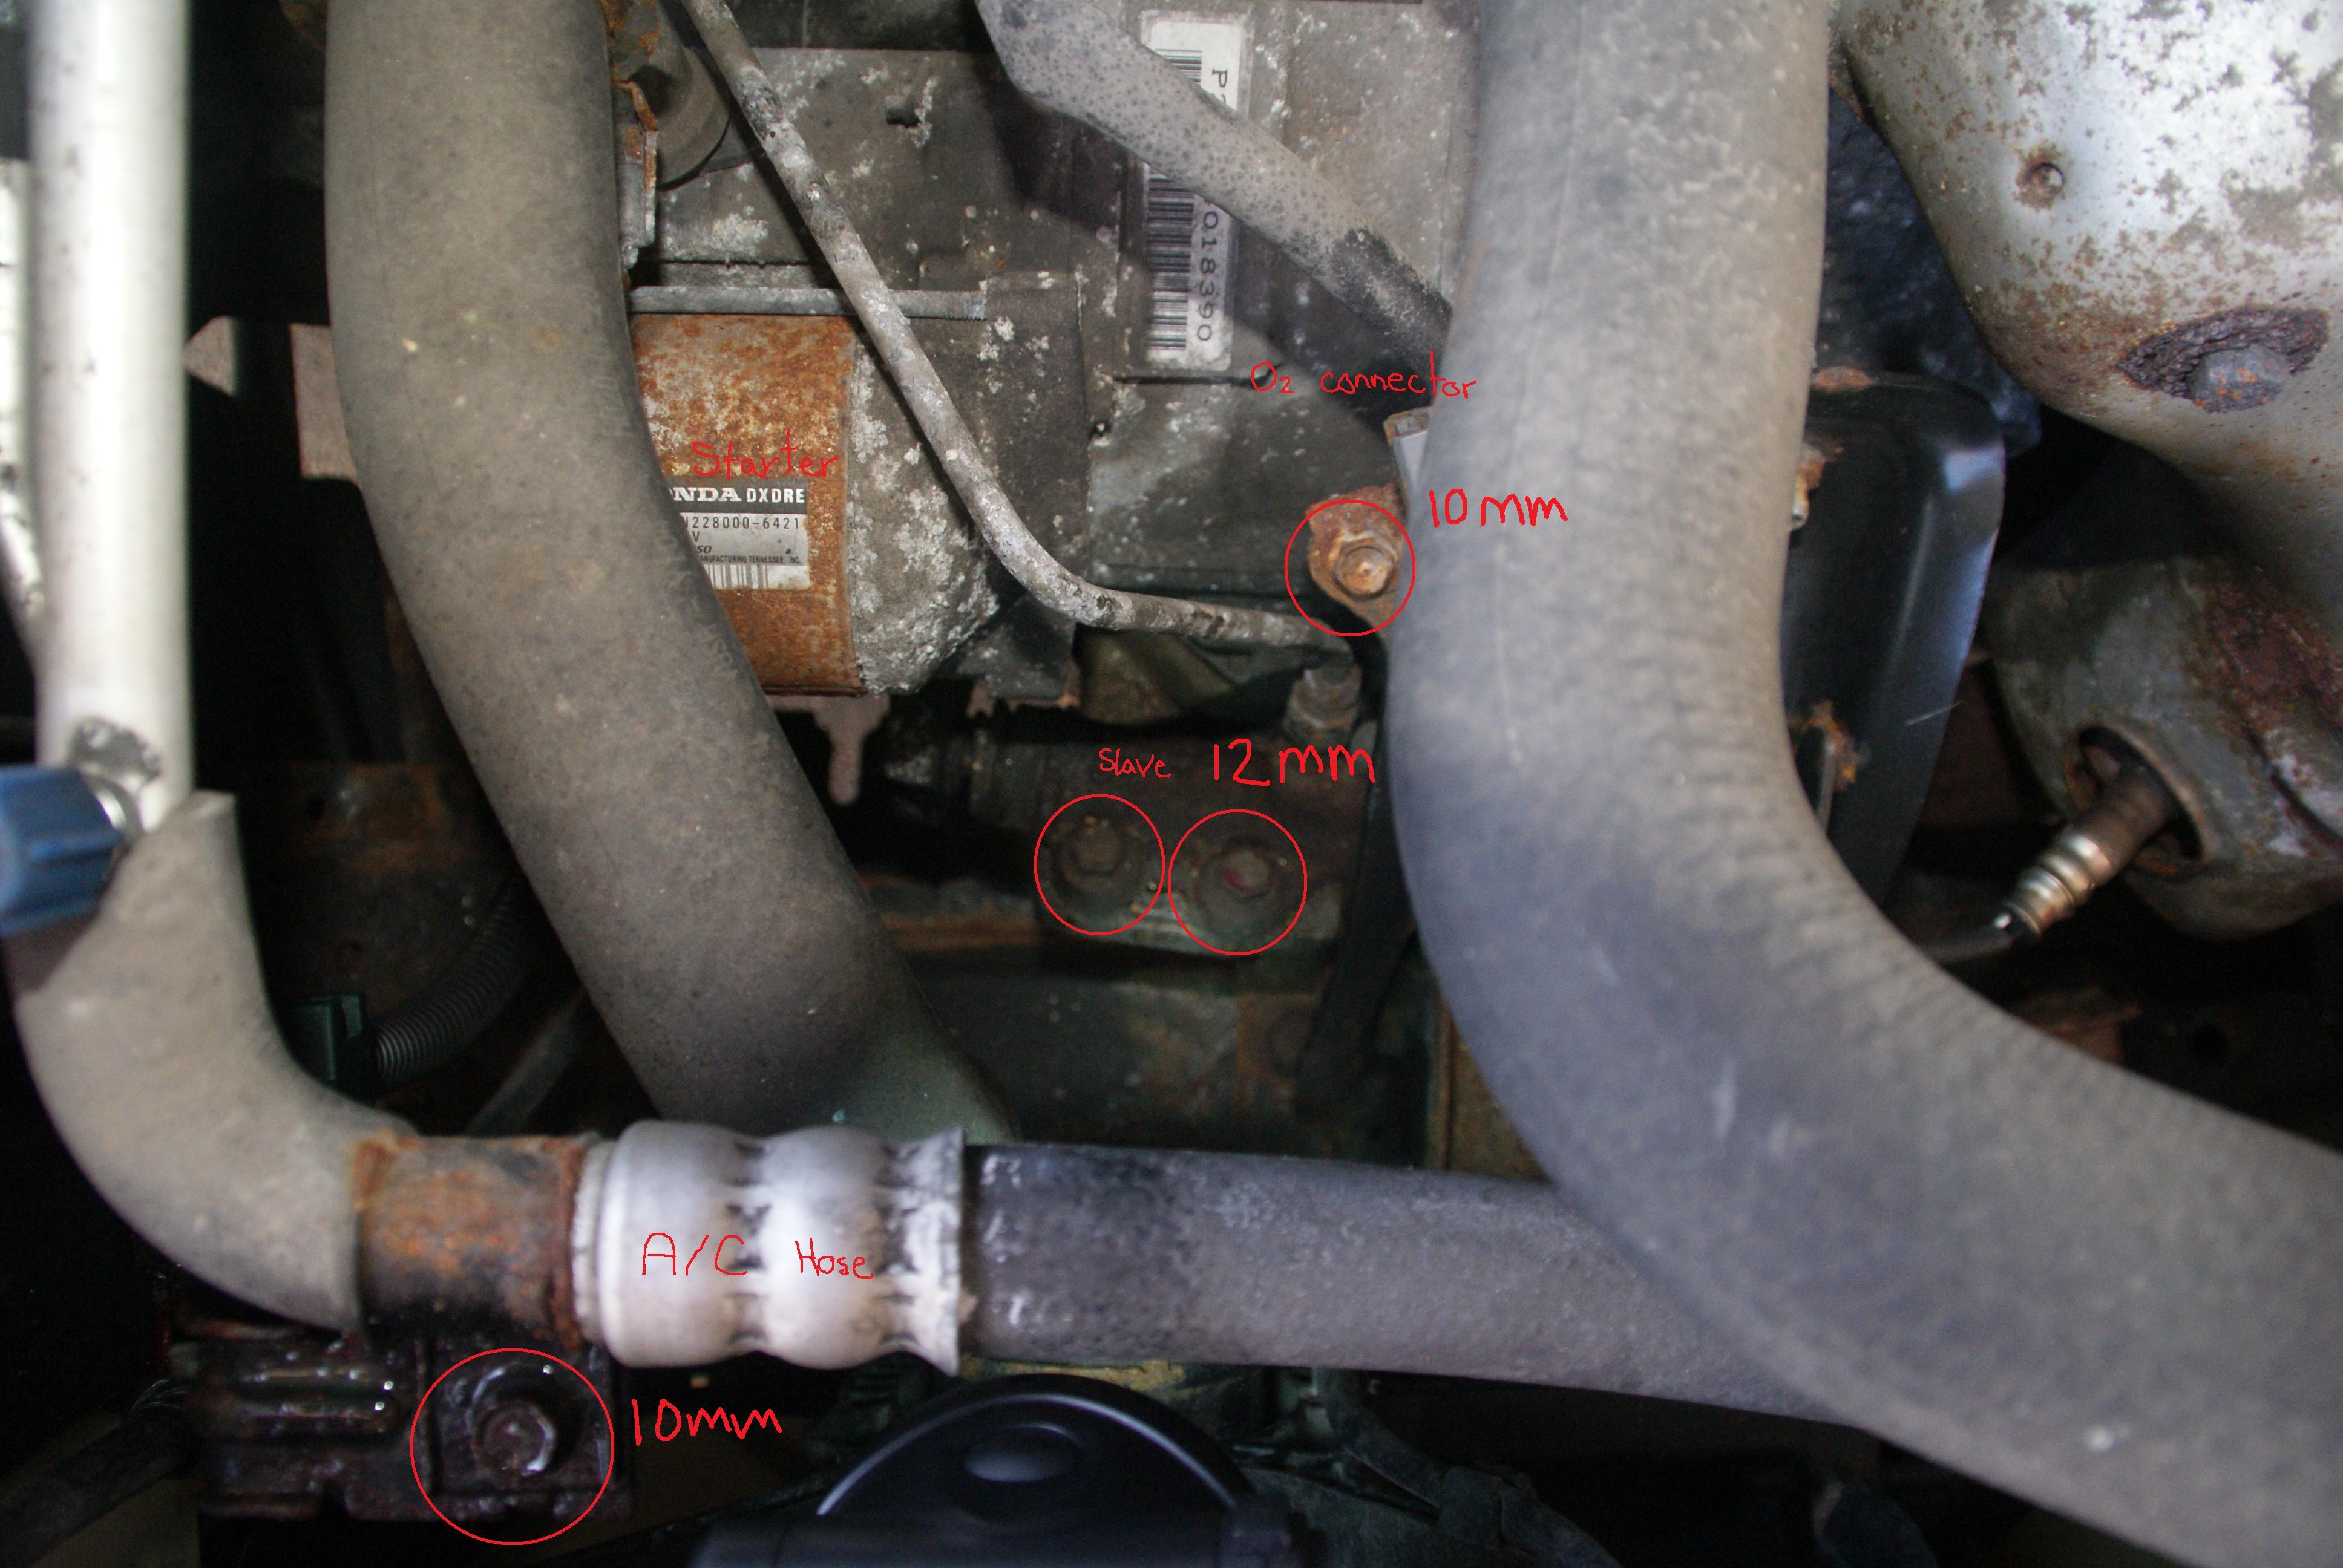
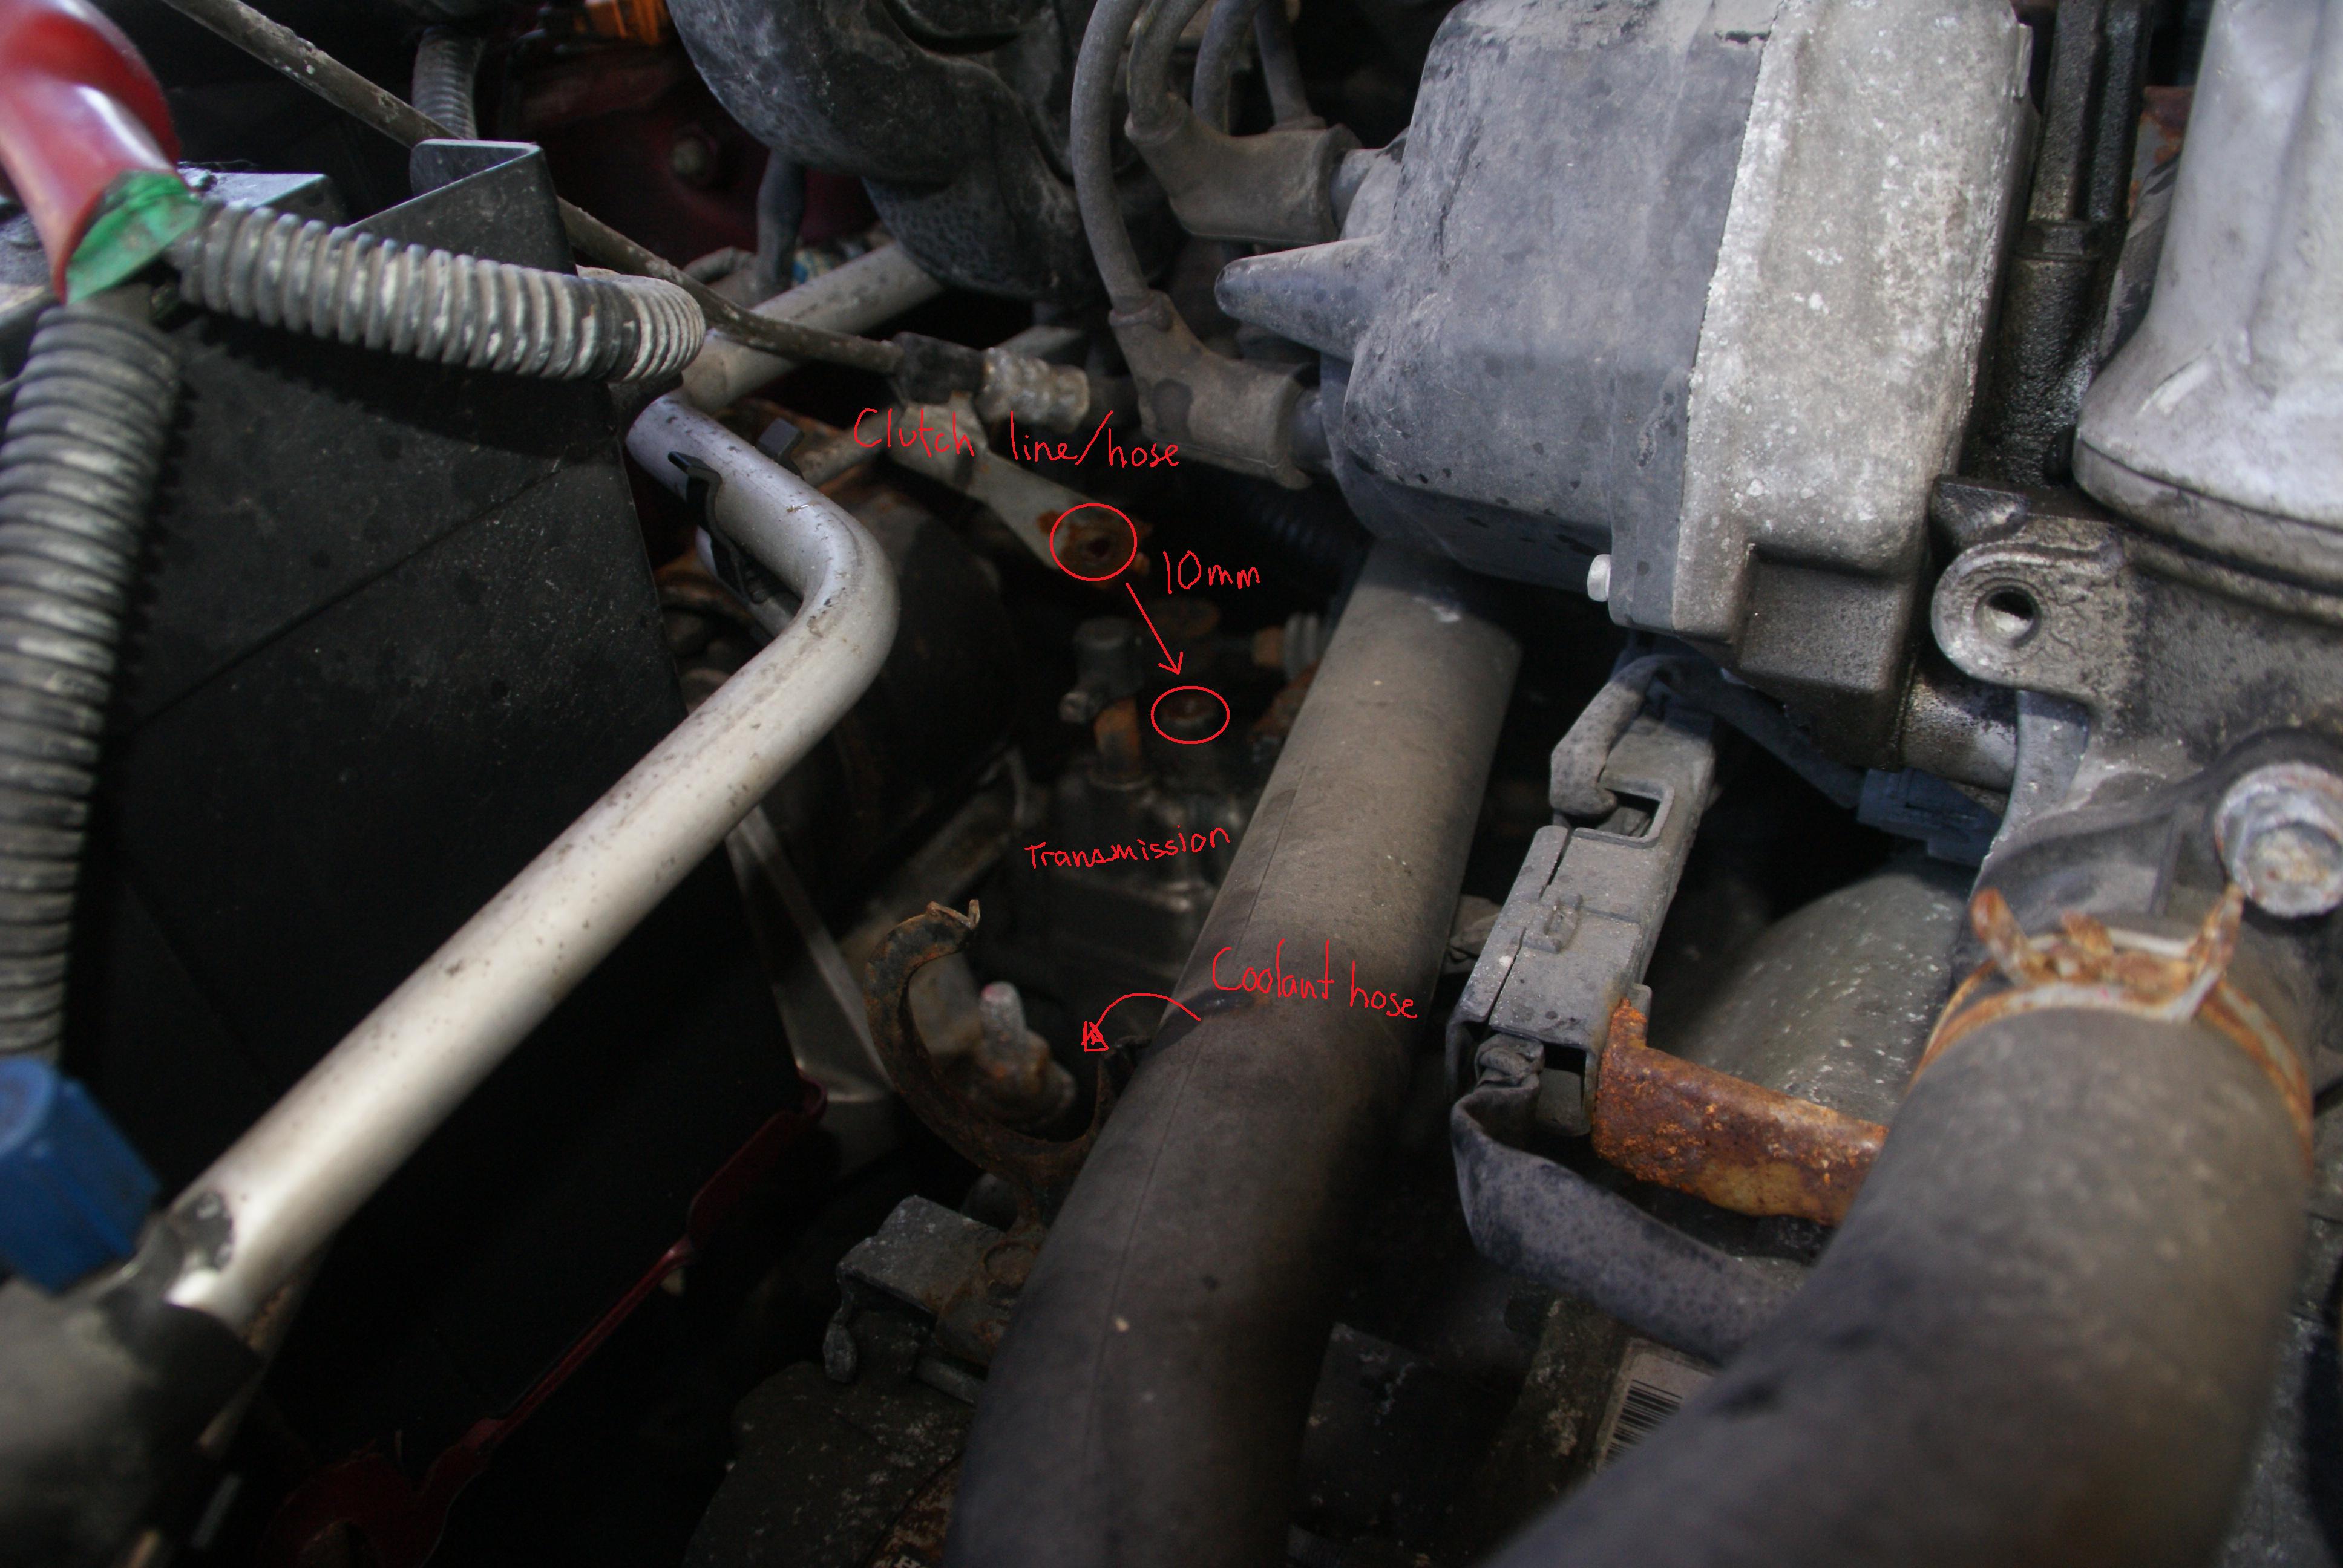
Start by removing the 10mm bolts from the A/C line, clutch line and o2 sensor bracket. You're removing these to make some room. you can move the coolant hose and disconnect the intake at the intake box.
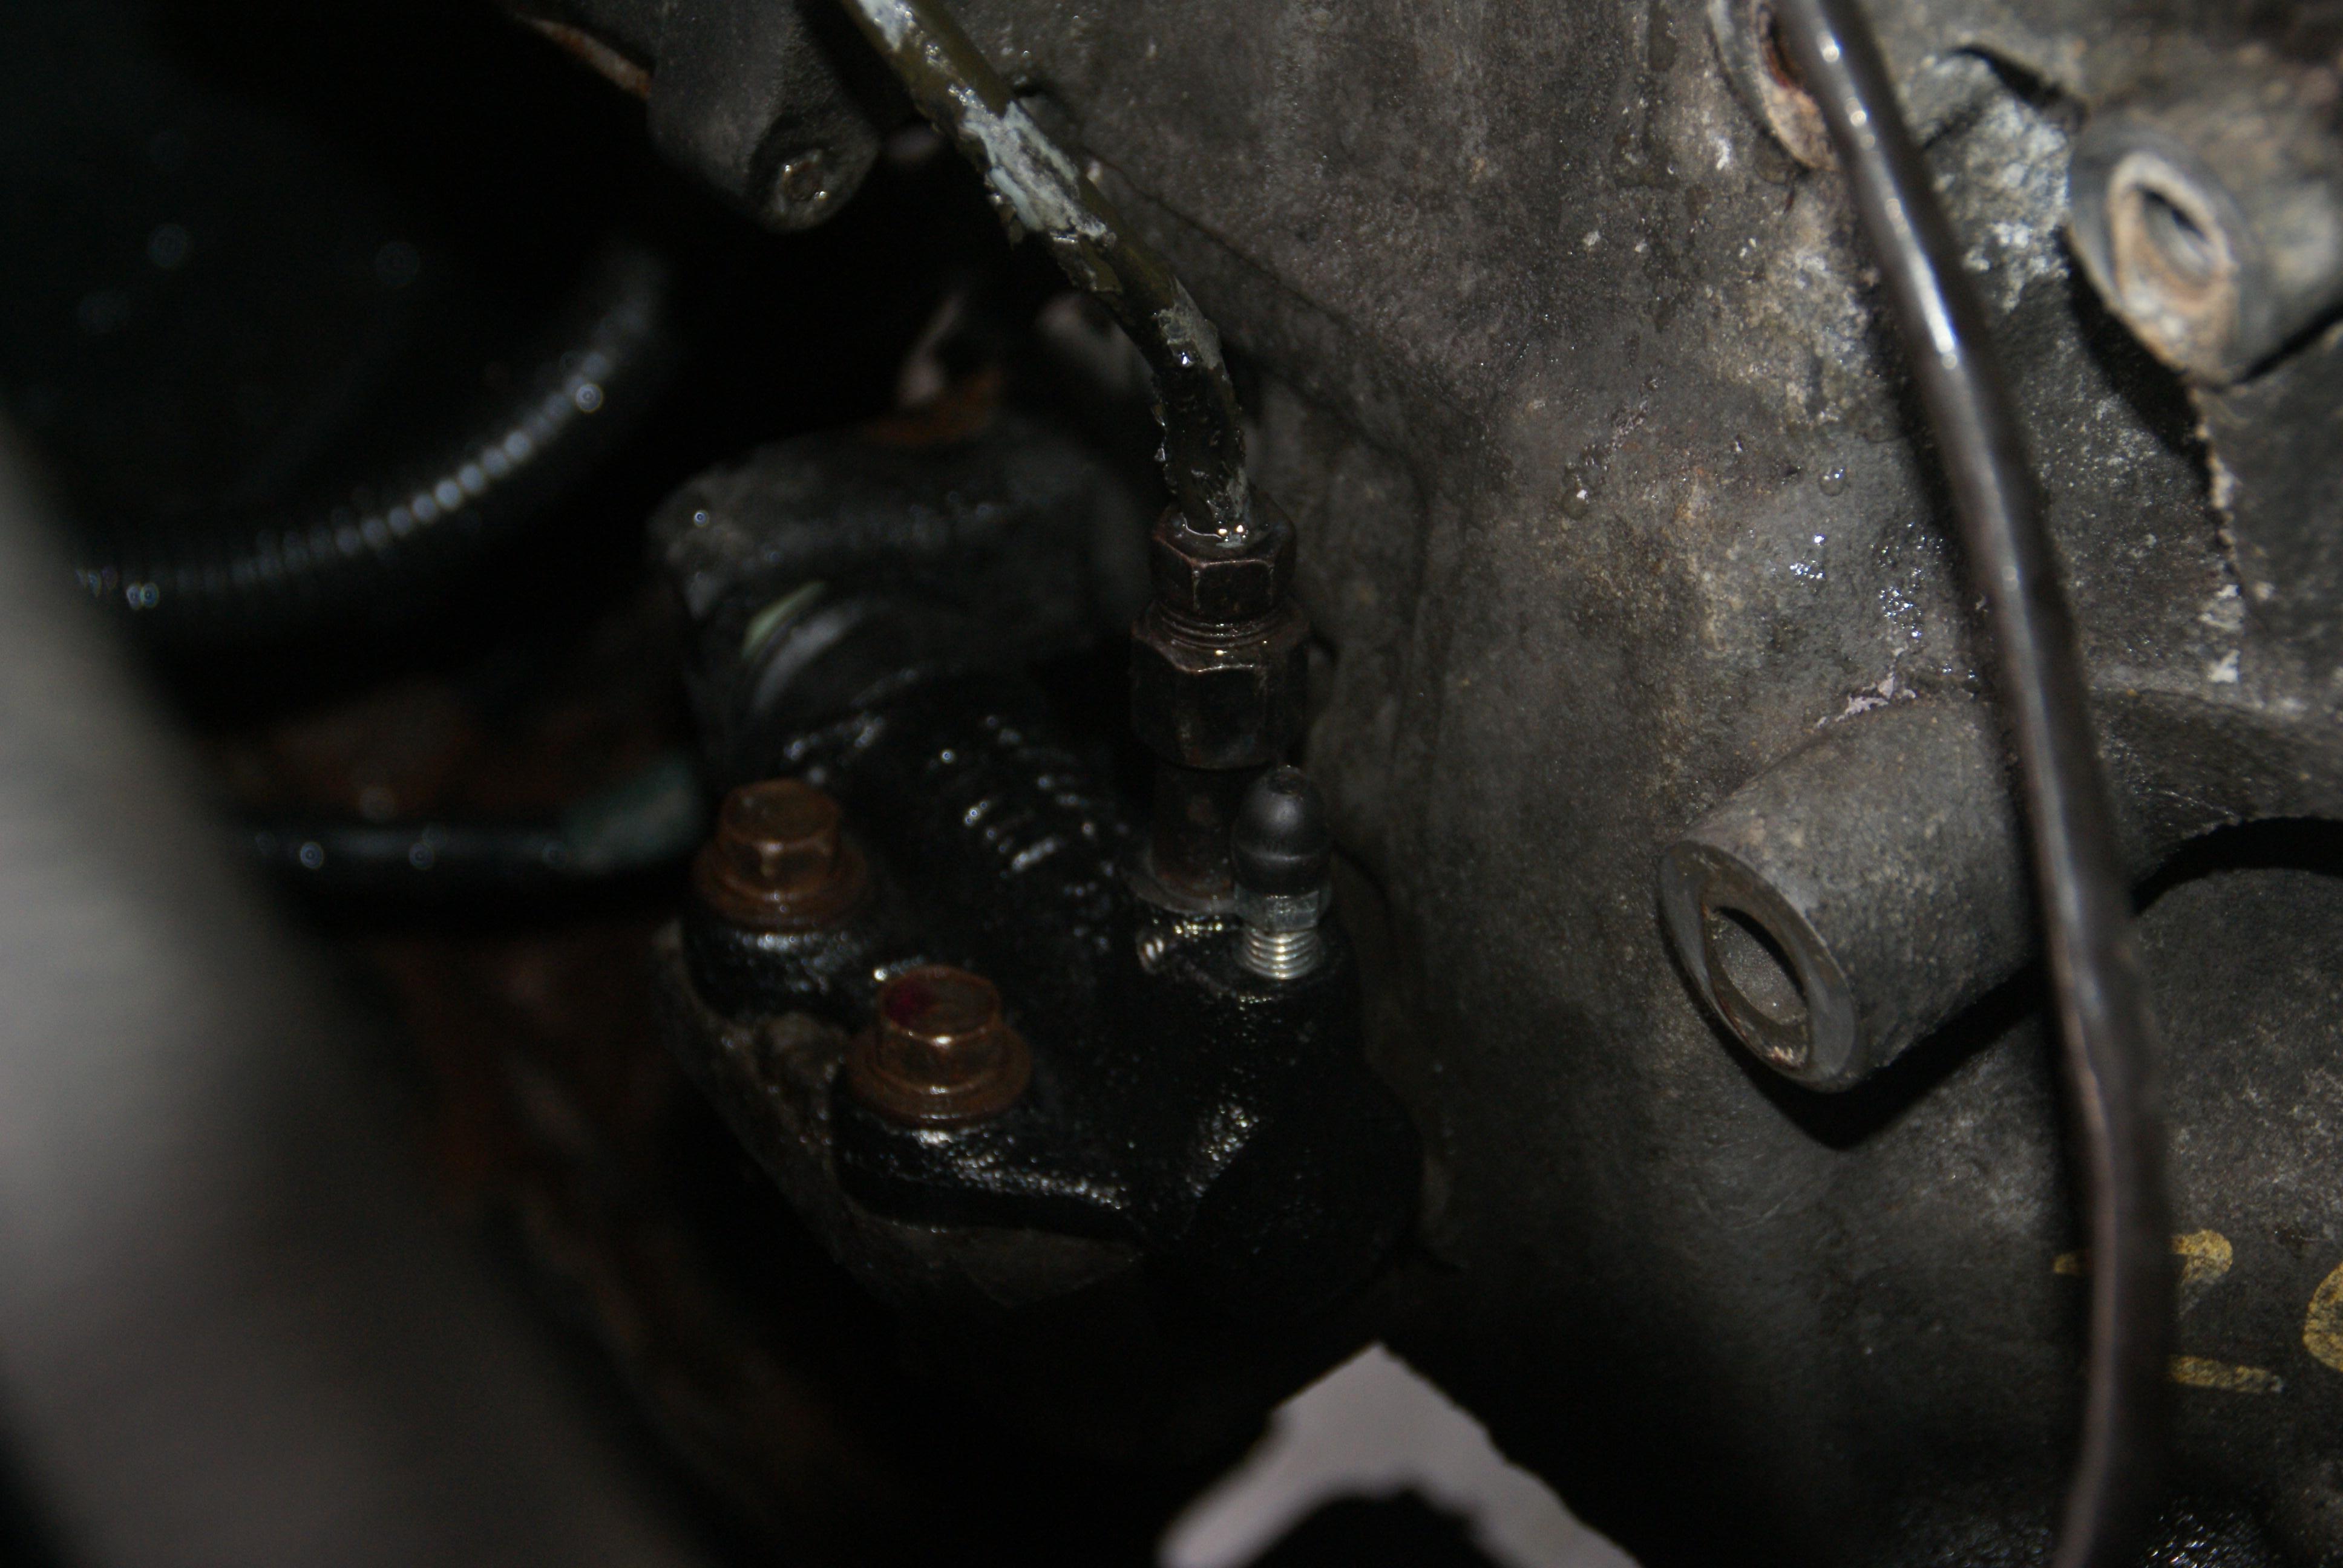
Remove the engine mount bracket 14mm and slave 12mm bolts. Loosen the long mount to bracket bolt (yellow). This one is a real PITA.
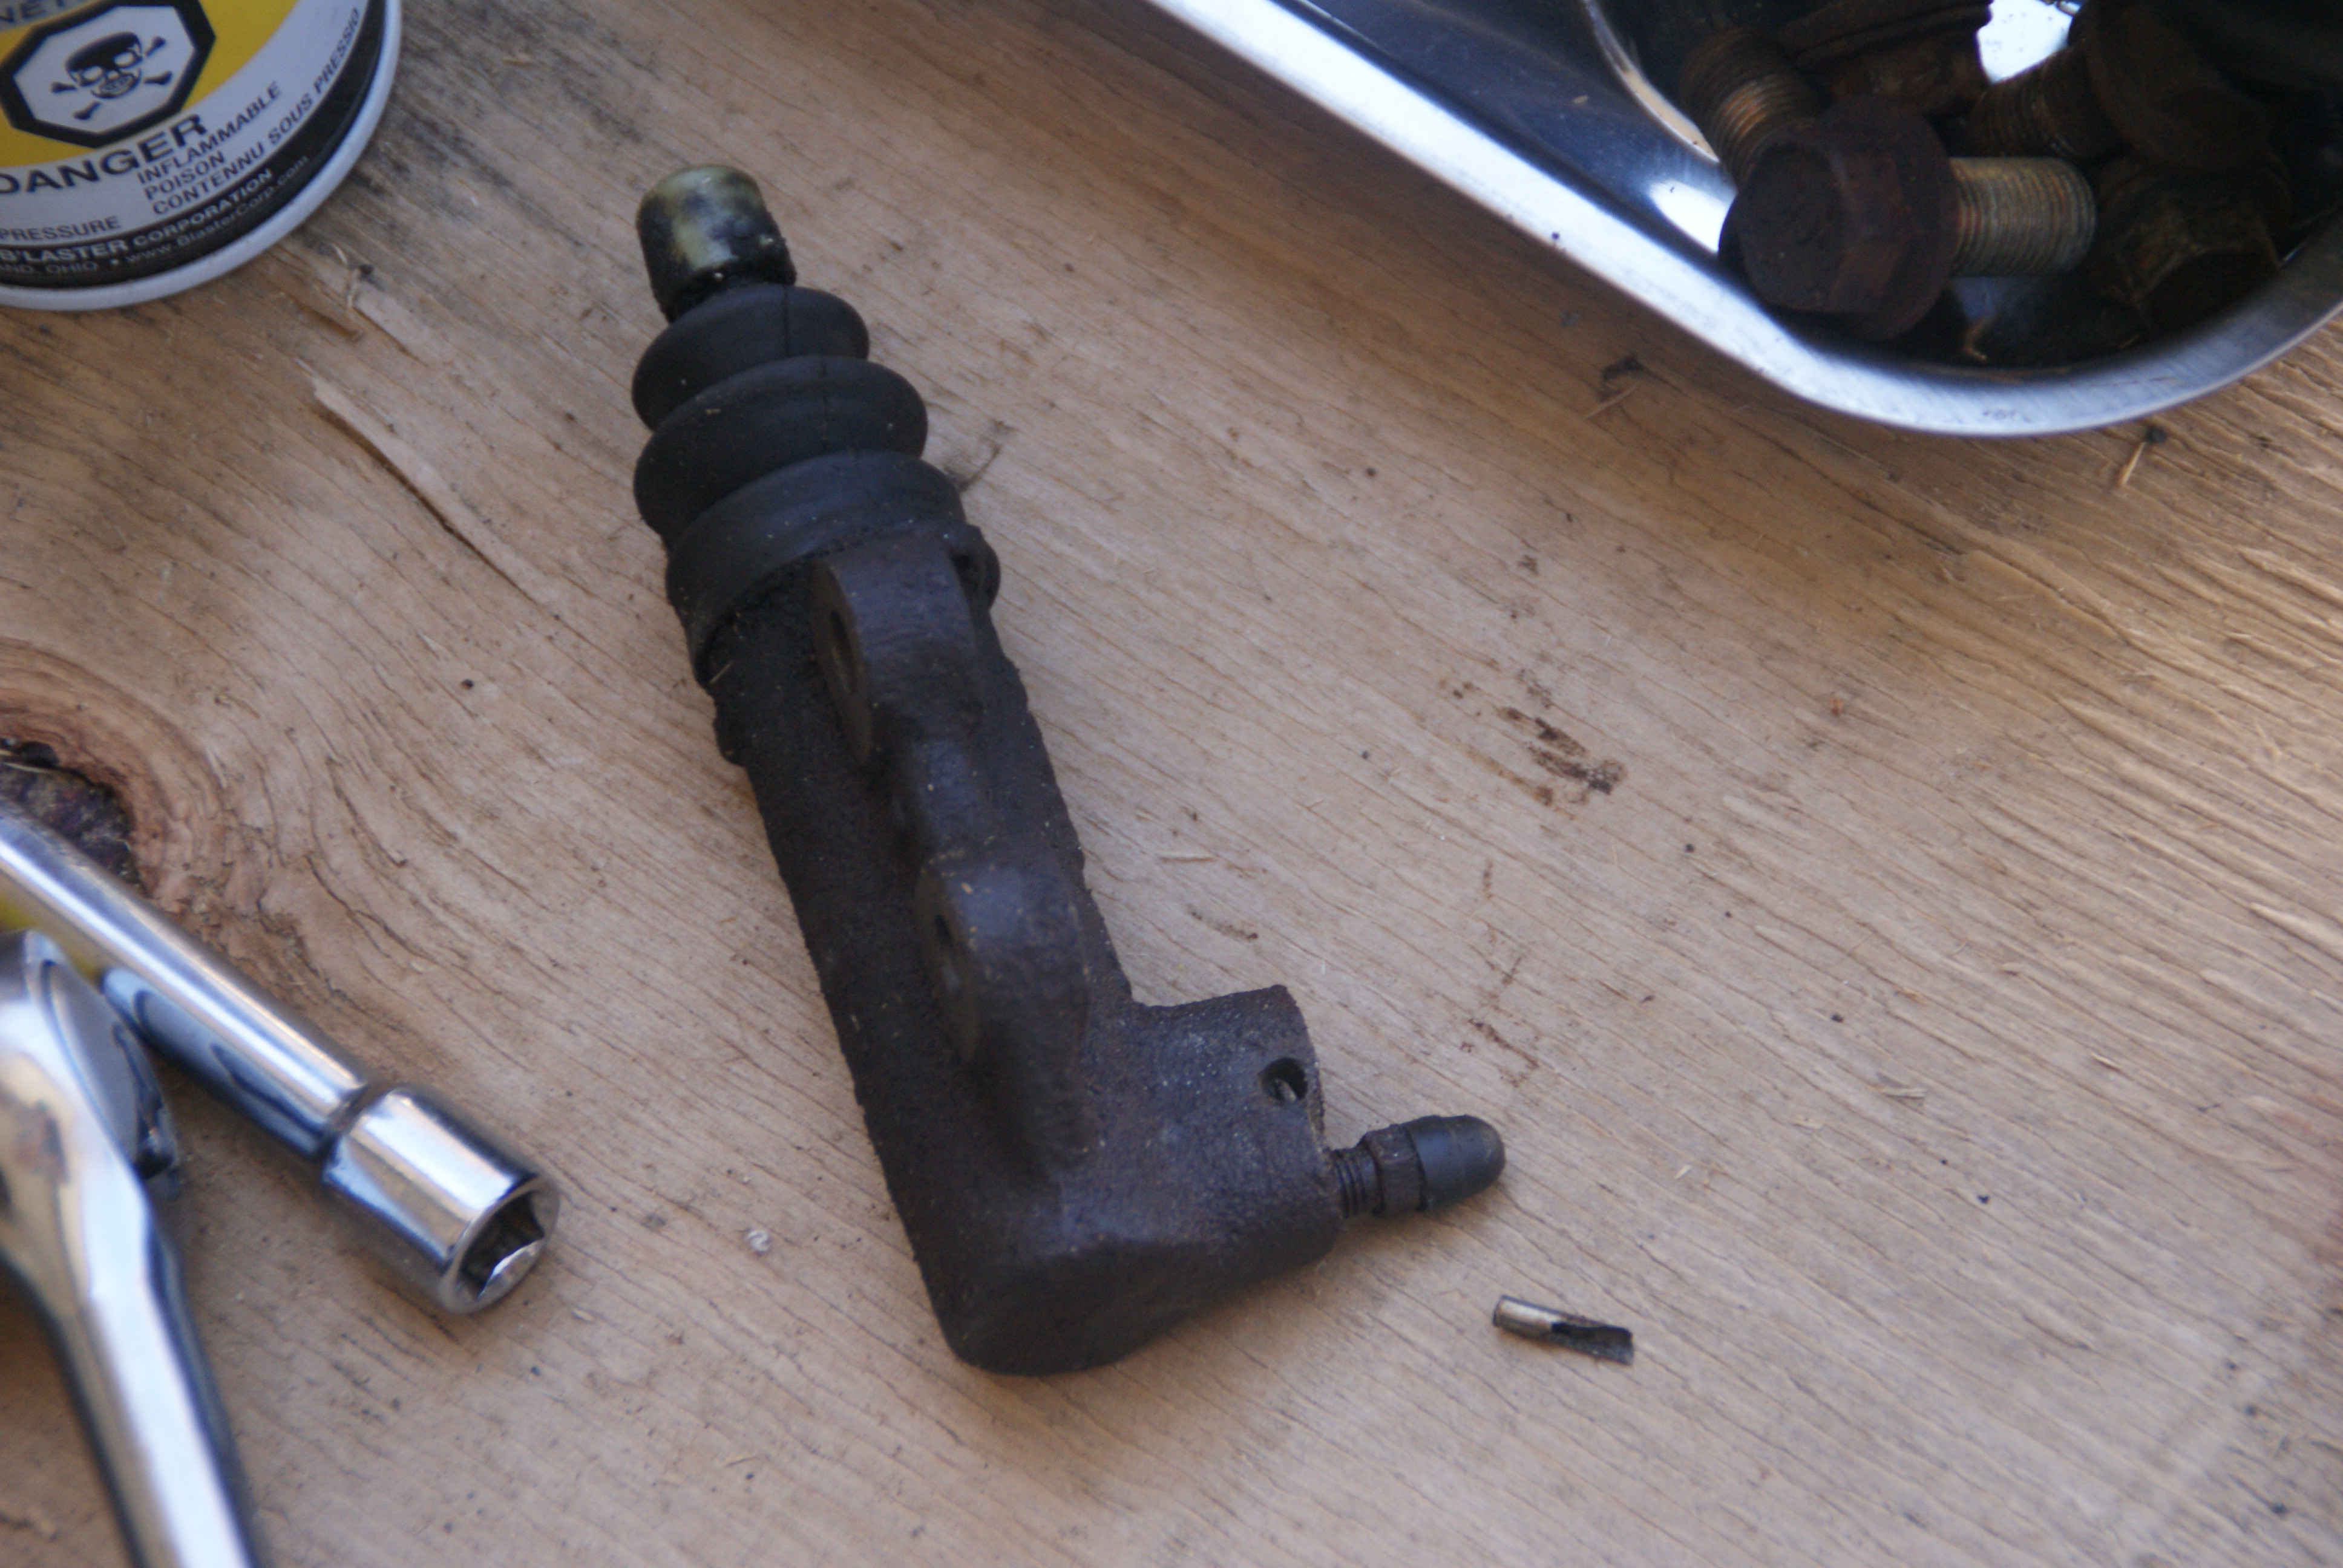
Once that's done, you should be able to easily access the slave cylinder and be able to bleed it later.
Punch out the old pin connector. I drilled it out...
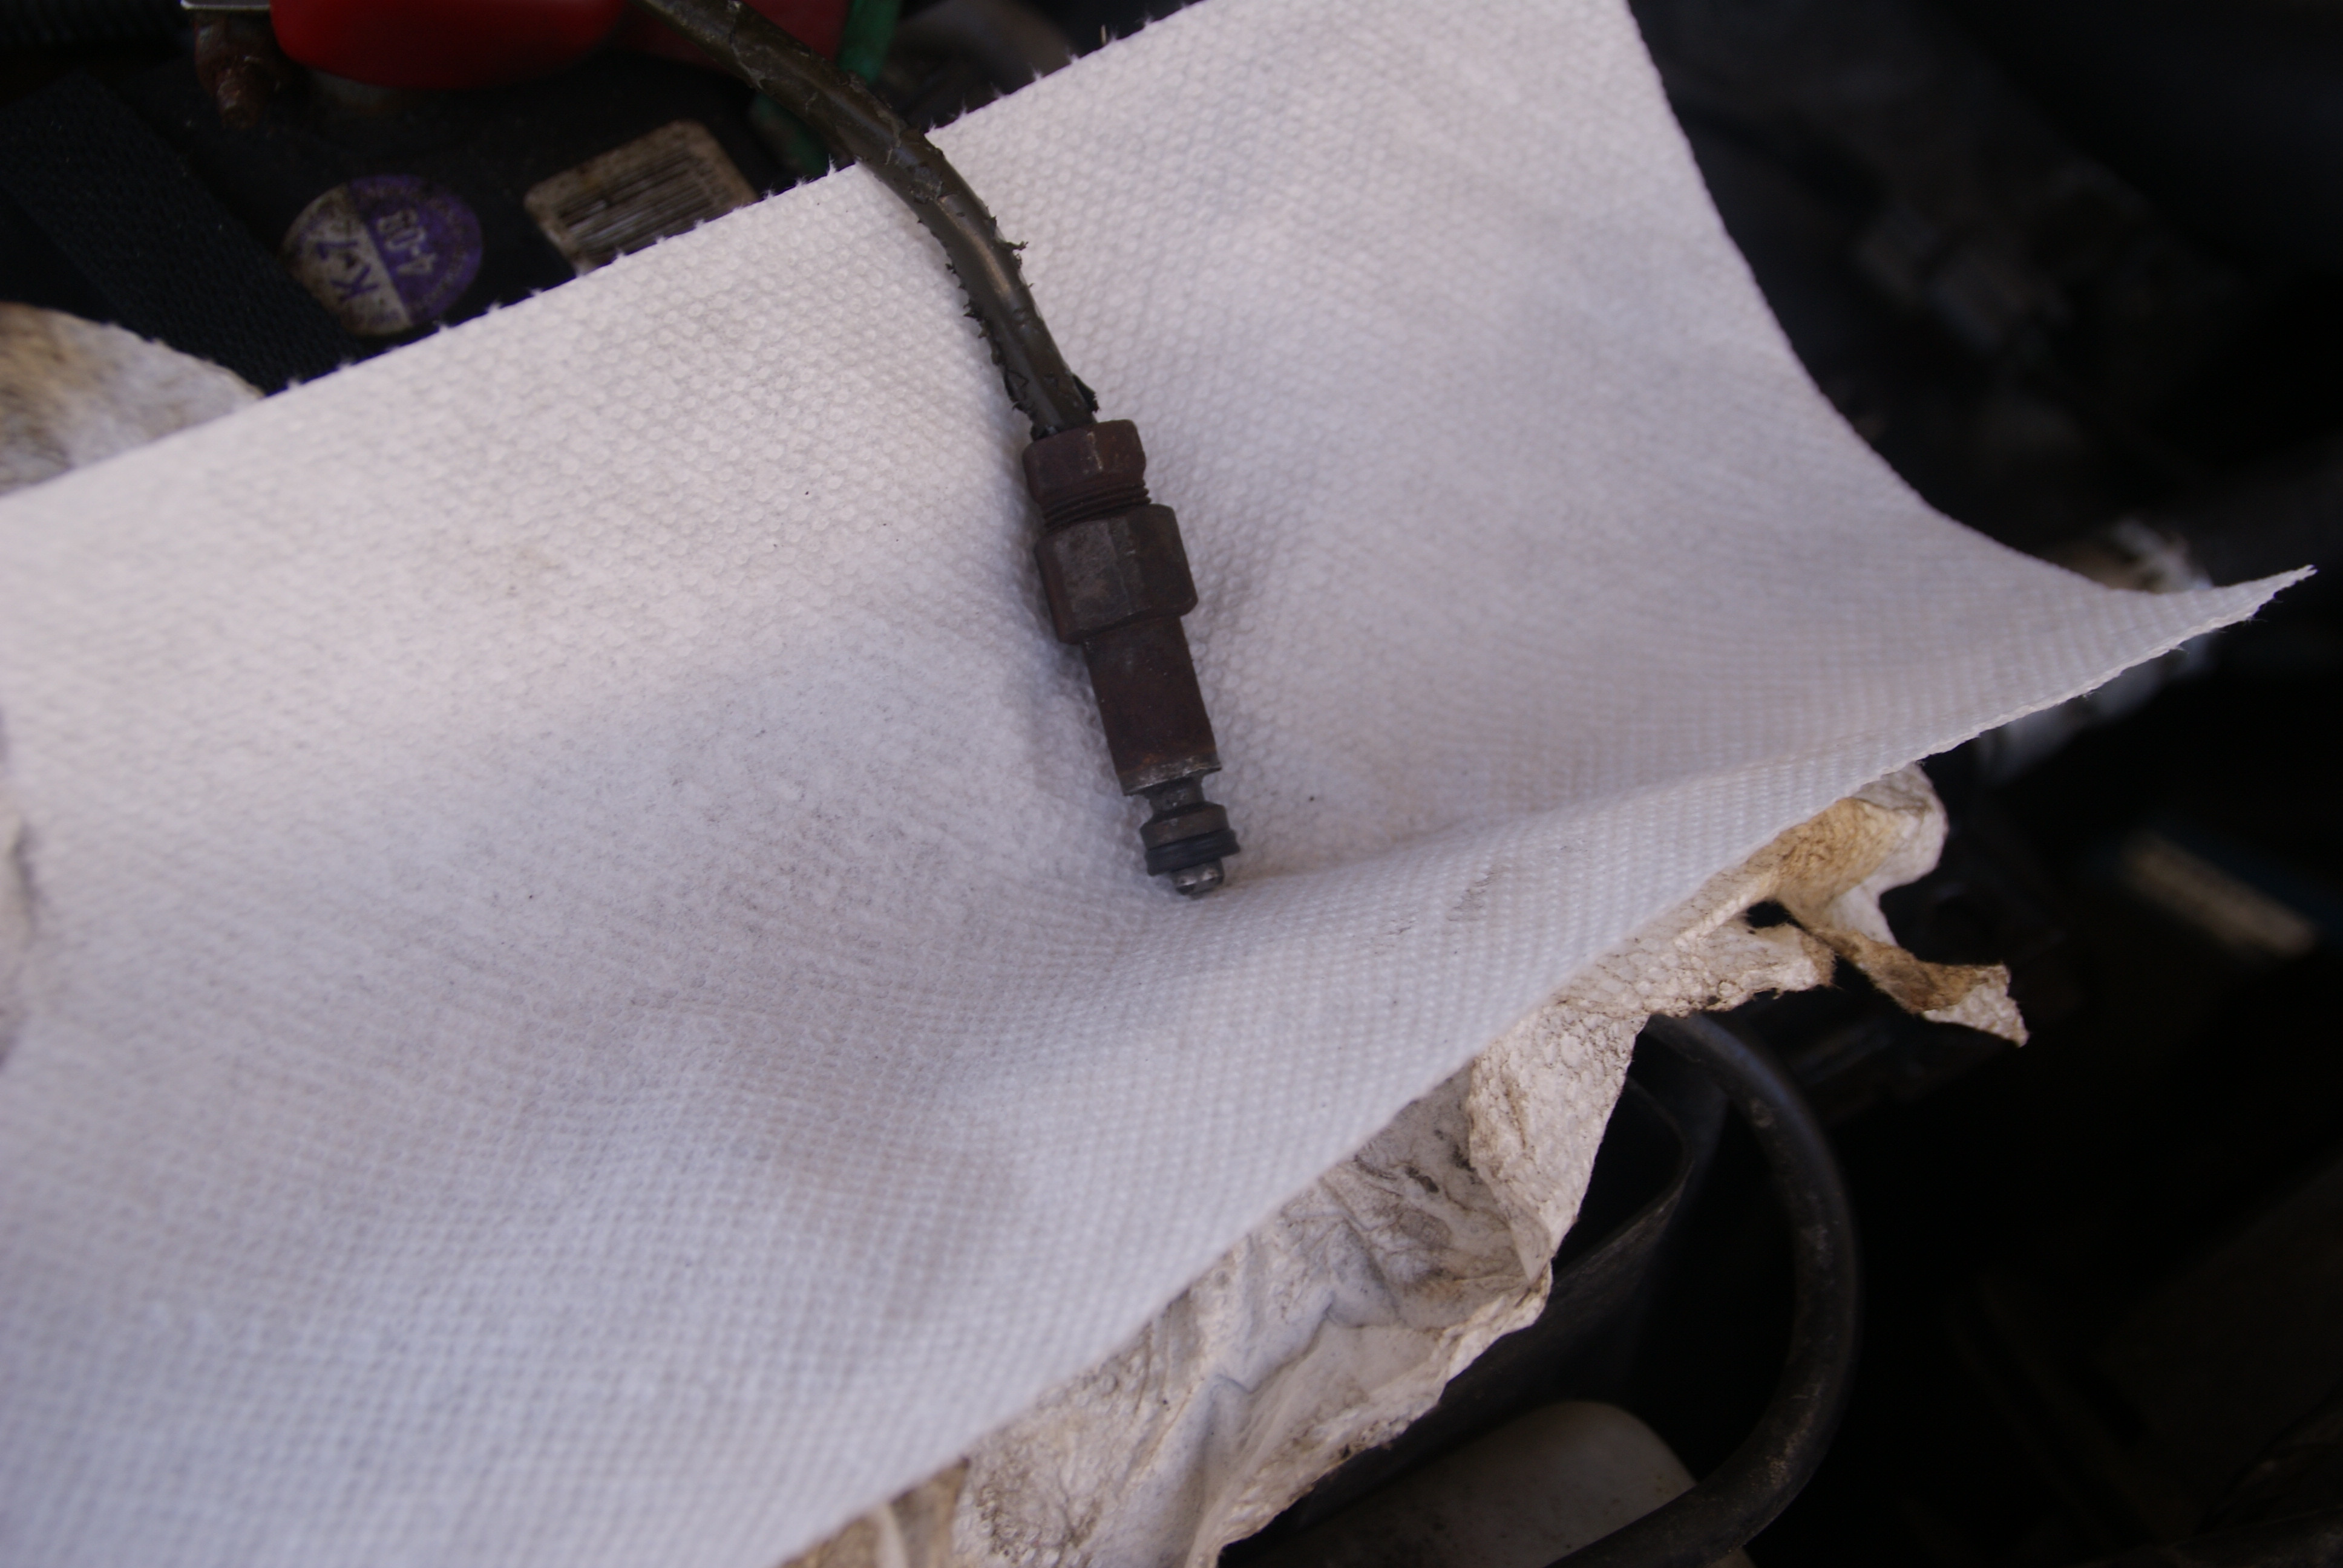
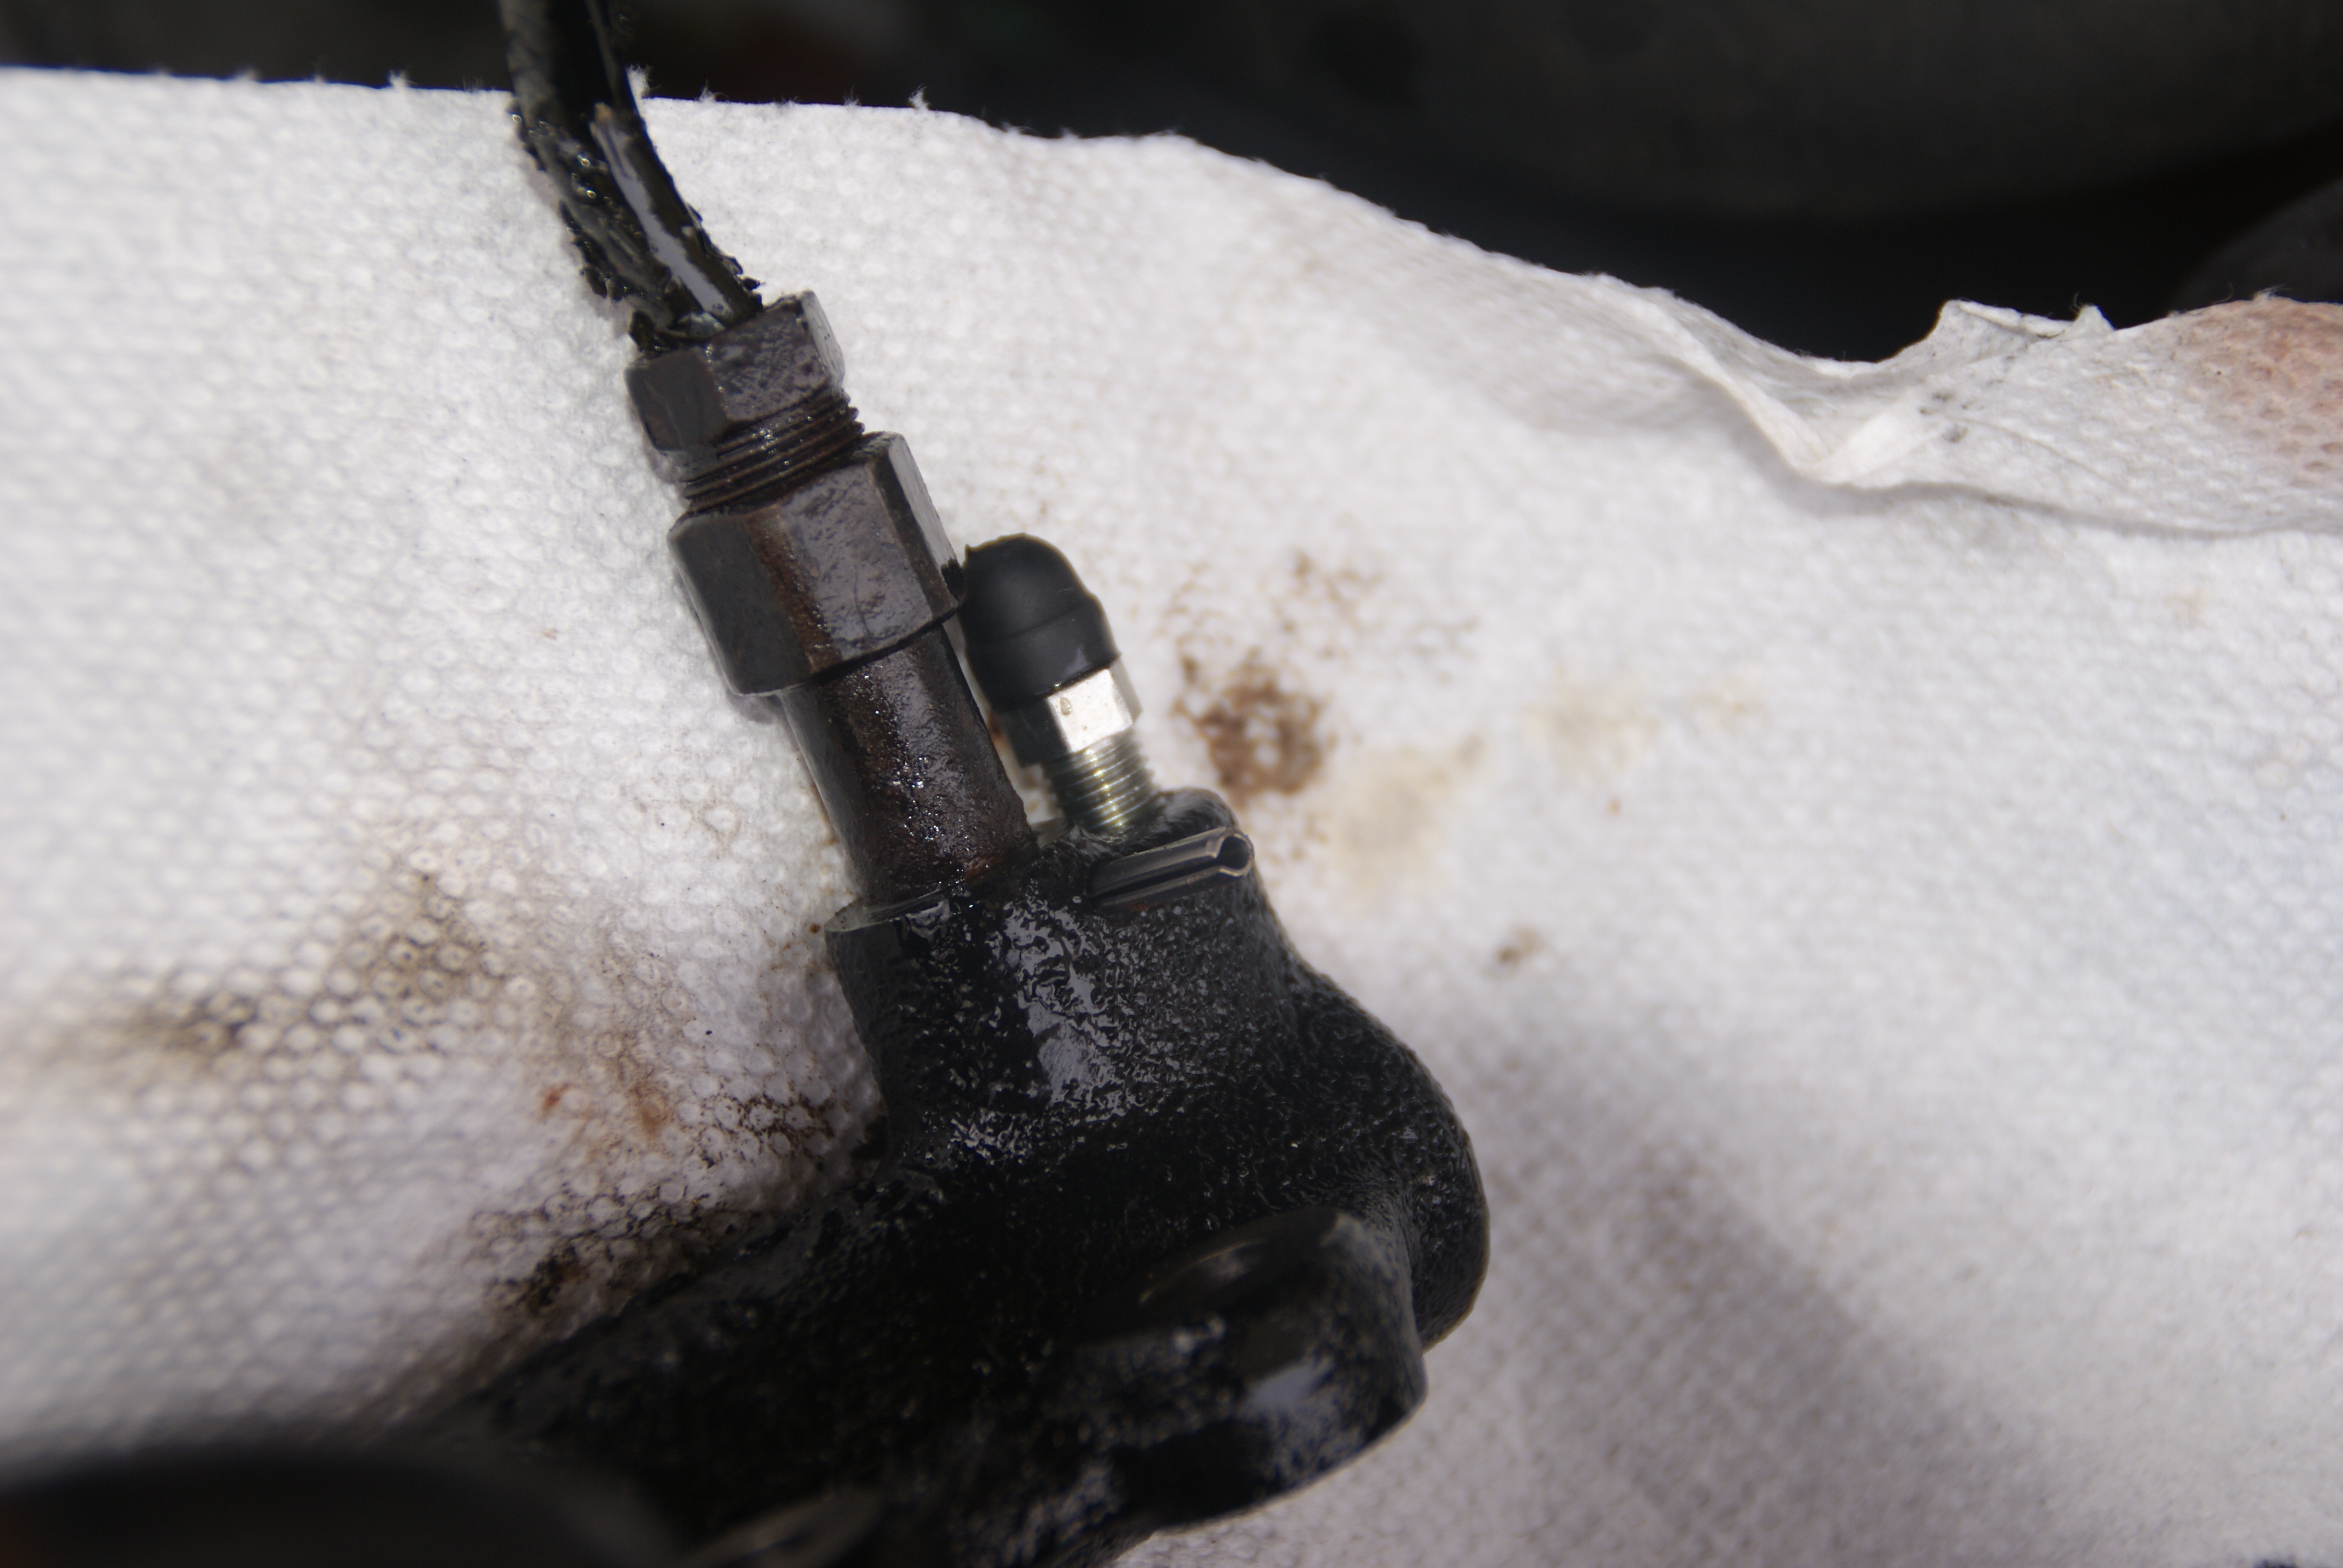
You can now easily detach the line from the slave.
Don't lose this tiny rubber seal. It may still be in the old slave. Put it back on the fitting.
Note: the picture shows it installed on the wrong way. Don't worry about this because you won't be able to put the fitting back proprely if the seal is not facing the right way.
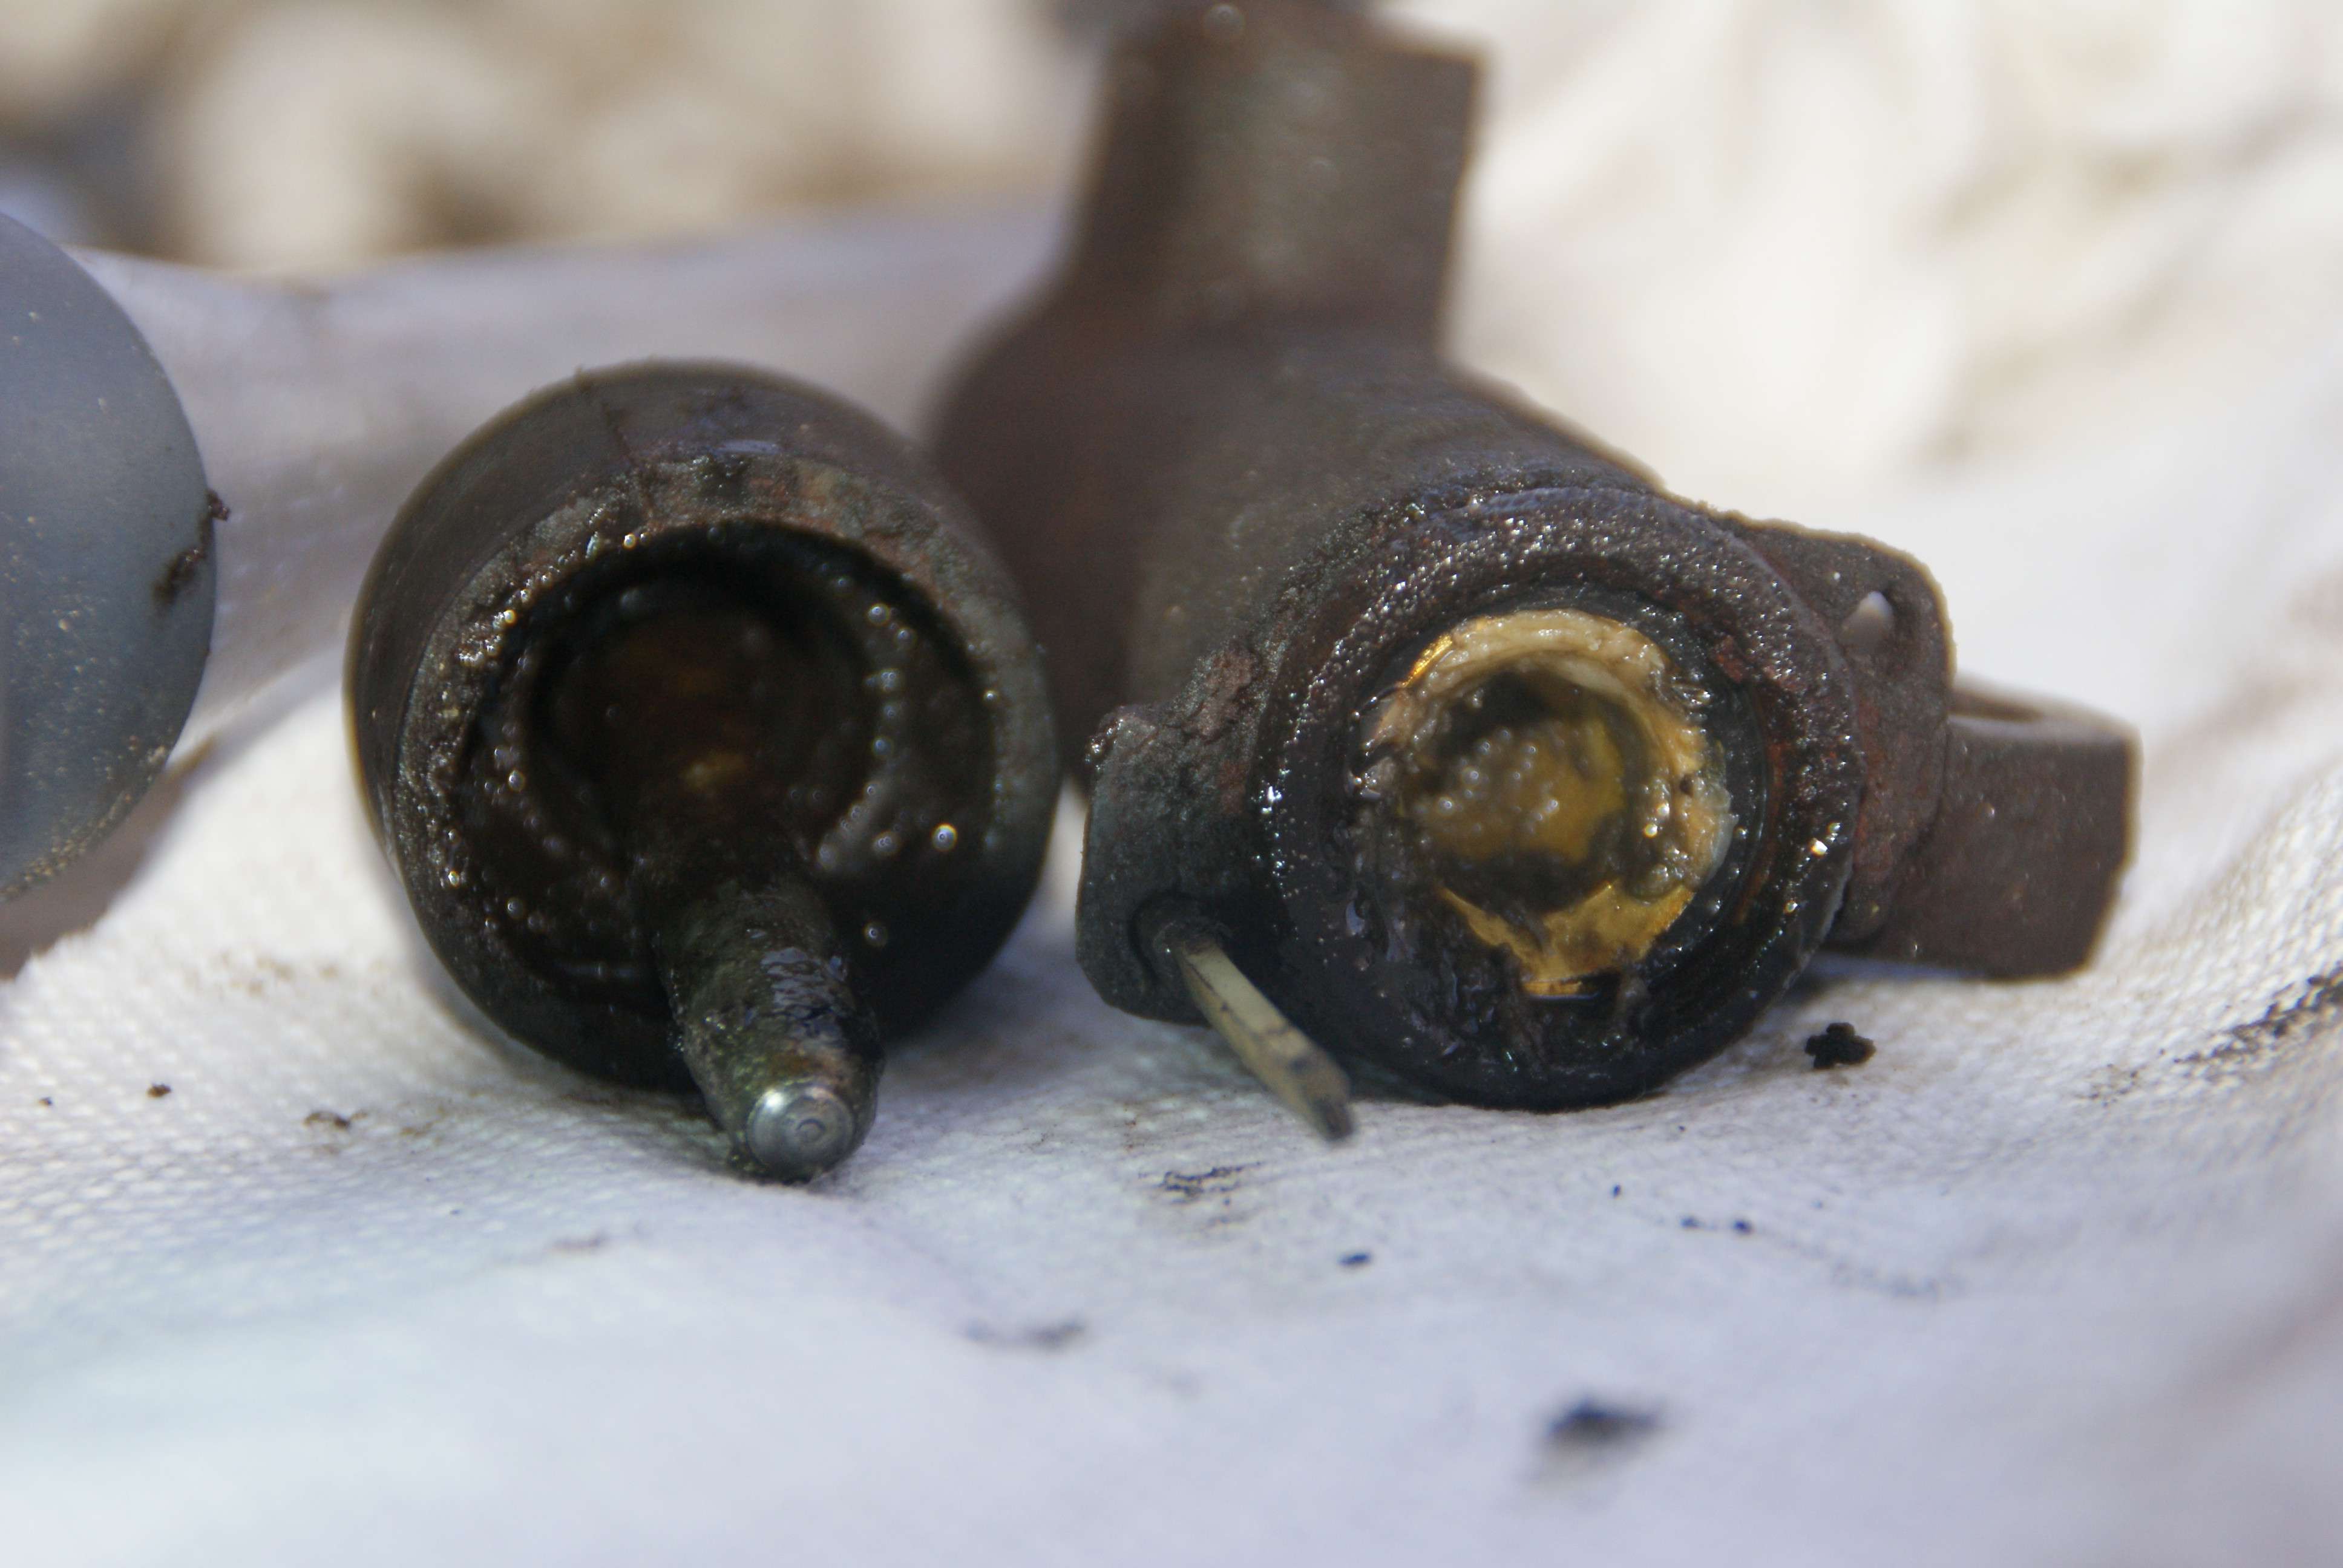
Old vs new
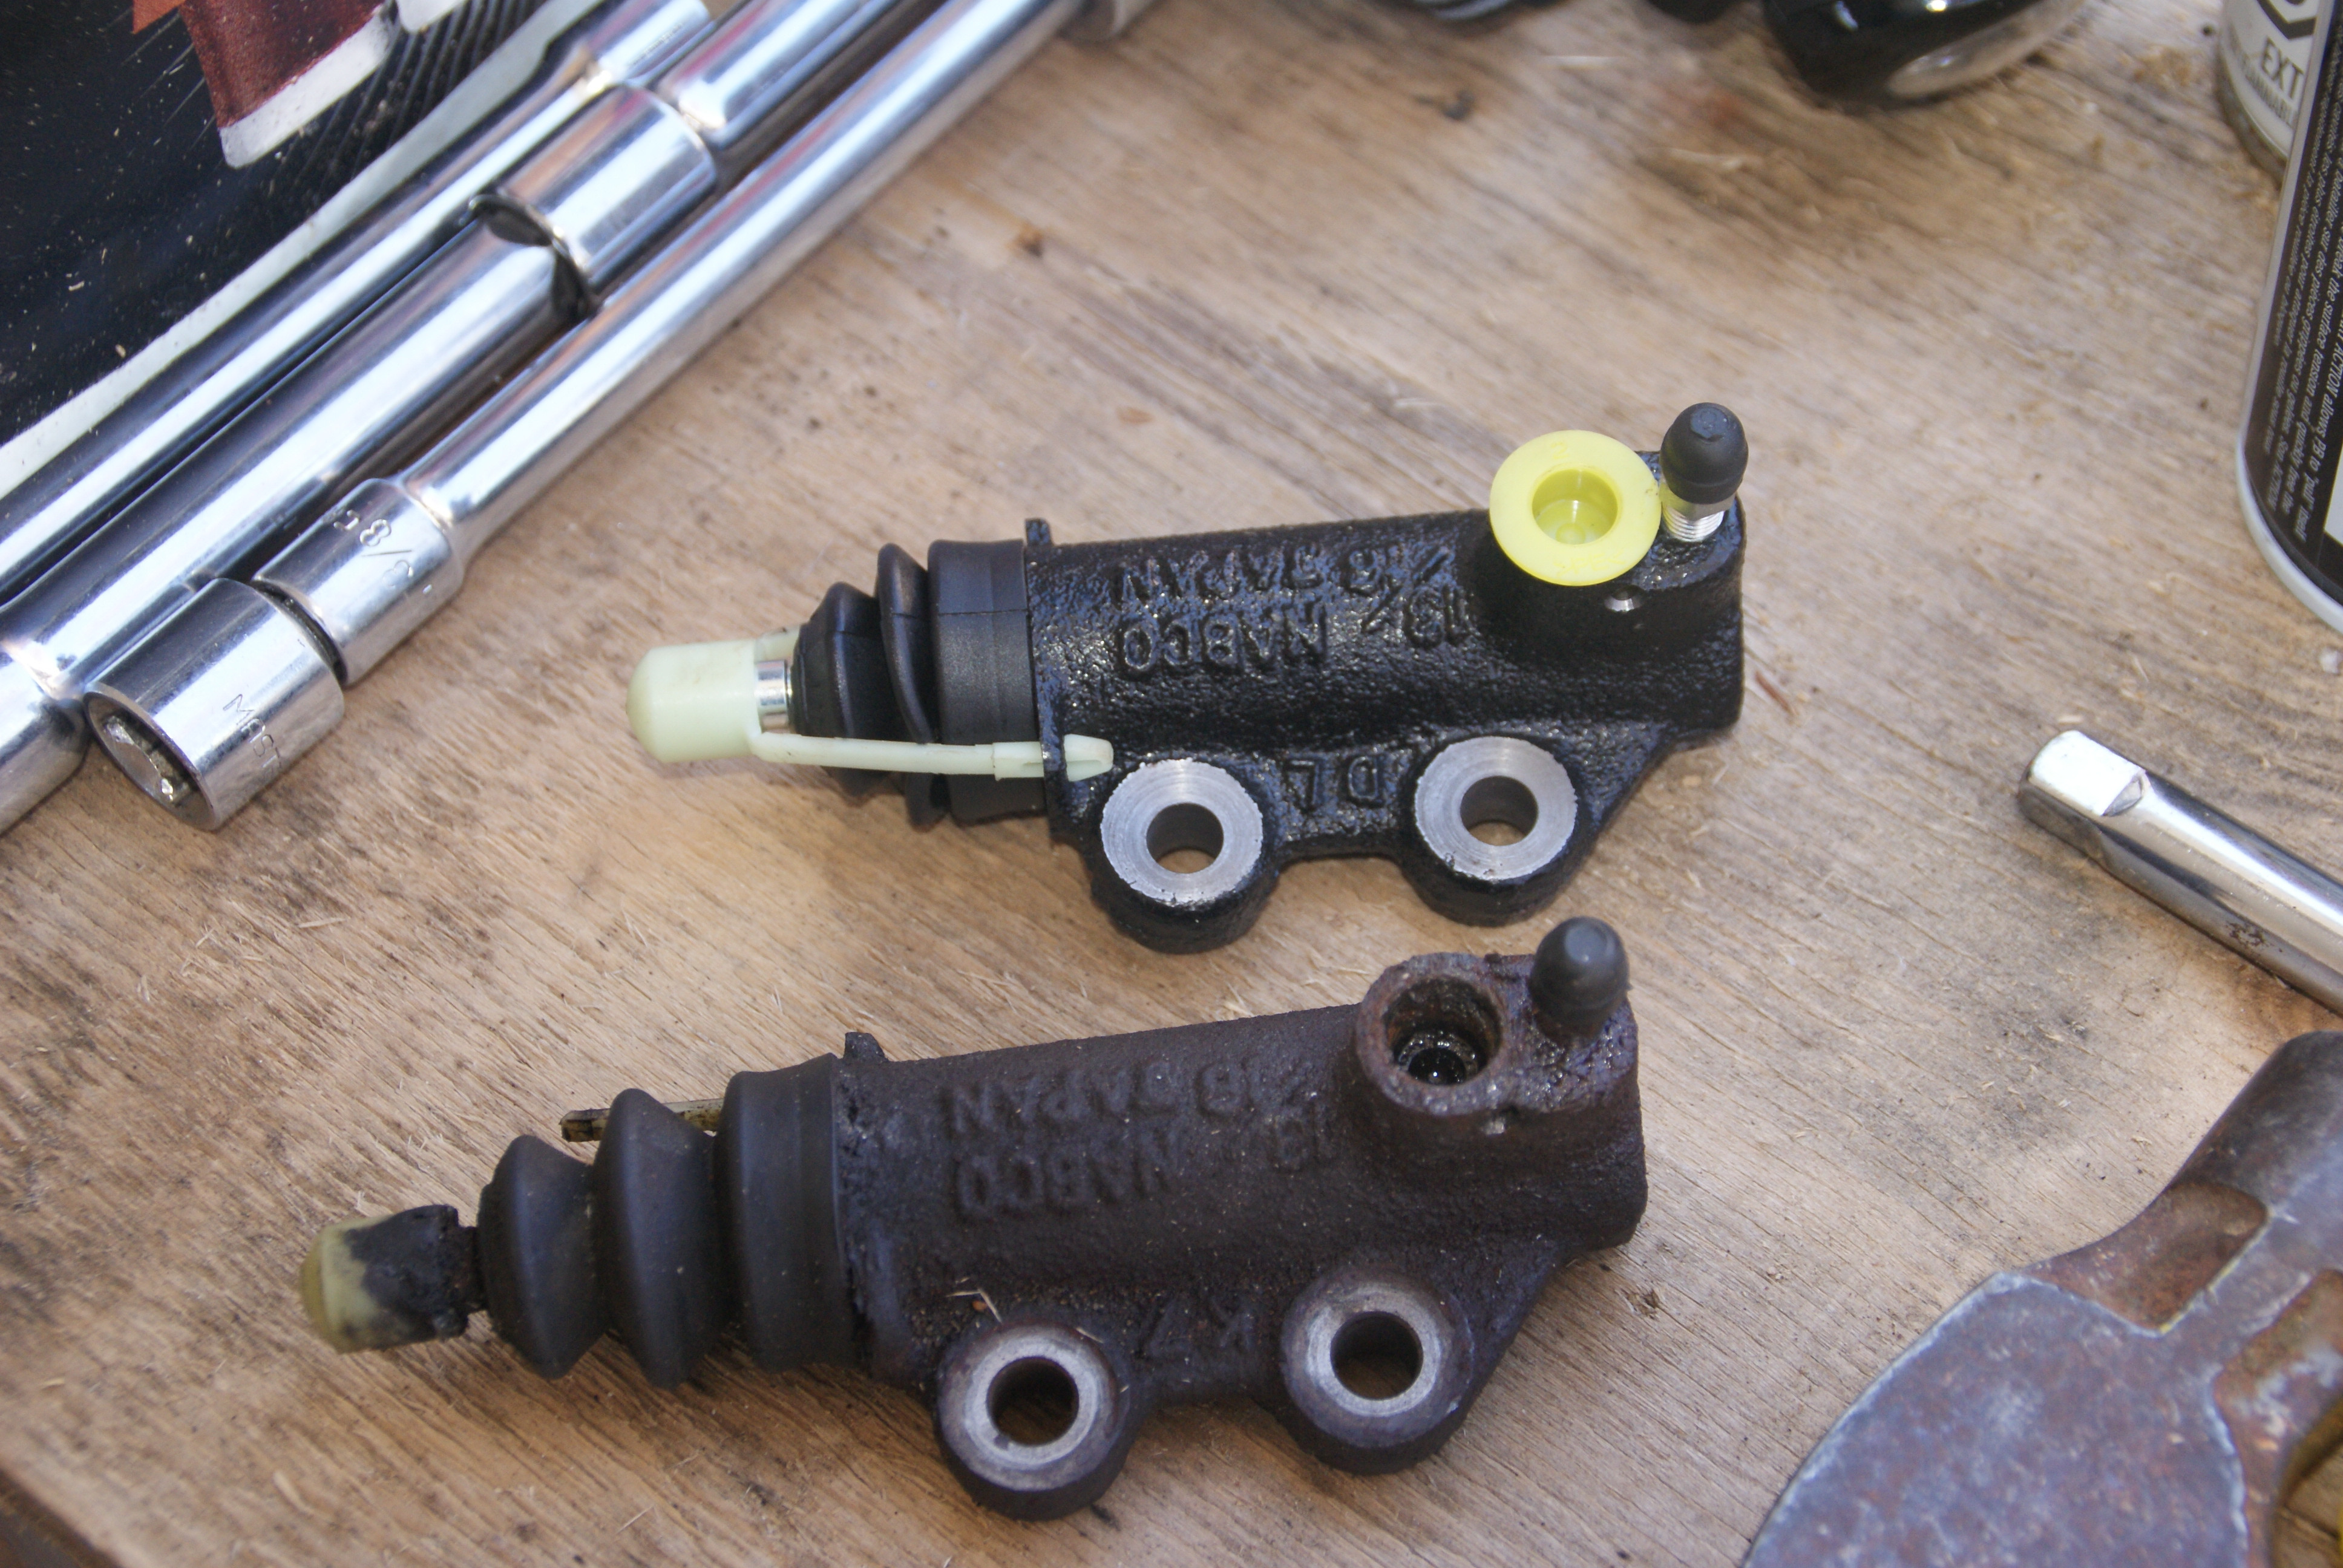
Old one was full of dirty sh*t
Put the fitting in the new slave. with your hammer, force the pin connector in. Be careful not to hit your fingers. Do this on a stable surface.
Now, bolt the slave cylinder back in place. Don't over tighten. You might want to put some grease on the bolts.
Congratulation! you have successfully installed your new clutch slave cylinder
Now, time to bleed.
How to bleed
1 Have a friend.
2 Install your bleed bottle hose on the bleed screw. Remove cap first...
3 Make sure the clutch fluid reservoir (behind the driver side strut tower) never goes empty or you will have to start the bleeding process all over again. Use a funnel. If you spill brake fluid on any painted area, quickly clean it with lots of water
4 Have a friend push and pull the clutch pedal
5 With your 8mm wrench, loosen the bleed screw then tighten it.
Repeat steps 4 and 5 until the liquid coming out is a light yellow color without any bubbles in it.
Test the clutch pedal. When satisfied with your pedal stiffness, put the engine mount bracket back in place. You should definitely put grease on the long engine mount bolt's thread. Don't forget A/C line, clutch line and o2 sensor brackets.
You're done!
I am not responsible for any damage you may do to your car.
Parts you'll need:
# 5 slave cylinder 46930-S84-A06
# 4 pin connector 46925-S84-A01 (or try to save it...)
Tools you will need:
10 mm socket
12 mm socket
14 mm socket
17 mm socket
Lots of extensions
3/8 ratchet
1/2 ratchet
hammer
punch
Dot 3 or 4 brake fluid
8 mm wrench
bleed bottle
Optional tools:
penetrating oil (recommanded)
funnel (recommanded)
brake line wrench
impact gun (recommanded)
synthetic grease
magnetized container
Support the engine with a jack and a piece of wood under the oil pan. You don't need to put the car on jack stands. Mine was already like this...
Spray some penetrating oil on all 12 bolts. Wait a bit. The long (yellow) bolt that goes through the mount is bolted in the bracket so only spray there the bolt thread comes out. (driver side for 01-02. passenger side for 98-00).
Start by removing the 10mm bolts from the A/C line, clutch line and o2 sensor bracket. You're removing these to make some room. you can move the coolant hose and disconnect the intake at the intake box.
Remove the engine mount bracket 14mm and slave 12mm bolts. Loosen the long mount to bracket bolt (yellow). This one is a real PITA.
Once that's done, you should be able to easily access the slave cylinder and be able to bleed it later.
Punch out the old pin connector. I drilled it out...
You can now easily detach the line from the slave.
Don't lose this tiny rubber seal. It may still be in the old slave. Put it back on the fitting.
Note: the picture shows it installed on the wrong way. Don't worry about this because you won't be able to put the fitting back proprely if the seal is not facing the right way.
Old vs new
Old one was full of dirty sh*t
Put the fitting in the new slave. with your hammer, force the pin connector in. Be careful not to hit your fingers. Do this on a stable surface.
Now, bolt the slave cylinder back in place. Don't over tighten. You might want to put some grease on the bolts.
Congratulation! you have successfully installed your new clutch slave cylinder
Now, time to bleed.
How to bleed
1 Have a friend.
2 Install your bleed bottle hose on the bleed screw. Remove cap first...
3 Make sure the clutch fluid reservoir (behind the driver side strut tower) never goes empty or you will have to start the bleeding process all over again. Use a funnel. If you spill brake fluid on any painted area, quickly clean it with lots of water
4 Have a friend push and pull the clutch pedal
5 With your 8mm wrench, loosen the bleed screw then tighten it.
Repeat steps 4 and 5 until the liquid coming out is a light yellow color without any bubbles in it.
Test the clutch pedal. When satisfied with your pedal stiffness, put the engine mount bracket back in place. You should definitely put grease on the long engine mount bolt's thread. Don't forget A/C line, clutch line and o2 sensor brackets.
You're done!
Last edited: