AggieMan
Member
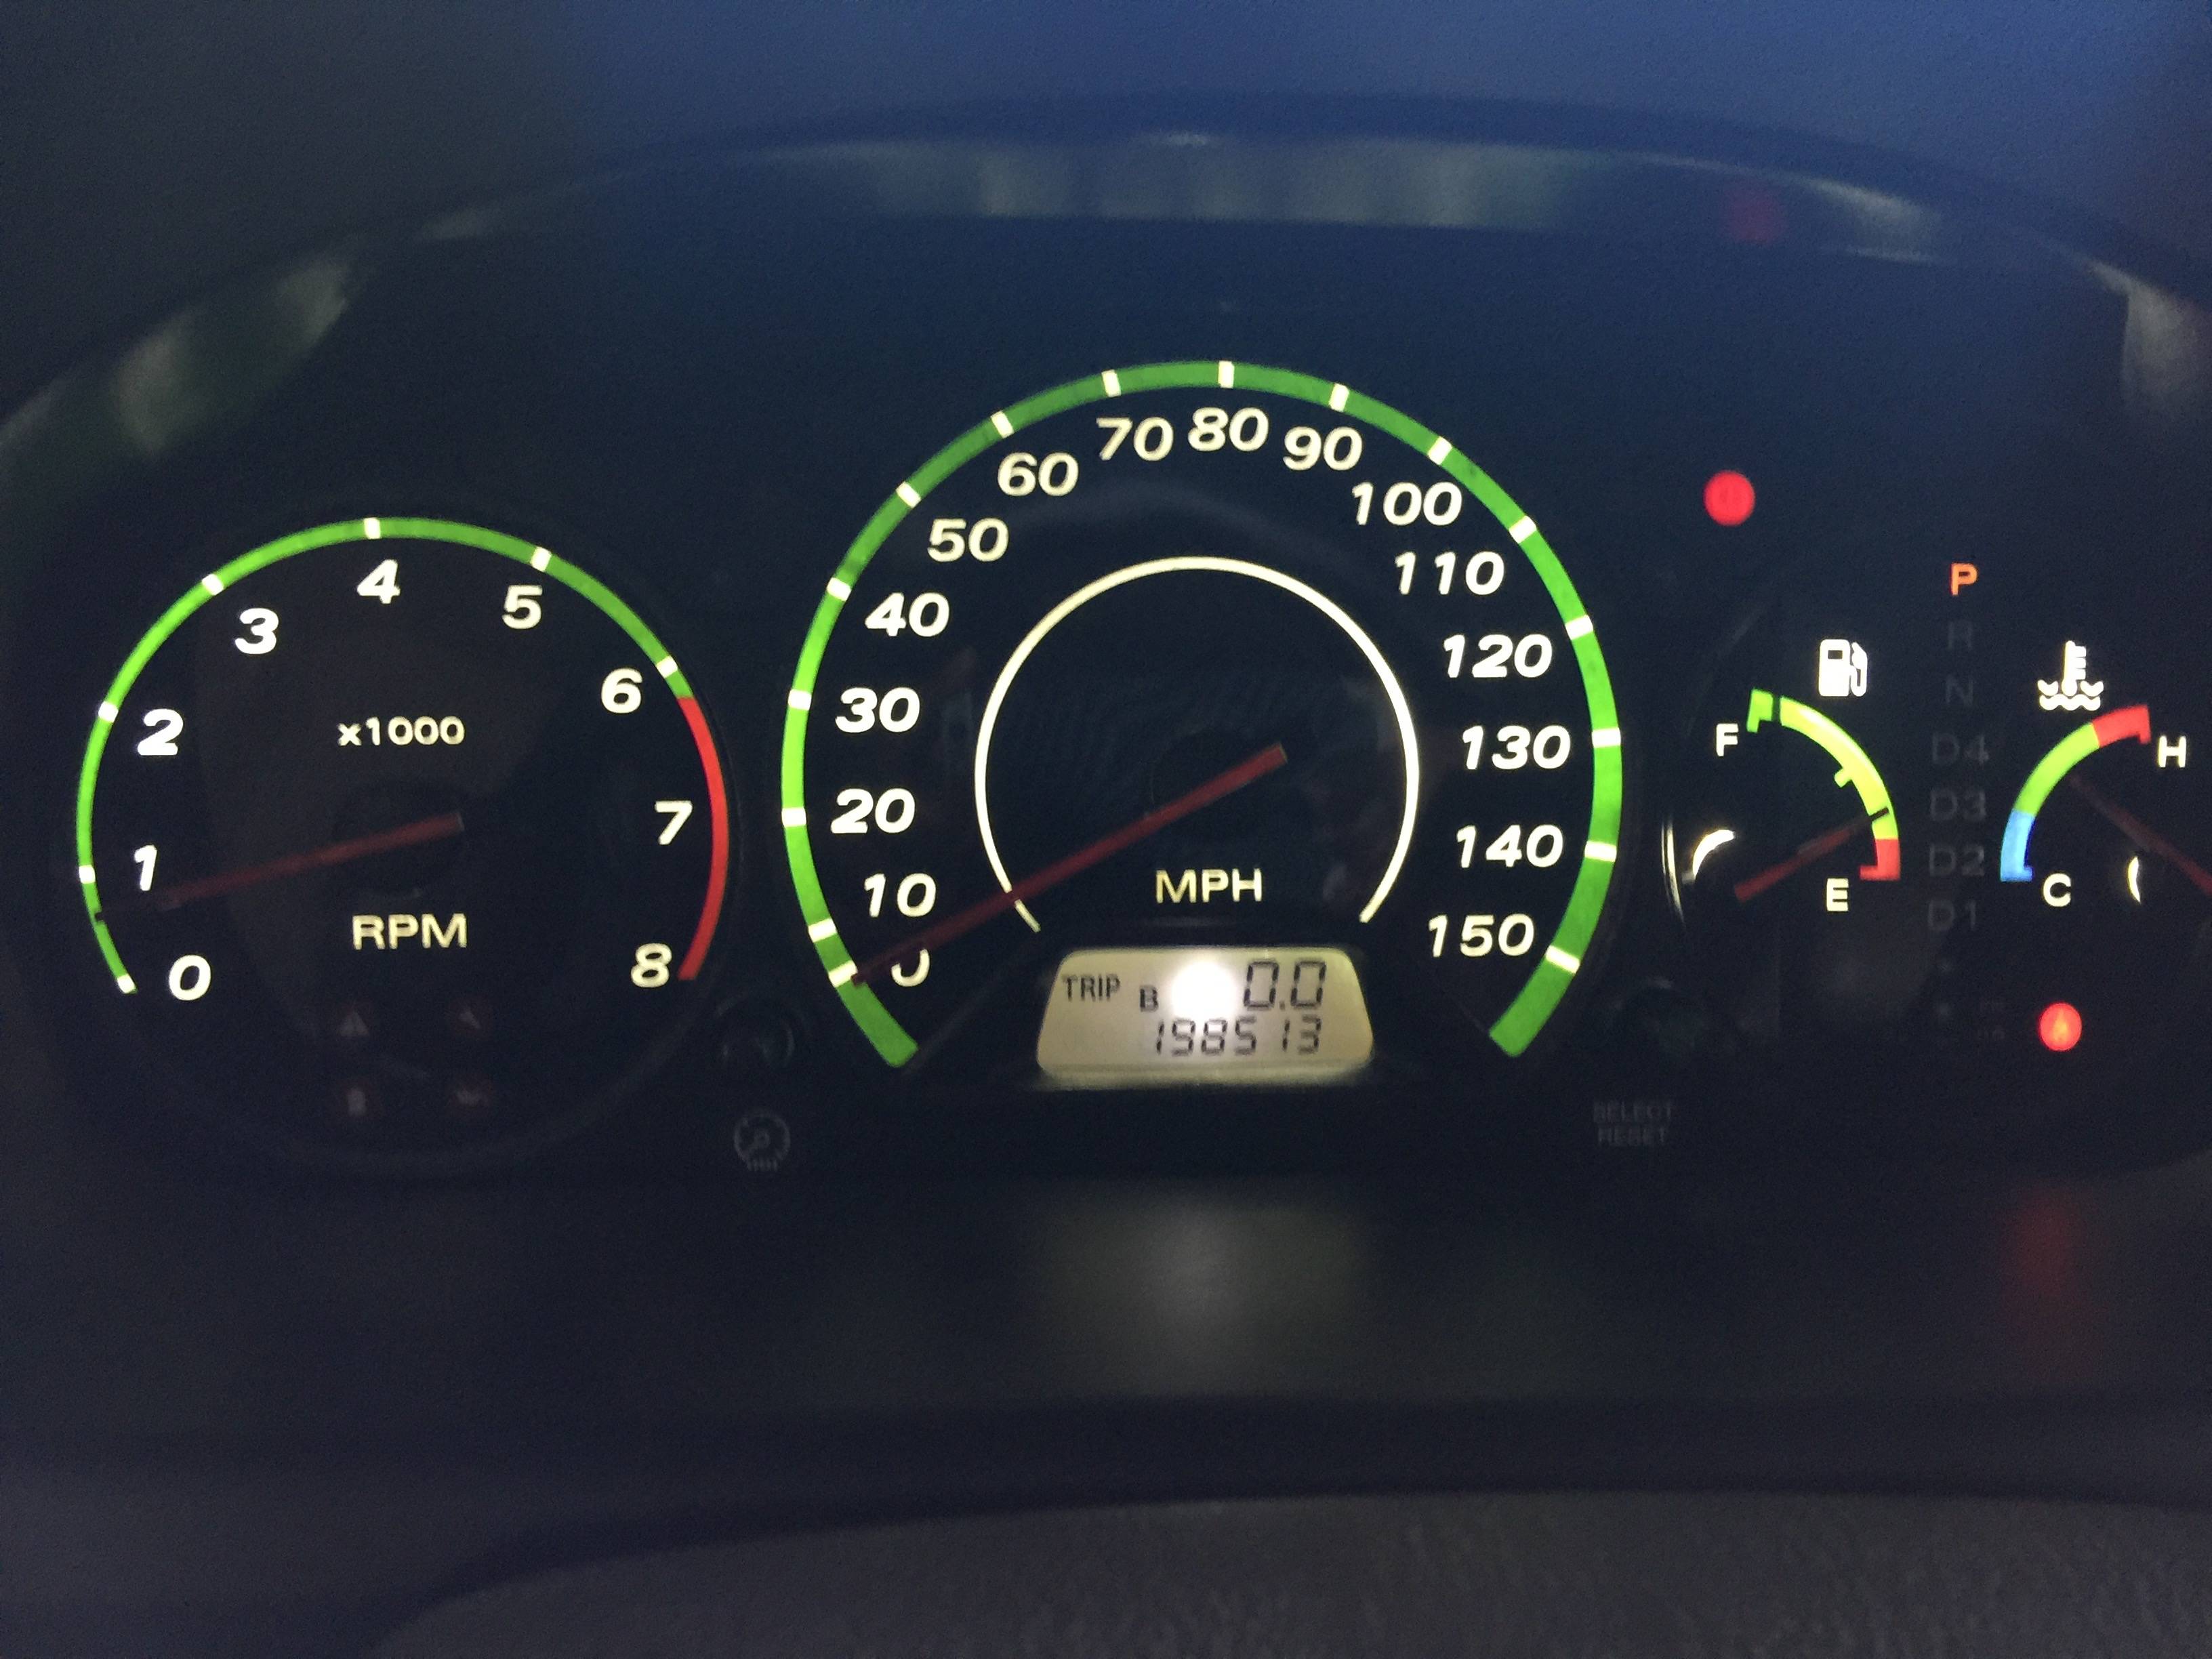
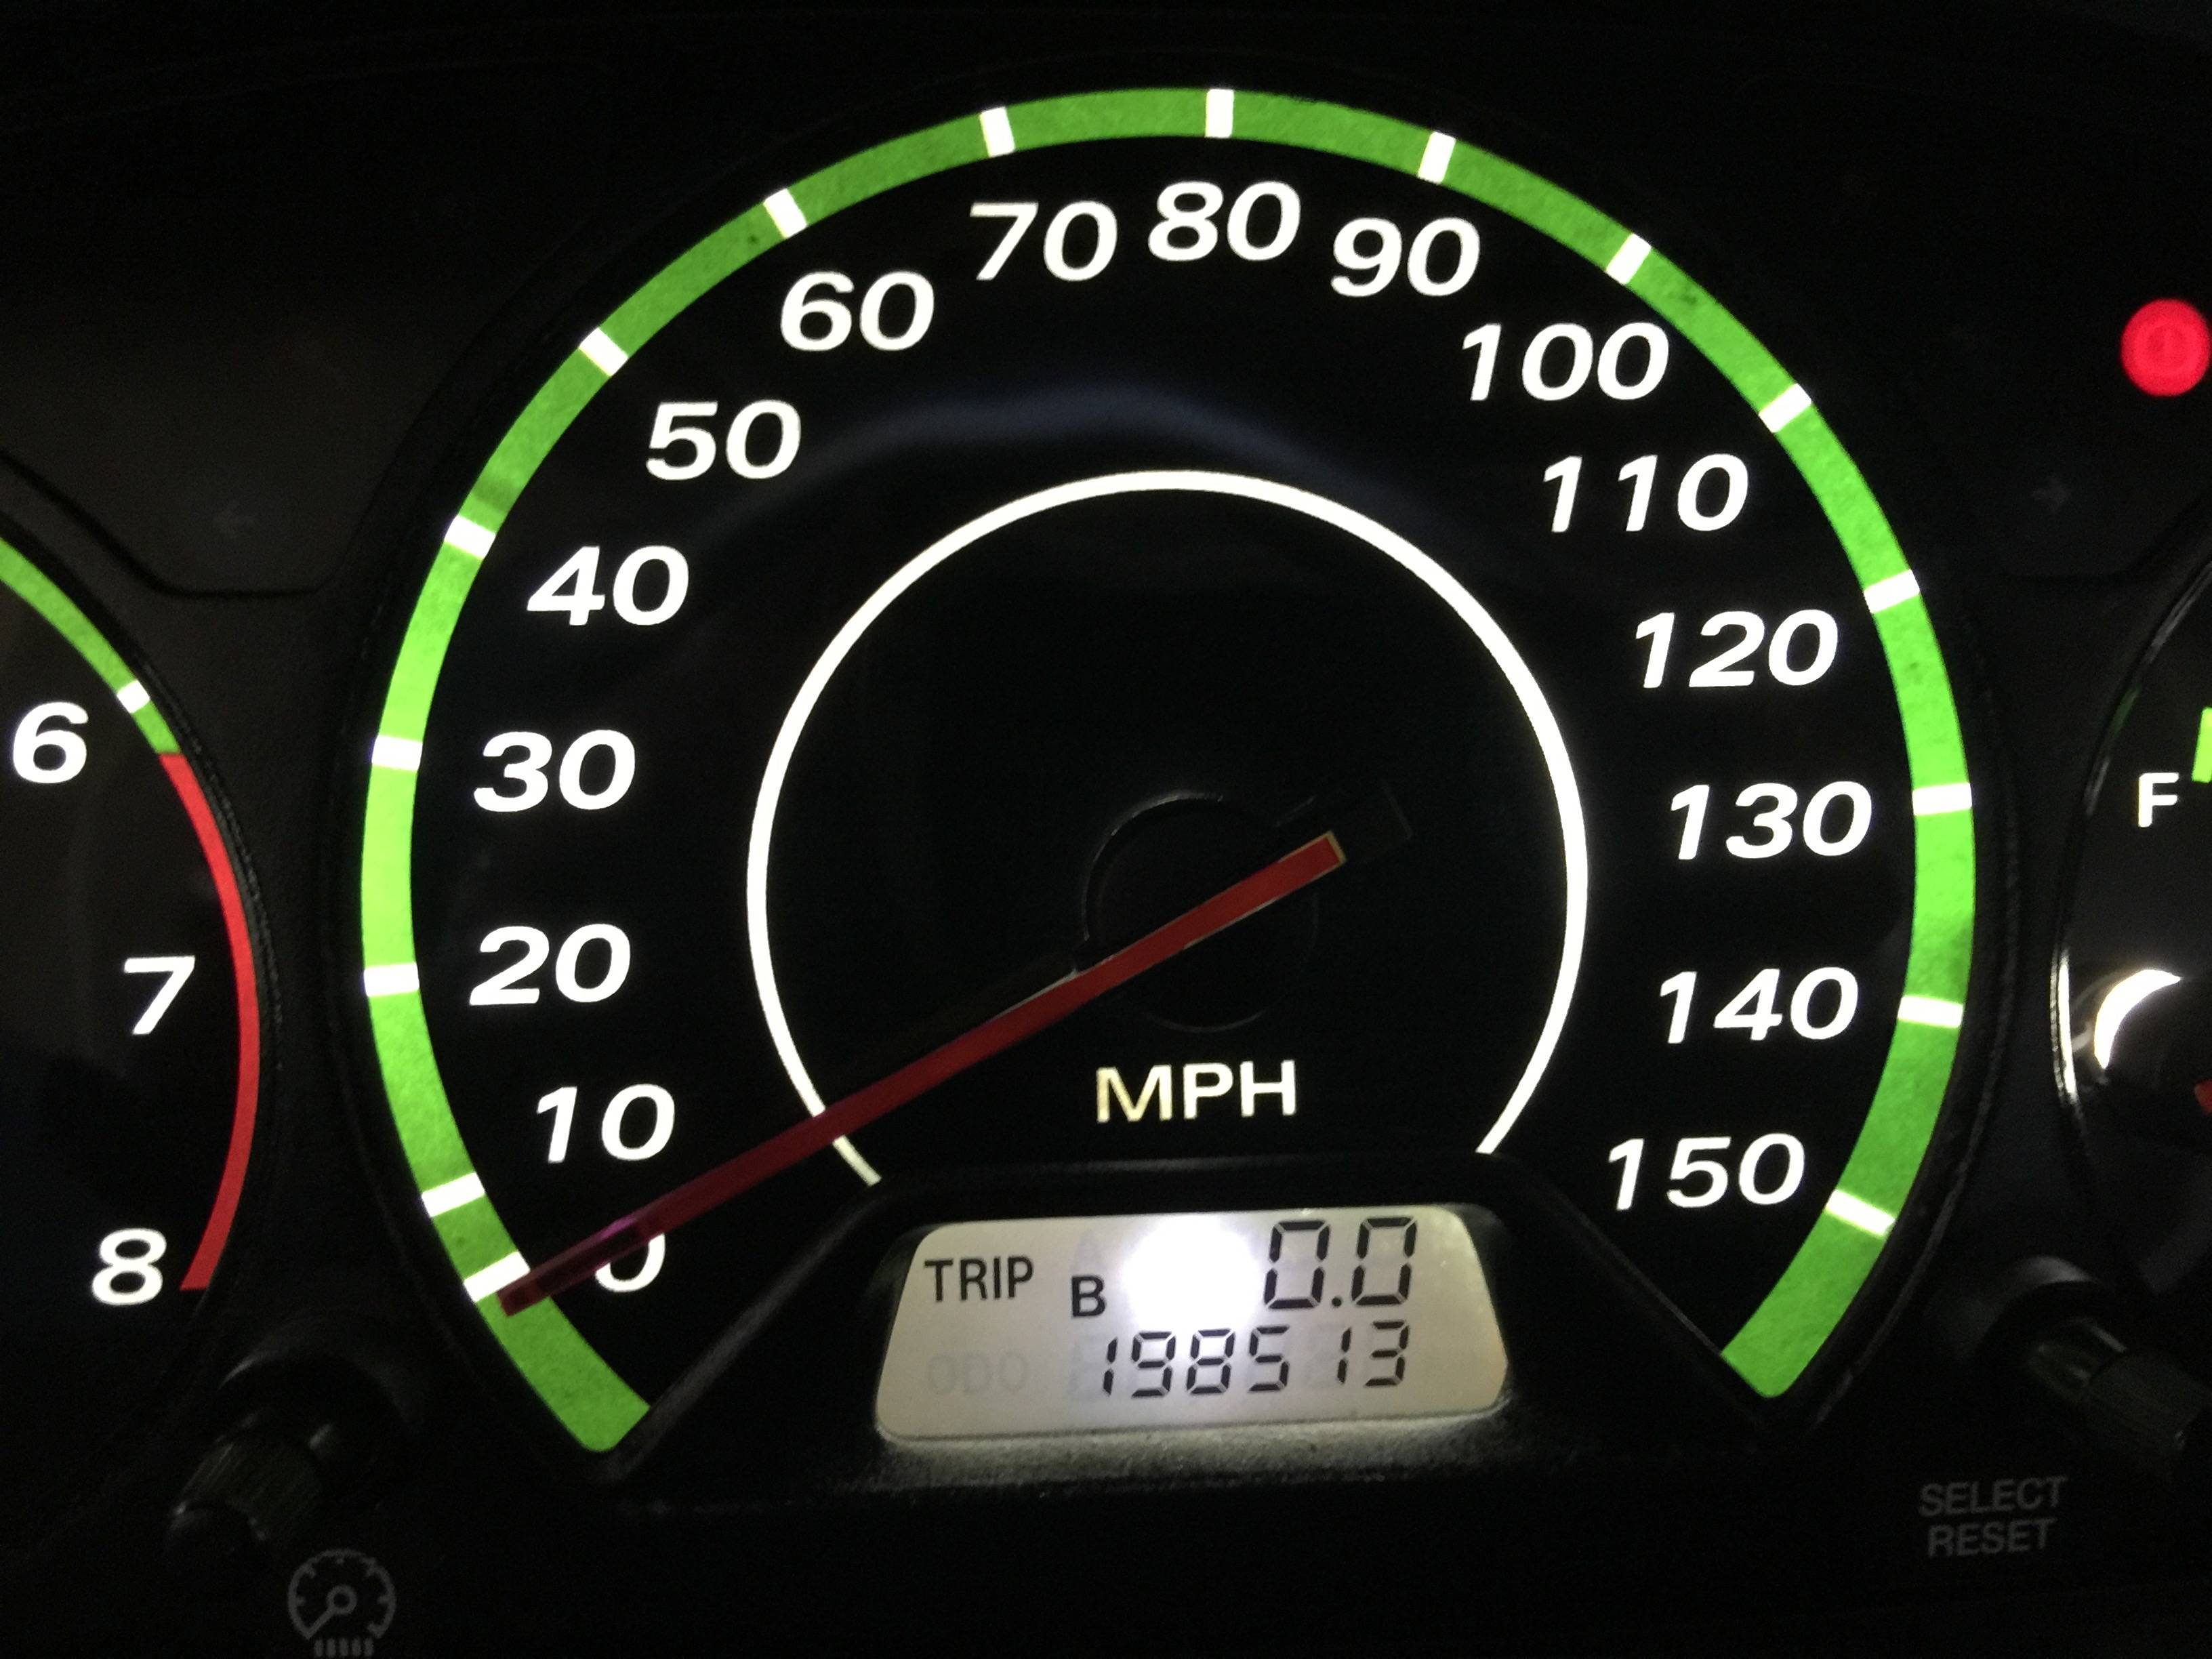
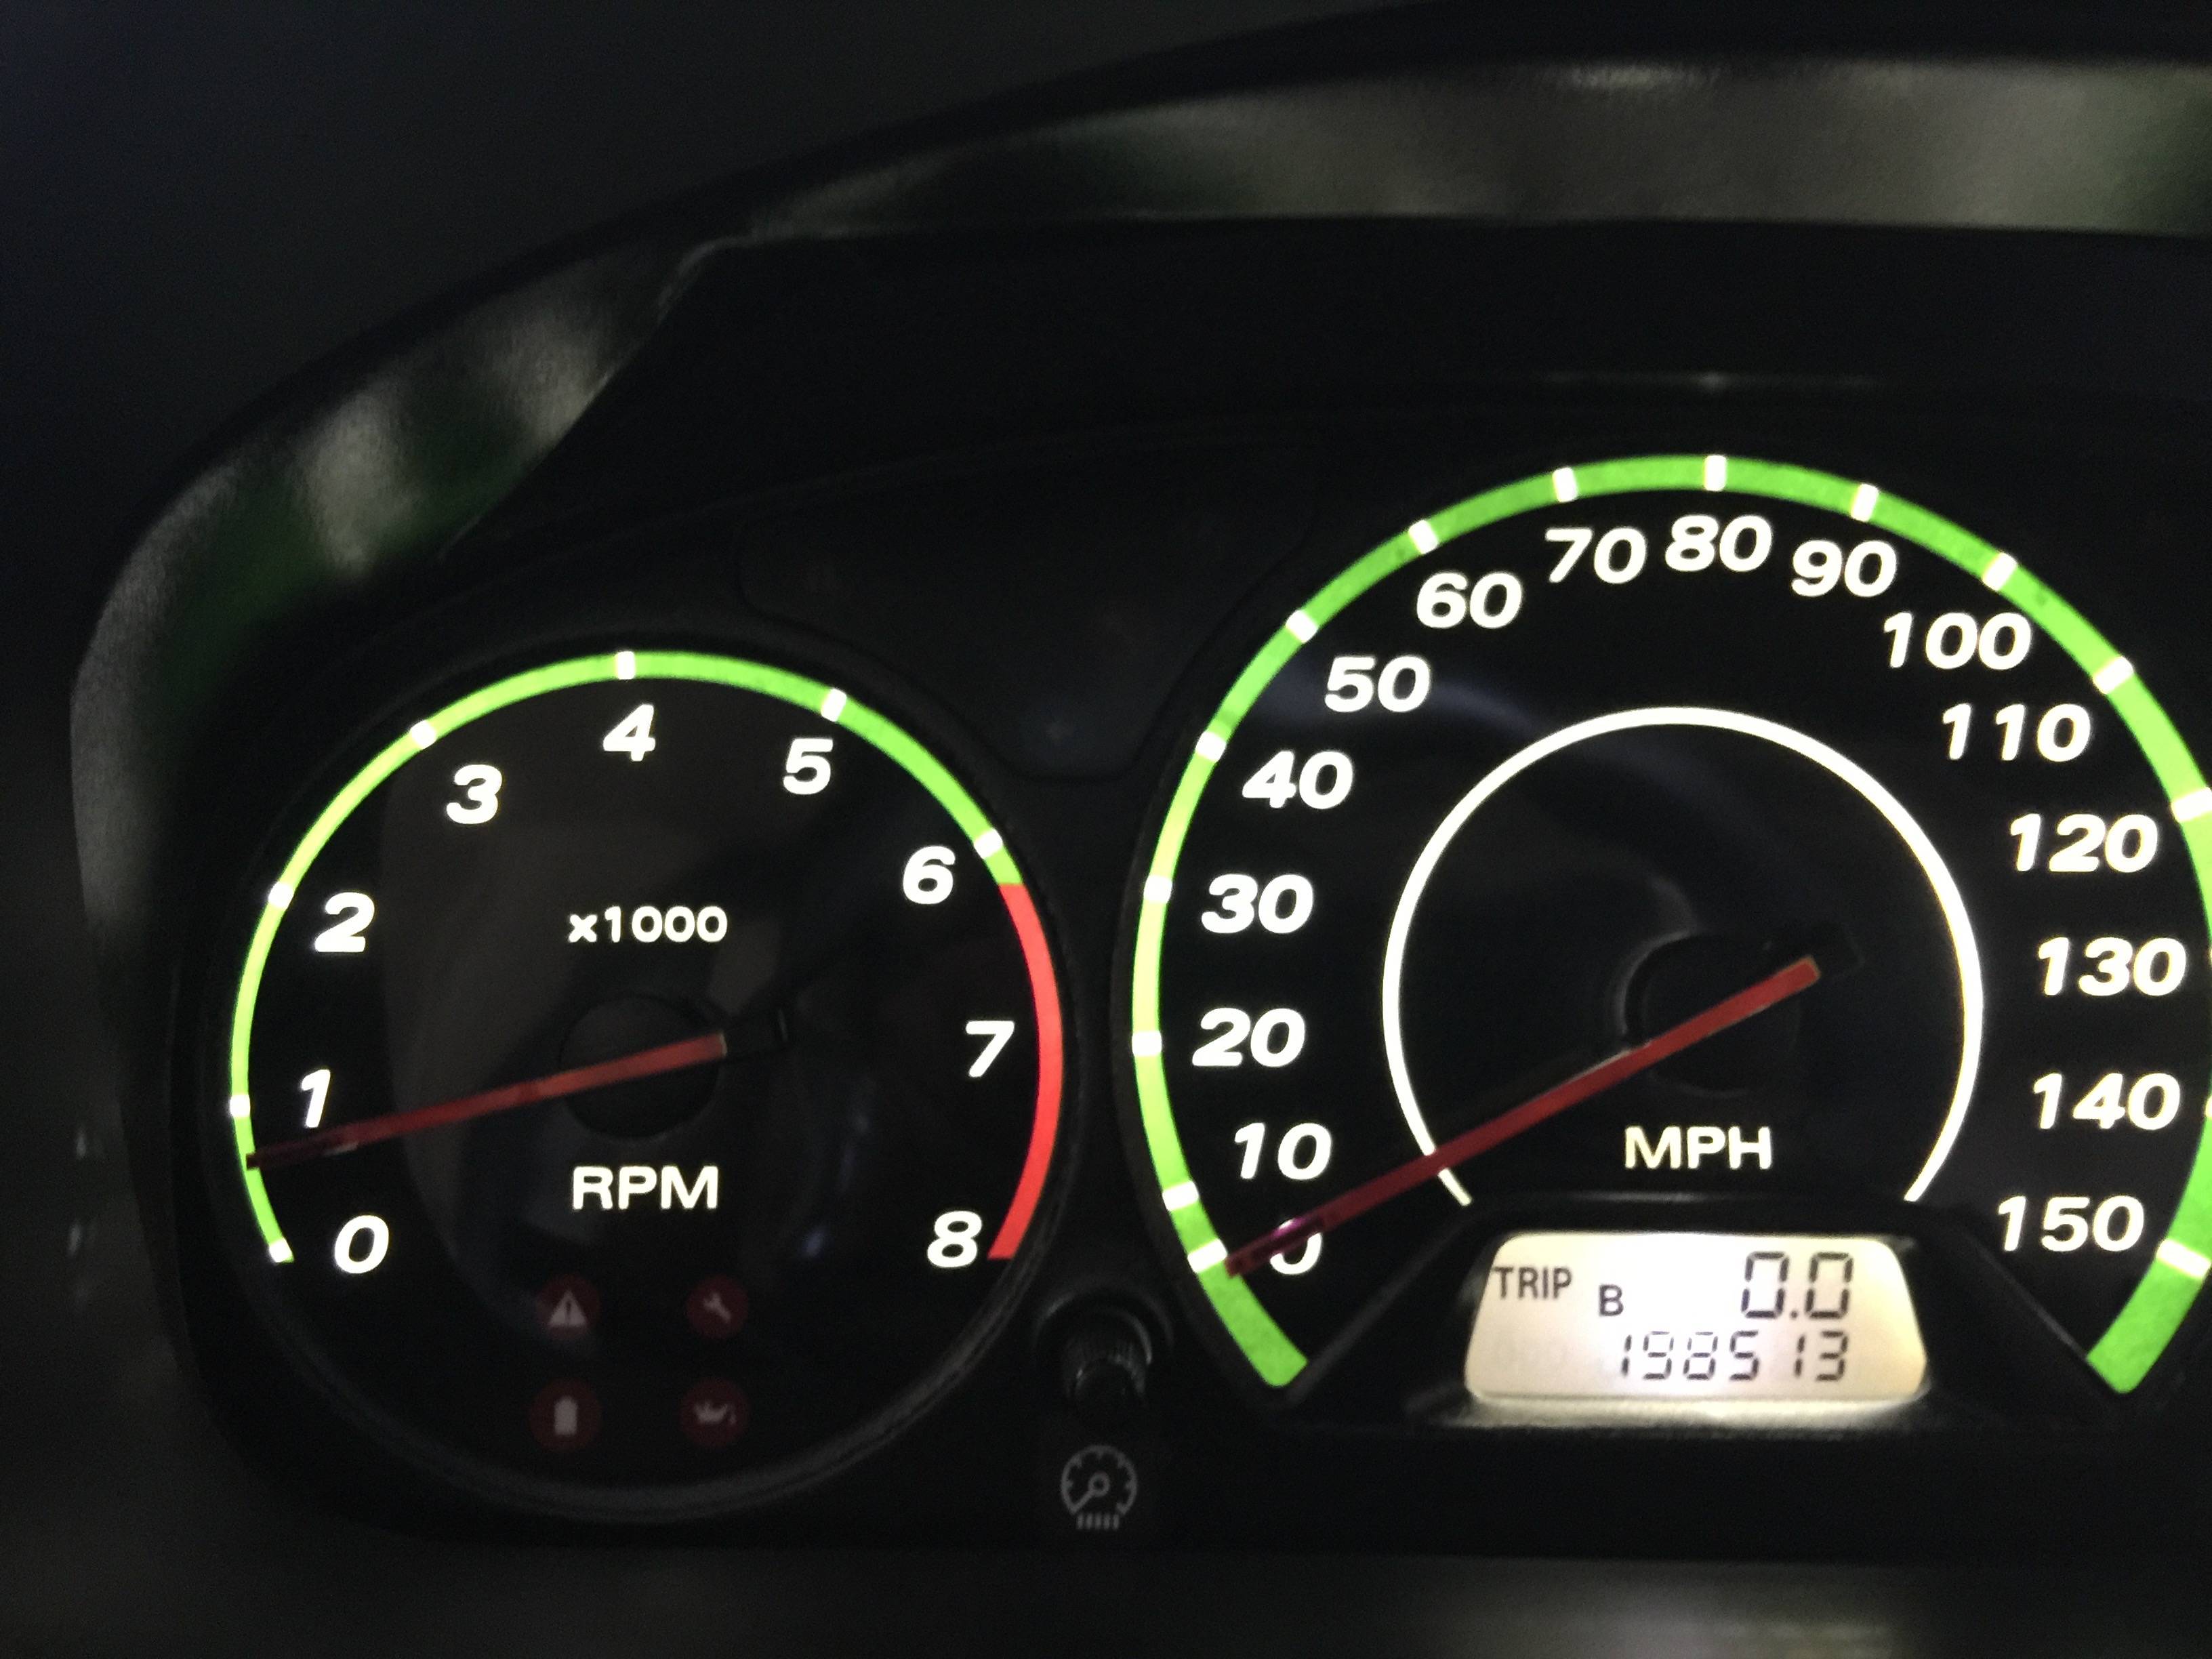
I was looking to see if I could find any decent looking 3rd party gauge faces that would help make our cars' interiors look more modern, but I wasn't able to find any. So I figured I'd try my hand at making my own gauge faces.
I found this tutorial on the Mazda forums that outlines the general process so I adapted it for our cars. The general procedure is the same, so I'll make this DIY quick and not too detailed (you can refer to the Mazda forums for more details).
You'll need a scanner, a computer and ideally access to Adobe Photoshop or Illustrator. You might be able to try it out with Microsoft Paint but that definitely sounds janky and probably won't work out too well.
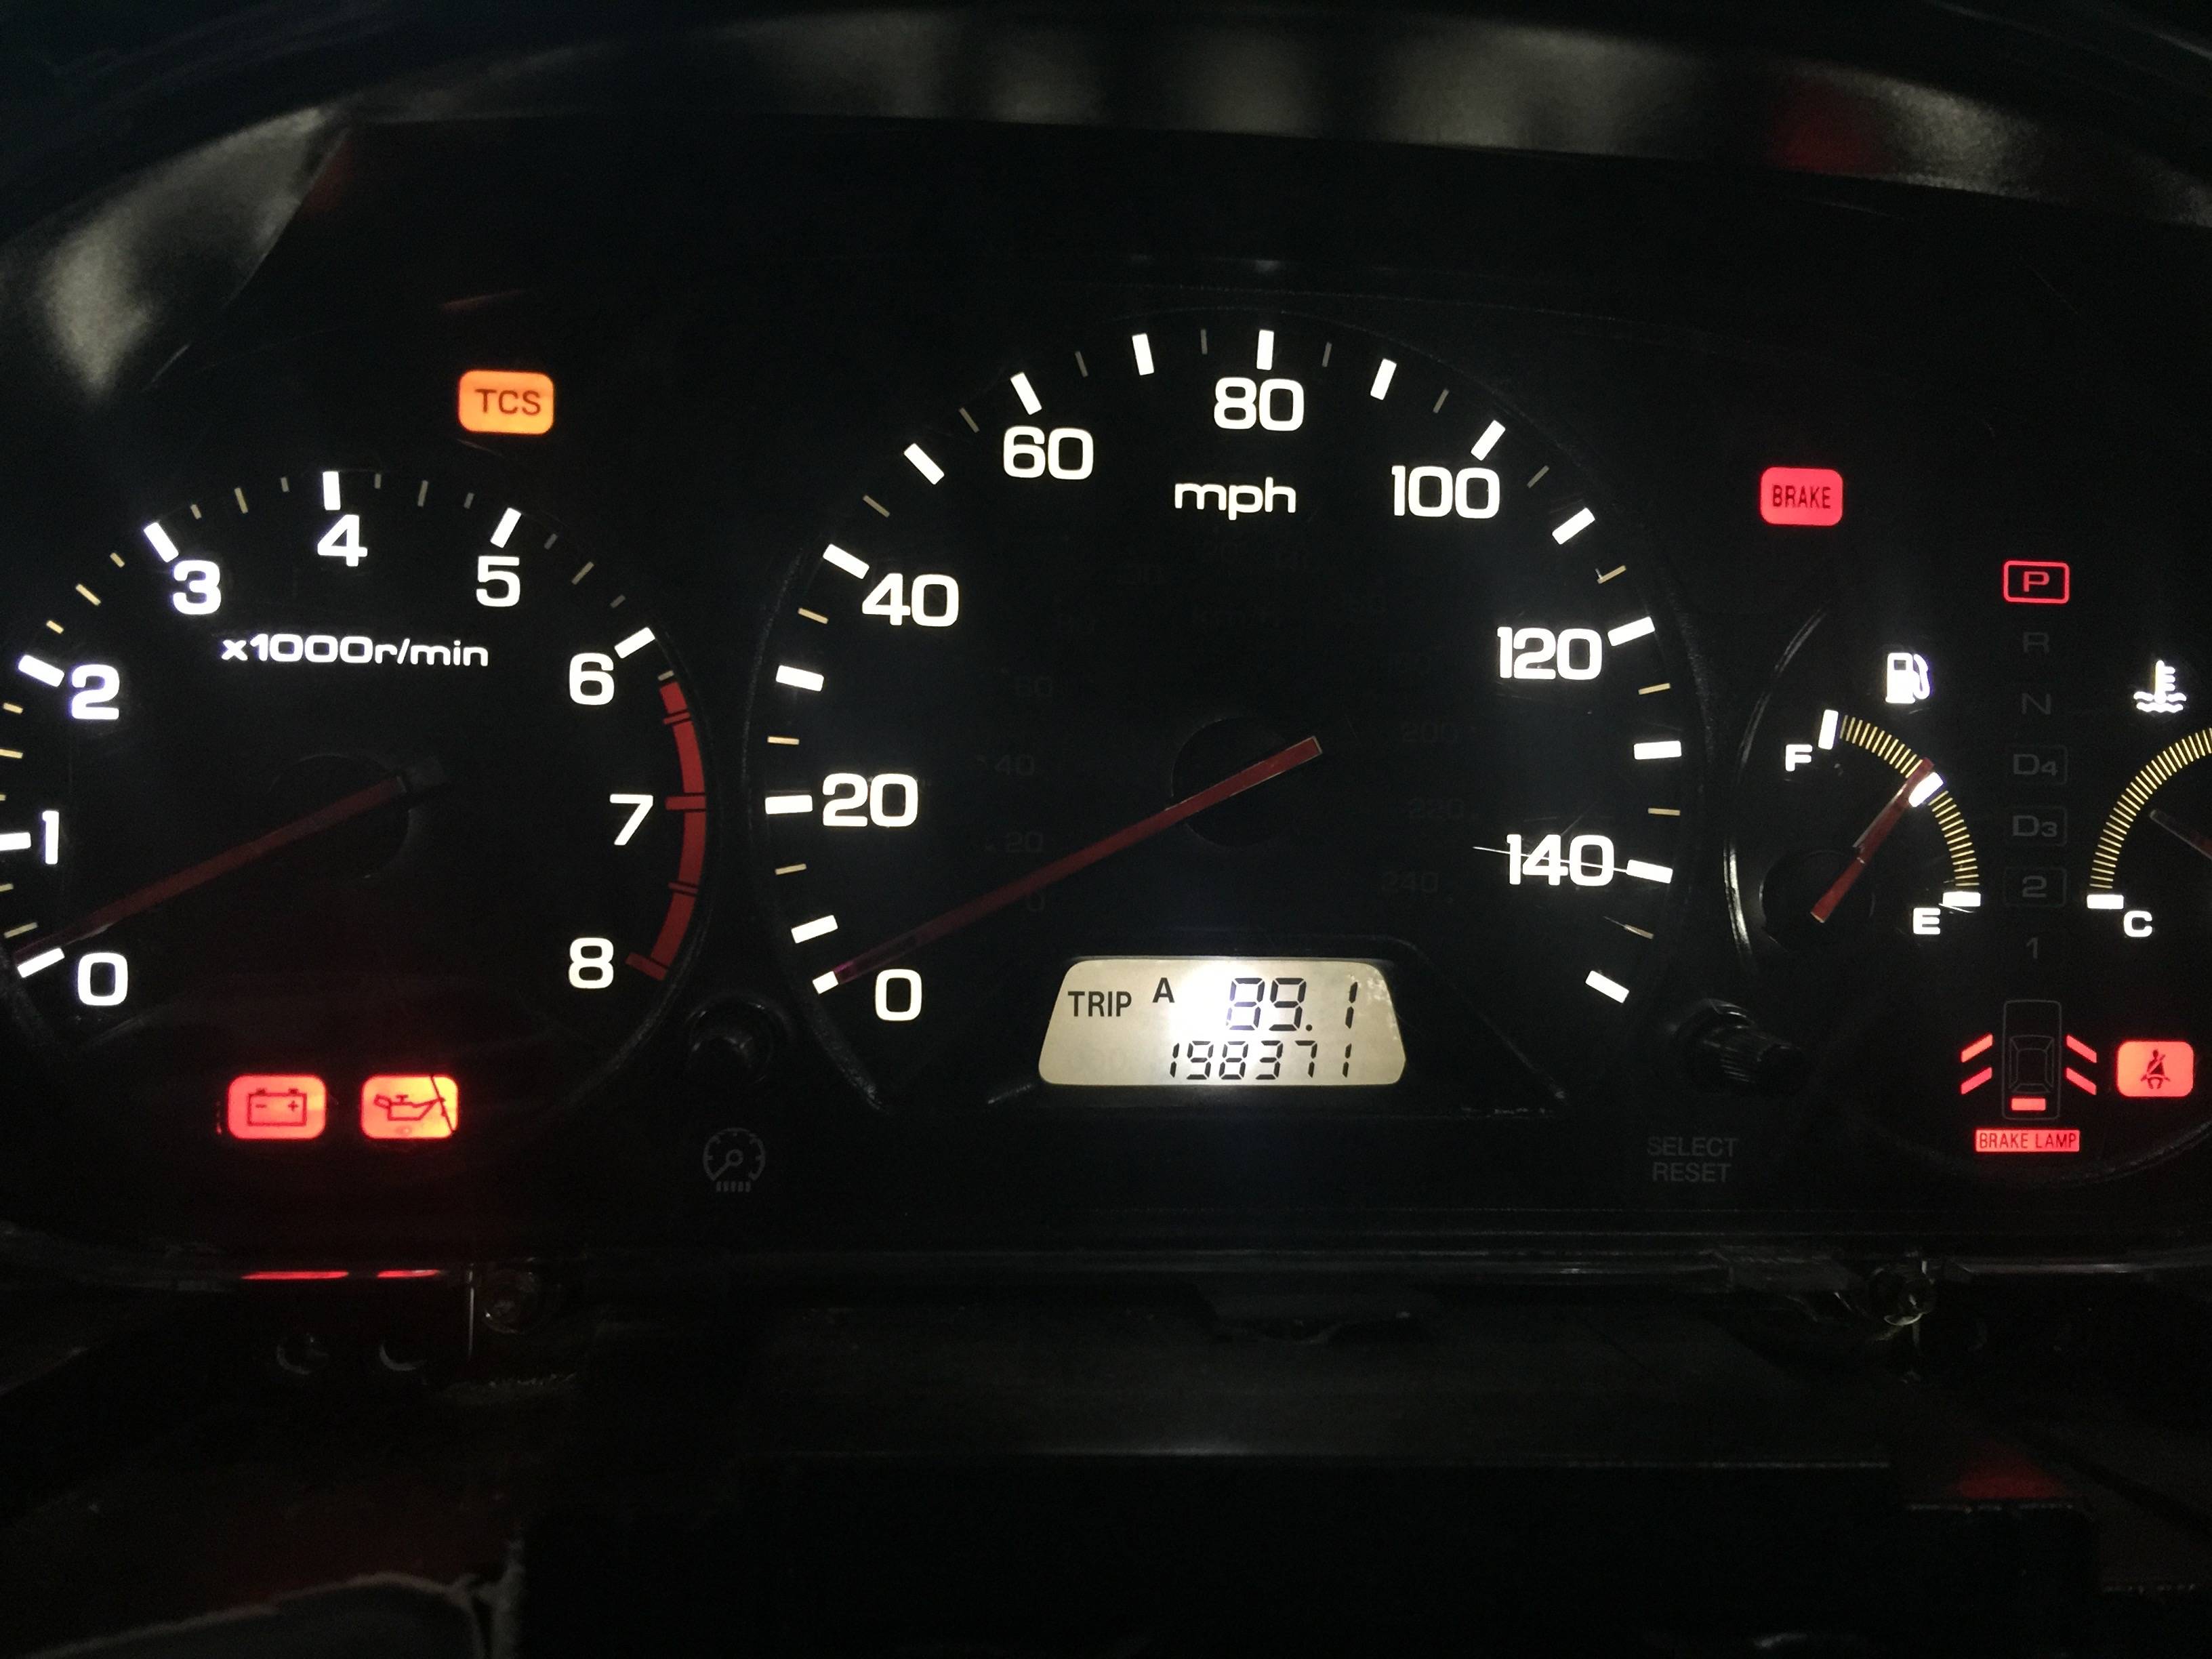
First, some before and after pics:
BEFORE:
AFTER:
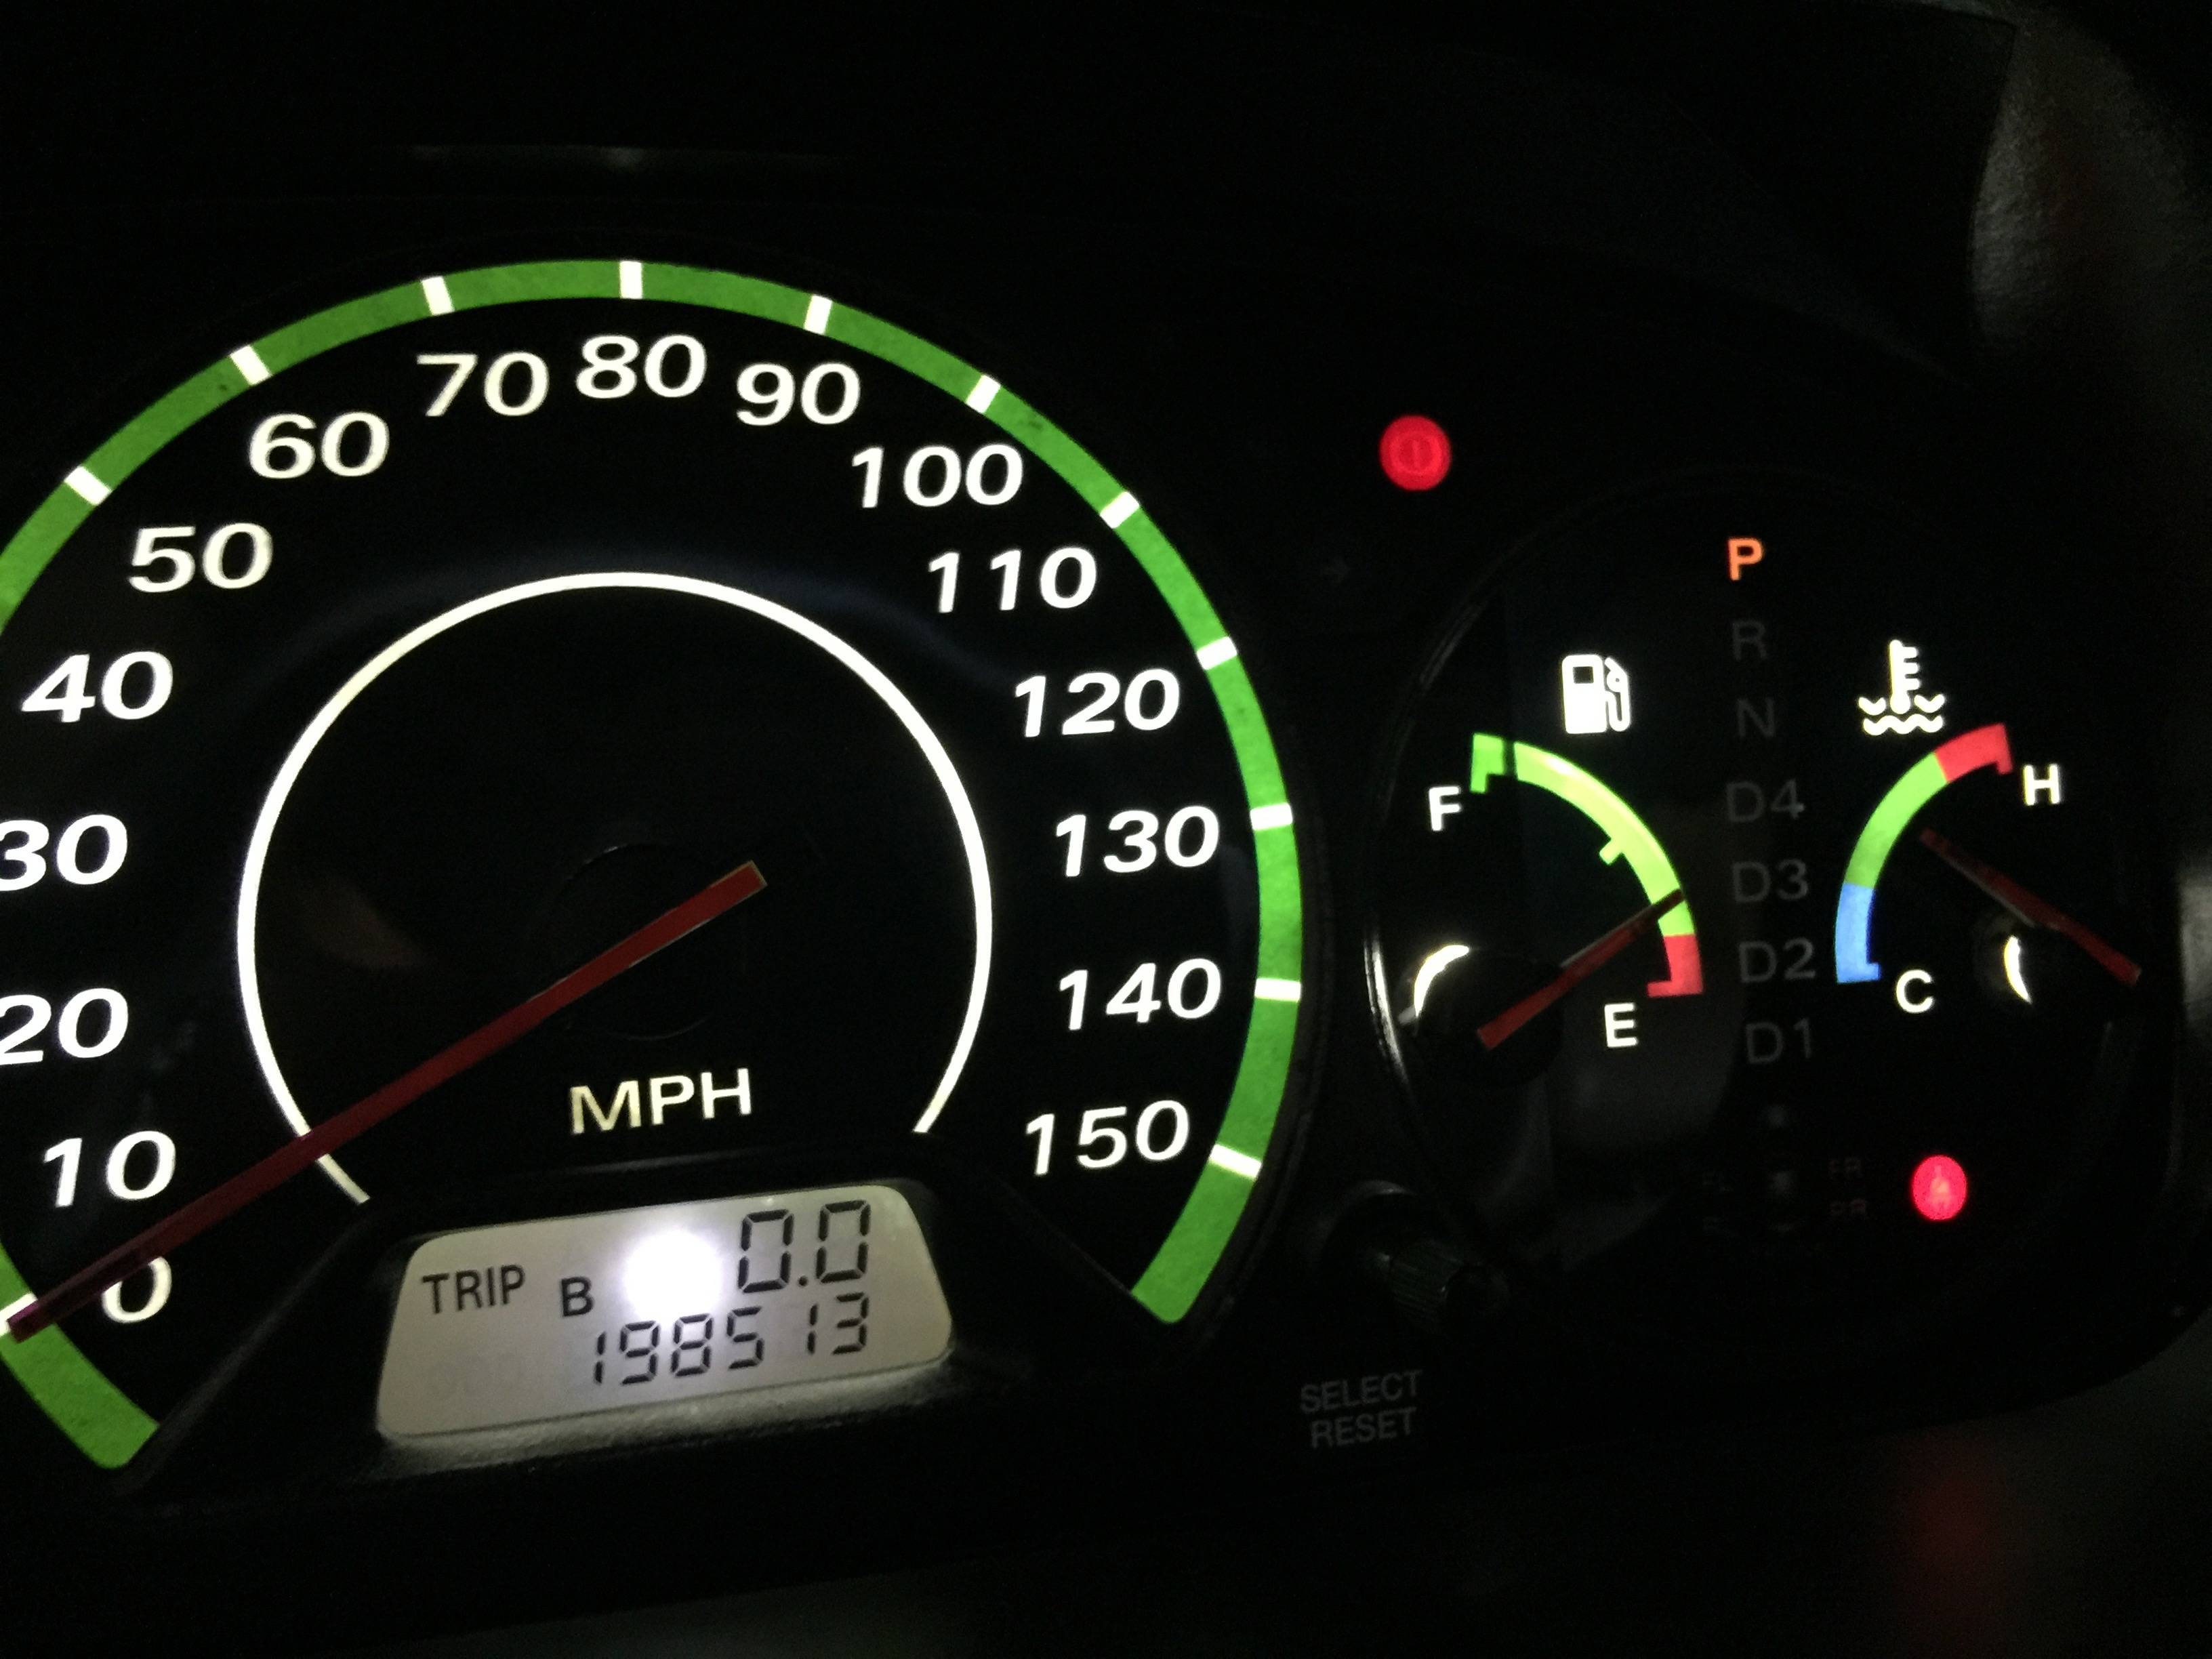
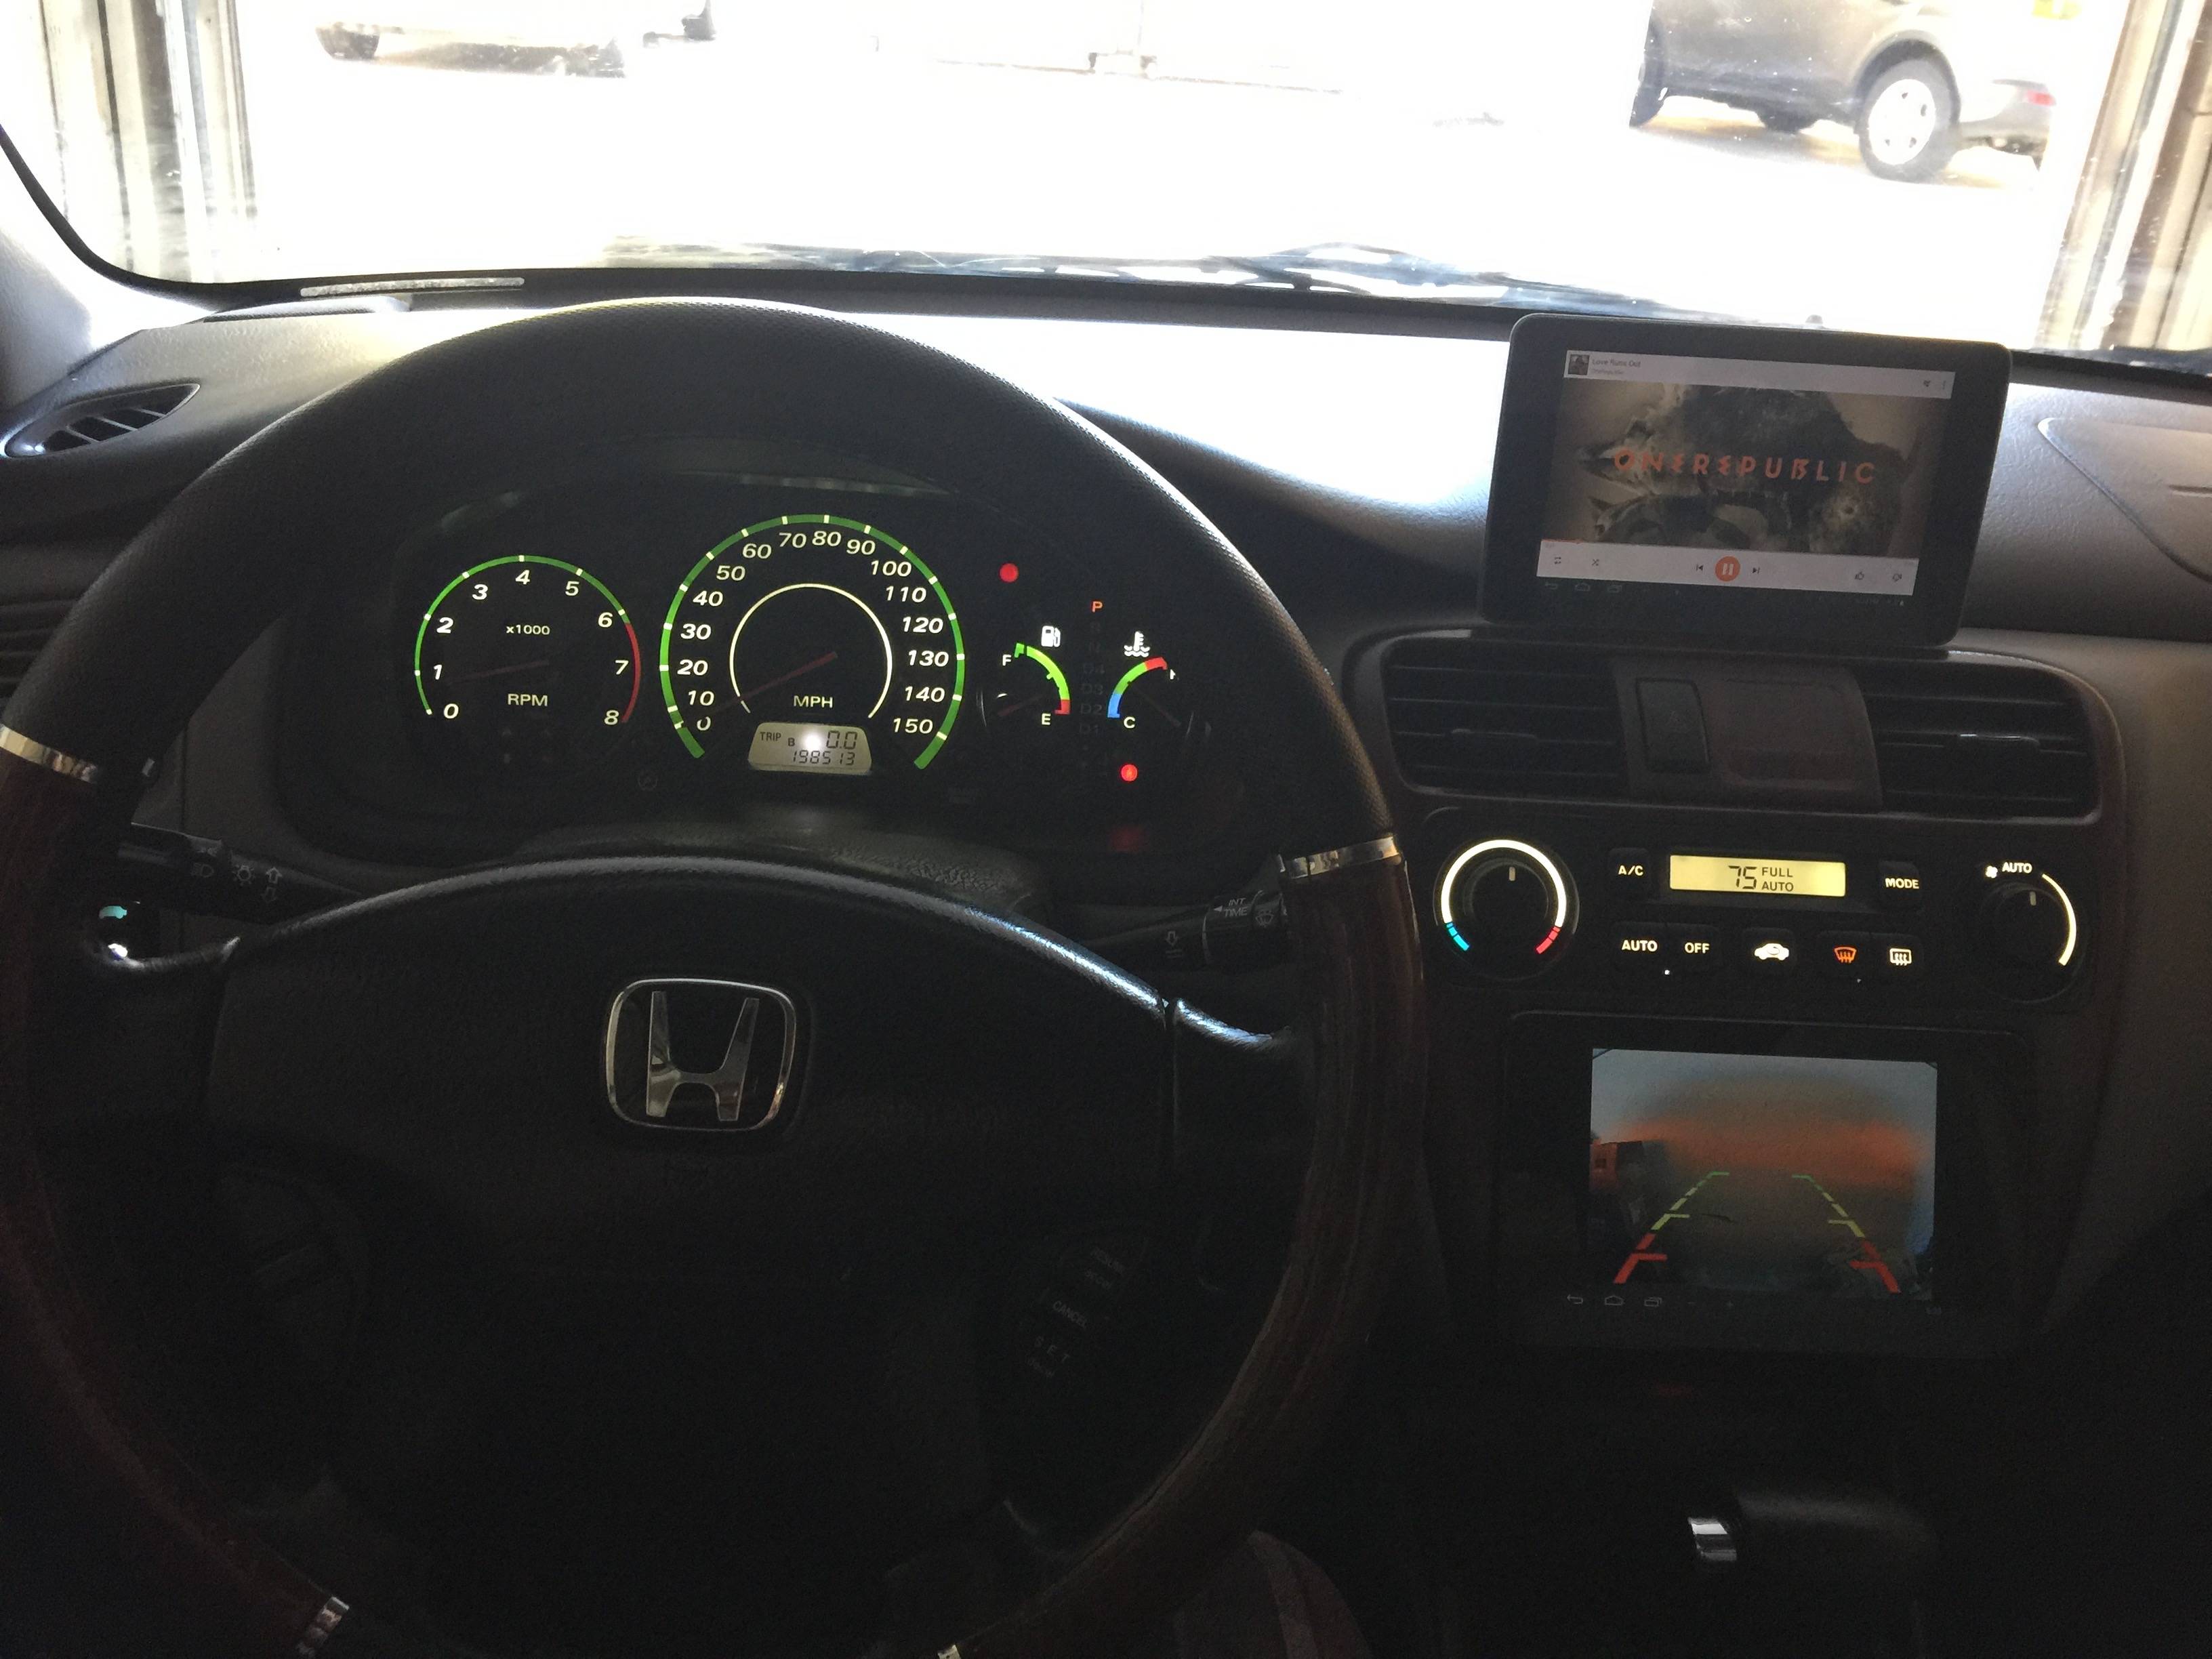
THE PROCESS:
So first off, you'll take apart your gauges and lift up the gauge face. There's plenty of tutorials on how to do this, so do a quick search on this forum for the details. This is what the gauge face looks like after you lift it out from the instrument cluster:
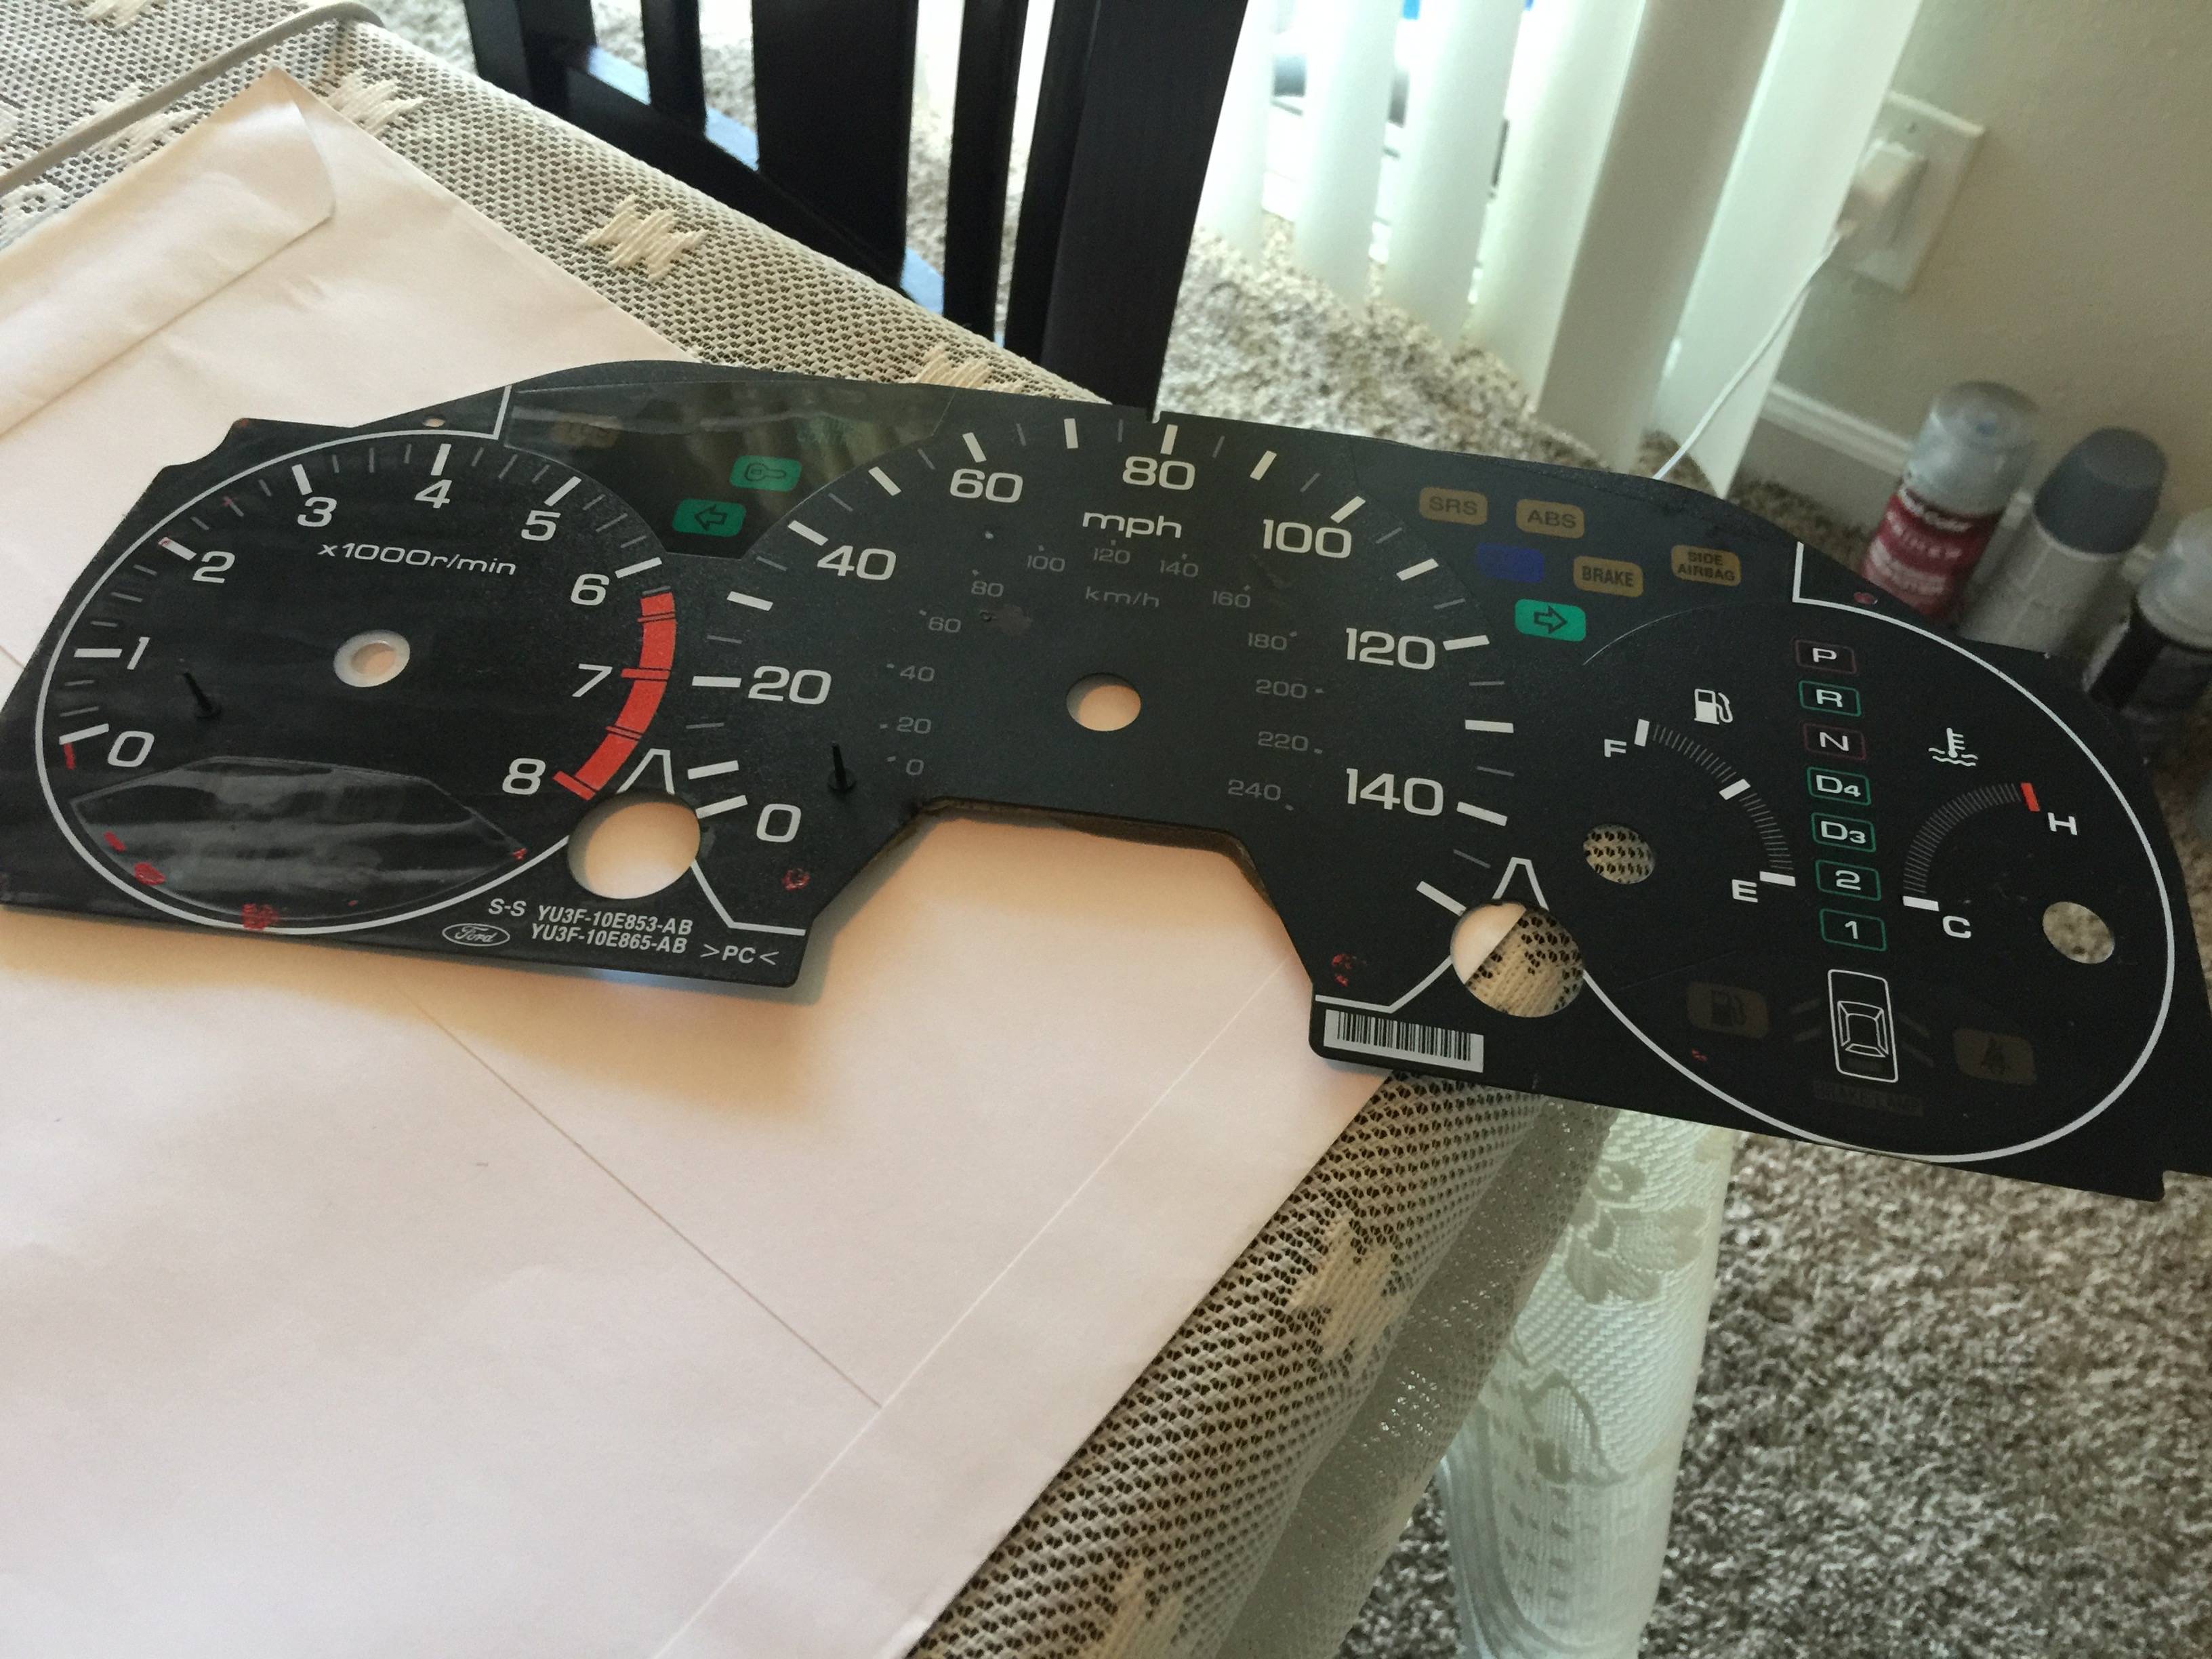
Now go ahead and scan it onto your computer. I used 600dpi for the resolution, but 300dpi should also work fine. Once you get the JPEG, load it up into Photoshop/Illustrator/whatever you plan on using to edit the file.
You'll need some decent editing skills, but I basically overlaid a black layer in the shape of the cluster face and then started adding more custom layers over the original scanned gauge face. Once that was all in place, I deleted the original gauge face and was left with the newly constructed gauge.
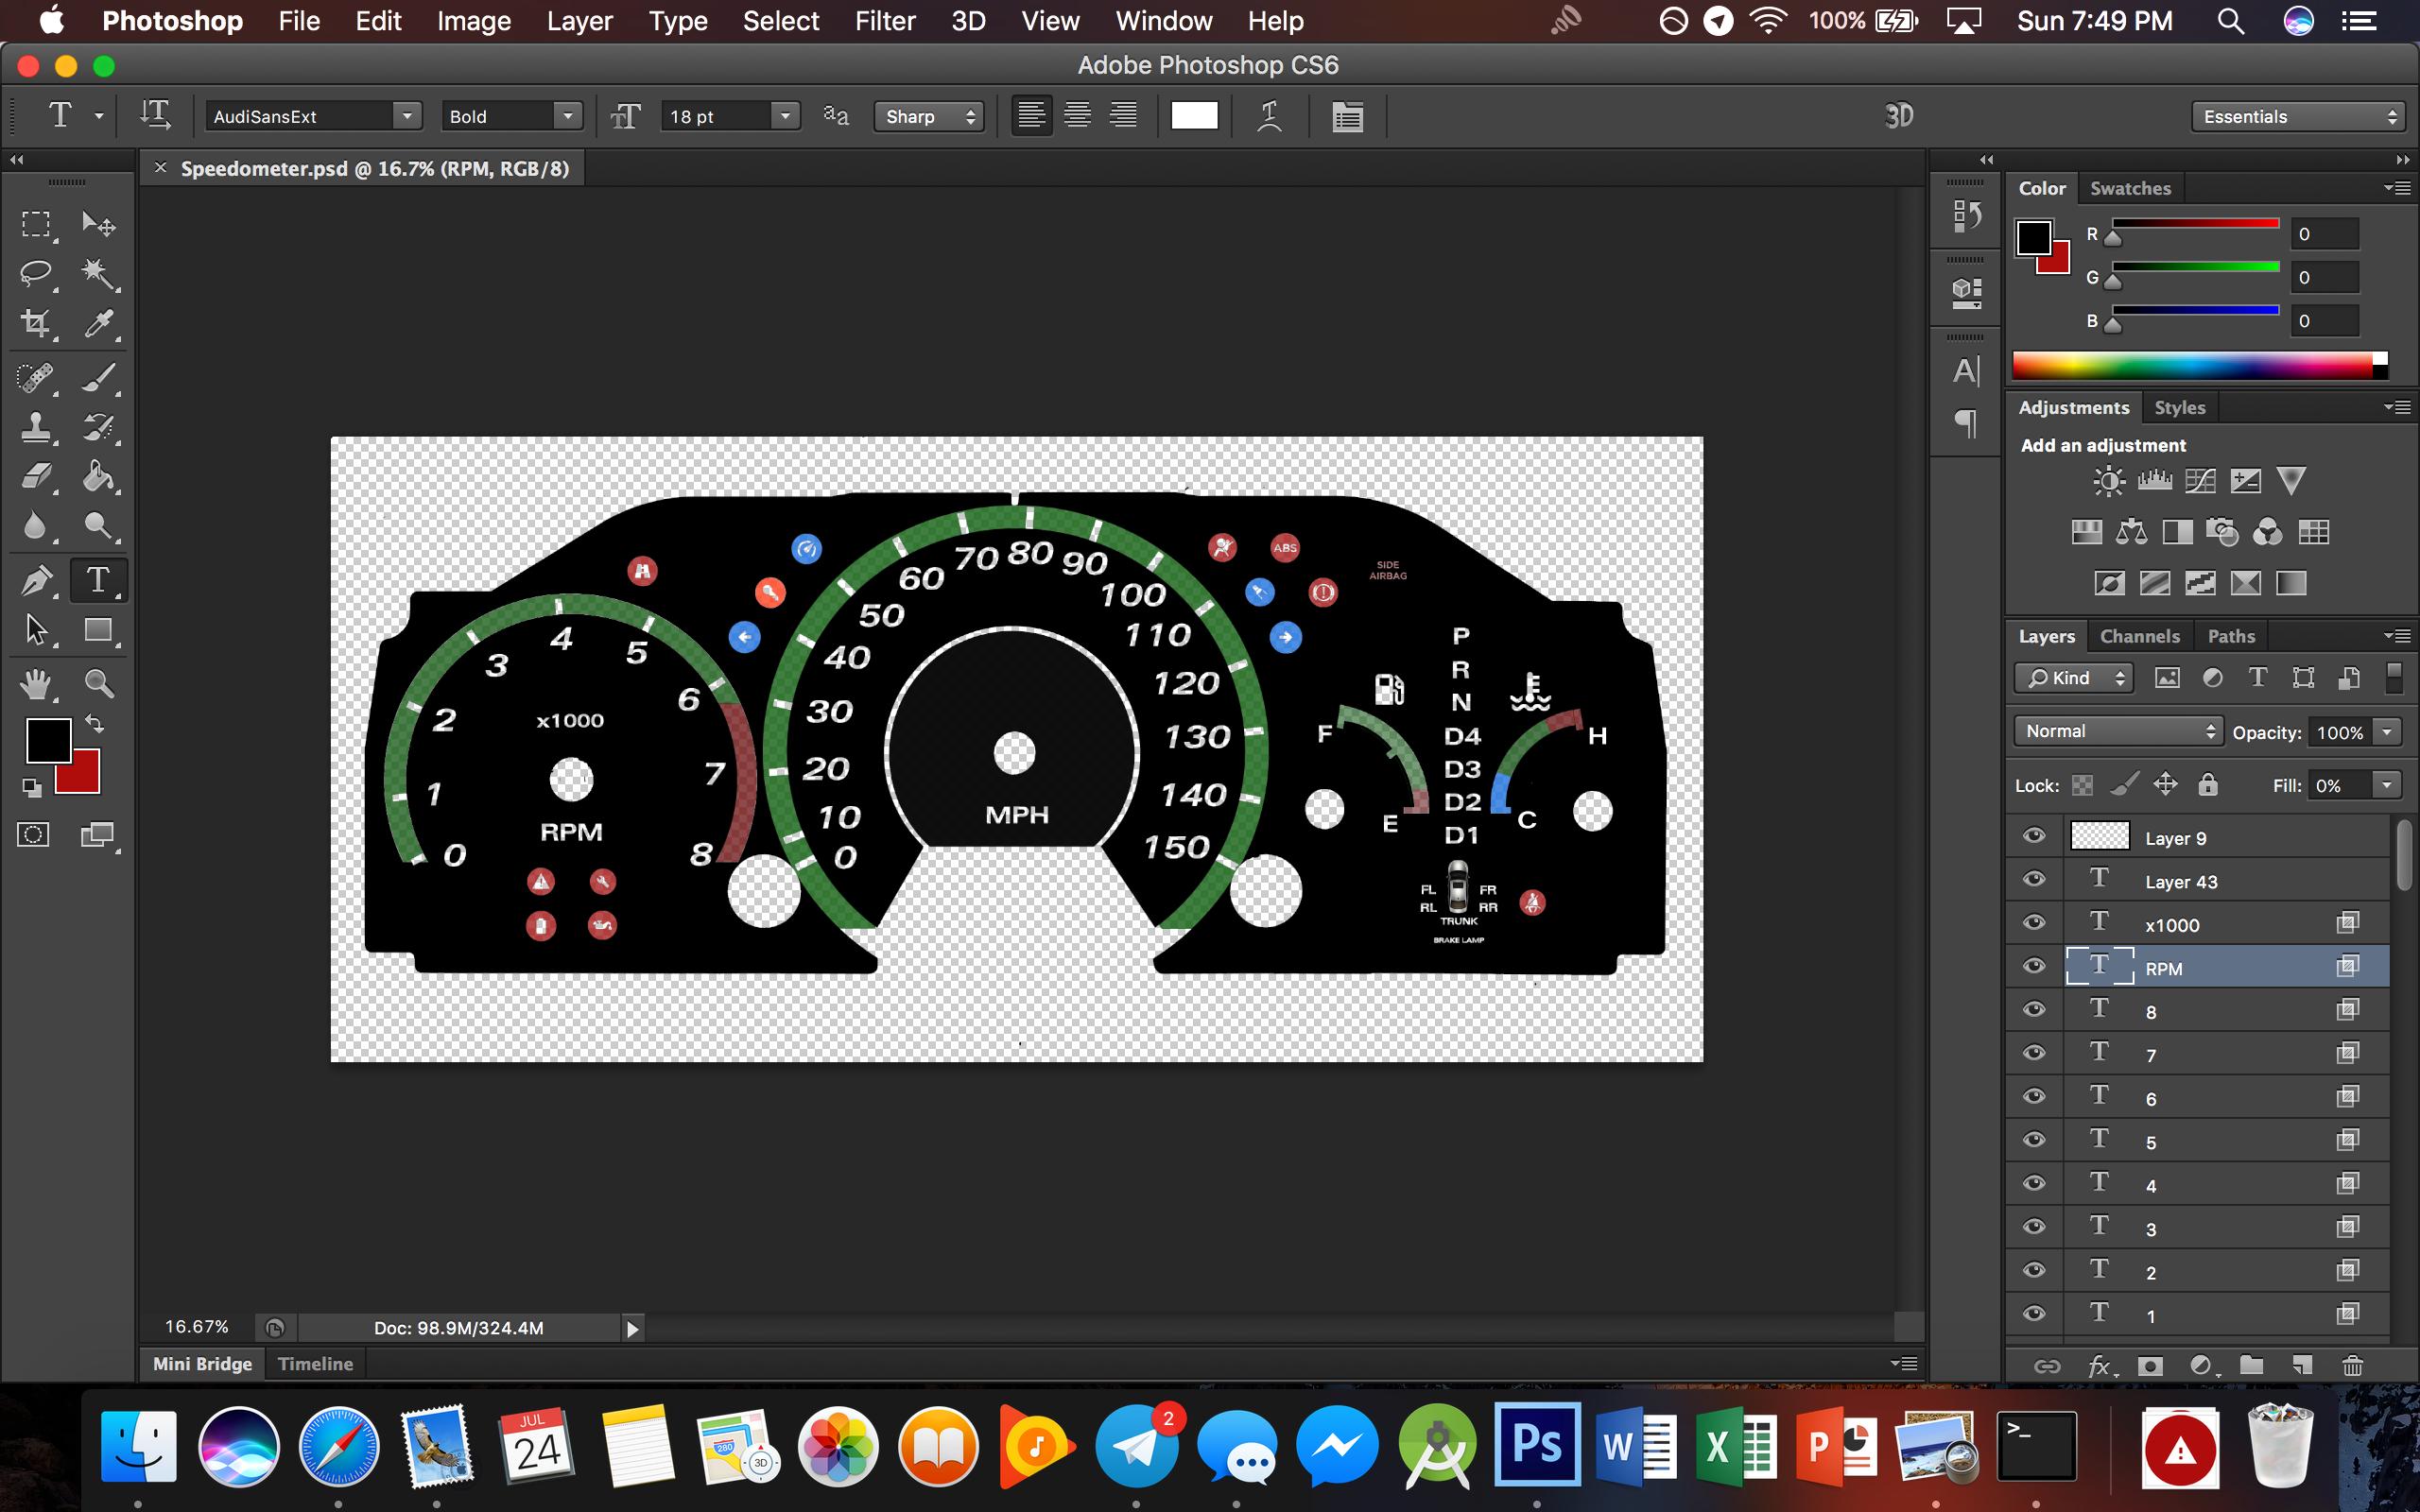
I know that was a very limited set of instructions for the actual gauge construction, but that step is more about having Photoshop/editing skills than something that can be detailed in this post.
Once you have your gauges ready to go, go ahead and head to your nearest FedEx Office Print & Ship Center. You'll need to print your custom gauge on 11x17in transparencies. I would print 2-3 copies (each one runs about $2.50 for the paper and the printing) so you'll have extras if you mess up. Once you get your transparencies, ask the FedEx guys to scan each copy and make a color copy on plain paper for you (again 11x17in paper). Make sure you do NOT touch the printed part of the transparencies. Fingerprints will ruin the prints and make them look nasty/possibly cause the ink to run.
While you're out, go ahead and grab a can of spray adhesive. I used 3M 45 Spray Adhesive which you can find at Home Depot for about $5.
Now come back to your workbench and align a transparency over it's printed color copy. make sure every thing matches up. You shouldn't see any doubles or misaligned elements (make sure to wear latex gloves so you don't accidentally touch the printed ink). Clip the two aligned layers together with some binder clips (only clip them on one side). Then lift the transparency up and spray it with a light layer of adhesive. Wait for 30 seconds and then lay the transparency back down onto the paper (the binder clips on the top will keep the two layers aligned). Firmly press down on the top of the two layers and then set it aside for about an hour.
Next, grab some sharp scissors and then cut your way around the outside shape of the gauge cluster. You'll be left with a brand new cluster face. But you're not done yet! Grab an Xacto knife with a brand new blade and then cut through the circles in the gauge face where the needles and the trip reset toggle/cluster bulb dimmer will go. Now go ahead and lay your fully finished gauge face on your old cluster and put it all back in your car. Congrats, you now have your very own custom gauges in your Accord!
I found this tutorial on the Mazda forums that outlines the general process so I adapted it for our cars. The general procedure is the same, so I'll make this DIY quick and not too detailed (you can refer to the Mazda forums for more details).
You'll need a scanner, a computer and ideally access to Adobe Photoshop or Illustrator. You might be able to try it out with Microsoft Paint but that definitely sounds janky and probably won't work out too well.
First, some before and after pics:
BEFORE:

AFTER:


THE PROCESS:
So first off, you'll take apart your gauges and lift up the gauge face. There's plenty of tutorials on how to do this, so do a quick search on this forum for the details. This is what the gauge face looks like after you lift it out from the instrument cluster:

Now go ahead and scan it onto your computer. I used 600dpi for the resolution, but 300dpi should also work fine. Once you get the JPEG, load it up into Photoshop/Illustrator/whatever you plan on using to edit the file.
You'll need some decent editing skills, but I basically overlaid a black layer in the shape of the cluster face and then started adding more custom layers over the original scanned gauge face. Once that was all in place, I deleted the original gauge face and was left with the newly constructed gauge.

I know that was a very limited set of instructions for the actual gauge construction, but that step is more about having Photoshop/editing skills than something that can be detailed in this post.
Once you have your gauges ready to go, go ahead and head to your nearest FedEx Office Print & Ship Center. You'll need to print your custom gauge on 11x17in transparencies. I would print 2-3 copies (each one runs about $2.50 for the paper and the printing) so you'll have extras if you mess up. Once you get your transparencies, ask the FedEx guys to scan each copy and make a color copy on plain paper for you (again 11x17in paper). Make sure you do NOT touch the printed part of the transparencies. Fingerprints will ruin the prints and make them look nasty/possibly cause the ink to run.
While you're out, go ahead and grab a can of spray adhesive. I used 3M 45 Spray Adhesive which you can find at Home Depot for about $5.
Now come back to your workbench and align a transparency over it's printed color copy. make sure every thing matches up. You shouldn't see any doubles or misaligned elements (make sure to wear latex gloves so you don't accidentally touch the printed ink). Clip the two aligned layers together with some binder clips (only clip them on one side). Then lift the transparency up and spray it with a light layer of adhesive. Wait for 30 seconds and then lay the transparency back down onto the paper (the binder clips on the top will keep the two layers aligned). Firmly press down on the top of the two layers and then set it aside for about an hour.
Next, grab some sharp scissors and then cut your way around the outside shape of the gauge cluster. You'll be left with a brand new cluster face. But you're not done yet! Grab an Xacto knife with a brand new blade and then cut through the circles in the gauge face where the needles and the trip reset toggle/cluster bulb dimmer will go. Now go ahead and lay your fully finished gauge face on your old cluster and put it all back in your car. Congrats, you now have your very own custom gauges in your Accord!
Last edited:


