For those of you who are getting tired of having the chrome side window trimmings, but being discouraged to vinyl them, I am hoping that this DIY will help you.
・DISCLAIMER・
Please perform at your own risk. Failure of accomplishment, injuries, or damages to your vehicle cannot be blamed. This is only to help you get the job done as cleanly & neatly as possible based on my experience.
・IMPORTANT・
The key point is to remove the side mirrors in order to apply the plasti-dip on the trimmings efficiently. I hear that some of you preffer your mirrors mounted when doing this project, but I hightly recommend you remove the mirrors, because it is going to be very difficult to obtain the clean result, if you work with the mirrors mounted.
Things you'll need for this DIY:
・Plasti-dip spray can (1 can)
・Masking tape
・Scissors
・Razor Blade
・Straight slot screwdriver
・Cross slot screwdriver
・Clean cloth towel w/ mild soap water
・Newspaper
1. Roll down the window completely.
2. Remove the cover behind the mirror. Let's be brave. It'll pry off.
↓
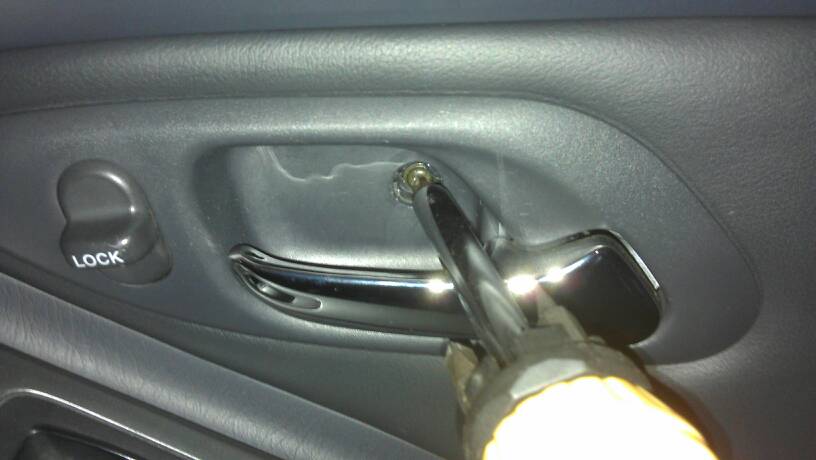
3. Remove the screw bolted by the door handle piece.
↓
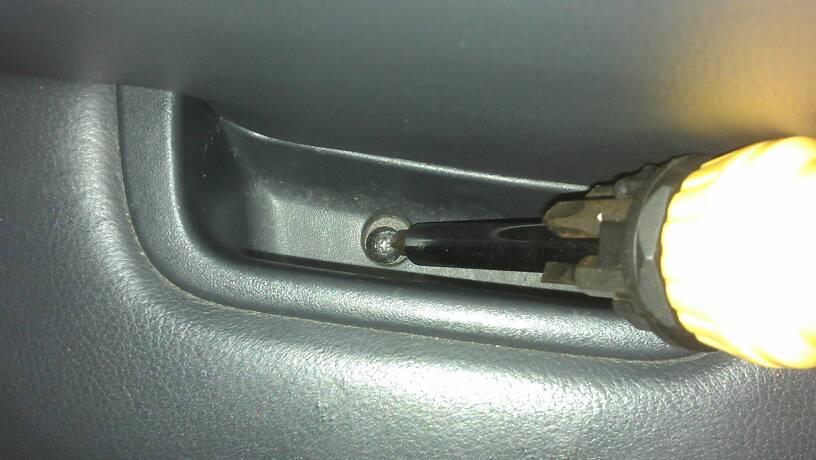
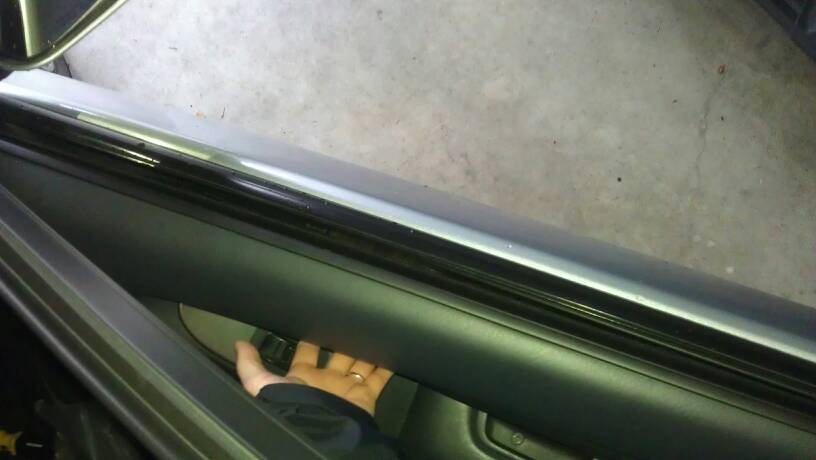
4. Remove the screw bolted in the pocket of the arm rest.
↓
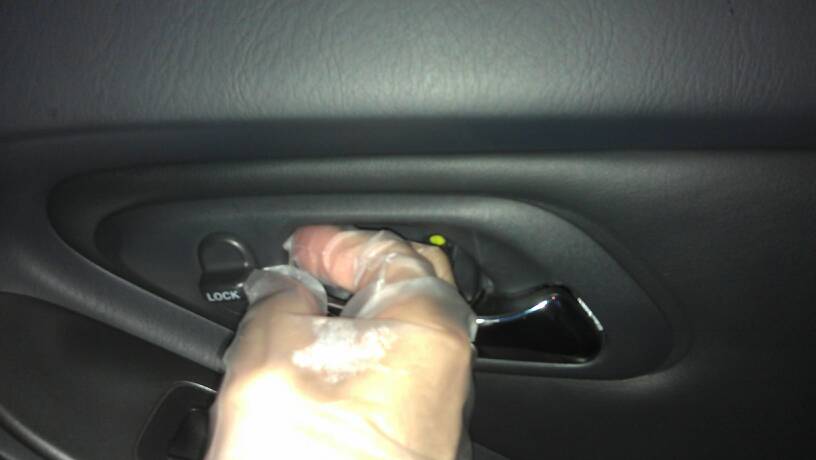
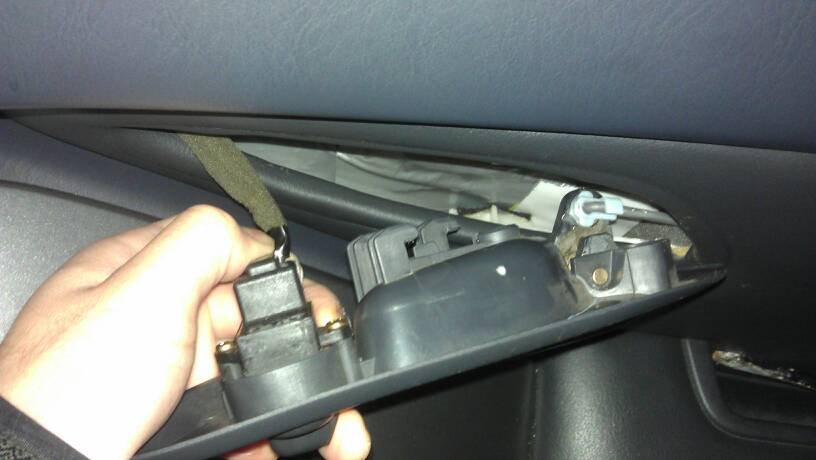
5. Push 'n slide the door handle piece to the side way until it becomes loose.
↓
6. Detach the plastic pin that's holding the metal rod. Using a flat-head screw driver helps, as it's shown.
↓
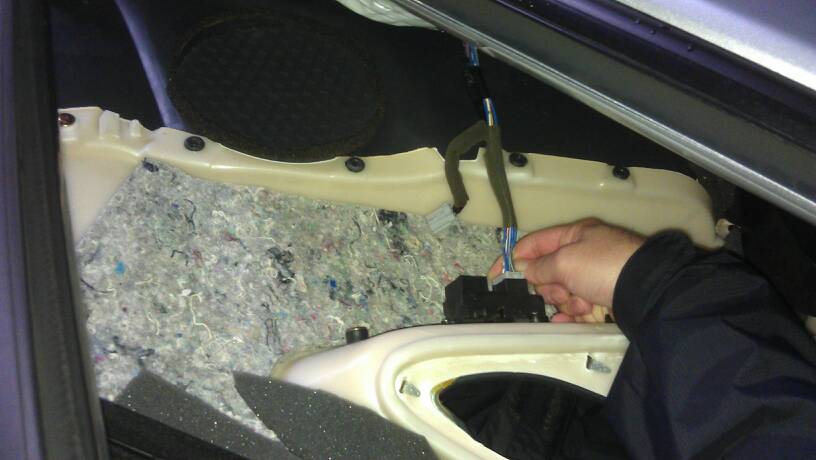
7. Disconnect the power door lock connector. (Pic shows that I haven't done it yet, but you should do the step 6 before this.)
↓
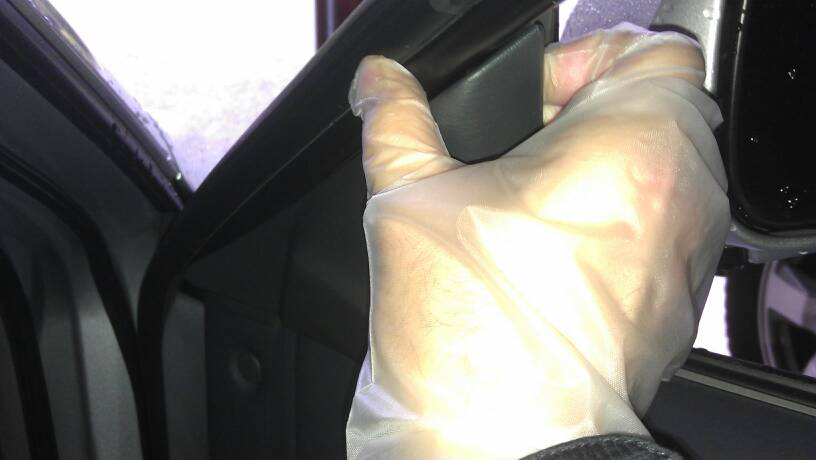
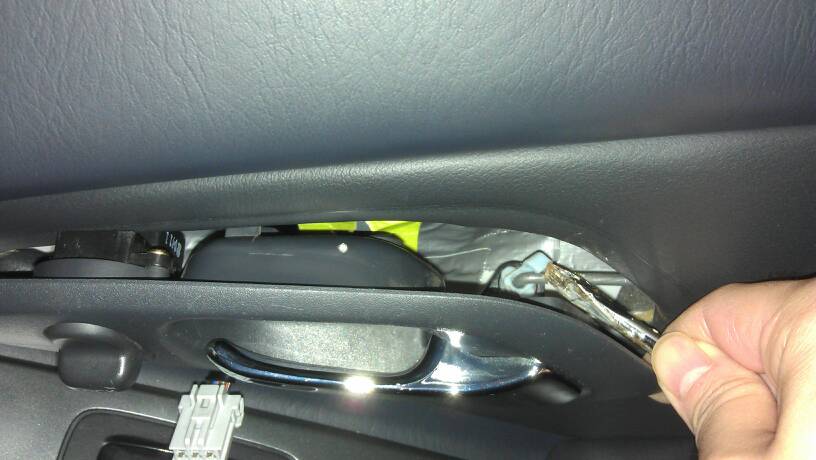
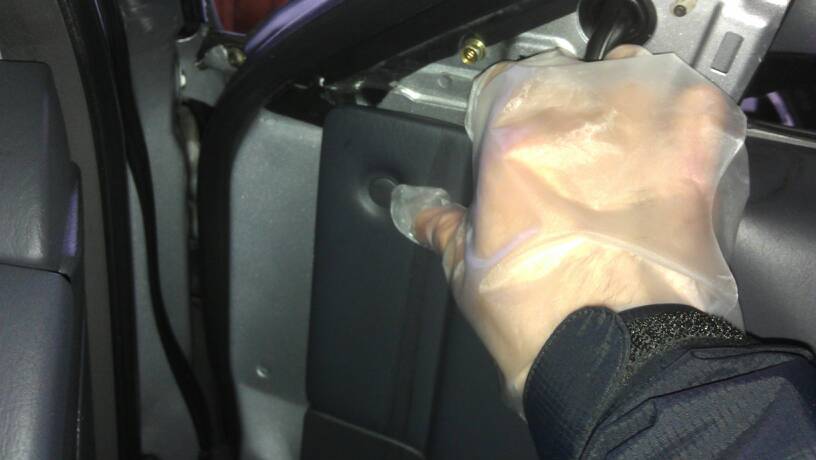
8. Pry off the door trim from the top portion. (The cap piece held by my thumb will detach itself after you pull it. Be brave. It'll pry off.)
↓
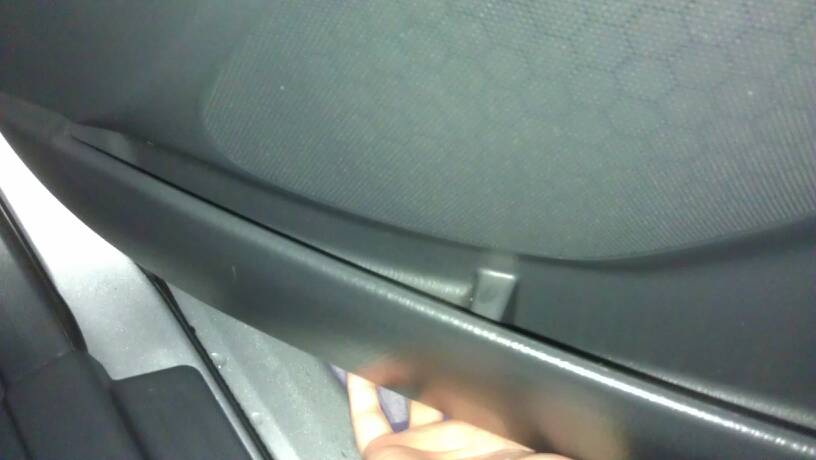
9. Pry off the bottom door trim. (Make sure you are NOT holding the rubber packing together when you pry it off.)
↓
10. The whole door lining is fully detached, and it's hanging by the window rail. Disconnect the courtesy light socket.
↓
11. Carefully lift up the door lining piece from the window rail.
↓
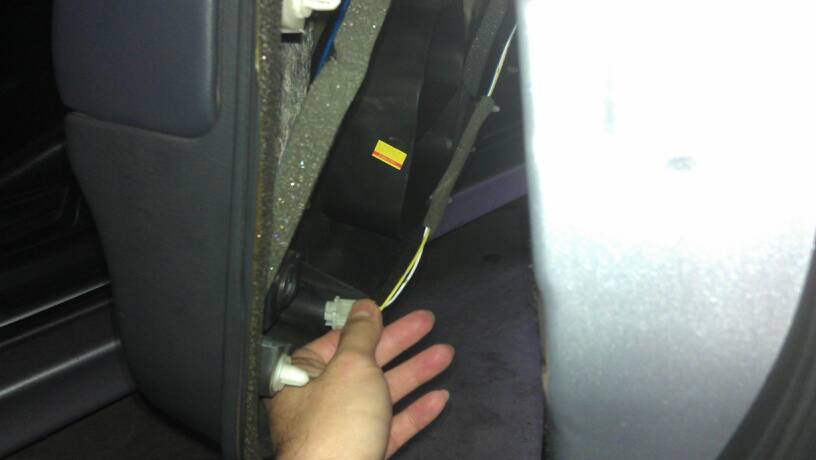
12. Hold the door lining piece with your thigh, and disconnect the power window connector, if equipped. Now, the whole peace can be fully removed from the door panel.
↓
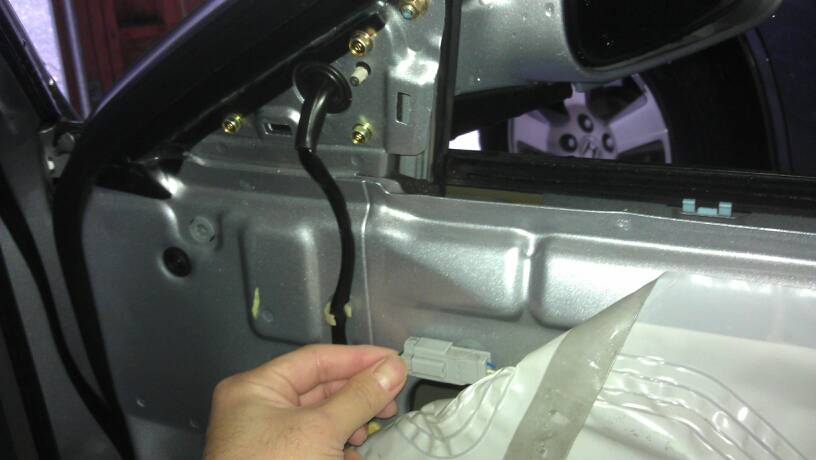
13. Carefully peel off the vinyl cover, and disconnect the power mirror conector. (Note: there is a zip-tie piece that is mounted by the cord. I was lazy, so I cut off the tie.)
↓
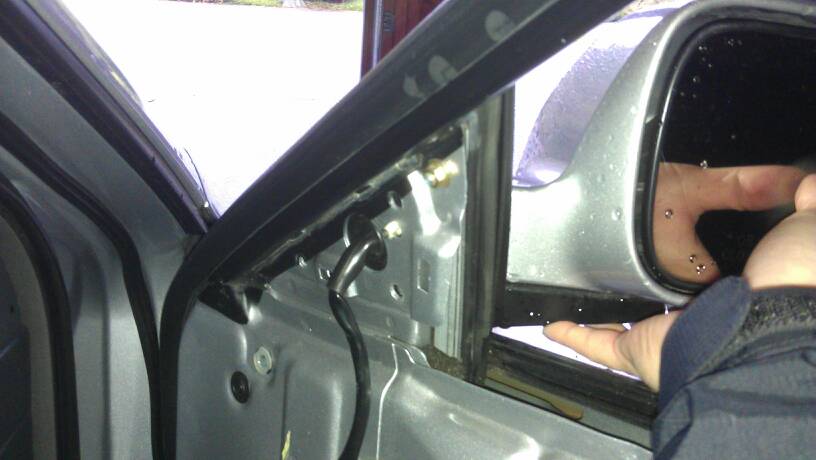
14. Remove 3 bolts by the pillar. (Leave the top 4th one bolted.)
↓
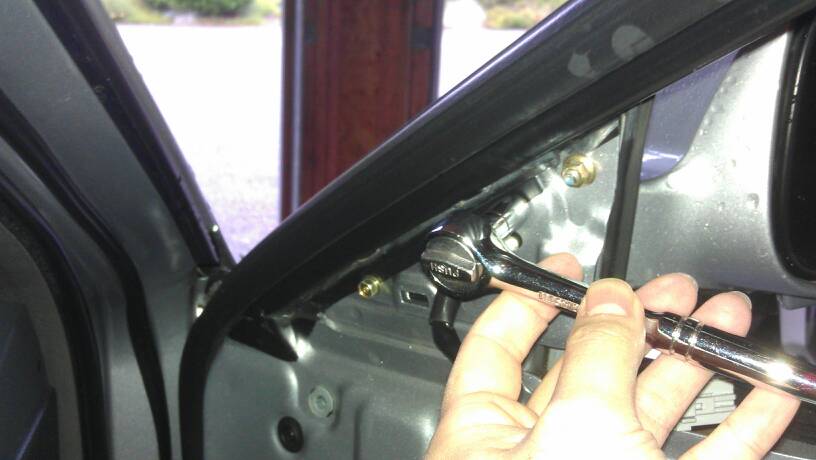
You see that the mirror is only held by the plastic anchor in the middle of the pillar, which is located next to the cord going through the pillar.
↓
15. While holding the mirror, pinch the anchor and let the piece outside the pillar.
↓
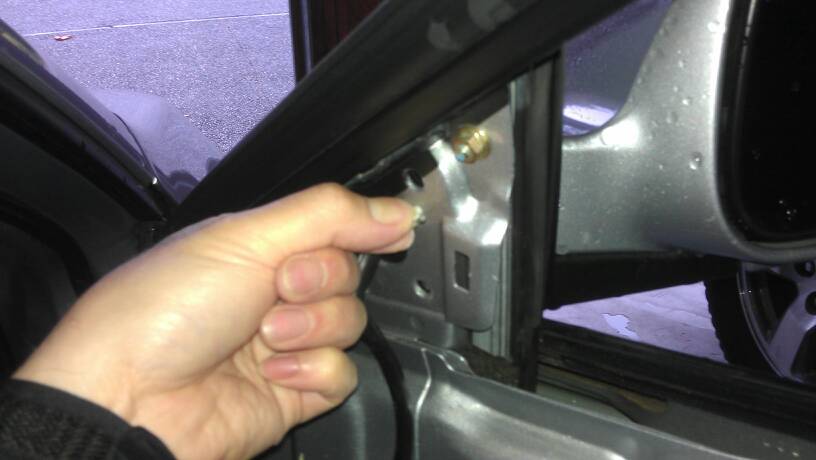
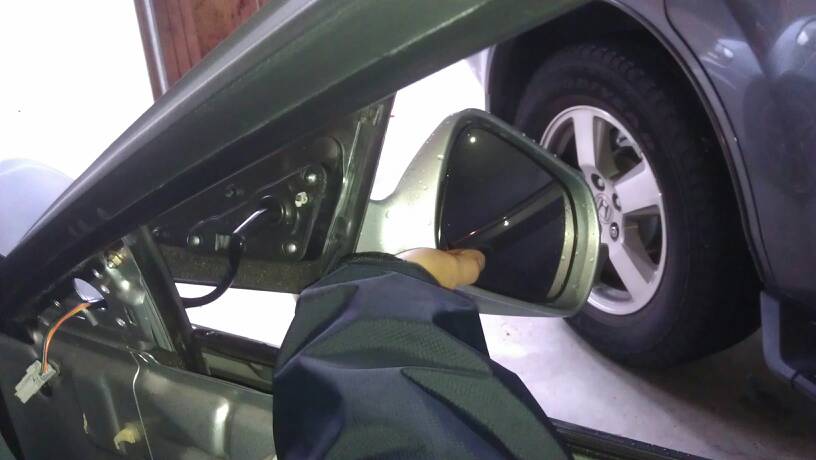
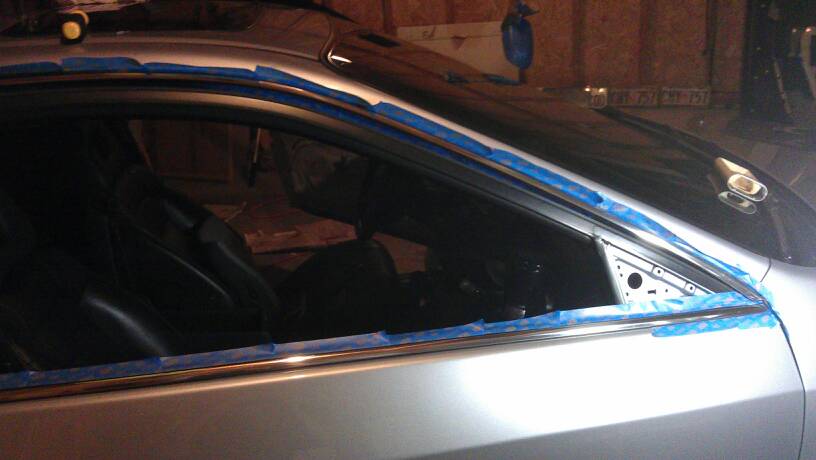
16. Now, the side mirror can be fully removed from pillar.
↓
17. One of the most important steps: Clean up the chrome surface with mild soap water, and wipe it off completely. Make sure that it is free of dirts, dusts, stains, or anything.
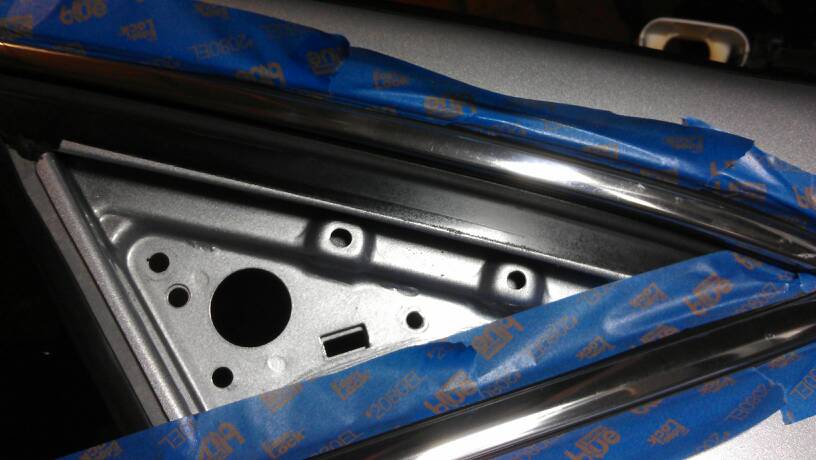
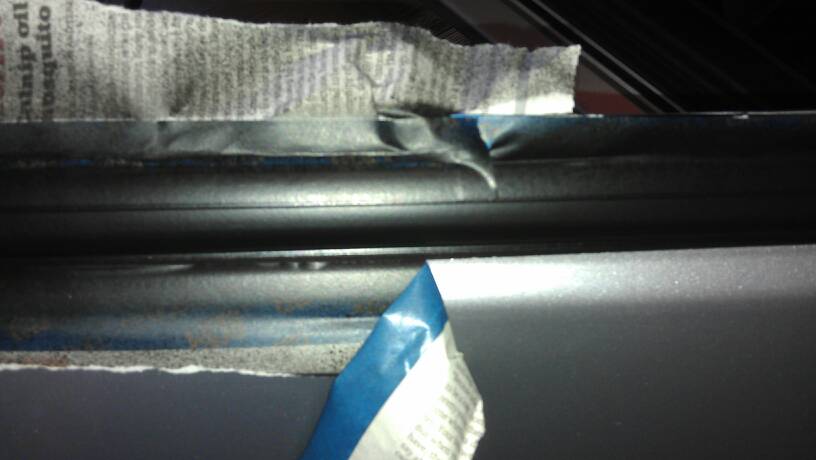
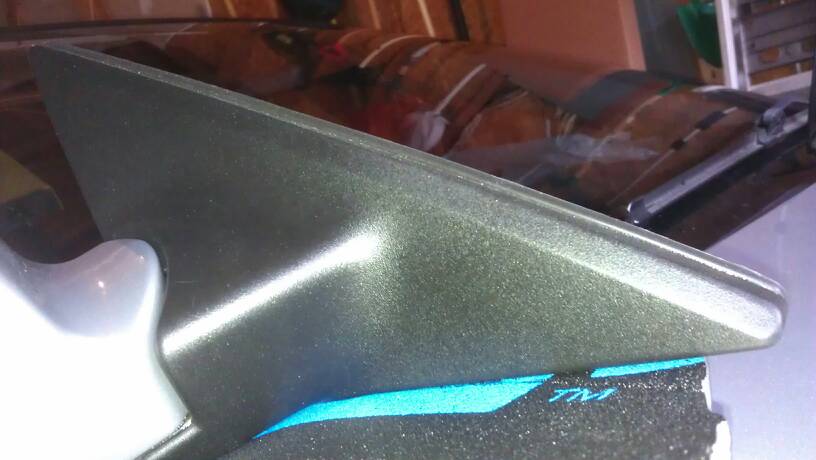
18. Mask out the chrome trimmings. THIS IS THE MOST IMPORTANT STEP IN THIS PROJECT. Unlike masking a surface for a regular spray paint, when it comes to spray Plasti-Dip, it is very important that you LEAVE A NICE EXTRA GAP from the desired area. In another words, LEAVING NICE MARGINS. Our chrome trimminngs are outlined with black rubber channel. My advise is to even further tape away from the black rubber channel area. Masking on the body panel surface is ideal. The reason of doing this is, if you don't leave enough margins, you will spend hrs and hrs of pealing off the Plasti-Dip stuck in the black rubber part with toothpicks and tweezers. More or less, there is going to be a big chance you might end up peeling it off the desired portion as well. I know this because I masked from the rubber channel (not enough margins), and it took forever to finalize my job done. Here is the close up of my masking job.
↓
↑
Ideally, you will want to leave the margins to the point where you can see the body color between your masking tape and the trimming. Trust me on this. I spent nearly 2 hours of pealing off the plasti-dipped in the rubber channel. If you follow my suggestion, you will only need less than half an hour to finalize your job in the end.
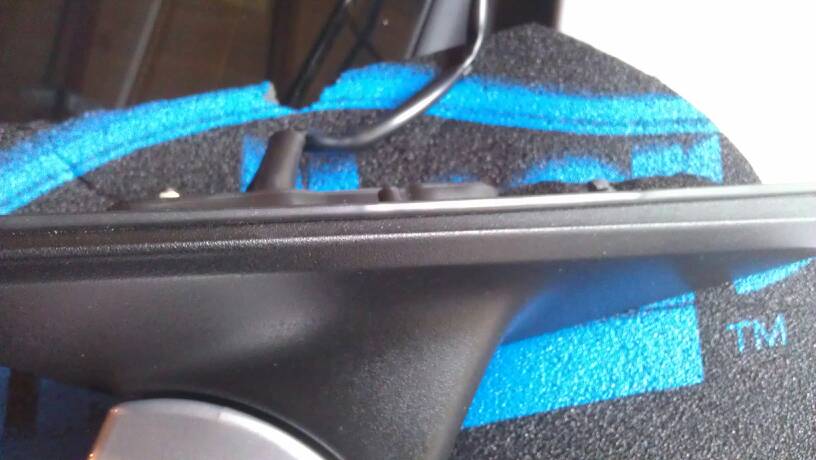
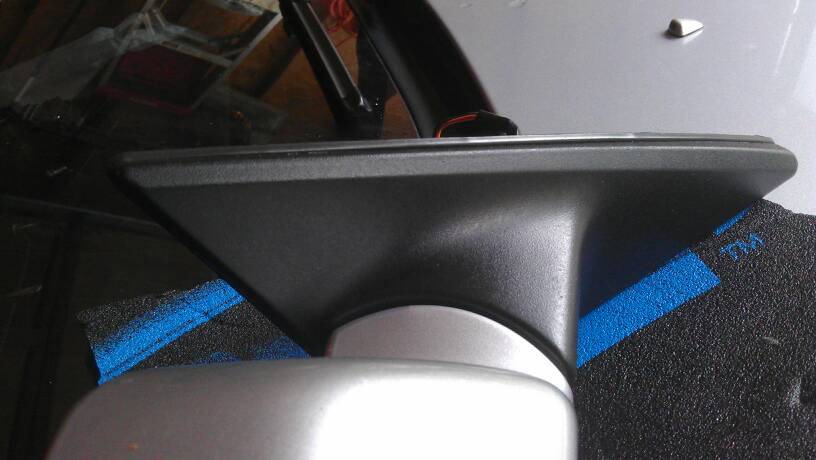
19. Once you are done with masking, you are ready to spray the Plasti-Dip. I'd say minimum number of coating is 5, but it wouldn't hurt to go more than 5. 1st coating needs to be very light. Make sure you wait at least 30 minutes between the coatings, or dry enough to touch. Avoid direct sunlight. Avoid spraying under old weather. Just follow the instructions on the label and you'll be fine. Here is how I was spraying. I decided to apply on the base of the side mirror as well.
↓
20. You don't see me doing in any of my pictures, but once you're done with spraying and drying, slide a razor blade into the whole outline of the chrome (plasti-dipped) area. THIS STEP IS THE ONE YOU WILL NEED THE MOST OF YOUR CONCENTRATION. It is because you need to be extra careful not to cut the plasti-dipped chrome trim, or the black rubber channel. You need to place your blade between the trim and the rubber channel. When you are ready to move your blade, take a deep breath and straighten the trajectory of your blade.
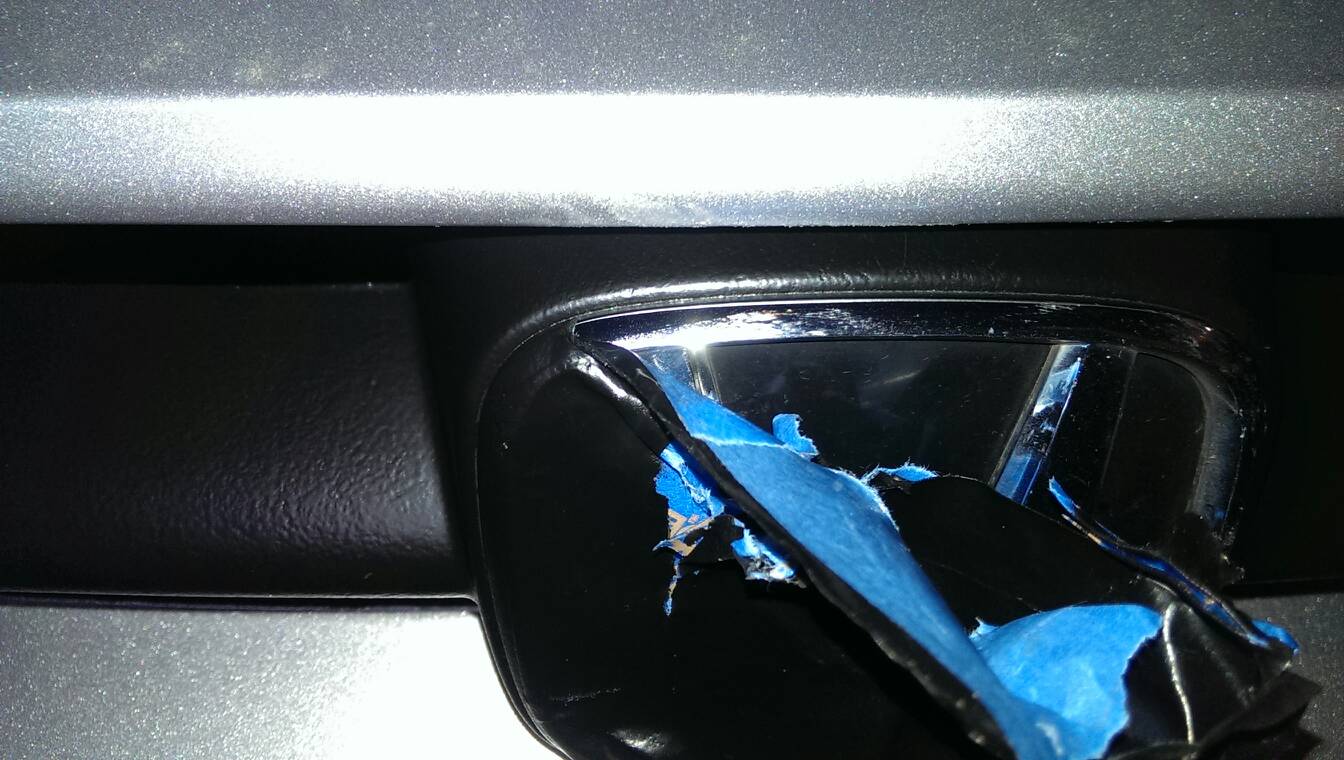
21. Once you finished incising the hole trimmings, it's time to peal off the masking tape. When you peal off the masking tape, you will see that there will be extra area of plasti-dipped area remained outside of the trimmings due to the margins you left in the masking step. In this picture, you can only see a tiny bit of my marginal portion of plasti-dip (at the bottom of my lower trimming for an example), because my margins were not wide enough...
↓
22. The final step is to carefully peel off those marginal sections. When peeling those off, make sure that the sections are peeling off smoothly from the insiced area. THIS IS WHY THE MORE YOU LEAVE THOSE PORTIONS, WHEN MASKING OFF THE SURFACE, THE EASIER TO PEEL OFF THE MARGINAL SECTION IN THE END.
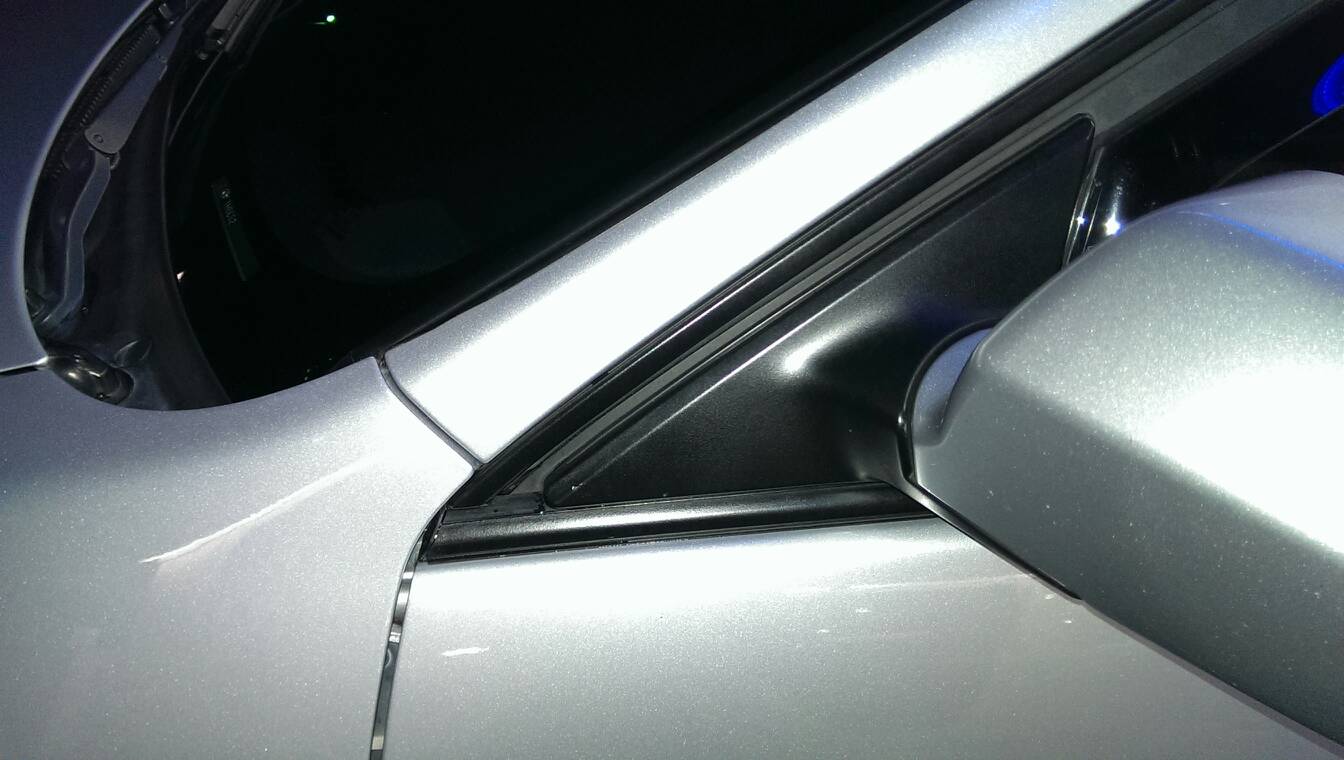
Here are the results.
↓
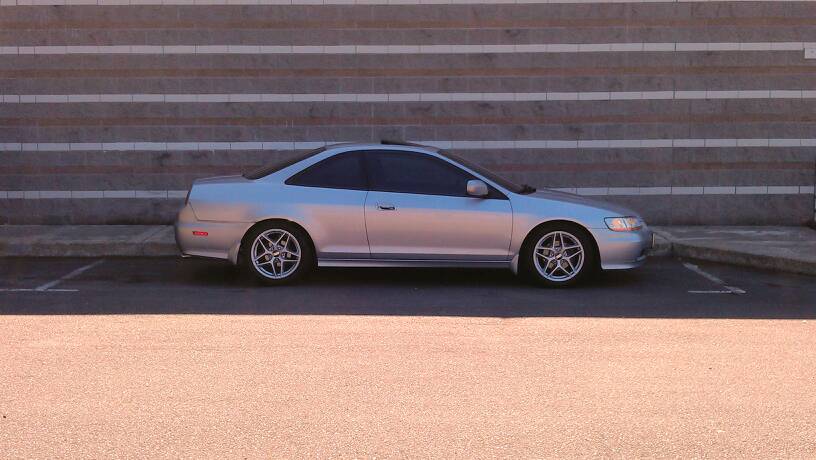
Results after 3 months withstanding: heat, rain, dirt, hand carwash, and drive-through wash. (snow=yet to be determined.)
↓

Results after 3 years. Still holding up very strong!
↓
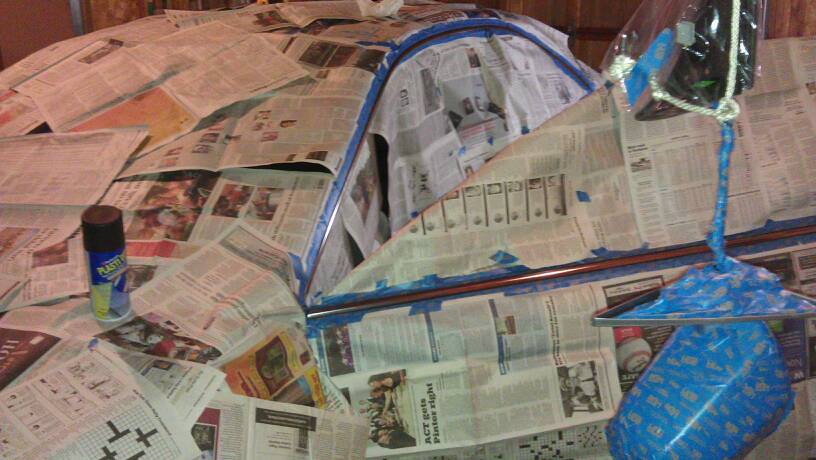
Since I couldn't show you the actual process of spraying, this would help you see how it gets done.
Clean out the surface w/ mild soap water.
Mask off the desired section with "good margin".
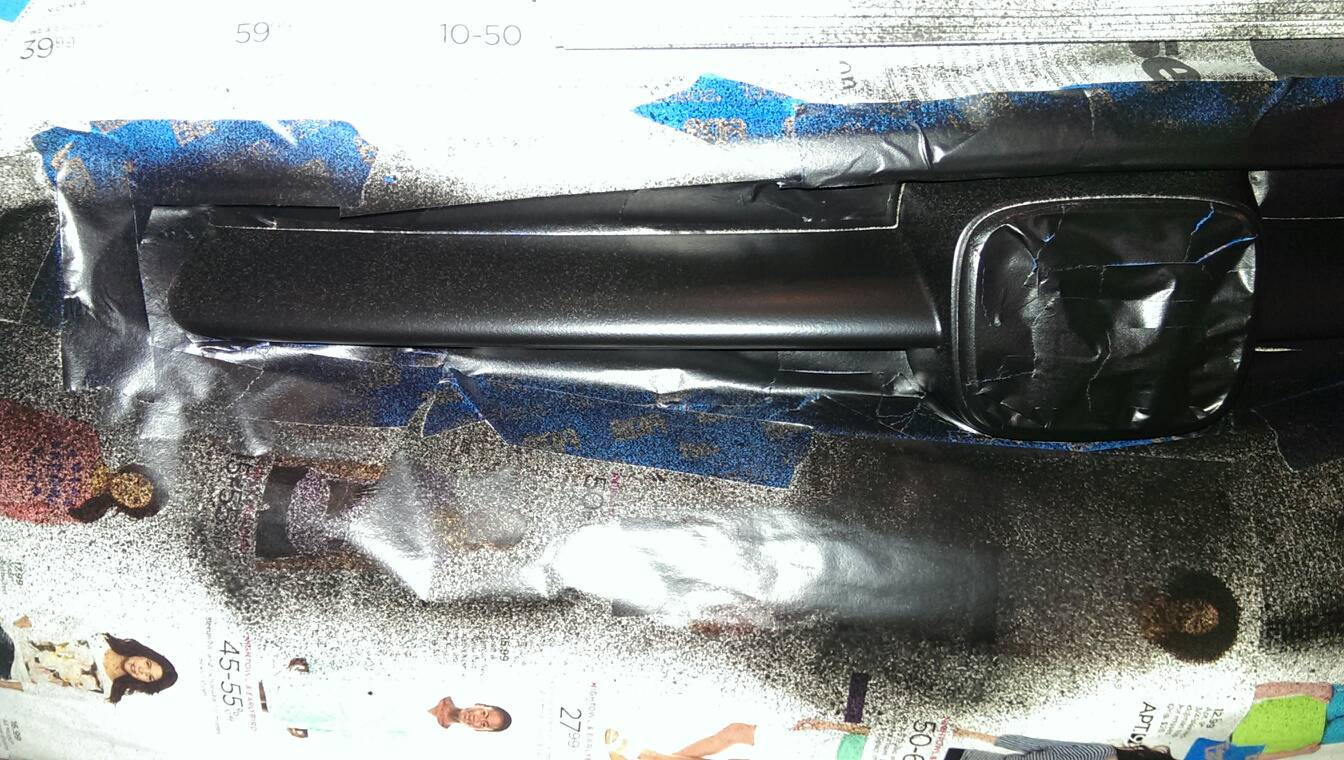
Slide a news paper 'n taped it behind the grille.
You don't have to mask it entirely, but I just did it for the hell of it. Lol
・IMPORTANT・ Make sure you wipe off the spray nozzle w/ a towel or tissue paper, if you see the stuff on the nozzle while spraying. Otherwise, the target will be spotty, and it won't be evenly sprayed. And, wipe it off, after each of the coating.
First coating. (Very lightly.) 30 min drying time.
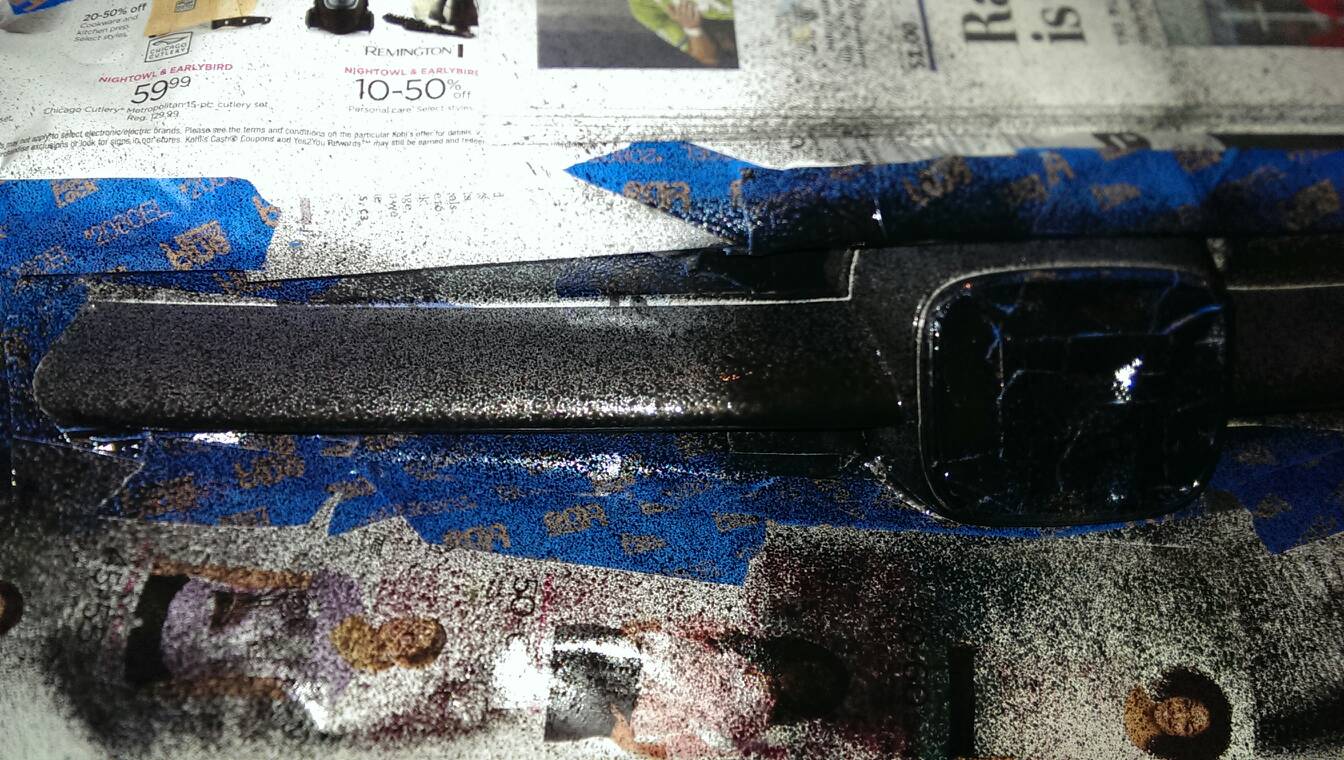
Second coating. (Semi-light coat.) 30 min drying time.
Third coating. (Thick coat.) 40 min drying time.

Fourth coating. (Thick coat.) 40 min drying time.

Fifth coating. (Heavy coat.) 50 min drying time.
Incising it carefully.

Peal off the tape VERY x2 carefully...
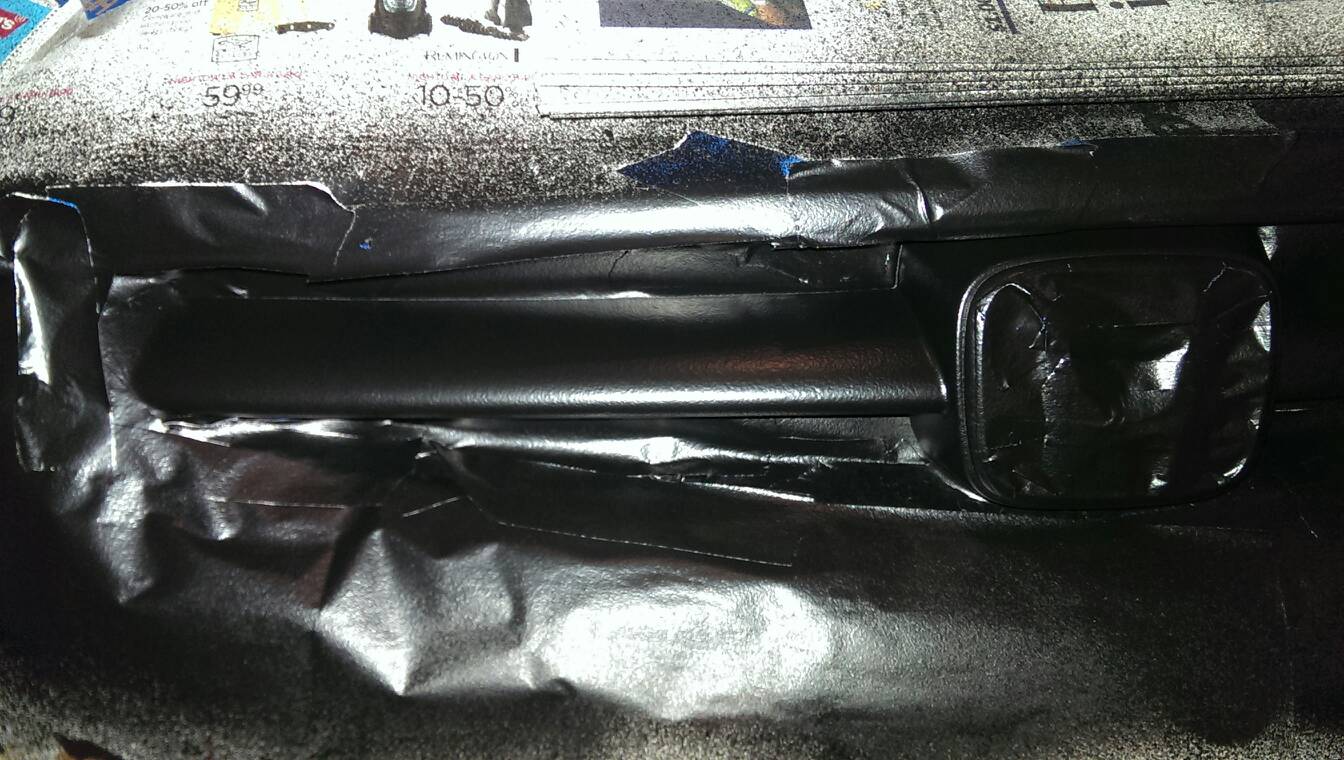
Done!
A little close-up.
Final outcome:

Hopefully it will hold up for a long time, like my side window trims. It has the thickest coatings I could possibly applied, so we'll see how it can withstand from rock chips. Will update w/ pics as the time goes by.
Thanks for looking! Hope this helps you get the job done!")
And, if it's cool, a rep point is much appreciated.
・DISCLAIMER・
Please perform at your own risk. Failure of accomplishment, injuries, or damages to your vehicle cannot be blamed. This is only to help you get the job done as cleanly & neatly as possible based on my experience.
・IMPORTANT・
The key point is to remove the side mirrors in order to apply the plasti-dip on the trimmings efficiently. I hear that some of you preffer your mirrors mounted when doing this project, but I hightly recommend you remove the mirrors, because it is going to be very difficult to obtain the clean result, if you work with the mirrors mounted.
Things you'll need for this DIY:
・Plasti-dip spray can (1 can)
・Masking tape
・Scissors
・Razor Blade
・Straight slot screwdriver
・Cross slot screwdriver
・Clean cloth towel w/ mild soap water
・Newspaper
1. Roll down the window completely.
2. Remove the cover behind the mirror. Let's be brave. It'll pry off.
↓
3. Remove the screw bolted by the door handle piece.
↓
4. Remove the screw bolted in the pocket of the arm rest.
↓
5. Push 'n slide the door handle piece to the side way until it becomes loose.
↓
6. Detach the plastic pin that's holding the metal rod. Using a flat-head screw driver helps, as it's shown.
↓
7. Disconnect the power door lock connector. (Pic shows that I haven't done it yet, but you should do the step 6 before this.)
↓
8. Pry off the door trim from the top portion. (The cap piece held by my thumb will detach itself after you pull it. Be brave. It'll pry off.)
↓
9. Pry off the bottom door trim. (Make sure you are NOT holding the rubber packing together when you pry it off.)
↓
10. The whole door lining is fully detached, and it's hanging by the window rail. Disconnect the courtesy light socket.
↓
11. Carefully lift up the door lining piece from the window rail.
↓
12. Hold the door lining piece with your thigh, and disconnect the power window connector, if equipped. Now, the whole peace can be fully removed from the door panel.
↓
13. Carefully peel off the vinyl cover, and disconnect the power mirror conector. (Note: there is a zip-tie piece that is mounted by the cord. I was lazy, so I cut off the tie.)
↓
14. Remove 3 bolts by the pillar. (Leave the top 4th one bolted.)
↓
You see that the mirror is only held by the plastic anchor in the middle of the pillar, which is located next to the cord going through the pillar.
↓
15. While holding the mirror, pinch the anchor and let the piece outside the pillar.
↓
16. Now, the side mirror can be fully removed from pillar.
↓
17. One of the most important steps: Clean up the chrome surface with mild soap water, and wipe it off completely. Make sure that it is free of dirts, dusts, stains, or anything.
18. Mask out the chrome trimmings. THIS IS THE MOST IMPORTANT STEP IN THIS PROJECT. Unlike masking a surface for a regular spray paint, when it comes to spray Plasti-Dip, it is very important that you LEAVE A NICE EXTRA GAP from the desired area. In another words, LEAVING NICE MARGINS. Our chrome trimminngs are outlined with black rubber channel. My advise is to even further tape away from the black rubber channel area. Masking on the body panel surface is ideal. The reason of doing this is, if you don't leave enough margins, you will spend hrs and hrs of pealing off the Plasti-Dip stuck in the black rubber part with toothpicks and tweezers. More or less, there is going to be a big chance you might end up peeling it off the desired portion as well. I know this because I masked from the rubber channel (not enough margins), and it took forever to finalize my job done. Here is the close up of my masking job.
↓
↑
Ideally, you will want to leave the margins to the point where you can see the body color between your masking tape and the trimming. Trust me on this. I spent nearly 2 hours of pealing off the plasti-dipped in the rubber channel. If you follow my suggestion, you will only need less than half an hour to finalize your job in the end.
19. Once you are done with masking, you are ready to spray the Plasti-Dip. I'd say minimum number of coating is 5, but it wouldn't hurt to go more than 5. 1st coating needs to be very light. Make sure you wait at least 30 minutes between the coatings, or dry enough to touch. Avoid direct sunlight. Avoid spraying under old weather. Just follow the instructions on the label and you'll be fine. Here is how I was spraying. I decided to apply on the base of the side mirror as well.
↓
20. You don't see me doing in any of my pictures, but once you're done with spraying and drying, slide a razor blade into the whole outline of the chrome (plasti-dipped) area. THIS STEP IS THE ONE YOU WILL NEED THE MOST OF YOUR CONCENTRATION. It is because you need to be extra careful not to cut the plasti-dipped chrome trim, or the black rubber channel. You need to place your blade between the trim and the rubber channel. When you are ready to move your blade, take a deep breath and straighten the trajectory of your blade.
21. Once you finished incising the hole trimmings, it's time to peal off the masking tape. When you peal off the masking tape, you will see that there will be extra area of plasti-dipped area remained outside of the trimmings due to the margins you left in the masking step. In this picture, you can only see a tiny bit of my marginal portion of plasti-dip (at the bottom of my lower trimming for an example), because my margins were not wide enough...
↓
22. The final step is to carefully peel off those marginal sections. When peeling those off, make sure that the sections are peeling off smoothly from the insiced area. THIS IS WHY THE MORE YOU LEAVE THOSE PORTIONS, WHEN MASKING OFF THE SURFACE, THE EASIER TO PEEL OFF THE MARGINAL SECTION IN THE END.
Here are the results.
↓
Results after 3 months withstanding: heat, rain, dirt, hand carwash, and drive-through wash. (snow=yet to be determined.)
↓
Results after 3 years. Still holding up very strong!
↓
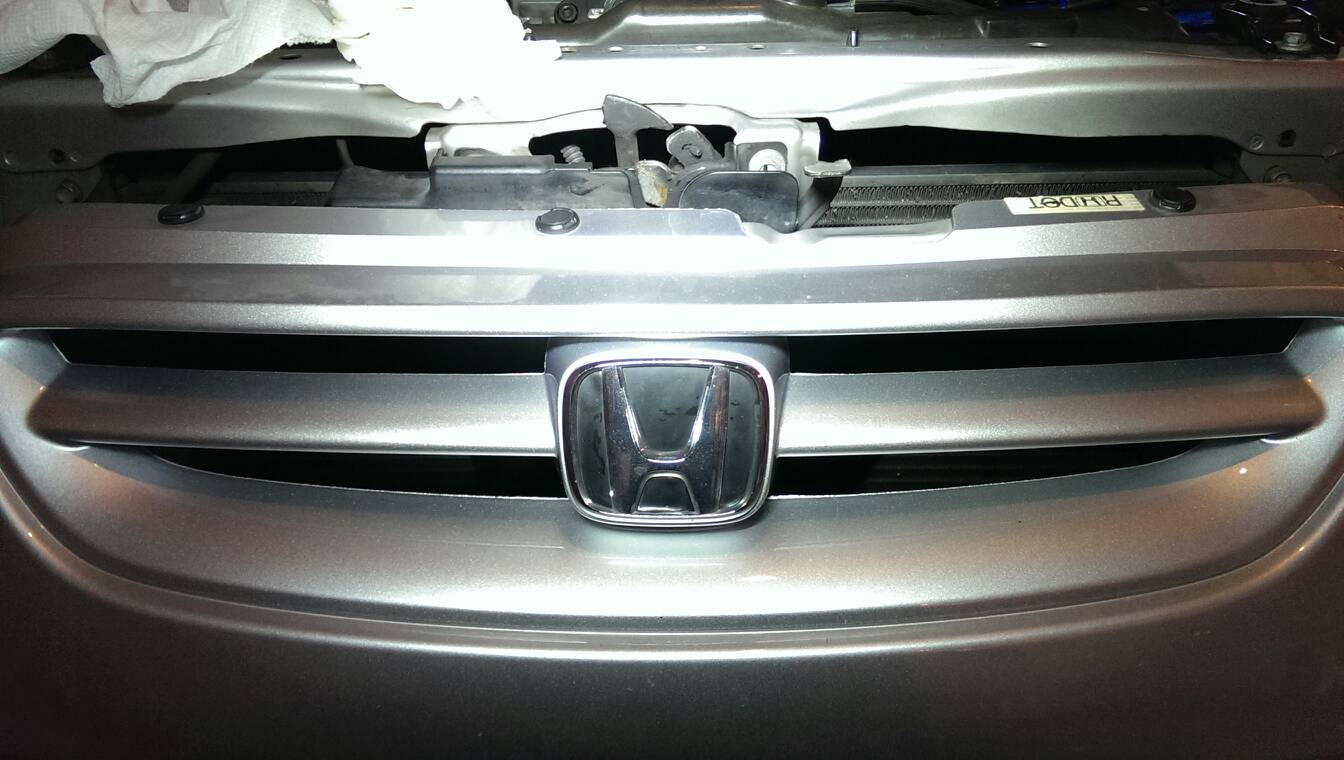
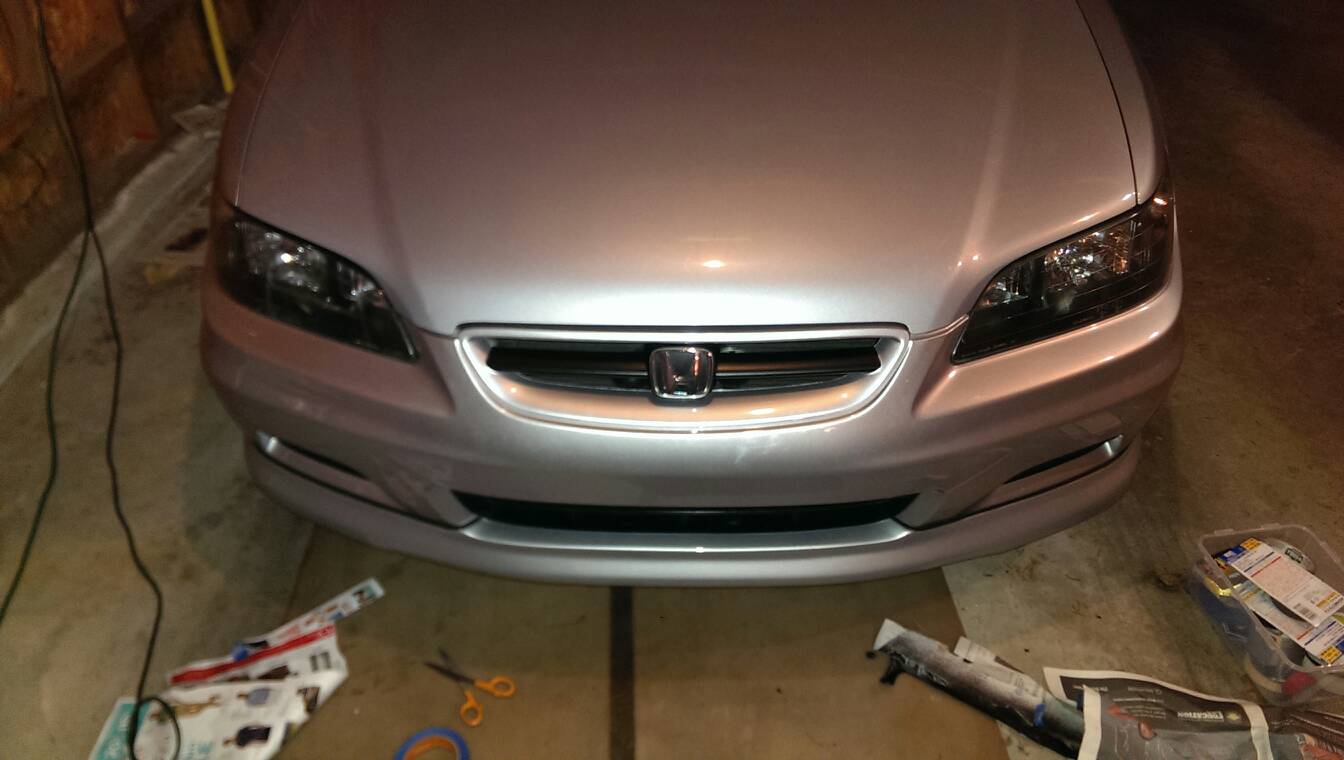
---Dipping Additional Parts: Front Upper Grille Center Bar ('01-'02 Model)---
Since I couldn't show you the actual process of spraying, this would help you see how it gets done.
Clean out the surface w/ mild soap water.
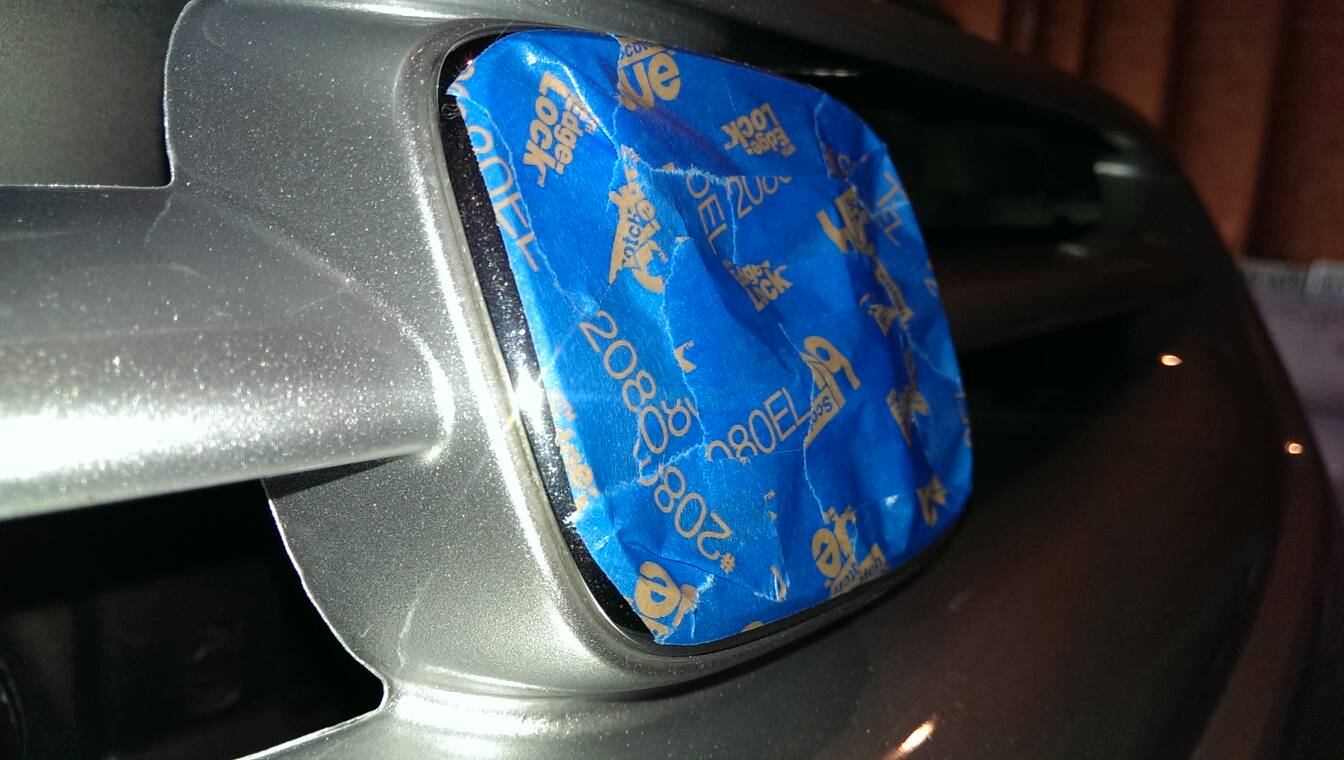
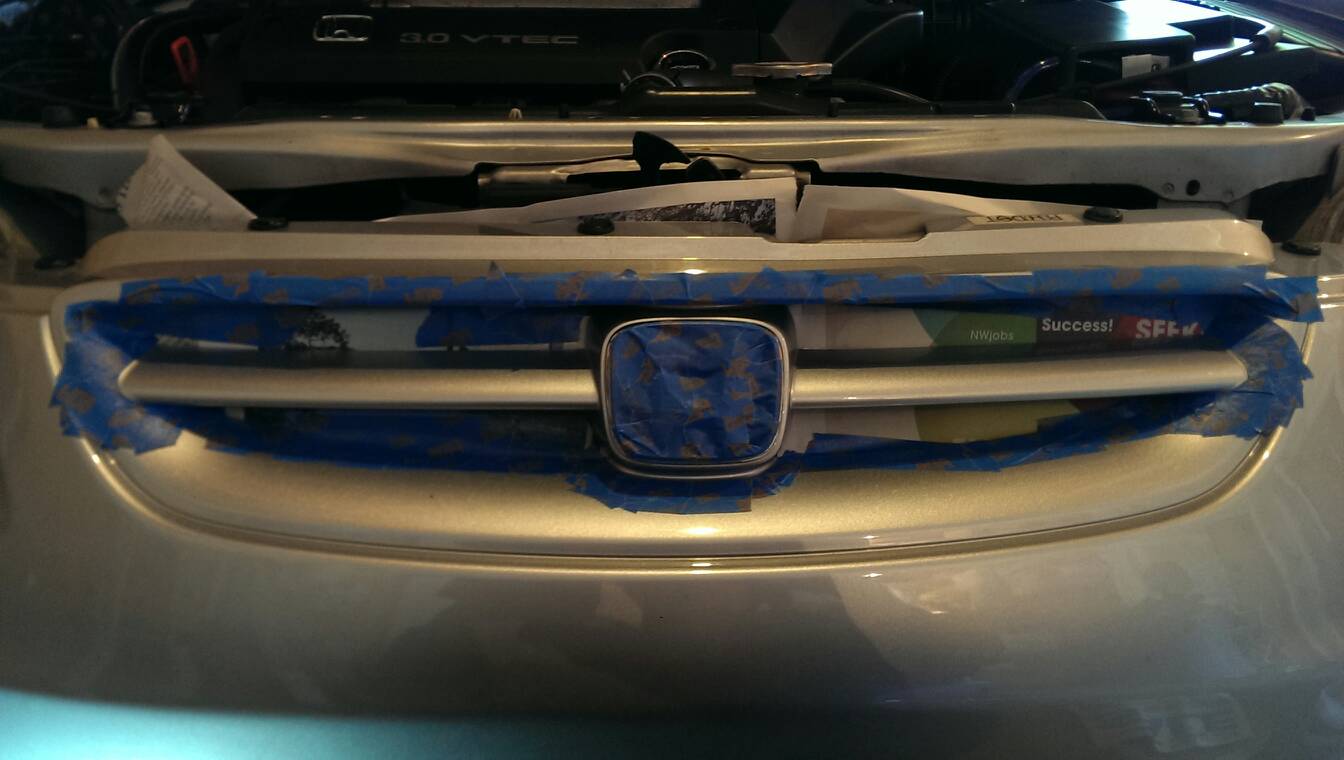
Mask off the desired section with "good margin".
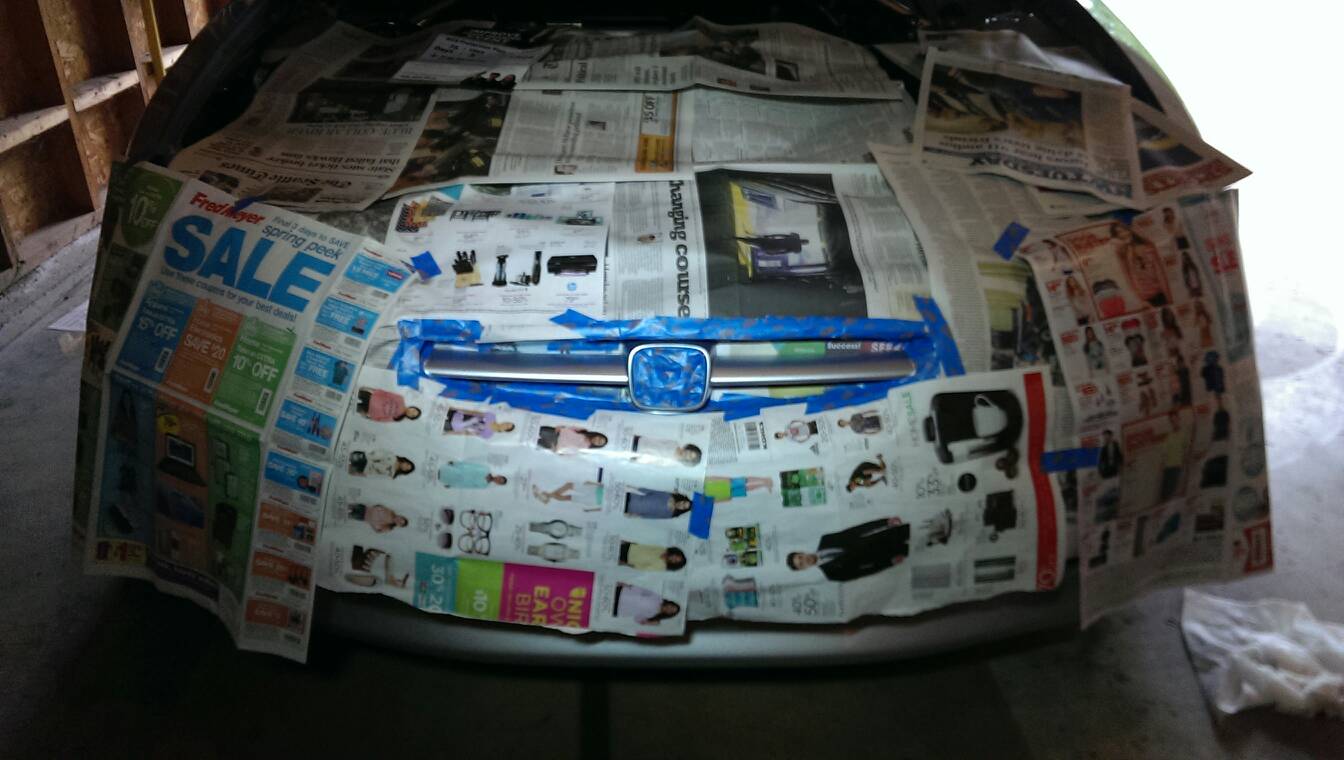
Slide a news paper 'n taped it behind the grille.
You don't have to mask it entirely, but I just did it for the hell of it. Lol
・IMPORTANT・ Make sure you wipe off the spray nozzle w/ a towel or tissue paper, if you see the stuff on the nozzle while spraying. Otherwise, the target will be spotty, and it won't be evenly sprayed. And, wipe it off, after each of the coating.
First coating. (Very lightly.) 30 min drying time.
Second coating. (Semi-light coat.) 30 min drying time.
Third coating. (Thick coat.) 40 min drying time.
Fourth coating. (Thick coat.) 40 min drying time.
Fifth coating. (Heavy coat.) 50 min drying time.
Incising it carefully.
Peal off the tape VERY x2 carefully...
Done!
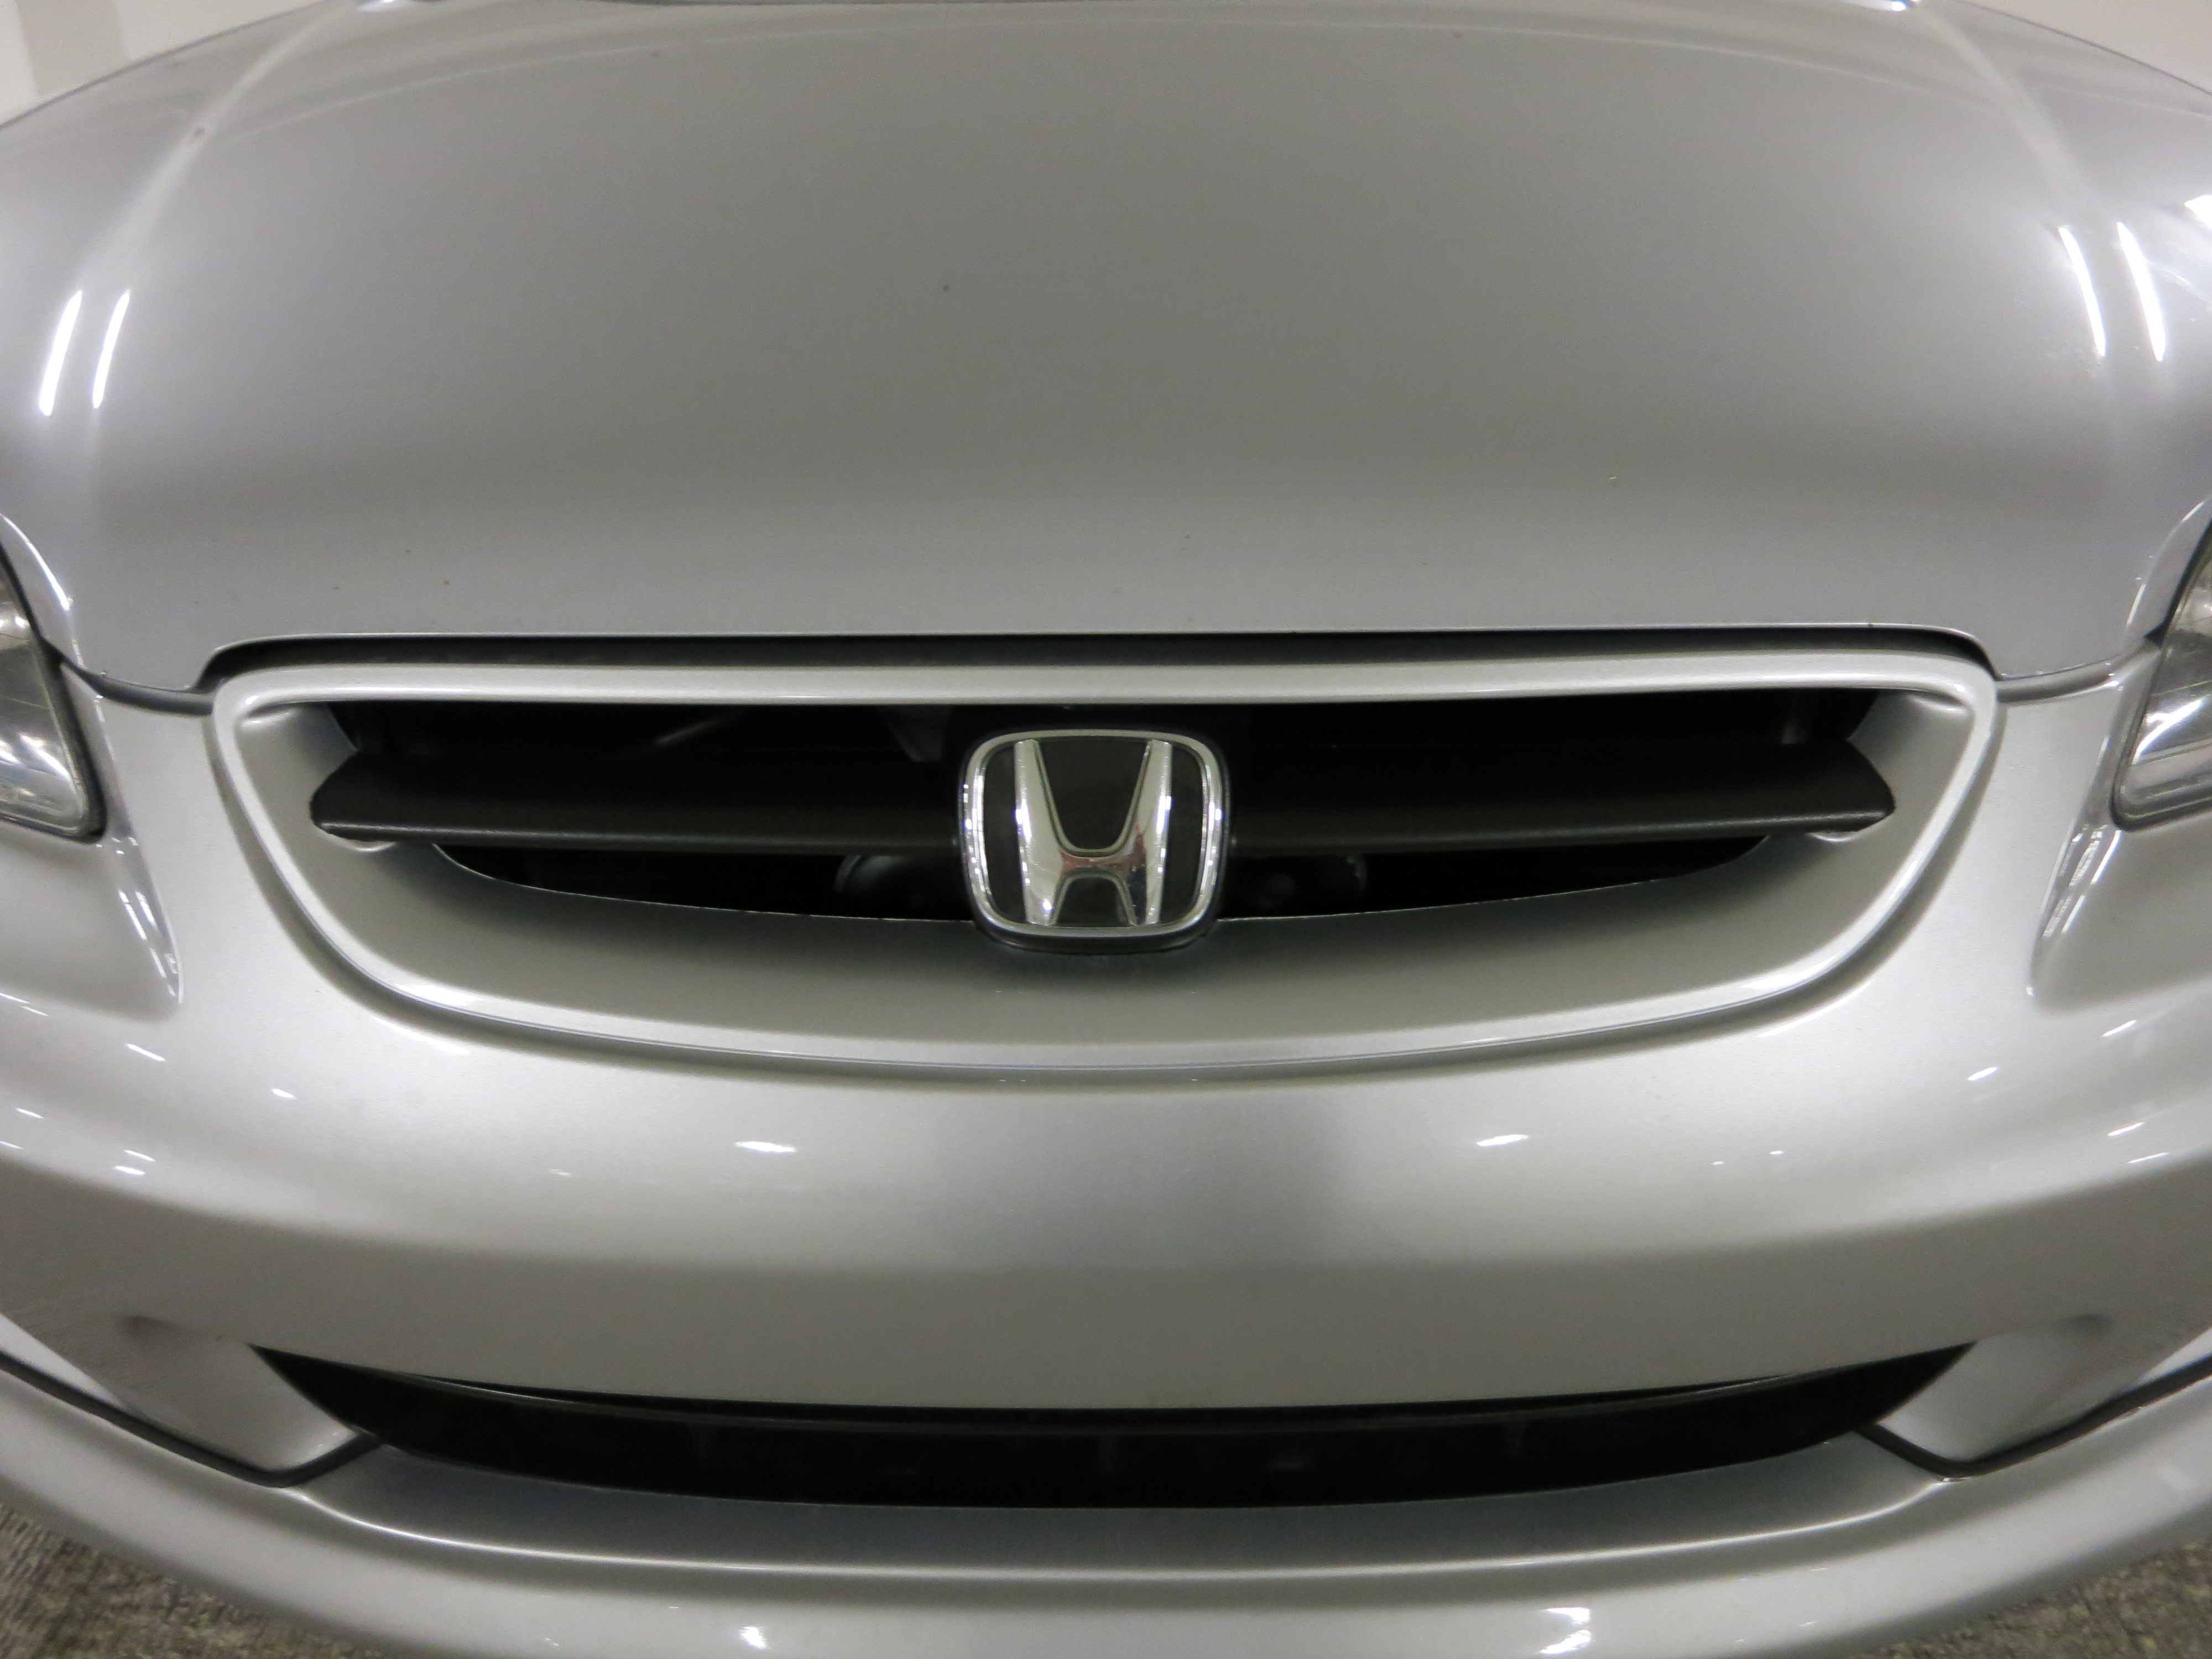
A little close-up.
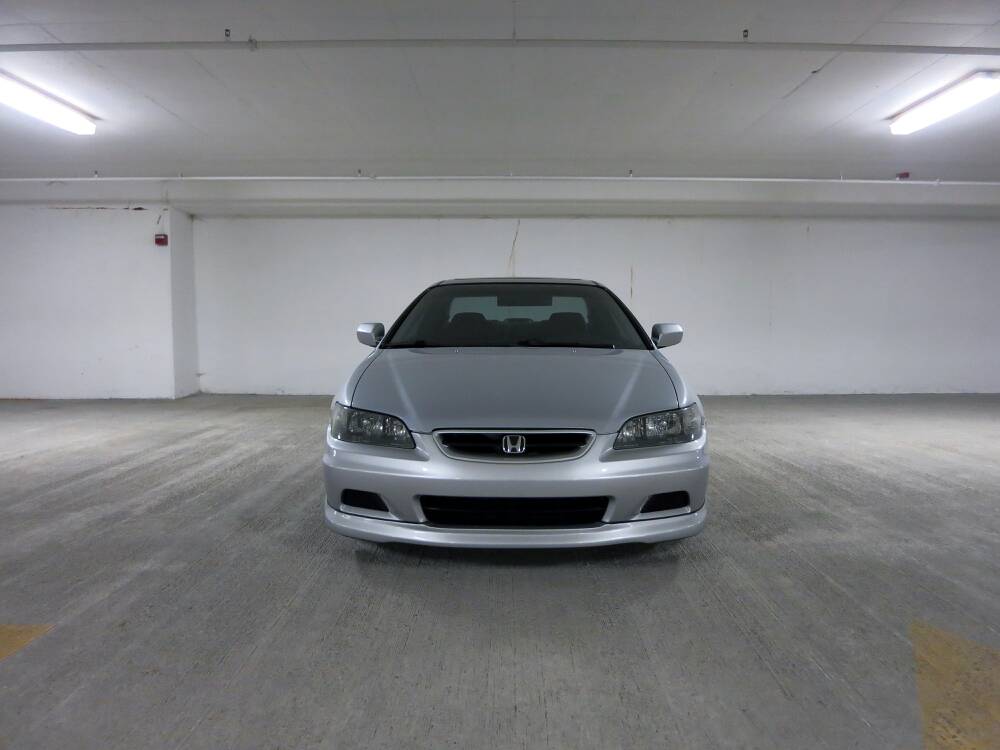
Final outcome:
Hopefully it will hold up for a long time, like my side window trims. It has the thickest coatings I could possibly applied, so we'll see how it can withstand from rock chips. Will update w/ pics as the time goes by.
Thanks for looking! Hope this helps you get the job done!
And, if it's cool, a rep point is much appreciated.
Last edited: