


Alpha_Onion
Well-Known Member
DISCLAIMER: I do not recommend attempting this DIY unless you have at least a basic knowledge of wiring and soldering. I am not responsible for any damage to you or your vehicle.
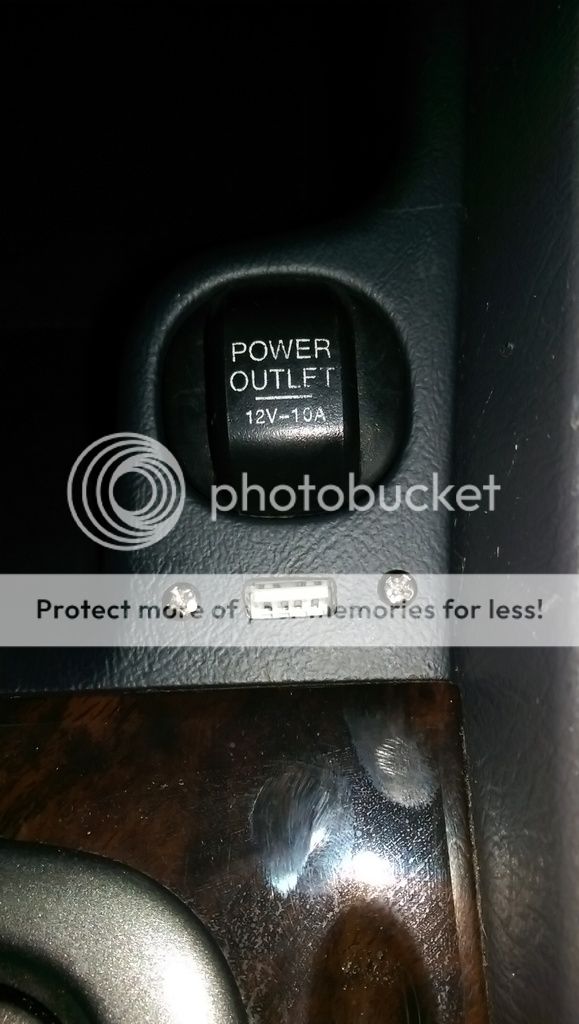
Listen up, class. Today we’re going to learn how to install a USB phone charging port in our 6th Gen Accords. It goes right below the 12V socket. This works on both sedans and coupes, and can be applied to almost any other car for that matter. Here are the tools you’ll need:
Panel-mount USB port (female)
12-volt car charger
Dremel with cutting wheel attachment
Soldering Iron and solder
Wire
Wire cutters/strippers
Small needle-nose pliers
Drill
Small metal file
Sharpie
Medium Phillips screwdriver
Dull flathead
Hot glue gun
Step 1: Disassembly
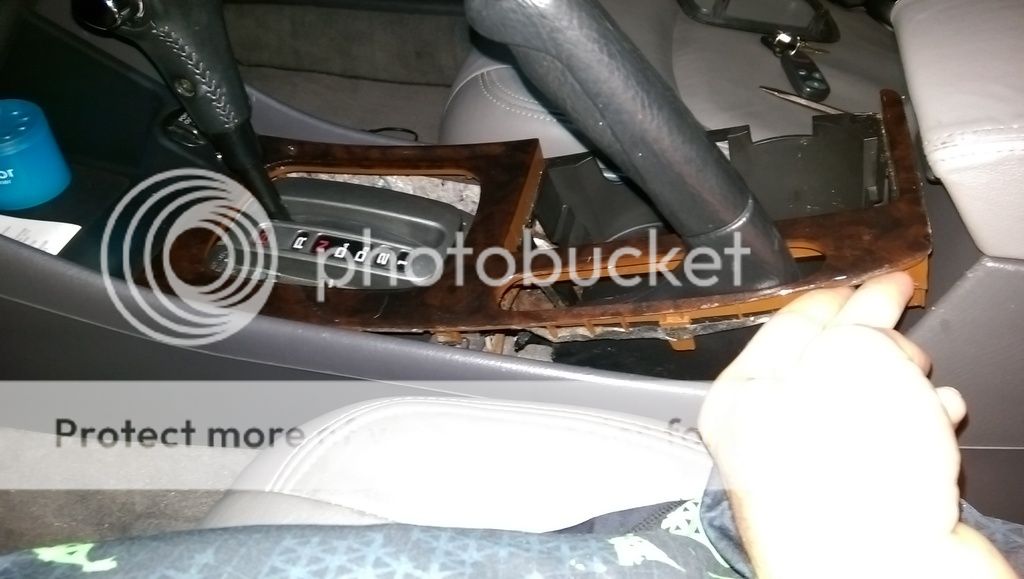
Start by disconnecting the battery and engaging the emergency brake. Open your cupholder and pull upwards on it from both sides, it should pop right out. Then pull upwards from both sides on the shifter trim ring, get that outta here. Now pull upwards on the entire console trim, starting from the back and working your way forward; this is held in by clips as well. Feed it over the brake handle and shifter, toss it:
Remove the plate between the radio bezel and the bottom tray. Use a flathead to pry it outwards towards you on all four corners:

Now remove the two screws holding the bottom tray in, followed by the bottom tray itself, unplugging the 12V socket (you will have to put the car all the way in first gear to make room to get the tray out).
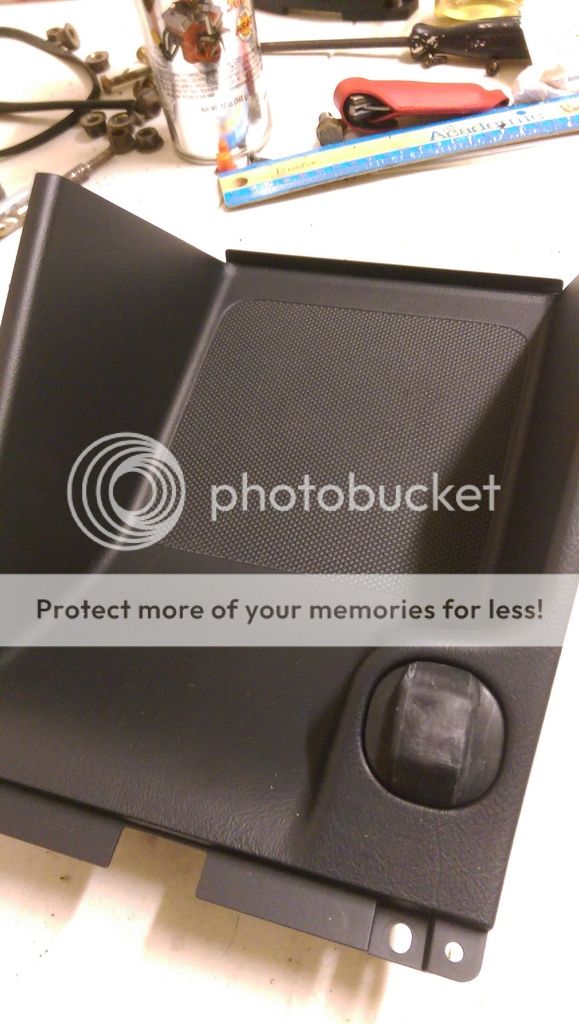
By now, you should be left with this:
Step 2: Mounting the port
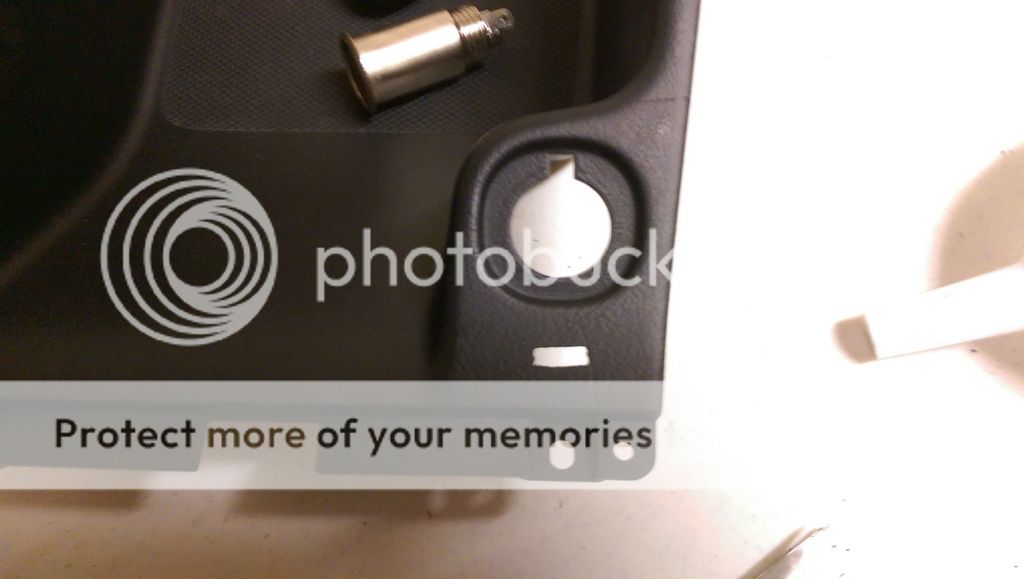
Remove the 12V socket by unscrewing the outer shell. On the backside of the tray, underneath the hole you just left (you dirty vandal), there’s a plastic vertical spine. Grind that down and grab a flash drive. Trace the outline of the USB plug onto the very center of this open space you’ve created. Then grab your drill and drill out three holes in the rectangle. Here’s how it should look so far:

Get aggressive with that drill bit and bore out the holes into the shape of that rectangle. Use your small metal file to shape it the rest of the way, going just a little bit at a time and trying to make the most perfect rectangle you can:
Keep going until you can fit your flash drive into the hole, and all edges of the hole fit snugly (Giggity):
Now you can actually mount the port. You can use any one you like, but the one I used is from Adafruit.com and cost me about $4 plus shipping:

Keep your flash drive through the hole and plug your port in on the other side. Use a small drill bit to drill through the screwholes, then bore those out with a larger bit that’s just barely big enough for the screws. I recommend a 5/64 followed by a 7/64. Secure your port to the tray, like so:
Now you need to strip the cable down. Cut it in half (you’ll have to cut more off when you solder it to the transformer), then strip off the outer sheathing. Cut away the metal on the outside, then snip the green and white wires. Leave nothing but the red and black wires, and do this all the way down to the base:
Step 3: Making the transformer
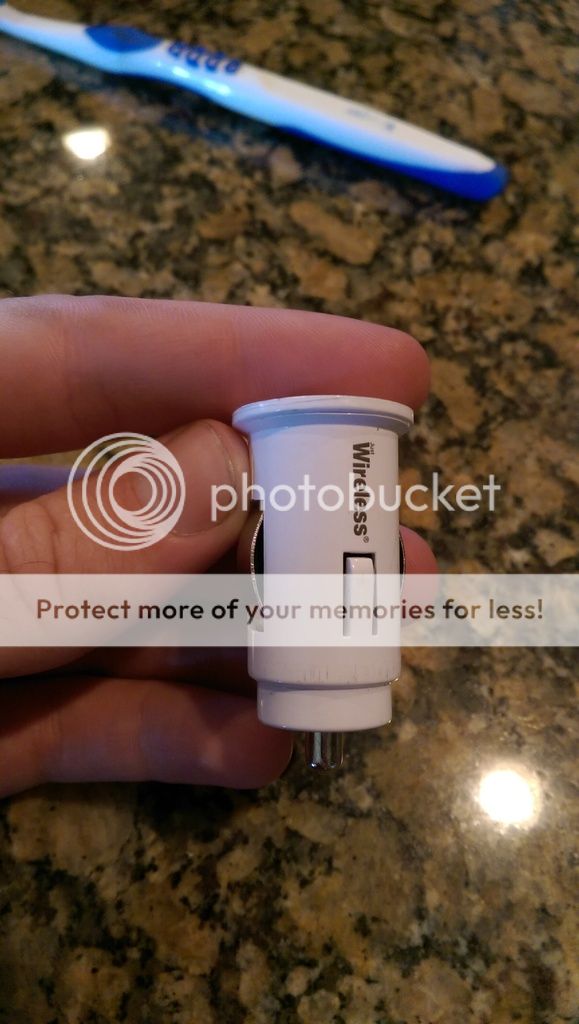
Since you're going to all the trouble to do this, you might as well use a genuine HTC, Samsung, Apple, or otherwise high-quality car charger for best results. Take your 12V car charger:
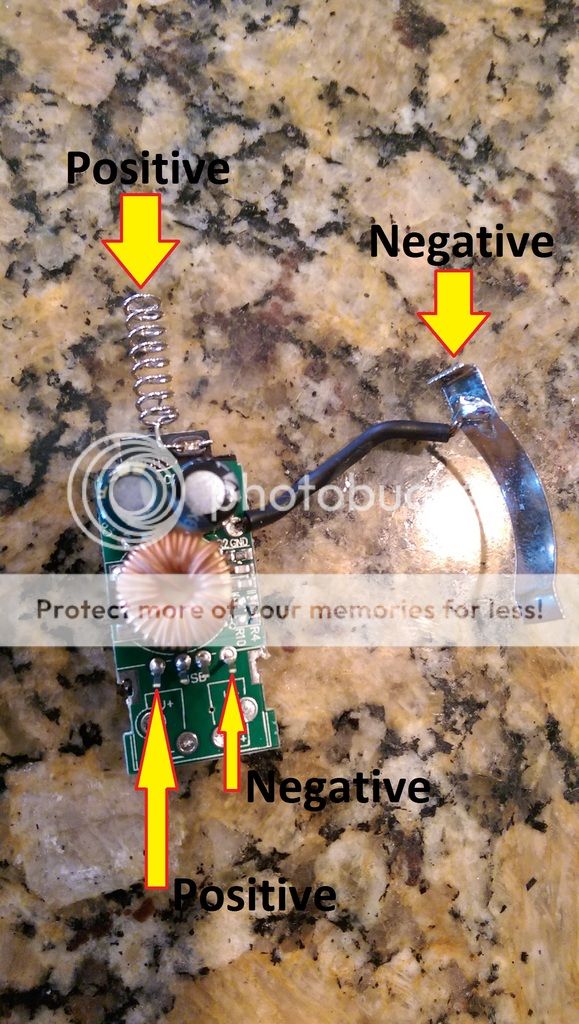
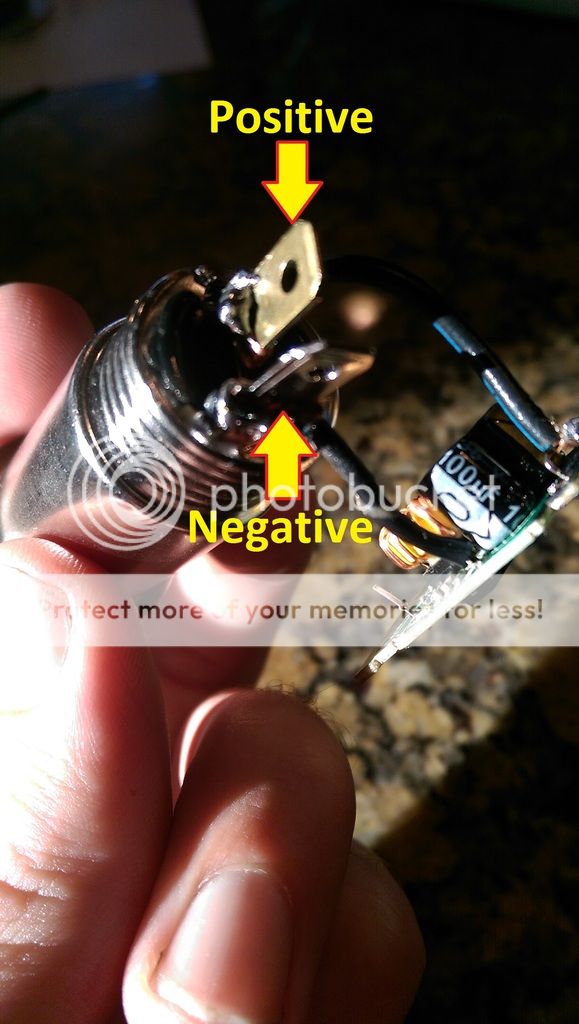
And pry off the outer shell and you’ll have the guts. This will differ greatly depending on what charger you use, but mine looked like this:
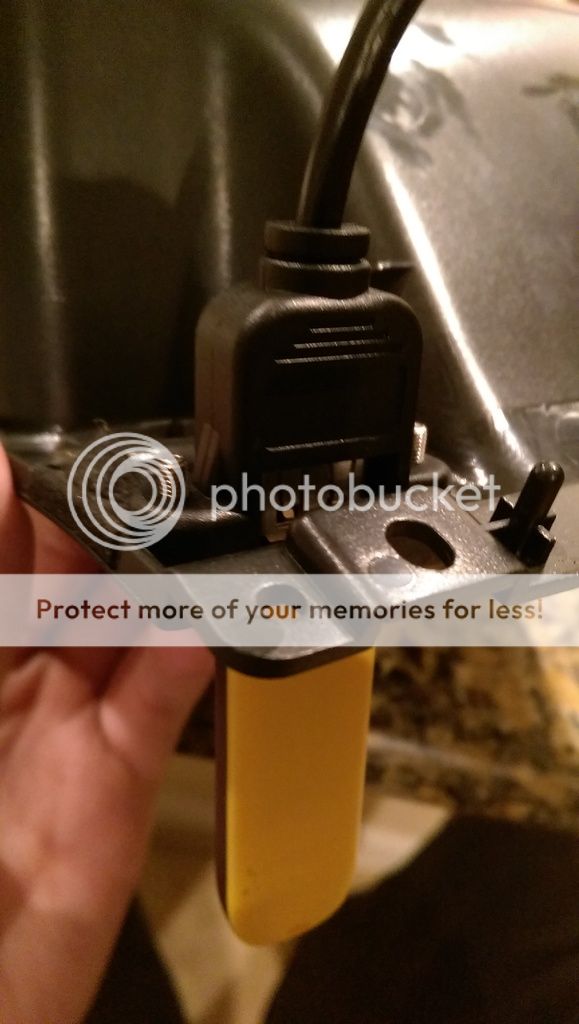
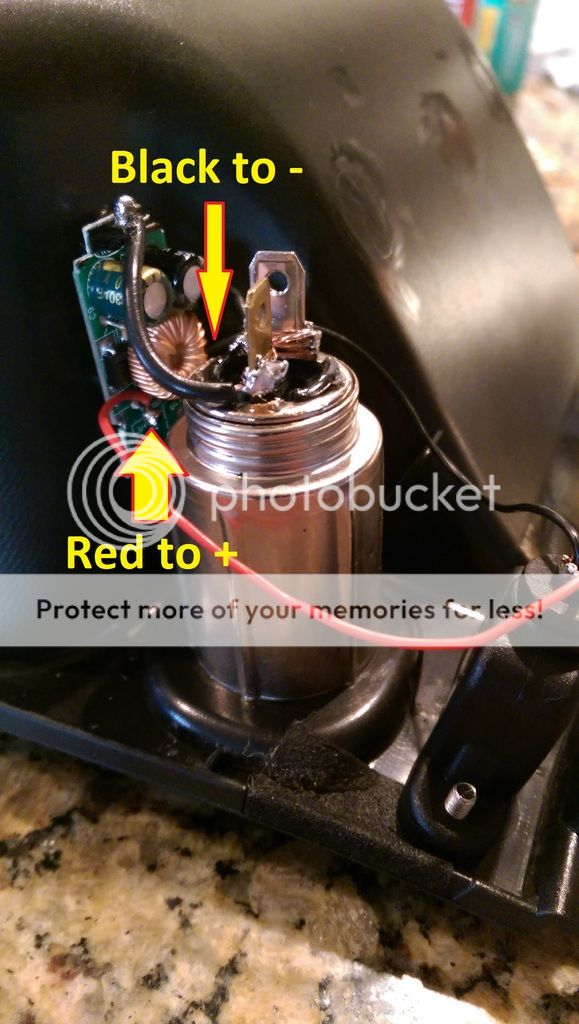
Wire the transformer to your 12V socket, positive to positive and negative to negative. You probably should reinstall the socket before doing this:
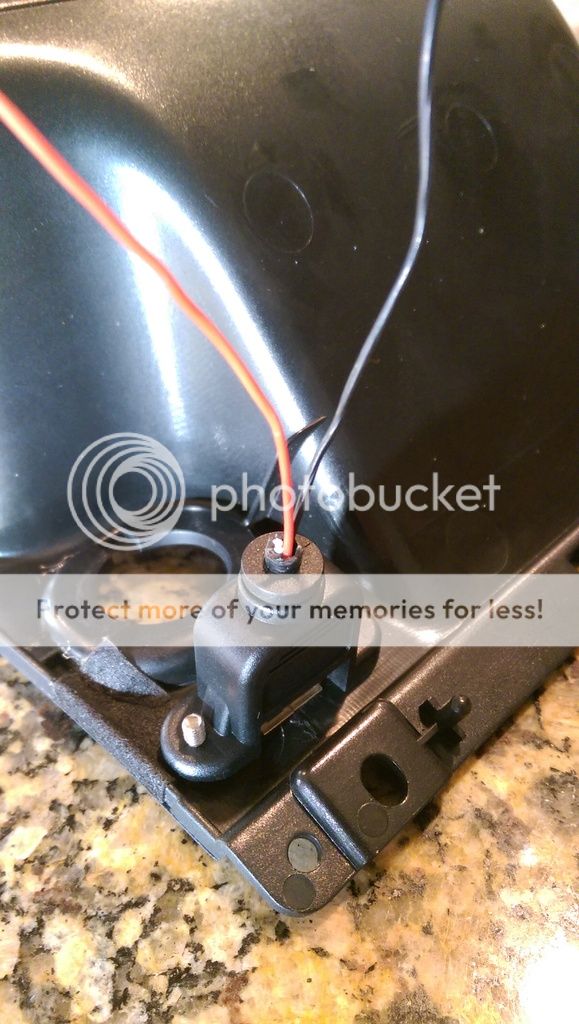
Now screw the socket back into the tray and connect the wires from the USB port to the other side of the transformer, like so:
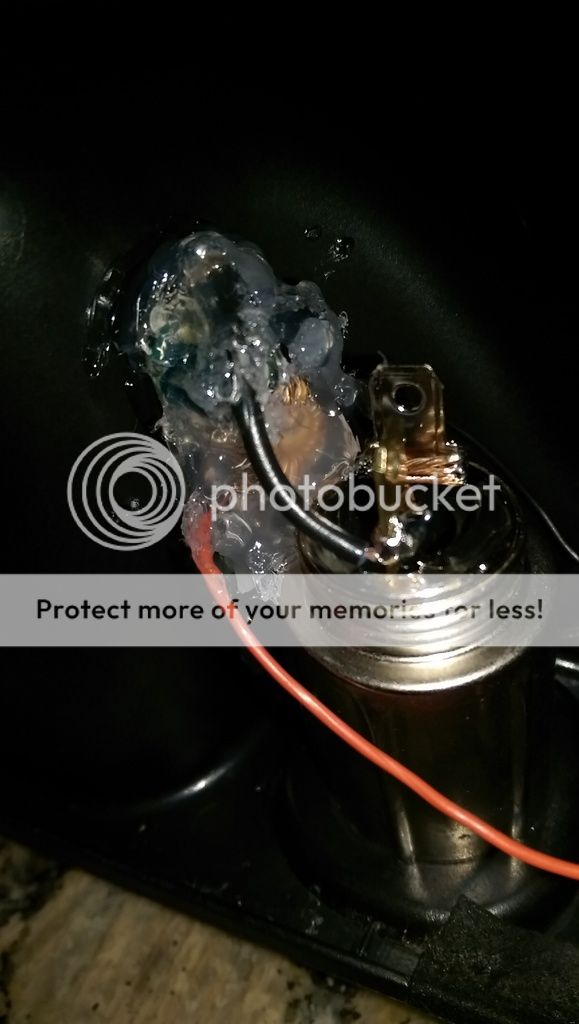
I used hot glue to secure the transformer to the tray, as well as prevent any short-circuits:
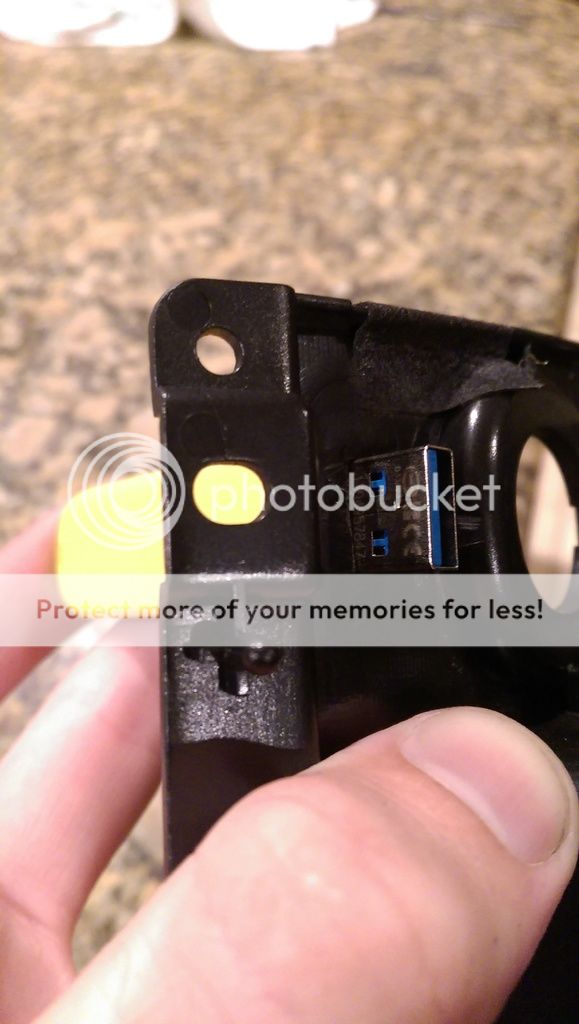
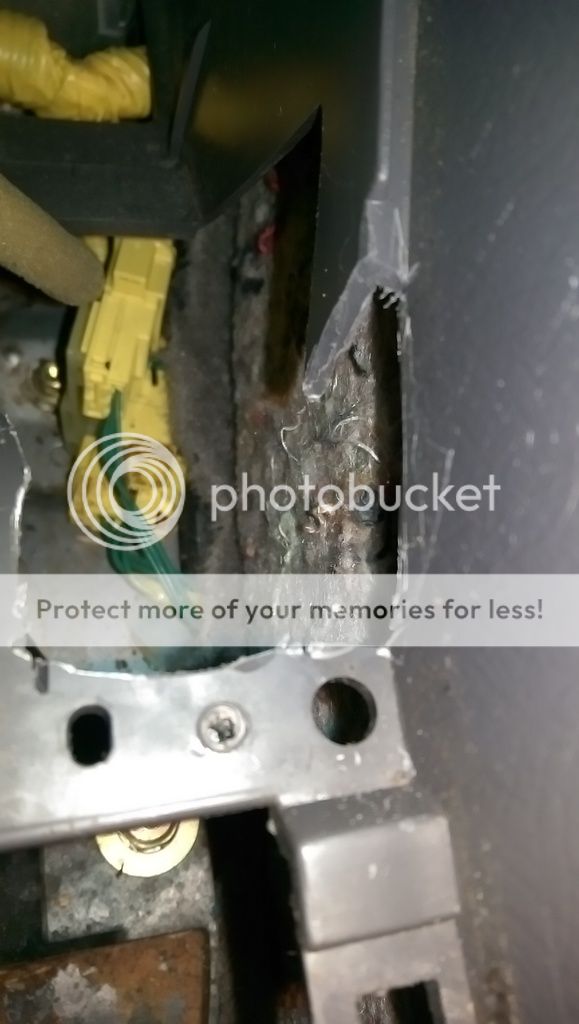
We’re almost done. Unfortunately, there’s no open space underneath the tray for the back of the USB port to fit. Here’s the piece you need to cut out:
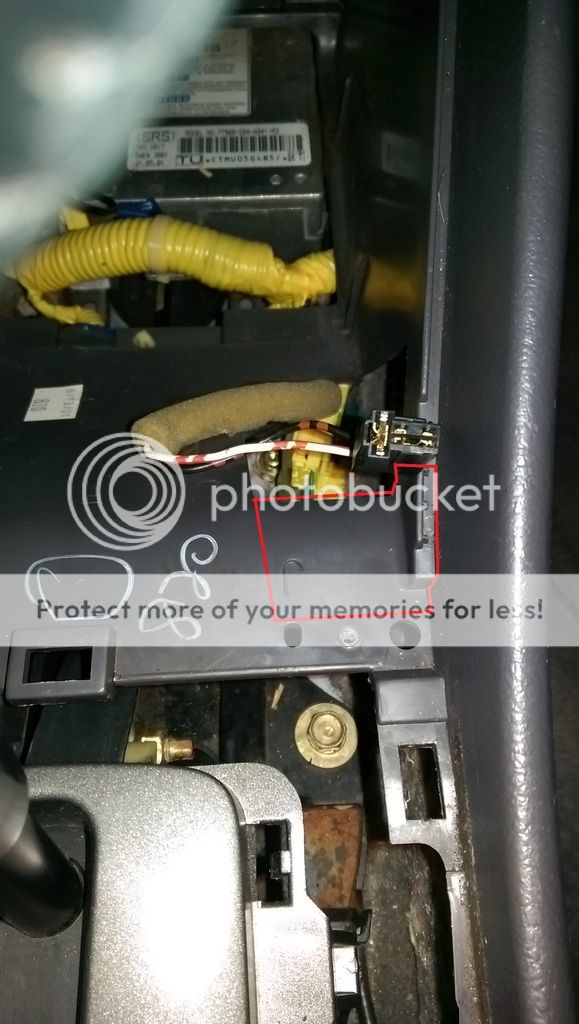
And here it is ready to go:
All you gotta do now is reassemble everything in reverse order, and you got yourself one badass phone charger!
Alternatively, you could just leave the male USB on the other end and plug it directly into the back of your radio if you want power AND data (the phone will charge slower this way though).
Listen up, class. Today we’re going to learn how to install a USB phone charging port in our 6th Gen Accords. It goes right below the 12V socket. This works on both sedans and coupes, and can be applied to almost any other car for that matter. Here are the tools you’ll need:
Panel-mount USB port (female)
12-volt car charger
Dremel with cutting wheel attachment
Soldering Iron and solder
Wire
Wire cutters/strippers
Small needle-nose pliers
Drill
Small metal file
Sharpie
Medium Phillips screwdriver
Dull flathead
Hot glue gun
Step 1: Disassembly
Start by disconnecting the battery and engaging the emergency brake. Open your cupholder and pull upwards on it from both sides, it should pop right out. Then pull upwards from both sides on the shifter trim ring, get that outta here. Now pull upwards on the entire console trim, starting from the back and working your way forward; this is held in by clips as well. Feed it over the brake handle and shifter, toss it:
Remove the plate between the radio bezel and the bottom tray. Use a flathead to pry it outwards towards you on all four corners:
Now remove the two screws holding the bottom tray in, followed by the bottom tray itself, unplugging the 12V socket (you will have to put the car all the way in first gear to make room to get the tray out).
By now, you should be left with this:
Step 2: Mounting the port
Remove the 12V socket by unscrewing the outer shell. On the backside of the tray, underneath the hole you just left (you dirty vandal), there’s a plastic vertical spine. Grind that down and grab a flash drive. Trace the outline of the USB plug onto the very center of this open space you’ve created. Then grab your drill and drill out three holes in the rectangle. Here’s how it should look so far:
Get aggressive with that drill bit and bore out the holes into the shape of that rectangle. Use your small metal file to shape it the rest of the way, going just a little bit at a time and trying to make the most perfect rectangle you can:
Keep going until you can fit your flash drive into the hole, and all edges of the hole fit snugly (Giggity):
Now you can actually mount the port. You can use any one you like, but the one I used is from Adafruit.com and cost me about $4 plus shipping:
Keep your flash drive through the hole and plug your port in on the other side. Use a small drill bit to drill through the screwholes, then bore those out with a larger bit that’s just barely big enough for the screws. I recommend a 5/64 followed by a 7/64. Secure your port to the tray, like so:
Now you need to strip the cable down. Cut it in half (you’ll have to cut more off when you solder it to the transformer), then strip off the outer sheathing. Cut away the metal on the outside, then snip the green and white wires. Leave nothing but the red and black wires, and do this all the way down to the base:
Step 3: Making the transformer
Since you're going to all the trouble to do this, you might as well use a genuine HTC, Samsung, Apple, or otherwise high-quality car charger for best results. Take your 12V car charger:
And pry off the outer shell and you’ll have the guts. This will differ greatly depending on what charger you use, but mine looked like this:
Wire the transformer to your 12V socket, positive to positive and negative to negative. You probably should reinstall the socket before doing this:
Now screw the socket back into the tray and connect the wires from the USB port to the other side of the transformer, like so:
I used hot glue to secure the transformer to the tray, as well as prevent any short-circuits:
We’re almost done. Unfortunately, there’s no open space underneath the tray for the back of the USB port to fit. Here’s the piece you need to cut out:
And here it is ready to go:
All you gotta do now is reassemble everything in reverse order, and you got yourself one badass phone charger!
Alternatively, you could just leave the male USB on the other end and plug it directly into the back of your radio if you want power AND data (the phone will charge slower this way though).
Last edited:
 added to the master list...don't delete your pictures! haha.