

KnightRyder
Well-Known Member
I've been working on this project none stop for a couple weeks now, a few of you have seen updates via facebook but i decided to finally let the cat out of the bag since im approaching the end of the project.
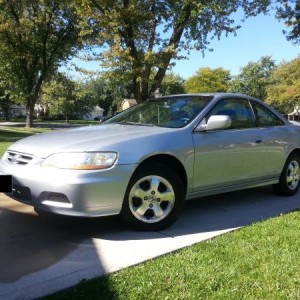
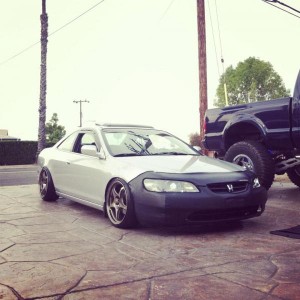
Front lip is the 01-02 Accord Coupe Wings West Lip. but im mounting on the 98-00 bumper because i like that bumper better for the look im trying to achieve. rest of the kit is the normal Wings West kit.
What separates me from all the rest of the people who mold kits, specifically this WW kit, is that im molding it to the point where it wont look like a lip kit anymore, completley flush. most people who mold their kits, end up spending a lot of money to mold the kit, only to still have it look very much like a lip kit still.
i seeked the assistance of none other than Nexson for this project and i pretty much followed what he told me to do, i've done smaller projects in the past which he has helped me with so i have a general understanding of what to do but i can always learn more from him.
Products used....
Fusor 602EZ (plastic to plastic adhesion promoter)
Fusor 152 (the main adhesive that is used for molding)
Evercoat FiberTech (main filler used to achieve the look i wanted)
Evercoat PolyFlex (finer filler used to finish off)
theres a LOT of pictures so be patient. ive been posting daily updates on my team's site so im just copying all those posts here so ignore the tenses and whatnot, you guys are getting it all at once.
____________________________________________________________
today is the first official day i did any work on the car with the new Wings West kit. If you dont already know, im molding the kit onto the bumpers for a flush look, when im done with it, you wont even be able to tell it is a lip kit, its going to look like a full body kit.
I 3m taped the rear lip onto the bumper after i scuffed the paint down in the area. im only using the 3m tape as my guide so that i can step back and take a look at how im going to proceed.


the one area where it doesnt quite fit but its no big deal, i can make it work.


tomorrow i plan on starting the drilling. what i mean by drilling is that where the lip touches the bumper, im going to drill a 1/8" hole every inch or so along the entire joint so that when i apply the adhesive that is going to hold the lip kit on the bumper permanently, the adhesive will ooze into the holes and provide a better bite so it will hold stronger.
also tomorrow i will probably do the same thing with my front end, 3m tape and drill the holes hopefully if i have time. i have to work tomorrow and go shopping for my families camping trip this weekend. busy day.
theres no going back now. wish me luck. i pray im going to be done in time for japantown.
Front lip is the 01-02 Accord Coupe Wings West Lip. but im mounting on the 98-00 bumper because i like that bumper better for the look im trying to achieve. rest of the kit is the normal Wings West kit.
What separates me from all the rest of the people who mold kits, specifically this WW kit, is that im molding it to the point where it wont look like a lip kit anymore, completley flush. most people who mold their kits, end up spending a lot of money to mold the kit, only to still have it look very much like a lip kit still.
i seeked the assistance of none other than Nexson for this project and i pretty much followed what he told me to do, i've done smaller projects in the past which he has helped me with so i have a general understanding of what to do but i can always learn more from him.
Products used....
Fusor 602EZ (plastic to plastic adhesion promoter)
Fusor 152 (the main adhesive that is used for molding)
Evercoat FiberTech (main filler used to achieve the look i wanted)
Evercoat PolyFlex (finer filler used to finish off)
theres a LOT of pictures so be patient. ive been posting daily updates on my team's site so im just copying all those posts here so ignore the tenses and whatnot, you guys are getting it all at once.
____________________________________________________________
today is the first official day i did any work on the car with the new Wings West kit. If you dont already know, im molding the kit onto the bumpers for a flush look, when im done with it, you wont even be able to tell it is a lip kit, its going to look like a full body kit.
I 3m taped the rear lip onto the bumper after i scuffed the paint down in the area. im only using the 3m tape as my guide so that i can step back and take a look at how im going to proceed.
the one area where it doesnt quite fit but its no big deal, i can make it work.
tomorrow i plan on starting the drilling. what i mean by drilling is that where the lip touches the bumper, im going to drill a 1/8" hole every inch or so along the entire joint so that when i apply the adhesive that is going to hold the lip kit on the bumper permanently, the adhesive will ooze into the holes and provide a better bite so it will hold stronger.
also tomorrow i will probably do the same thing with my front end, 3m tape and drill the holes hopefully if i have time. i have to work tomorrow and go shopping for my families camping trip this weekend. busy day.
theres no going back now. wish me luck. i pray im going to be done in time for japantown.