

JLaneAccord
Well-Known Member
Just started upgrading my grounds. I got my P3 battery terminals. I will post more pics throughout progress.
*This will help with a better idle if all 3 are done, but im doing just 2 for now.
*It is also a great upgrade for a high end sound system, or just any aftermarket sound system(helps with lights and relieves stress)
*Get a capacitor too!
Great Place for these products.
http://www.parts-express.com/?utm_s...e=search&9gkw=Parts-Express&9gad=8880051313.1
-3 Things you need to do or should know!-
1.)UNHOOK YOUR BATTERY
2.)WRAP YOUR POSTIVE TERMINAL IN CLOTH
3.)THE HARDEST PART IS GETTING THE STOCK RING TERMINALS OFF THE POSTIVE AND NEGATIVE WIRES
-What you Need-2.)WRAP YOUR POSTIVE TERMINAL IN CLOTH
3.)THE HARDEST PART IS GETTING THE STOCK RING TERMINALS OFF THE POSTIVE AND NEGATIVE WIRES
-P3 Positive and Negative Terminals Plug and play, NO WIRE CRIMPING!
http://www.parts-express.com/pe/showdetl.cfm?Partnumber=263-682 $5.00 a piece
-1/0 awg wire http://www.knukonceptz.com/productDetail.cfm?prodID=KFX0BK $4.00 a foot, really flexable
-1/0 Ring terminals (Gold or Platinum)
-Sandpaper
-Basic Hand tools
http://www.parts-express.com/pe/showdetl.cfm?Partnumber=263-682 $5.00 a piece
-1/0 awg wire http://www.knukonceptz.com/productDetail.cfm?prodID=KFX0BK $4.00 a foot, really flexable
-1/0 Ring terminals (Gold or Platinum)
-Sandpaper
-Basic Hand tools
UNHOOK YOUR BATTERY!!!
I reccomend 1/0 guage wire! Bigger the better when grounding

1.) So first i unhooked my postive and Negative Battery Terminals
2.) Like I have always been told, wrap your negative wire in cloth or anything like it.Non conductive. Bad experiences if you do not
3.)It is sooooo hard to get the stock ring terminals off the wire so i cut them as close to the terminal as i could to ensure enough length.
4.) Just Got the wires, (12/14/11) hooking them up now!
Positive P3 Teminal: As you can see it wasnt the greatest fit at the top due to the wear of the terminal, But It fit snug the other 3/4 the way down. Same with the Negative Terminal
Positive

Negative

Both

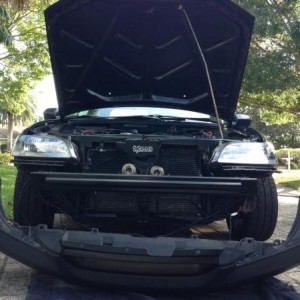
Negative Wire that will be upgraded to 1/0 guage wire.

The Ground that is on the engine mount that will be upgraded to 1/0 guage soon and possibly relocated

P3 Terminal Pack

1/0 Guage Ring Terminals

1/0 guage wire Super flexable! like its weird?


Just my car

Last edited: