What did you do today Auto Detailing related?

puzzlemaster94

6GA Connoisseur
Joined
Jun 6, 2012
Posts
1,511
Reaction score
12
Location
Louisville Area
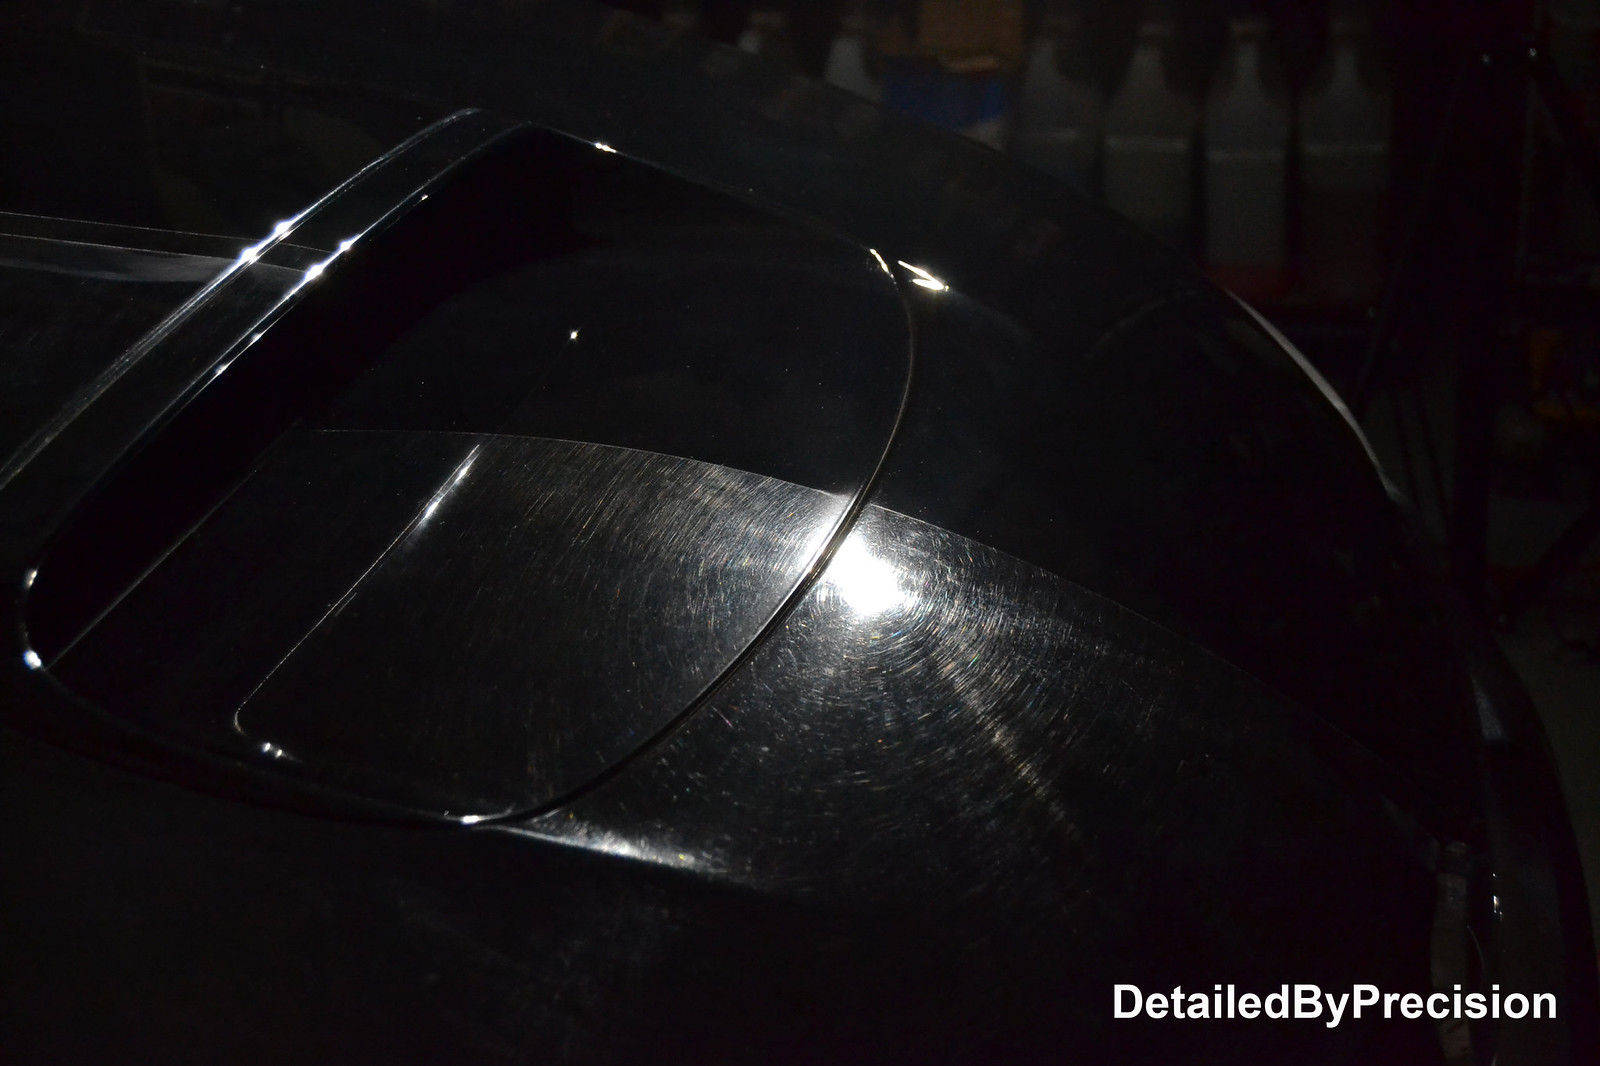
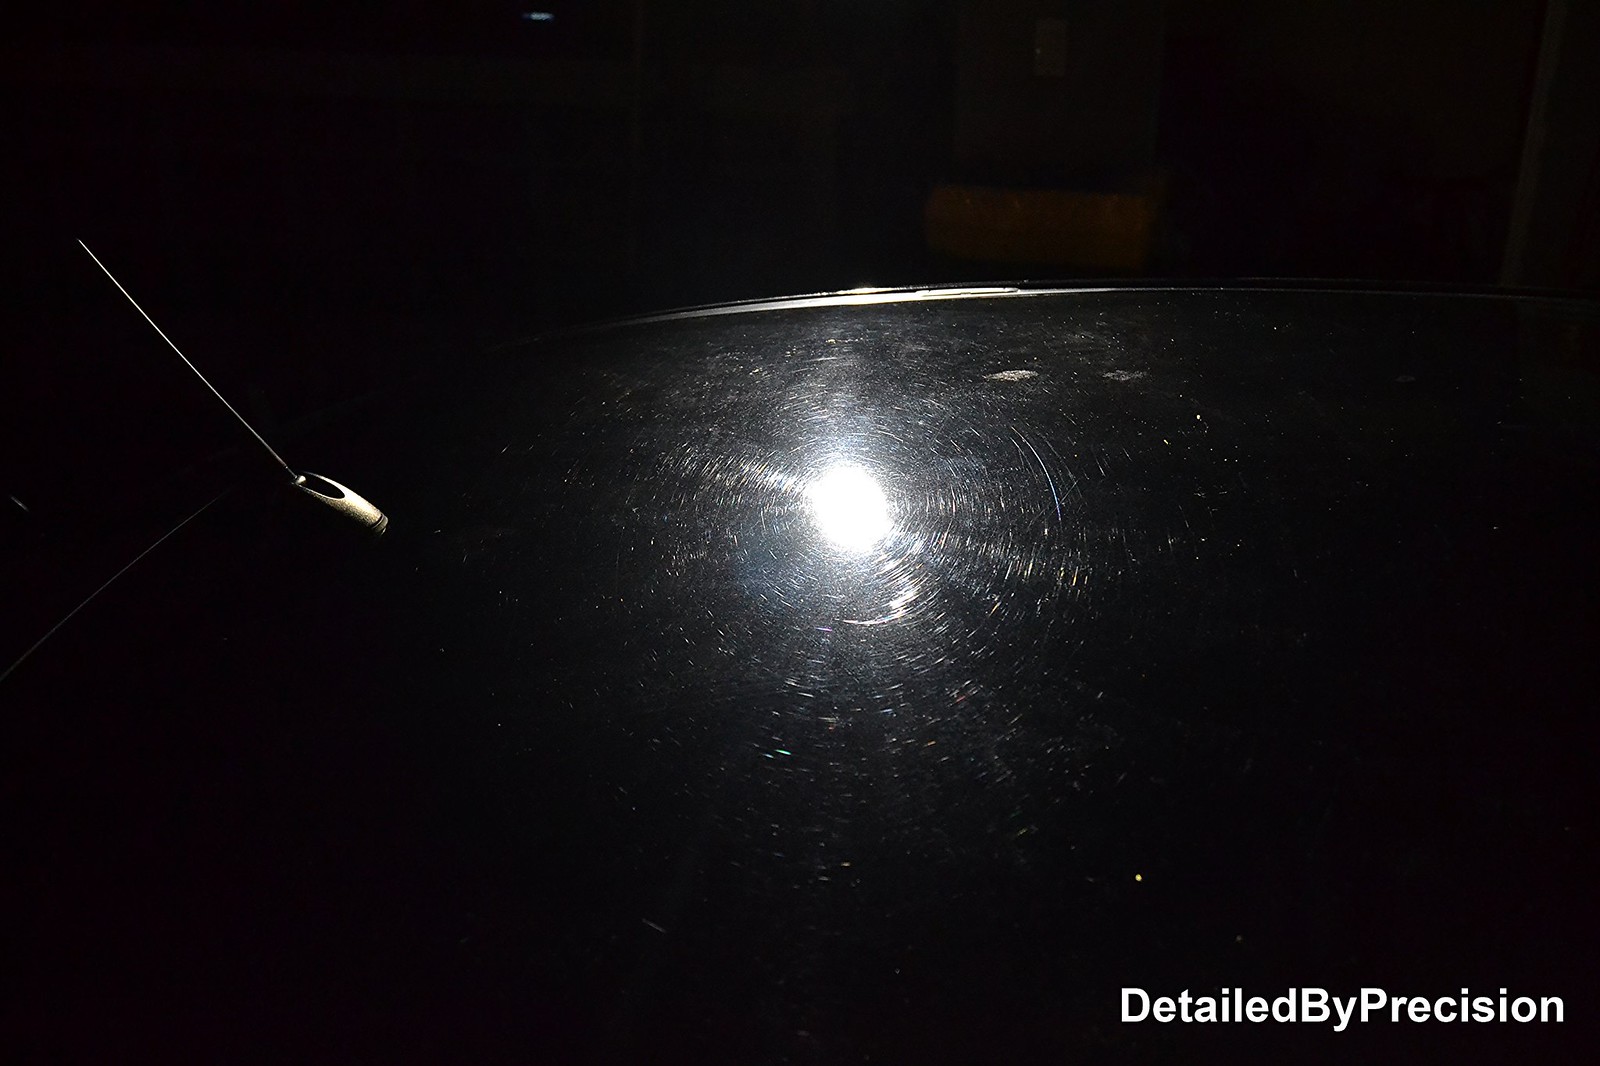
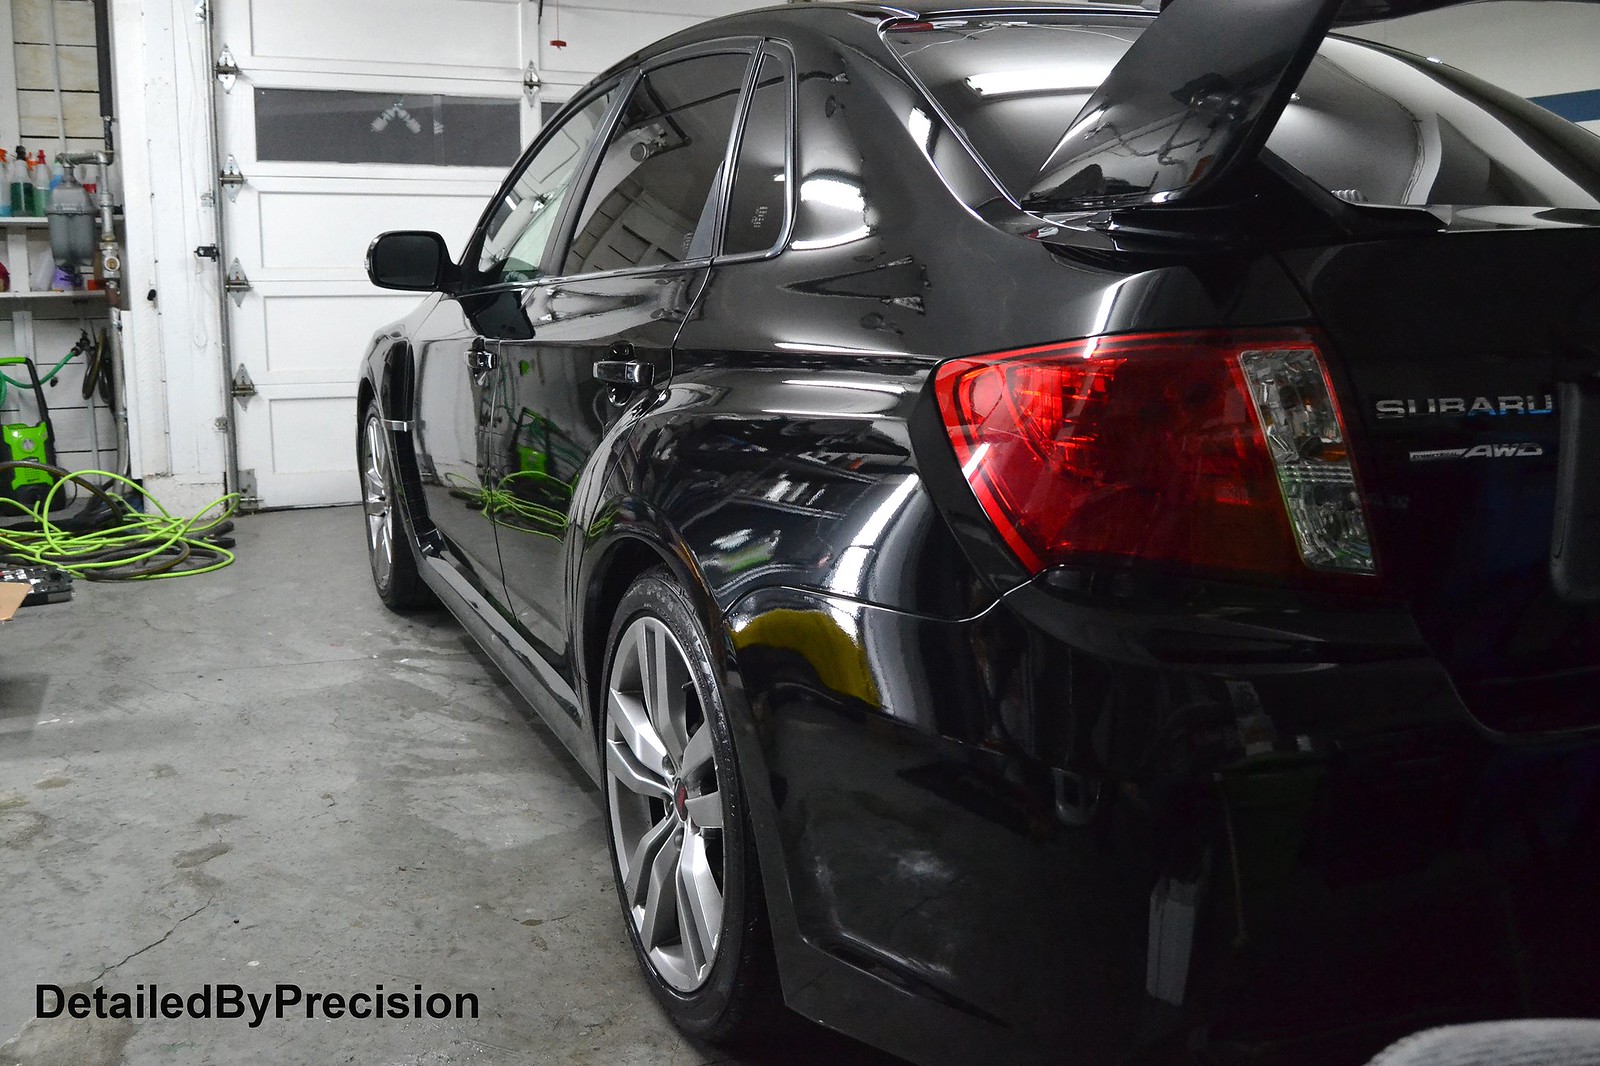
What was your process Evan? Some areas look good, some areas look like there could be improvement with some tweaking.


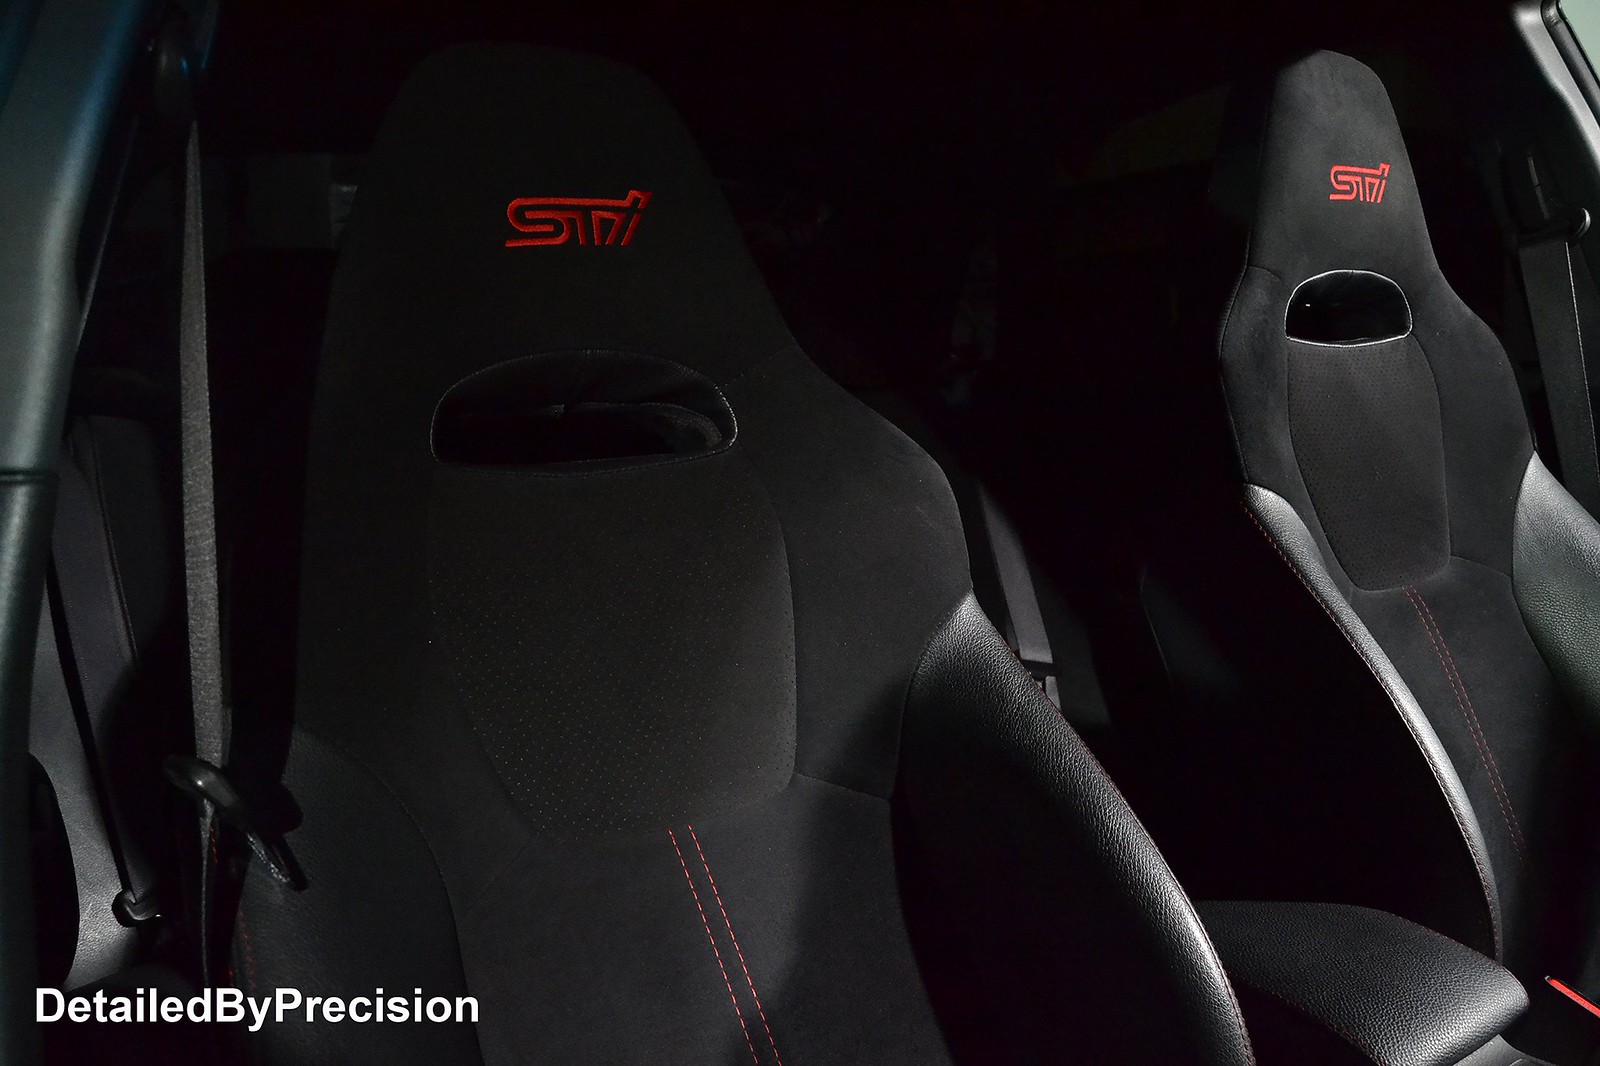
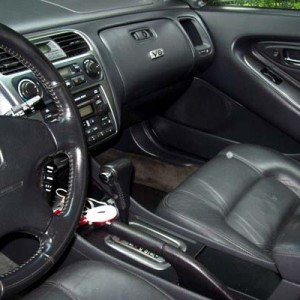
I took the seats out, sprayed a little cleaner and vacuumed. Could of done more, but it was getting ready to rain lol


Sent from my iPhone using Tapatalk
 

CG6Lemon

Detailing Enthusiast
Joined
Jun 6, 2008
Posts
7,715
Reaction score
46
Location
S.F Bay Area, CA
Half of car repainted & wetsanded: 2012 Sti Paint correction & wheels off & Cquartz Coating... DetailedByPrecision - Bay Area


This customer had an interesting story to share about his car when we met up. The previous owner rented the car out through on of those car renting sites. The renter crashed the car and ruined the whole driver side and passenger fender and door. The previous owner sold it to my customer and my customer got it repaired and repainted. The repair turned out good but the finish of the repaint required sanding to level the orange peel. Since I was going to polish the repair areas I recommended the rest of the car get polished as well in order to not make the unpolished panels stand out. The wheels were to be removed from the car and coated along with the paint.


Started with wheels & tires. Then Foamed with CG Maxi suds


DSC_20751 by Limny Kuang, on Flickr


DSC_20981 by Limny Kuang, on Flickr


After washing the car, I was able to take a closer look at the car. There were plenty of overspray I needed to address.


DSC_2110 copy by Limny Kuang, on Flickr


DSC_2126 copy by Limny Kuang, on Flickr


DSC_2205 copy by Limny Kuang, on Flickr


DSC_21221 by Limny Kuang, on Flickr


DSC_21121 by Limny Kuang, on Flickr


Severity of orange peel, overall condition of car, and swirled out mess on soft OEM paint.


DSC_21681 by Limny Kuang, on Flickr


DSC_22411 by Limny Kuang, on Flickr


DSC_21401 by Limny Kuang, on Flickr


DSC_21331 by Limny Kuang, on Flickr


DSC_21321 by Limny Kuang, on Flickr


DSC_21211 by Limny Kuang, on Flickr


Oem paint readings(1st pair) & Aftermarket paint readings. Lowest and highest readings


DSC_21601 by Limny Kuang, on Flickr


DSC_21501 by Limny Kuang, on Flickr


DSC_21561 by Limny Kuang, on Flickr


DSC_21571 by Limny Kuang, on Flickr


Starting to address the dirts in the paint, the dry areas, machine sanding, and blocking by hand as well for certain areas. Scuffed all the panels, then chased after dirts, and some minor fish eyes. Afterwards thoroughly went over it again to achieve a uniform white sheet look to it to ensure paint is flat and no hills or valleys.


DSC_2173 copy by Limny Kuang, on Flickr


DSC_2174 copy by Limny Kuang, on Flickr


DSC_2370 copy by Limny Kuang, on Flickr


DSC_2381 copy by Limny Kuang, on Flickr


DSC_2446 copy by Limny Kuang, on Flickr


I noticed the hood scoop was dull so I removed it to clean and dress it before I rinsed the car down to prep it for Iron X decon and claybar


DSC_2313 copy by Limny Kuang, on Flickr


DSC_2315 copy by Limny Kuang, on Flickr


DSC_2316 copy by Limny Kuang, on Flickr


DSC_2242 copy by Limny Kuang, on Flickr


DSC_2244 copy by Limny Kuang, on Flickr


Now the fun part begins after the long hours of prep work. The OEM paint was soft and finicky. It would cut really easy but the funny thing is the paint only like SMAT products. DAT products did not wipe off easy and left micro marring. I dialed in my test spot process for the OEM paint using Boss 21/HF DA paired with D300 W/LC orange, M205 W/LC white, and Essence was a life saver. The noticeably subtle white faint haze specifically for black cars would be a huge problem if I didn't have Essence in my arsenal. I tried a lot of finishing combinations using SMAT & DAT products and none played nicely. For the Aftermarket paint, it was on the hard side. Boss 21/HF DA paired with M101 W/MF pad, Menz203 W/LC white, Essence.


DSC_2263 copy by Limny Kuang, on Flickr


DSC_2278 copy by Limny Kuang, on Flickr


DSC_2294 copy by Limny Kuang, on Flickr


DSC_2252 copy by Limny Kuang, on Flickr


DSC_2257 copy by Limny Kuang, on Flickr


DSC_2412 copy by Limny Kuang, on Flickr


DSC_2410 copy by Limny Kuang, on Flickr


DSC_2435 copy by Limny Kuang, on Flickr


Headlights required a complete restoration. Sanded with 800/1000/1500/3000. Protected with Opt Opti Lense.


DSC_2320 copy by Limny Kuang, on Flickr


DSC_2341 copy by Limny Kuang, on Flickr


DSC_2329 copy by Limny Kuang, on Flickr


DSC_2335 copy by Limny Kuang, on Flickr


Finished pics of the whole job.


DSC_2366 copy by Limny Kuang, on Flickr


DSC_26001 by Limny Kuang, on Flickr


DSC_259611 by Limny Kuang, on Flickr


DSC_259411 by Limny Kuang, on Flickr


DSC_2654 copy by Limny Kuang, on Flickr


DSC_26451 by Limny Kuang, on Flickr


DSC_2657 copy by Limny Kuang, on Flickr


DSC_26621 by Limny Kuang, on Flickr


DSC_2509 copy by Limny Kuang, on Flickr


DSC_2532 copy by Limny Kuang, on Flickr


DSC_2530 copy by Limny Kuang, on Flickr


DSC_2544 copy by Limny Kuang, on Flickr


DSC_2511 copy by Limny Kuang, on Flickr


DSC_2510 copy by Limny Kuang, on Flickr


Total hours: 30.

What I learned from this job:

You can never have too much sanding tools.

Not all sanding paper/disc are made equal. Some wear out a lot faster depending on brand

Test spot is invaluable to save time and materials

Always carry SMAT and DAT products in your arsenal

Essence is a game changer

Need a better alcantara cleaning product. (Appreciate recommendations)

Sonax leather foam works really well but pricey

Need to find another product other than 303 Fabric Guard


All i can think of for now... I'm sure I missed a couple more. If you guys have any favorite GO TO products that I can possibly replace the ones I listed please give me a shout out! Thanks for viewing. This was a pain in the butt job but very rewarding as well when everything is all done.
 

CG6Lemon

Detailing Enthusiast
Joined
Jun 6, 2008
Posts
7,715
Reaction score
46
Location
S.F Bay Area, CA
2009 Smart Car Brabus: Wash, Decontaminate, Protect


This customer was a referral from the scion Xb job. The owner of the smart car wanted to sell the car. I talked with him about a couple things he could address to get a higher resale value out of the car. I went over the car with him and he specifically stated which areas he would like to be improved. Decided on my most basic exterior package, with pushing out a huge dent from the front bumper on driver side, and touch up some areas.


Took care of the wheels and tires first. Applied sealant to wheels to help clean up easier next time.


DSC_2670 copy by Limny Kuang, on Flickr


2012 scion XB by Limny Kuang, on Flickr


DSC_2672 copy by Limny Kuang, on Flickr


Took care of the fabric top before washing it. (reason is because it takes very long to thoroughly rinse the foam off from the soap)


DSC_2678 copy by Limny Kuang, on Flickr


Washed it, decontaminated with Iron X, then clayed.


DSC_2683 copy by Limny Kuang, on Flickr


DSC_2689 copy by Limny Kuang, on Flickr


DSC_2688 copy by Limny Kuang, on Flickr


DSC_2691 copy by Limny Kuang, on Flickr


You can slightly see the dent near the body line. Touched up whole car


DSC_2693 copy by Limny Kuang, on Flickr


DSC_2694 copy by Limny Kuang, on Flickr


DSC_2696 copy by Limny Kuang, on Flickr


DSC_2697 copy by Limny Kuang, on Flickr


DSC_2699 copy by Limny Kuang, on Flickr


DSC_2700 copy by Limny Kuang, on Flickr


DSC_2701 copy by Limny Kuang, on Flickr


DSC_2702 copy by Limny Kuang, on Flickr


DSC_2703 copy by Limny Kuang, on Flickr


DSC_2705 copy by Limny Kuang, on Flickr


DSC_2707 copy by Limny Kuang, on Flickr


DSC_2708 copy by Limny Kuang, on Flickr


Final finished pics:


DSC_2716 copy by Limny Kuang, on Flickr


DSC_2715 copy by Limny Kuang, on Flickr


DSC_2712 copy by Limny Kuang, on Flickr


DSC_2711 copy by Limny Kuang, on Flickr


Total hours: 7hr

What I learned from this job:

The gas lid unlocks and locks with keyfob

Gained more experience and knowledge regarding when to use cold water to shock the paint when pushing out dent with heat gun
 

CG6Lemon

Detailing Enthusiast
Joined
Jun 6, 2008
Posts
7,715
Reaction score
46
Location
S.F Bay Area, CA
How to clean a fabric top using Raggtopp Fabric and Vinyl


My personal preference is to clean the fabric top first before washing the car. I don't like the idea of introducing a lot of foam/suds from the car soap thus requiring lots of flushing. This way I can tackle the situation while isolating everything else around it.


Start by working in sections. (This part is very important). I rinsed the top and applied cleaner. Agitated with a medium stiffness brush in circles. Here I am working on a section.


DSC_2678 copy by Limny Kuang, on Flickr


Same section. Afterwards you want to rinse to your left(closest to front windshield) instead of to the right. You will see why afterwards.


DetailedByPrecision_2679 copy by Limny Kuang, on Flickr


Rinsed and all clean. Working on 2nd section now. For the 2nd section you want to rinse to your right instead of left because you don't want to reintroduce dirt back to the side you just cleaned.


DetailedByPrecision_2680 copy by Limny Kuang, on Flickr


3rd section. Continue rinsing to the opposite side you've already cleaned until you finish the whole top.


DetailedByPrecision_2681 copy by Limny Kuang, on Flickr


That pretty much wraps up one method I personally like to use and follow. If desired, can apply a hydrophobic product for the fabric material. IE: Gtechniq fabric guard, 303 Fabric guard. Thanks for viewing.

 
Back
Top