

You are using an out of date browser. It may not display this or other websites correctly.
You should upgrade or use an alternative browser.
You should upgrade or use an alternative browser.
What did you do today Auto Detailing related?
- Thread starter CG6Lemon
- Start date
puzzlemaster94
6GA Connoisseur
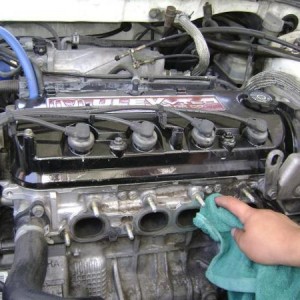
Well I still work at the detail shop and I've learned quite a few things.
I bought a Porter Cable DA and it really does help.
On Saturday, I compounded, polished, and waxed my car using the DA. Really speeds up the process and keeping my arms from dying.
Used Ultimate Compound, followed by Mirror Glaze 205, then NXT wax. Really pops and shines now. I'll get the pictures finished soonish
CG6Lemon
Detailing Enthusiast
Well I still work at the detail shop and I've learned quite a few things.
I bought a Porter Cable DA and it really does help.
On Saturday, I compounded, polished, and waxed my car using the DA. Really speeds up the process and keeping my arms from dying.
Used Ultimate Compound, followed by Mirror Glaze 205, then NXT wax. Really pops and shines now. I'll get the pictures finished soonish
Evan, based on your post, I can tell you have grown and gained some good valuable experience within the detailing industry and used car industry. Keep practicing with the PC DA and master it. Then expand and work on other cars. Within 1-2 years maybe you will follow the same path as me who knows..... Keep it up bro!
puzzlemaster94
6GA Connoisseur
Evan, based on your post, I can tell you have grown and gained some good valuable experience within the detailing industry and used car industry. Keep practicing with the PC DA and master it. Then expand and work on other cars. Within 1-2 years maybe you will follow the same path as me who knows..... Keep it up bro!
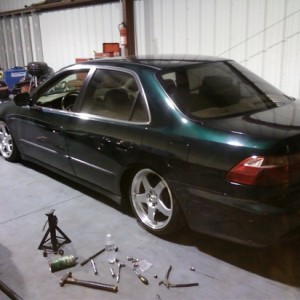
I plan to learn as much as I can. I kind of have a little side business going on where I sometimes detail my friends cars. I used a rotary buffer on my friends 350Z and it turned out very decent.
Here's the 350Z
 IMG_0820 by Evan Aschbacher, on Flickr
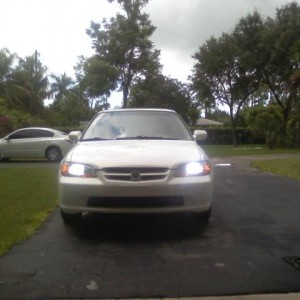
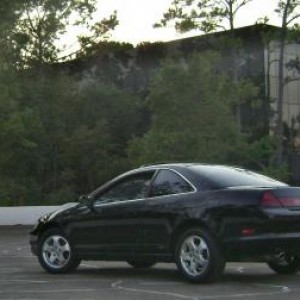
And a few randoms I took during different stages of cleaning/polishing the Accord.
 IMG_0789 by Evan Aschbacher, on Flickr
 IMG_0787 by Evan Aschbacher, on Flickr
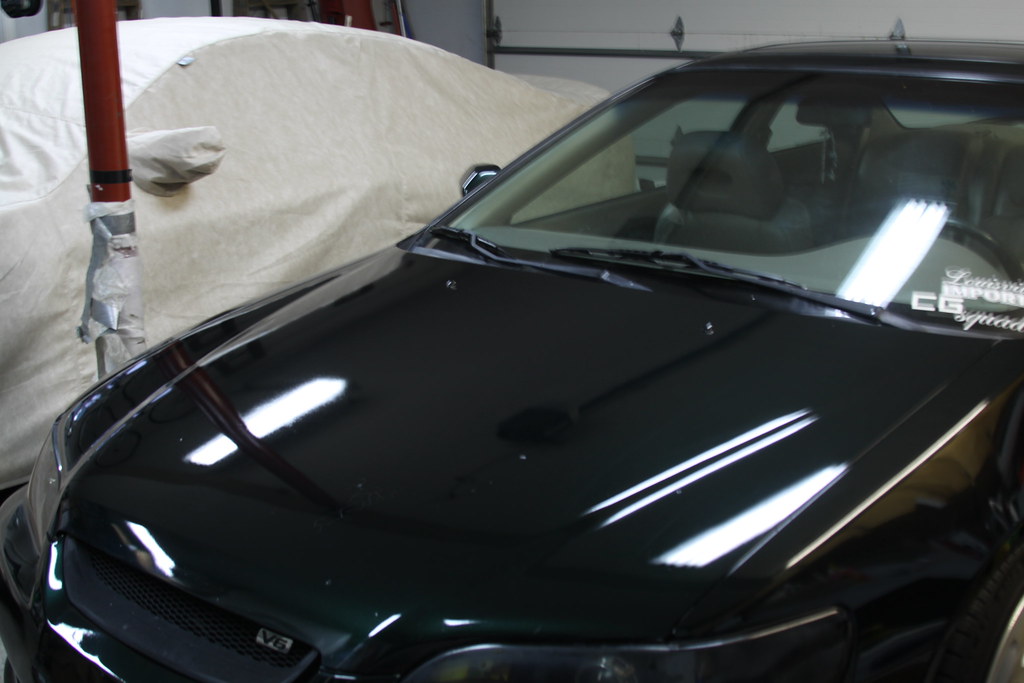 IMG_0779 by Evan Aschbacher, on Flickr
 IMG_0776 by Evan Aschbacher, on Flickr
 IMG_0775 by Evan Aschbacher, on Flickr
 IMG_0774 by Evan Aschbacher, on Flickr
 IMG_0770 by Evan Aschbacher, on Flickr
 IMG_0767 by Evan Aschbacher, on Flickr
CG6Lemon
Detailing Enthusiast
Not bad.... for just starting out working at the detail shop.
Couple tips:
Never get too comfortable with the rotary machine. Slip ups can happen in one sec compared to using a DA
clean out the compound in the cracks and crevices before taking a pic
some pics are a little blurry. Maybe camera focus issue?
Look up your local area detail shops and see how much they charge for their services. Then price your prices higher than theirs at a desired rate you wanna earn. Do exceptional quality work and word will spread I promise you. Do not compete with shops, but DOMINATE! You will never win trying to compete, besides you are probably aiming to do high end work only like I am.
CG6Lemon
Detailing Enthusiast
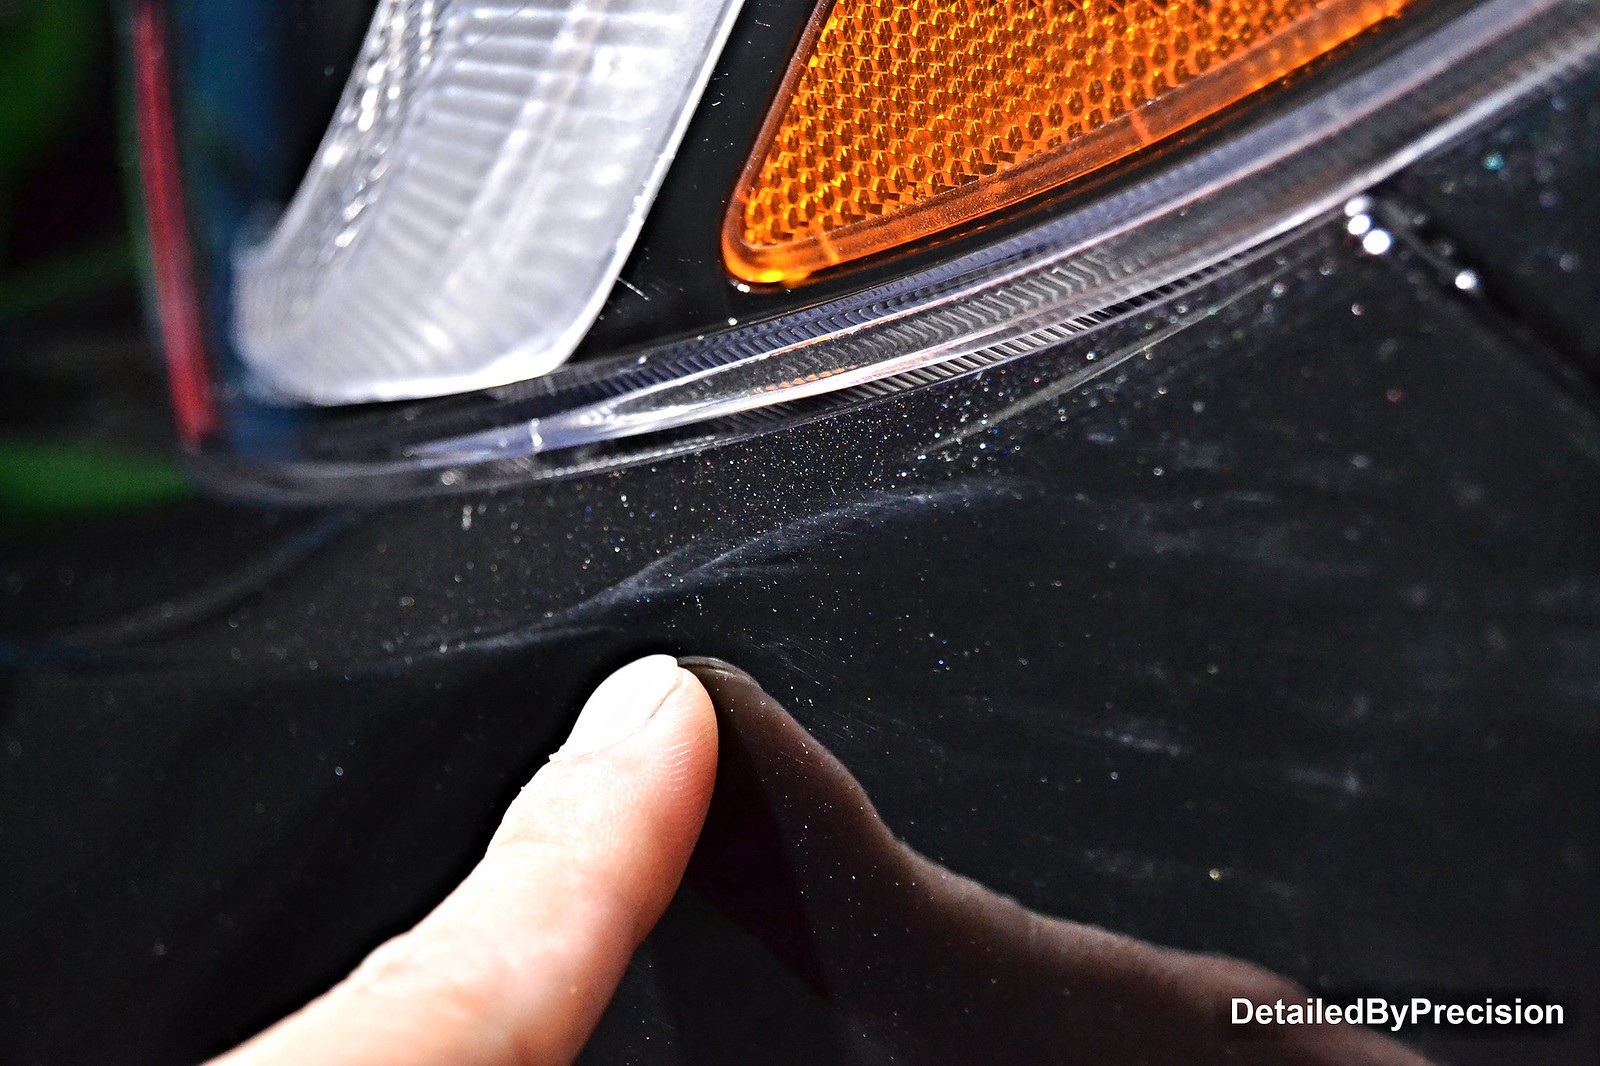
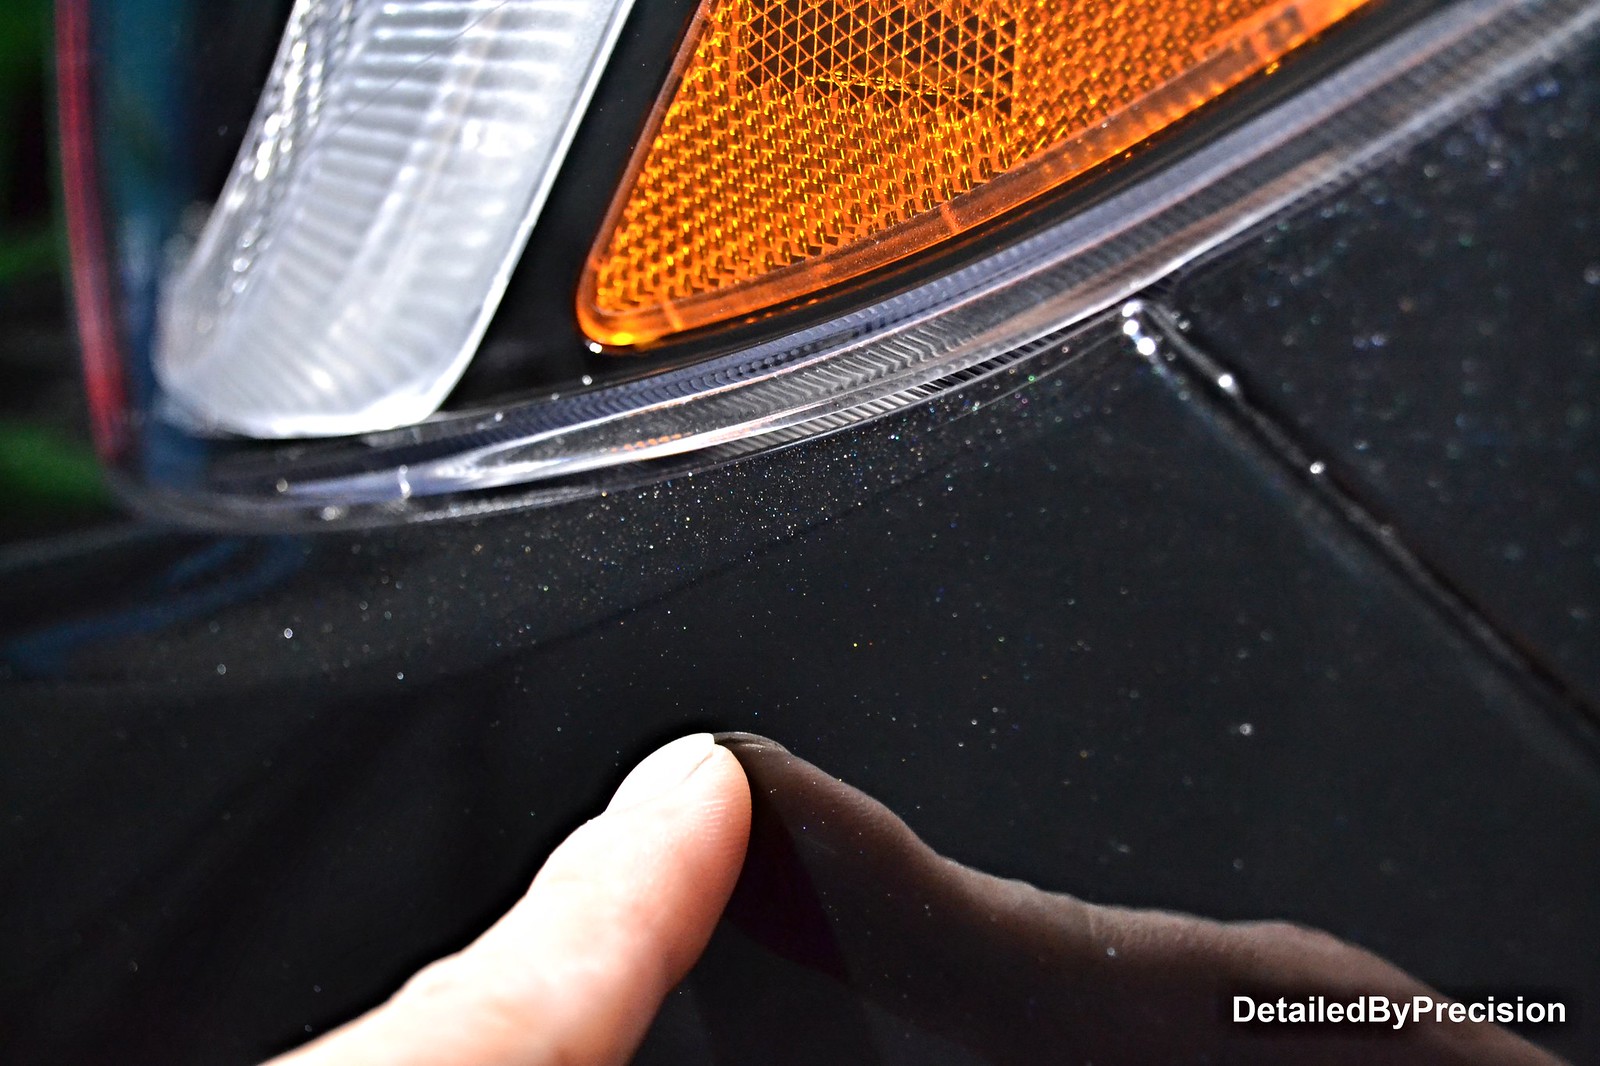
A friend stopped by to replace a headlight. Got him a OEM headlight for a price of a aftermarket one. Old headlight had a crack on top and water kept getting in so it had to go.
 DetailedByPrecision2857 copy by Limny Kuang, on Flickr
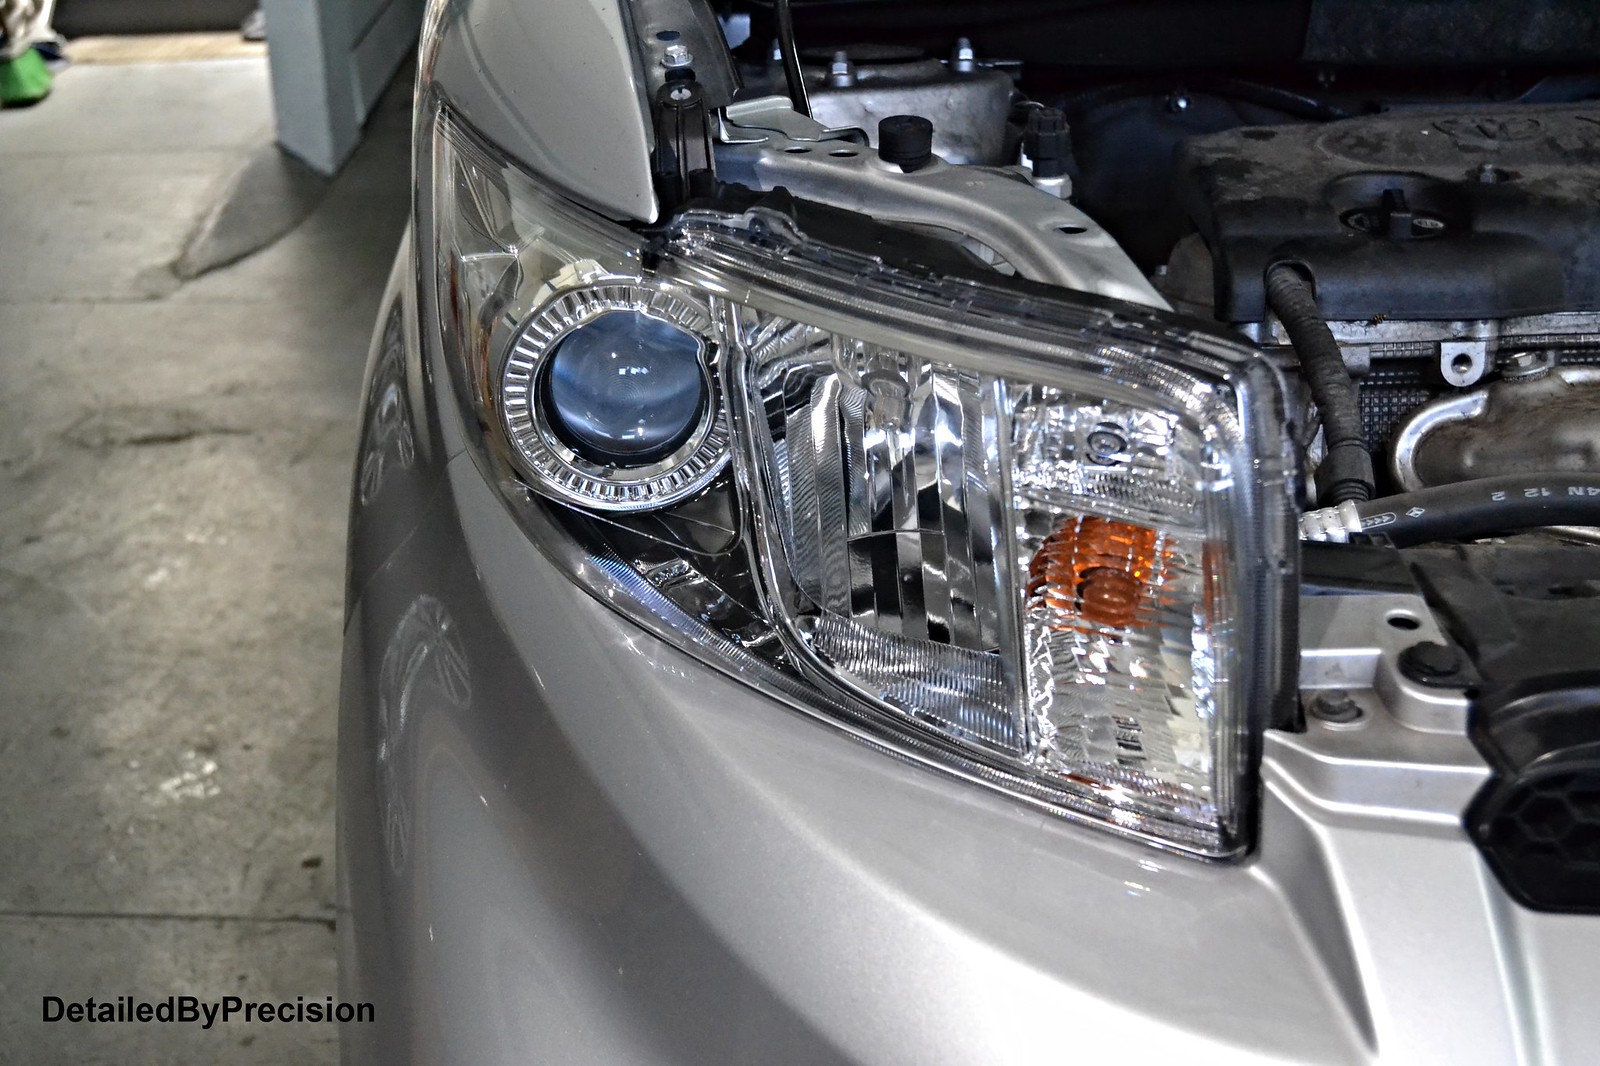 DetailedByPrecision2858 copy by Limny Kuang, on Flickr
DetailedByPrecision2857 copy by Limny Kuang, on FlickrDetailedByPrecision2858 copy by Limny Kuang, on FlickrCG6Lemon
Detailing Enthusiast
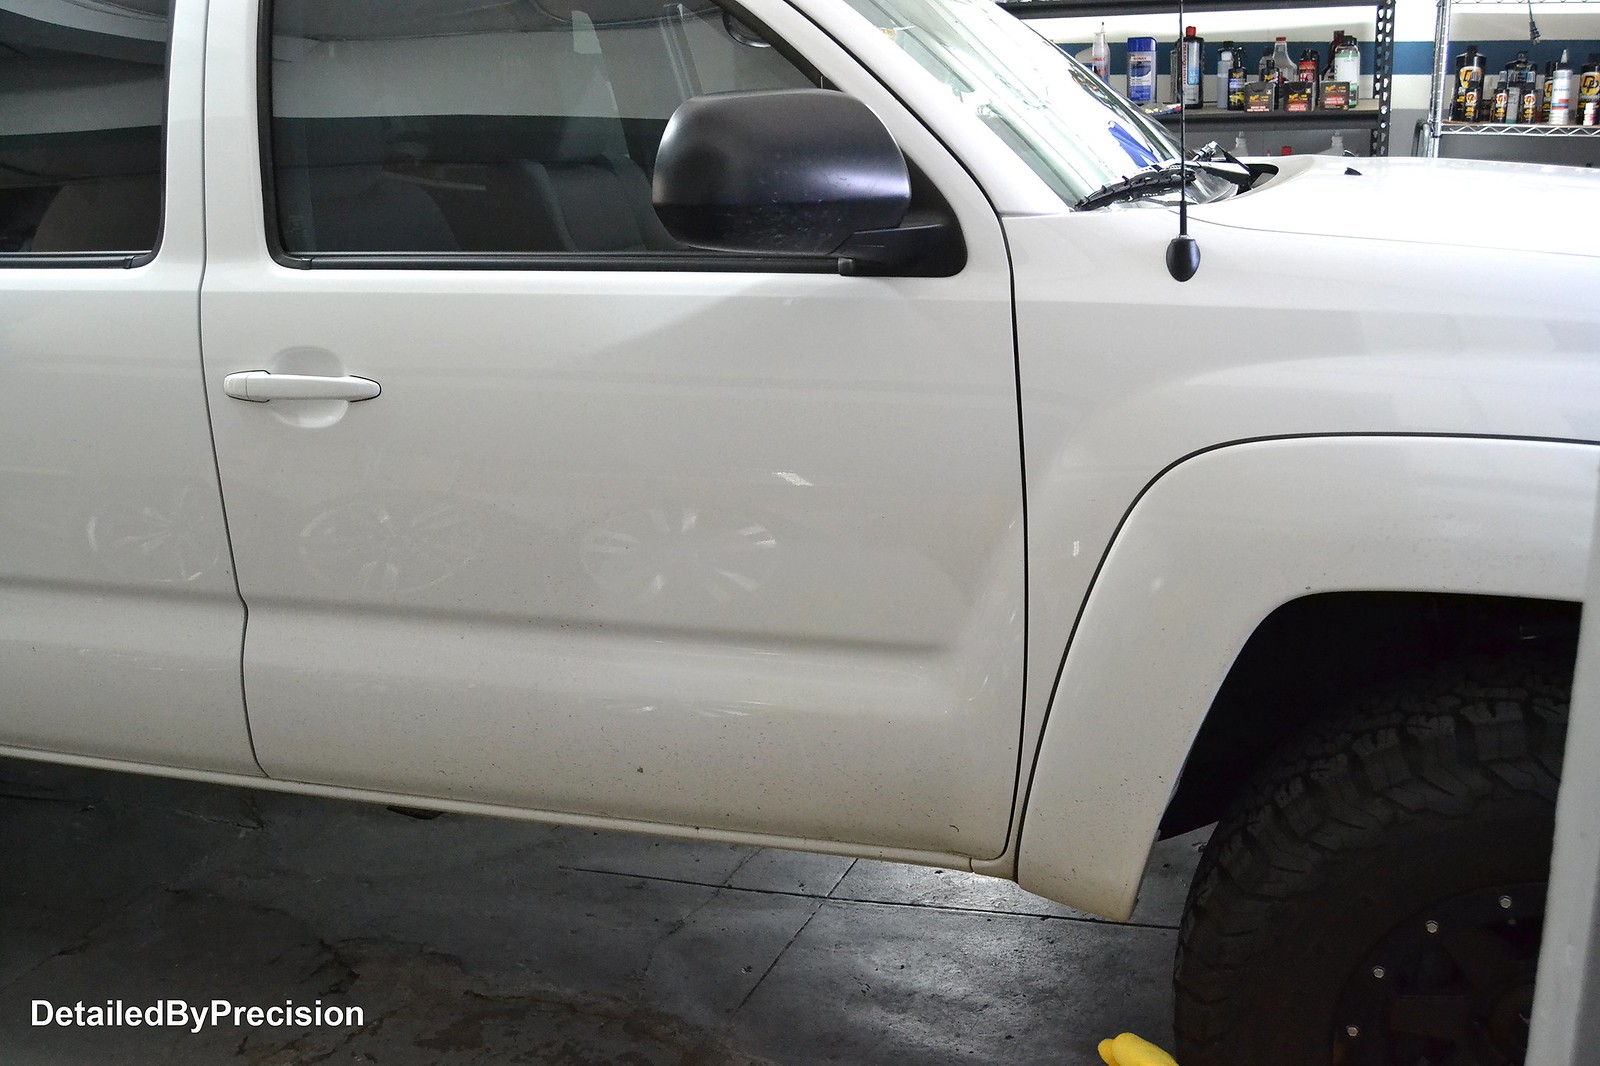
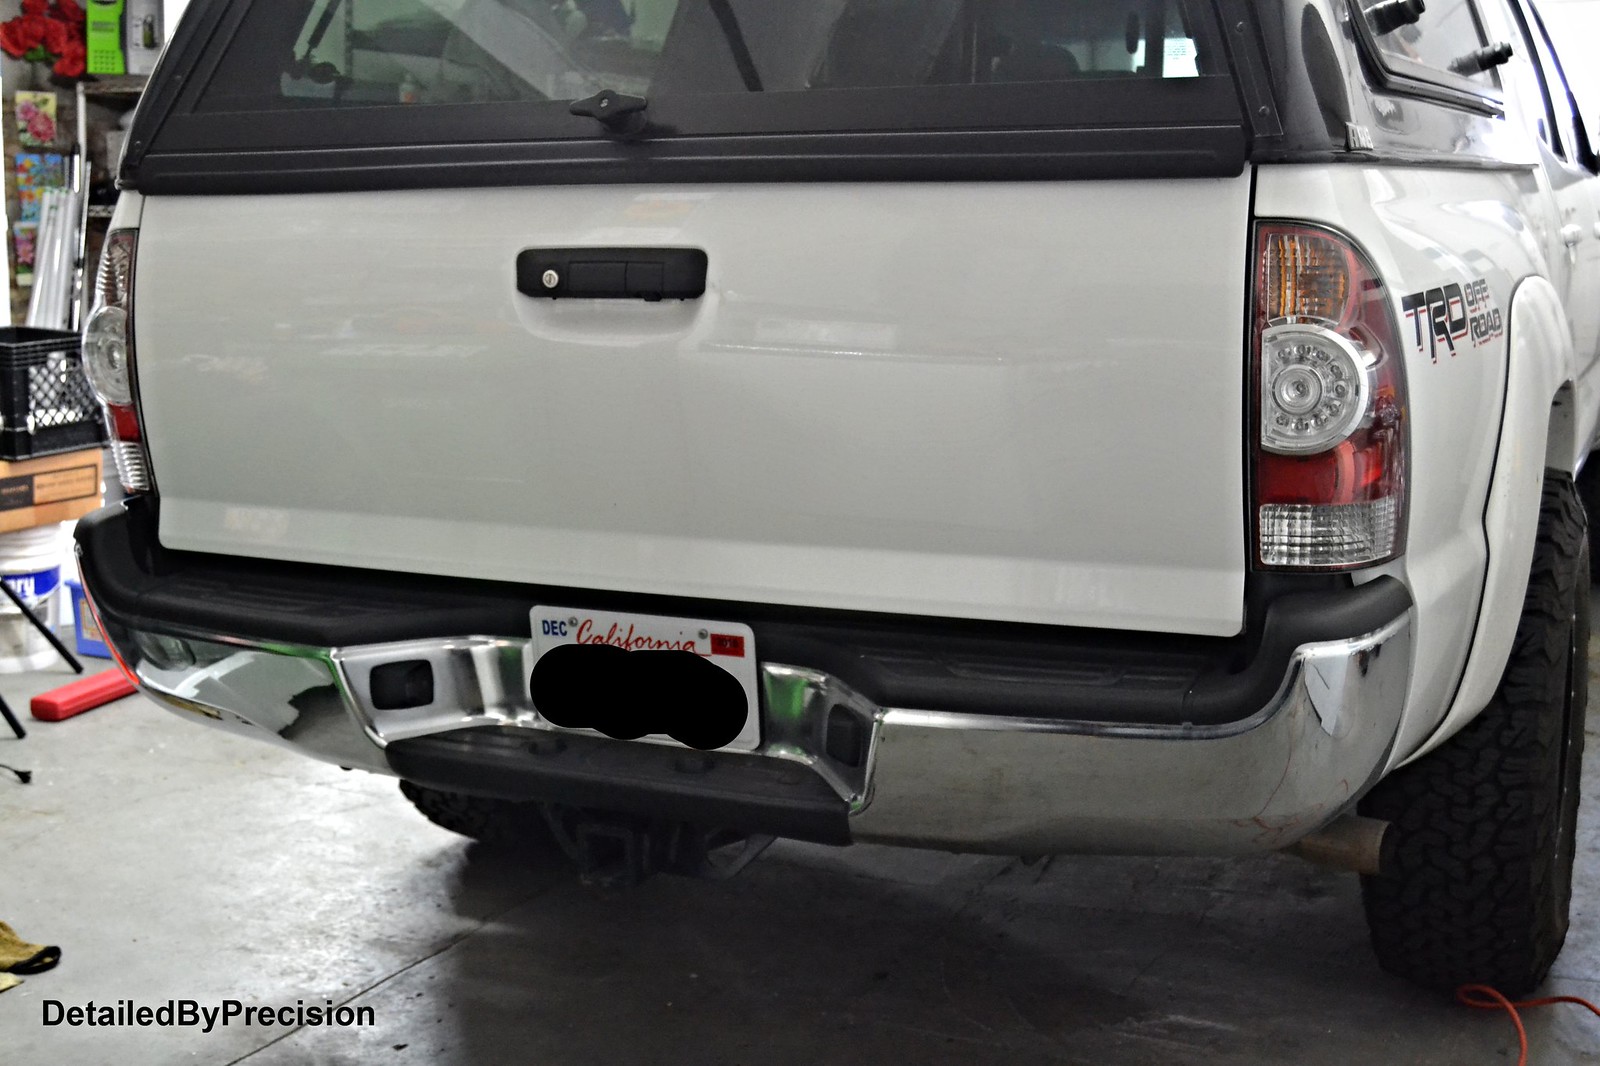
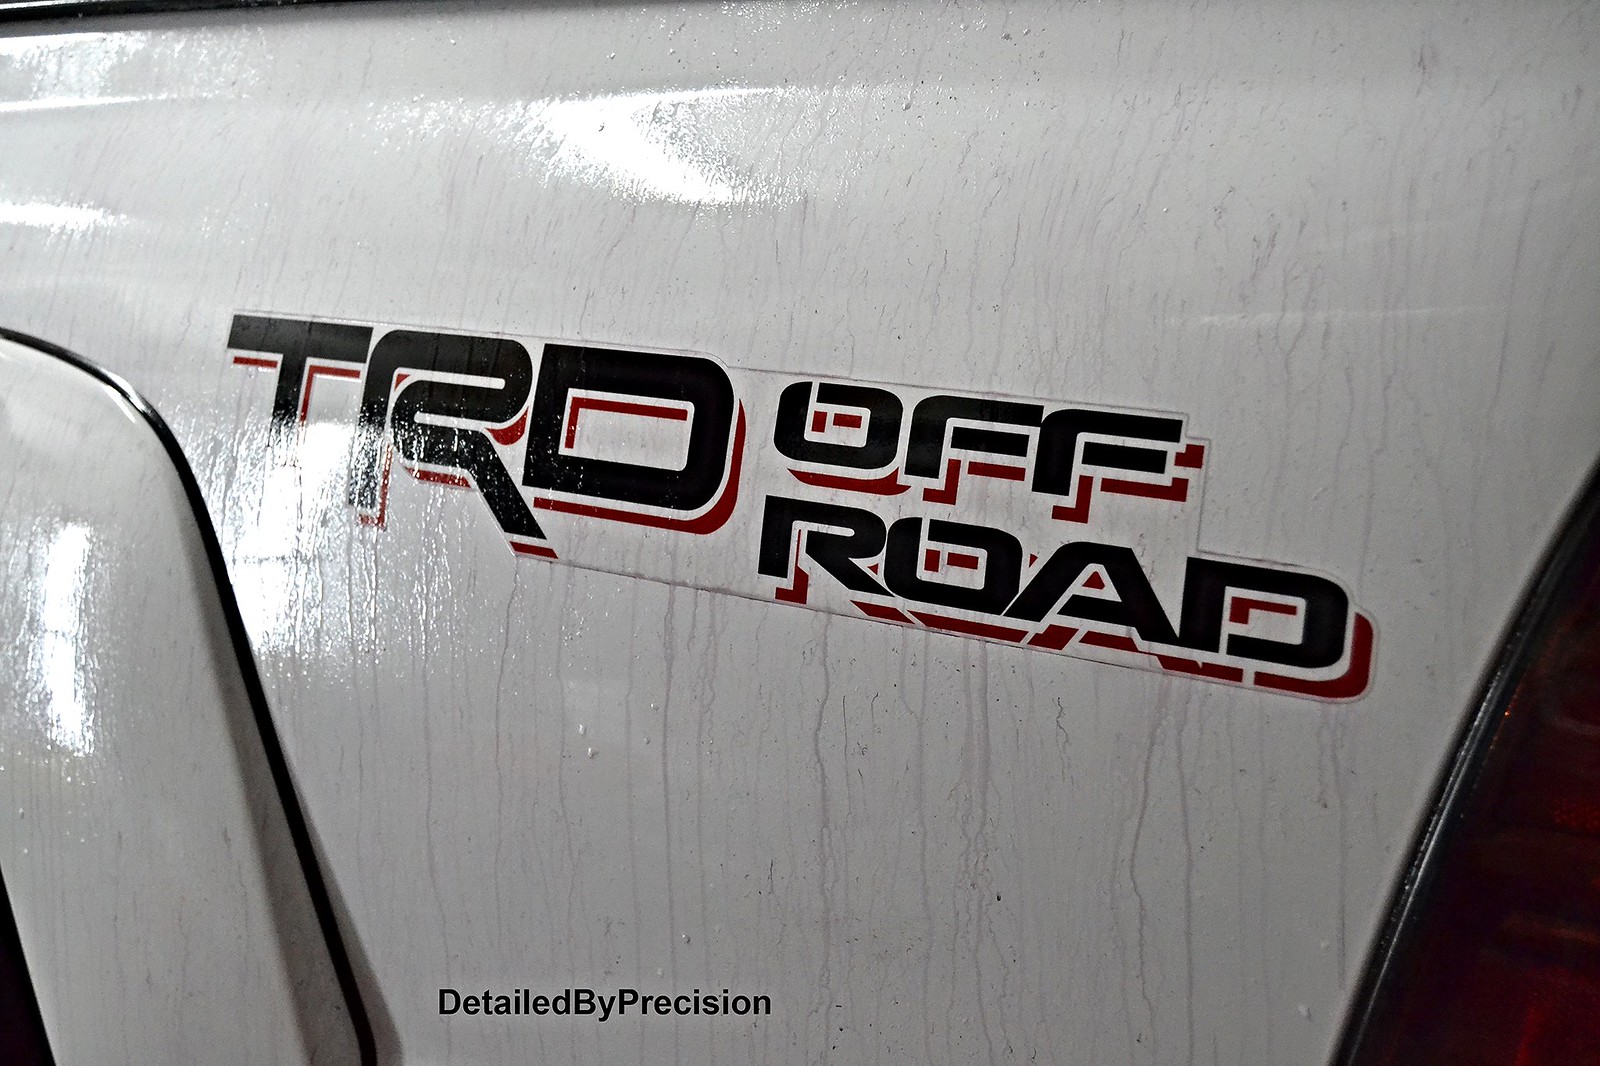
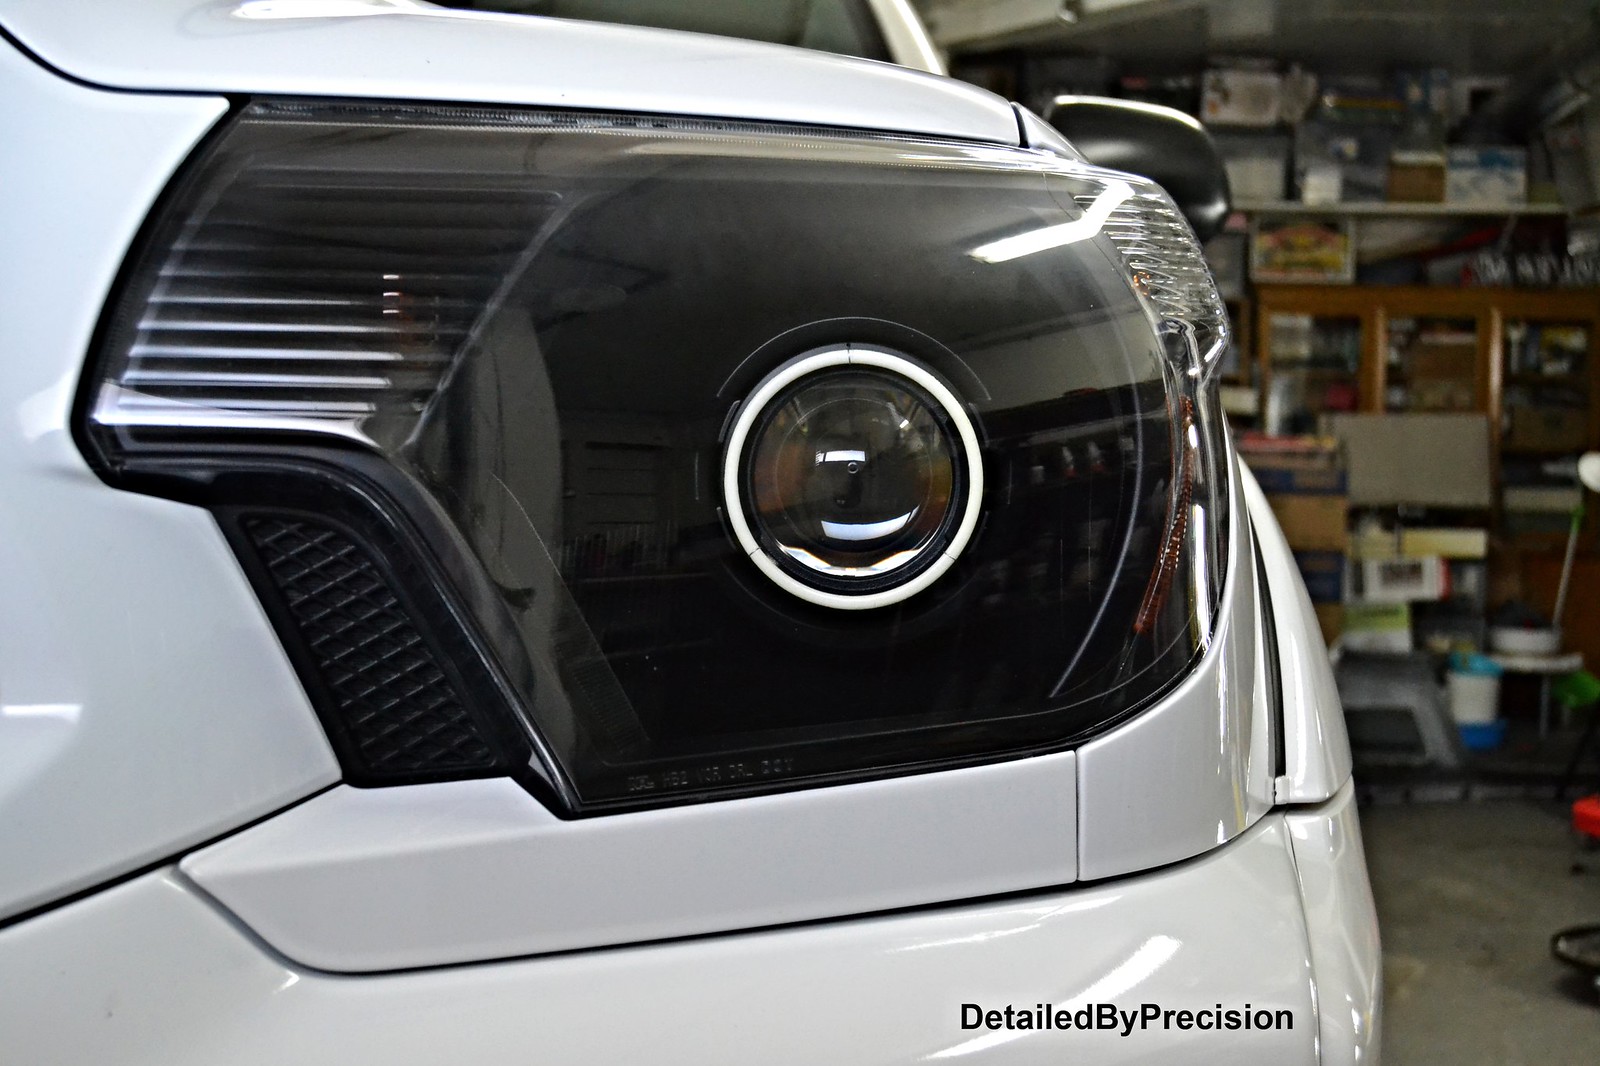
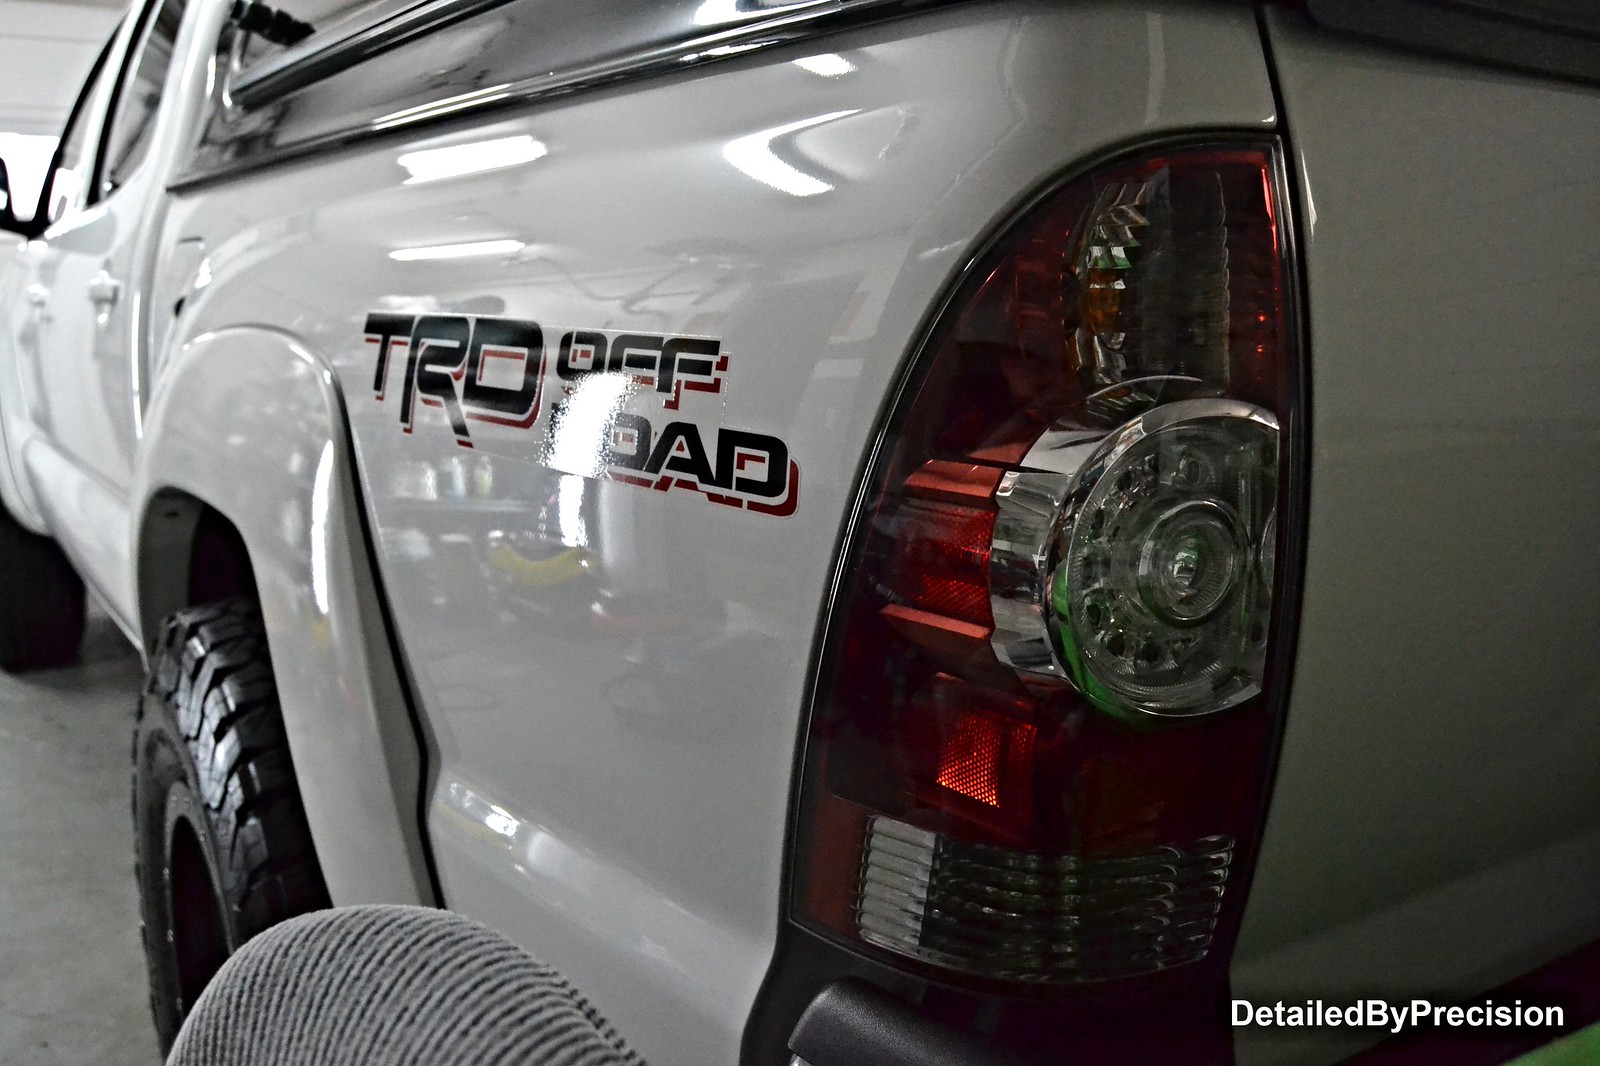
2015 Toyota Tacoma Offroad
This customer was a referral from the Acura job. He wanted the same thing as in wash, decontaminate, Iron X, clay bar, and sealant. In addition to remove emblems and headlight restoration for his retrofit headlights he purchased. The main focus was to remove all the deep scratches on the headlight because the customer paid a pretty price for them. I took a look at the headlight and knew I had my work cut out for me.
Started off with removing emblems. Heat gun, plastic card, adhesive remover, polish
 DetailedByPrecision2726 copy by Limny Kuang, on Flickr
 DetailedByPrecision2727 copy by Limny Kuang, on Flickr
 DetailedByPrecision2728 copy by Limny Kuang, on Flickr
 DetailedByPrecision2731 copy by Limny Kuang, on Flickr
 DetailedByPrecision2732 copy by Limny Kuang, on Flickr
 DetailedByPrecision2733 copy by Limny Kuang, on Flickr
 DetailedByPrecision2734 copy by Limny Kuang, on Flickr
Continued with washing car, decontaminate, Iron X, claybar
 DetailedByPrecision2739 copy by Limny Kuang, on Flickr
 DetailedByPrecision2742 copy by Limny Kuang, on Flickr
 DSC_2743 copy by Limny Kuang, on Flickr
 DetailedByPrecision2745 copy by Limny Kuang, on Flickr
 DetailedByPrecision2746 copy by Limny Kuang, on Flickr
 DetailedByPrecision2748 copy by Limny Kuang, on Flickr
 DetailedByPrecision2749 copy by Limny Kuang, on Flickr
 DetailedByPrecision2752 copy by Limny Kuang, on Flickr
Headlight restoration using 800 grit, 1500, 2000, 3000
 DetailedByPrecision2754 copy by Limny Kuang, on Flickr
 DetailedByPrecision2761 copy by Limny Kuang, on Flickr
 DetailedByPrecision2757 copy by Limny Kuang, on Flickr
 DetailedByPrecision2762 copy by Limny Kuang, on Flickr
Finished pics:
 DetailedByPrecision2764 copy by Limny Kuang, on Flickr
 DetailedByPrecision2765 copy by Limny Kuang, on Flickr
 DetailedByPrecision2766 copy by Limny Kuang, on Flickr
 DetailedByPrecision2778 copy by Limny Kuang, on Flickr
 DetailedByPrecision2779 copy by Limny Kuang, on Flickr
Total time: 8 hrs 18mins
What I learned from this job:
adhesive remover can stain single stage white paint
truck tires takes more time and effort to get an even finish with tire gel due to grooves
passenger headlight took longer to polish out sanding scratches compared to driver side even though same products and techniques were used.
That sums up this project. Feel free to contribute or comment. Thanks for viewing.
This customer was a referral from the Acura job. He wanted the same thing as in wash, decontaminate, Iron X, clay bar, and sealant. In addition to remove emblems and headlight restoration for his retrofit headlights he purchased. The main focus was to remove all the deep scratches on the headlight because the customer paid a pretty price for them. I took a look at the headlight and knew I had my work cut out for me.
Started off with removing emblems. Heat gun, plastic card, adhesive remover, polish
DetailedByPrecision2726 copy by Limny Kuang, on FlickrDetailedByPrecision2727 copy by Limny Kuang, on FlickrDetailedByPrecision2728 copy by Limny Kuang, on FlickrDetailedByPrecision2731 copy by Limny Kuang, on FlickrDetailedByPrecision2732 copy by Limny Kuang, on FlickrDetailedByPrecision2733 copy by Limny Kuang, on FlickrDetailedByPrecision2734 copy by Limny Kuang, on FlickrContinued with washing car, decontaminate, Iron X, claybar
DetailedByPrecision2739 copy by Limny Kuang, on FlickrDetailedByPrecision2742 copy by Limny Kuang, on FlickrDSC_2743 copy by Limny Kuang, on FlickrDetailedByPrecision2745 copy by Limny Kuang, on FlickrDetailedByPrecision2746 copy by Limny Kuang, on FlickrDetailedByPrecision2748 copy by Limny Kuang, on FlickrDetailedByPrecision2749 copy by Limny Kuang, on FlickrDetailedByPrecision2752 copy by Limny Kuang, on FlickrHeadlight restoration using 800 grit, 1500, 2000, 3000
DetailedByPrecision2754 copy by Limny Kuang, on FlickrDetailedByPrecision2761 copy by Limny Kuang, on FlickrDetailedByPrecision2757 copy by Limny Kuang, on FlickrDetailedByPrecision2762 copy by Limny Kuang, on FlickrFinished pics:
DetailedByPrecision2764 copy by Limny Kuang, on FlickrDetailedByPrecision2765 copy by Limny Kuang, on FlickrDetailedByPrecision2766 copy by Limny Kuang, on FlickrDetailedByPrecision2778 copy by Limny Kuang, on FlickrDetailedByPrecision2779 copy by Limny Kuang, on FlickrTotal time: 8 hrs 18mins
What I learned from this job:
adhesive remover can stain single stage white paint
truck tires takes more time and effort to get an even finish with tire gel due to grooves
passenger headlight took longer to polish out sanding scratches compared to driver side even though same products and techniques were used.
That sums up this project. Feel free to contribute or comment. Thanks for viewing.
CG6Lemon
Detailing Enthusiast

CG6Lemon
Detailing Enthusiast
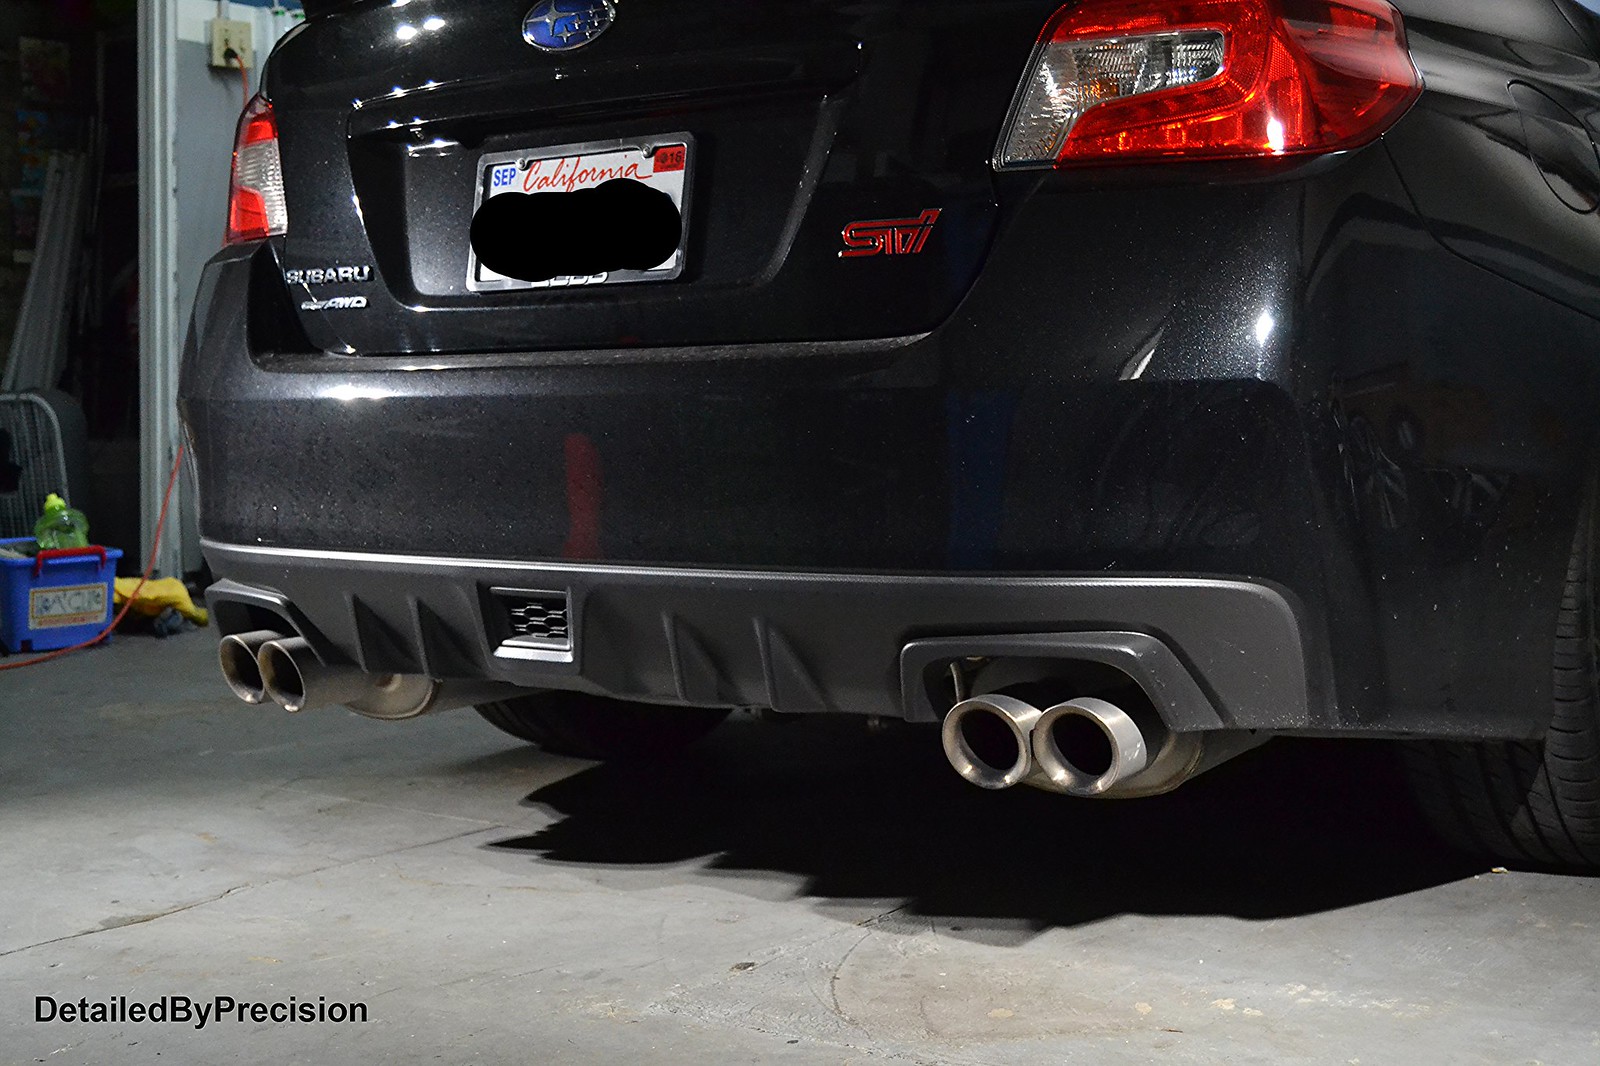
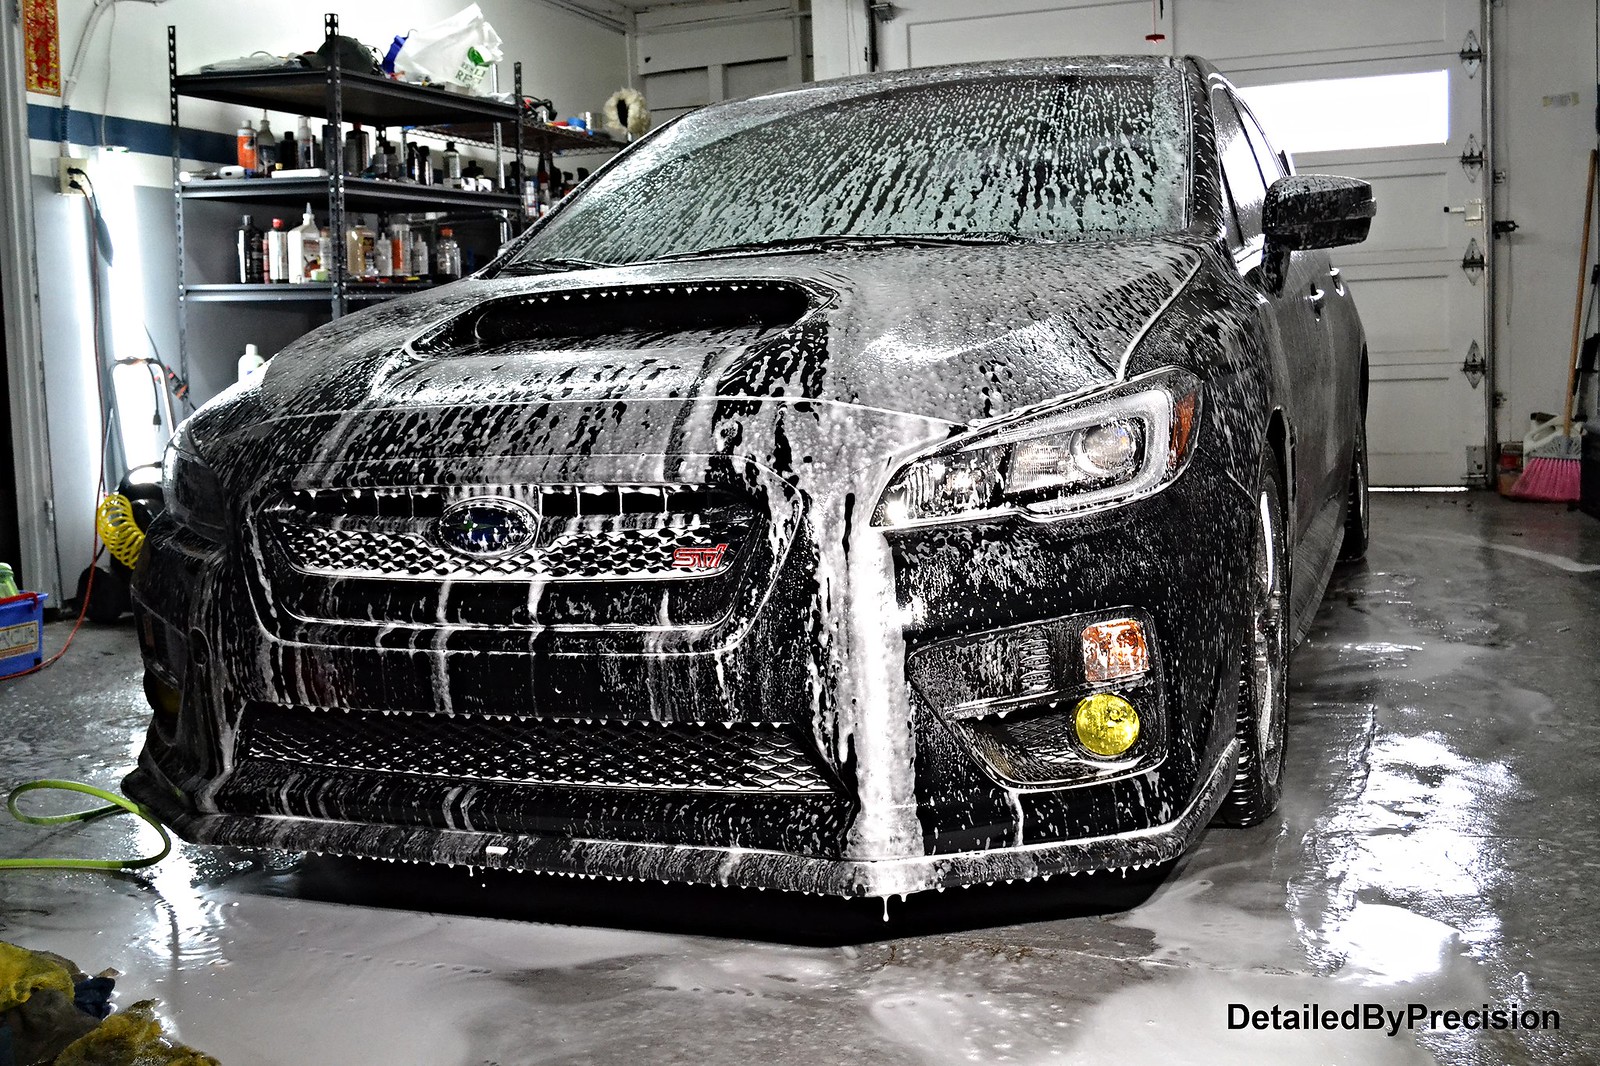
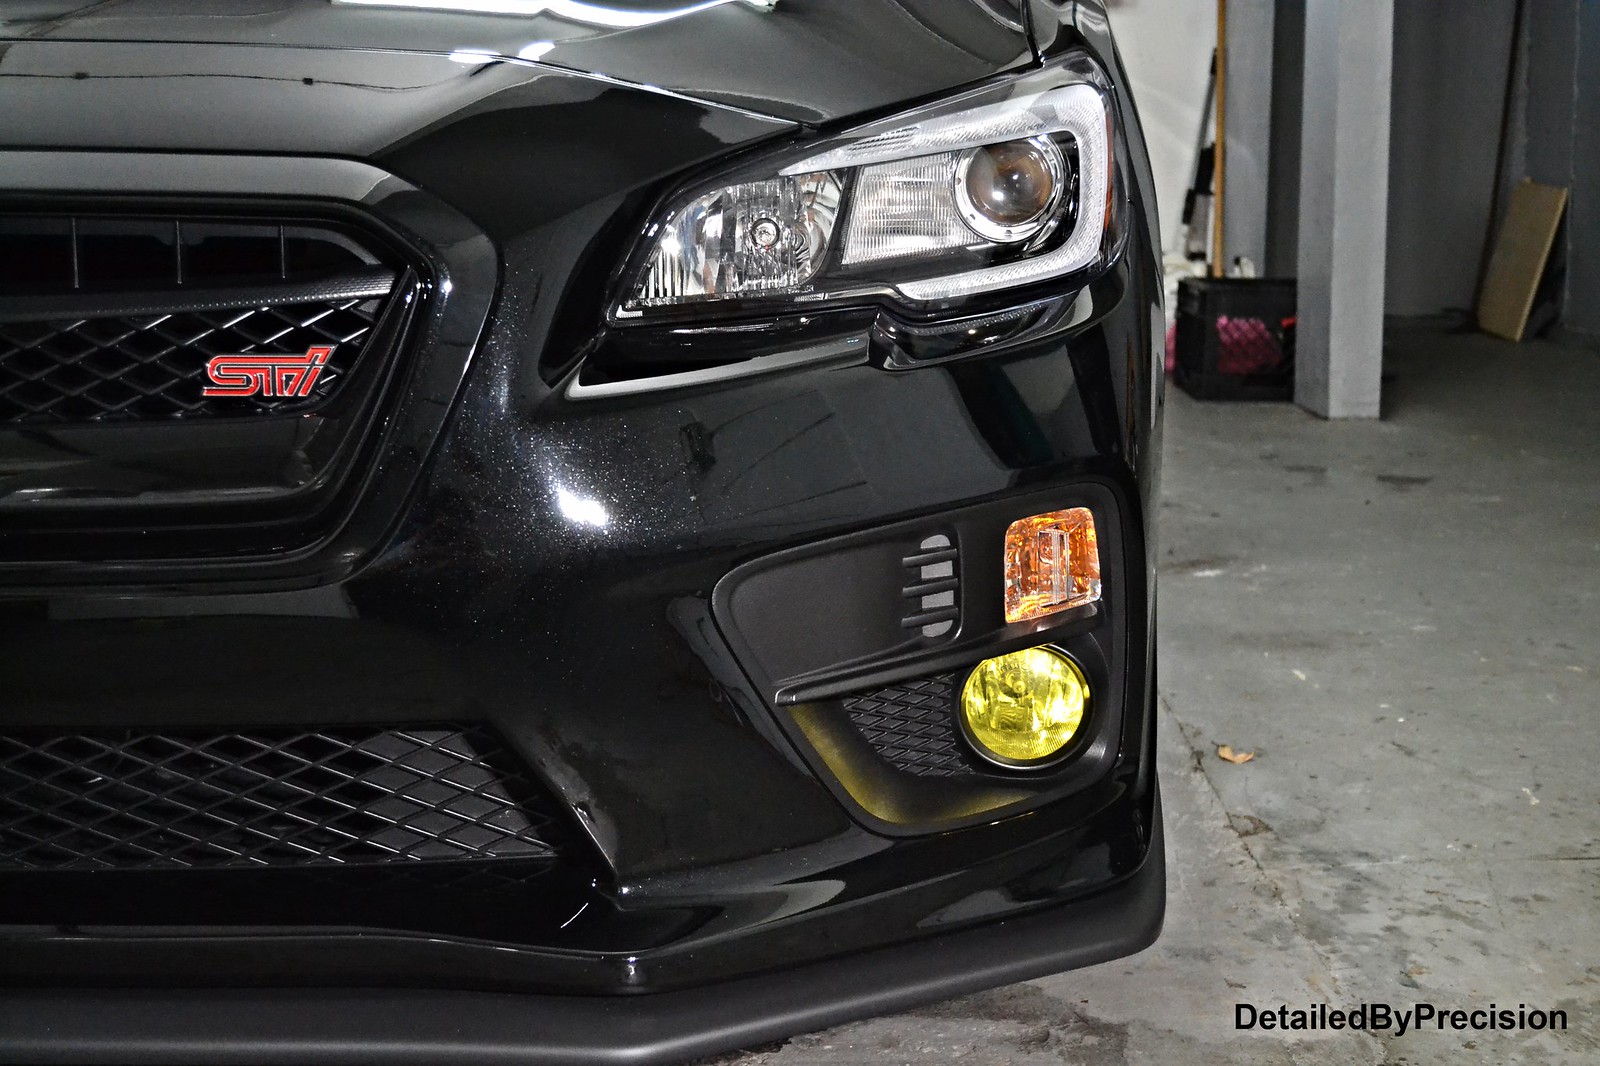
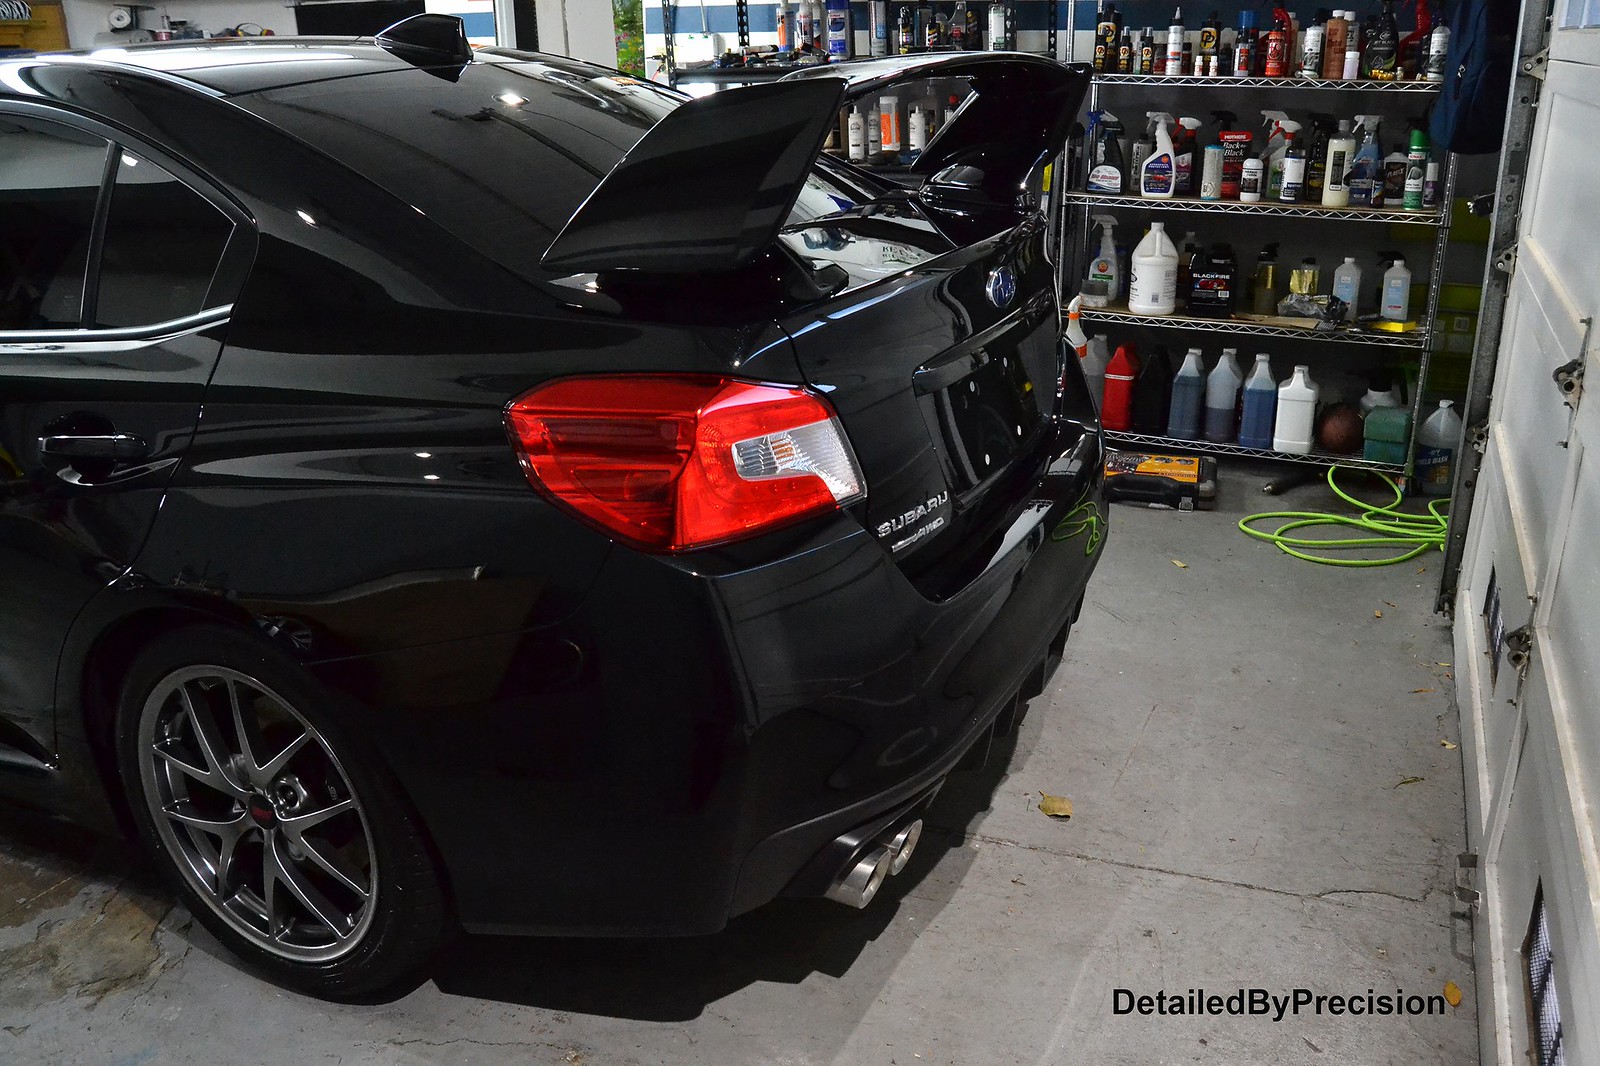
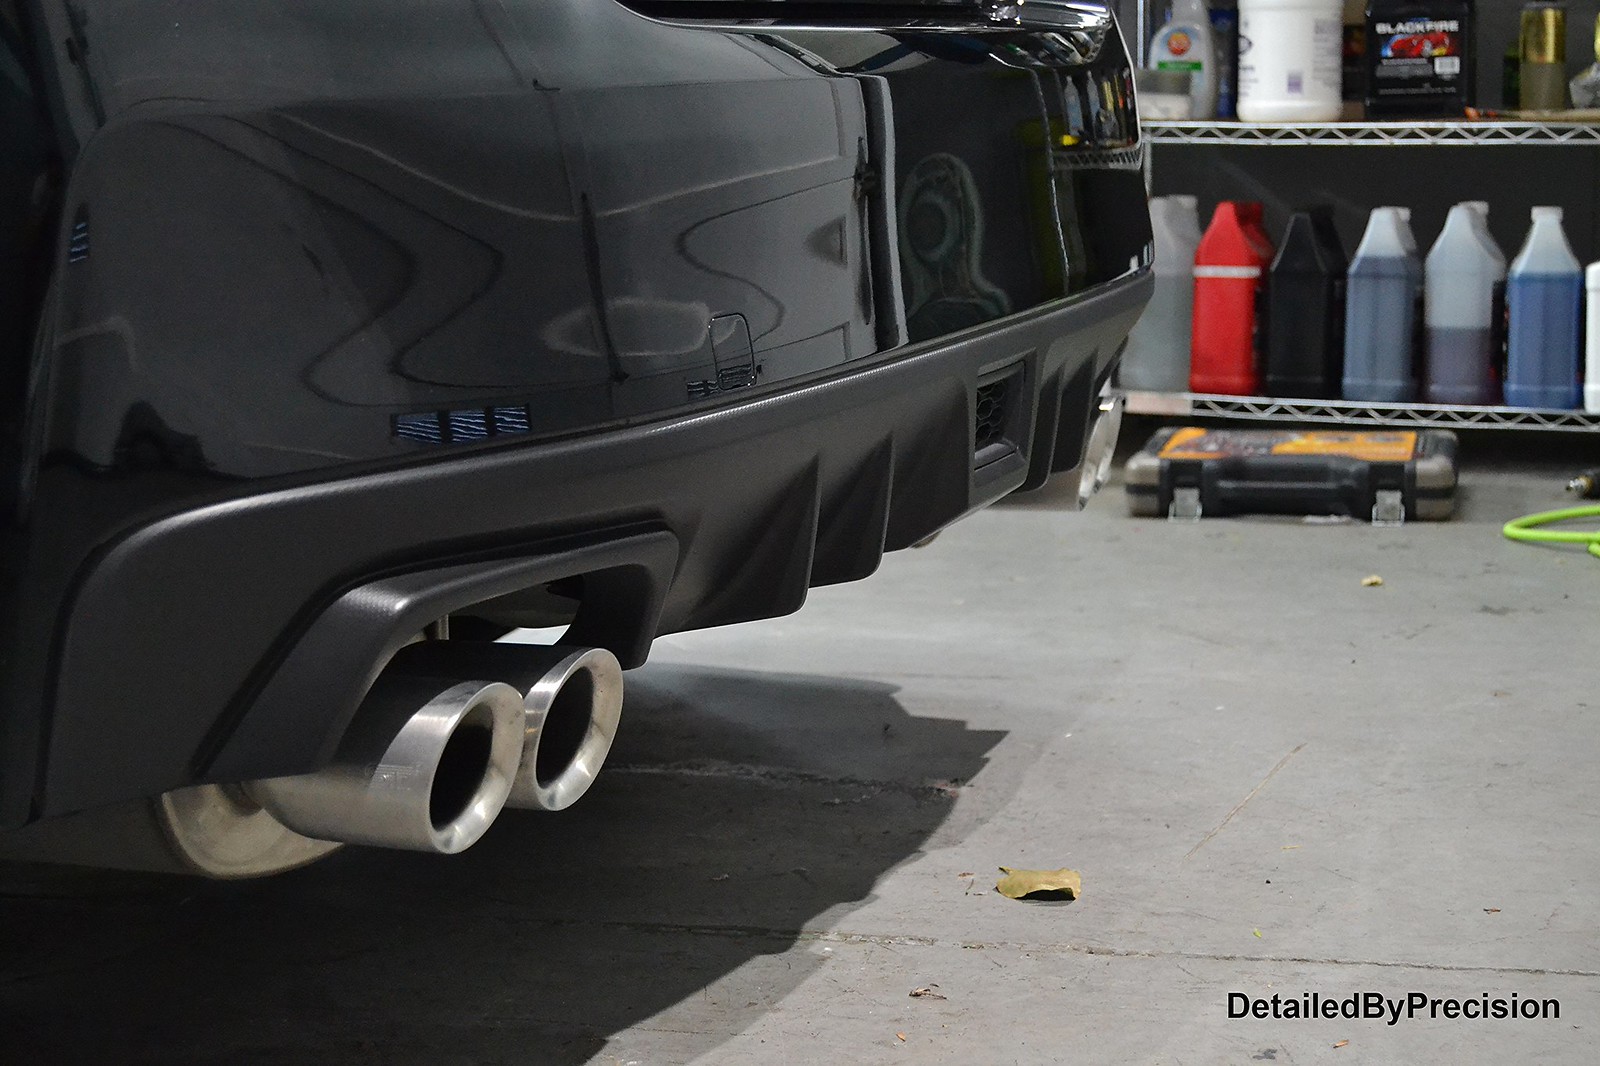
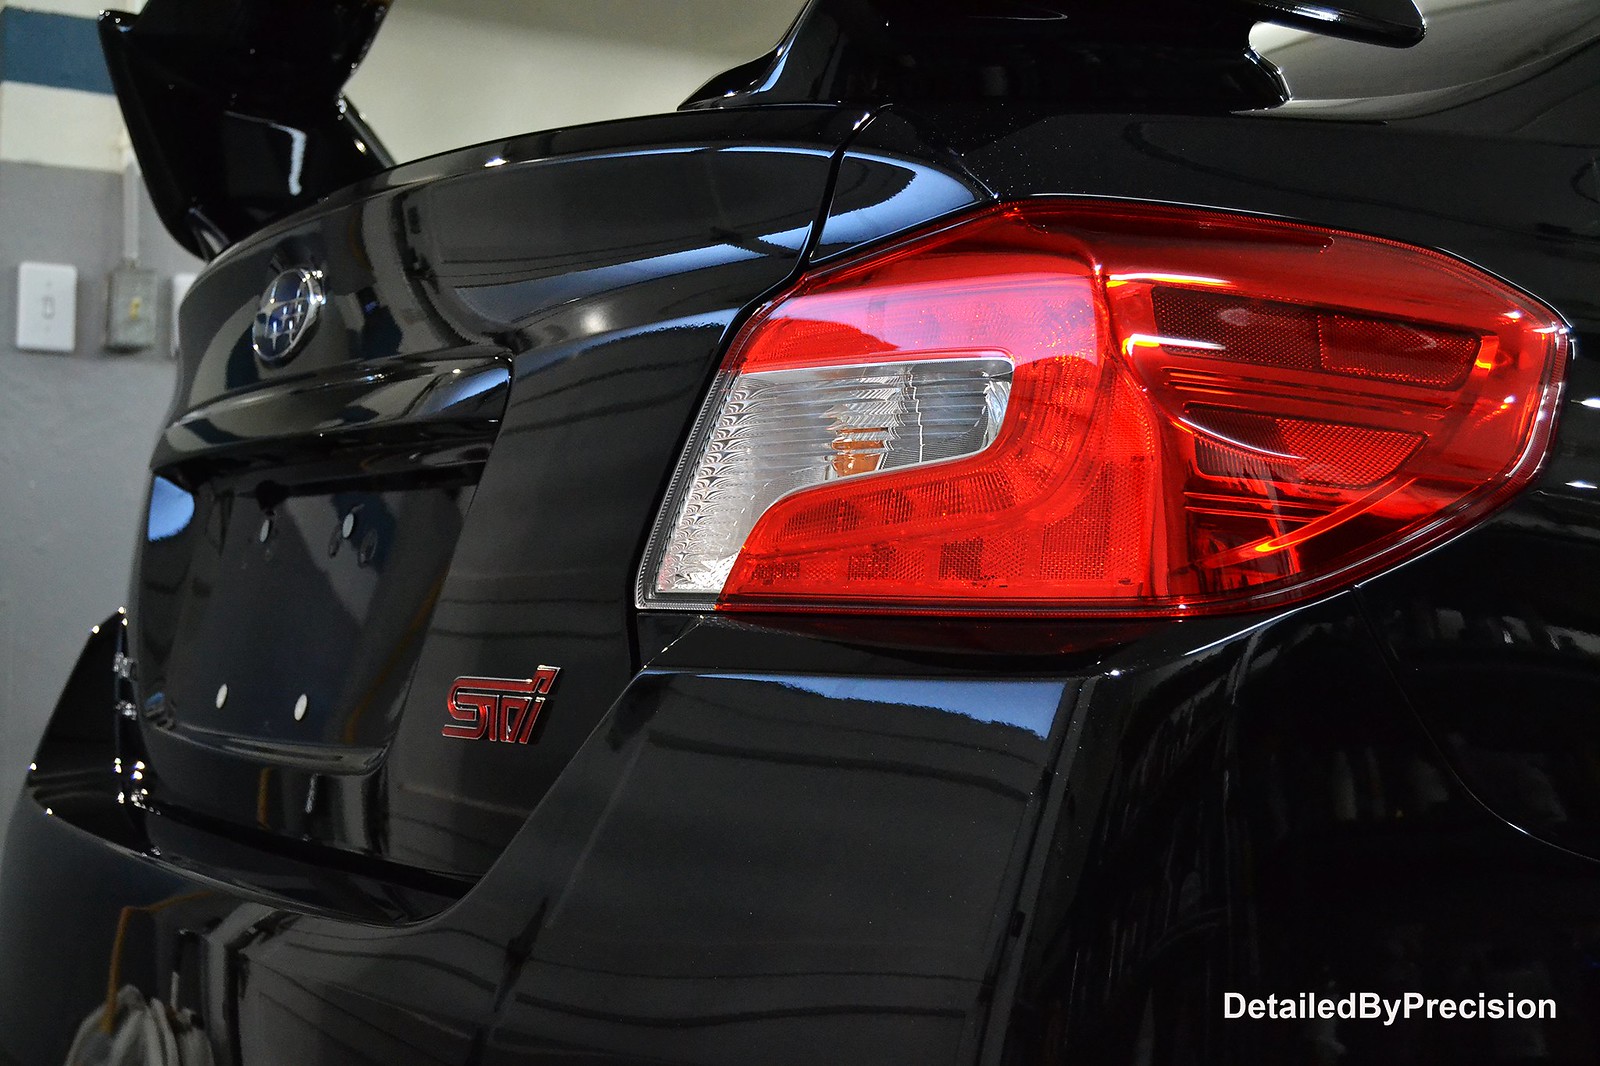
2016 Subaru Sti New Car Prep & 3" scratch removal success
This job was a referral of the white tacoma truck I did beforehand. The customer is a coworker of the tacoma owner and commented on how clean his truck looked parked at work. They had a conversation and my contact information was given to get in touch with me. Had a couple brief text messages and set up an inspection to go over the car and talk about the customers concerns and goals for his new to him car. He stopped by and he wanted the same job done as his co workers truck, but on top of that also polish out the right fender and hood for scratches. But, his main concern was a 3 inch scratch on his rear bumper which he did not know how it got there. I went over the options with him and explained my process clearly and thoroughly so we are both on the same page and no miscommunication. I advised him to buy a bottle of touch up from the dealer just in case I needed to use it on the scratch. We set up a drop off day for me to work on the car and his anticipation to see the end outcome of the 3" scratch was exciting.
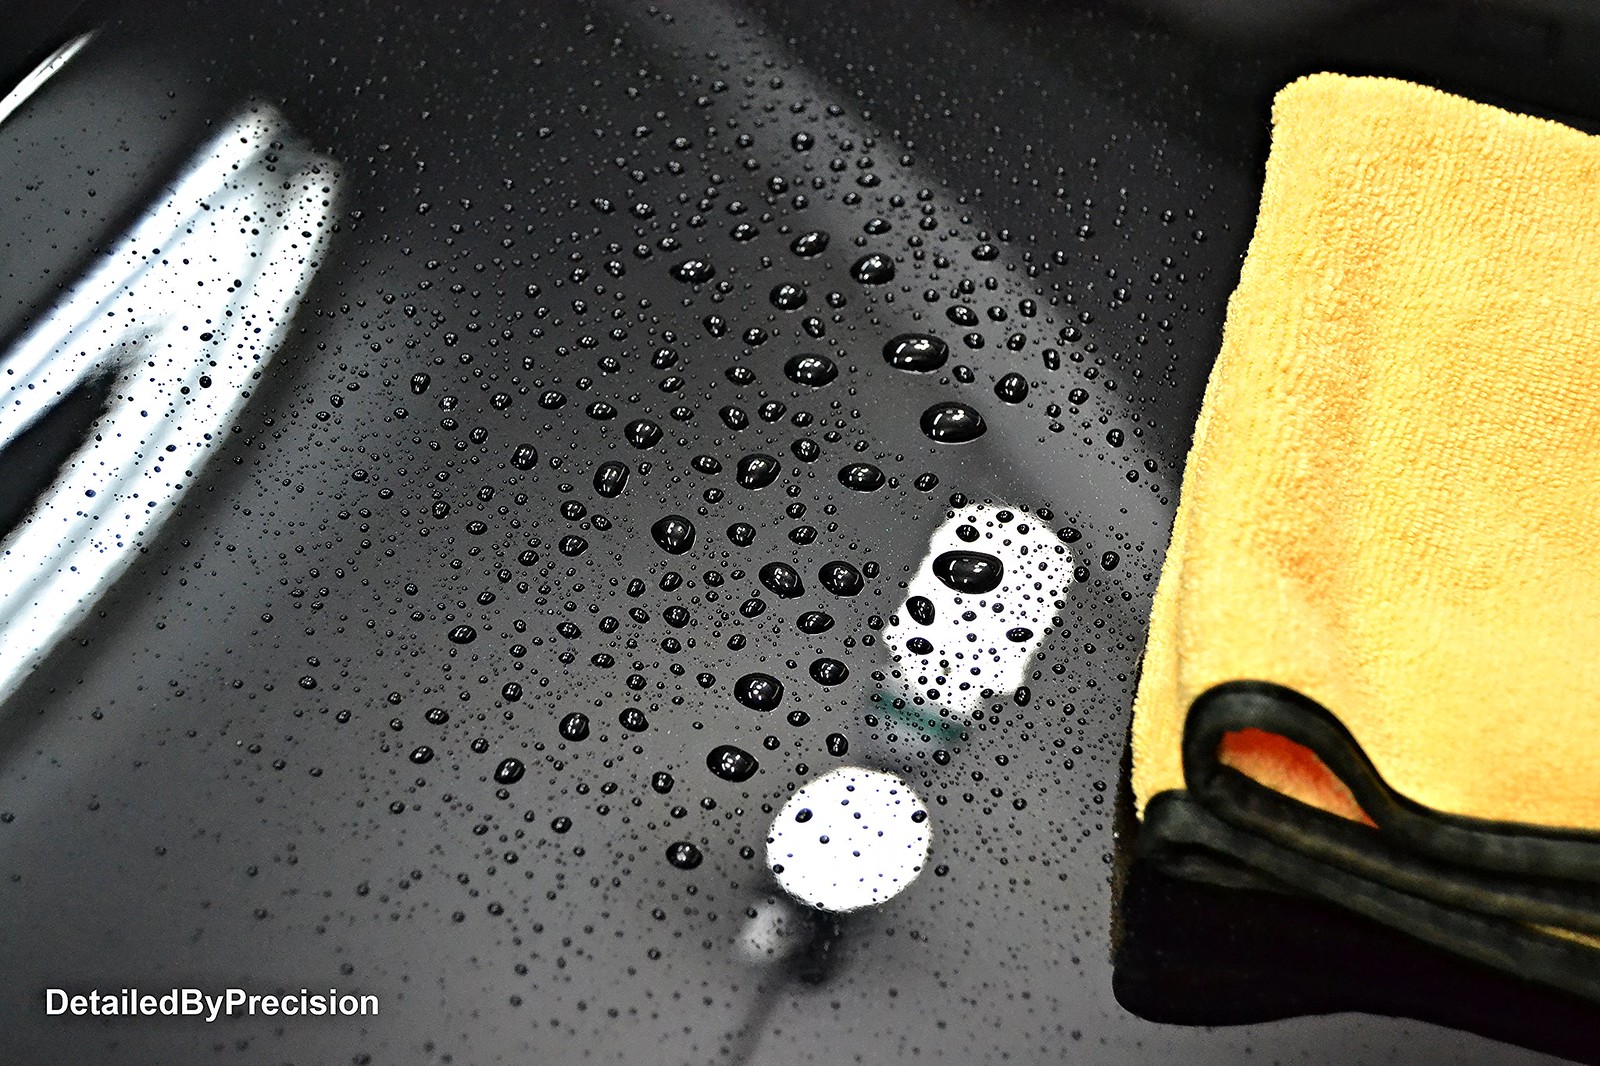
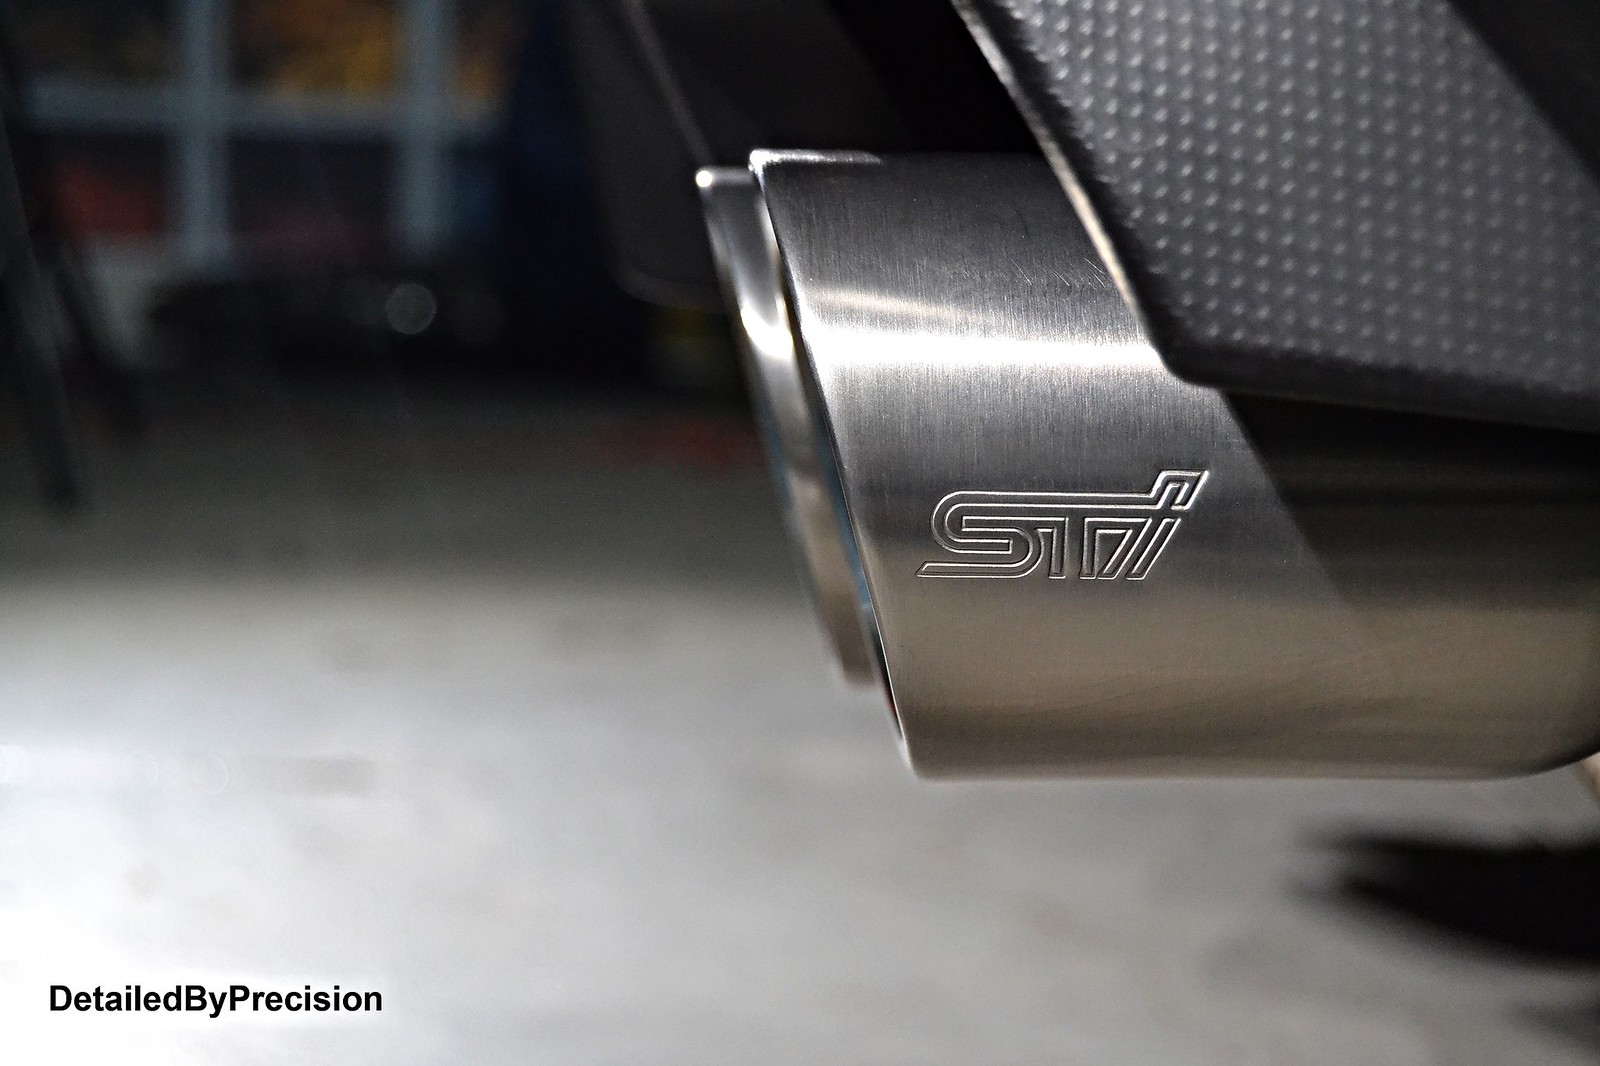
Worked on the exhaust tips first
 DetailedByPrecision2878 by Limny Kuang, on Flickr
 DetailedByPrecision2879 by Limny Kuang, on Flickr
 DetailedByPrecision2882 by Limny Kuang, on Flickr
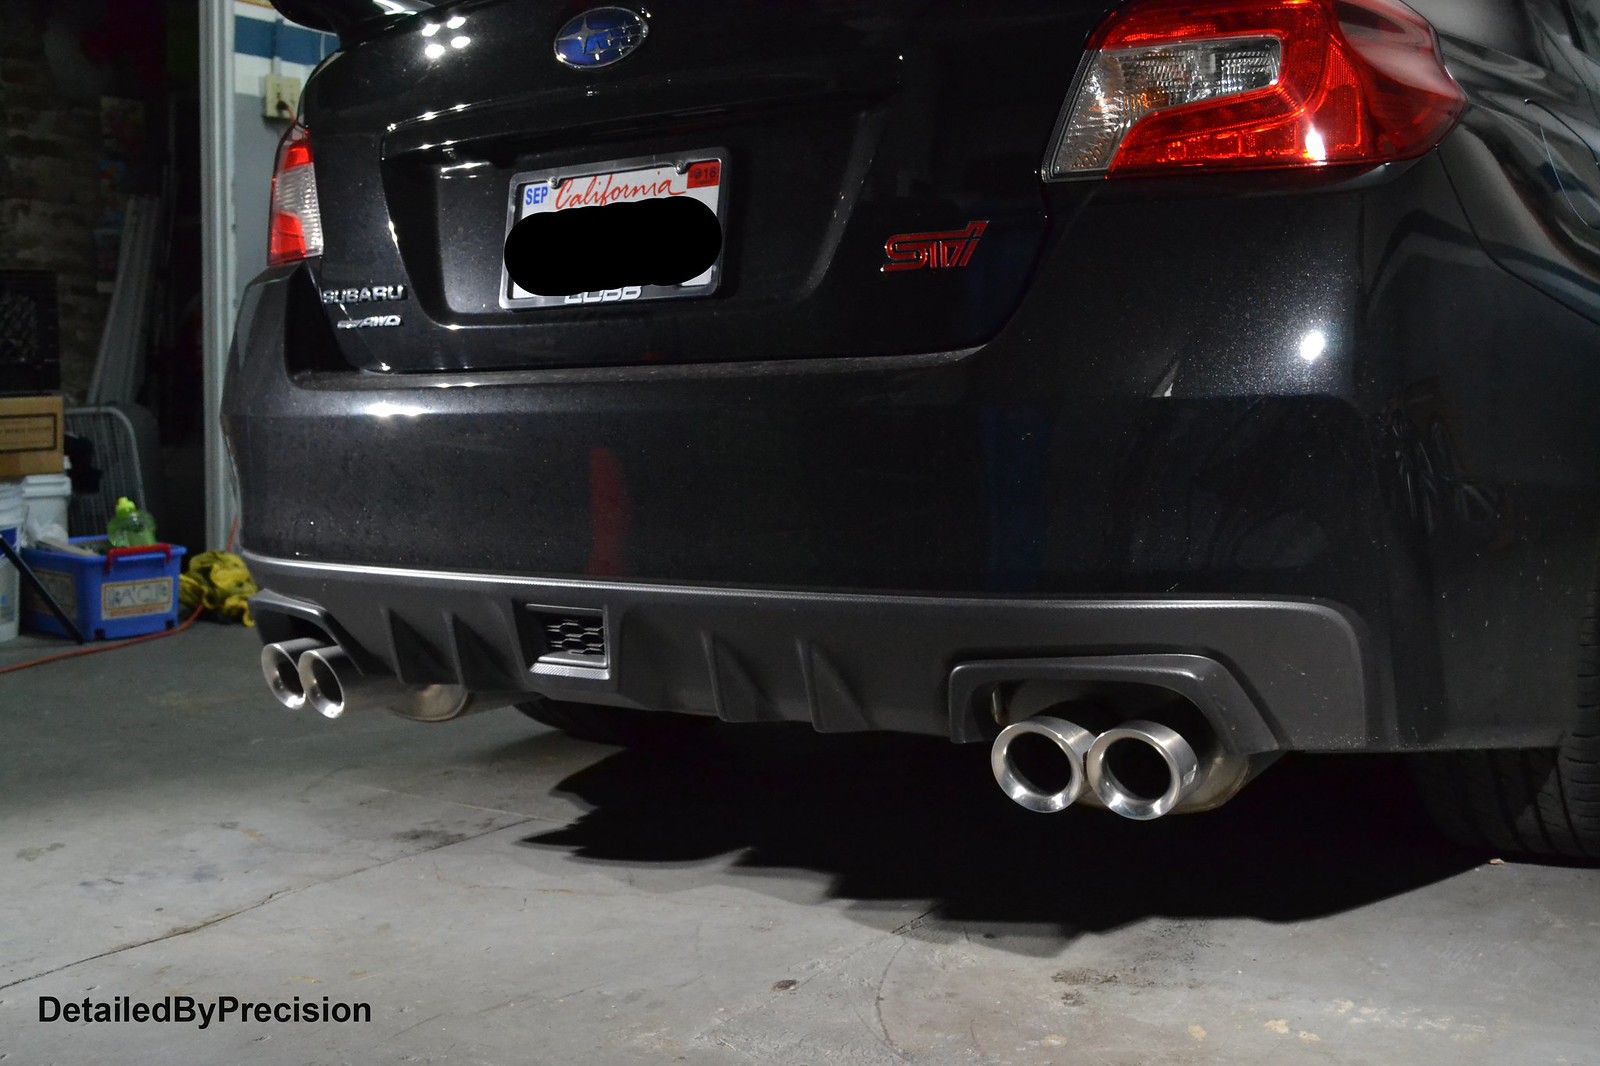 DetailedByPrecision2885 by Limny Kuang, on Flickr
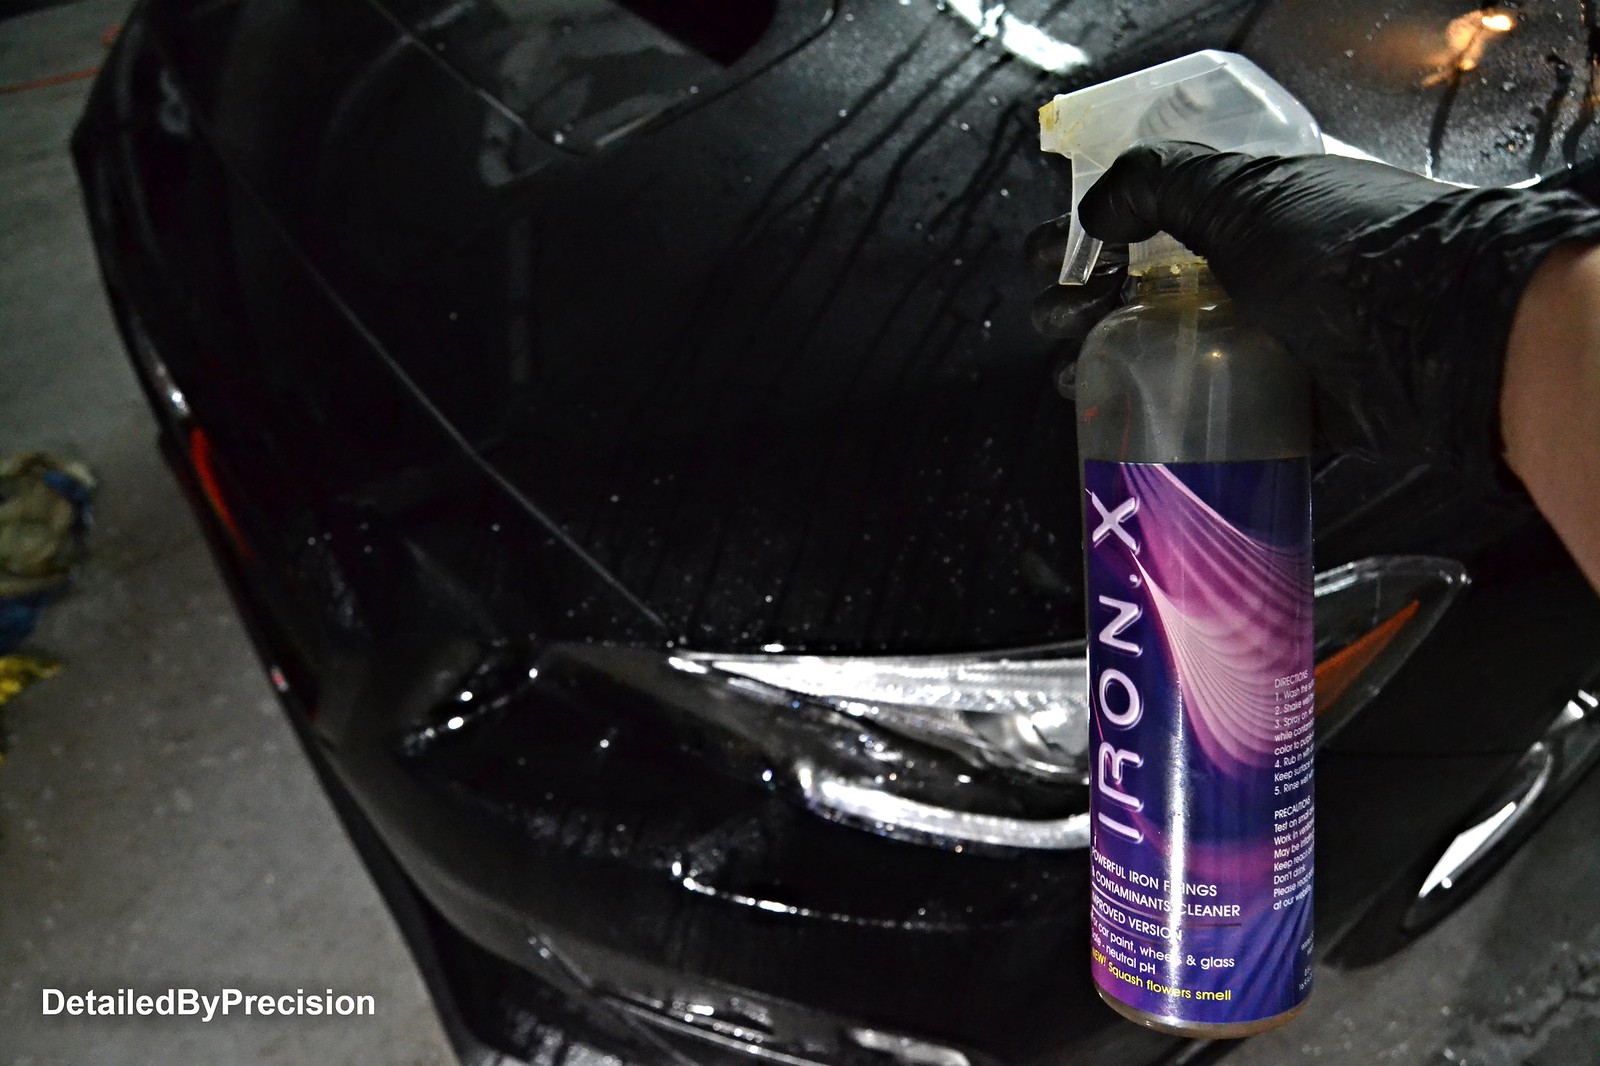
Started the wash, decontamination process with foaming the car, Iron X, Claybar
 DetailedByPrecision2886 by Limny Kuang, on Flickr
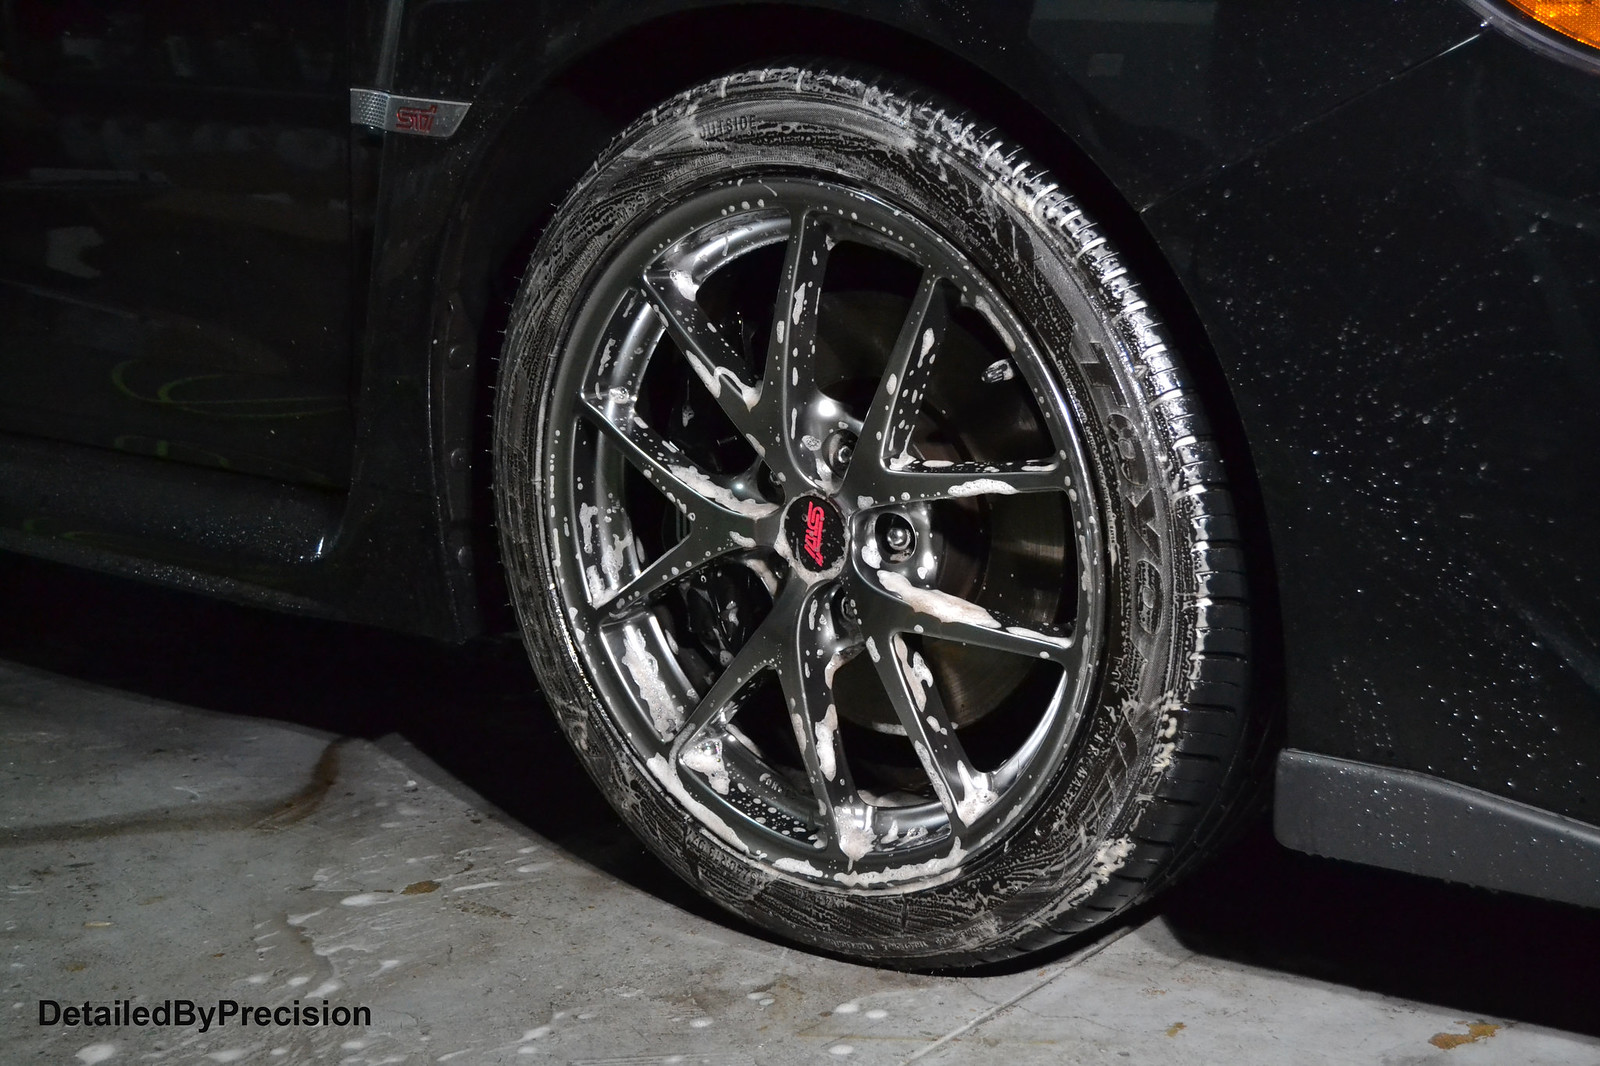 DetailedByPrecision2889 by Limny Kuang, on Flickr
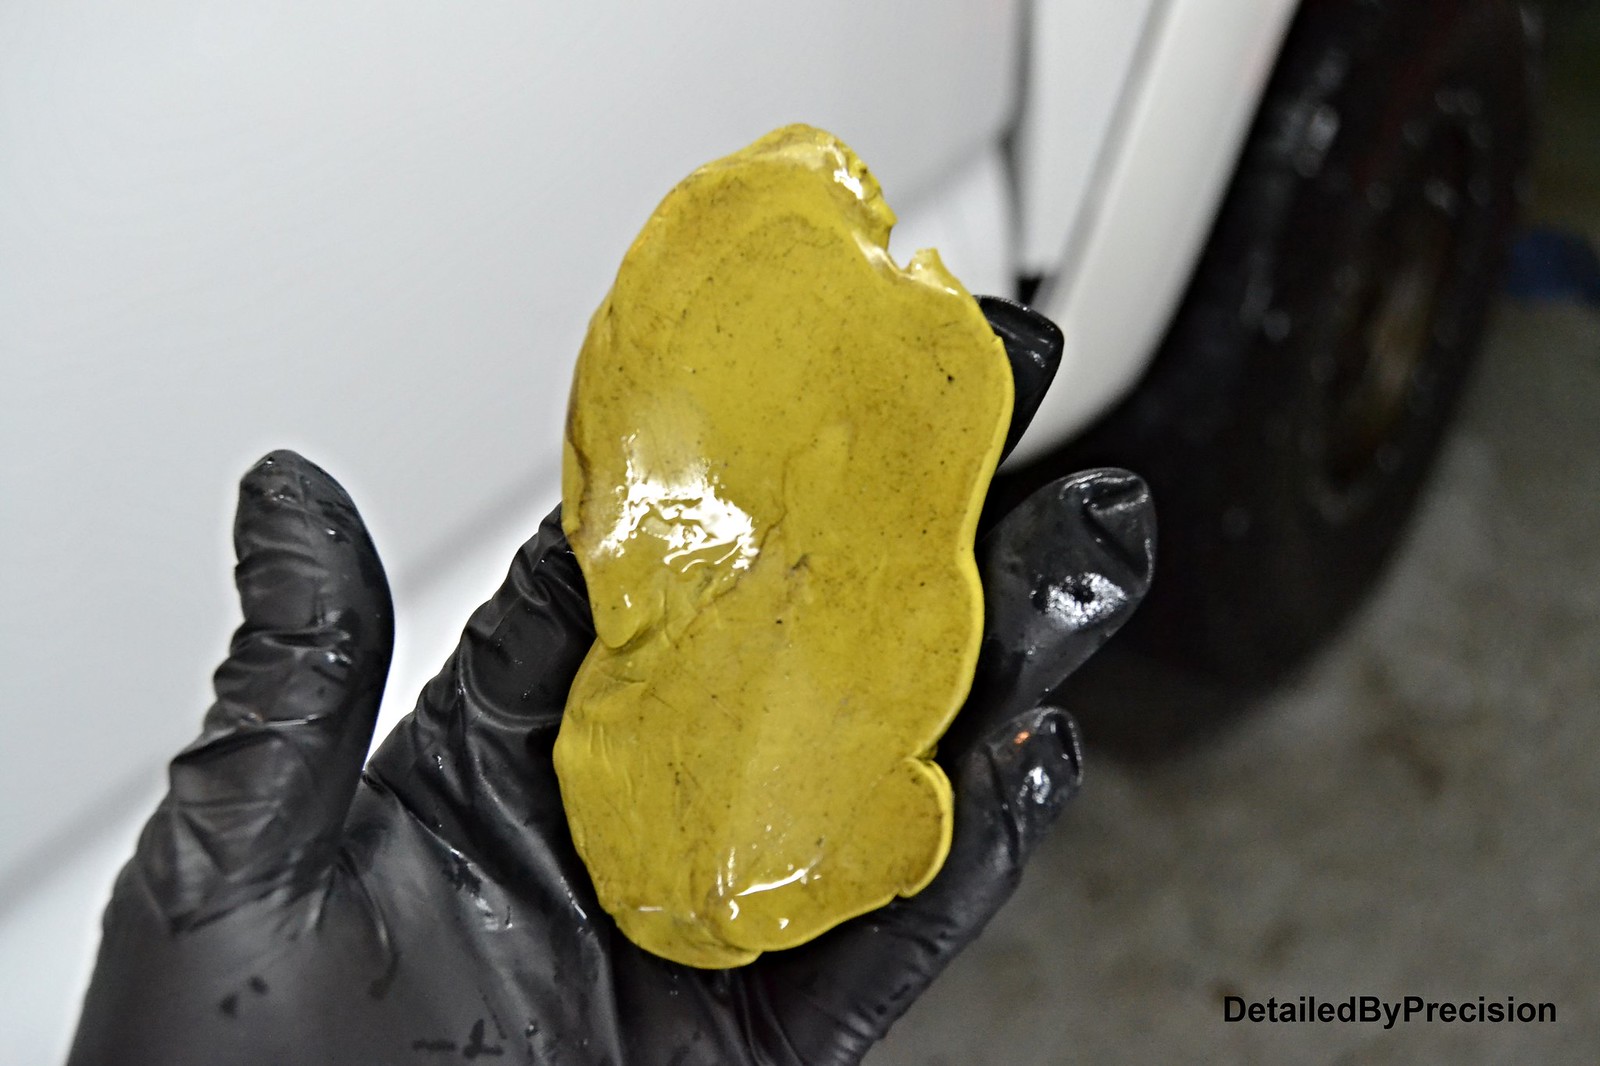
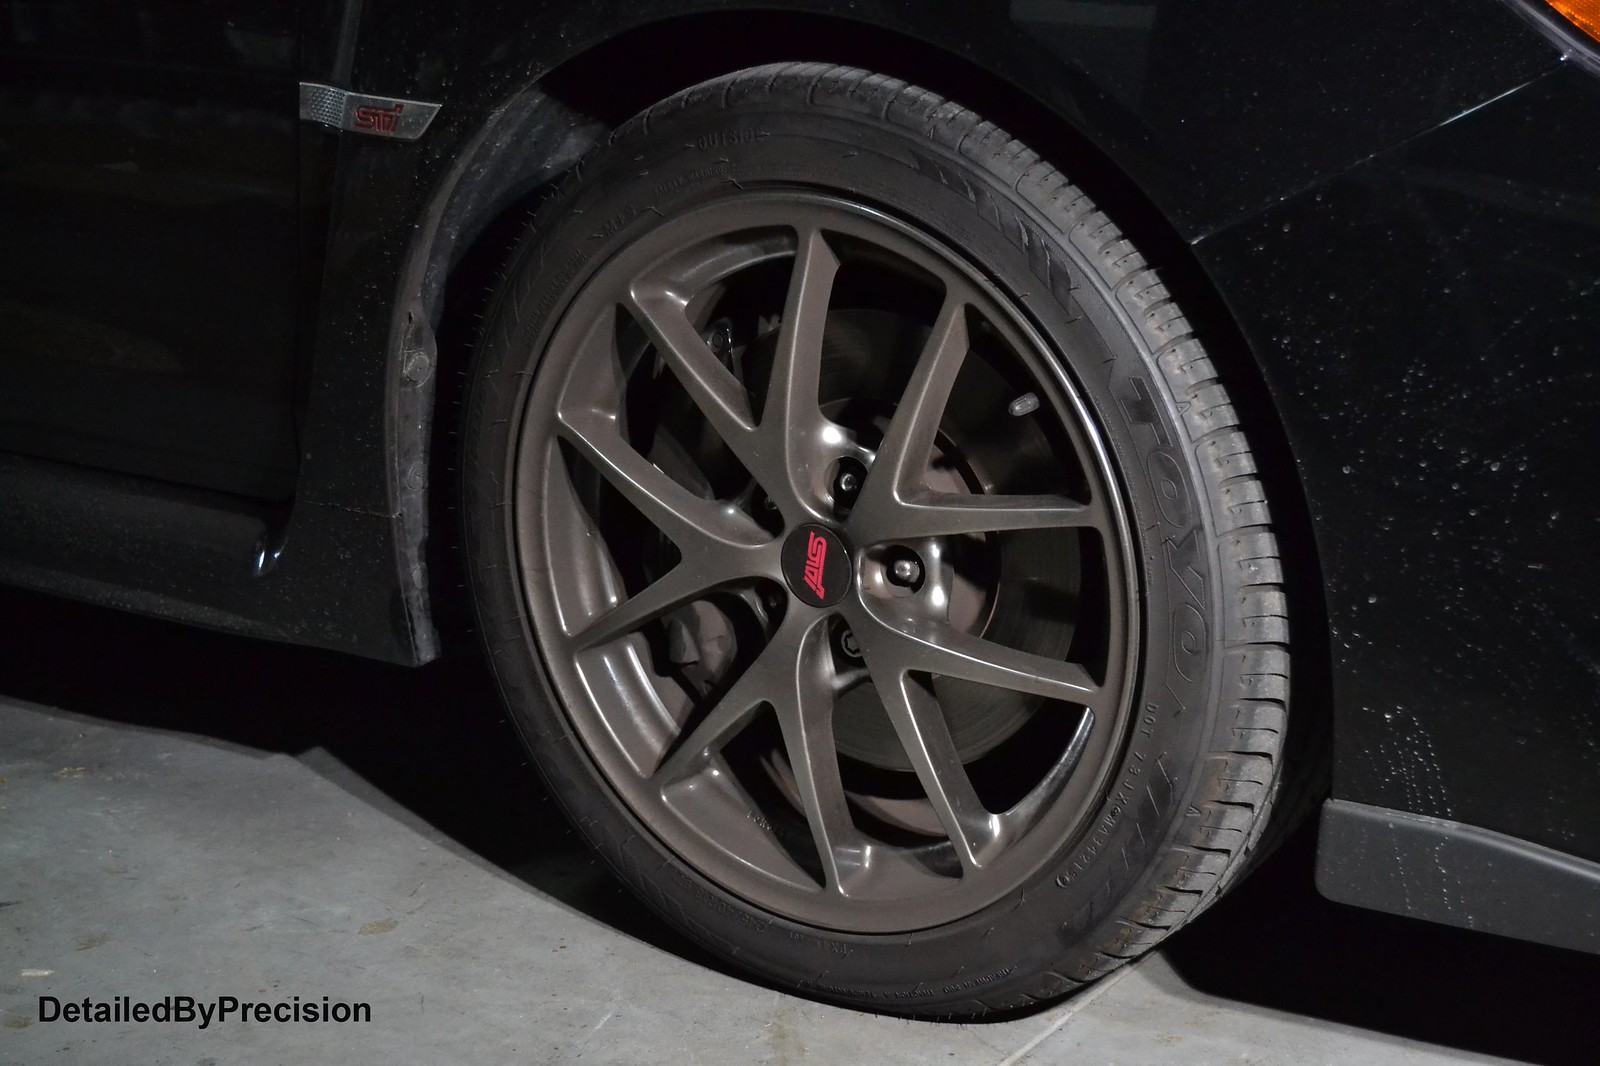
Applied Carpro Hydro onto the wheels for protection
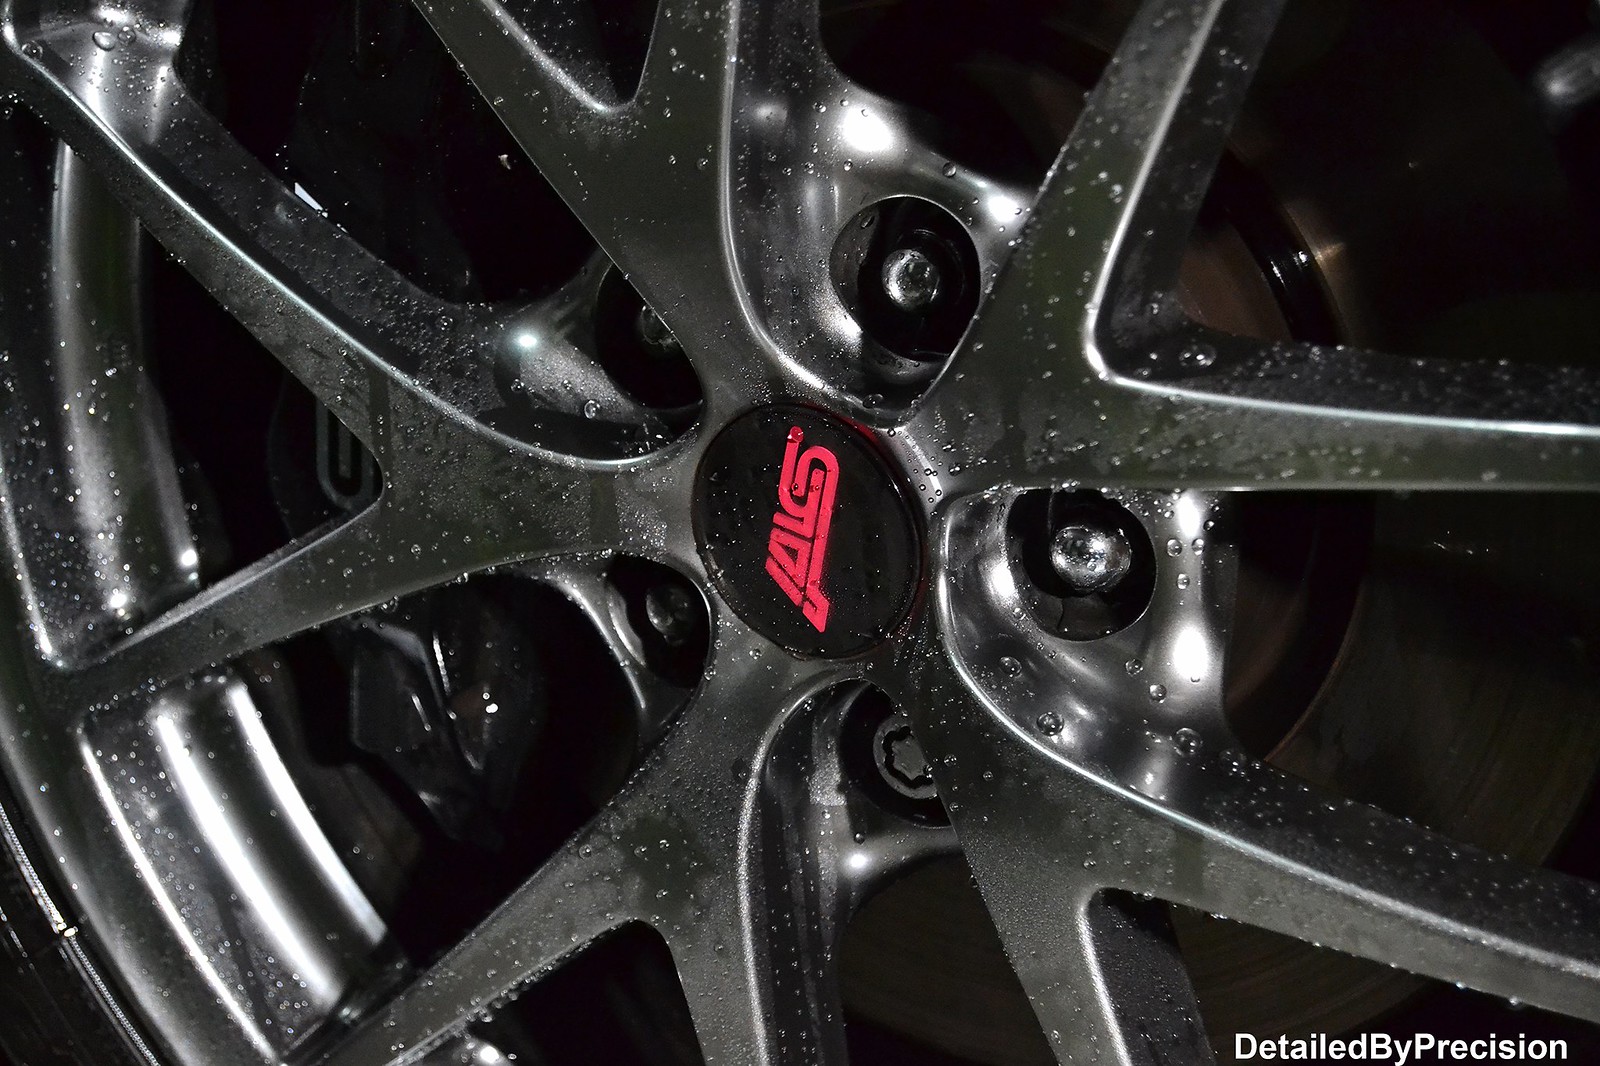 DetailedByPrecision2893 by Limny Kuang, on Flickr
 DetailedByPrecision2894 by Limny Kuang, on Flickr
 DetailedByPrecision2896 by Limny Kuang, on Flickr
 DetailedByPrecision2898 by Limny Kuang, on Flickr
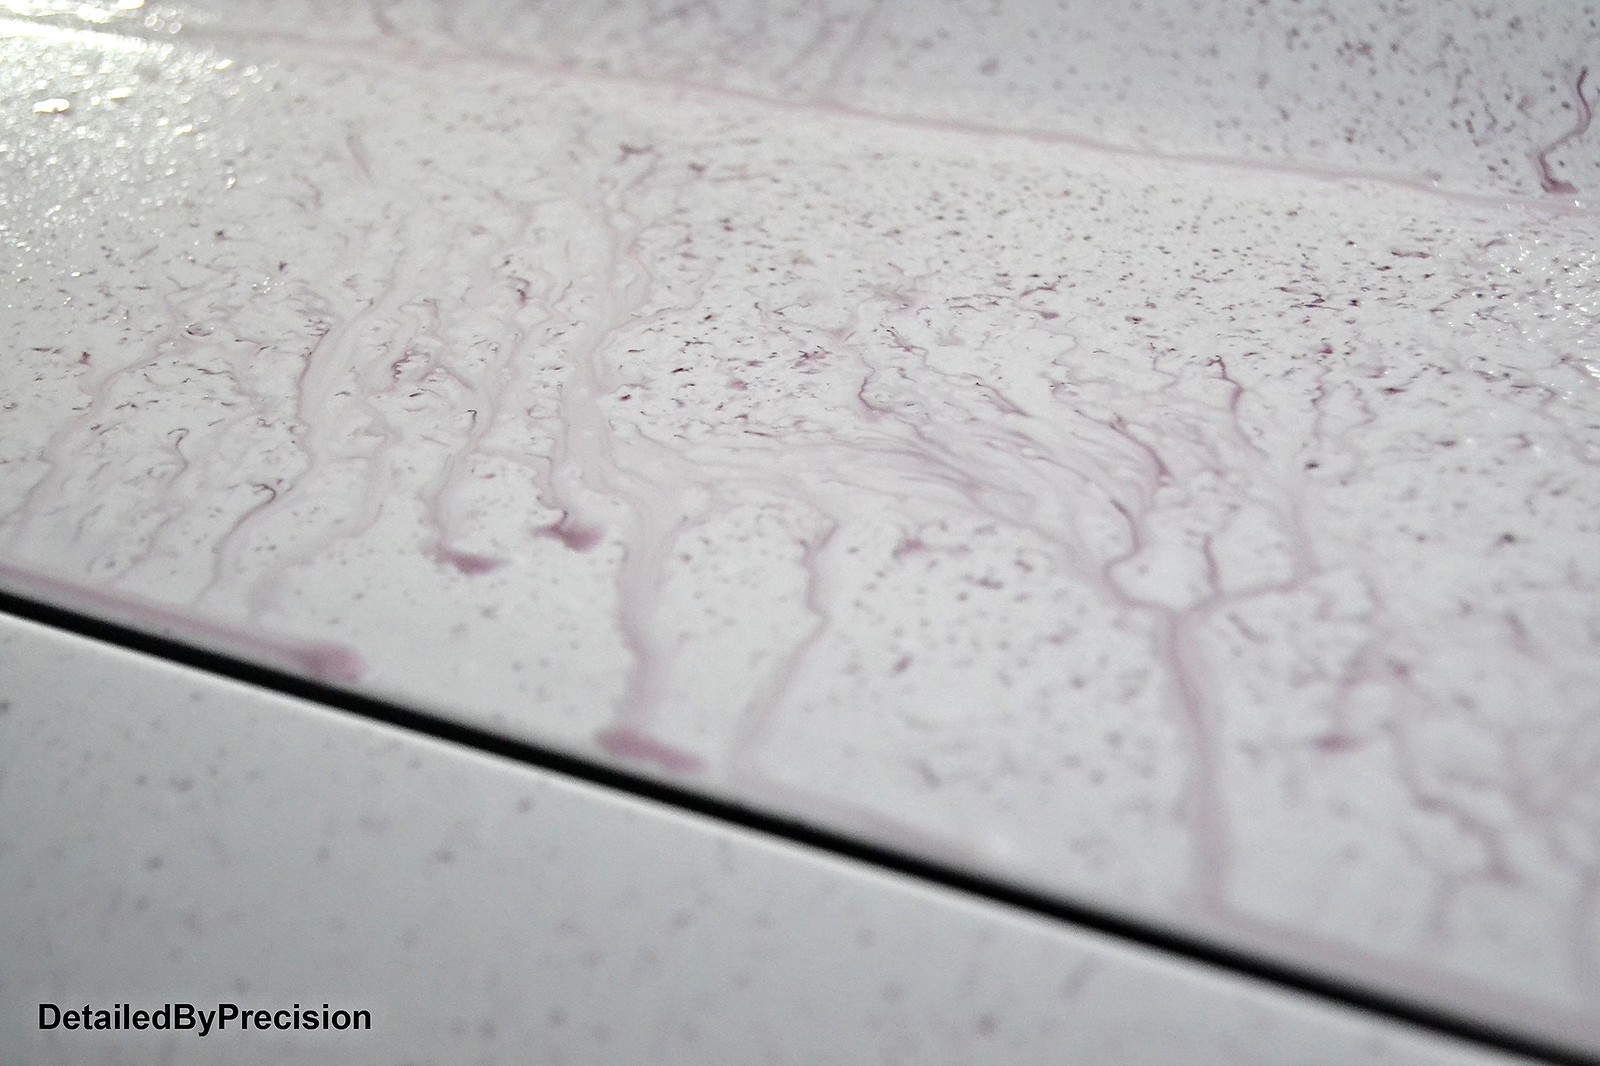
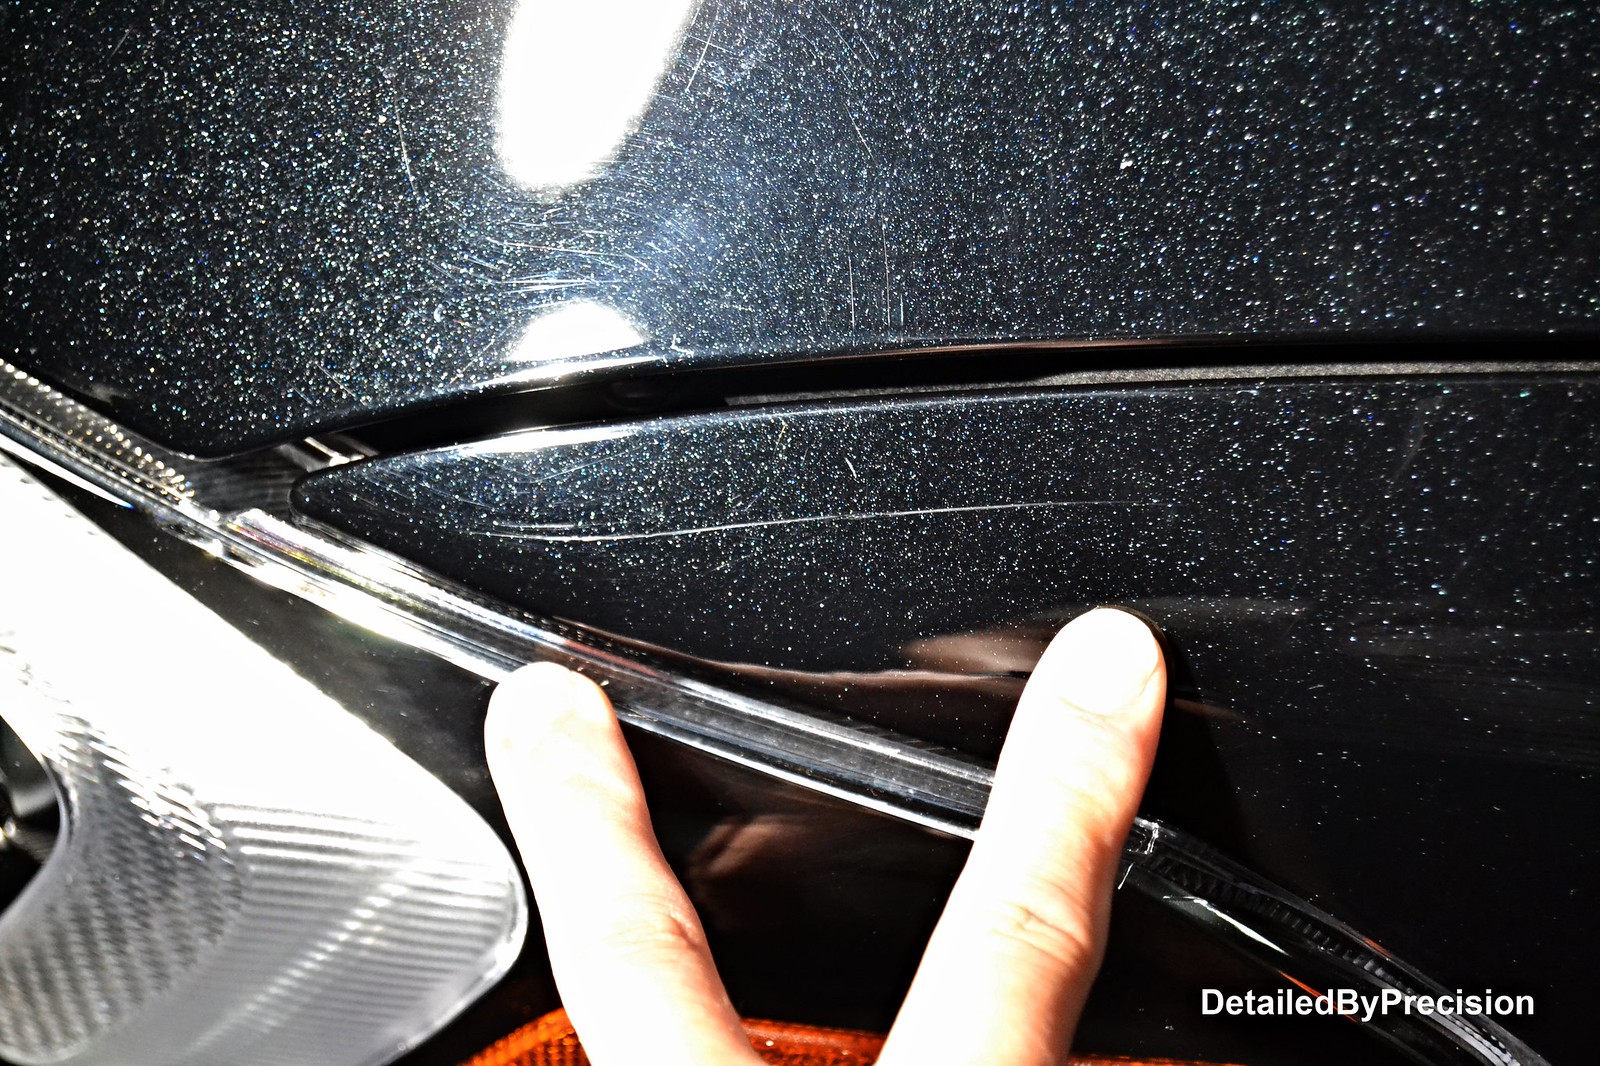
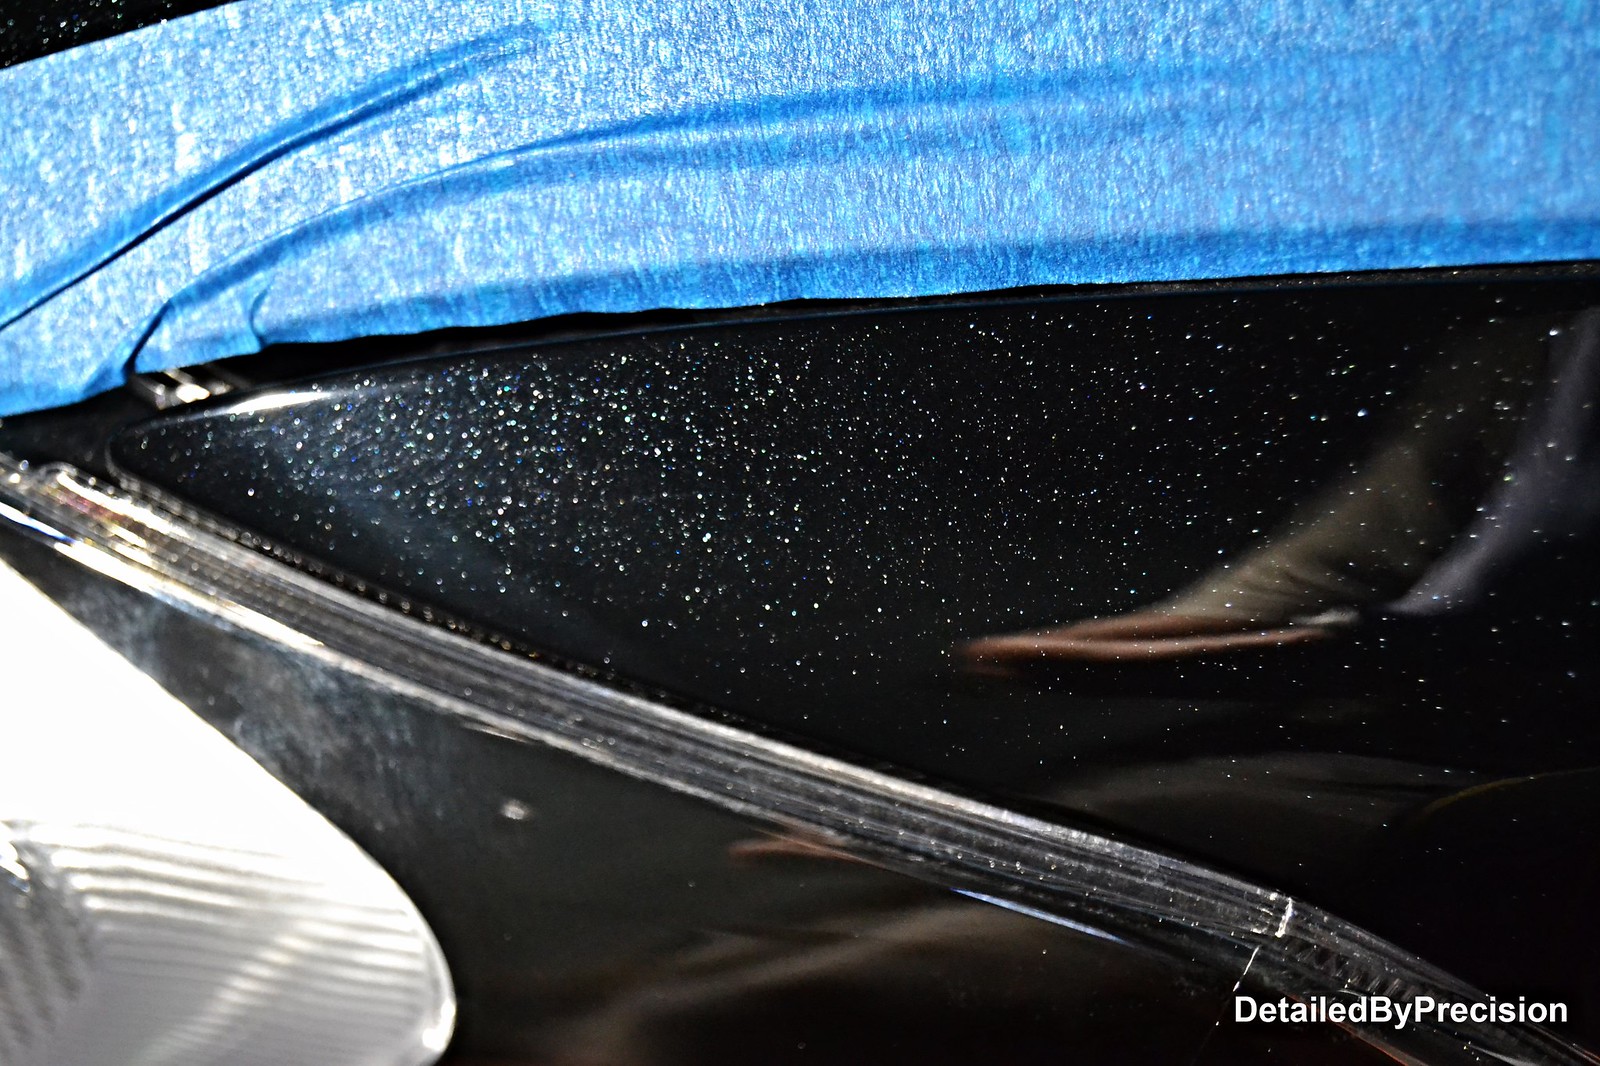
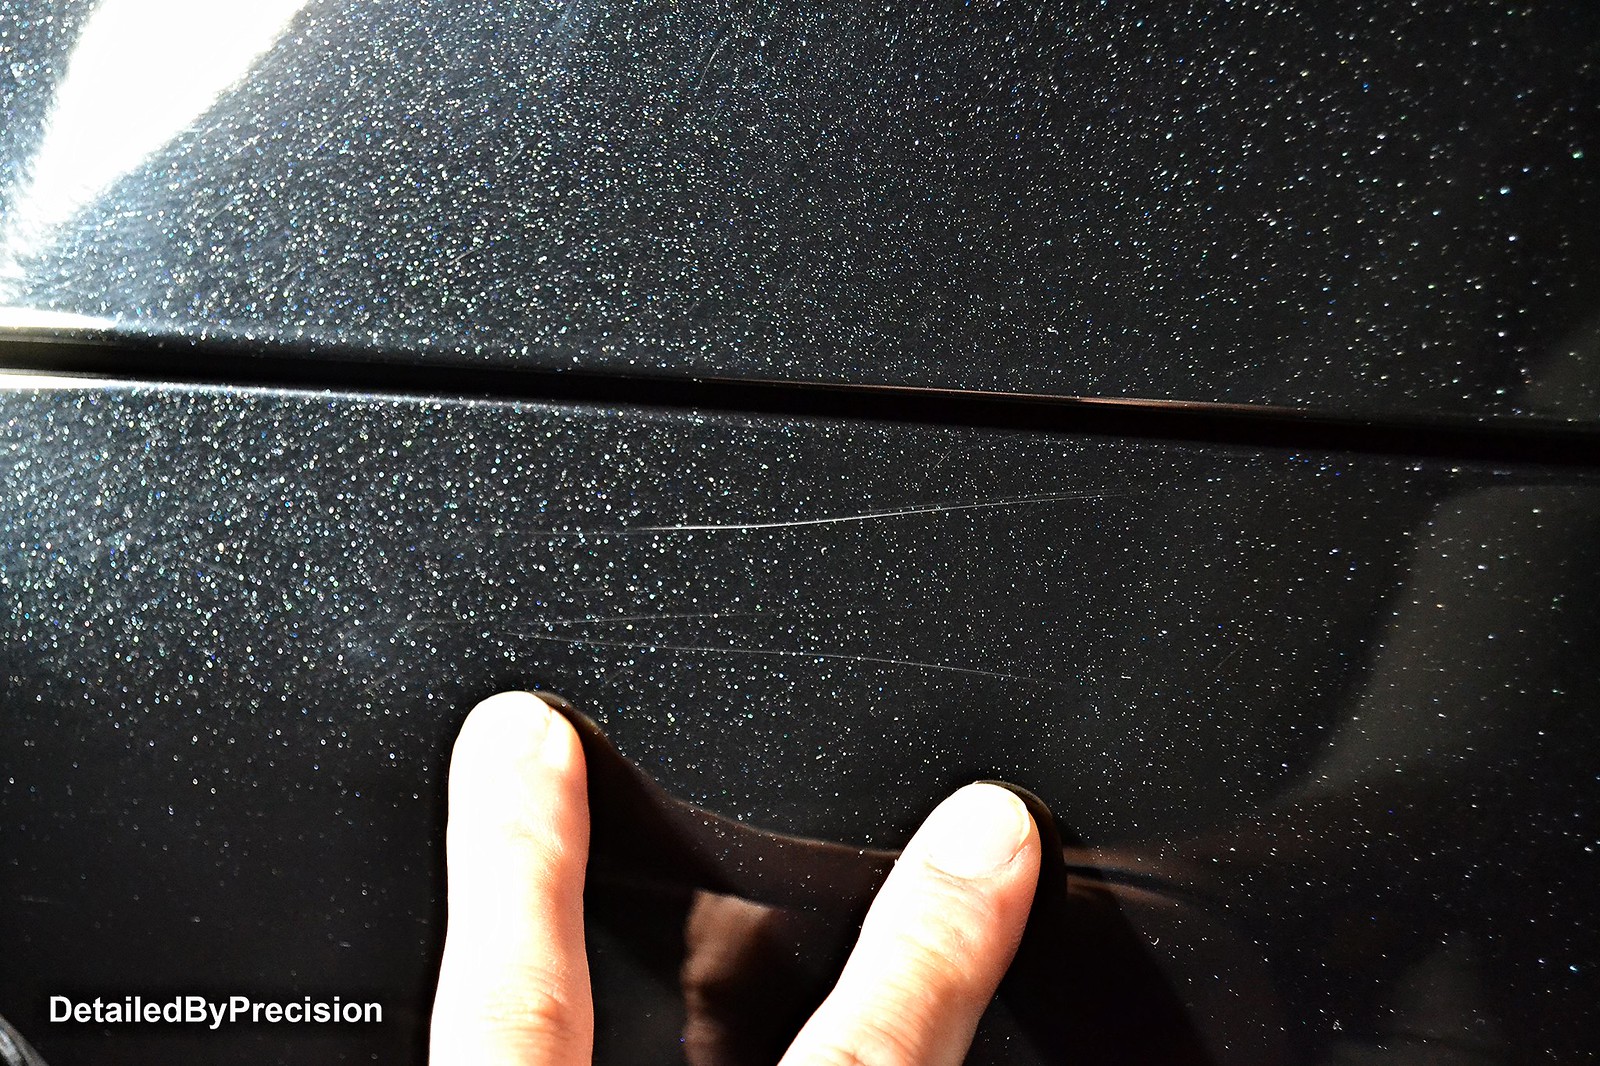
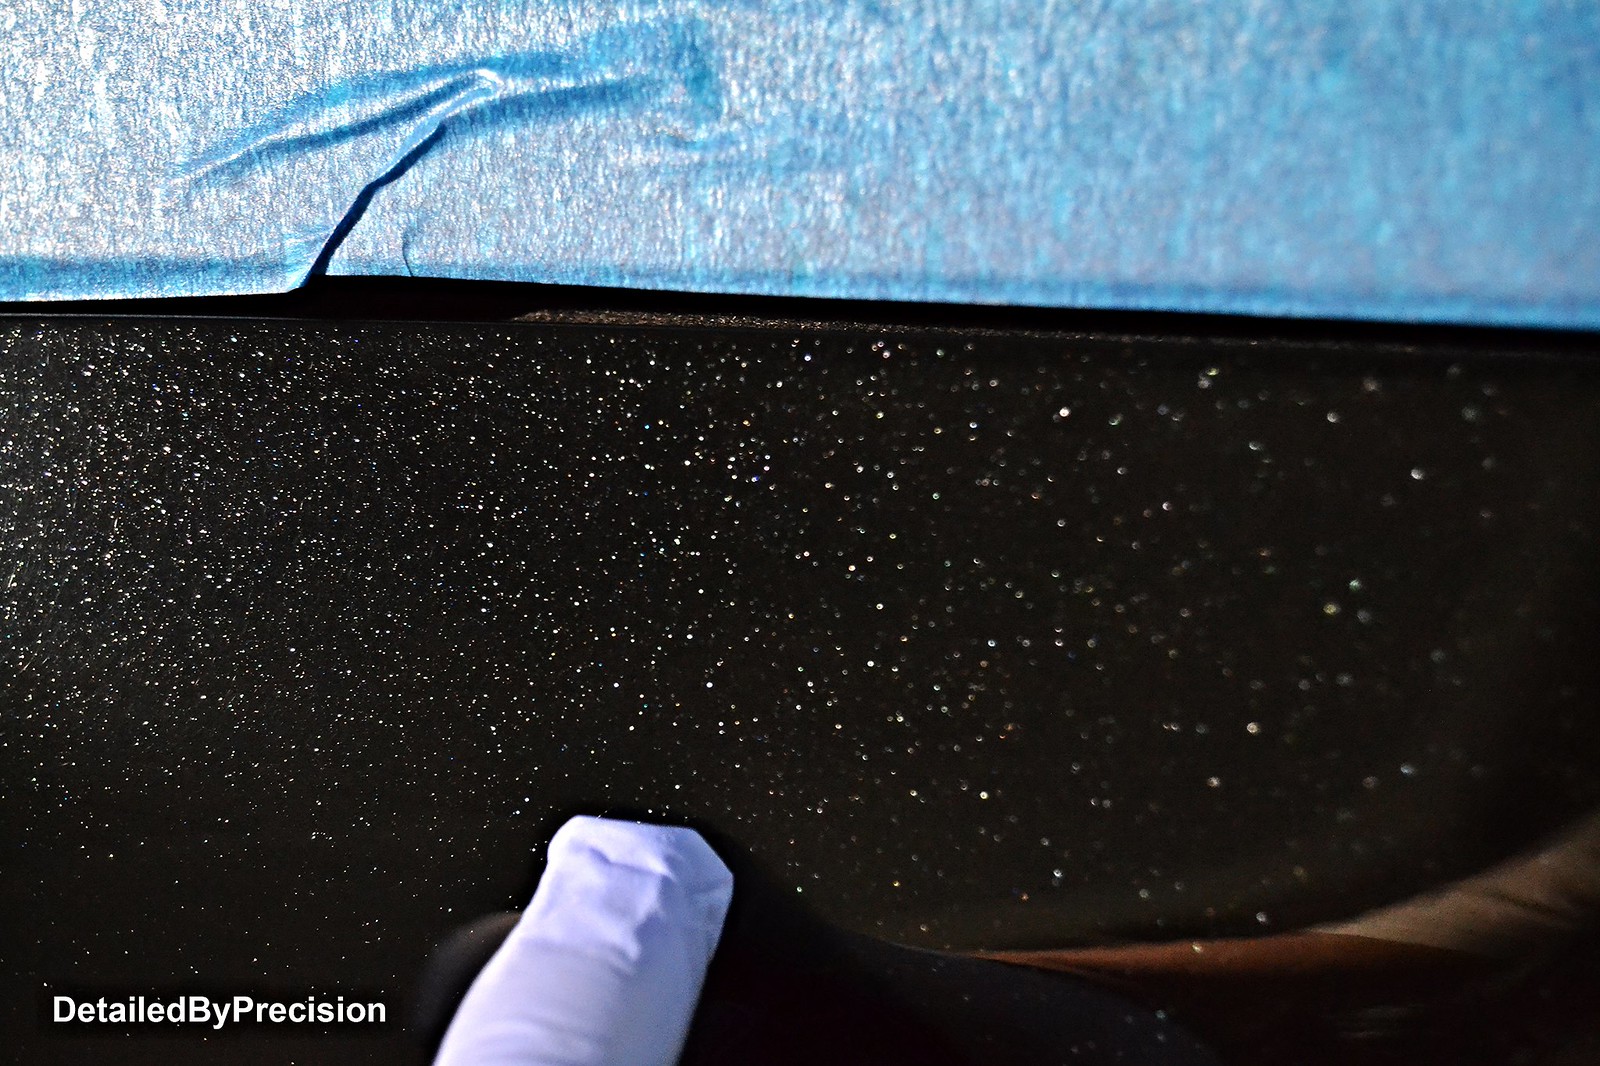
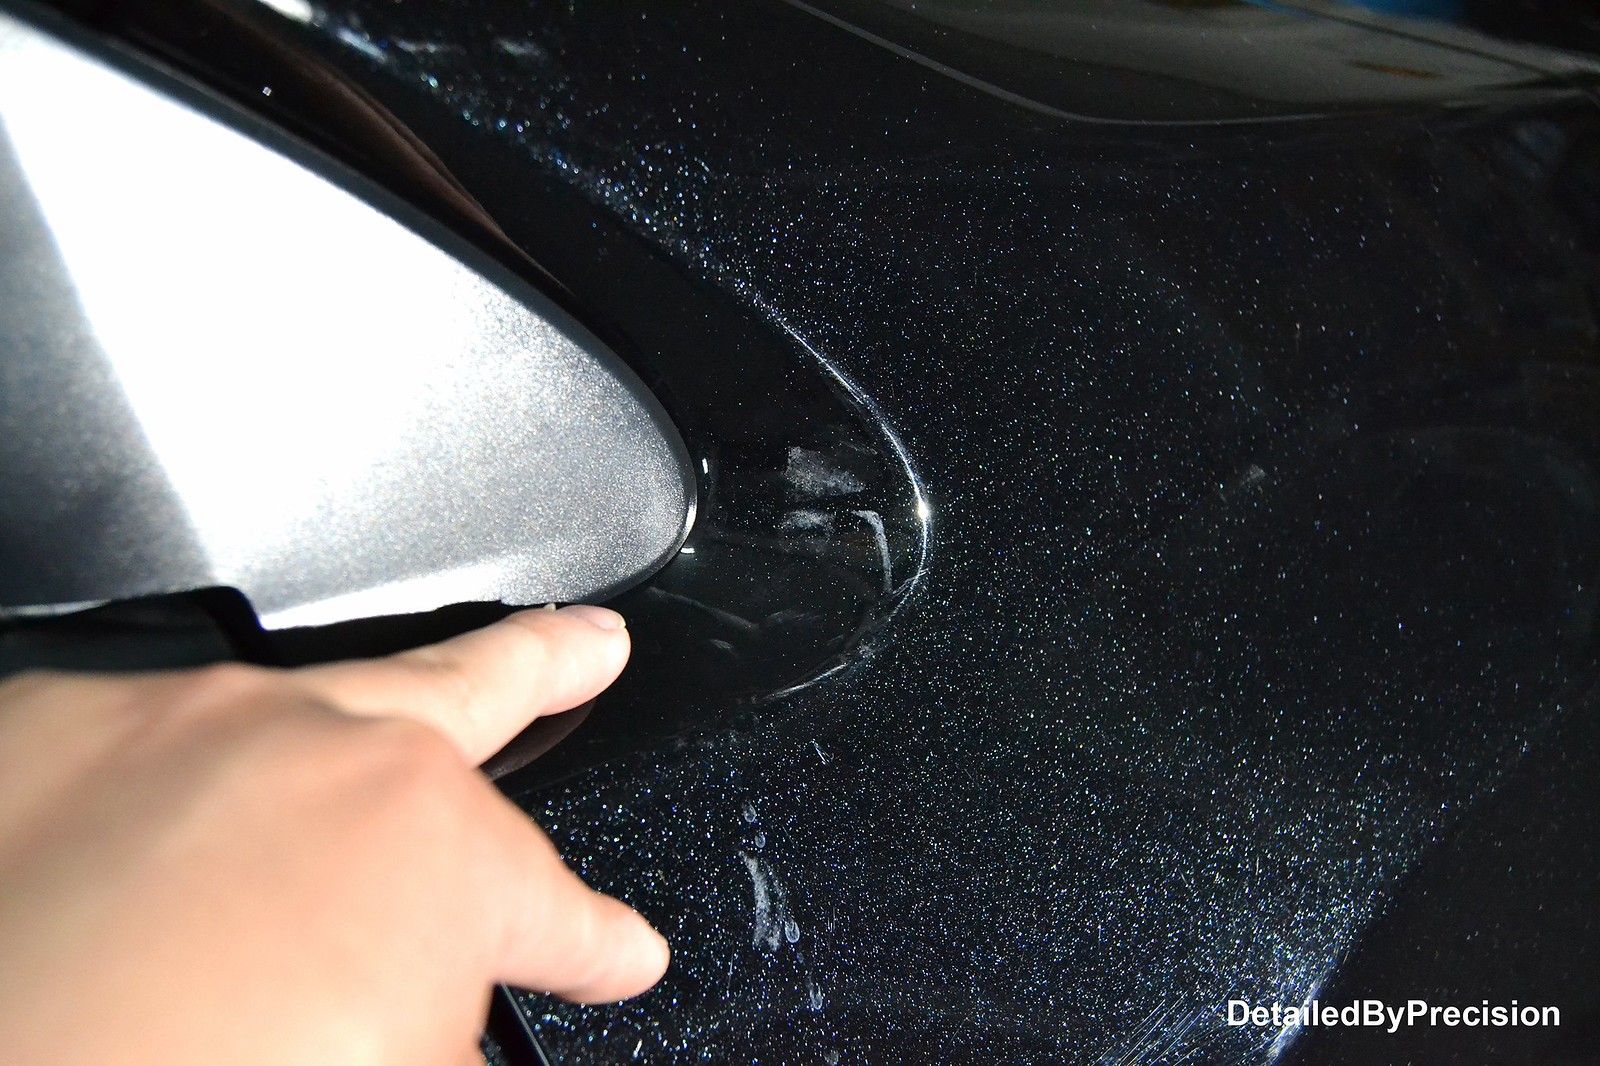
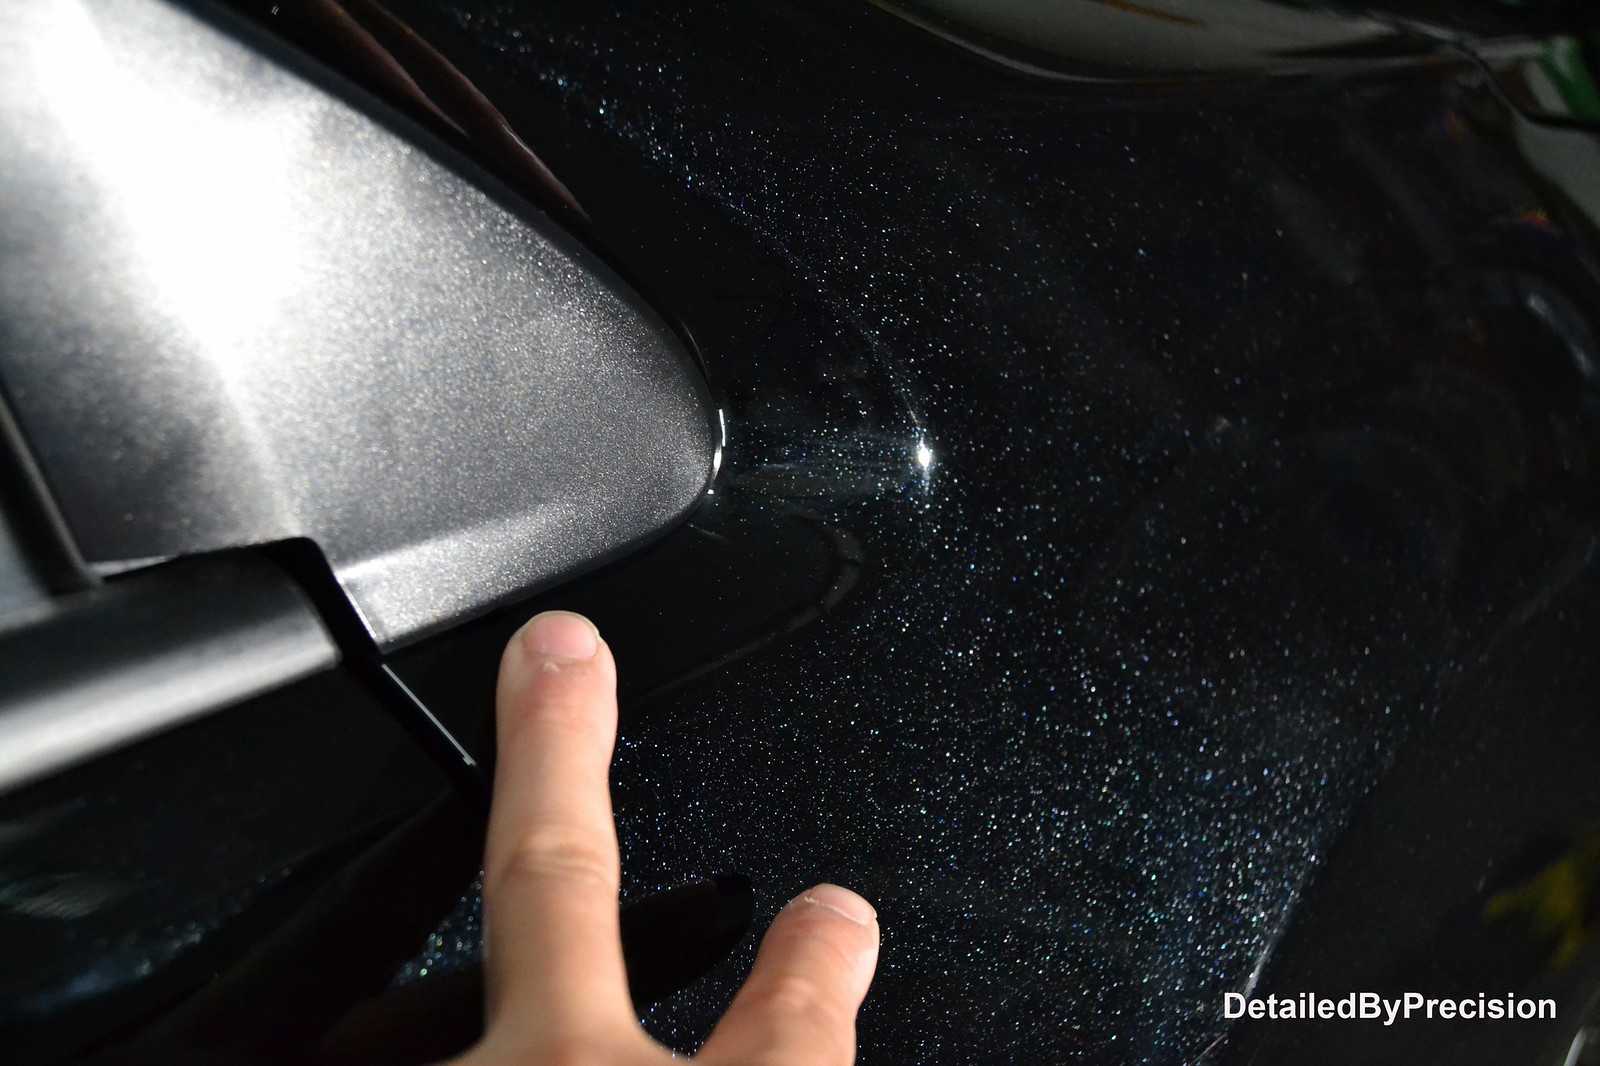
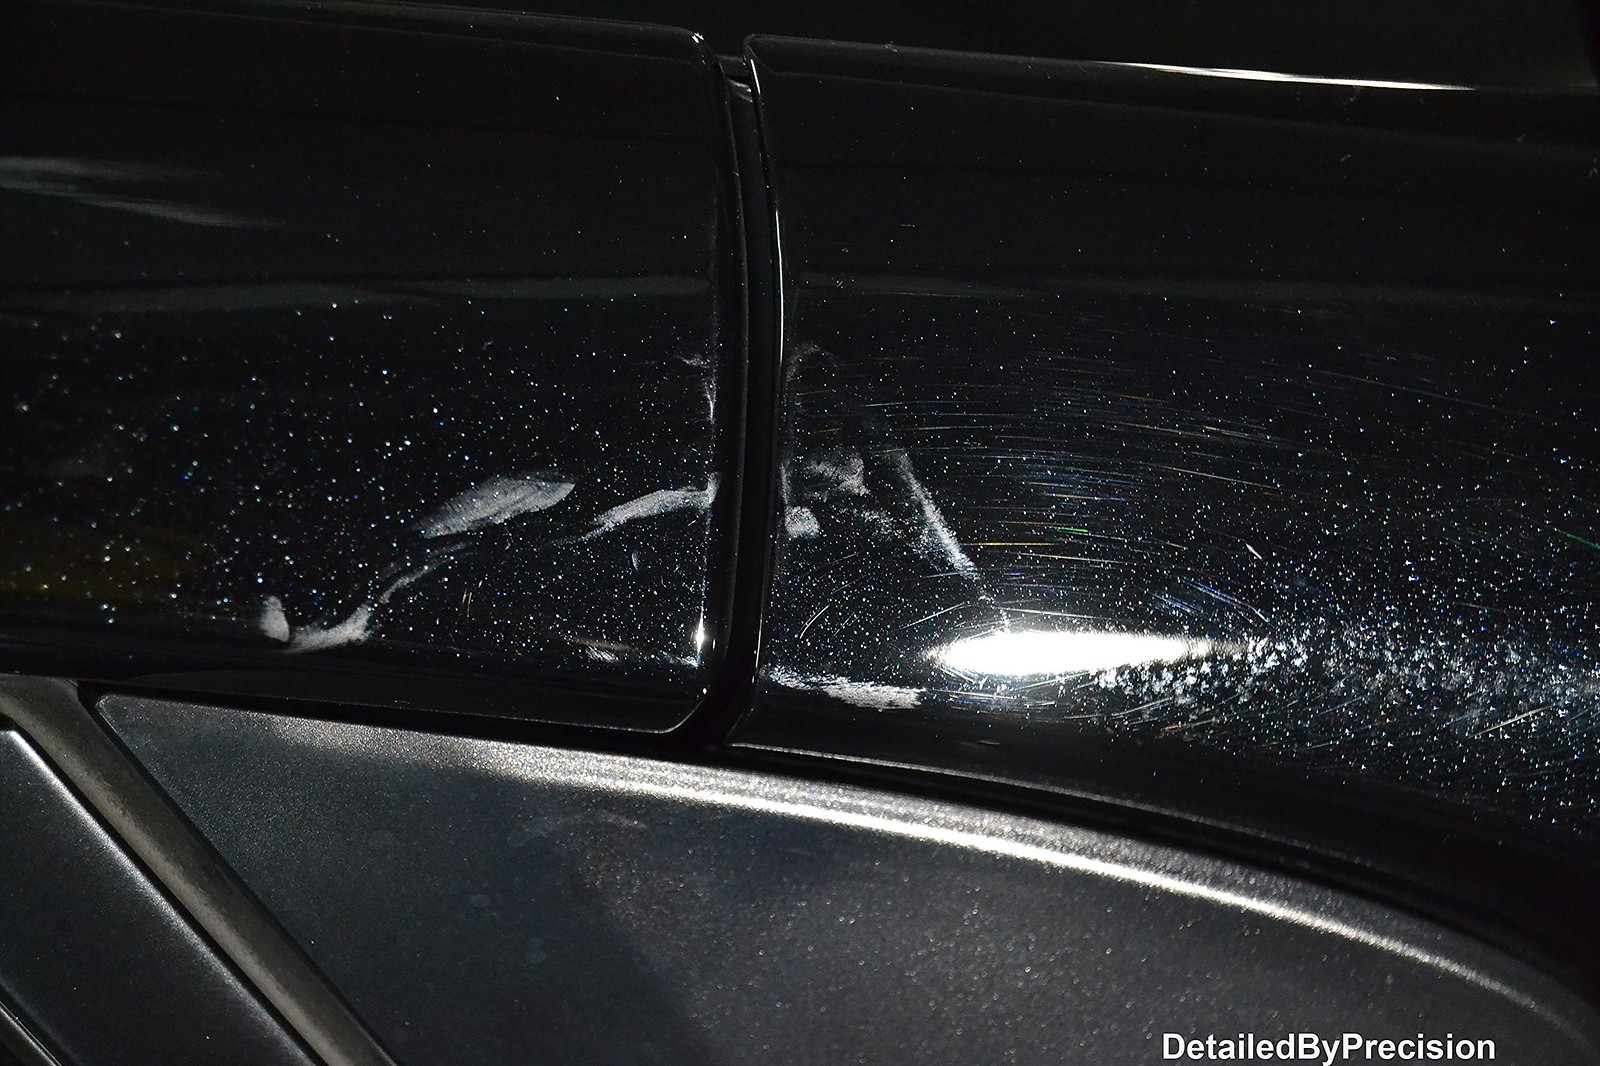
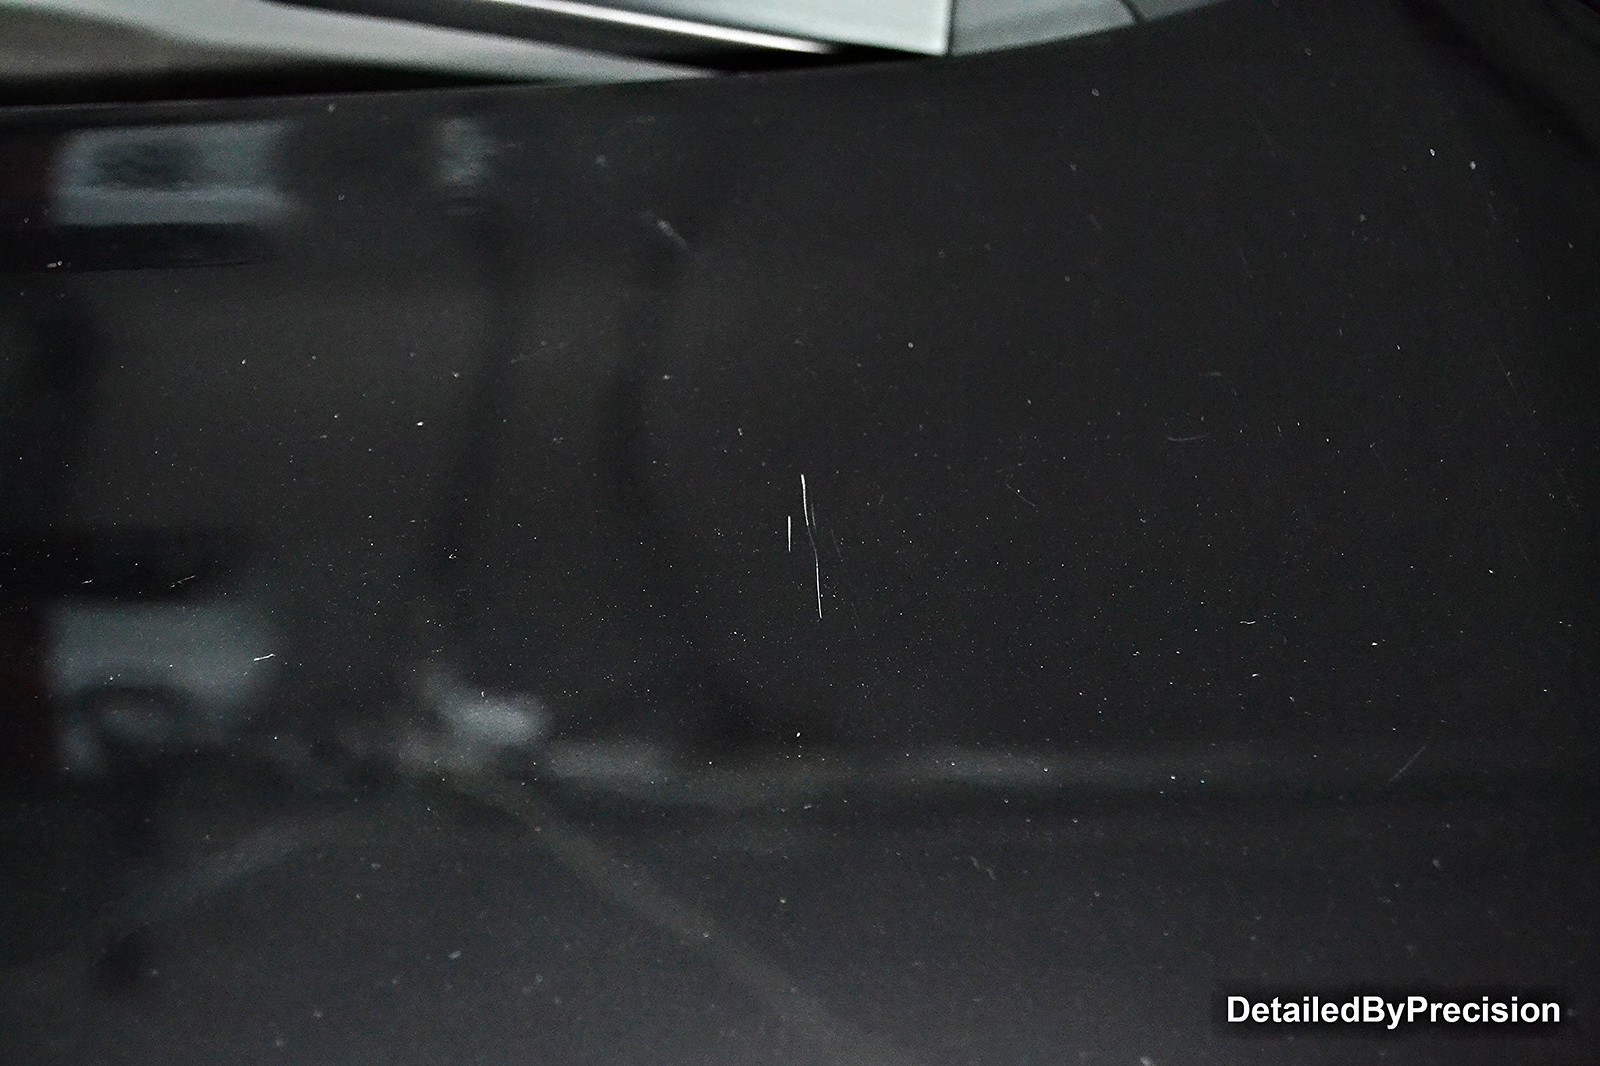
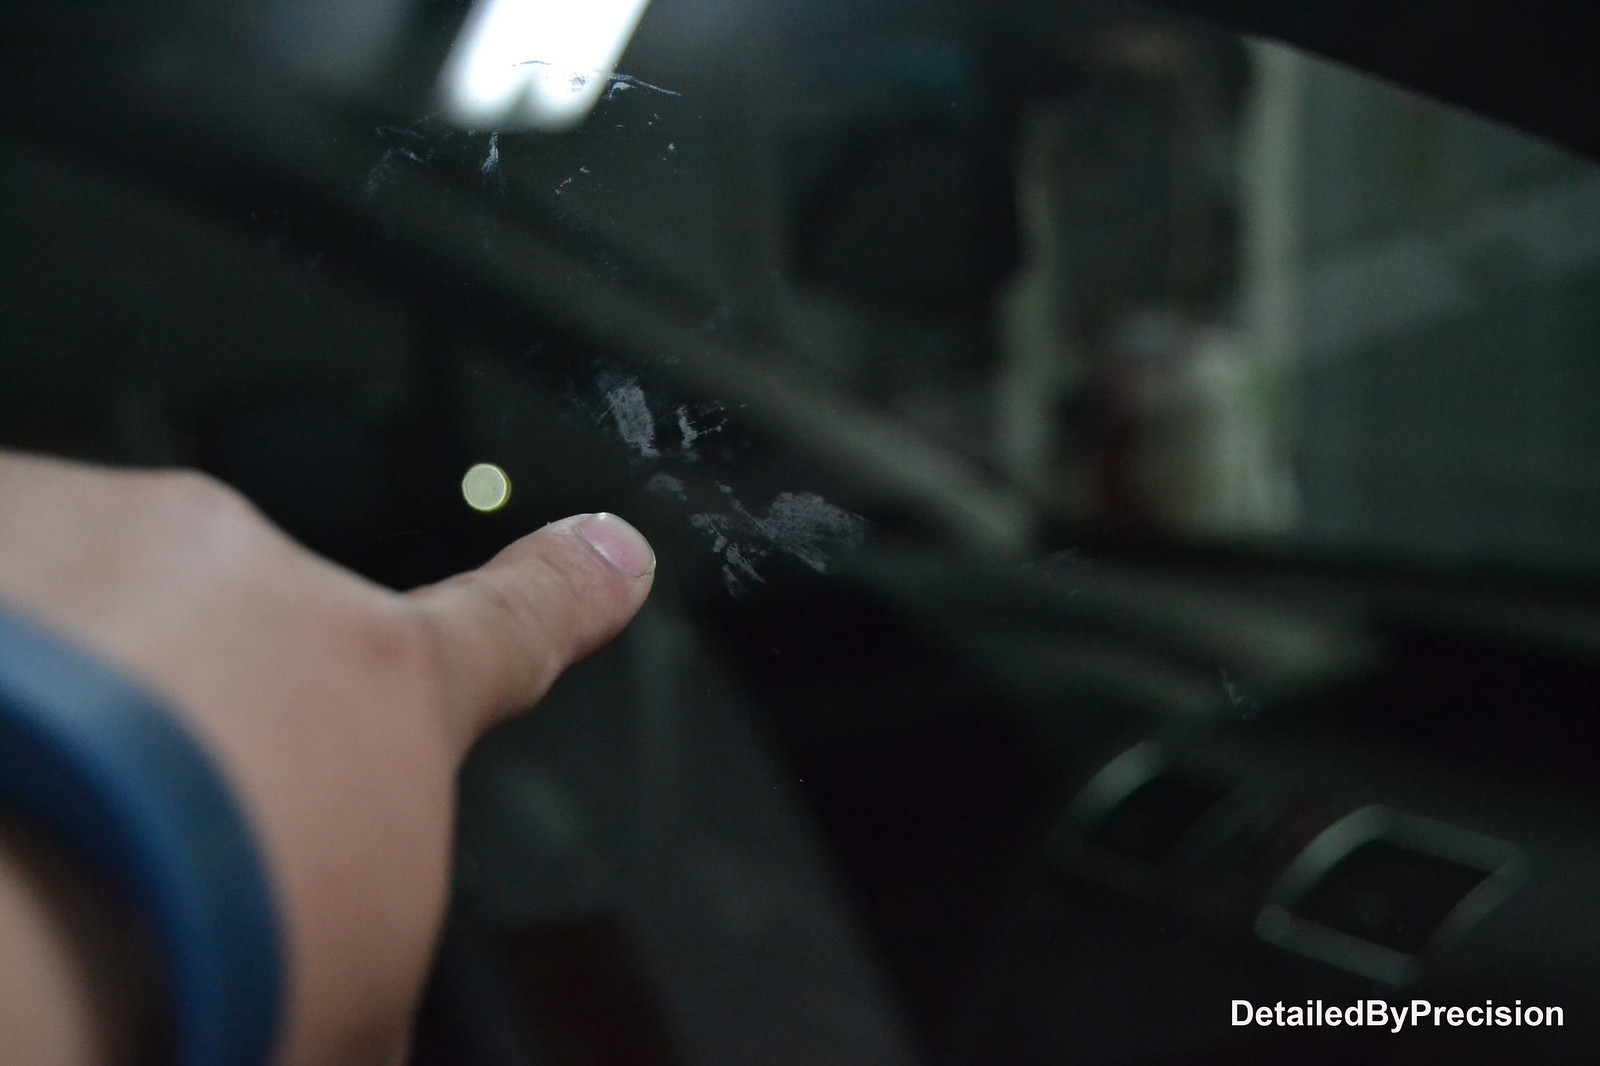
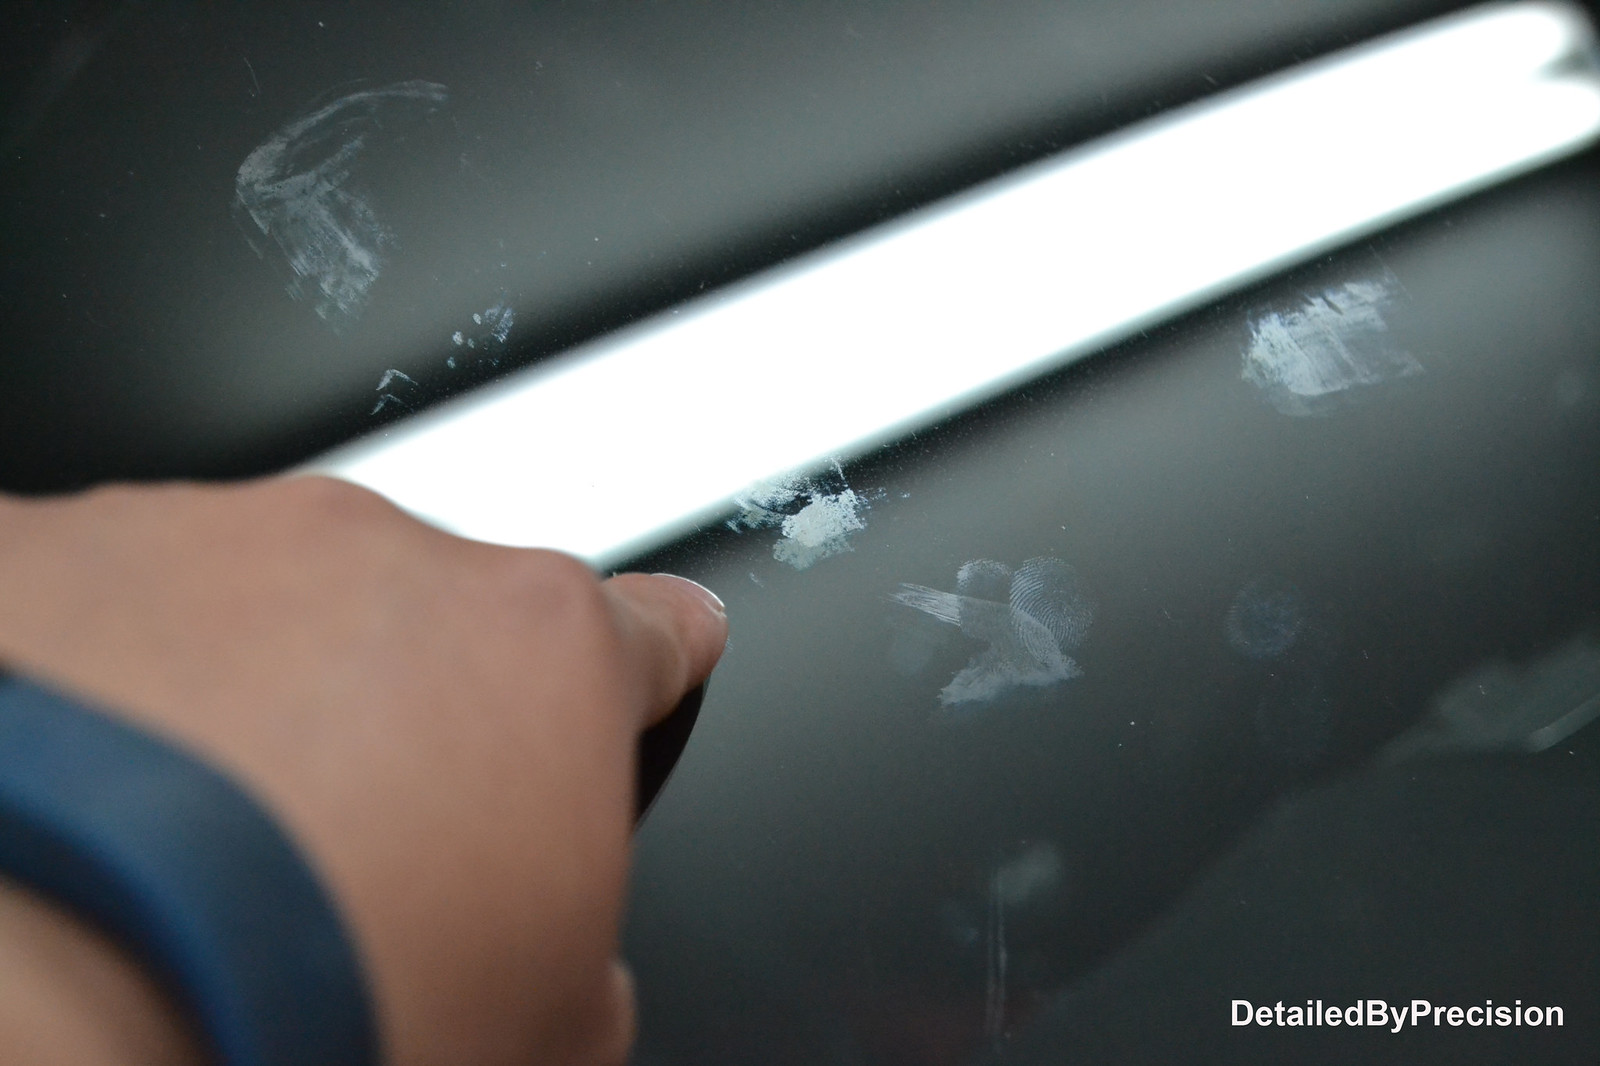
Post claying, a lot of defects showed up on various panels. I'm pretty sure the dealer slapped on some glaze to prepare the car for sale and the claybar removed it and the original defects resurfaced at this point. Some glue residue on the windows and some bird poop shape stains on the hood with some scratches.
Used FG400 and Menz203
 DetailedByPrecision2899 by Limny Kuang, on Flickr
 DetailedByPrecision2959 by Limny Kuang, on Flickr
 DetailedByPrecision2906 by Limny Kuang, on Flickr
 DetailedByPrecision2932 by Limny Kuang, on Flickr
 DetailedByPrecision2905 by Limny Kuang, on Flickr
 DetailedByPrecision2933 by Limny Kuang, on Flickr
 DetailedByPrecision2909 by Limny Kuang, on Flickr
 DetailedByPrecision2914 by Limny Kuang, on Flickr
 DetailedByPrecision2920 by Limny Kuang, on Flickr
 DetailedByPrecision292 by Limny Kuang, on Flickr
 DetailedByPrecision2911 by Limny Kuang, on Flickr
 DetailedByPrecision2915 by Limny Kuang, on Flickr
 DetailedByPrecision2922 by Limny Kuang, on Flickr
 DetailedByPrecision2923 by Limny Kuang, on Flickr
 DetailedByPrecision2930 by Limny Kuang, on Flickr
 DetailedByPrecision2931 by Limny Kuang, on Flickr
 DetailedByPrecision2902 by Limny Kuang, on Flickr
 DetailedByPrecision2960 by Limny Kuang, on Flickr
Onto the film residue. Used Menz203 by hand
 DetailedByPrecision2907 by Limny Kuang, on Flickr
 DetailedByPrecision2918 by Limny Kuang, on Flickr
 DetailedByPrecision2926 by Limny Kuang, on Flickr
 DetailedByPrecision2927 by Limny Kuang, on Flickr
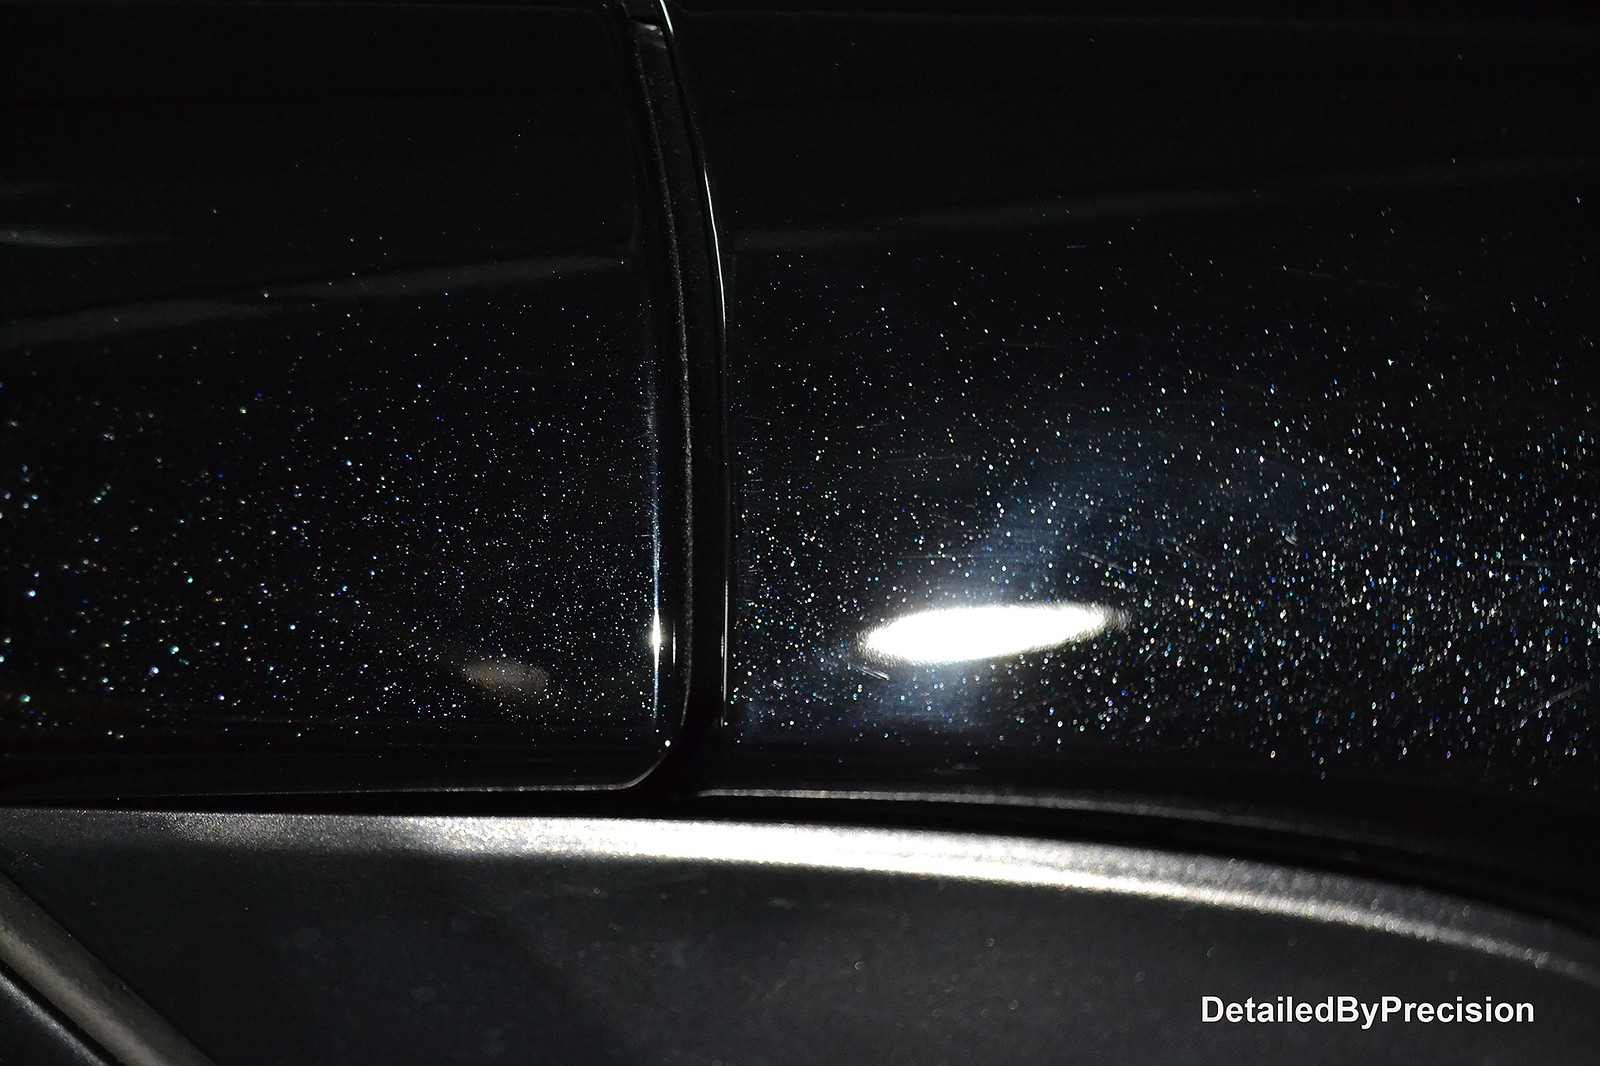
Couple 50/50's from polishing the hood and driver fender
 DetailedByPrecision2958 by Limny Kuang, on Flickr
 DetailedByPrecision2939 by Limny Kuang, on Flickr
 DetailedByPrecision2941 by Limny Kuang, on Flickr
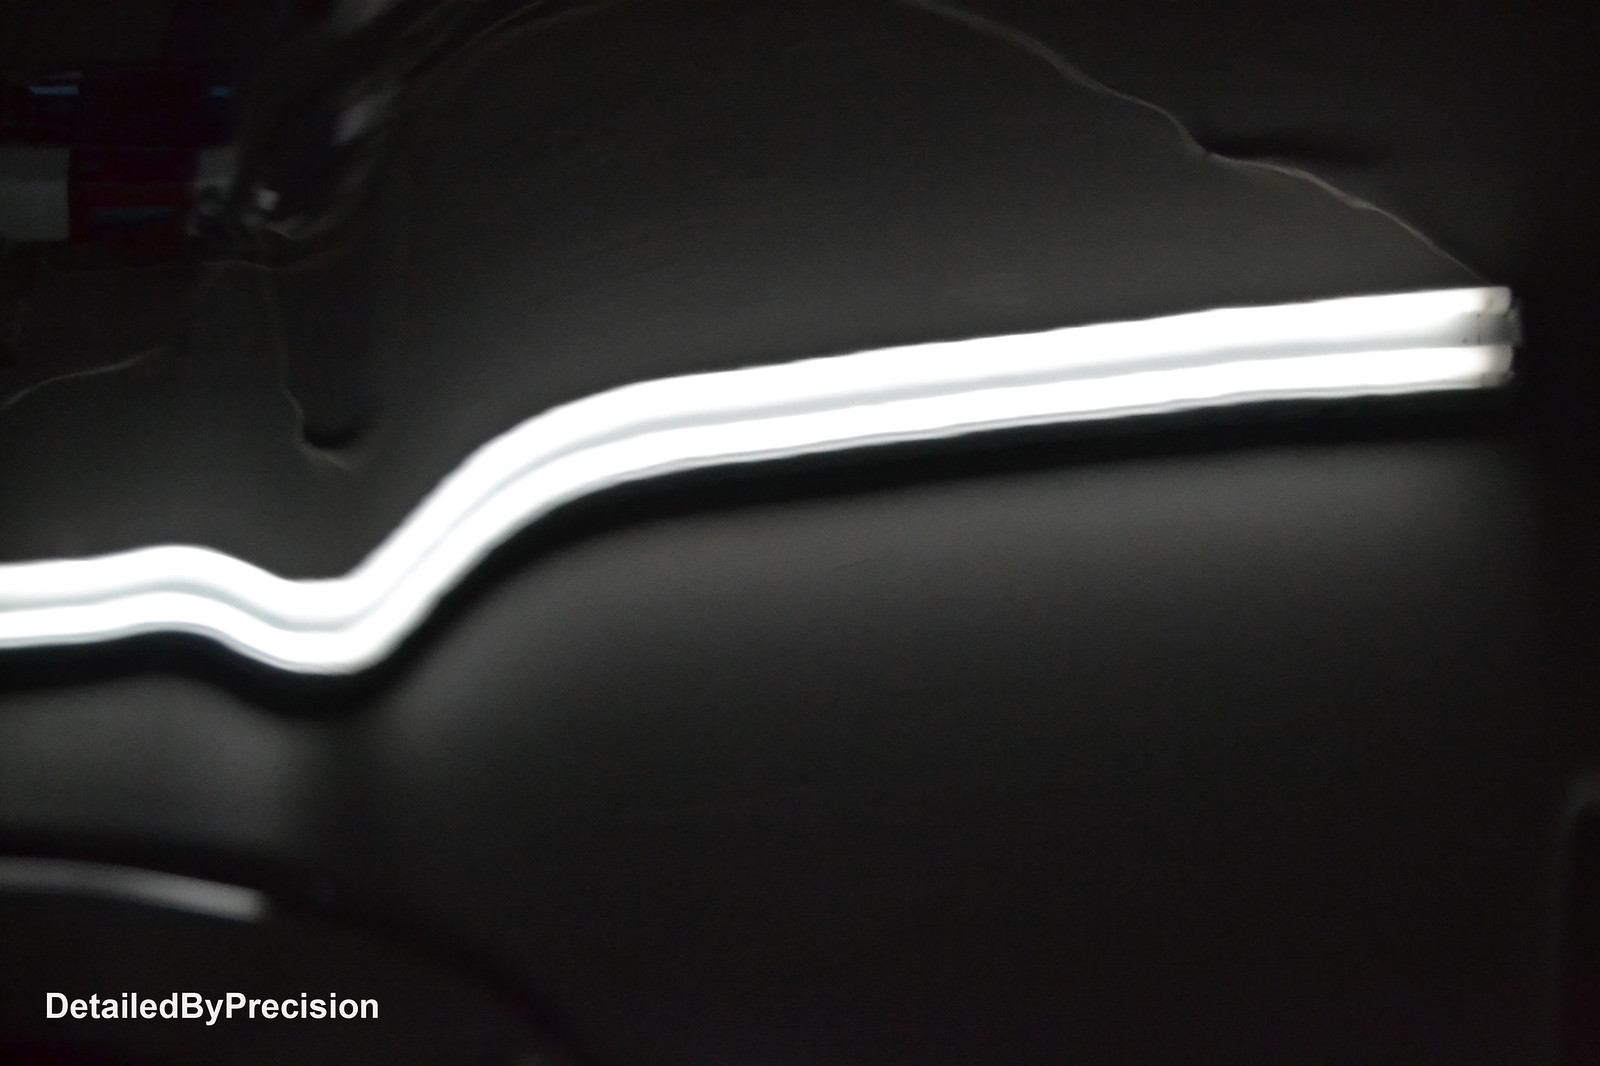
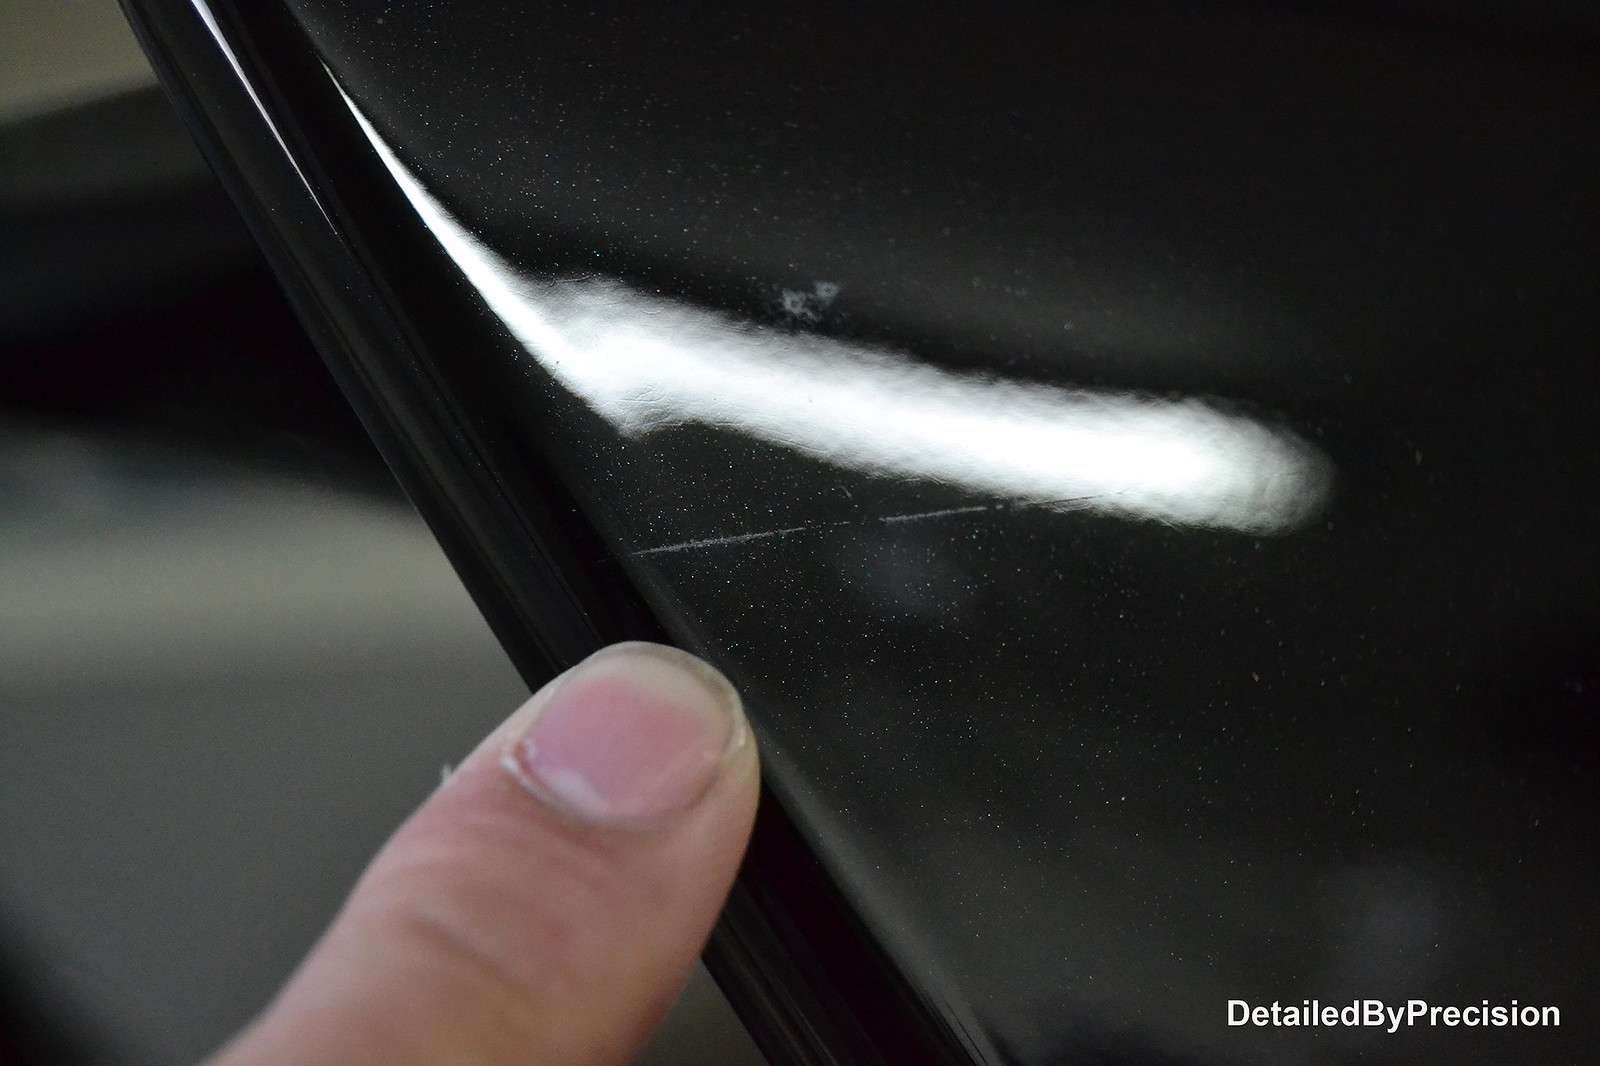
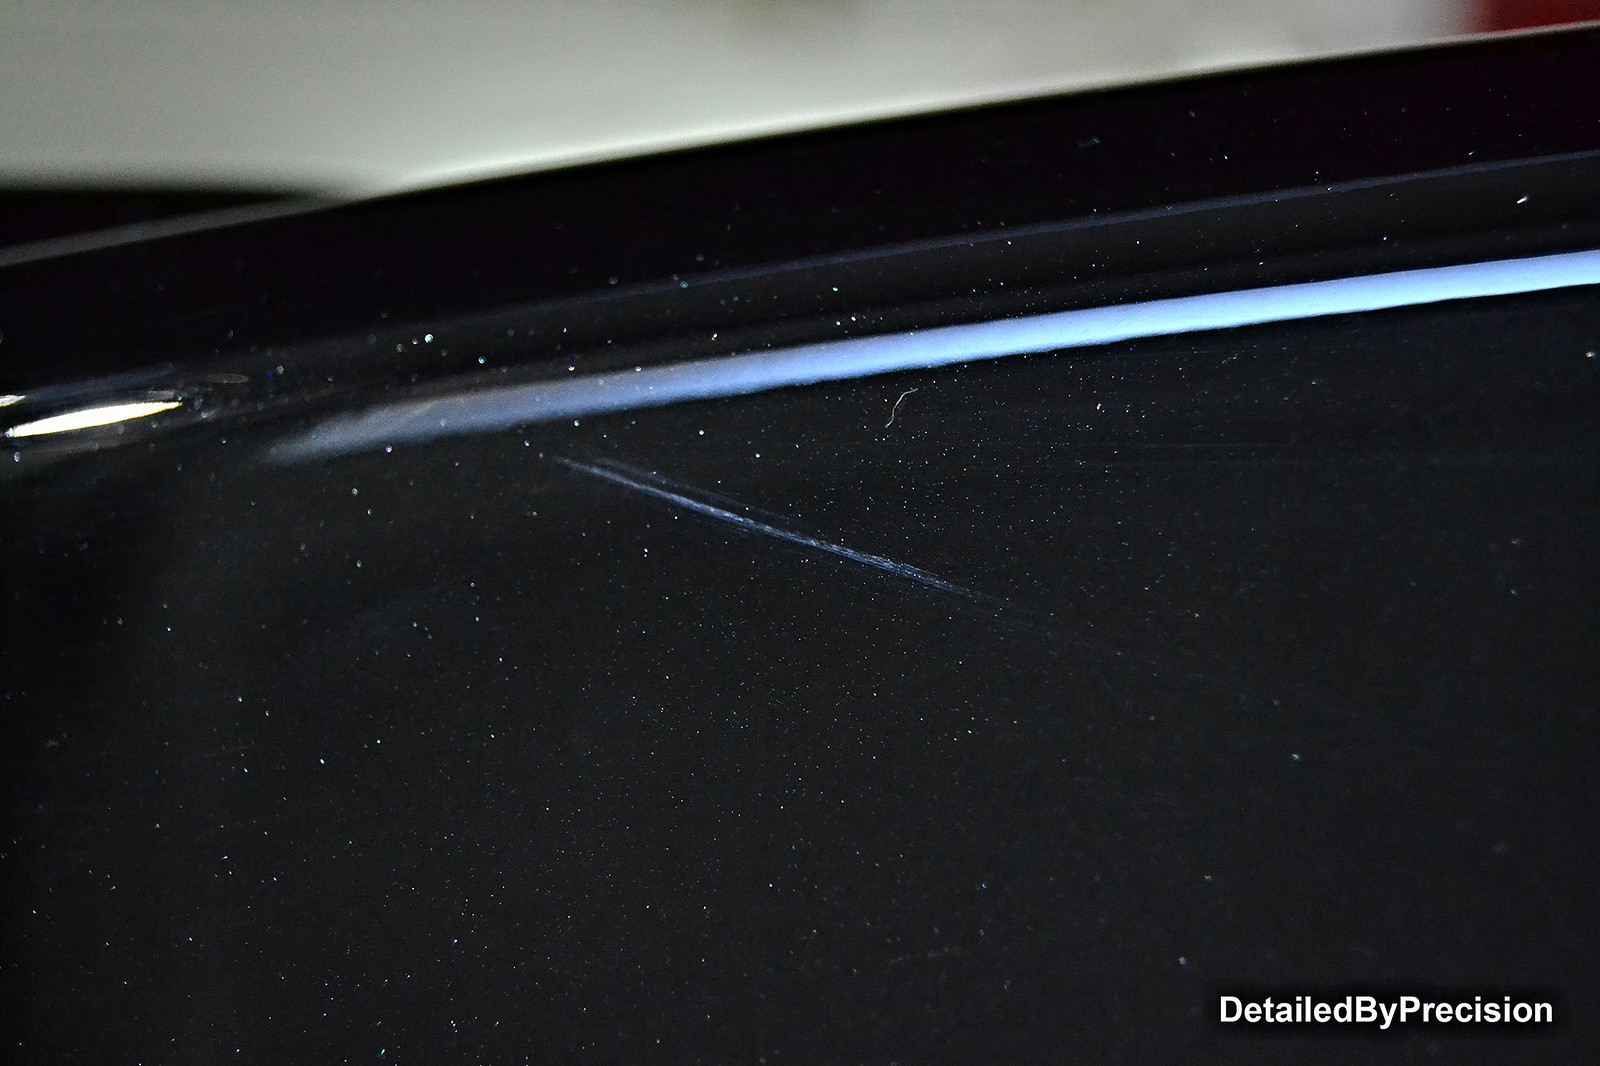
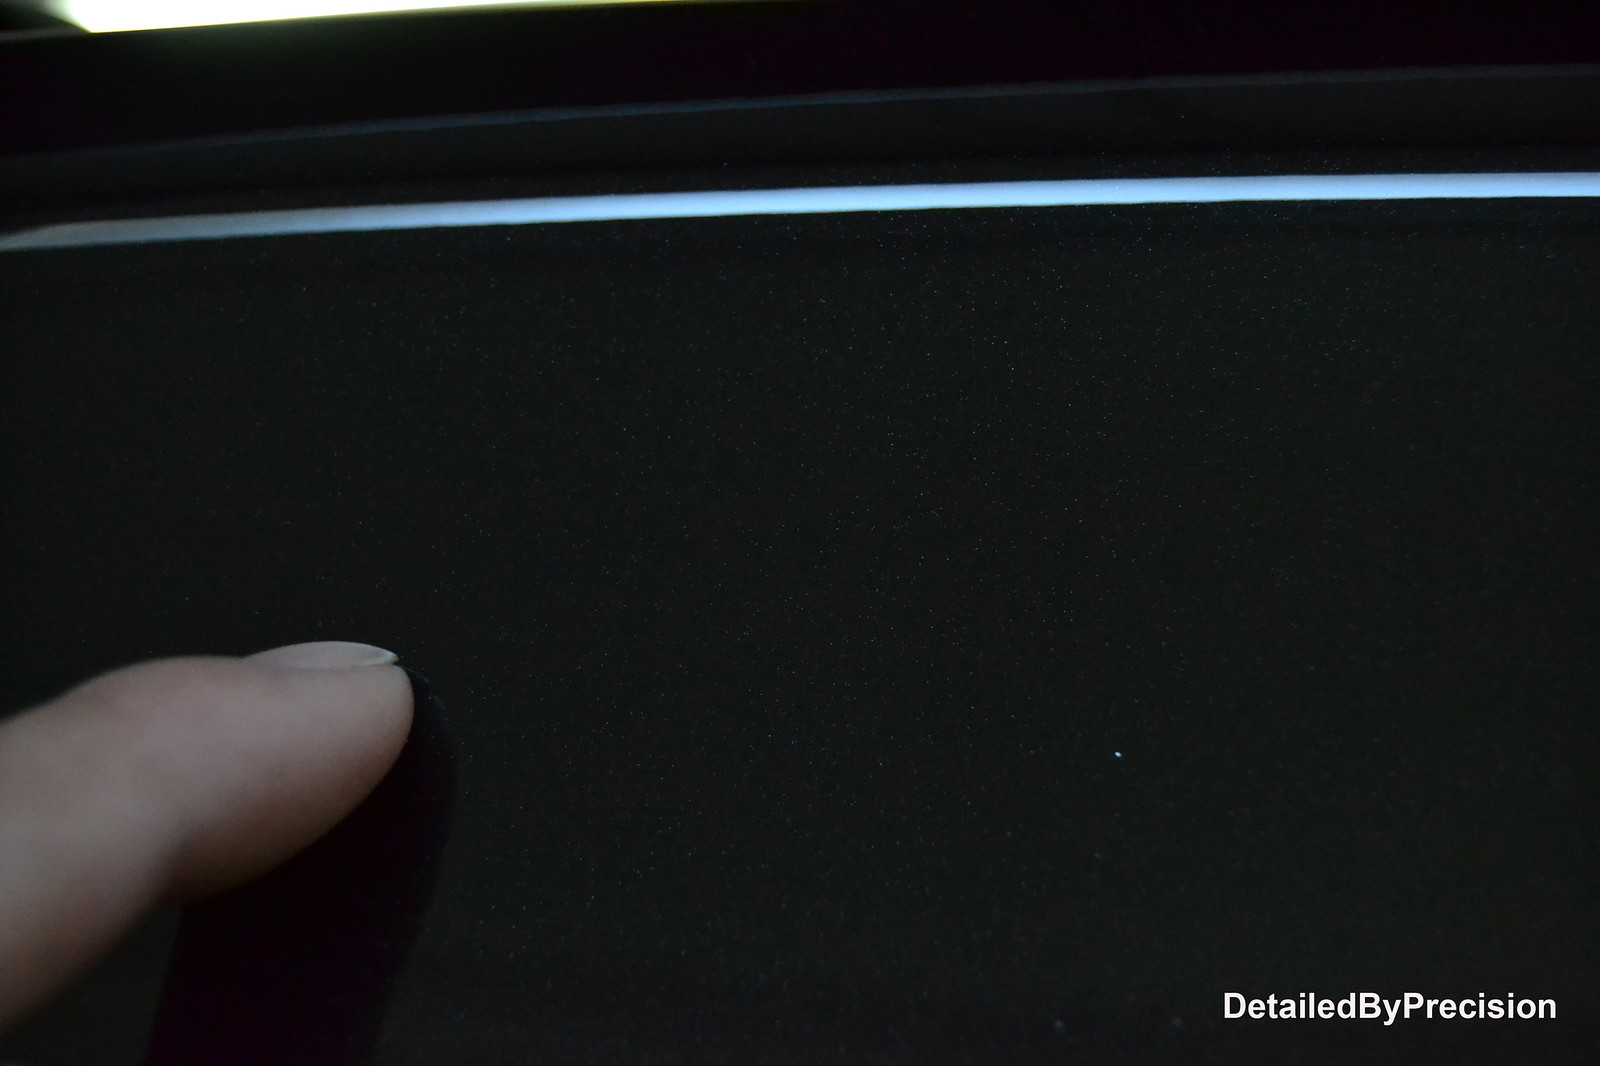
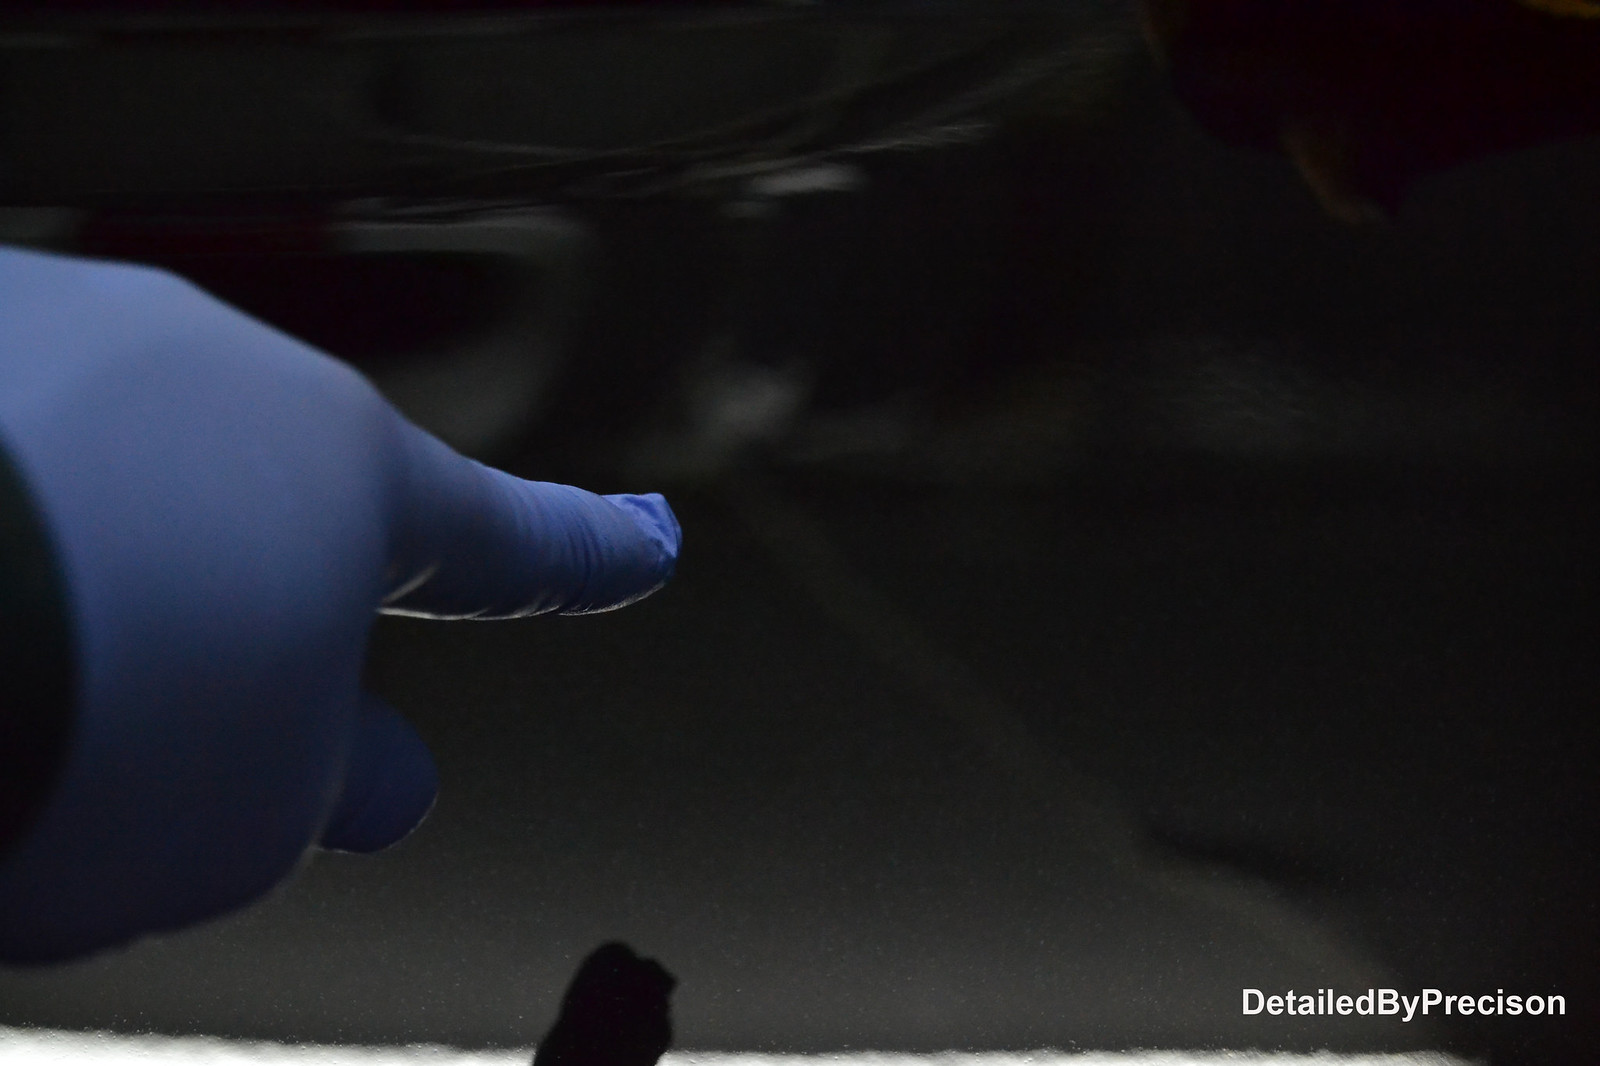
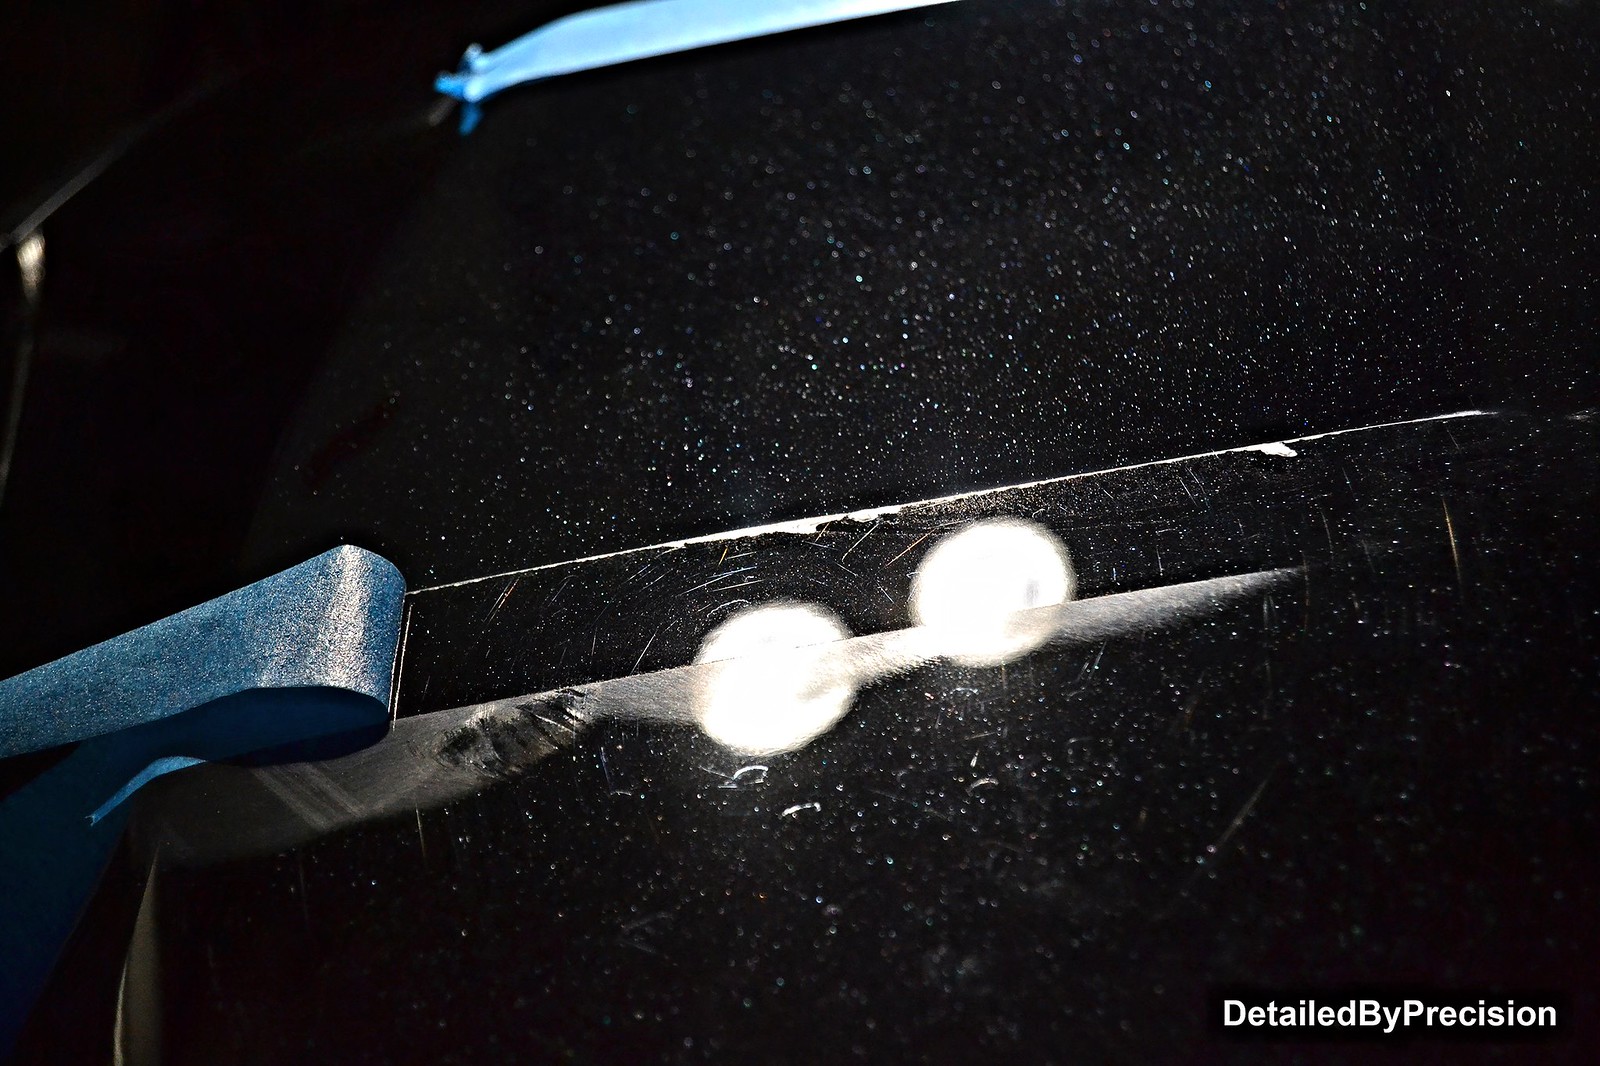
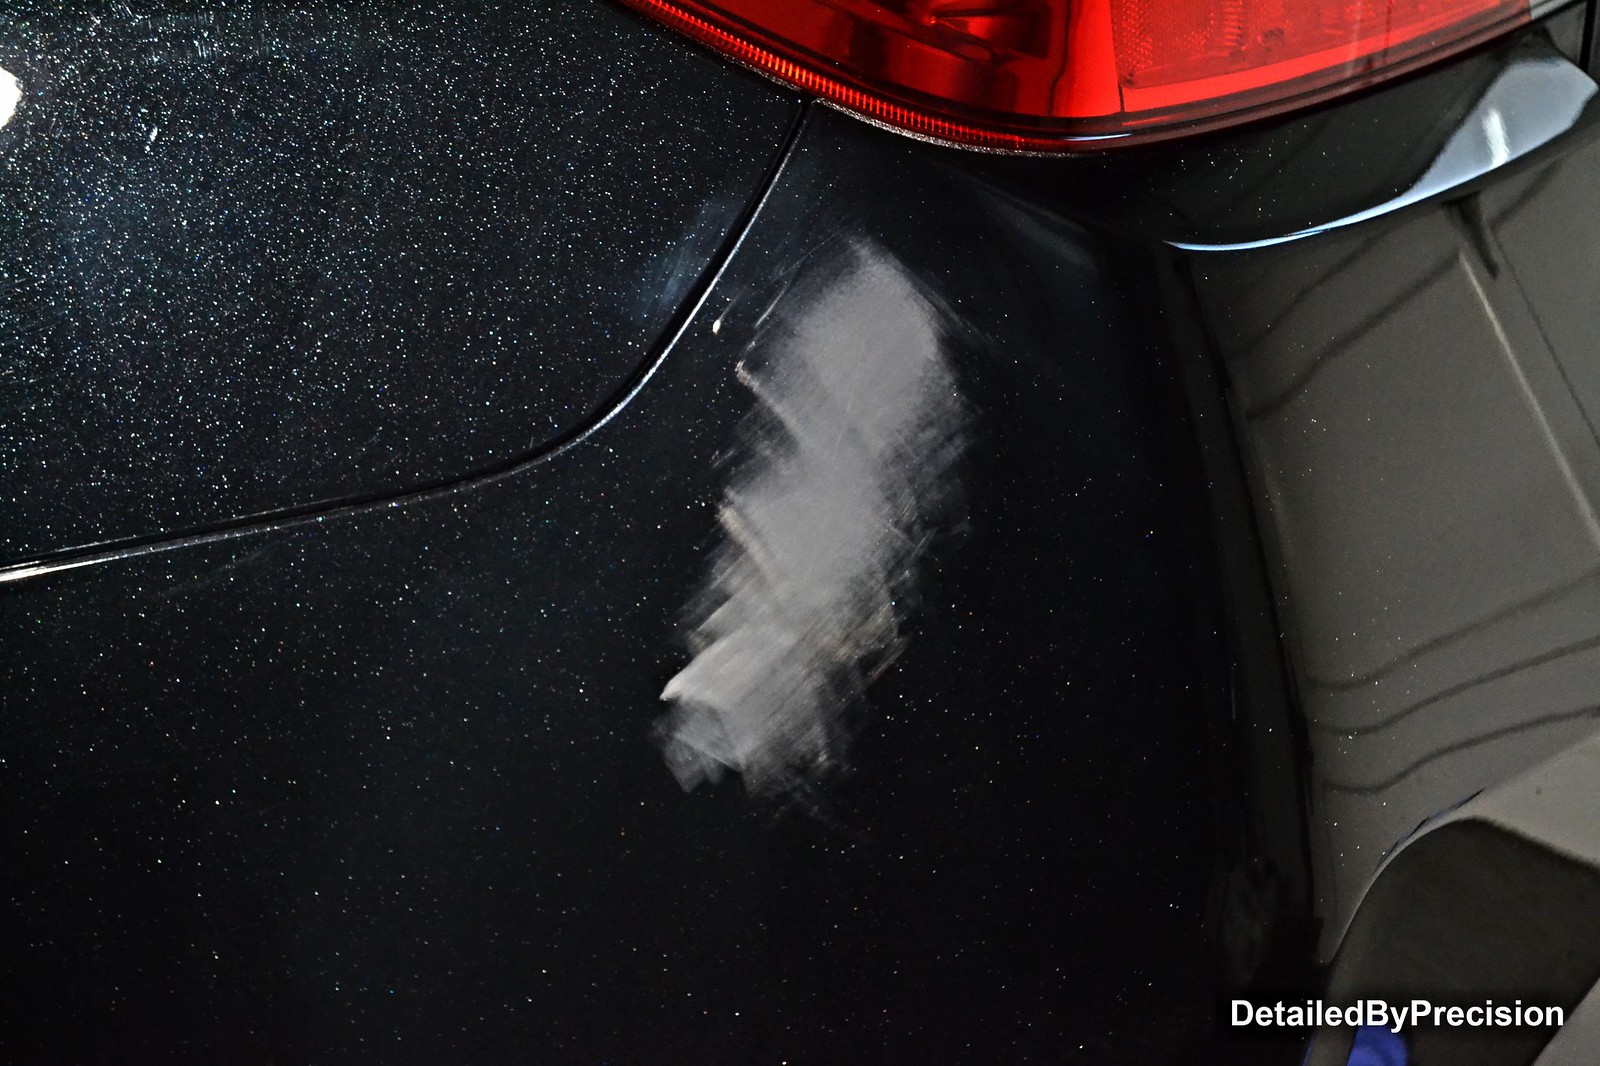
Now the fun part and most pressure to perform.... the 3" scratch. I assessed it under LED lighting and using my finger nail to see if it catches or not before I dialed in my process. It barely caught my finger nail so there was hope of not having to use the touch up.
 DetailedByPrecision2962 by Limny Kuang, on Flickr
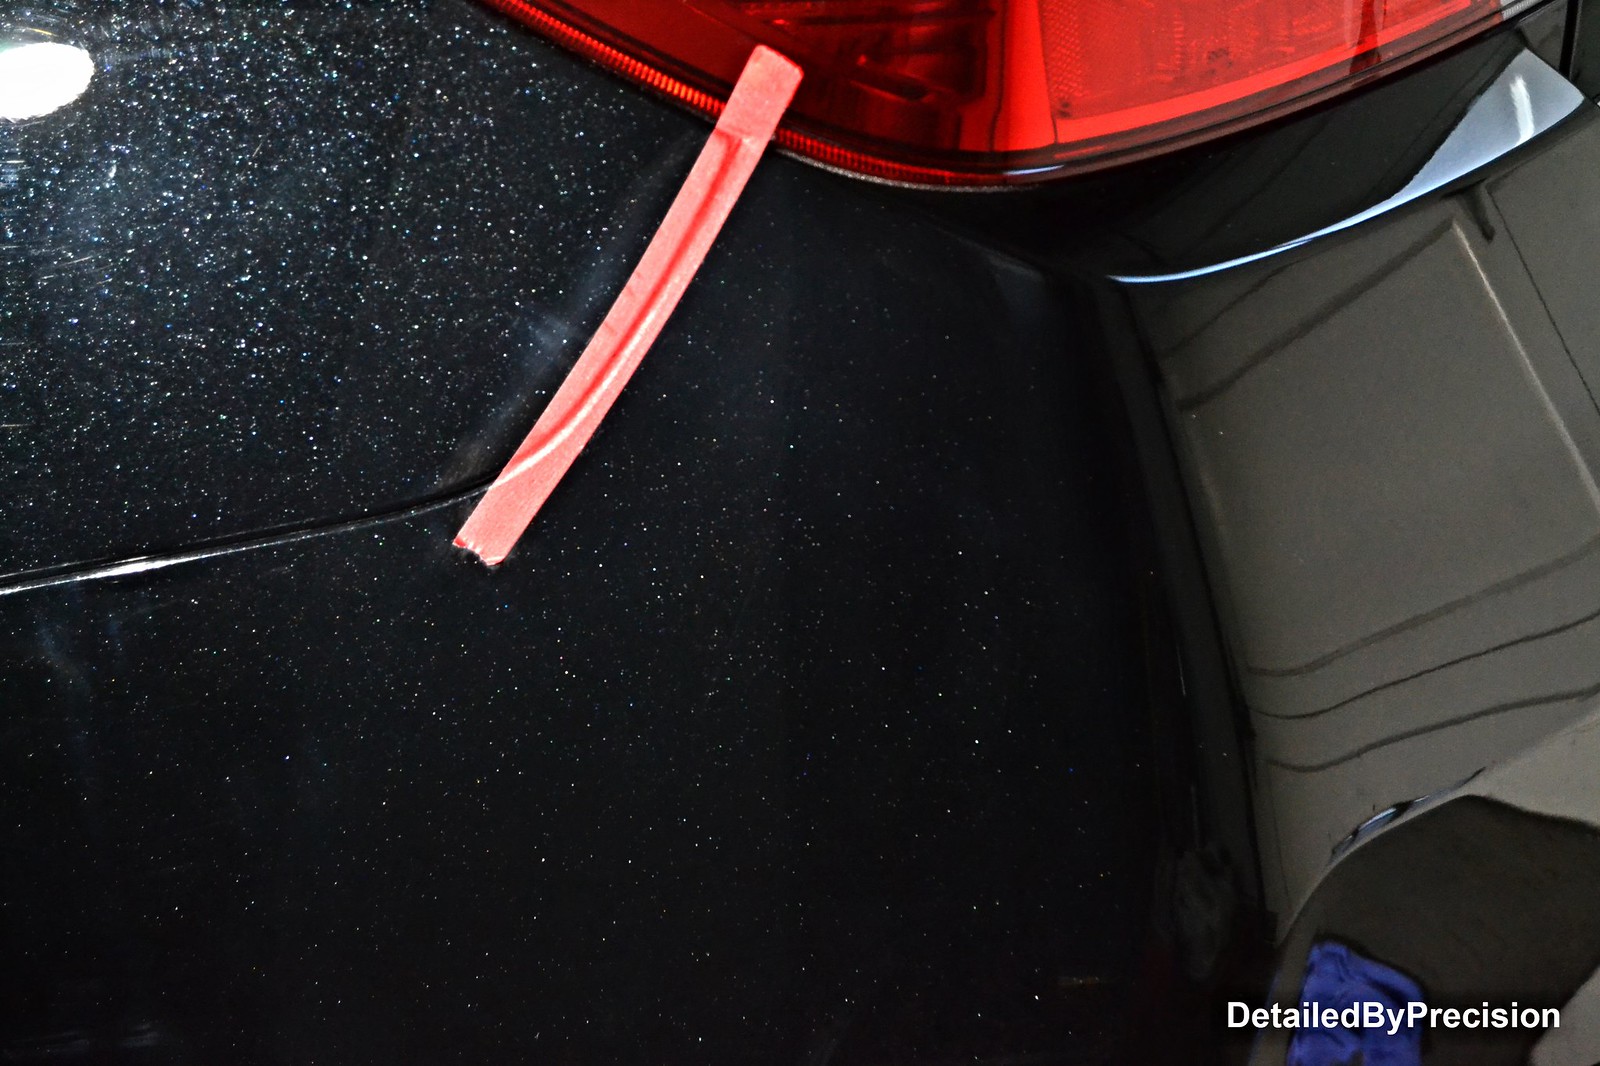
I hit the scratch with M101 w/ MF pad first to see if there is an improvement or not. Not as obvious anymore...
 DetailedByPrecision2963 by Limny Kuang, on Flickr
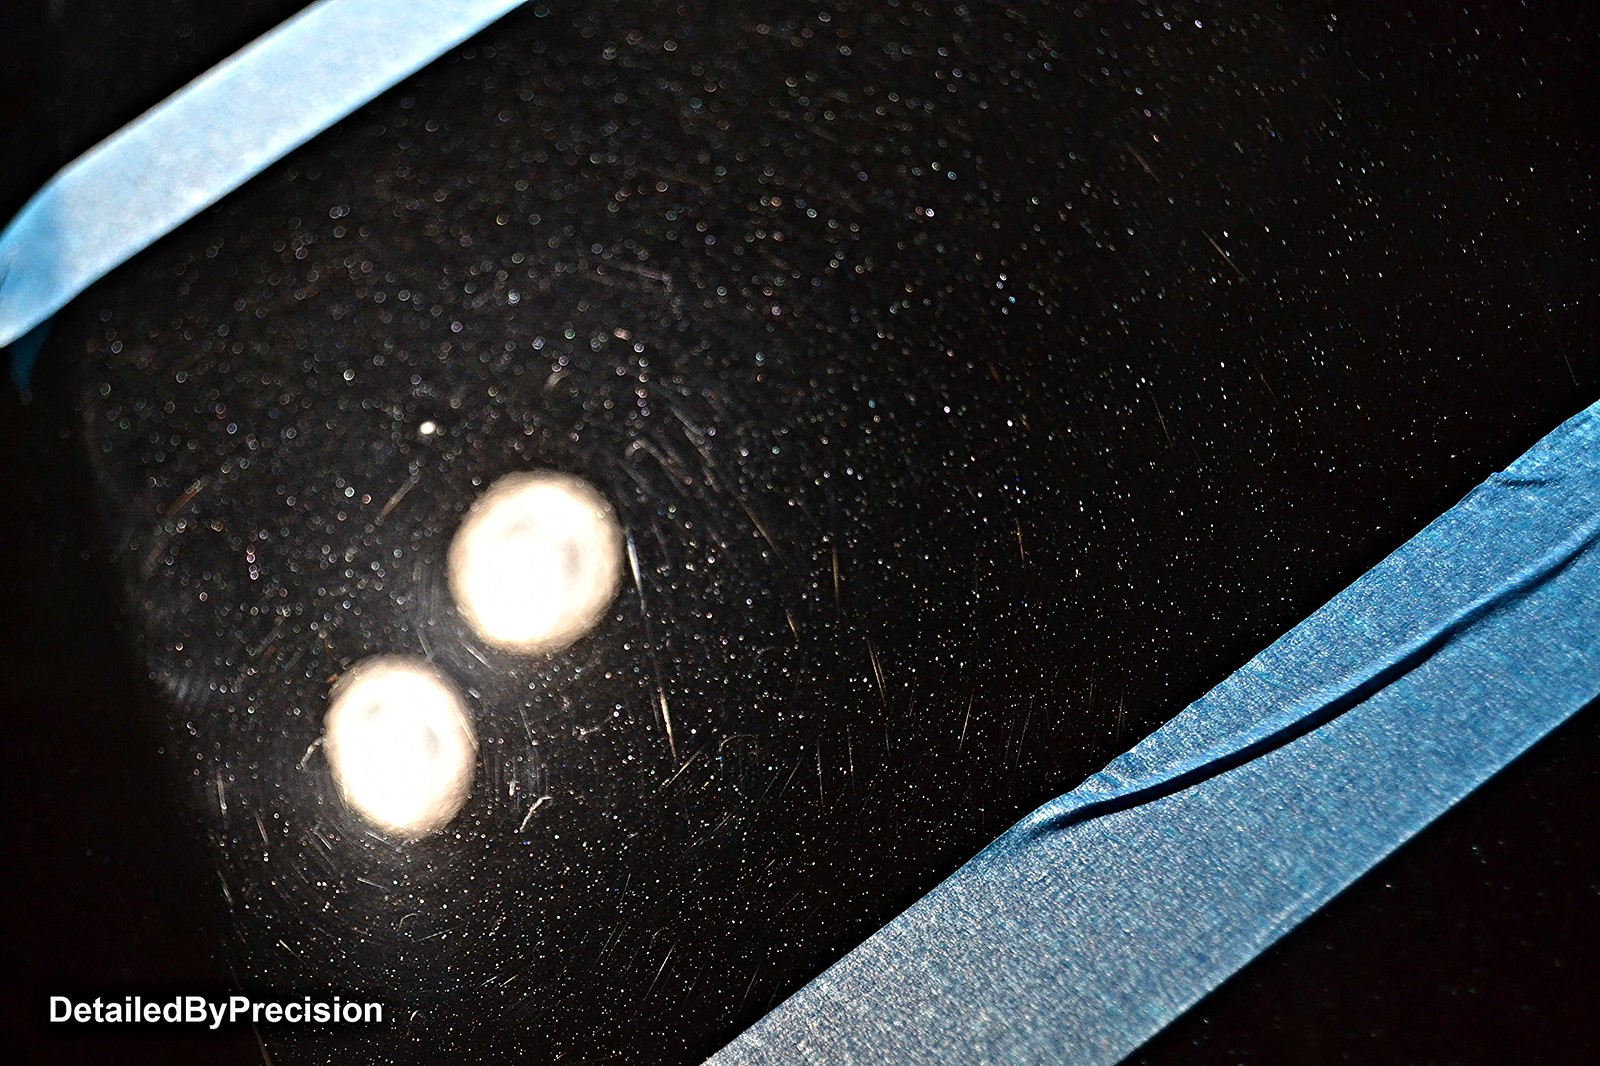
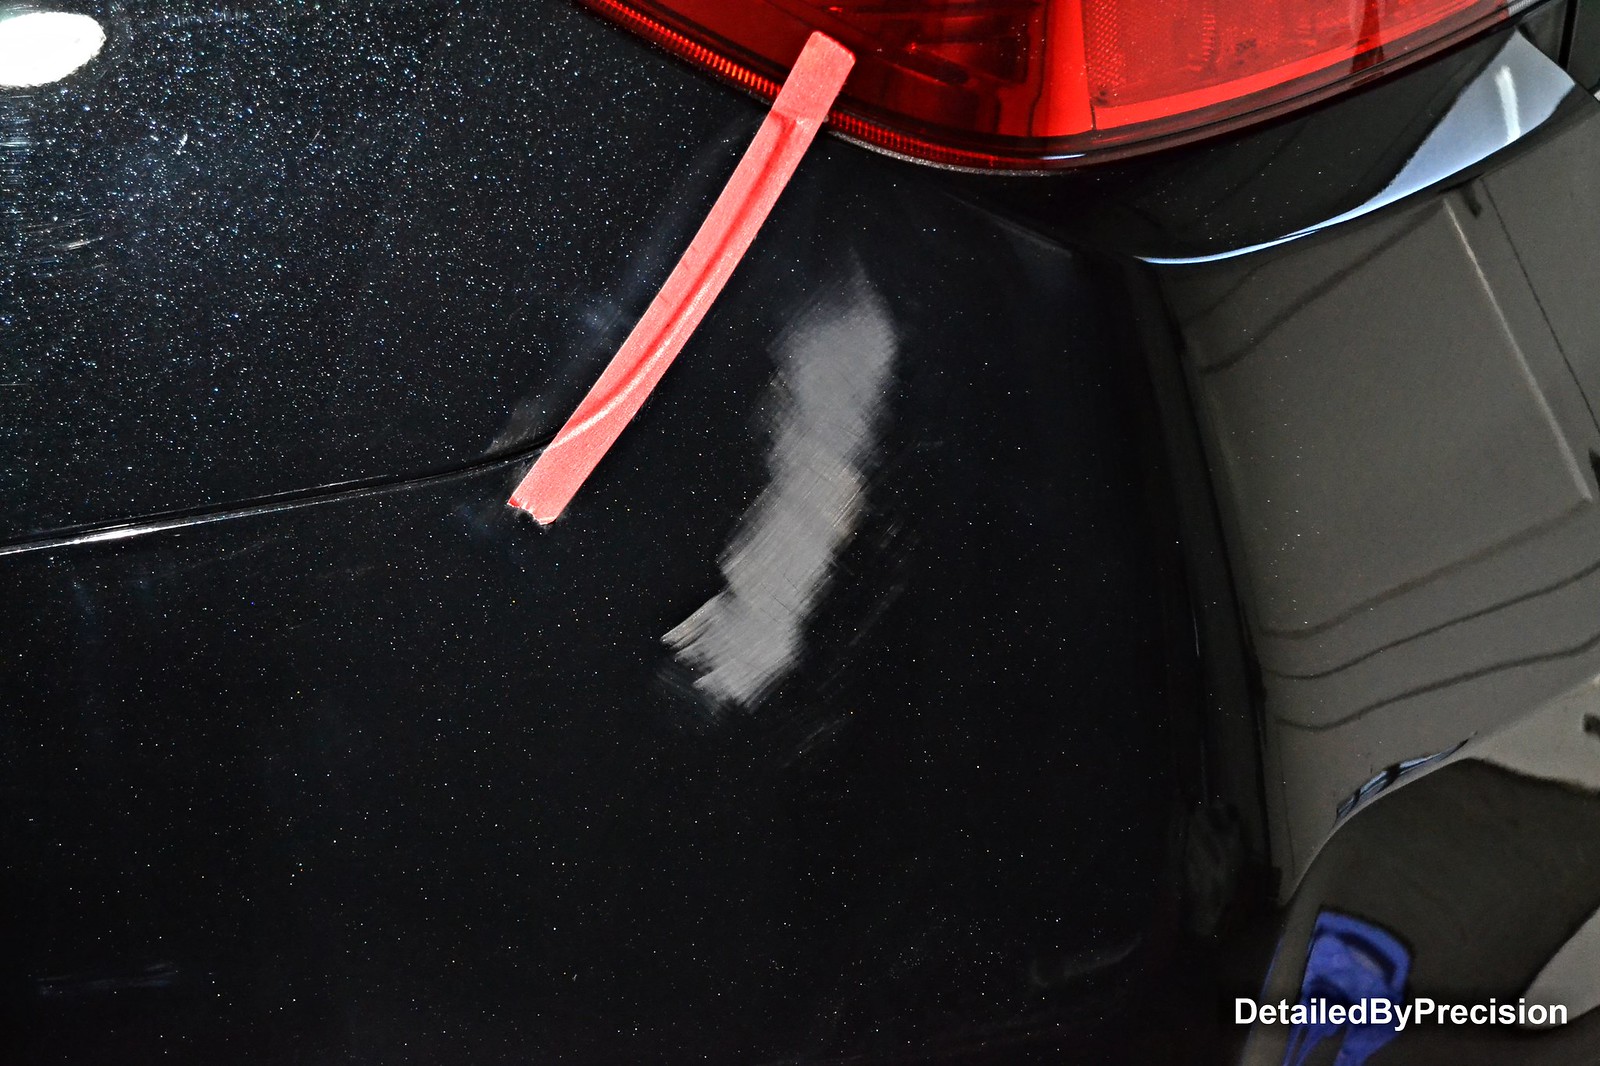
Was not satisfied with the result. I decided to use 2000 grit block and wetsanded the area.
 DetailedByPrecision2964 by Limny Kuang, on Flickr
Polished out using same combo listed above
 DetailedByPrecision2965 by Limny Kuang, on Flickr
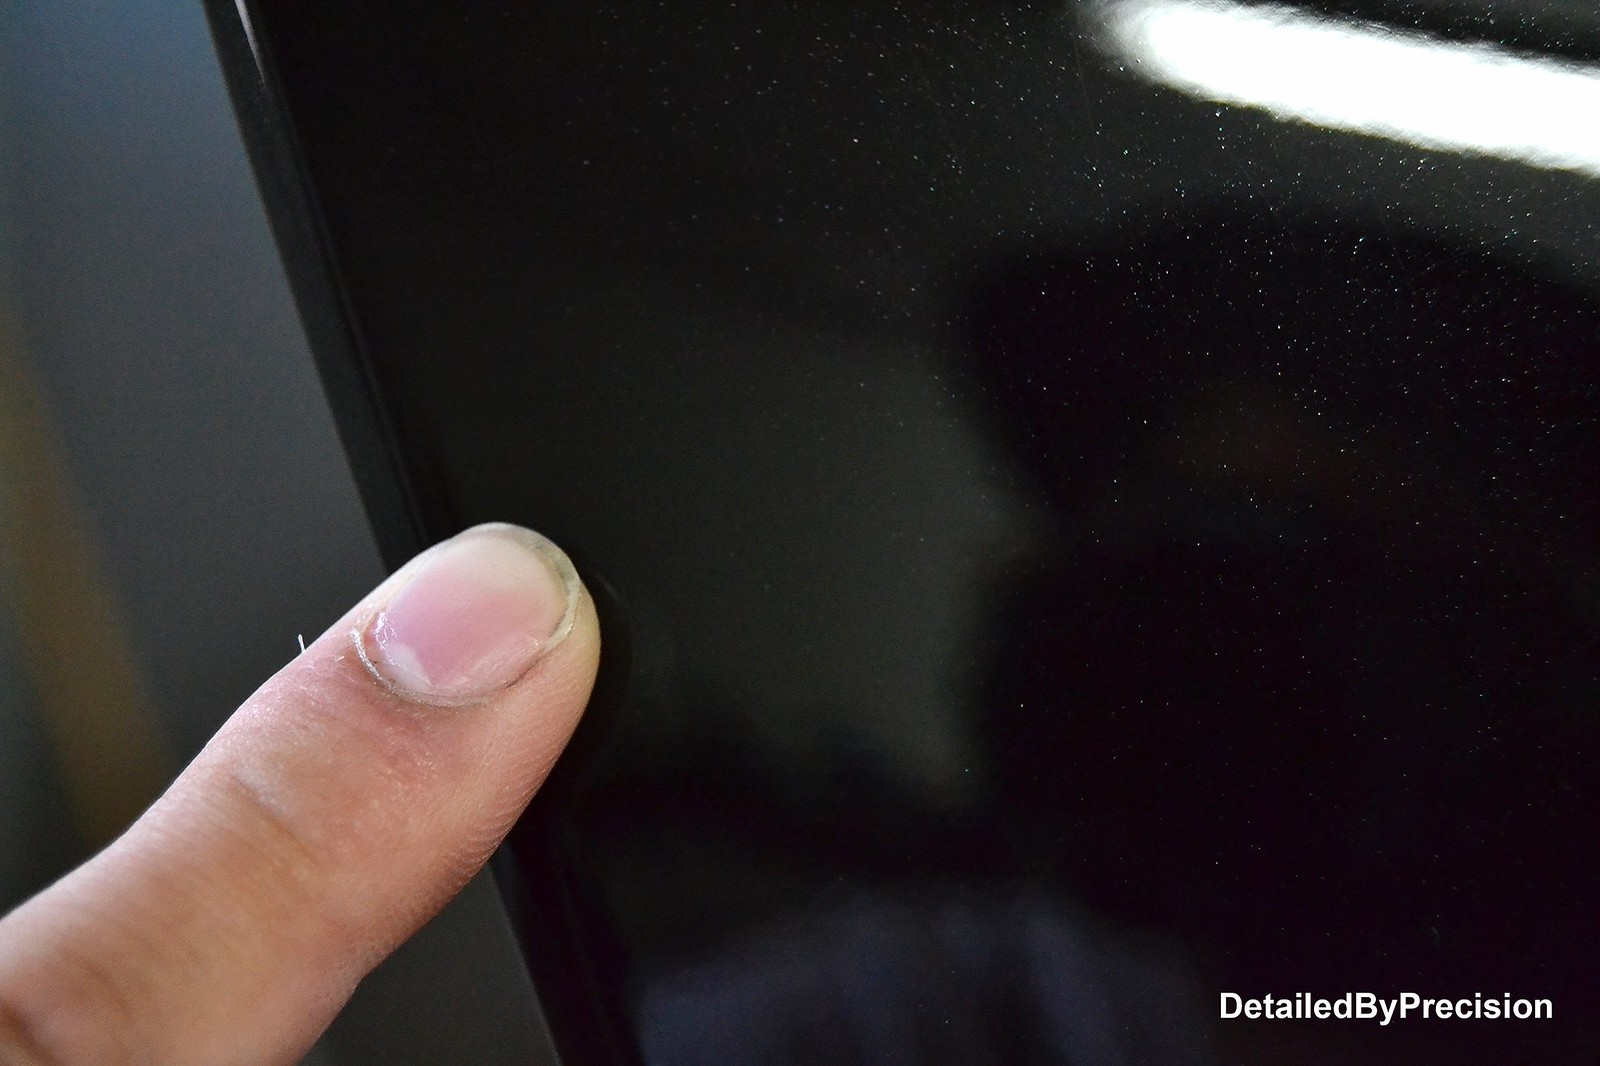
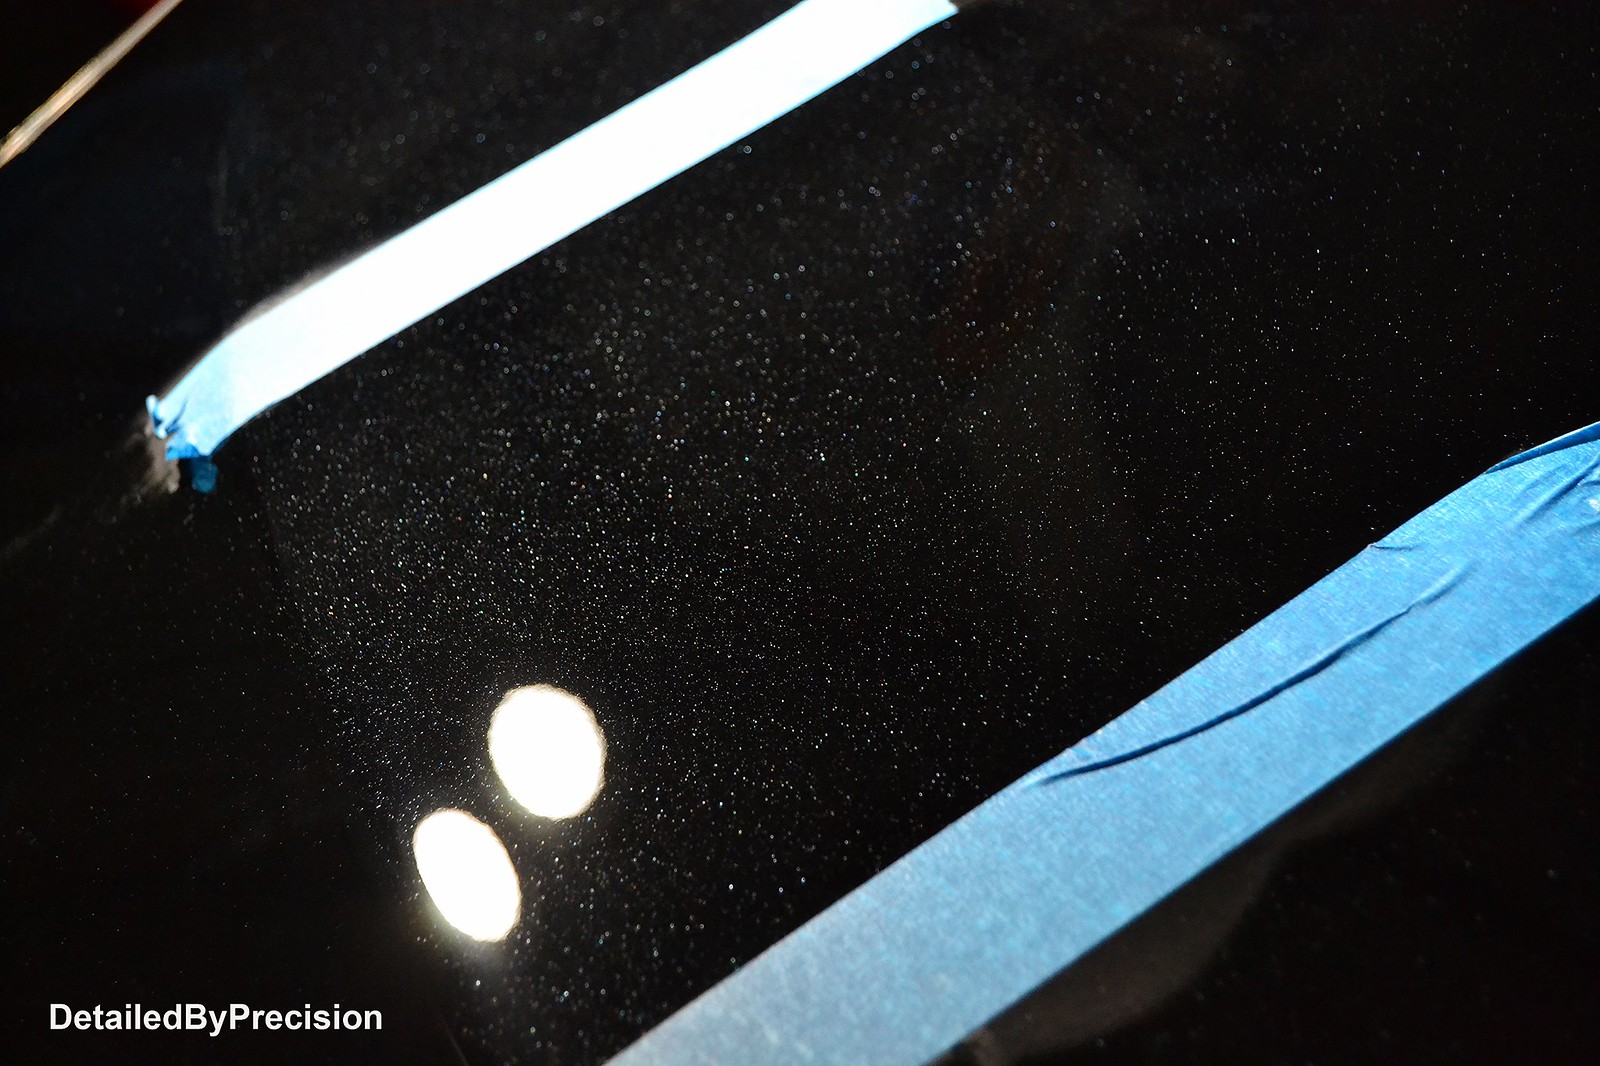
After polishing it out, the damage minimized a lot at this point. I took a look at it and decided I can push it a little more to get that last percent of correction.
 DetailedByPrecision2966 by Limny Kuang, on Flickr
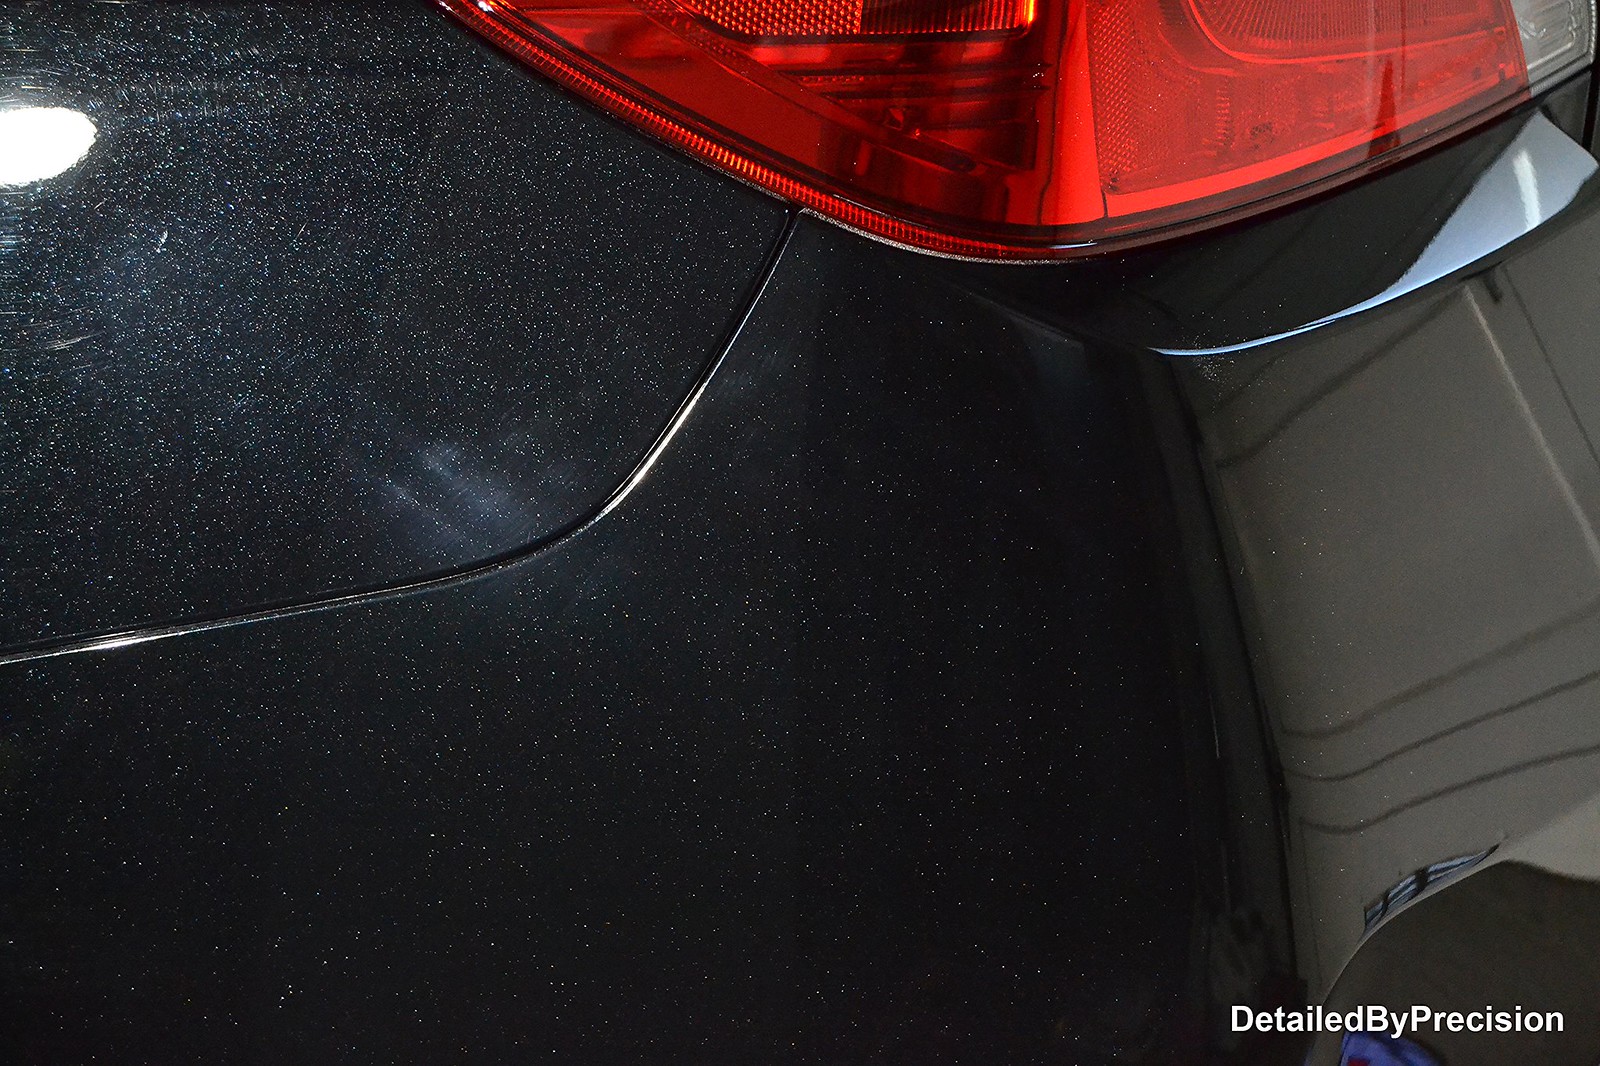 DetailedByPrecision2967 by Limny Kuang, on Flickr
Success! You cannot see it in day time unless you have LED lights blasting at it and looking at it within inches like this....
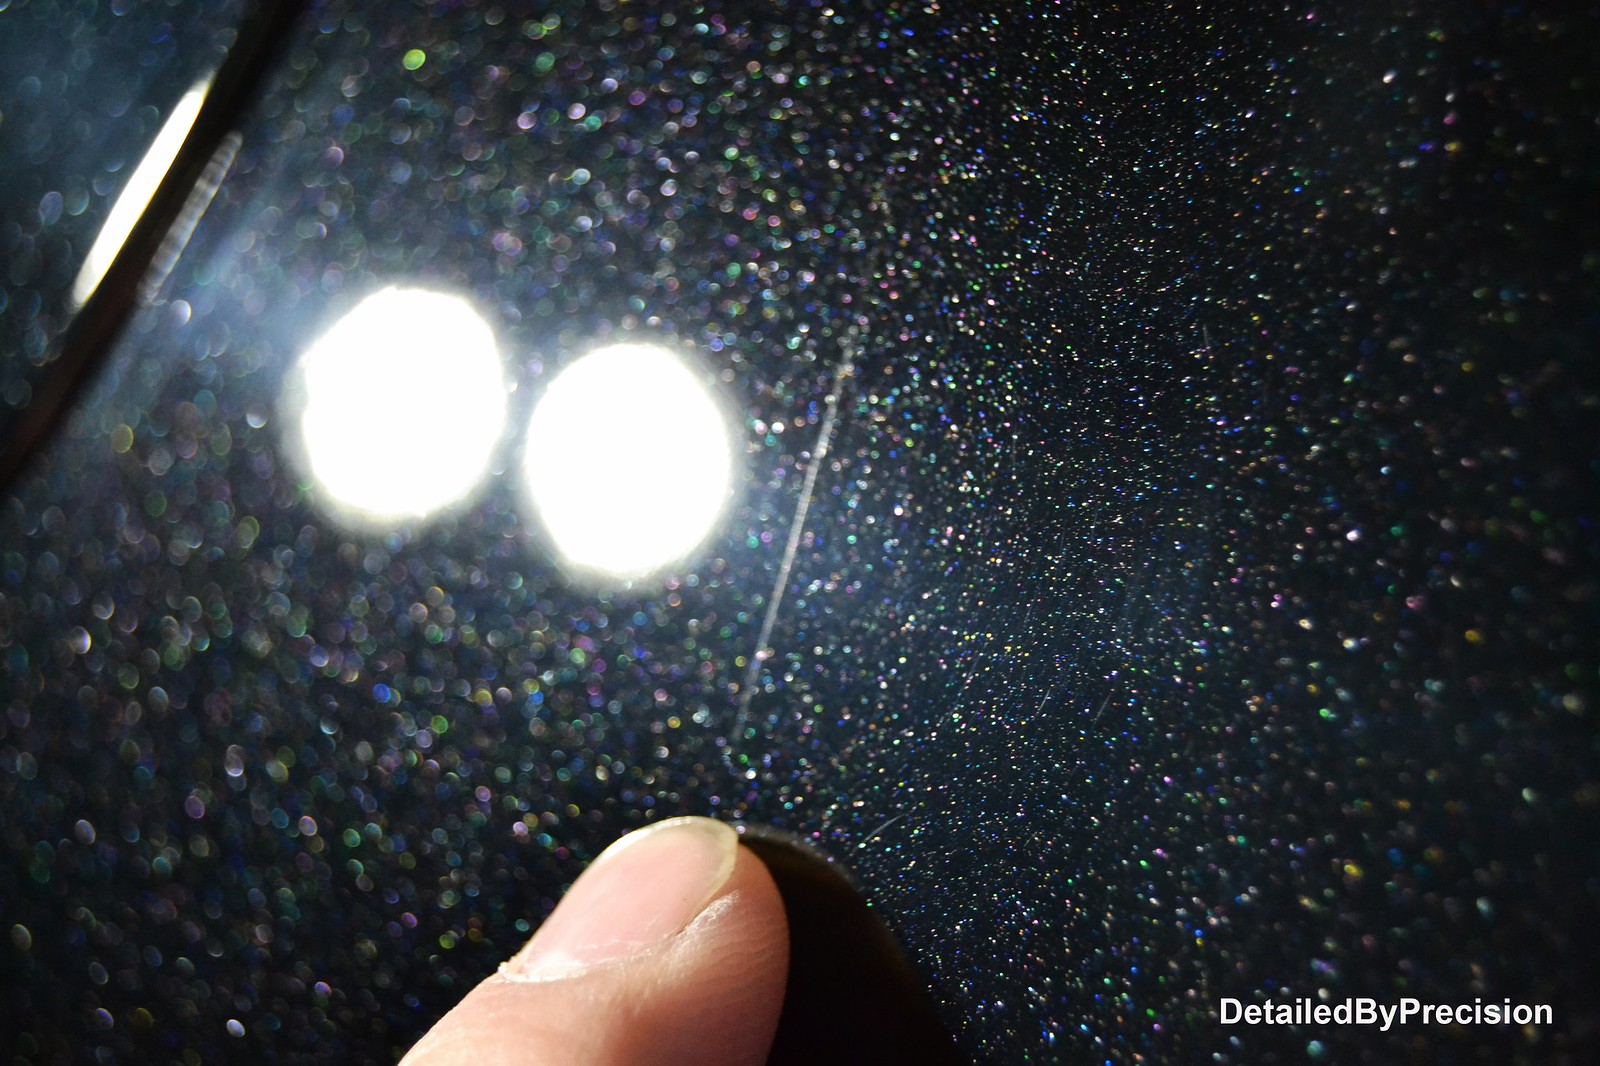 DetailedByPrecision2969 by Limny Kuang, on Flickr
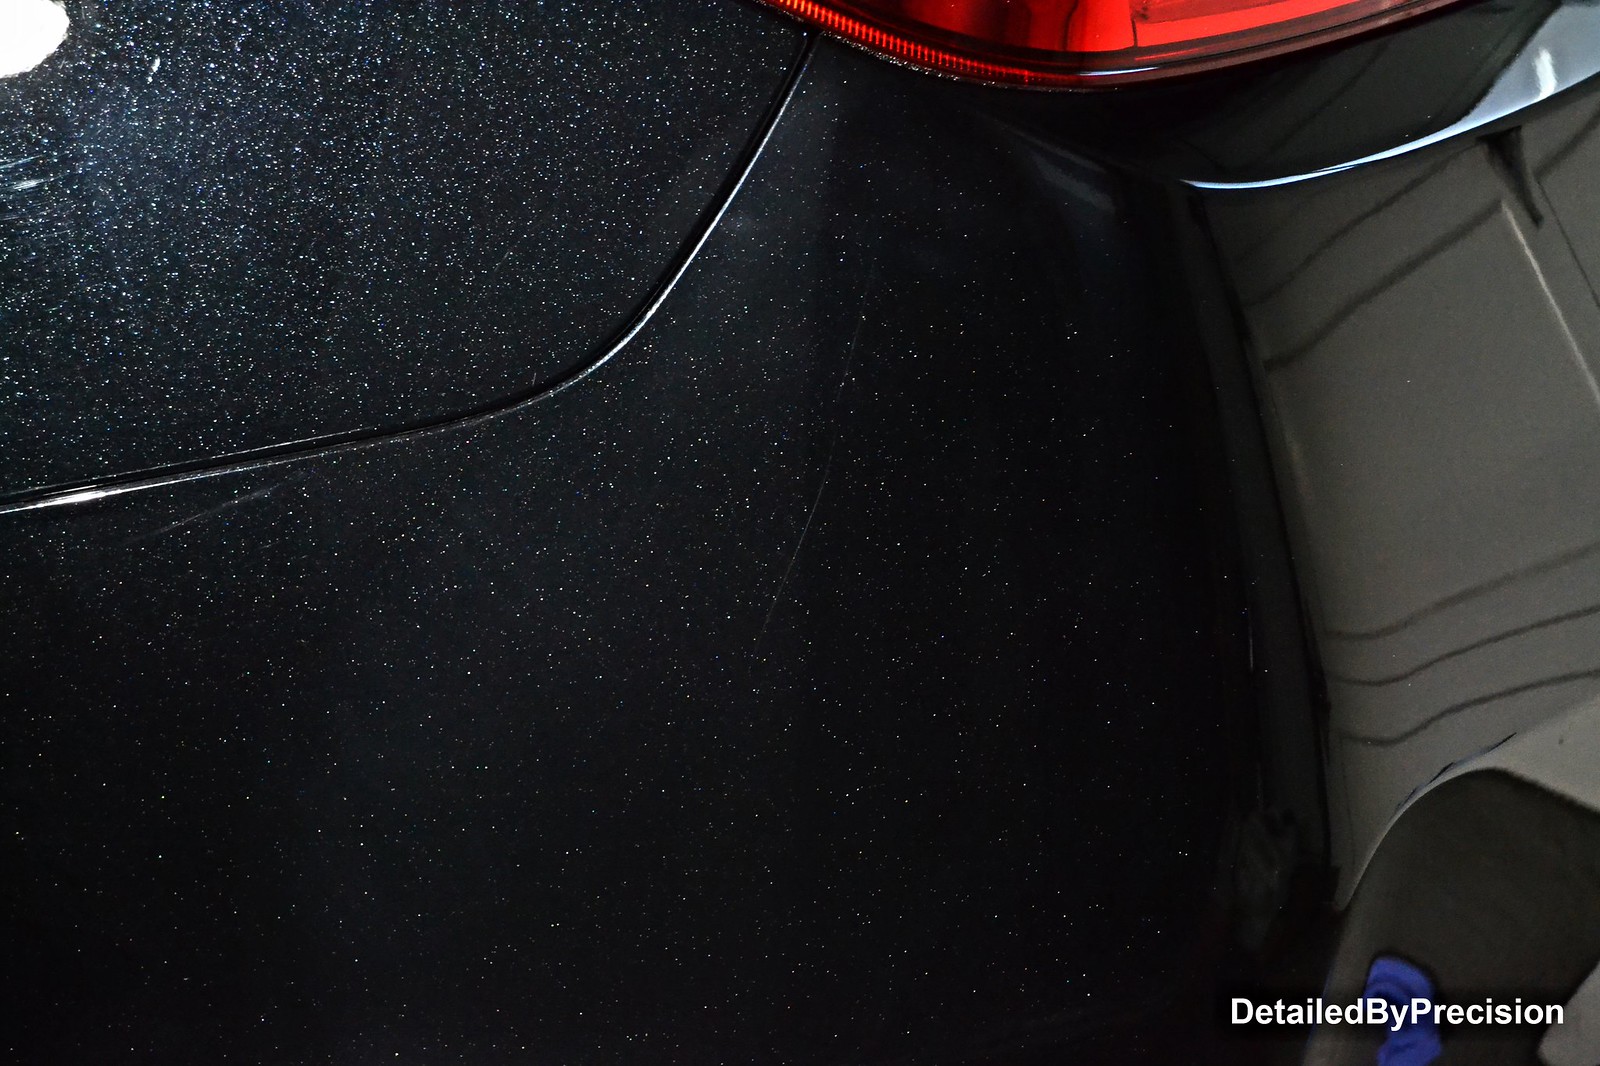
Sealed the paint afterwards with Blackfire wet diamond paint sealant
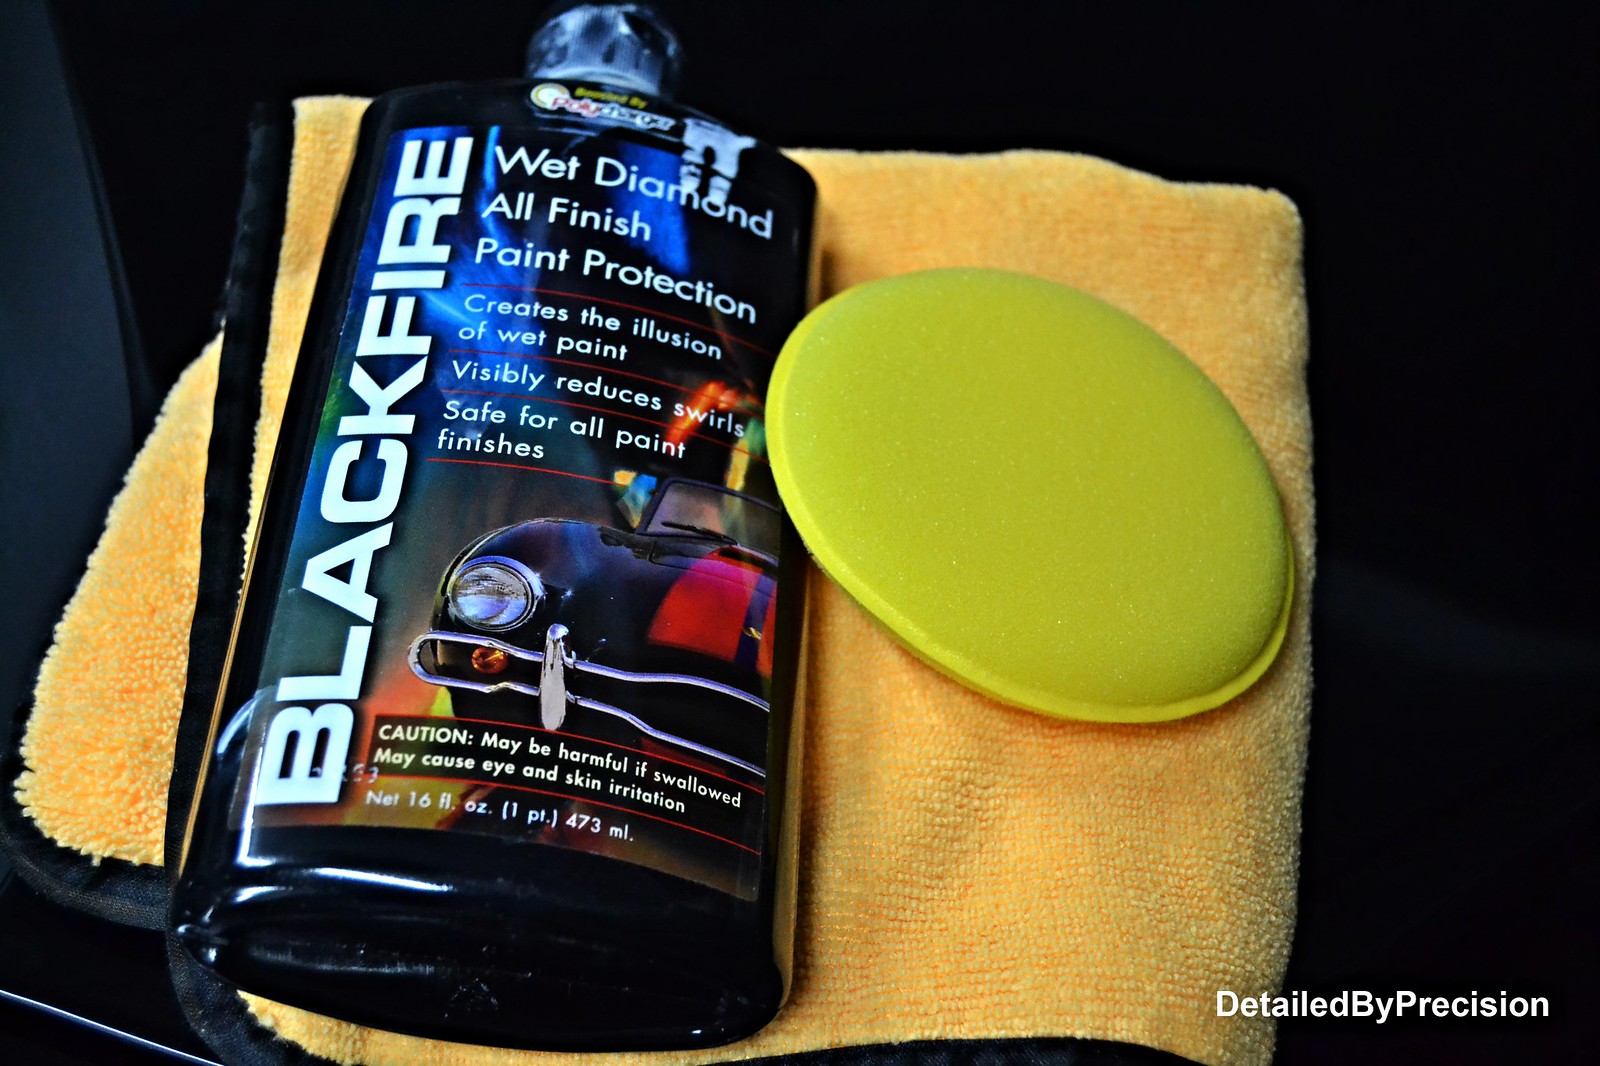 DetailedByPrecision2974 by Limny Kuang, on Flickr
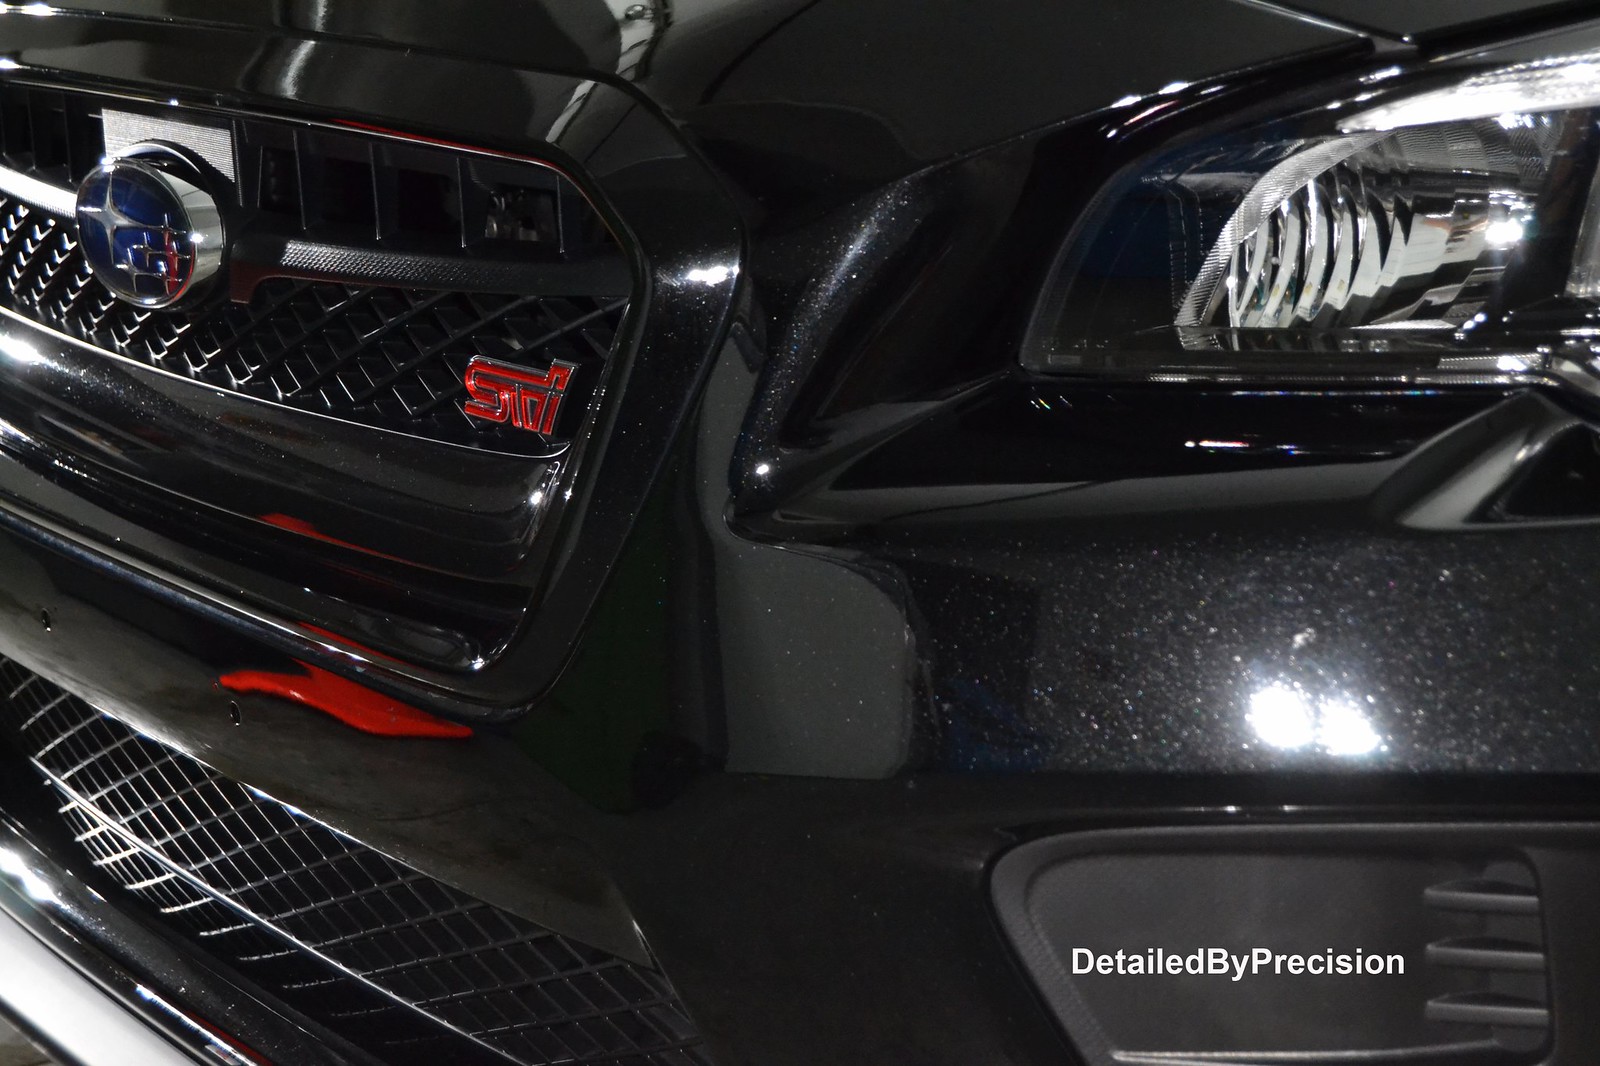
Finished pics of the car
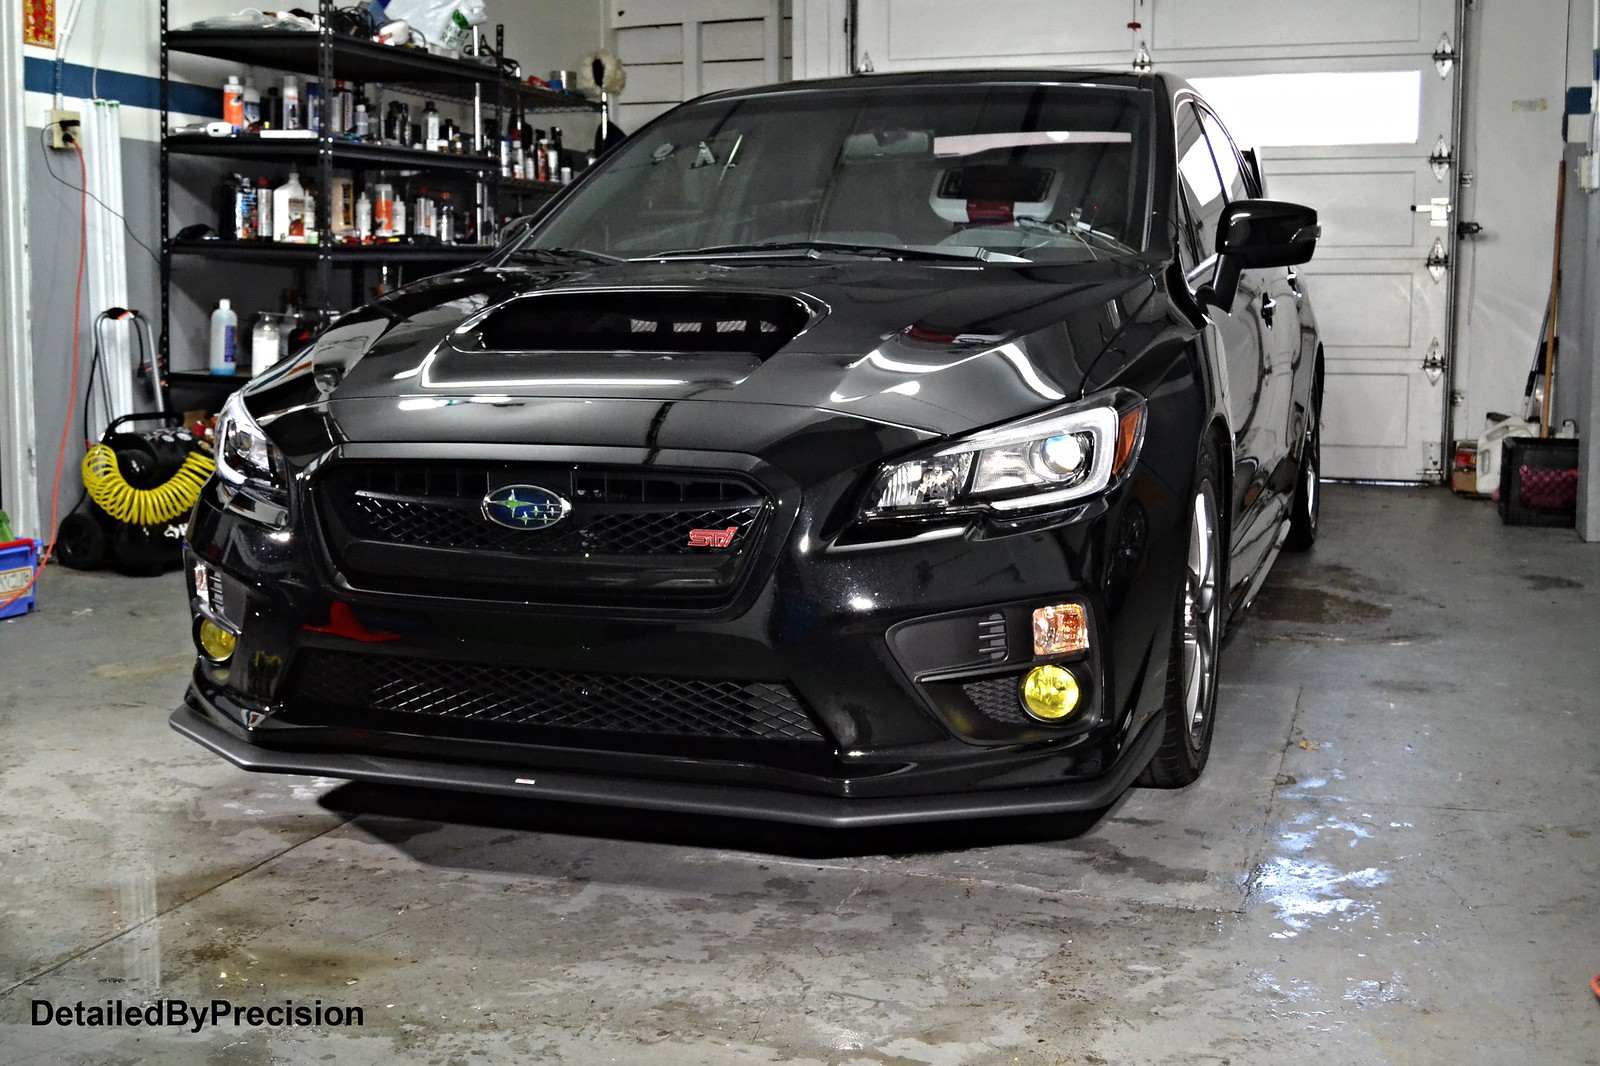 DetailedByPrecision2975 by Limny Kuang, on Flickr
 DetailedByPrecision2979 by Limny Kuang, on Flickr
 DetailedByPrecision2980 by Limny Kuang, on Flickr
 DetailedByPrecision2985 by Limny Kuang, on Flickr
 DetailedByPrecision2995 by Limny Kuang, on Flickr
 DetailedByPrecision2987 by Limny Kuang, on Flickr
 DetailedByPrecision2986 by Limny Kuang, on Flickr
 DetailedByPrecision3000 by Limny Kuang, on Flickr
 DetailedByPrecision2883 by Limny Kuang, on Flickr
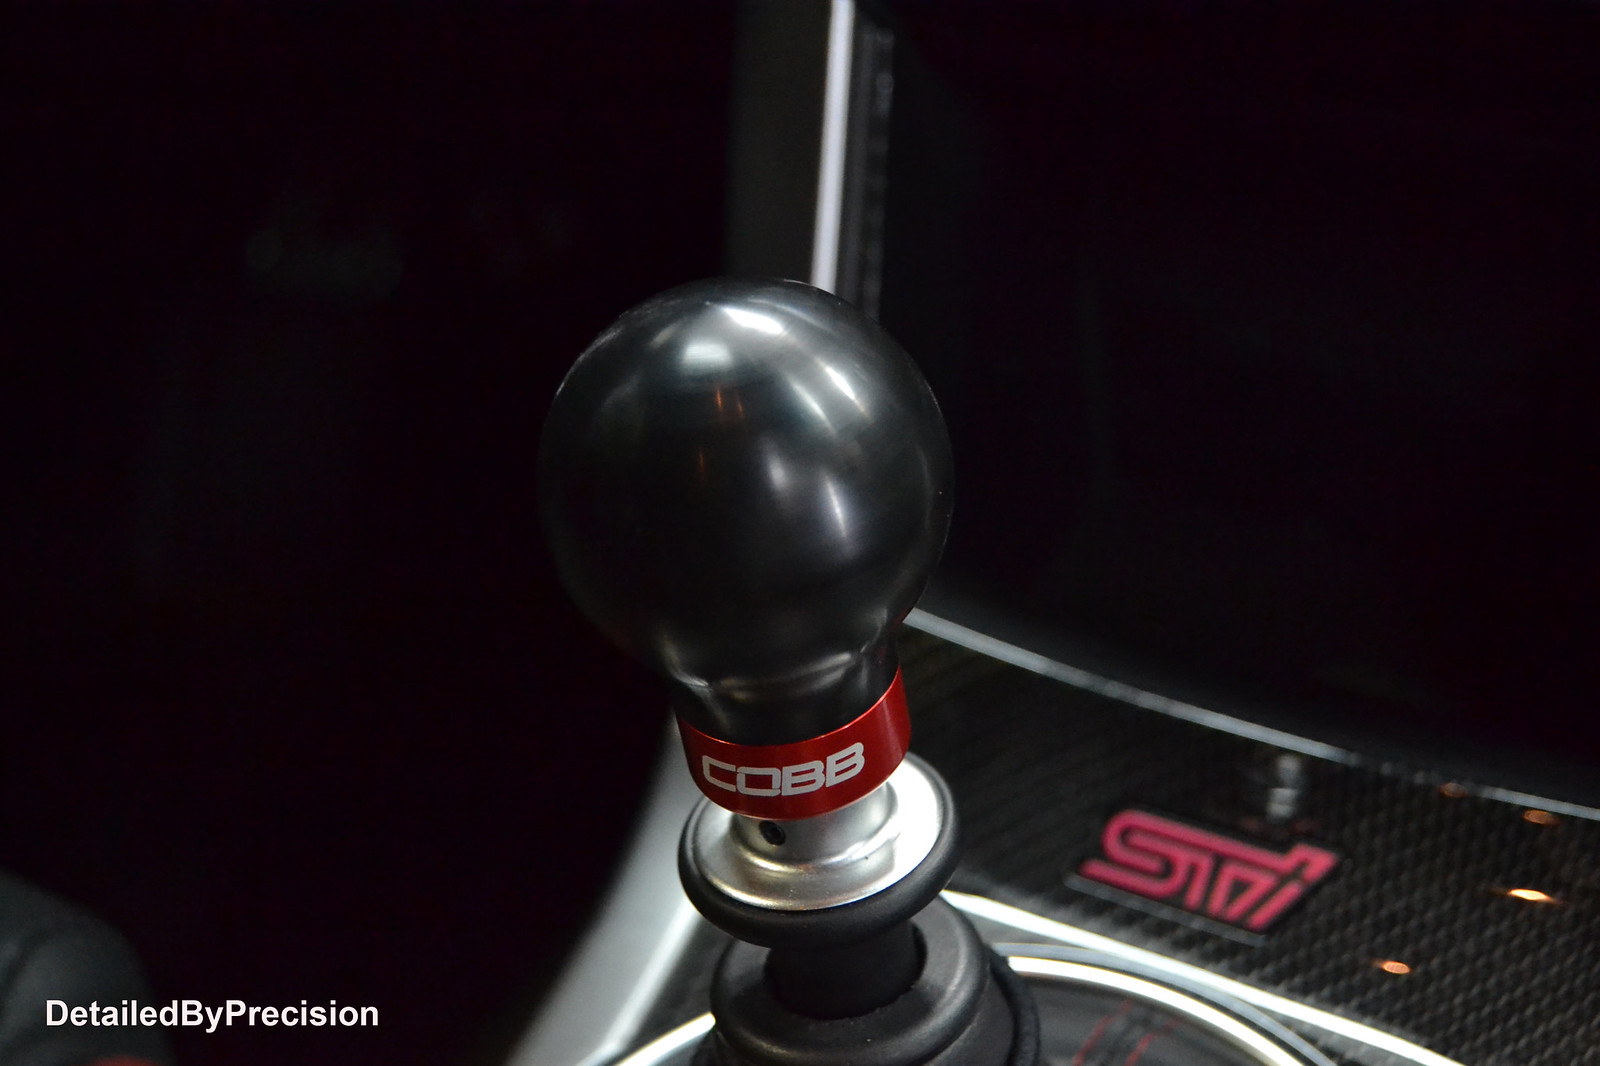
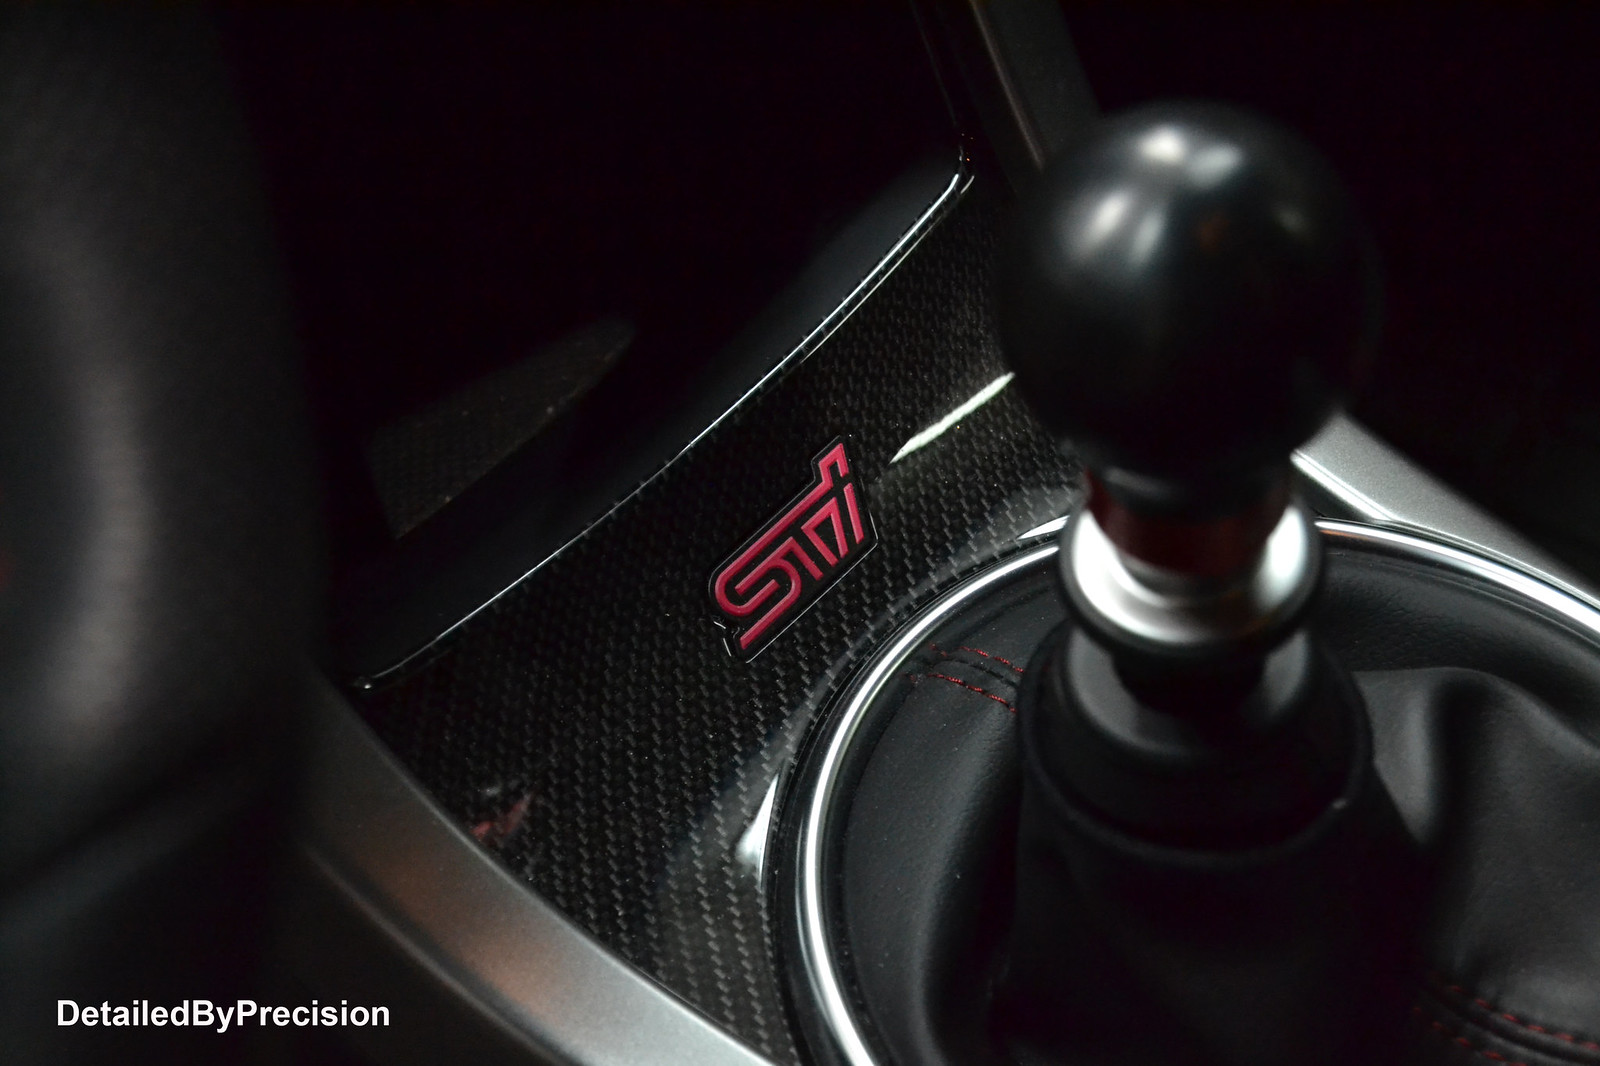
Took some shots of the interior to appreciate the mods done to it. I did not work on the interior.
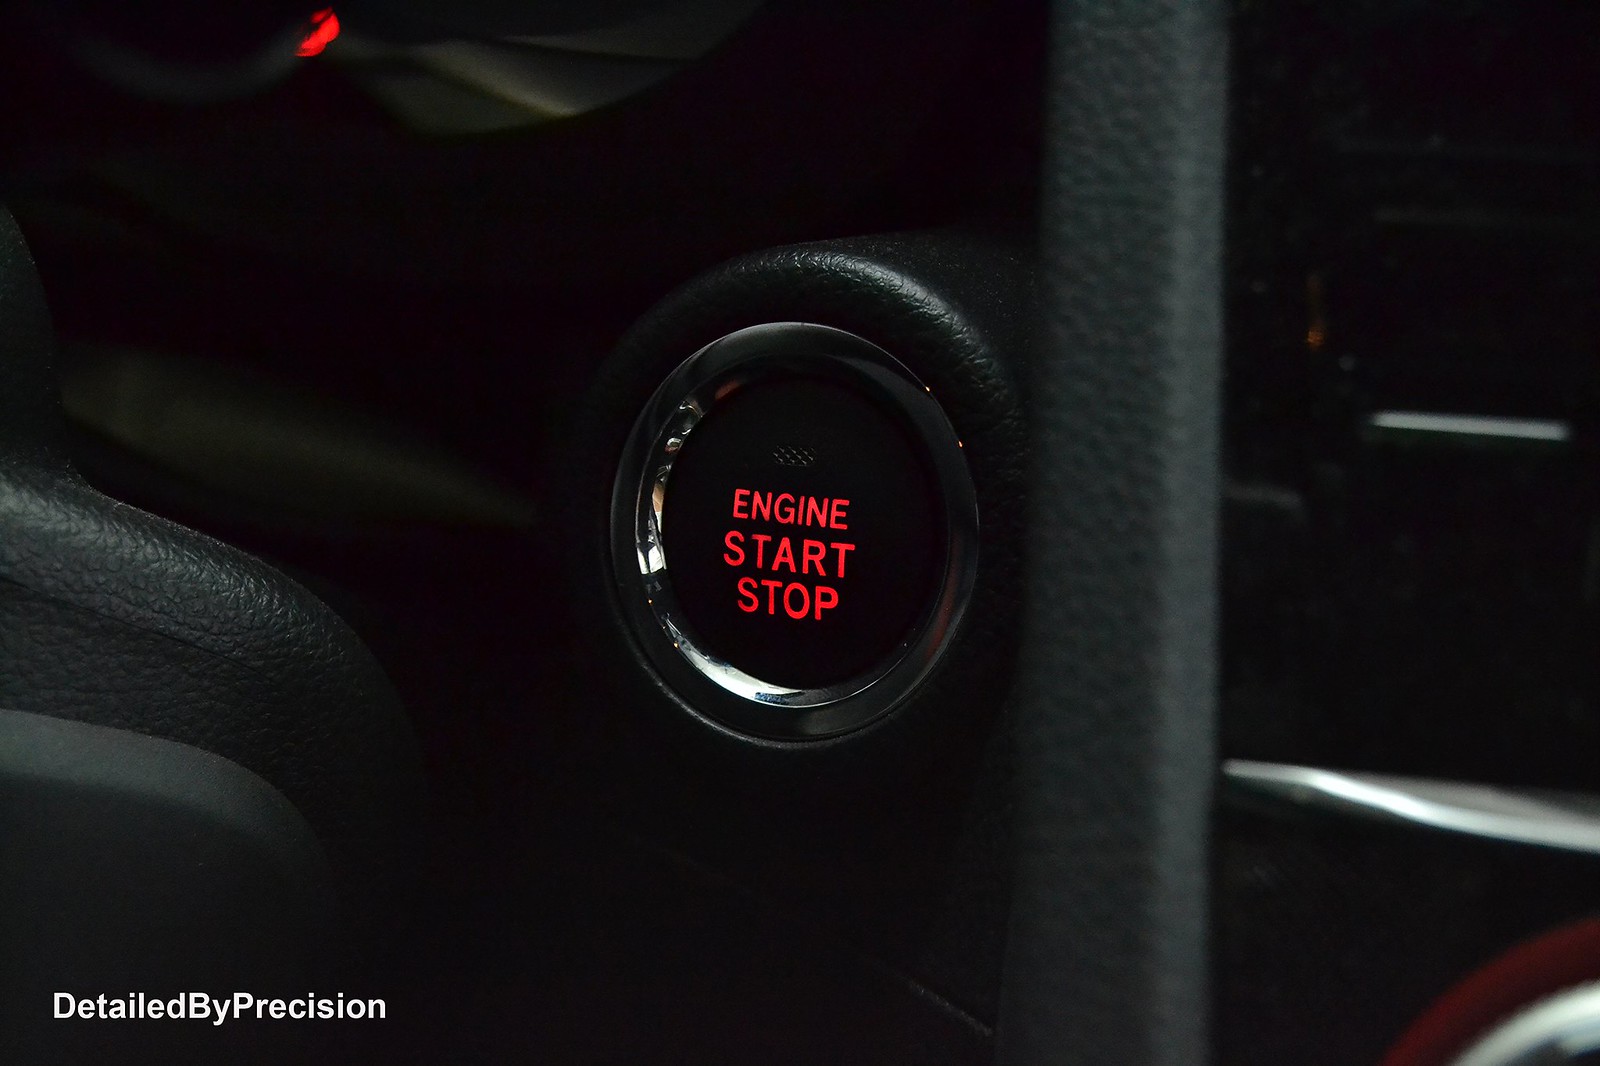 DetailedByPrecision2993 by Limny Kuang, on Flickr
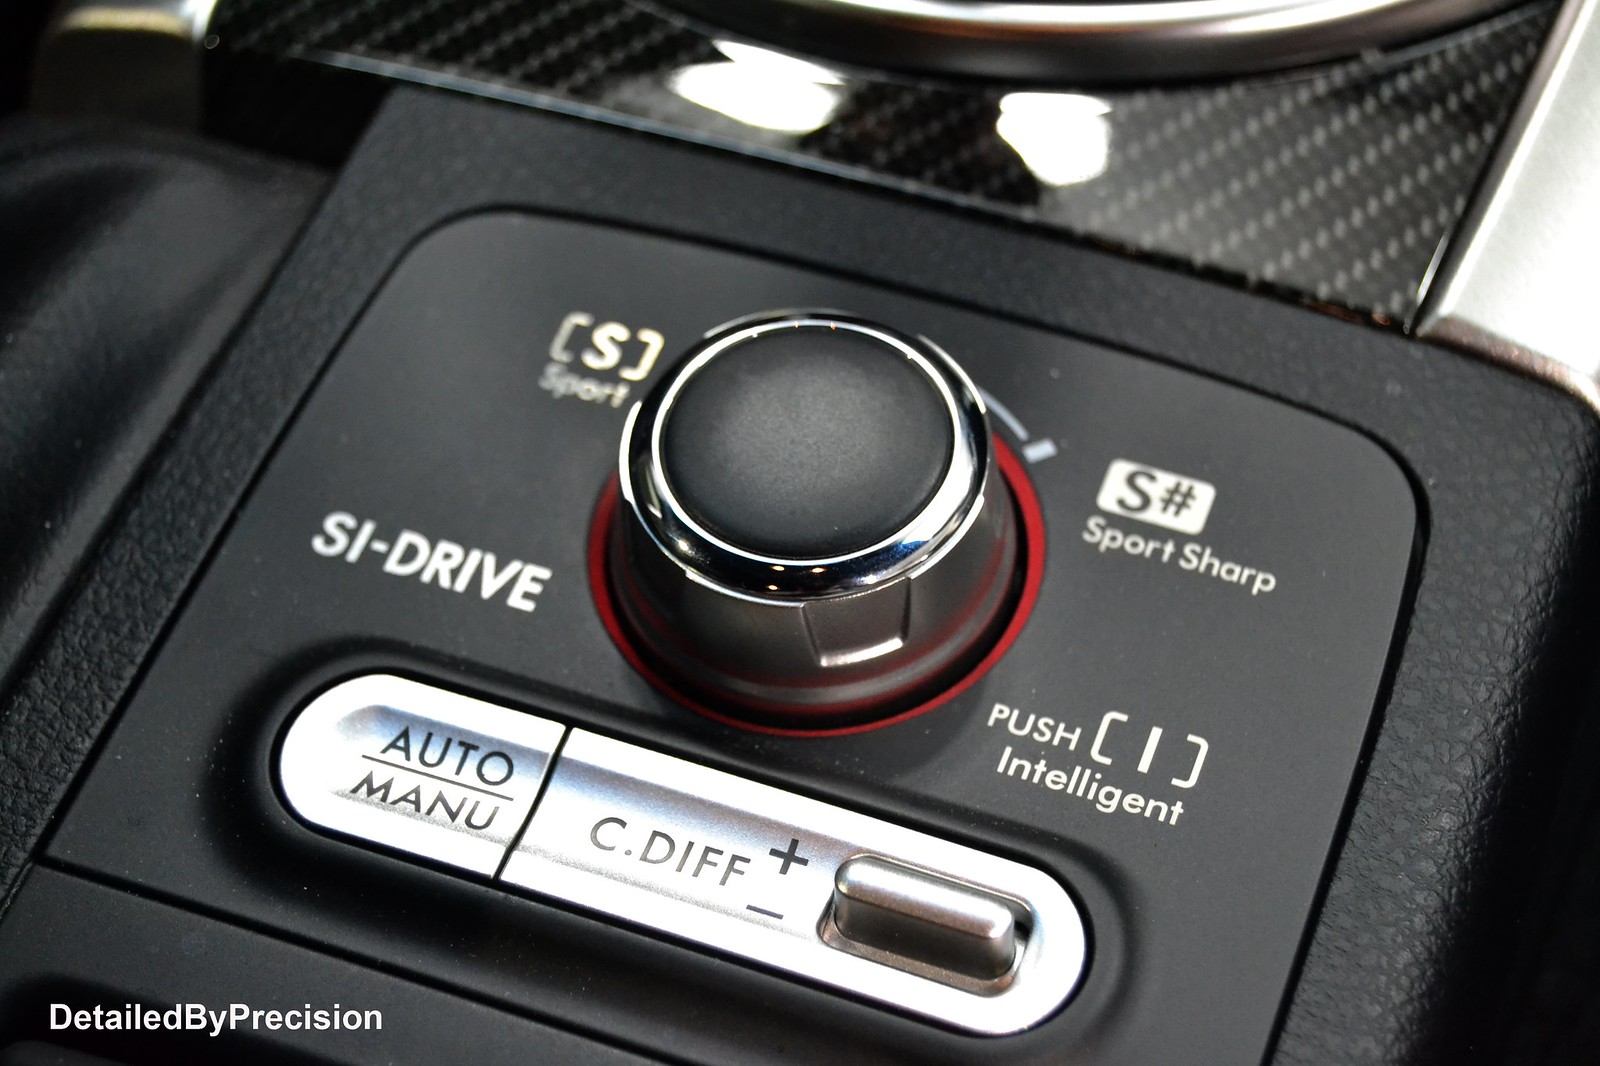 DetailedByPrecision2992 by Limny Kuang, on Flickr
 DetailedByPrecision2991 by Limny Kuang, on Flickr
 DetailedByPrecision2989 by Limny Kuang, on Flickr
Total time: 8 hr 18 mins
What I learned from this job:
You can't tell the paint's real condition until you wash and clay it. Not just a wash alone.
The paint was easy to correct and did not have micro marring occur upon wiping off polish residue. Easy to work with.
Never get too confident with sanding isolated deep scratches. I need to focus on task 110% of the time. One slip up is a repaint.
Thanks for viewing for those who made it this far. Appreciate comments and questions are welcomed. I had a lot of fun working on this car. I accepted a challenge and I prevailed. The customer was extremely happy I did not have to resort to touching it up.
This job was a referral of the white tacoma truck I did beforehand. The customer is a coworker of the tacoma owner and commented on how clean his truck looked parked at work. They had a conversation and my contact information was given to get in touch with me. Had a couple brief text messages and set up an inspection to go over the car and talk about the customers concerns and goals for his new to him car. He stopped by and he wanted the same job done as his co workers truck, but on top of that also polish out the right fender and hood for scratches. But, his main concern was a 3 inch scratch on his rear bumper which he did not know how it got there. I went over the options with him and explained my process clearly and thoroughly so we are both on the same page and no miscommunication. I advised him to buy a bottle of touch up from the dealer just in case I needed to use it on the scratch. We set up a drop off day for me to work on the car and his anticipation to see the end outcome of the 3" scratch was exciting.
Worked on the exhaust tips first
DetailedByPrecision2878 by Limny Kuang, on FlickrDetailedByPrecision2879 by Limny Kuang, on FlickrDetailedByPrecision2882 by Limny Kuang, on FlickrDetailedByPrecision2885 by Limny Kuang, on FlickrStarted the wash, decontamination process with foaming the car, Iron X, Claybar
DetailedByPrecision2886 by Limny Kuang, on FlickrDetailedByPrecision2889 by Limny Kuang, on FlickrApplied Carpro Hydro onto the wheels for protection
DetailedByPrecision2893 by Limny Kuang, on FlickrDetailedByPrecision2894 by Limny Kuang, on FlickrDetailedByPrecision2896 by Limny Kuang, on FlickrDetailedByPrecision2898 by Limny Kuang, on FlickrPost claying, a lot of defects showed up on various panels. I'm pretty sure the dealer slapped on some glaze to prepare the car for sale and the claybar removed it and the original defects resurfaced at this point. Some glue residue on the windows and some bird poop shape stains on the hood with some scratches.
Used FG400 and Menz203
DetailedByPrecision2899 by Limny Kuang, on FlickrDetailedByPrecision2959 by Limny Kuang, on FlickrDetailedByPrecision2906 by Limny Kuang, on FlickrDetailedByPrecision2932 by Limny Kuang, on FlickrDetailedByPrecision2905 by Limny Kuang, on FlickrDetailedByPrecision2933 by Limny Kuang, on FlickrDetailedByPrecision2909 by Limny Kuang, on FlickrDetailedByPrecision2914 by Limny Kuang, on FlickrDetailedByPrecision2920 by Limny Kuang, on FlickrDetailedByPrecision292 by Limny Kuang, on FlickrDetailedByPrecision2911 by Limny Kuang, on FlickrDetailedByPrecision2915 by Limny Kuang, on FlickrDetailedByPrecision2922 by Limny Kuang, on FlickrDetailedByPrecision2923 by Limny Kuang, on FlickrDetailedByPrecision2930 by Limny Kuang, on FlickrDetailedByPrecision2931 by Limny Kuang, on FlickrDetailedByPrecision2902 by Limny Kuang, on FlickrDetailedByPrecision2960 by Limny Kuang, on FlickrOnto the film residue. Used Menz203 by hand
DetailedByPrecision2907 by Limny Kuang, on FlickrDetailedByPrecision2918 by Limny Kuang, on FlickrDetailedByPrecision2926 by Limny Kuang, on FlickrDetailedByPrecision2927 by Limny Kuang, on FlickrCouple 50/50's from polishing the hood and driver fender
DetailedByPrecision2958 by Limny Kuang, on FlickrDetailedByPrecision2939 by Limny Kuang, on FlickrDetailedByPrecision2941 by Limny Kuang, on FlickrNow the fun part and most pressure to perform.... the 3" scratch. I assessed it under LED lighting and using my finger nail to see if it catches or not before I dialed in my process. It barely caught my finger nail so there was hope of not having to use the touch up.
DetailedByPrecision2962 by Limny Kuang, on FlickrI hit the scratch with M101 w/ MF pad first to see if there is an improvement or not. Not as obvious anymore...
DetailedByPrecision2963 by Limny Kuang, on FlickrWas not satisfied with the result. I decided to use 2000 grit block and wetsanded the area.
DetailedByPrecision2964 by Limny Kuang, on FlickrPolished out using same combo listed above
DetailedByPrecision2965 by Limny Kuang, on FlickrAfter polishing it out, the damage minimized a lot at this point. I took a look at it and decided I can push it a little more to get that last percent of correction.
DetailedByPrecision2966 by Limny Kuang, on FlickrDetailedByPrecision2967 by Limny Kuang, on FlickrSuccess! You cannot see it in day time unless you have LED lights blasting at it and looking at it within inches like this....
DetailedByPrecision2969 by Limny Kuang, on FlickrSealed the paint afterwards with Blackfire wet diamond paint sealant
DetailedByPrecision2974 by Limny Kuang, on FlickrFinished pics of the car
DetailedByPrecision2975 by Limny Kuang, on FlickrDetailedByPrecision2979 by Limny Kuang, on FlickrDetailedByPrecision2980 by Limny Kuang, on FlickrDetailedByPrecision2985 by Limny Kuang, on FlickrDetailedByPrecision2995 by Limny Kuang, on FlickrDetailedByPrecision2987 by Limny Kuang, on FlickrDetailedByPrecision2986 by Limny Kuang, on FlickrDetailedByPrecision3000 by Limny Kuang, on FlickrDetailedByPrecision2883 by Limny Kuang, on FlickrTook some shots of the interior to appreciate the mods done to it. I did not work on the interior.
DetailedByPrecision2993 by Limny Kuang, on FlickrDetailedByPrecision2992 by Limny Kuang, on FlickrDetailedByPrecision2991 by Limny Kuang, on FlickrDetailedByPrecision2989 by Limny Kuang, on FlickrTotal time: 8 hr 18 mins
What I learned from this job:
You can't tell the paint's real condition until you wash and clay it. Not just a wash alone.
The paint was easy to correct and did not have micro marring occur upon wiping off polish residue. Easy to work with.
Never get too confident with sanding isolated deep scratches. I need to focus on task 110% of the time. One slip up is a repaint.
Thanks for viewing for those who made it this far. Appreciate comments and questions are welcomed. I had a lot of fun working on this car. I accepted a challenge and I prevailed. The customer was extremely happy I did not have to resort to touching it up.
CG6Lemon
Detailing Enthusiast
2005 Lotus
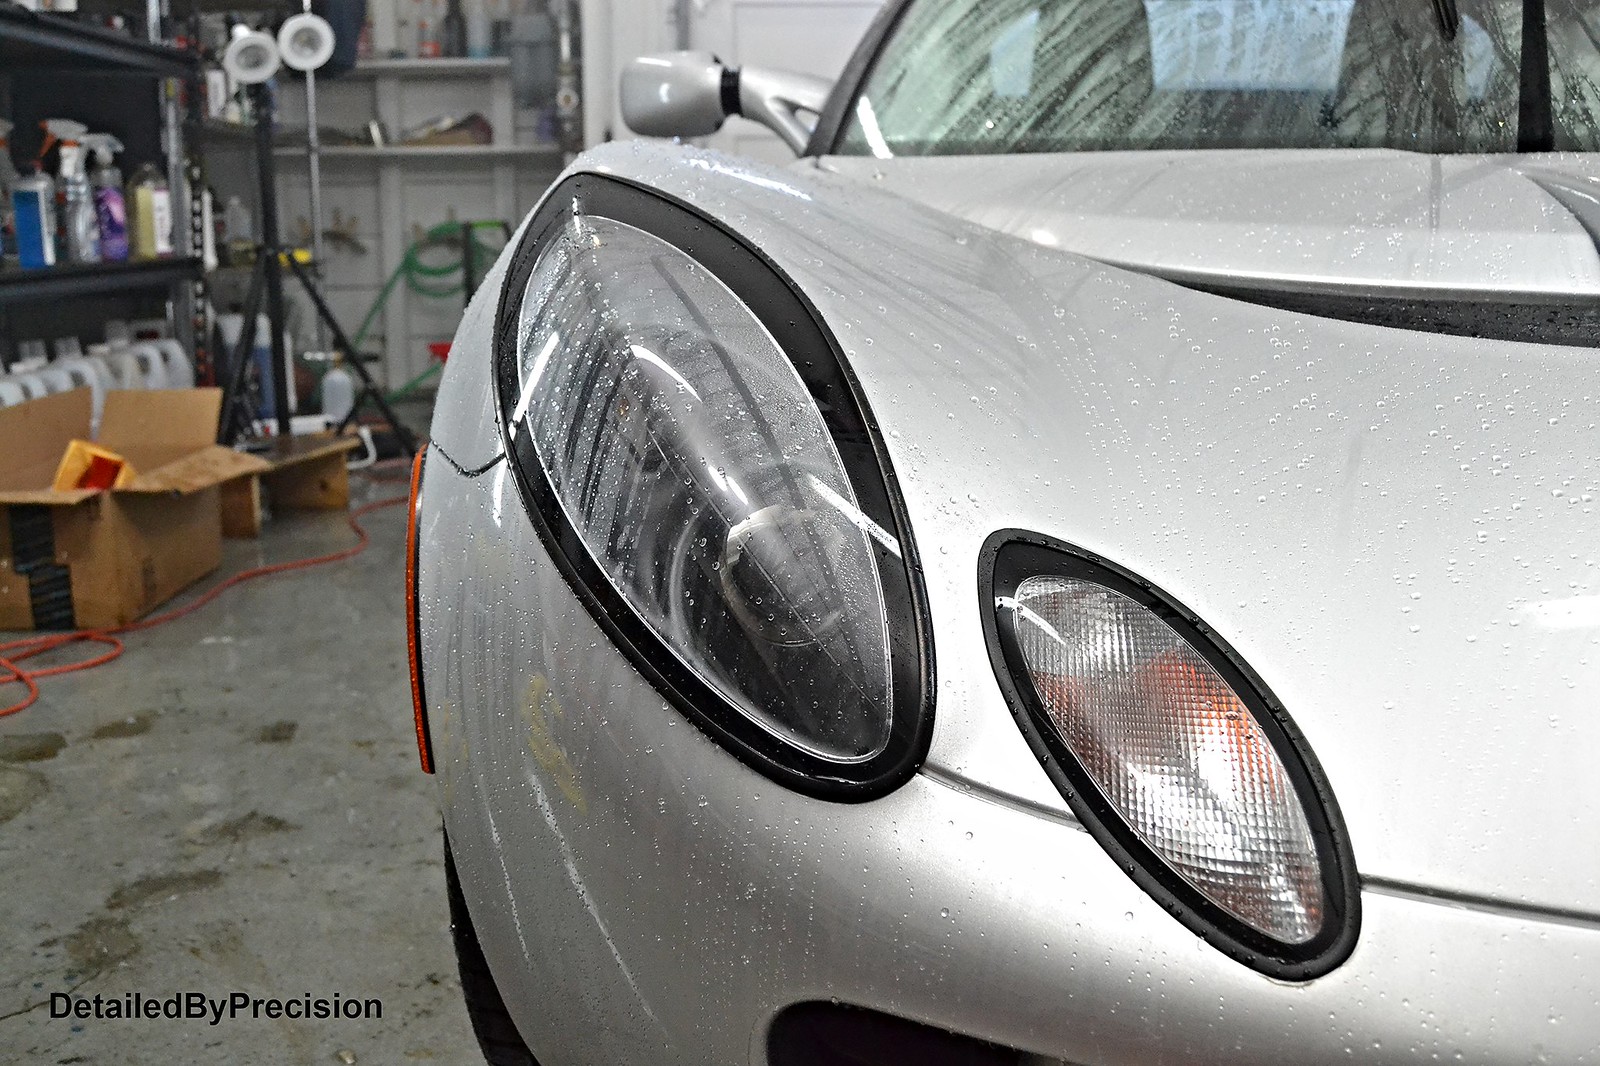
A longtime and good friend of mine recently acquired a new to him car, which is a 2005 Lotus. He wanted to learn how to clean it up and maintain. I offered him to teach him on a weekend where I was free. He gladly accepted my offer and we set up a day. The car only had a single owner before he bought it so it was in good condition to begin with. After a couple of hours of hard work on his part of course we took it for a drive to get a feel of the car. We took it to some back roads and surprisingly the car's power to weight ratio feels really good. Had a blast and grabbed some food to catch up and parted ways. Onto the pics....
Started with wheels, applying Hydro afterwards
 DetailedByPrecision2795 by Limny Kuang, on Flickr
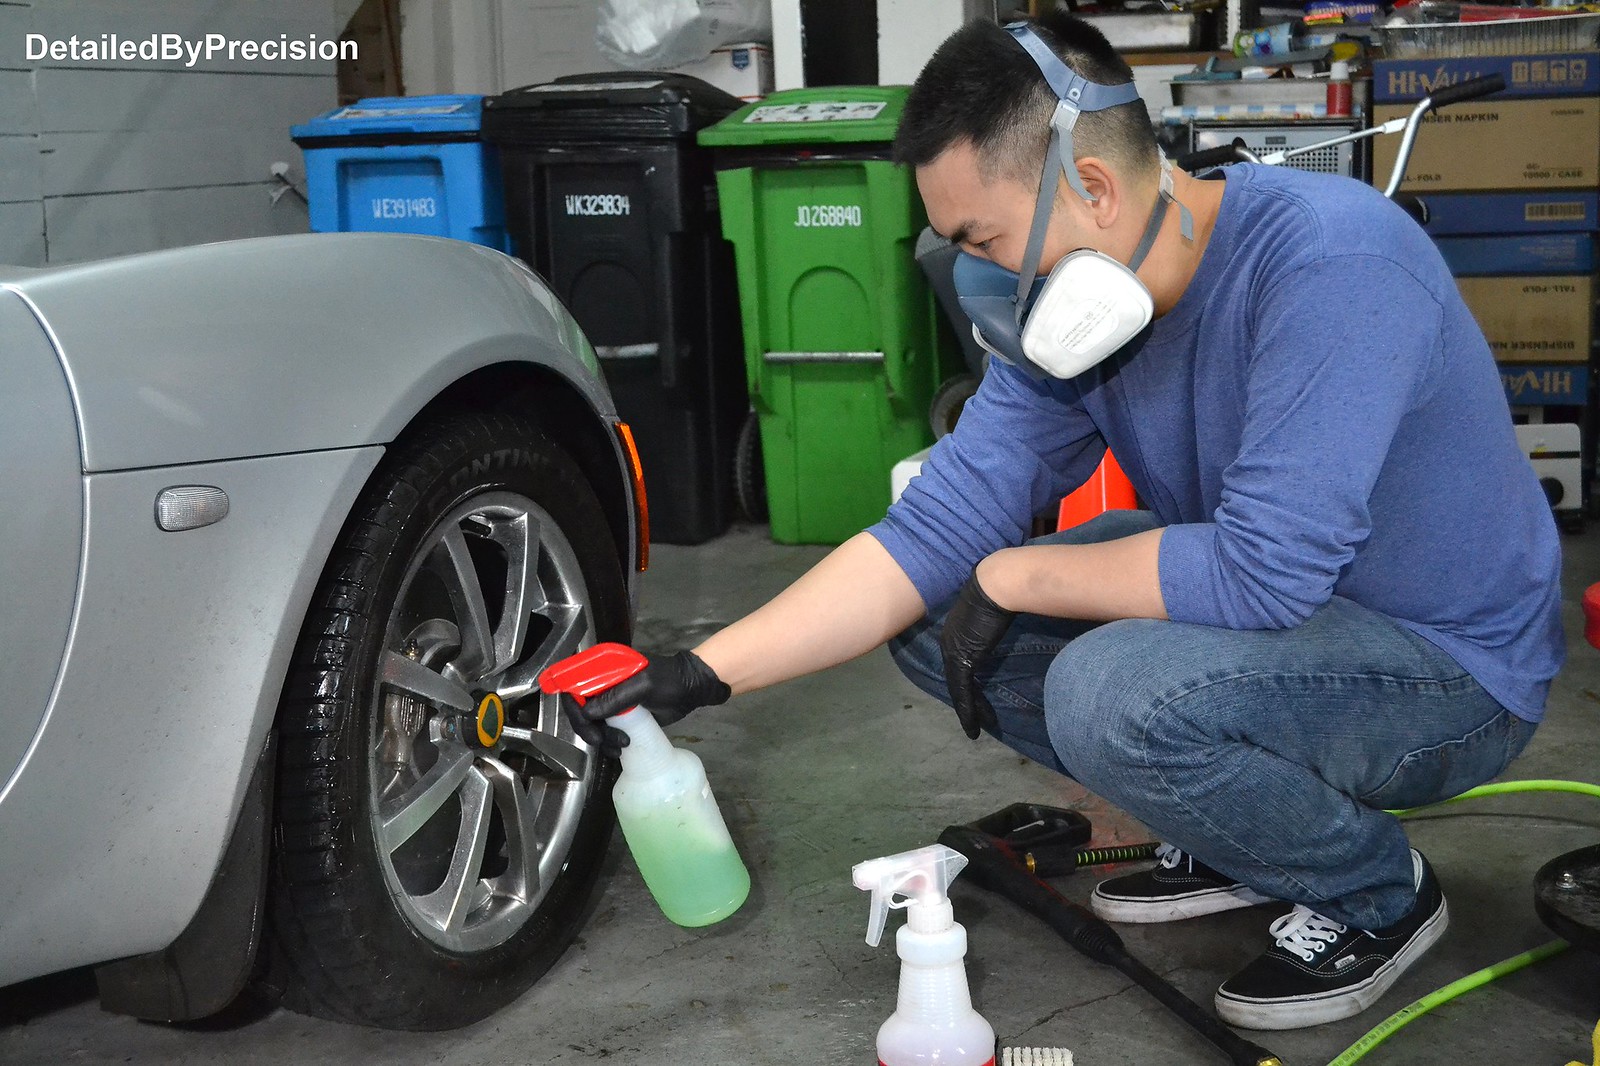 DetailedByPrecision2803 by Limny Kuang, on Flickr
 DetailedByPrecision2799 by Limny Kuang, on Flickr
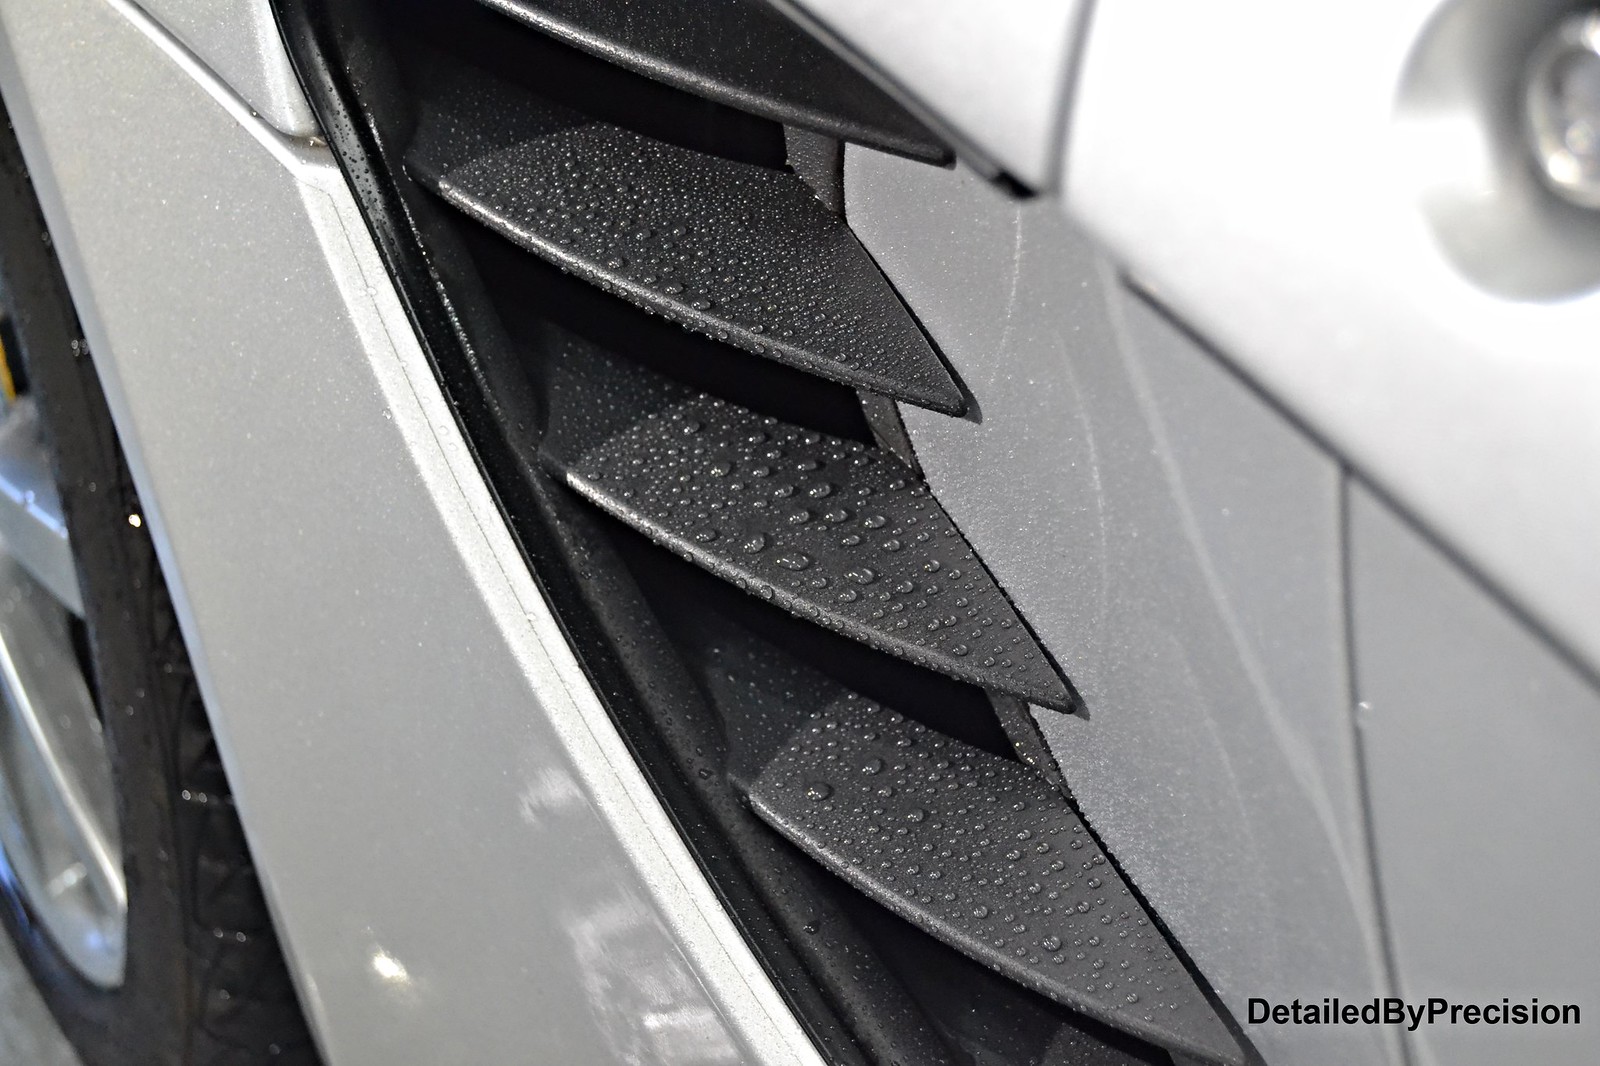
Followed with foam, clay, iron X. For protection, applied Hydro to all surfaces
 DSC_2809 copy by Limny Kuang, on Flickr
 DSC_2810 copy by Limny Kuang, on Flickr
 DetailedByPrecision2822 by Limny Kuang, on Flickr
 DetailedByPrecision2812 by Limny Kuang, on Flickr
 DetailedByPrecision2826 by Limny Kuang, on Flickr
Applied Wolfgang Trim Sealant to trim pieces as well
 DetailedByPrecision2804 by Limny Kuang, on Flickr
 DetailedByPrecision2840 by Limny Kuang, on Flickr
 DetailedByPrecision2806 by Limny Kuang, on Flickr
 DetailedByPrecision2842 by Limny Kuang, on Flickr
 DetailedByPrecision2853 by Limny Kuang, on Flickr
Finished pics:
 DetailedByPrecision2833 by Limny Kuang, on Flickr
 DetailedByPrecision2837 by Limny Kuang, on Flickr
 DetailedByPrecision2836 by Limny Kuang, on Flickr
 DetailedByPrecision2835 by Limny Kuang, on Flickr
 DetailedByPrecision2830 by Limny Kuang, on Flickr
 DetailedByPrecision2843 by Limny Kuang, on Flickr
 DetailedByPrecision2852 by Limny Kuang, on Flickr
What I learned from this detail:
Cannot spray water around rear tail lights. The design of it will allow water to seep through and flood the trunk area.
Thanks if you guys read the whole thread. Any comments or input are always welcomed.
A longtime and good friend of mine recently acquired a new to him car, which is a 2005 Lotus. He wanted to learn how to clean it up and maintain. I offered him to teach him on a weekend where I was free. He gladly accepted my offer and we set up a day. The car only had a single owner before he bought it so it was in good condition to begin with. After a couple of hours of hard work on his part of course we took it for a drive to get a feel of the car. We took it to some back roads and surprisingly the car's power to weight ratio feels really good. Had a blast and grabbed some food to catch up and parted ways. Onto the pics....
Started with wheels, applying Hydro afterwards
DetailedByPrecision2795 by Limny Kuang, on FlickrDetailedByPrecision2803 by Limny Kuang, on FlickrDetailedByPrecision2799 by Limny Kuang, on FlickrFollowed with foam, clay, iron X. For protection, applied Hydro to all surfaces
DSC_2809 copy by Limny Kuang, on FlickrDSC_2810 copy by Limny Kuang, on FlickrDetailedByPrecision2822 by Limny Kuang, on FlickrDetailedByPrecision2812 by Limny Kuang, on FlickrDetailedByPrecision2826 by Limny Kuang, on FlickrApplied Wolfgang Trim Sealant to trim pieces as well
DetailedByPrecision2804 by Limny Kuang, on FlickrDetailedByPrecision2840 by Limny Kuang, on FlickrDetailedByPrecision2806 by Limny Kuang, on FlickrDetailedByPrecision2842 by Limny Kuang, on FlickrDetailedByPrecision2853 by Limny Kuang, on FlickrFinished pics:
DetailedByPrecision2833 by Limny Kuang, on FlickrDetailedByPrecision2837 by Limny Kuang, on FlickrDetailedByPrecision2836 by Limny Kuang, on FlickrDetailedByPrecision2835 by Limny Kuang, on FlickrDetailedByPrecision2830 by Limny Kuang, on FlickrDetailedByPrecision2843 by Limny Kuang, on FlickrDetailedByPrecision2852 by Limny Kuang, on FlickrWhat I learned from this detail:
Cannot spray water around rear tail lights. The design of it will allow water to seep through and flood the trunk area.
Thanks if you guys read the whole thread. Any comments or input are always welcomed.