

This is most likely one of the more bland DIYs you've seen. It's what I'd call a "practical" DIY as it's got nothing to do with making your car look or perform better...")
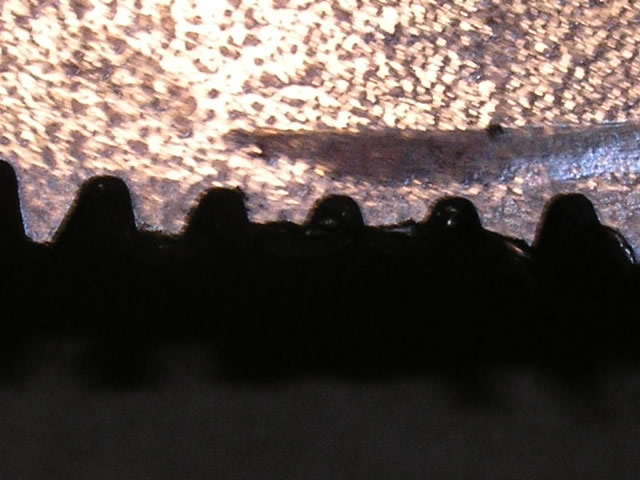
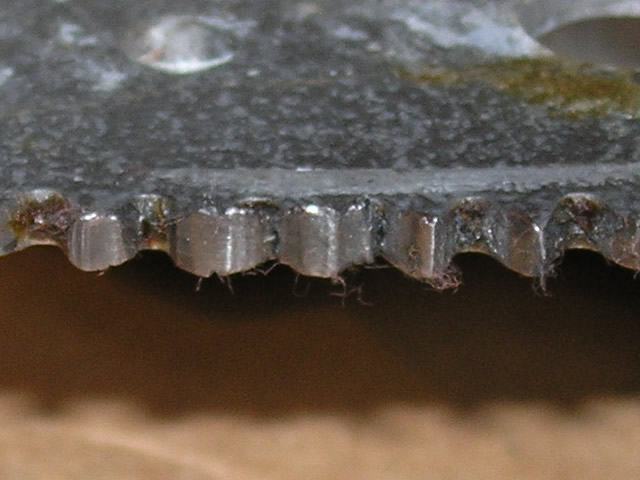
Somehow the upper rear corner of the "glass run channel" gasket was being grabbed by the window whenever I raised the window. Over the years, this resulted in stripped teeth on the window regulator and eventually the motor was unable to close the window completely.
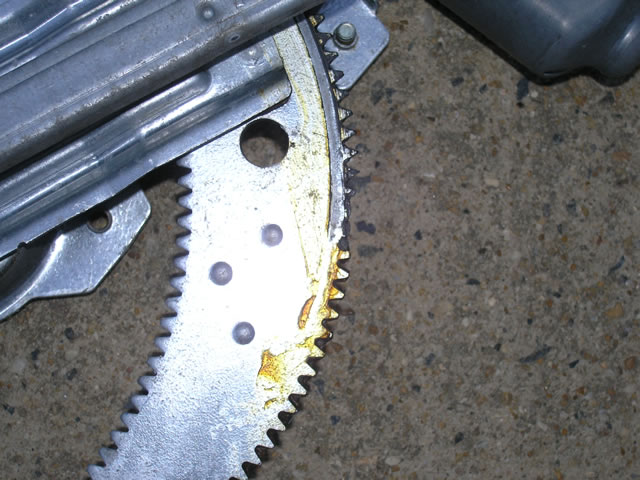
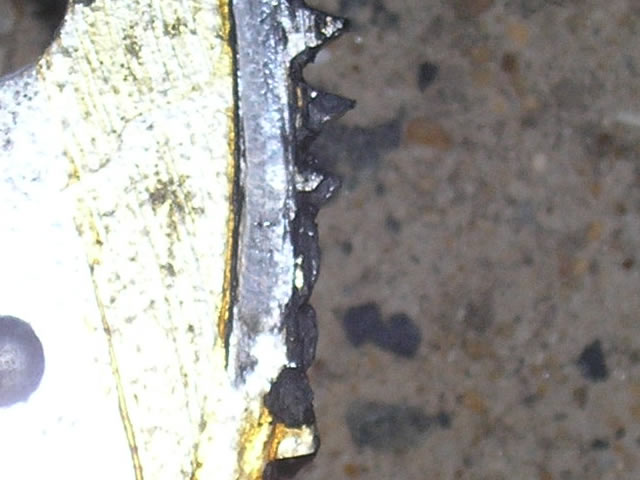
This is what my regulator looked like (additional damage photos below):
I finally got around to changing the regulator this weekend......it's nice to be able to roll that window up. Considering the glass run channel was the catalyst, I replaced this part as well.
This DIY is for the coupe. From the service manual, it appears the regulators for four doors are a completely different style than those used on the coupe.
What you'll need:
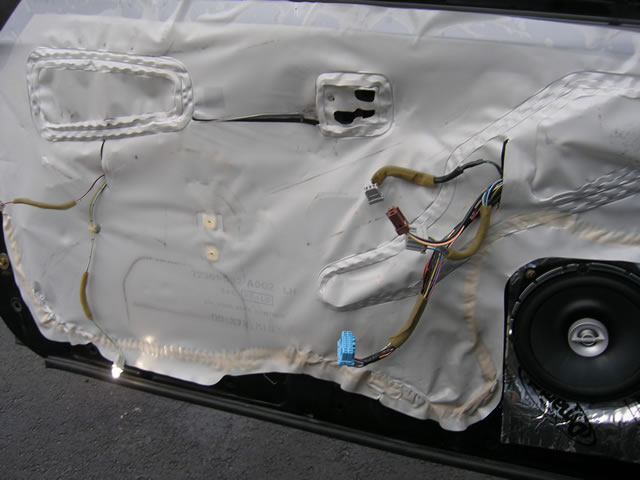
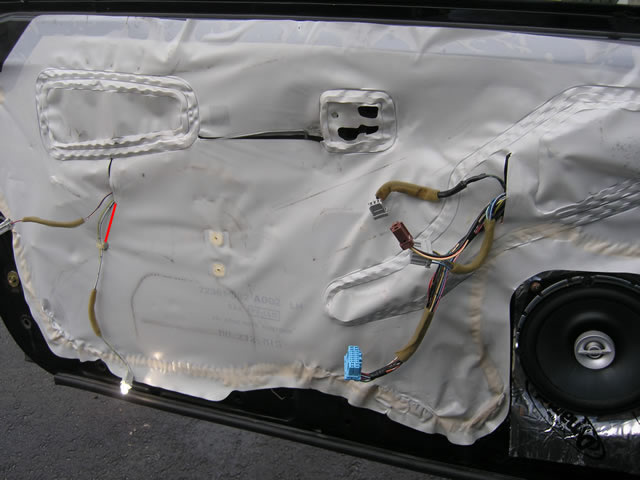
2) Now remove the white plastic cover. I simply peeled it back from top to bottom. I was unable to get the clip holding the light wire removed so I cut the plastic where the red line is below:
3) Lower the glass (I removed the door switches from the door panel and reconnected the blue wire connector) until you can see the two bolts holding the window in place. Be sure to hold the glass so as to not drop into the door when it's removed. Remove both bolts. Remove the glass by pulling up, and towards the outside. This is what you'll have now:
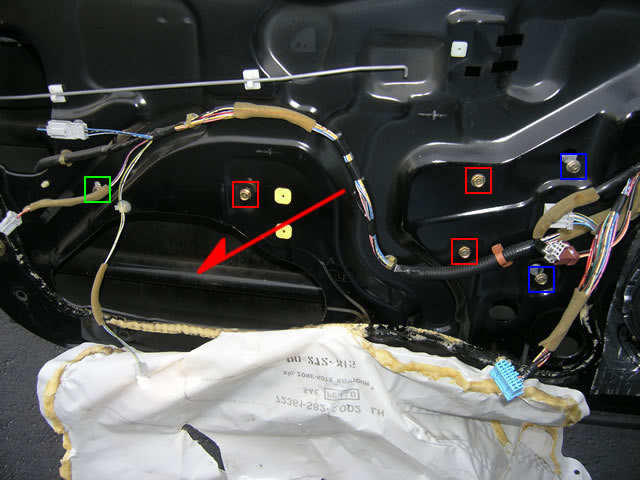
4) Scribe a mark around the bolt marked in green above. Disconnect the wiring harness that is in the corner of the door on the hinge side. The wiring harness disconnects from a clip that is holding it in place. Loosen the wire from another clip in the door. Remove the red bolts, and loosen the blue bolts. Remove the regulator through the hole marked with a red arrow.
(At this point I was starting to run out of sunlight so took fewer pictures)
5) Remove the torx bolts that are holding the motor to the regulator. BE CAREFUL as there is a spring that will release when the motor is removed.
6) Remove the spring from the old regulator and install into the replacement regulator.
7) Grease the joints of the regulator assembly and the point at which the motor gear fits into the regulator.
This is what my damaged regulator looked like:
8) Reattach the motor to the regulator. I had a bit of trouble with getting one of the screws past the regulator gear. Since the new regulator came with new screws, I used all 4 holes instead of the 3 originally used.
Reversing the steps at this point would complete the regulator replacement. If you need to change your glass run channel the next few steps will explain that process.
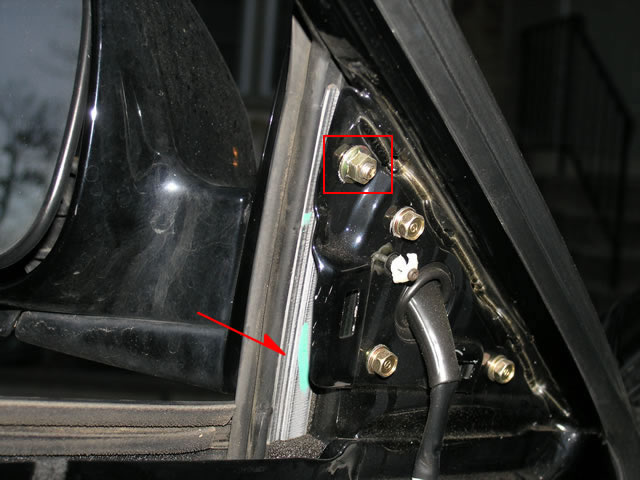
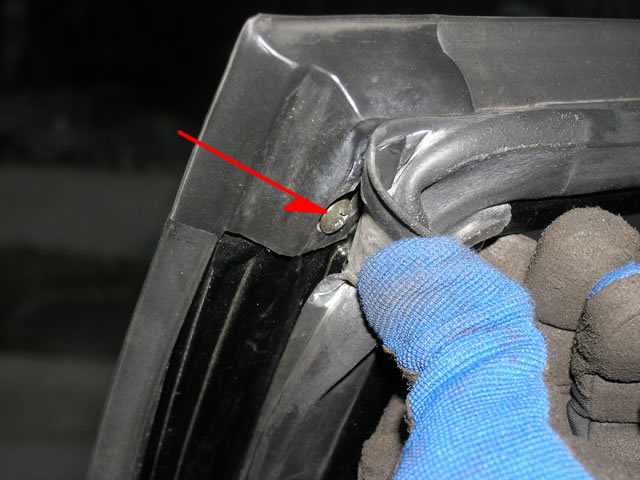
9) Loosen the three bolts holding the side mirror. Remove the nut marked in red below. The silver track marked with the red arrow is what we want to remove. You will need to remove the nuts listed in step 10 before the track can be removed.
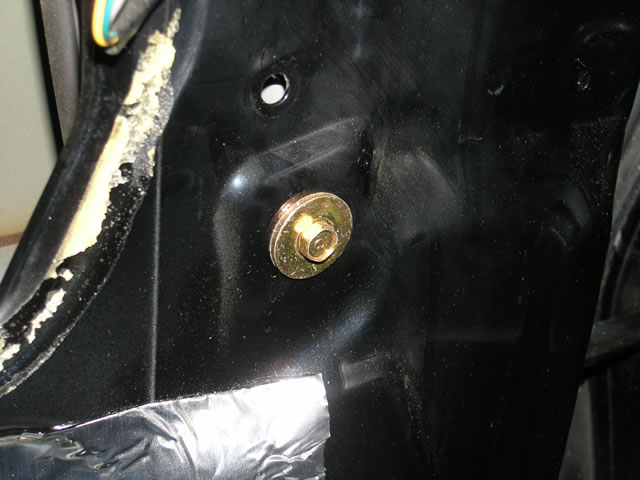
10) Remove the gold-covered bolt in the middle of the door (in line with the nut you just removed):
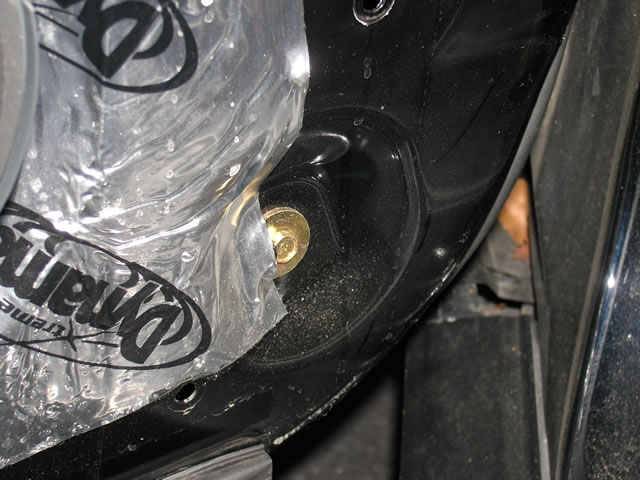
And the second bolt a little further down:
11) Remove three screws to remove the outer vertical trim (on the vertical door edge). The top screw is hidden below the weatherstripping:
12) Now back to the mirror side of the door. A little twisting (and maybe some more loosening) will remove the silver track (marked with red arrow):
13) Once the track is loosened, the remaining portion of the strip can be removed from the window channel. Once the entire piece has been loosened, the track and strip can be removed from the same opening used to remove the regulator (marked with red arrow):
14) Remove the weatherstripping from the track, replace with the new glass run channel. A la Haynes, installation is reverse of removal... The end of the new glass run channel near the door lock was longer than I needed so I cut the extra material to match the weatherstripping I removed.
Hope you enjoyed this DIY as much as possible......it's my first and I'll be the first to admit not what I'd call a "fun" DIY. Although, the quiet ride down the highway is certainly a welcome update...
It took me ~2-1/2 to 3 hours to complete both tasks. I took my time, although it was getting dark. Thankfully, I had an Energizer tripod flashlight on hand which helped once the sun went down...
Somehow the upper rear corner of the "glass run channel" gasket was being grabbed by the window whenever I raised the window. Over the years, this resulted in stripped teeth on the window regulator and eventually the motor was unable to close the window completely.
This is what my regulator looked like (additional damage photos below):
I finally got around to changing the regulator this weekend...
...it's nice to be able to roll that window up. Considering the glass run channel was the catalyst, I replaced this part as well.This DIY is for the coupe. From the service manual, it appears the regulators for four doors are a completely different style than those used on the coupe.
What you'll need:
- A broken window regulator or screwed up glass run channel. Otherwise you probably won't be doing this work...
- Replacement regulator - $68
- Replacement glass run channel - listed as "UPPER WINDOW SEAL" (on the bottom of the linked page) - $36
- Socket set (10mm and 8mm)
- Torx driver (T-15)
2) Now remove the white plastic cover. I simply peeled it back from top to bottom. I was unable to get the clip holding the light wire removed so I cut the plastic where the red line is below:
3) Lower the glass (I removed the door switches from the door panel and reconnected the blue wire connector) until you can see the two bolts holding the window in place. Be sure to hold the glass so as to not drop into the door when it's removed. Remove both bolts. Remove the glass by pulling up, and towards the outside. This is what you'll have now:
4) Scribe a mark around the bolt marked in green above. Disconnect the wiring harness that is in the corner of the door on the hinge side. The wiring harness disconnects from a clip that is holding it in place. Loosen the wire from another clip in the door. Remove the red bolts, and loosen the blue bolts. Remove the regulator through the hole marked with a red arrow.
(At this point I was starting to run out of sunlight so took fewer pictures)
5) Remove the torx bolts that are holding the motor to the regulator. BE CAREFUL as there is a spring that will release when the motor is removed.
6) Remove the spring from the old regulator and install into the replacement regulator.
7) Grease the joints of the regulator assembly and the point at which the motor gear fits into the regulator.
This is what my damaged regulator looked like:
8) Reattach the motor to the regulator. I had a bit of trouble with getting one of the screws past the regulator gear. Since the new regulator came with new screws, I used all 4 holes instead of the 3 originally used.
Reversing the steps at this point would complete the regulator replacement. If you need to change your glass run channel the next few steps will explain that process.
9) Loosen the three bolts holding the side mirror. Remove the nut marked in red below. The silver track marked with the red arrow is what we want to remove. You will need to remove the nuts listed in step 10 before the track can be removed.
10) Remove the gold-covered bolt in the middle of the door (in line with the nut you just removed):
And the second bolt a little further down:
11) Remove three screws to remove the outer vertical trim (on the vertical door edge). The top screw is hidden below the weatherstripping:
12) Now back to the mirror side of the door. A little twisting (and maybe some more loosening) will remove the silver track (marked with red arrow):
13) Once the track is loosened, the remaining portion of the strip can be removed from the window channel. Once the entire piece has been loosened, the track and strip can be removed from the same opening used to remove the regulator (marked with red arrow):
14) Remove the weatherstripping from the track, replace with the new glass run channel. A la Haynes, installation is reverse of removal...
The end of the new glass run channel near the door lock was longer than I needed so I cut the extra material to match the weatherstripping I removed.Hope you enjoyed this DIY as much as possible...
...it's my first and I'll be the first to admit not what I'd call a "fun" DIY. Although, the quiet ride down the highway is certainly a welcome update...It took me ~2-1/2 to 3 hours to complete both tasks. I took my time, although it was getting dark. Thankfully, I had an Energizer tripod flashlight on hand which helped once the sun went down...
Last edited: