method5150
Member
Parts:
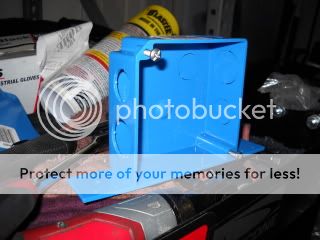
Blue “electric boxes” purchased from Home-depot. Approx. 2$ each.
Electric box caps approx. .80$ each.
55W HID kit purchased from SharpHID.com approx. 90$ (both fog-light kit and HI beam). completely plug and play!
I bought my 35W low-beam kit from these guys. User friendly site, great customer service, products, and prices.
Zip-ties
3M black weather sealant (or gorilla glue-yellow in color) approx. 3-4$, found at wal-mart or any auto store.
Light-switch backings and padded weather stripping, both found at home-depot, approx. 4$ total for both.
Tools:
Flat-head driver
Drill (my trusty craftsman cordless was able to drill through metal)
Dewalt Titanium drill bits (set approx. 19$ @Home-Depot) used 3/16” bit
White-out (for drilling holes)
Black-paint (used engine block paint I had in garage.) Approx. 7$ from Napa
3/16” Rivets and Rivet gun.
Diagonal cutters “dikes” (used to cut plastic tabs off blue electric boxes)
Knife or something with a sharp point (“drilled” starter holes for dead center drilling)
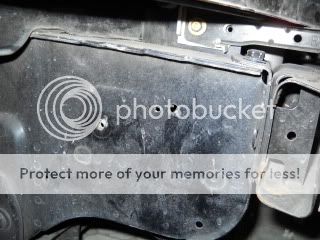
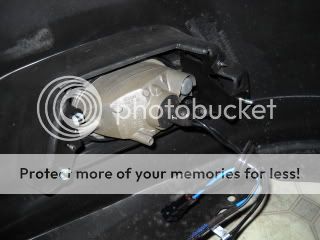
1. Remove splash guard(s). Remove front bumper.
2. It’s up to you how you want to mount the Ballast but this is the easiest/quickest/cheapest solution for me with the tools and supplies available. Actually, these blue boxes worked out like they were made for this project. The cut out holes were spaced perfectly.
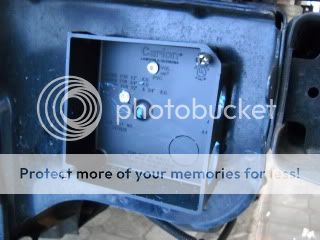
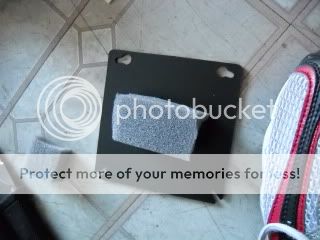
3. Blue box with tabs.
4.
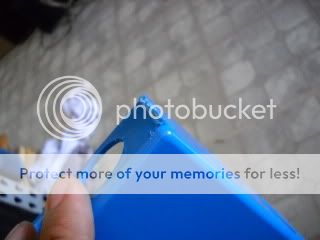
5. Cut off blue tabs, I used Diagonal Cutters. Did not have any power cutting tools available.
6.
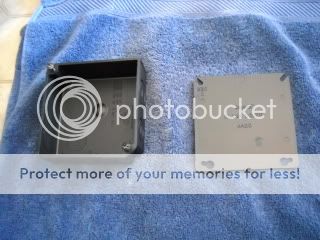
7. I painted boxes black for aesthetics.
8.
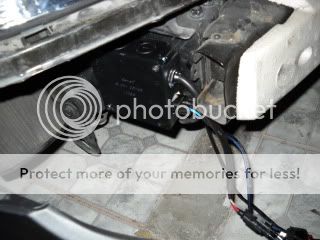
9. Passenger side, I had to drill two holes. Hole in frame was too big for 3/16” rivet. Also a threaded hole but decided not to use.
10.
11. Passenger side with box mounted. I could not access holes from opposite side so I coated circumference of drilled holes with white-out, pressed box against white out, leaving markings on where to drill.
12.
13. Used “light-switch” backing as padding between back of holder and ballast.
14.
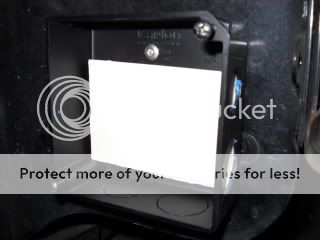
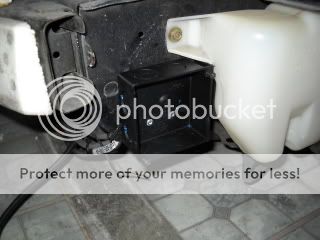
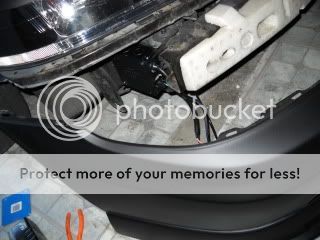
15. Inserted ballast into holder. Notice padded weather stripping to reduce slack and act as a shock absorber since ballast is free floating.
16.
17. Cover with weather stripping
18.
19. Holder with cover.
20.
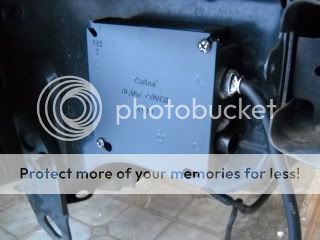
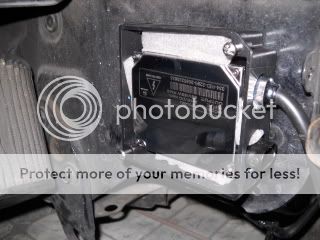
21. Driver’s side drilled two holes towards the bottom of the “pinch” weld on frame. I placed holder against frame and used white-out on opposite side to mark for drilling. Used rivets because they lay flat, very secure. Only way to remove is to drill out center.
22.
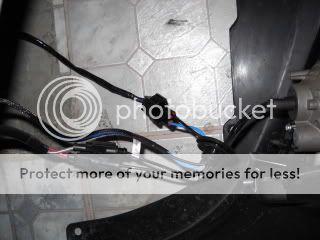
23. After drivers and pass side ballasts are installed replace old bulbs for the HID bulbs.
24. DO NOT touch HID blubs. The oils on your skin or gloves will cause a chemical reaction resulting in a damaged bulb. I had to line up the rubber gasket on HID lights in the correct place. If something doesn’t fit, take a step back, think about it. Don’t force it.
25.
26. Secure loose wires with zip ties. So nothing is rubbing.
27.
28.
29.
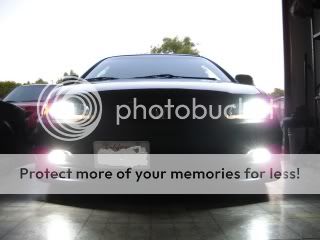
30. I would suggest turning on fog-lights before re-installing front bumper. Once you are sure everything works, install front bumper. All-a-ka-zam, you now have HID fog-lights.
31.
Feel free to add any ideas on better ways to secure ballast to car, I’m sure their are brackets out there but was feeling impatient. What I found at home depot worked out like a charm. I also was surprised these ballasts were so bulky. The 35W I had ordered before were much slimmer and lighter. I was able to “glue” to car using 3M weather sealant only. I opted for 55W fogs/hi-beams because I wanted a brighter beam to make up for the lower 35W low-beam. Also be aware HID’s need time to warm up so if you use your Hi’s to “flick” people off you may burn out blubs a lot quicker. Consider sticking to your stock bulbs.
Hope this helps anyone out there thinking about the same project. Take into consideration this is a 01 bumper on an 00 Accord coupe. Constructive criticism always welcome!
Blue “electric boxes” purchased from Home-depot. Approx. 2$ each.
Electric box caps approx. .80$ each.
55W HID kit purchased from SharpHID.com approx. 90$ (both fog-light kit and HI beam). completely plug and play!
I bought my 35W low-beam kit from these guys. User friendly site, great customer service, products, and prices.
Zip-ties
3M black weather sealant (or gorilla glue-yellow in color) approx. 3-4$, found at wal-mart or any auto store.
Light-switch backings and padded weather stripping, both found at home-depot, approx. 4$ total for both.
Tools:
Flat-head driver
Drill (my trusty craftsman cordless was able to drill through metal)
Dewalt Titanium drill bits (set approx. 19$ @Home-Depot) used 3/16” bit
White-out (for drilling holes)
Black-paint (used engine block paint I had in garage.) Approx. 7$ from Napa
3/16” Rivets and Rivet gun.
Diagonal cutters “dikes” (used to cut plastic tabs off blue electric boxes)
Knife or something with a sharp point (“drilled” starter holes for dead center drilling)
1. Remove splash guard(s). Remove front bumper.
2. It’s up to you how you want to mount the Ballast but this is the easiest/quickest/cheapest solution for me with the tools and supplies available. Actually, these blue boxes worked out like they were made for this project. The cut out holes were spaced perfectly.
3. Blue box with tabs.
4.
5. Cut off blue tabs, I used Diagonal Cutters. Did not have any power cutting tools available.
6.
7. I painted boxes black for aesthetics.
8.
9. Passenger side, I had to drill two holes. Hole in frame was too big for 3/16” rivet. Also a threaded hole but decided not to use.
10.
11. Passenger side with box mounted. I could not access holes from opposite side so I coated circumference of drilled holes with white-out, pressed box against white out, leaving markings on where to drill.
12.
13. Used “light-switch” backing as padding between back of holder and ballast.
14.
15. Inserted ballast into holder. Notice padded weather stripping to reduce slack and act as a shock absorber since ballast is free floating.
16.
17. Cover with weather stripping
18.
19. Holder with cover.
20.
21. Driver’s side drilled two holes towards the bottom of the “pinch” weld on frame. I placed holder against frame and used white-out on opposite side to mark for drilling. Used rivets because they lay flat, very secure. Only way to remove is to drill out center.
22.
23. After drivers and pass side ballasts are installed replace old bulbs for the HID bulbs.
24. DO NOT touch HID blubs. The oils on your skin or gloves will cause a chemical reaction resulting in a damaged bulb. I had to line up the rubber gasket on HID lights in the correct place. If something doesn’t fit, take a step back, think about it. Don’t force it.
25.
26. Secure loose wires with zip ties. So nothing is rubbing.
27.
28.
29.
30. I would suggest turning on fog-lights before re-installing front bumper. Once you are sure everything works, install front bumper. All-a-ka-zam, you now have HID fog-lights.
31.
Feel free to add any ideas on better ways to secure ballast to car, I’m sure their are brackets out there but was feeling impatient. What I found at home depot worked out like a charm. I also was surprised these ballasts were so bulky. The 35W I had ordered before were much slimmer and lighter. I was able to “glue” to car using 3M weather sealant only. I opted for 55W fogs/hi-beams because I wanted a brighter beam to make up for the lower 35W low-beam. Also be aware HID’s need time to warm up so if you use your Hi’s to “flick” people off you may burn out blubs a lot quicker. Consider sticking to your stock bulbs.
Hope this helps anyone out there thinking about the same project. Take into consideration this is a 01 bumper on an 00 Accord coupe. Constructive criticism always welcome!
Last edited:
") I always like these DIY "keep an OEM look" style projects.
I always like these DIY "keep an OEM look" style projects.