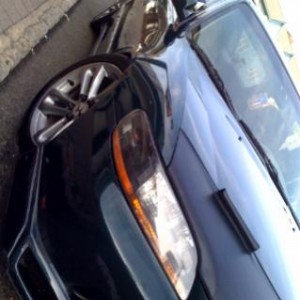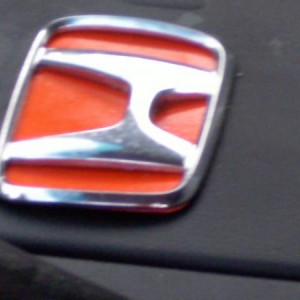


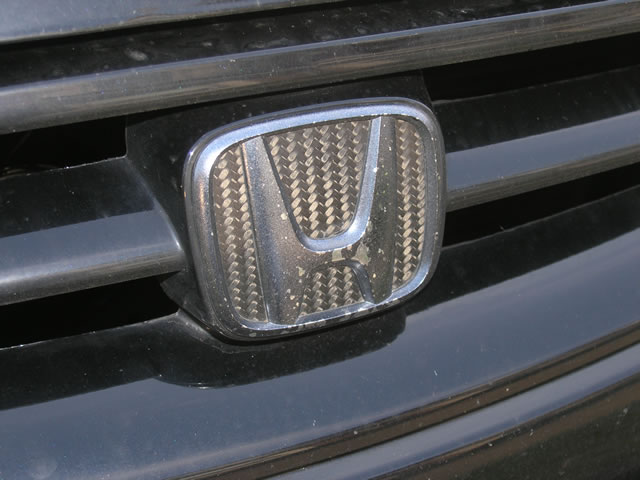
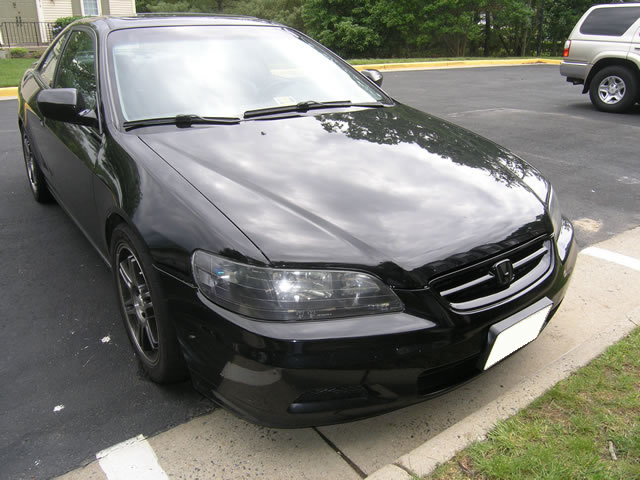
Back in January, I tinted my emblems with spray tint. I only ever got around to installing the front emblem. Well, this is what the emblem looks like now:
Of course, this isn't quite what I wanted. I tried painting a few new emblems with wheel paint but was never happy with the result. Then I started thinking about how to make solid black plastic emblems. Then I found some great videos at Freeman Supply and Alumilite. I now knew what I had to do. On my quest to remove all chrome from my car, I knew I wasn't going to go back to chrome.
I am well aware that this little project became an obsession. But I succeeded, so that's all that really matters, right?...")
This was a very pricey project. I was determined...plus, I had never made a mold of anything of any use. I figured that was worth at least something. Not only that, if I were to do it again, I know how to make it much less costly (use the clear mold technique below for both emblems).
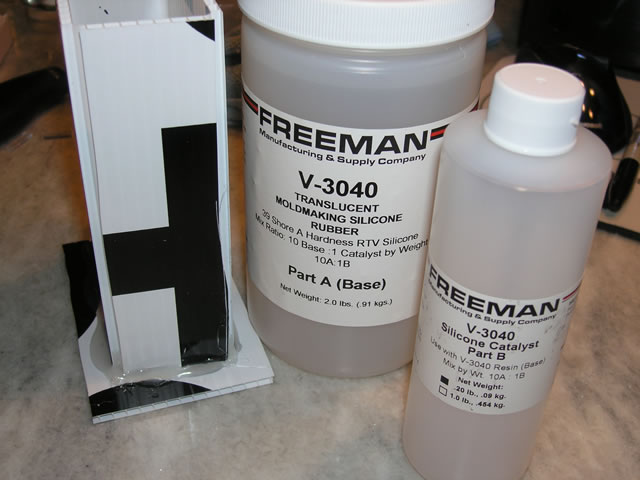
Here are the supplies I used throughout:
From left to right:
An approximation of what the "black chrome" emblem looked like before being damaged with road gravel, etc.
It was only a little more so I figured I'd try the gunmetal coloring as well. It didn't work out too well. I like the black a lot more. I only tried it once. It's a powder that is brushed into the mold and mixes in with the casting resin.
Making the Rear Emblem Mold
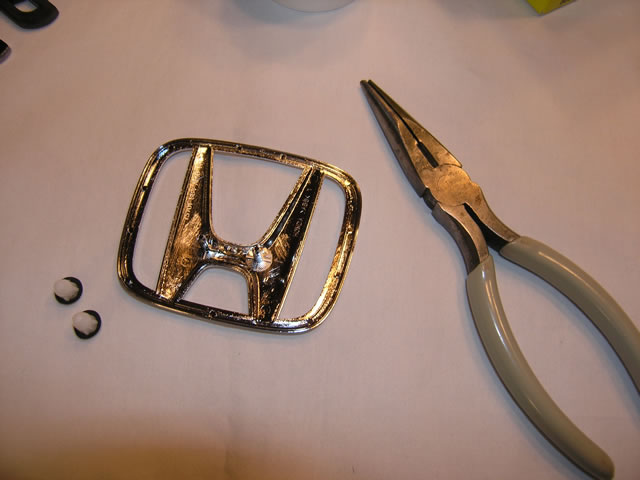
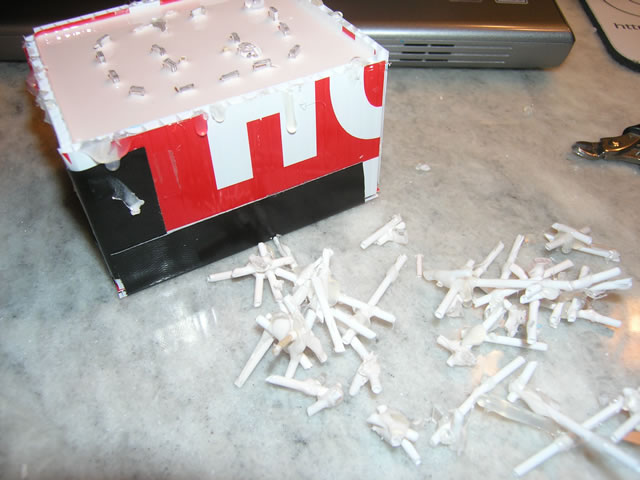
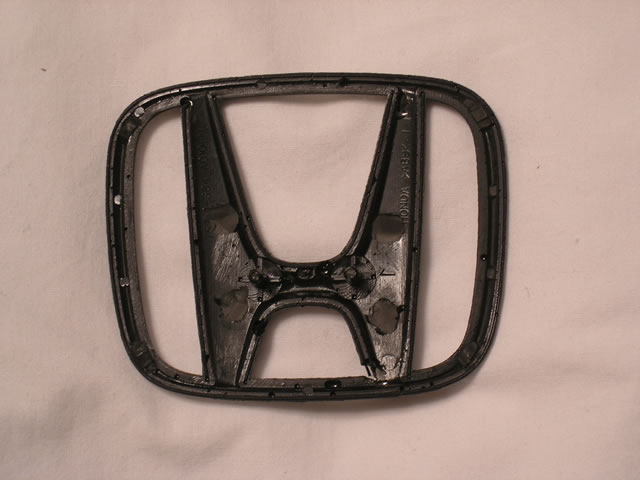
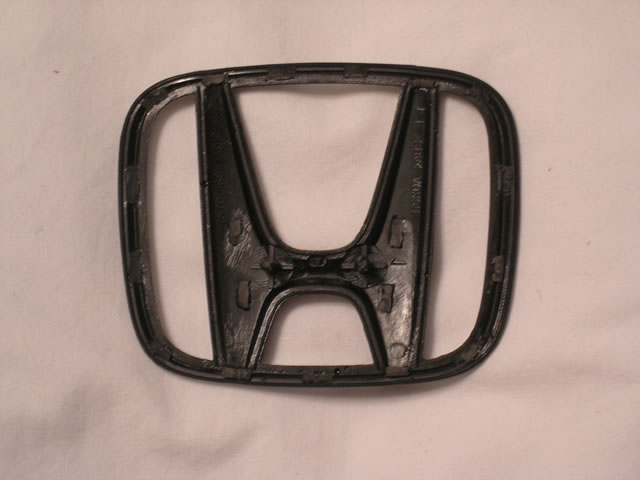
Remove the white "clips" from the original Honda emblem. I used needle nose pliers to gently twist them off.
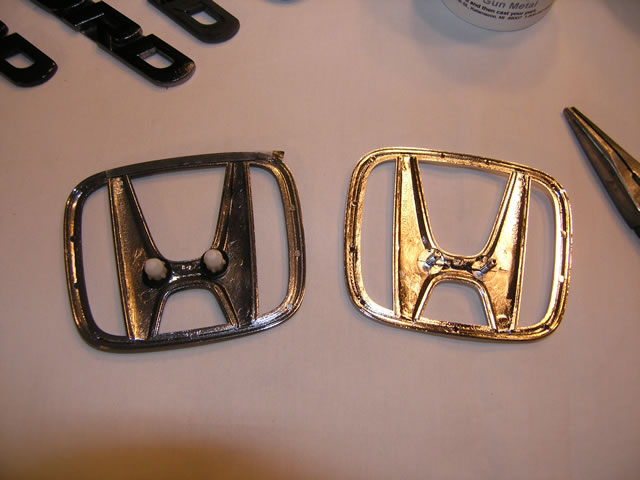
Because I have plenty of spare emblems......before and after:
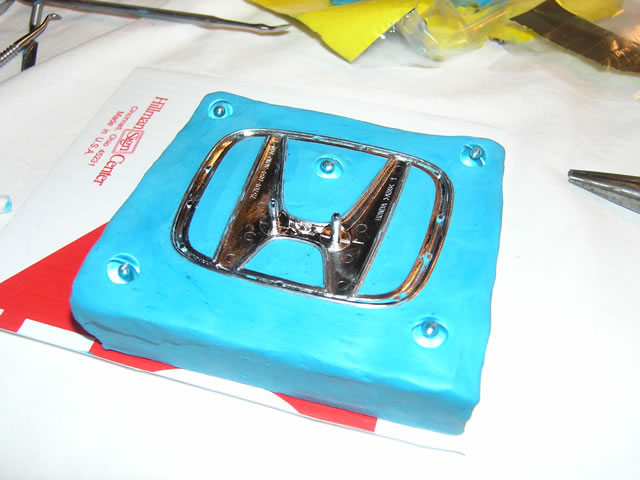
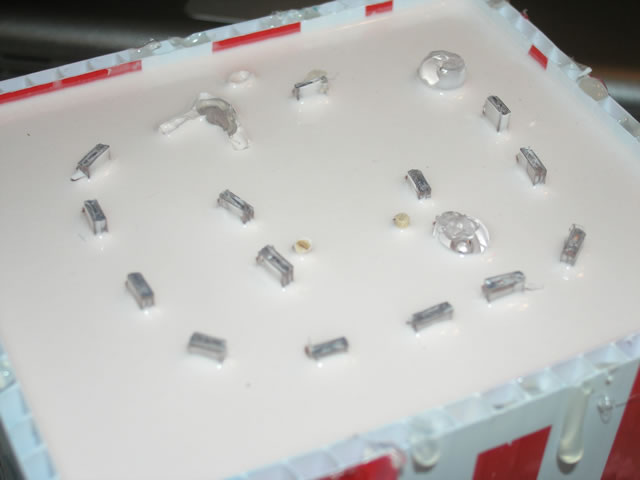
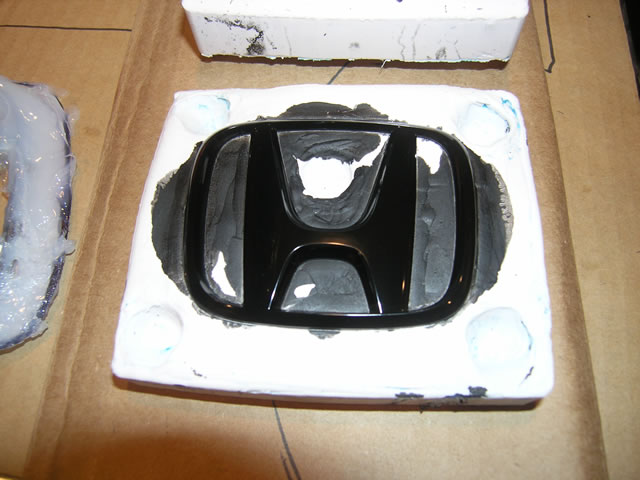
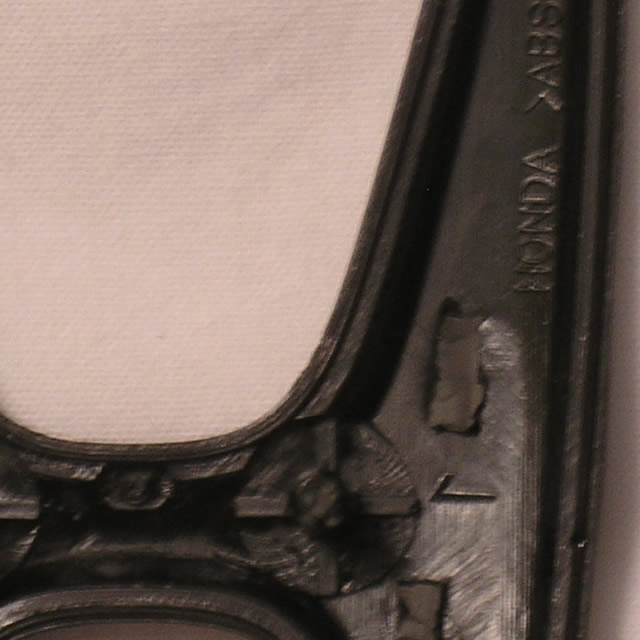
Place the front side of the rear emblem into the modeling clay. Make the clay ~1/4-1/2" from edge of emblem. This will determine the size of the mold. Build up the clay between all the openings. Use the wax carving tools to level out the clay around the emblem. The round spheres are simply ends of the swizle sticks. You could also roll up balls of clay. The bumps create a registration so that the mold fits together squarely and snugly.
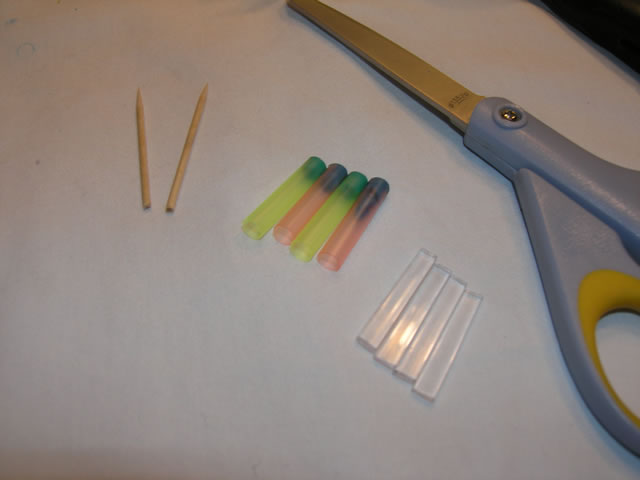
Prepare swizle sticks/straws to create vents and voids in the mold. The rear emblem ultimately needed ~20 vents. This is what I used for the first mold:
Wrap the clay with plastic cardboard. Slit the side opposite the clay to make it easily turn corners.
Support the vents with q-tips or other means. I went crazy with the glue gun at this point. Here are the vents used for the first mold:
After poor results with so few vents, I made a new mold with many more vents:
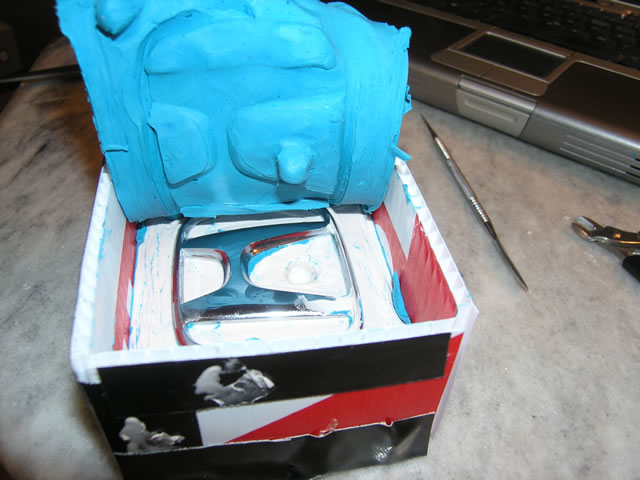
Mix together the mold making silicone. I found it easier to measure out what would be needed (~1/2 pound per side) using water in a cup, mark the cup, empty the water, then transfer silicone into the cup using stir sticks. It's quite messy to work with so be sure to use gloves. I went through quite a few disposable laytex gloves throughout this project. I eventually settled on 5 oz of base with 2.5 measuring cups (included in kit) of catalyst per side. Once the silicone is mixed evenly, spread a light coat on using a glue brush:

Pour the remaining silicone into the mold:
For a better quality mold, apply pressure at this point (see "Pressure Pot" section below). I would apply 40psi when curing silicone. This results in a bubble free mold.
About 18-24 hours later, clip the supports that held the vents:
Carefully remove the clay from the mold:
Clean up the emblem. I used micro fiber cloths to remove any remaining clay.
IMPORTANT! You must apply several coats of rubber to rubber mold release at this point. The only thing silicone sticks to is silicone. If you were to mold the face at this point without applying rubber to rubber mold release, the template emblem would be stuck in a block of silicone.
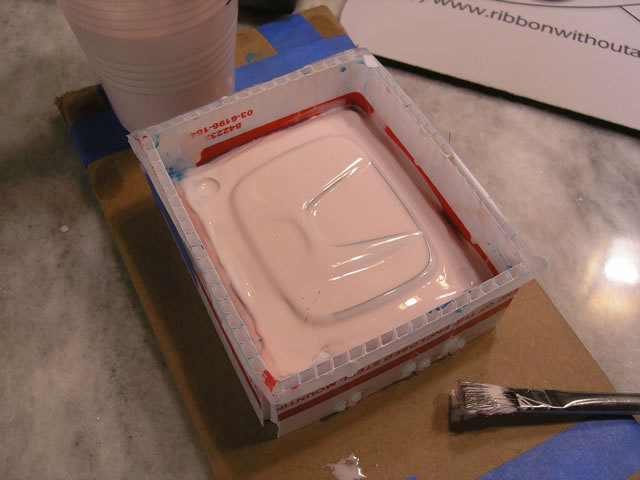
Once again, mix up silicone according to the instructions. Brush on a coat with a glue brush before pouring on the remaining silicone.
Apply pressure (if available) and wait 18-24 hours before removing mold from box. DO NOT TOUCH the front mold. If you get dirt on the mold, you will not be able to remove it without impacting the emblems you mold.
To cast an emblem, mix the casting resin according to instructions. For front emblems, I used slightly more than 10 mL for each part. For rear emblems, I used 7.5 mL for each part.
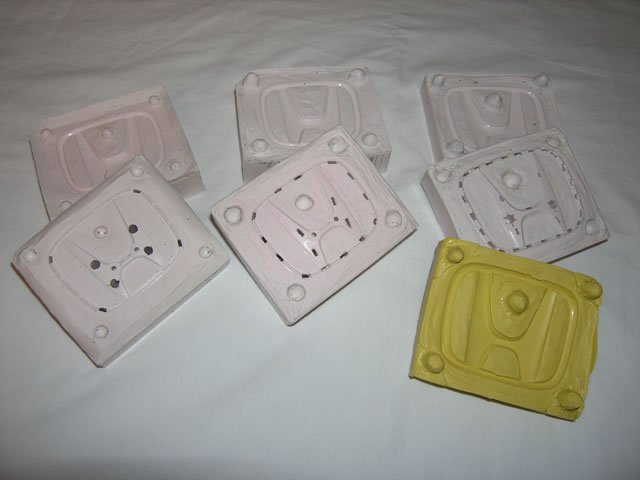
This picture shows why the first mold design (far too few vents...air pockets would easily build in the ring of the emblem):
This was not the only one that went wrong. Throughout the project, it took a lot of patience and trial and error. A few of the bad emblems I made:
Pressure Pot
Alumilite offers a pressure pot for $187. I wasn't about to pay that much but I also wanted to try pressure casting. Not only that, I could use it for making bubble free silicone molds.
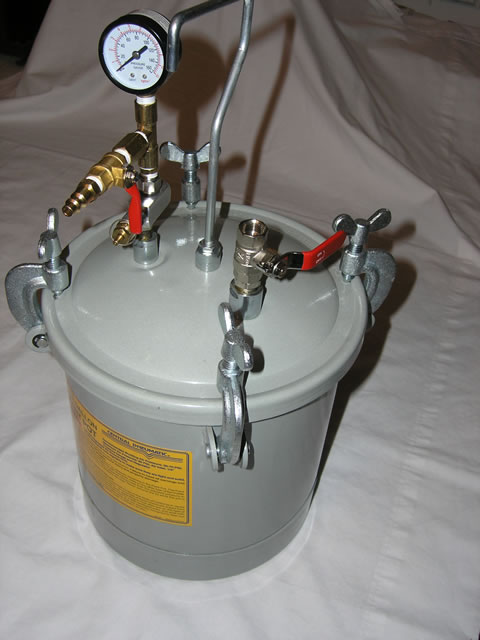
I was able to put a similar pressure pot together for ~$65:
This is the pressure pot as it arrived:

After a little elbow grease, I removed the dip tube and elbow from the exit:
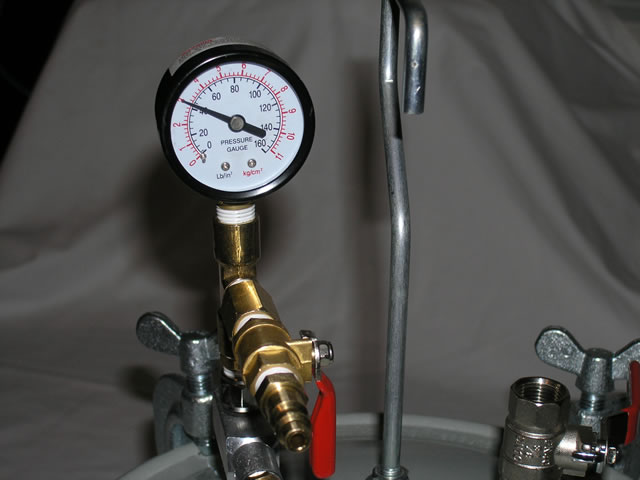
The air fittings from Home Depot along with the pressure gauge (from the regulator that came with pressure pot):
The larger valve closes off the exit and the tee connects where the regulator was supposed to go.
Fully assembled:
Undergoing pressure testing:
Making the Front Emblem Mold
The rear emblem was easily made using the two part mold method above. I was able to make 3 molds of the rear emblem and never once had a problem. I kept ruining the molds but was able to use the clay method each time without problems. The front emblem always seemed to lift which resulted in the second silicone pour leaking under the emblem which required cutting that didn't work out so well. A few of the molds I ruined or never worked:
There is another technique for making two part molds. I bought more silicone because it needed to be clear to use this technique:
Place tape around the edge of the emblem. Color the edge so it will be visible in the cured silicone. There is also tape applied (from the back) in between all the spaces inside the emblem. The tape will create a barrier when pouring the clear silicone (both sides at once).
Place q-tips or other pieces to both suspend the emblem in the middle of a box (in this picture the box is on it's side; the opening is the top). The q-tips create the vent holes as well. I used ~30 q-tips for the front emblem. There are also a few swizzle sticks used in the middle area. I used plenty of hot glue to secure the emblem in the box:
Fold the cardboard around to create a box, add a bottom to the box. Hot glue comes in handy here as well.
Mix the silicone according to the instructions. I needed a scale to measure out the silicone this time around. Since both base and catalyst are clear, be sure to mix together quite well. Pour into mold, apply pressure (if available; I used 40psi), wait 18-24 hours. After the silicone has cured, remove from the box:
Carefully use a chisel or other sharp instrument to cut the silicone to the TAPE EDGE (not the emblem edge). I took two passes to completely separate the two sides. The more cuts you make, the more unique the registration will be between the two mold halves.
Finally...Success!!
After several trials, I finally got good results for both the rear and front emblems.
Rear:
Front:
Cast w/o pressure:
Note the bubbles throughout:
Cast w/ pressure (20psi):
No visible bubbles:
I was going to use carbon fiber behind the rear emblem:

But it would stand off a bit too much from the trunk so I went with the emblem alone:

Front:

Finally!!
Of course, this isn't quite what I wanted. I tried painting a few new emblems with wheel paint but was never happy with the result. Then I started thinking about how to make solid black plastic emblems. Then I found some great videos at Freeman Supply and Alumilite. I now knew what I had to do. On my quest to remove all chrome from my car, I knew I wasn't going to go back to chrome.
I am well aware that this little project became an obsession. But I succeeded, so that's all that really matters, right?...
This was a very pricey project. I was determined...plus, I had never made a mold of anything of any use. I figured that was worth at least something. Not only that, if I were to do it again, I know how to make it much less costly (use the clear mold technique below for both emblems).
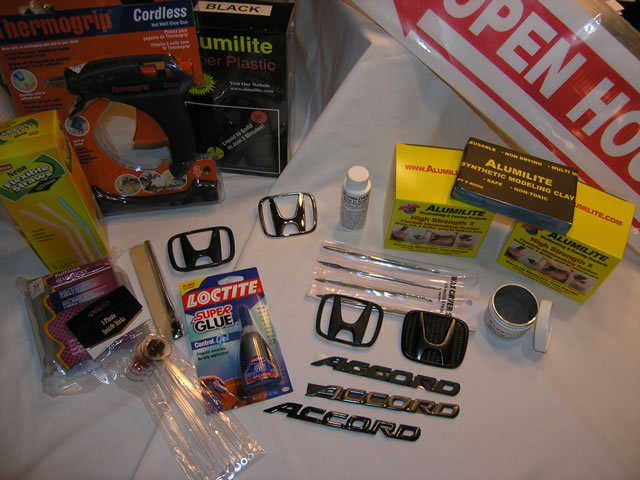
Here are the supplies I used throughout:
From left to right:
- straws [for creating vents]
- glue gun
- 2 part plastic casting resin
- plastic cardboard [open house sign]
- jumbo craft sticks
- glue brushes
- swizle sticks [for creating vents]
- super glue
- rubber to rubber mold release (small white bottle)
- moldmaking silicone
- modeling clay
- wax carving tools
- gunmetal gray coloring powder [optional]
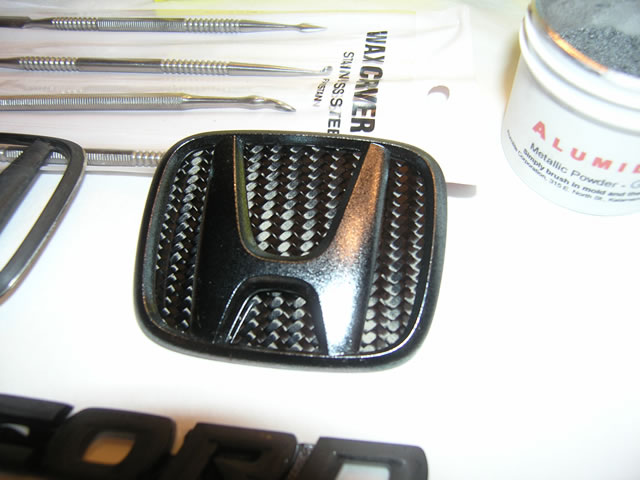
An approximation of what the "black chrome" emblem looked like before being damaged with road gravel, etc.
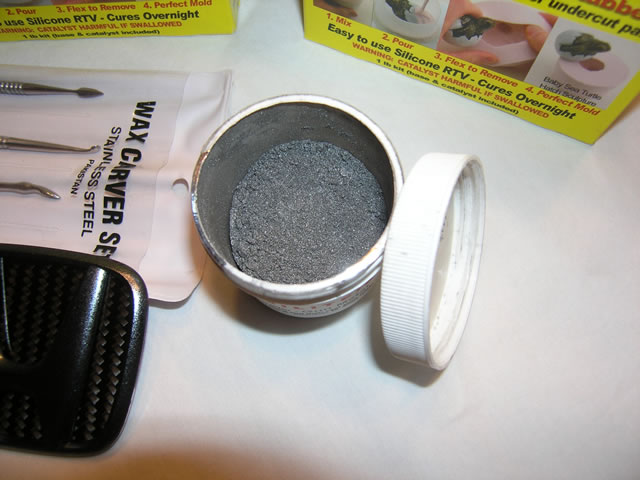
It was only a little more so I figured I'd try the gunmetal coloring as well. It didn't work out too well. I like the black a lot more. I only tried it once. It's a powder that is brushed into the mold and mixes in with the casting resin.
Making the Rear Emblem Mold
Remove the white "clips" from the original Honda emblem. I used needle nose pliers to gently twist them off.
Because I have plenty of spare emblems...
...before and after:
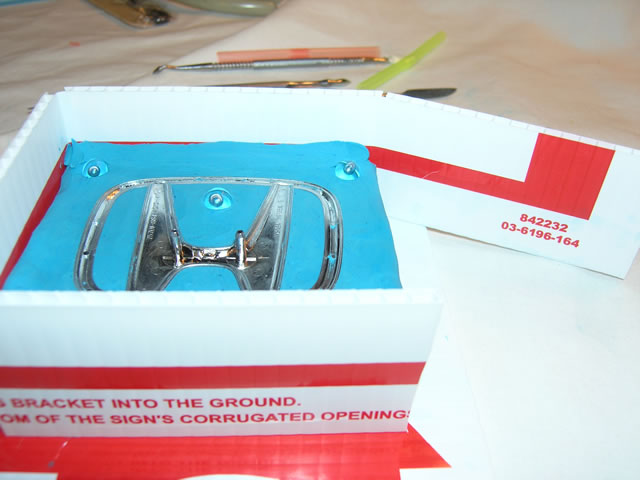
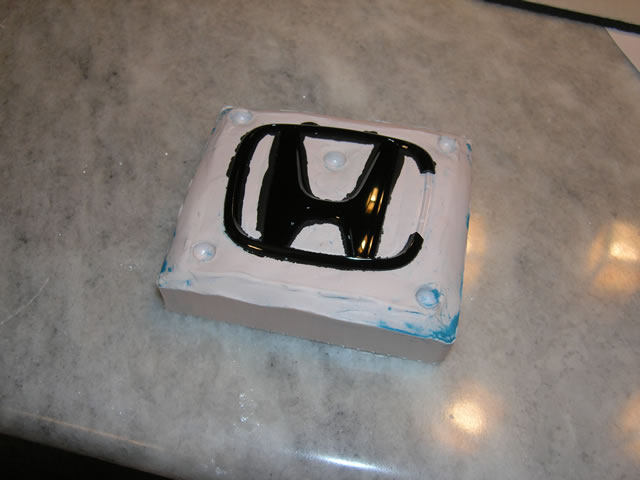
Place the front side of the rear emblem into the modeling clay. Make the clay ~1/4-1/2" from edge of emblem. This will determine the size of the mold. Build up the clay between all the openings. Use the wax carving tools to level out the clay around the emblem. The round spheres are simply ends of the swizle sticks. You could also roll up balls of clay. The bumps create a registration so that the mold fits together squarely and snugly.
Prepare swizle sticks/straws to create vents and voids in the mold. The rear emblem ultimately needed ~20 vents. This is what I used for the first mold:
Wrap the clay with plastic cardboard. Slit the side opposite the clay to make it easily turn corners.
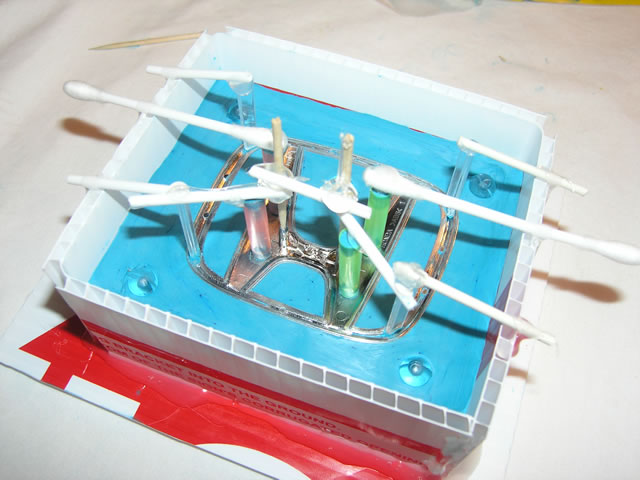
Support the vents with q-tips or other means. I went crazy with the glue gun at this point. Here are the vents used for the first mold:
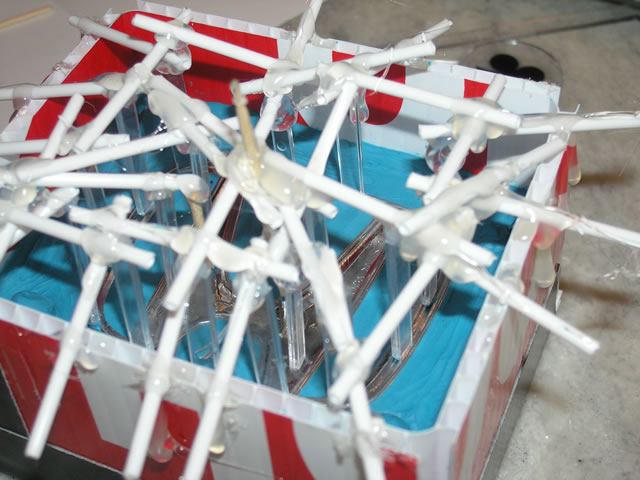
After poor results with so few vents, I made a new mold with many more vents:
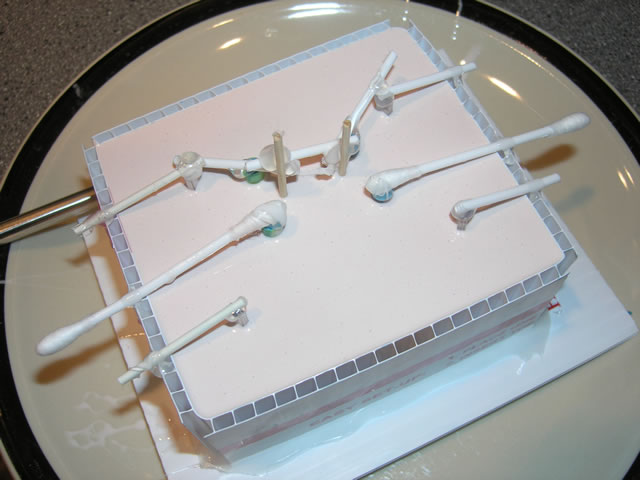
Mix together the mold making silicone. I found it easier to measure out what would be needed (~1/2 pound per side) using water in a cup, mark the cup, empty the water, then transfer silicone into the cup using stir sticks. It's quite messy to work with so be sure to use gloves. I went through quite a few disposable laytex gloves throughout this project. I eventually settled on 5 oz of base with 2.5 measuring cups (included in kit) of catalyst per side. Once the silicone is mixed evenly, spread a light coat on using a glue brush:
Pour the remaining silicone into the mold:
For a better quality mold, apply pressure at this point (see "Pressure Pot" section below). I would apply 40psi when curing silicone. This results in a bubble free mold.
About 18-24 hours later, clip the supports that held the vents:
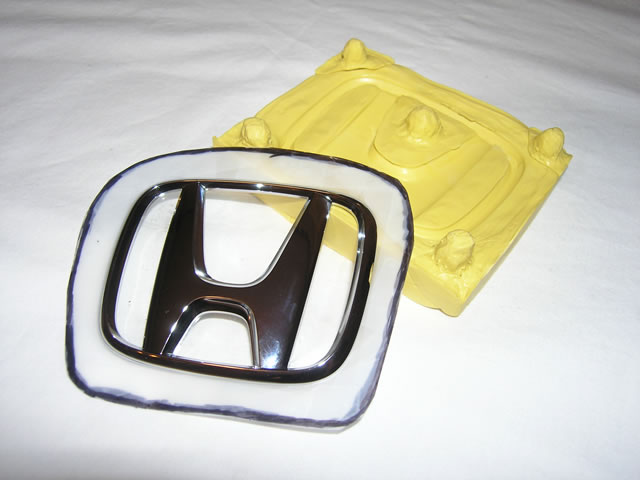
Carefully remove the clay from the mold:
Clean up the emblem. I used micro fiber cloths to remove any remaining clay.
IMPORTANT! You must apply several coats of rubber to rubber mold release at this point. The only thing silicone sticks to is silicone. If you were to mold the face at this point without applying rubber to rubber mold release, the template emblem would be stuck in a block of silicone.
Once again, mix up silicone according to the instructions. Brush on a coat with a glue brush before pouring on the remaining silicone.
Apply pressure (if available) and wait 18-24 hours before removing mold from box. DO NOT TOUCH the front mold. If you get dirt on the mold, you will not be able to remove it without impacting the emblems you mold.
To cast an emblem, mix the casting resin according to instructions. For front emblems, I used slightly more than 10 mL for each part. For rear emblems, I used 7.5 mL for each part.
- Heat mold in microwave. One minute per pound of silicone. I found heat really mattered. You can't use too much and you can't use too little.
- Make sure you have laytex gloves on at this point
- Measure out each part of the resin
- Mix together, stir for 15-20 seconds
- Pour into mold
- Apply pressure (if available); only ~15-20psi
- Wait 10 minutes
- Carefully remove emblem from mold
This picture shows why the first mold design (far too few vents...air pockets would easily build in the ring of the emblem):
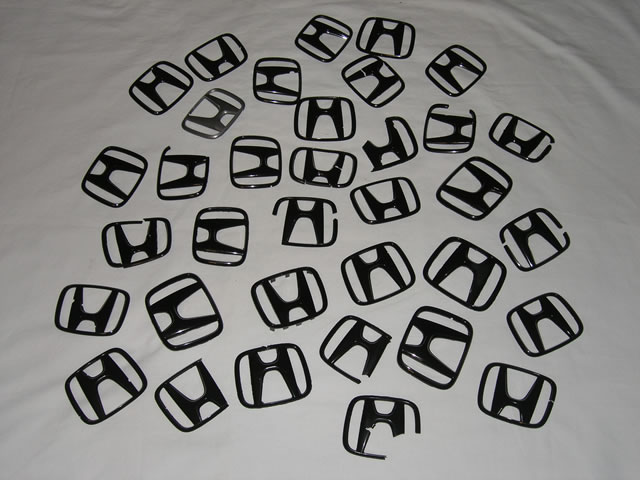
This was not the only one that went wrong. Throughout the project, it took a lot of patience and trial and error. A few of the bad emblems I made:
Pressure Pot
Alumilite offers a pressure pot for $187. I wasn't about to pay that much but I also wanted to try pressure casting. Not only that, I could use it for making bubble free silicone molds.
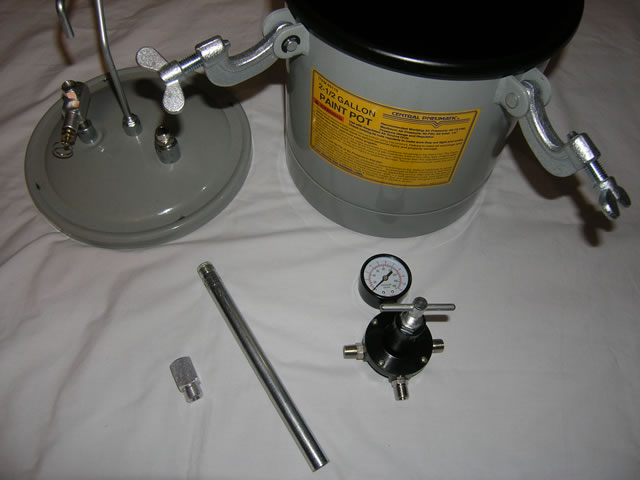
I was able to put a similar pressure pot together for ~$65:
- Pressure paint tank
- A few air fittings from Home Depot
This is the pressure pot as it arrived:
After a little elbow grease, I removed the dip tube and elbow from the exit:
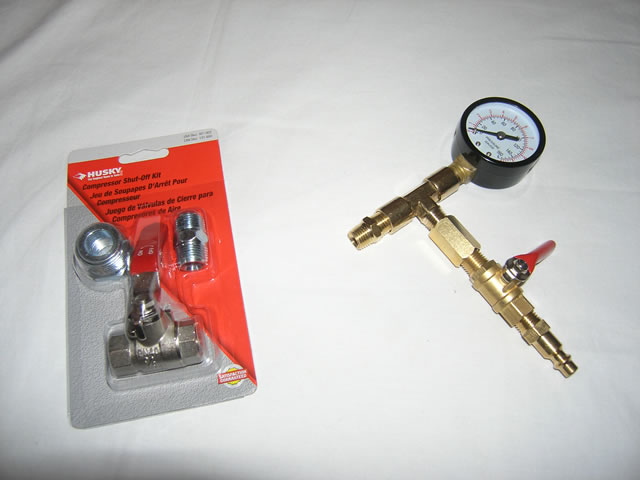
The air fittings from Home Depot along with the pressure gauge (from the regulator that came with pressure pot):
The larger valve closes off the exit and the tee connects where the regulator was supposed to go.
Fully assembled:
Undergoing pressure testing:
Making the Front Emblem Mold
The rear emblem was easily made using the two part mold method above. I was able to make 3 molds of the rear emblem and never once had a problem. I kept ruining the molds but was able to use the clay method each time without problems. The front emblem always seemed to lift which resulted in the second silicone pour leaking under the emblem which required cutting that didn't work out so well. A few of the molds I ruined or never worked:
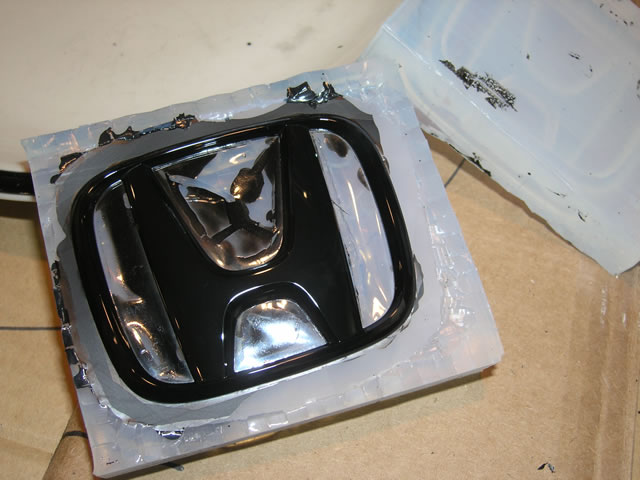
There is another technique for making two part molds. I bought more silicone because it needed to be clear to use this technique:
Place tape around the edge of the emblem. Color the edge so it will be visible in the cured silicone. There is also tape applied (from the back) in between all the spaces inside the emblem. The tape will create a barrier when pouring the clear silicone (both sides at once).
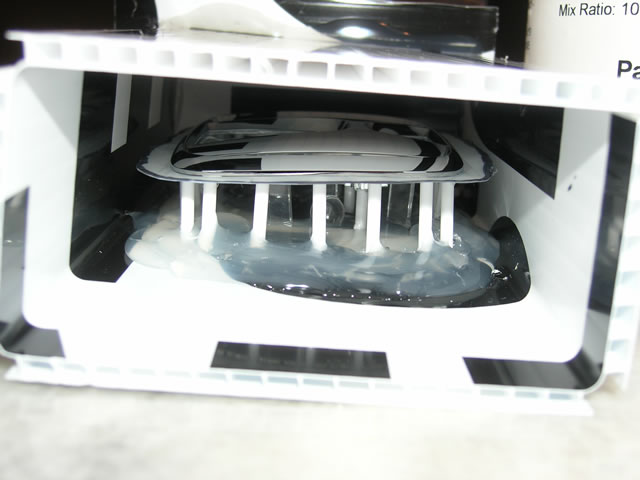
Place q-tips or other pieces to both suspend the emblem in the middle of a box (in this picture the box is on it's side; the opening is the top). The q-tips create the vent holes as well. I used ~30 q-tips for the front emblem. There are also a few swizzle sticks used in the middle area. I used plenty of hot glue to secure the emblem in the box:
Fold the cardboard around to create a box, add a bottom to the box. Hot glue comes in handy here as well.
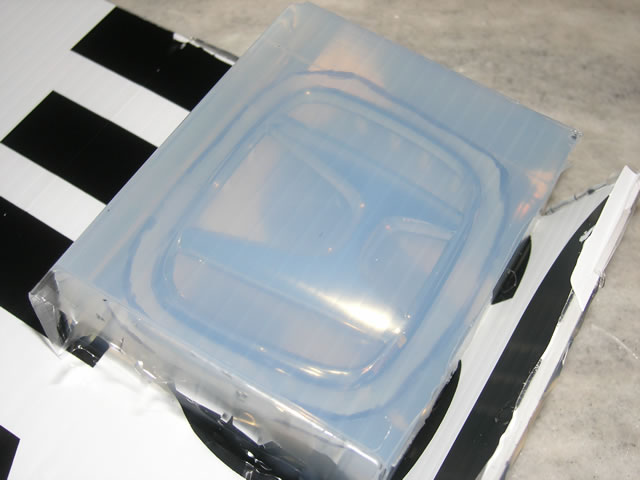
Mix the silicone according to the instructions. I needed a scale to measure out the silicone this time around. Since both base and catalyst are clear, be sure to mix together quite well. Pour into mold, apply pressure (if available; I used 40psi), wait 18-24 hours. After the silicone has cured, remove from the box:
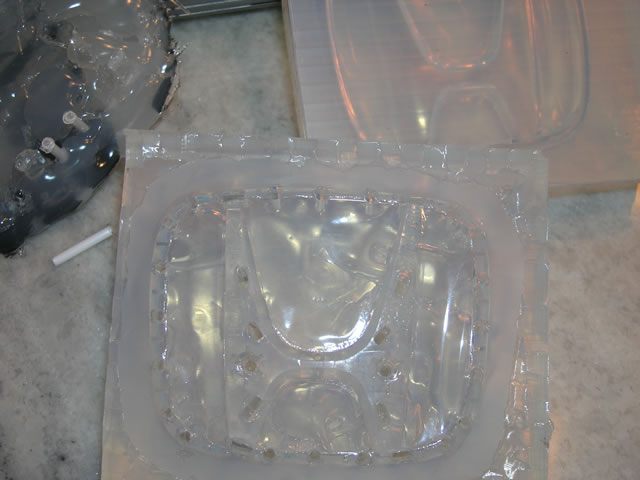
Carefully use a chisel or other sharp instrument to cut the silicone to the TAPE EDGE (not the emblem edge). I took two passes to completely separate the two sides. The more cuts you make, the more unique the registration will be between the two mold halves.
Finally...Success!!
After several trials, I finally got good results for both the rear and front emblems.
Rear:
Front:
Cast w/o pressure:
Note the bubbles throughout:
Cast w/ pressure (20psi):
No visible bubbles:
I was going to use carbon fiber behind the rear emblem:
But it would stand off a bit too much from the trunk so I went with the emblem alone:
Front:
Finally!!
Last edited: