Finished h22 swap, need ecu advice

Discussion in 'Engine & Transmission Mods' started by Matt Taylor, Dec 22, 2018.

  1. Matt Taylor

    Matt Taylor Active Member

    Posts:
    39
    Likes Received:
    0
    Joined:
    Dec 7, 2018
    Location:
    Colorado
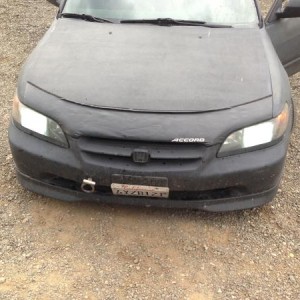
    The car is completely finished now!

    I opted for an android head unit and I am so glad I chose it over a traditional head unit. Photo session turned into a video game session! The vafc2 and steering wheel remote receiver are mounted in the cubby under the head unit in a custom 3d printed mounting bracket to enable visual alignment to the view from the driver's seat.
    20190316_111621.jpg

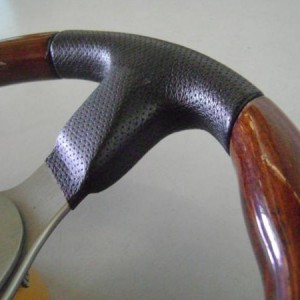
    I installed these steering wheel controls and all of the buttons work (correct signal voltage). I got one initially that had wrong voltages and only half of the buttons worked. I had to get the correct one for this particular head unit. These look and fit much better so I am glad that they are the correct ones. I also have the wideband installed on the a pillar.
    20190316_111645.jpg

    The dashcam is hardwired and can be integrated into the head unit via USB. I opted to only hardwire it and run it on a standalone basis. I have also wired a rear view camera that turns on when I shift the car into reverse.
    20190316_111656.jpg

    The USB cables are routed through the center console and I can lean on the armrest while playing video games as the lid closes with clearance for the cables. These are USB extension cables, one with the standard USB female connection and the other with a USB-C connection. 20190316_111738.jpg

    When I am finished using them, they coil up cleanly into the center console. 20190316_113548.jpg
     
  2. Matt Taylor

    Matt Taylor Active Member

    Posts:
    39
    Likes Received:
    0
    Joined:
    Dec 7, 2018
    Location:
    Colorado
    The final under hood upgrades:
    20190316_113709.jpg

    Msd ignition
    20190316_113738.jpg

    6a box under the battery
    20190316_113752.jpg

    Custom hydraquip power steering high pressure line utilizing custom compression fittings at each end, completely sealed and leak free. 20190316_113758.jpg

    I had to weld my adapter pipe to my upper headers to solve a rather large exhaust leak. Now the exhaust is completely sealed up also! 20190316_113818.jpg
     
  3. Matt Taylor

    Matt Taylor Active Member

    Posts:
    39
    Likes Received:
    0
    Joined:
    Dec 7, 2018
    Location:
    Colorado
    I installed new slotted and drilled rotors, pads and stainless braided lines in front.
    20190316_113950.jpg
    And the rear brakes also.
    20190316_114002.jpg

    This is the relay setup that I designed for wideband and dashcam power requirements. It uses ignition on as a signal rather than a power source.
    20190316_113901.jpg
     
    Last edited: Mar 25, 2019
  4. Matt Taylor

    Matt Taylor Active Member

    Posts:
    39
    Likes Received:
    0
    Joined:
    Dec 7, 2018
    Location:
    Colorado
    I designed a protective foot rest for the ecu. 20190318_190418.jpg

    20190319_154700.jpg
     
  5. Matt Taylor

    Matt Taylor Active Member

    Posts:
    39
    Likes Received:
    0
    Joined:
    Dec 7, 2018
    Location:
    Colorado
    I installed a fan for the android head unit that will create air movement under the dash, similar to inside of a CPU case. The fan is wired to my relay system that uses ignition on as a signal rather than a power source.
    20190324_164147.jpg

    DB9 to USB adaptation for data logging the wideband signal.
    20190324_180950.jpg

    I used these cool wire retainers to cleanly route the USB cables.
    20190324_190615.jpg

    It's important to keep the wiring away from the shifter assembly.
    20190324_191333.jpg
     
  6. Matt Taylor

    Matt Taylor Active Member

    Posts:
    39
    Likes Received:
    0
    Joined:
    Dec 7, 2018
    Location:
    Colorado
    I ran into an inefficiency in the relay wiring that I wanted to mention. The relay was initially located near the battery and the source wiring was traveling through the engine compartment and to the electronics within the cabin with no wire wrap or protection (apsx wideband, dashcam, 12v cooling fan). Another issue was that I located the grounds near the battery at the stock ground location and they traveled with the 12v+ wire downstream from the relay.

    The problem with this setup is that it leaves the circuit open to electromagnetic interference (EMI) when the wiring travels past the spark plug wires. Everything did work, but then when I wired the DB9 adapter and the apsx wideband showed 25.5 and wasn't properly running.

    The 25.5 on the apsx was from a bad ground connection. It turns out that in the long ground wire route, one of the places that I made a connection had been crimped too tightly and cut leaving about 2 strands of ground wire in the connector.

    I have instead decided to run the 12v+ source for the relays from the battery, through the engine compartment and to the relays which are now located in the cabin. These are now also covered with the plastic wire sheathing under the hood and routed away from the spark plugs. The grounds only travel through the cabin to the stock in cabin grounding location near the stock stereo location.

    The dashcam and the fan worked fine either way, but the apsx wideband improved significantly from these wiring changes. It shows much brighter and doesn't flash around like before. The 25.5 was fixed when I addressed the grounding issue that I think I created when I installed the DB9 connector. Everything works a lot better after these changes.
     
  7. Mark2001Accord

    Mark2001Accord Well-Known Member

    Posts:
    57
    Likes Received:
    11
    Joined:
    Apr 10, 2019
    Location:
    Chicagoland
    That footrest is really cool. You make the welds and everything?

    I put my primary ECU in the glove box. USB port up, for the Hondata.
    20190412_125815.jpg
     
  8. Matt Taylor

    Matt Taylor Active Member

    Posts:
    39
    Likes Received:
    0
    Joined:
    Dec 7, 2018
    Location:
    Colorado
    Nice, I like those isolation mounts, that's a good idea to have it in that location to hook up with your hondata system. Yes, I welded the foot rest. I do a lot of fabrication on my projects. For my cg, I also welded my own motor mounts, an exhaust adapter (h22 header to cg j pipe), I also use a plasma cnc to cut the shapes out of the 1/4" steel I use for the mounts and the 1/8" linkage adapter bracket for the h22 install. My cnc can cut up to 1/2" steel plate. I tuned my h22 with a vafc2. I don't think my big old p28 ecu would fit in my glove box, but I don't access it, as the vafc2 does the tuning, so I wanted it under the carpet and out of the way in this case.
     
    Last edited: Apr 18, 2019
  9. Tee6gen

    Tee6gen Active Member

    Posts:
    31
    Likes Received:
    0
    Joined:
    Apr 8, 2019
    Location:
    Ca
    Did u do a dirct swap from chassis to chassis or did u built the engine then swap? If it was a chassis to chassis swap, can u give a list of what u have to replace and custom to fit the cg chassis?
     
  10. Matt Taylor

    Matt Taylor Active Member

    Posts:
    39
    Likes Received:
    0
    Joined:
    Dec 7, 2018
    Location:
    Colorado
    It was a powerplant that I bought on Ebay, I would recommend doing this, as they are imported motors with low mileage. The car it came from was a 97-01 Honda Accord SiR. It's an obd1 motor, so this is where most of the conversion takes place, but it is fairly straight forward, but a lot of small things these chassis' vary with and it's hard to say what all is needed for every application to make this install possible. For example, the chassis should already be manual transmission, I don't recommend doing the auto to manual conversion for this chassis, I did it on my cb7, but that is a better platform to do that conversion. Some cg's have different distributor wiring because of different motors. For mine, it had an f23a1. The f23a1 has position signal wiring that goes into the motor and this has to be rerouted to the obd1 dizzy, whereas I have also seen other motors in the cg chassis that use a more traditional obd2 wiring that you would just use the wiring adapter for, no rerouting necessary. Barring the aforementioned, the custom parts needed are a h22 header to f23 j pipe adapter (I welded my adapter to my header as it's hard to seal it at this spot), and a throttle linkage adapter. The stock mounts can be used with the exception of the driver's side mount, I custom made all of mine to be super high performance mounts. I think the drivers side mount adapter can be purchased, but I'm not sure as I custom made my adapter on the motor side to enable the motor to sit level and use the stock attachment arm. This is a much better setup than what can be purchased. Beyond that, the obd1 conversion has to happen on the motor side. The obd1 injectors require a resistor box. The power steering high pressure hose needs customization. I worked with a company named hydraquip for that. I used custom special order compression fittings on the stock lines to connect to the custom line, in retrospect hydraquip probably could have supplied the fittings. I recommend using a p28 ecu and doing a butterfly, knock sensor, and egr delete and tuning with a vafc2 and wideband as an additional sensor to the stock primary sensor. With the p28, you can also delete the secondary o2 sensor.
     
    Last edited: Apr 18, 2019

Share This Page