"Big Three / Grounding Kit" - Improving your electrical grounds

ryan s

they dont think it
Joined
Dec 27, 2005
Posts
22,778
Reaction score
287
Location
be like it is
thats how fires start :skurred:

in the past for 4ga, ive used:

large vise grips...worked ok
bench vise...pretty good
hammer...nice if you do it right

there are large crimpers out there for 1/0...not cheap though. $50+ from snap-on, but worth it if you do that all the time. or even better if you have a hookup with the snap-on guy :naughty:

i'm going to do mine next week i guess...and i'm going to initially crimp with the vise grips, then finish with the bench vise. hammer if i need to take out some frustration :smash:

and i'm looking to sell my P3 battery terminals (new) since i'm going to need 2 1/0 openings per side.
 

inv4zn

Well-Known Member
Joined
Mar 5, 2009
Posts
306
Reaction score
2
Location
Vancouver
Ok, so I just did the battery-ground, and chassis-ground...and I'll just write everything I noticed/did.

I cut the wires, about 10 inches for the battery-ground, and 18~20 inches for the chassis-ground. Cutting them was a pain in the ***, but manageable. Stripping the ends is much easier, just use a good knife. It's also a pain putting the strands into the ring terminals, but also manageable. Just be patient, and it'll work out. Table vise works great for a strong grip. Also, if you have rubber ends for the ring terminals, put them onto the wire before you put the rings on. It's impossible to put them on through the ring.

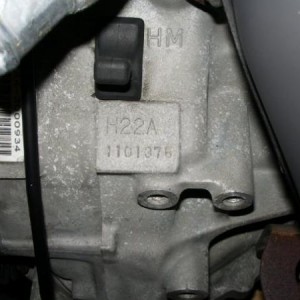
Remove negative, then positive from the battery, then remove the battery. Trust me, it'll make it so much easier. You don't need to remove the tray. The V6 engine has a "chassis--battery--ground" connection. However, i just made 2 different connections chassis--ground, and battery--ground that connect to the same point on the frame (stock location, by radiator)

Use an extension and a ratchet to remove the chassis bolt (10mm.) It's wayy under, by the transmission..might even be on it lol. The stock wire is fed through some plastic coils which is attached to a small cip to the side of the battery tray. I couldn't for the life of me get the clip off, so I just cut through the stock wire and pulled from both ends.

Other than that, it's easy enough; just a matter of elbow grease. Also, try and route the wires away from heat sources for obvious reasons.

Oh, and you probably removed the coolant reservoir to install the ground bolt. Don't forget to put it back (like I did lol).

I'll take some pics tomorrow, and do the alternator-battery on Monday. If you have any questions I'll answer them as best I can...
 

Jianizzle

Well-Known Member
Joined
Jul 10, 2008
Posts
214
Reaction score
0
Location
Oakley, CA
Alrighty folks, I just got done installing the Big 2 of 3! :leeann:

I did run into some minor problems and some possibly major.. :ugh2:

I'll post pics later today. My back hurts from leaning into the engine bay all day! :bash:
 

Jianizzle

Well-Known Member
Joined
Jul 10, 2008
Posts
214
Reaction score
0
Location
Oakley, CA
All day as in 2 hours.. haha. I exaggerated. :sad:

And plus, I'm a noobie at these things.. forgive me! :thumbup:
 

Jianizzle

Well-Known Member
Joined
Jul 10, 2008
Posts
214
Reaction score
0
Location
Oakley, CA
Okay, here are the results of the install...

DSC00228.jpg


DSC00230.jpg


DSC00235.jpg


DSC00233.jpg


Excuse the dirty engine bay...
The only problems I ran into was cutting the wire and throwing them into the ring terminals.. they were such a b****. Other then that, everything went fairly smooth.
The positive terminal is a bit loose and it worries me a bit. It is snug, but I wished it was more tight. I'm thinking about grinding down the clamp to make it more fit, but I don't really know what to grind it down with.

I also wrapped anything that was sticking out with electrical tape to give me a better sense of safety.

Overall, the install went pretty smoothly and my idle is noticeably smoother.
I can't speculate on how much brighter my headlights are just yet, but when I do get around to driving at night, I hope it gets brighter.

This cost a bout 35$ and it was a great investment. Thanks for the DIY Wildman!
 

Russianred

Snail Spools You!
Joined
Jan 10, 2007
Posts
9,458
Reaction score
51
Location
Southern Maine [207]
Looks good man. Glad you noticed at least some improvement. I did the exact same thing, but with copper wire. I didn't notice a single difference lol.
 

inv4zn

Well-Known Member
Joined
Mar 5, 2009
Posts
306
Reaction score
2
Location
Vancouver
Looks good man.

My positive terminal was loose as well (I could just pry it off by hand even after fully tightening), but I found that if you push them down onto the terminal (bang on it with a rubber mallet or something) then it becomes much more tighter/secure. Or just put something conductive between the terminal and your post lol

I still haven't done my alternator-battery cuz i can't reach the alternator positive terminal bolt lol
 

Jianizzle

Well-Known Member
Joined
Jul 10, 2008
Posts
214
Reaction score
0
Location
Oakley, CA
Sounds good! I'll keep that in mind.

And another thing.. I was driving earlier today at night and I REALLY noticed that my light output had dramatically increased. It was quite pleasing to my eyes. Now I'd really recommend doing this! ;)
 
Back
Top