

racerzedge
Well-Known Member
Hey guys. Just got myself a pair of EG smoked side markers. I picked these because they sit more flush to the car. I bought these off eBay for $20 shipped. These are JDM styled (aka. knock-offs), but a lot of people have preferred these over the Stanley.
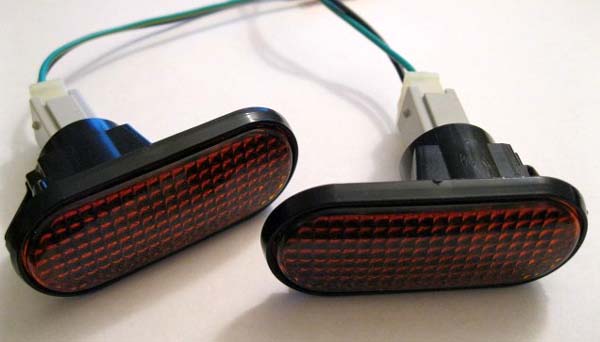
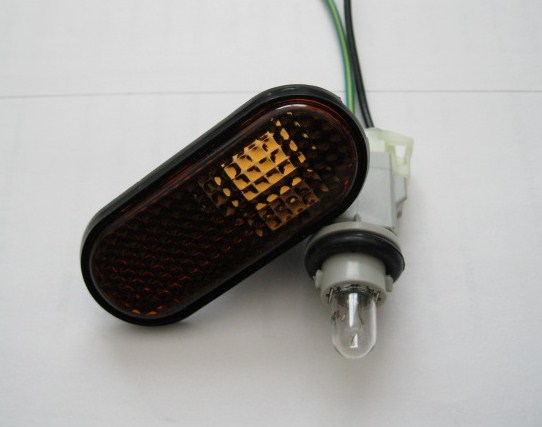
The good thing is that these came with the pigtails, so that saved me the time and efforts of soldering strips of wires into the harness.
The bad thing, there are no template available anywhere on the internet for these side markers (I probably didn't look hard enough), so I decided to make my own. I basically measured the back side of the housing and came up with this:
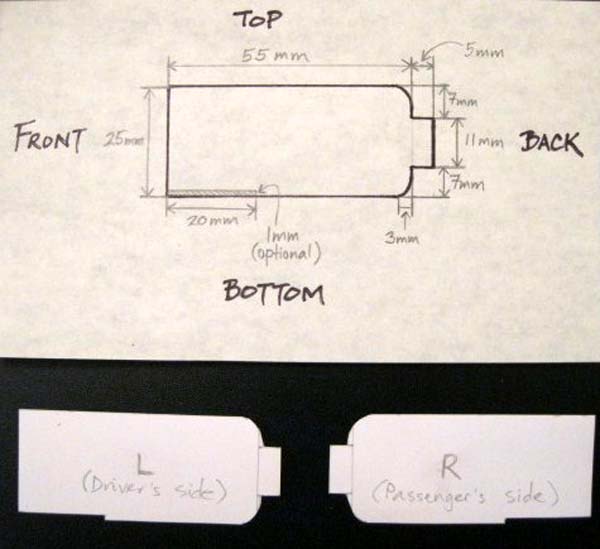
I basically went through 5 or 6 different designs before being satisfied with the one posted above.
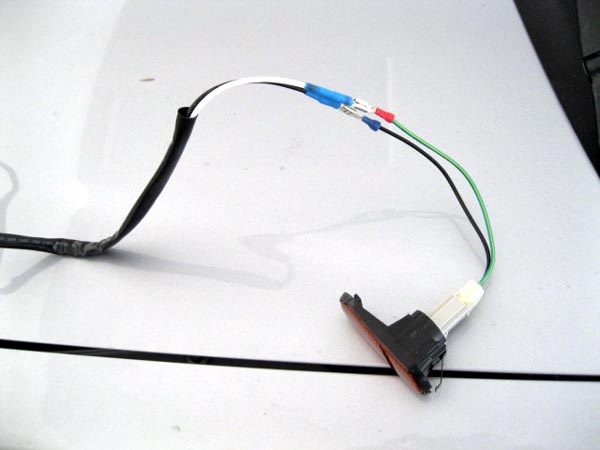
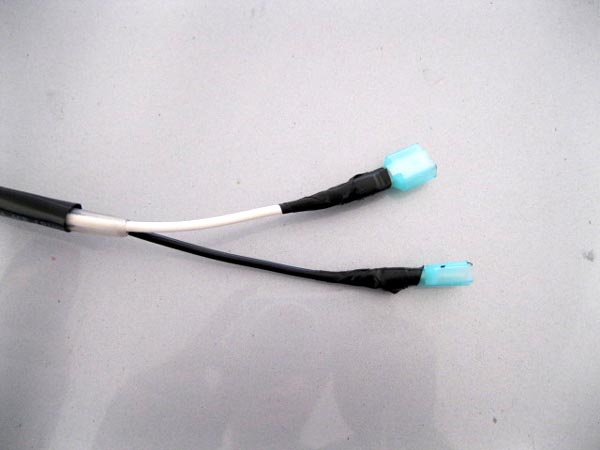
Next, I made the wire extension for the side markers. Make sure you use wires of the same gauge as the pigtails. You'll be safe with 14-16 Ga wires. You can use whatever color you want, just make sure you don't mix them up when connecting it to the car wires. I had an extra set of wiring harness for fog lights (they were black and white), so I just used those.
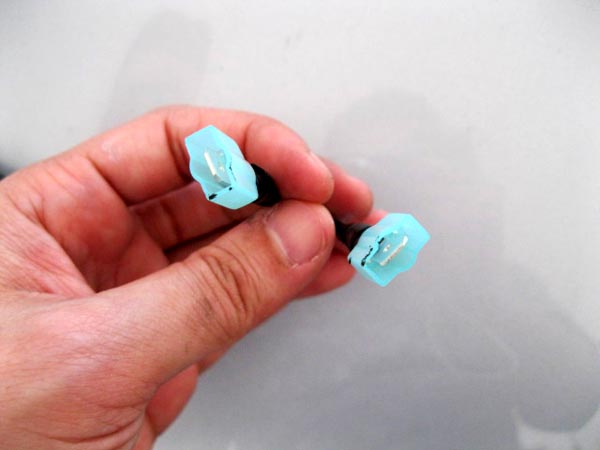
This step is pretty self explanatory. You basically just strip off about 1cm of tubing from the end of the wires. I crimped male connectors to the pigtails, and female connectors to the wire.
The wiring options will be discussed later, but now...the fun part begins.
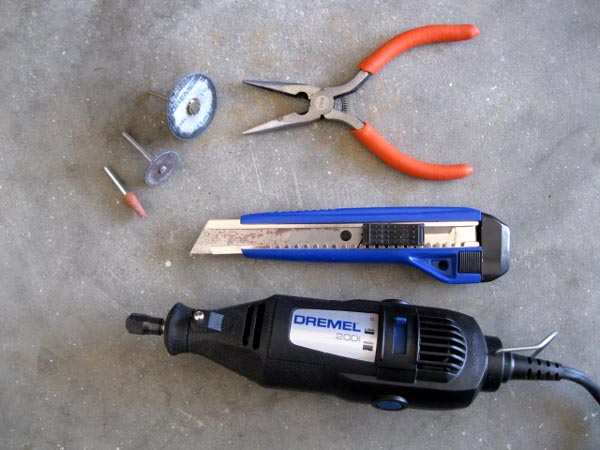
You'll have to gather up the nerves to cut into your car fenders. It literally took me a whole month of just standing there holding the side markers to the fenders just to visualize how sexy it'll look on the car. Once you've decided, here are the tools and equipment you'll need in order to finish the job in one session.
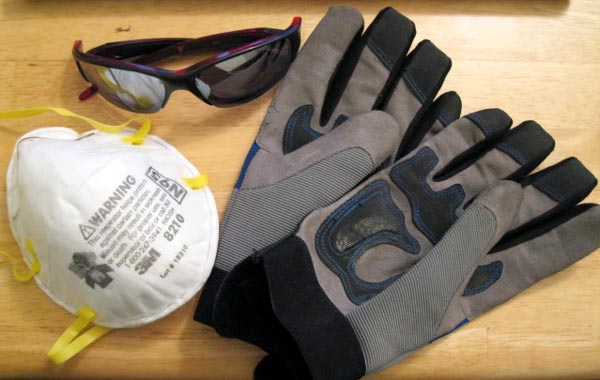
The face and hands protection are very important, unless you like metal dust on your skin, eyes, or inhaled in your mucosal linings (nose, mouth, lungs).
The most important tool would be the CORDED Dremel ($50 at Lowe's). I say that because I started with a cordless one, and I had to stop every 20 minutes to recharge the damn thing.
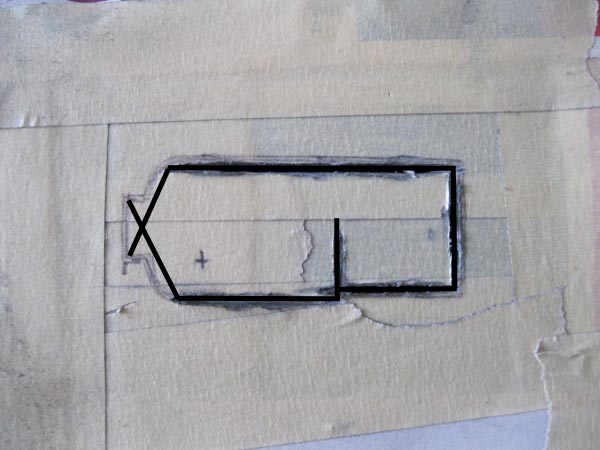
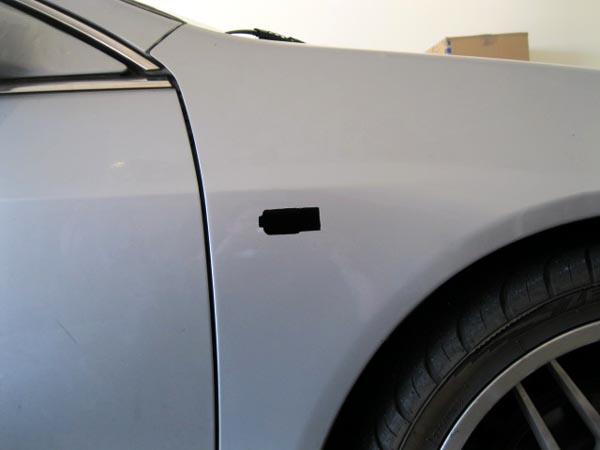
Figure out where you want to mount your side markers. Place masking tape on your fender to cover the immediate area of your intended cut. Place your template on the fender and trace it on the tape.
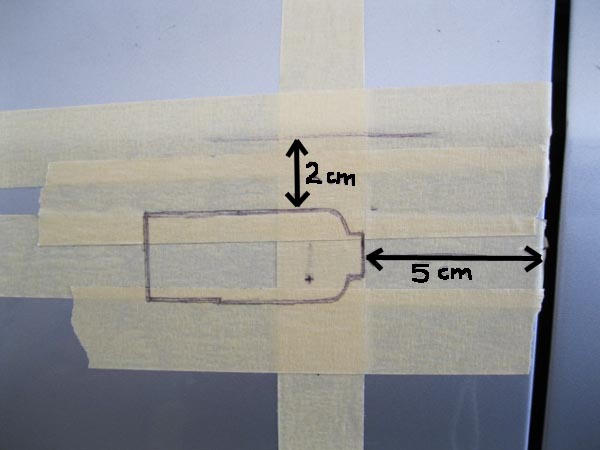
Unfortunately, our 6thgens don't have the side bumper to use as a reference point to measure the vertical height. I basically used the "crease" on the fender as a reference and measured 2cm down from that (as indicated on the picture above). Make sure you trace the outline on both sides before you start any cutting so you can compare and make sure they're aligned (+/- 2mm).
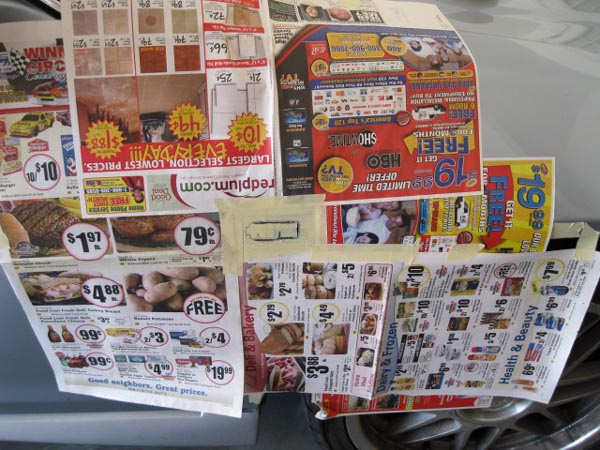
Next, cover the surrounding area with newspaper. This prevents metal flecks and dust to get onto your paint, rims, and tires.
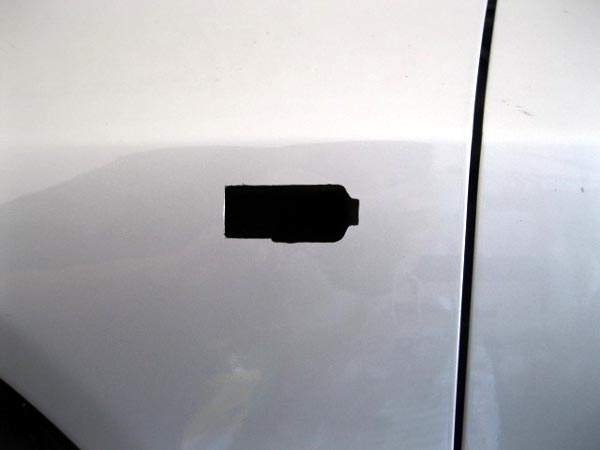
Take a breath....and make your cut. Be sure to cut a bit smaller than your outline. Use the metal disc to make the long cuts, then use the regular disc to cut the corners. I cut along the black lines (as indicated by the picture below). I found this way to be easiest, because you'll remove the majority of the cut piece this way.
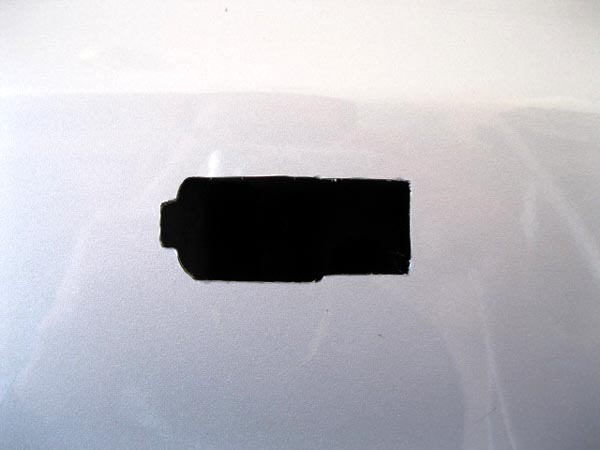
Once you've finished the cut, it should look like this
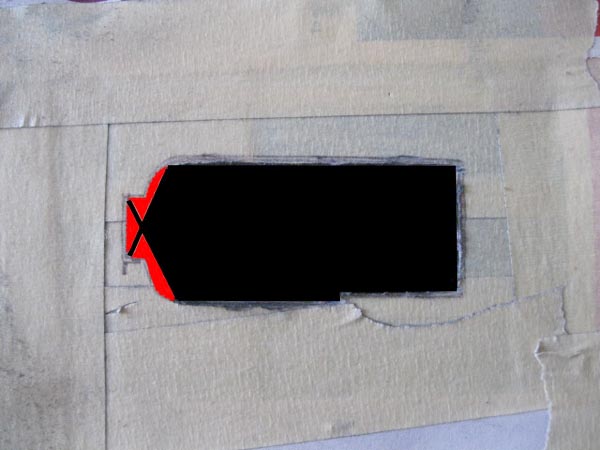
This is just a photoshop picture of the previous one (my cut is nowhere that straight) to show how it would look with the main piece cut off, and what remains (painted in red). In order to remove the red pieces, use the regular dremel disc and grind it away. Once all the pieces are removed, use the blade to clean up the cut surfaces, and sand it down with the cone tip grinder. Test fit your side markers. Fine tune as needed. Once you're satisfied, move to the other side.
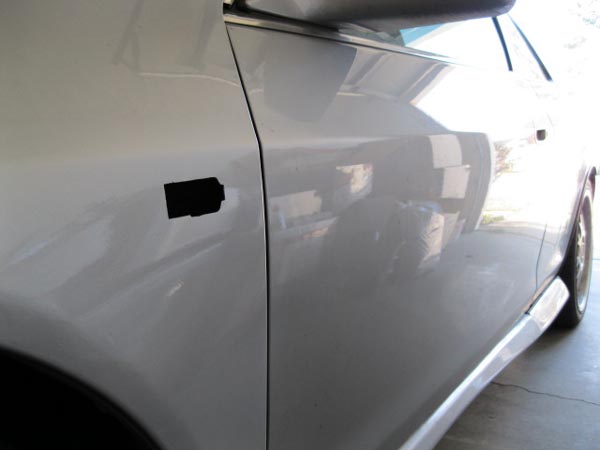
This is the finished product after 1.5 hours of cutting:
Right side
Left side
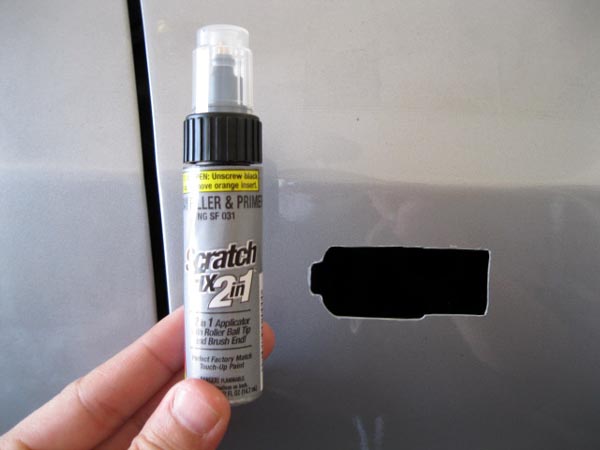
Since you've cut through the paint and exposed some metal, you'll have to take the extra step to prevent rust from forming. For $7 from Pepboys, I bought the touch-up primer. I used 3 coats on each side.
While you're waiting for the paint to dry. Consider your wiring options.
(This is copied from danomatic93's thread on JDMUniverse.com with minor edits...so thank you, danomatic93.)
Option 1: (US style)
- Side markers and blinker blink in phase (at the same time) whether or not Parking lamps are ON.
- Otherwise, side markers OFF (which means side markers will be OFF even with headlights ON)
Option 2: (Japanese style)
- Side markers illuminated and blink out of phase (alternate illumination) with blinkers when parking lamps are ON
- Parking lamps OFF: side markers blinks in phase with blinker
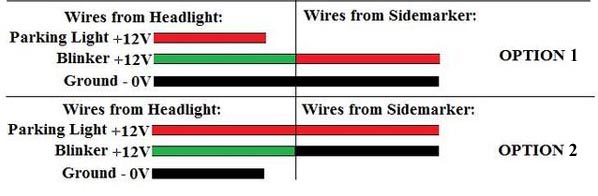
So depends on whichever option you decide on, the following is the wiring diagram:
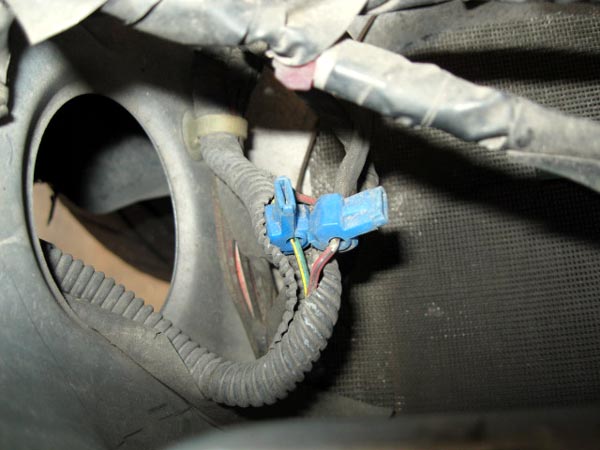
I decided on option 2 (which I think most of you would). Find the wire loom leading to your turn signal. Inside you'll find 2 wires: RED and GREEN. To make quick connections, I t-tapped the car wires. Quick review on this. Purchase some t-taps at Autozone. On the wire, cut the rubber coating and expose the wire underneath (if you cut through the whole wire, then just splice it back together). Snap on the t-tap. The male connectors for the t-taps are crimped to the side marker wire extensions.
T-taps on red and green car wires:
Right side
Left side

Male connectors on side marker wires
Next, either turn your wheels away from the side you're working on, or (in my case), jack the car up on the side you're working on.
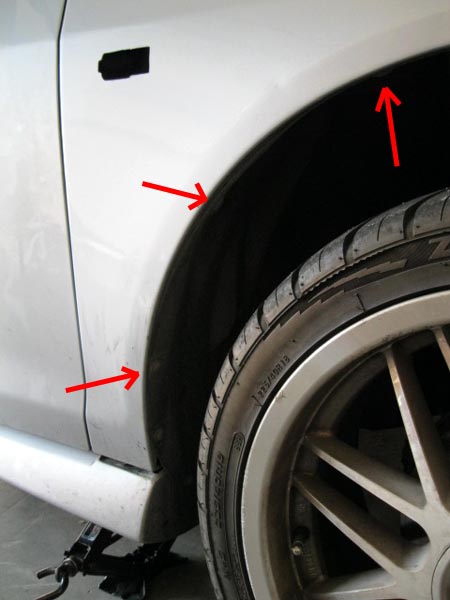
Remove the 2 plastic clips and 1 phillip screw (indicated by the red arrows in the picture below).
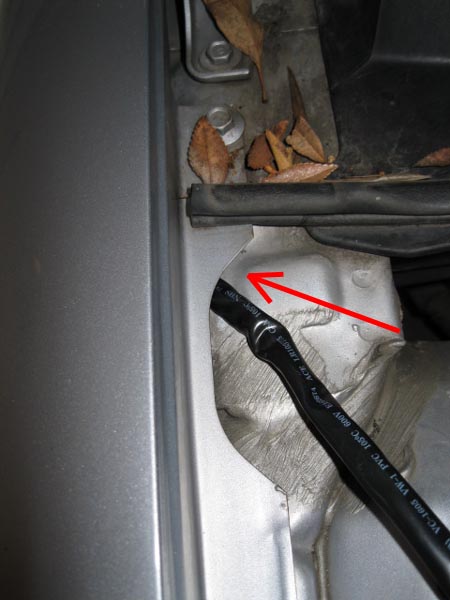
Pull down the wheel-well plastic cover. From the engine bay, feed the side marker wires into the space between the fender and the frame. Put your arm into this space from below and try to grab hold of the wires and feed it through the side marker holes you've just cut.
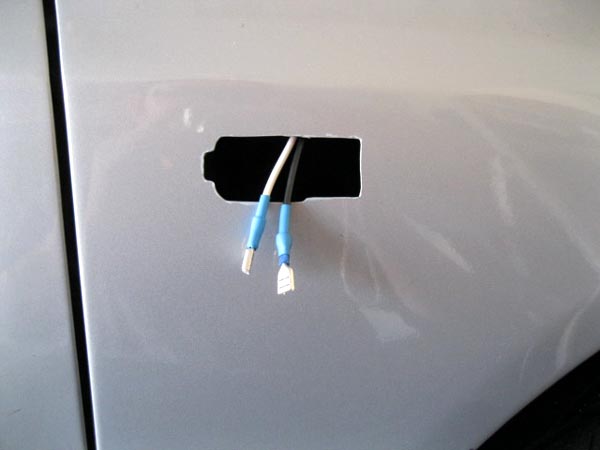
Connect the side markers to the wires. For me, it was green to white, and black to black.

Be sure to cover each connection separately with electrical tape.
Snap the side markers into the the fender
Plug the other end of your wire into the t-taps. For me, the white wire (which is connected to the green on the side marker) is connected to the red wire in the car. The black wire (which is connected to the black on the side marker) is connected to the green wire in the car. Hope this is not too confusing.
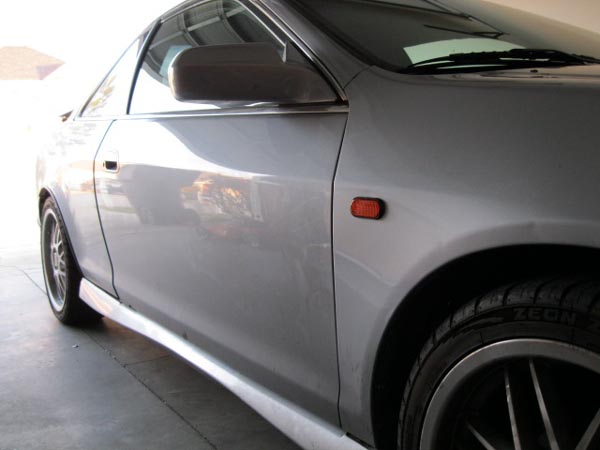
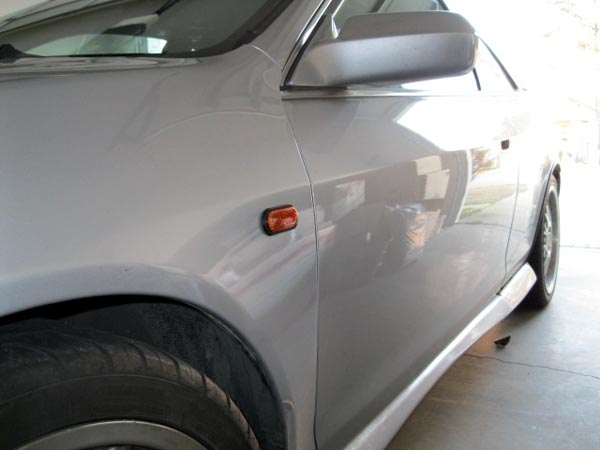
And that's it!!!! Stand back and marvel at your work. You now have side markers that other Hondas will envy.
Outcome:
Right side
Left side:
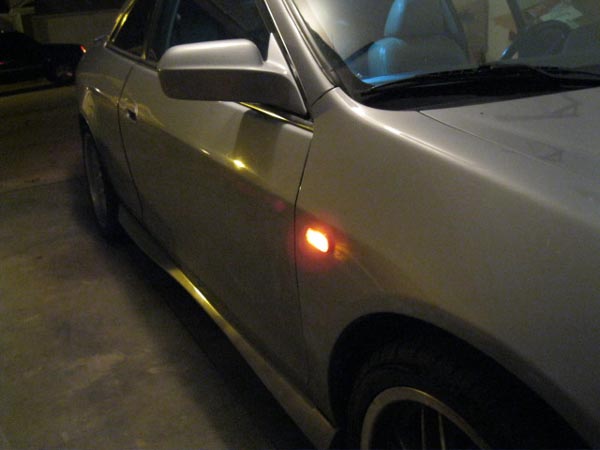
Right side illuminated:
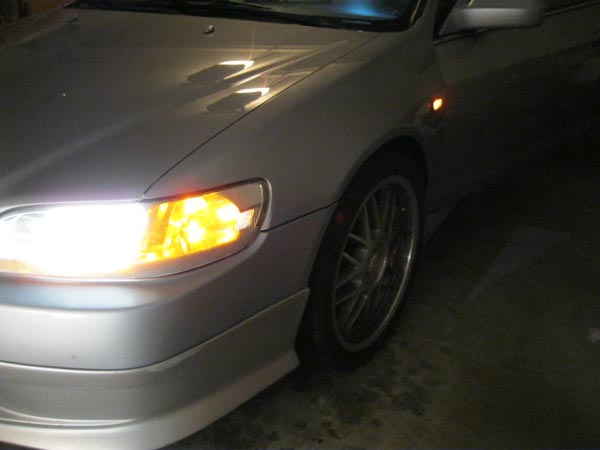
Left side illuminated:
Happy modding!!!
The good thing is that these came with the pigtails, so that saved me the time and efforts of soldering strips of wires into the harness.
The bad thing, there are no template available anywhere on the internet for these side markers (I probably didn't look hard enough), so I decided to make my own. I basically measured the back side of the housing and came up with this:
I basically went through 5 or 6 different designs before being satisfied with the one posted above.
Next, I made the wire extension for the side markers. Make sure you use wires of the same gauge as the pigtails. You'll be safe with 14-16 Ga wires. You can use whatever color you want, just make sure you don't mix them up when connecting it to the car wires. I had an extra set of wiring harness for fog lights (they were black and white), so I just used those.
This step is pretty self explanatory. You basically just strip off about 1cm of tubing from the end of the wires. I crimped male connectors to the pigtails, and female connectors to the wire.
The wiring options will be discussed later, but now...the fun part begins.
You'll have to gather up the nerves to cut into your car fenders. It literally took me a whole month of just standing there holding the side markers to the fenders just to visualize how sexy it'll look on the car. Once you've decided, here are the tools and equipment you'll need in order to finish the job in one session.
The face and hands protection are very important, unless you like metal dust on your skin, eyes, or inhaled in your mucosal linings (nose, mouth, lungs).
The most important tool would be the CORDED Dremel ($50 at Lowe's). I say that because I started with a cordless one, and I had to stop every 20 minutes to recharge the damn thing.
Figure out where you want to mount your side markers. Place masking tape on your fender to cover the immediate area of your intended cut. Place your template on the fender and trace it on the tape.
Unfortunately, our 6thgens don't have the side bumper to use as a reference point to measure the vertical height. I basically used the "crease" on the fender as a reference and measured 2cm down from that (as indicated on the picture above). Make sure you trace the outline on both sides before you start any cutting so you can compare and make sure they're aligned (+/- 2mm).
Next, cover the surrounding area with newspaper. This prevents metal flecks and dust to get onto your paint, rims, and tires.
Take a breath....and make your cut. Be sure to cut a bit smaller than your outline. Use the metal disc to make the long cuts, then use the regular disc to cut the corners. I cut along the black lines (as indicated by the picture below). I found this way to be easiest, because you'll remove the majority of the cut piece this way.
Once you've finished the cut, it should look like this
This is just a photoshop picture of the previous one (my cut is nowhere that straight) to show how it would look with the main piece cut off, and what remains (painted in red). In order to remove the red pieces, use the regular dremel disc and grind it away. Once all the pieces are removed, use the blade to clean up the cut surfaces, and sand it down with the cone tip grinder. Test fit your side markers. Fine tune as needed. Once you're satisfied, move to the other side.
This is the finished product after 1.5 hours of cutting:
Right side
Left side
Since you've cut through the paint and exposed some metal, you'll have to take the extra step to prevent rust from forming. For $7 from Pepboys, I bought the touch-up primer. I used 3 coats on each side.
While you're waiting for the paint to dry. Consider your wiring options.
(This is copied from danomatic93's thread on JDMUniverse.com with minor edits...so thank you, danomatic93.)
Option 1: (US style)
- Side markers and blinker blink in phase (at the same time) whether or not Parking lamps are ON.
- Otherwise, side markers OFF (which means side markers will be OFF even with headlights ON)
Option 2: (Japanese style)
- Side markers illuminated and blink out of phase (alternate illumination) with blinkers when parking lamps are ON
- Parking lamps OFF: side markers blinks in phase with blinker
So depends on whichever option you decide on, the following is the wiring diagram:
I decided on option 2 (which I think most of you would). Find the wire loom leading to your turn signal. Inside you'll find 2 wires: RED and GREEN. To make quick connections, I t-tapped the car wires. Quick review on this. Purchase some t-taps at Autozone. On the wire, cut the rubber coating and expose the wire underneath (if you cut through the whole wire, then just splice it back together). Snap on the t-tap. The male connectors for the t-taps are crimped to the side marker wire extensions.
T-taps on red and green car wires:
Right side
Left side
Male connectors on side marker wires
Next, either turn your wheels away from the side you're working on, or (in my case), jack the car up on the side you're working on.
Remove the 2 plastic clips and 1 phillip screw (indicated by the red arrows in the picture below).
Pull down the wheel-well plastic cover. From the engine bay, feed the side marker wires into the space between the fender and the frame. Put your arm into this space from below and try to grab hold of the wires and feed it through the side marker holes you've just cut.
Connect the side markers to the wires. For me, it was green to white, and black to black.
Be sure to cover each connection separately with electrical tape.
Snap the side markers into the the fender
Plug the other end of your wire into the t-taps. For me, the white wire (which is connected to the green on the side marker) is connected to the red wire in the car. The black wire (which is connected to the black on the side marker) is connected to the green wire in the car. Hope this is not too confusing.
And that's it!!!! Stand back and marvel at your work. You now have side markers that other Hondas will envy.
Outcome:
Right side
Left side:
Right side illuminated:
Left side illuminated:
Happy modding!!!
")