Garage Build for Auto Detailing(UPDATED 5/2 PG11)

CG6Lemon

Detailing Enthusiast
Joined
Jun 6, 2008
Posts
7,715
Reaction score
46
Location
S.F Bay Area, CA
Re: My garage build for auto detailing (UPDATED 8/24 PG 5) Eye Candy

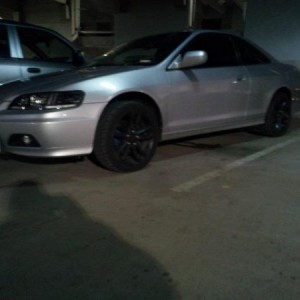
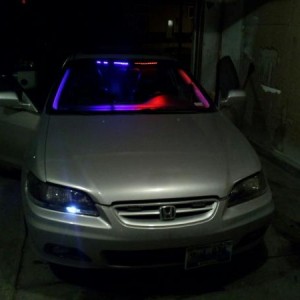
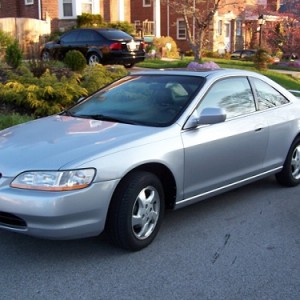
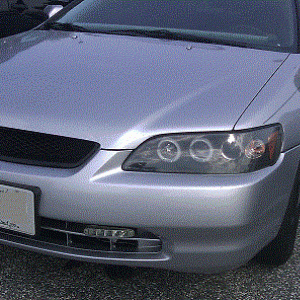
Was the application easy on and easy off, or were there certain areas of applying or removal issues? Did you get a chance to test the durability of it yet? I'm planning to give my little sister the auto accord, and I am going to apply Opti Coat 2.0 on it because it makes the maintenance washes a lot easier. As for my manual, I might only Opti Coat the bottom of the doors, and bottom of the rear bumper so dirt, and contamination won't be able to adhere to it as easily compared to a sealant or wax.

If only you were in the states, we could share some stuff for each other to test. Shipping to Cananda might be expensive, but I've never shipped anything there so I don't have any knowledge of what is the actual cost of shipping stuff.
 
Last edited:

CG6Lemon

Detailing Enthusiast
Joined
Jun 6, 2008
Posts
7,715
Reaction score
46
Location
S.F Bay Area, CA
Re: Garage build for auto detailing(UPDATED 9/07 PG6)Storage section complete,added l

Another update for you guys. I was really excited to put these couple projects together, because the image I planned out in my head, being put on paper, then being able to see it completed was really rewarding. I finished a section for storage, and I removed the 2 old shop lights, and installed 2 new ones to replace the old ones. And let me say this, the new one blows the water off the old ones in terms of brightness and light intensity output. On to the pictures, as I'm sure that's what everyone is eager to see.


A recap of this section through the stages it went through


First


End


The 2 new ones installed in the center of the garage


A shot from outside perspective to show how much light output it gives off


Old picture of center lights on only


Now with new lights on only


Old picture of side and center lights both on at once


Now with all lights on


Hope you guys enjoyed the update, and stay tuned for the next update.
 
Last edited:

CG6Lemon

Detailing Enthusiast
Joined
Jun 6, 2008
Posts
7,715
Reaction score
46
Location
S.F Bay Area, CA
Re: Garage build for auto detailing(UPDATED 9/16 PG6) Track Lighting

I have another update for you guys. This time I added 8 ft worth of track lighting with a total of 6 50W halogen bulbs. The reason I chose halogen bulbs is because I want 2 different color light source. Shop lights are 6500k white color, and these are 2700k halogen bulb color. My main objective for installing the track lighting is to be able to inspect the front end of the car more thoroughly. I will continue to adjust the angles of the lighting beam to the point where I think it will work for me. For now the angles I set were just to test it really quick and snap some pictures for you guys.


Installed:


A picture of it turned on aiming at the ground emitting light to the corner of the area


That's how much foreground light it gives off


From different angle


First attempt to aim them at the front end


Fender/wheel shot...


That's it for now. Stay tuned for the next update.
 

CG6Lemon

Detailing Enthusiast
Joined
Jun 6, 2008
Posts
7,715
Reaction score
46
Location
S.F Bay Area, CA
Re: Garage Build for Auto Detailing(UPDATED 9/22 PG6)Shop lights&vigorous cleaning

Another update for you guys. I spent the whole day today installing/major cleaning/throwing away stuff. On the other hand, the results definitely made my day. I can now proceed to start working on two critical areas of the garage. The little storage area, and the corner of the garage. For the little storage area, I'm thinking on placing more storage bins there to hold more pads/towels, or put another shelf there, and possibly some tools such as shop vac, compressor, etc. The corner area will consist of another 5 tier shelve to accommodate more products and will probably have some water cleaning/filtration set up to ensure the water is clean.


Remember this area full of crap?


After


Added some lighting to the little area as well


More lighting also added for the right corner when facing inward from outside of garage


Starting to work on the pegboard area as well


Shot with all installed lights on


Stay tuned for the next update.
 

CG6Lemon

Detailing Enthusiast
Joined
Jun 6, 2008
Posts
7,715
Reaction score
46
Location
S.F Bay Area, CA
Re: Garage Build for Auto Detailing(UPDATED 9/29 PG6)Entire corner area makeover

I have a huge update for you guys. Took the entire weekend to run back and forth to look for stuff and buy the correct stuff after supposedly triple checking. Made multiple trips to Lowes, Homedepot, and back to my house to check on measurements again. Bought a hose reel mount from Lowes, the dark color wood boards, black brackets, and 5 tier shelf are from Homedepot.


Hose reel mount installed. Looking sharp now instead of it on the floor.


Took off all the old wood, brackets, and some "tough" nails screwed in.


After much sweating, exhaustion, frustration, and anger, we come to this


With the help of my dad, the espresso colored wood boards are up, and paired with black brackets to give it a classy look


Close up of the color of it


The boards flow well with the new 5 tier shelf


Both shelves together with majority of my stuff in place


This corner all nice and tidy now


Hope you guys enjoyed the updates. Stay tuned for the next update.
 

SykVSyx

Well-Known Member
Joined
Jan 6, 2007
Posts
13,940
Reaction score
30
Location
Tee Dot Ohh
Re: Garage Build for Auto Detailing(UPDATED 9/29 PG6)Entire corner area makeover

Lemo, looking good.

Nice to see you putting in the work to do something you enjoy.

Looking at the last pic, you need more products!

The shelves are looking too scanty, I am sure there are more products you could invest in, especially since you could potentially be dealing with different types of cars/interiors/finishes.

You probably know more about this stuff than I do, so you would know what you need, but, I'm thinking you are still buidling up your supply of supplies, yes?
 

CG6Lemon

Detailing Enthusiast
Joined
Jun 6, 2008
Posts
7,715
Reaction score
46
Location
S.F Bay Area, CA
Re: Garage Build for Auto Detailing(UPDATED 9/29 PG6)Entire corner area makeover

Thanks Derek. Appreciate the comment. I want to test my limit and potential to see how far I can go in order to be successful. The best thing anyone can hope for is doing something you enjoy for a living while getting paid to do what you do best. For now I stopped investing in products because I want to get the garage ready first, and that will be my number 1 priority at the moment. In the future, my collection will just keep growing due to my nature of liking to try out new stuff to see what works for me.
 
Last edited:

Brad2274

Well-Known Member
Joined
Jul 18, 2011
Posts
1,388
Reaction score
4
Location
Melbourne, FL
Re: Garage Build for Auto Detailing(UPDATED 9/29 PG6)Entire corner area makeover

wow looks really clean, been a while since ive looked at this thread, good job!
id say that's enough supplies depending on what all of it is, i know i dont usually use nearly half of that stuff when i detail a customers car. i started doing some freelance stuff, made $100 on my first solo detail, so it's not very hard to recoop money spent on products if you wanna buy more!
 

CG6Lemon

Detailing Enthusiast
Joined
Jun 6, 2008
Posts
7,715
Reaction score
46
Location
S.F Bay Area, CA
Re: Garage Build for Auto Detailing(UPDATED 9/29 PG6)Entire corner area makeover

thanks Brad. I will try to think of more ideas on making it look even cleaner.
 
Last edited:

CG6Lemon

Detailing Enthusiast
Joined
Jun 6, 2008
Posts
7,715
Reaction score
46
Location
S.F Bay Area, CA
Re: Garage Build for Auto Detailing(UPDATED 10/27 PG6)Bought shop stuff,Eye Candy,Did

Been a while guys since the last update. I saved money for a couple weeks so I could afford some stuff I had to buy for the shop. I was eager to start tinkering around the shop and just trying to find something to do in order to improve it. Bought a DSLR camera, which is a big improvement over the Samsung S3. Now I am able to show everyone what I am looking at with my own eyes through the lens of the camera. Also bought a shop vac, which was of course a necessity if I am going to work on interiors as well. I also picked up some smaller stuff, but equally as important as the big ticket items which you will see below.


Went to Lowes and picked up a shop vac


Picked up a 15w Led work light as well.


Some pictures of it in action. I was also amazed with the camera when the picture I took came out so awesome.


Couple shots of it being used on the car's paint


Bought a microscope with USB port. I am using this to take very close up pictures of scratches so it can help me determine how deep of a scratch I am working with.


A shot zoomed in from my wooden desk


Bought two of these black liner from Lowes to make my work bench look newer


Before


Starting


Ran out at this point so I went to Lowes to buy the 2nd roll and continued


Took me 3 hours from start to completion. The most time consuming part was using double sided tape on all the edges to hold it in place


Well that's it for now, hope you guys enjoyed the read, and stay tuned for the next updates.
 

Latest posts

Back
Top