


Mikey
Well-Known Member
Got tired of the "MEEP MEEP". Sourced out that a lot of Civic and Fit guys were able to use newer (2010) Accord horns and it turns out it works for us, too.
PART NUMBERS:
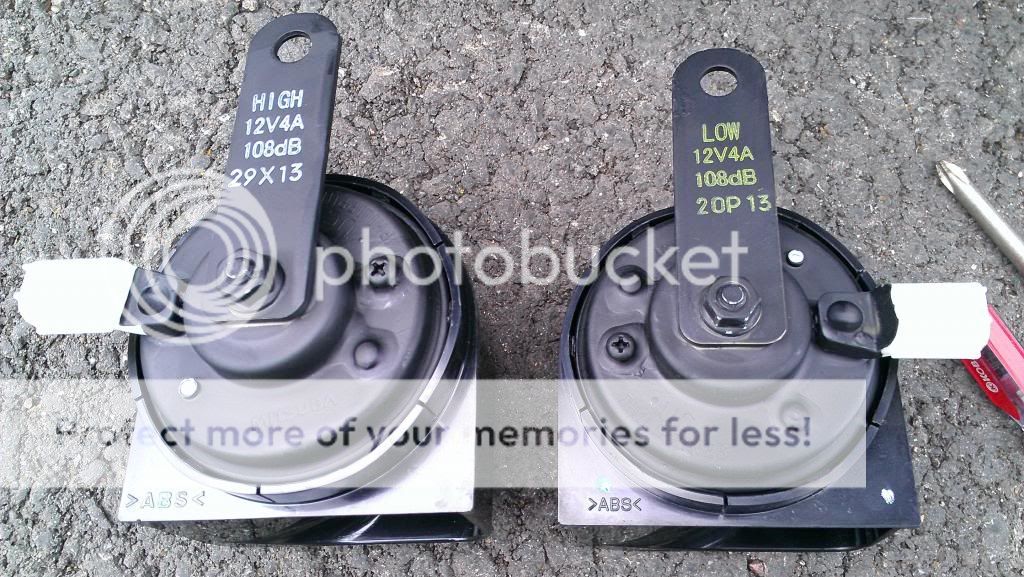
38100-STK-A02 - HORN ASSY. (LOW)
38150-TA0-A01 - HORN ASSY. (HIGH)
Online they run $11-$12+shipping; dealership has them for $16-ish each. I suggest, and prefer, the dealer because I can get them same/next day and if I have return issues I can talk to someone in person.
-------------------------------------------------------------------------------------------
***DISCLAIMER: This DIY involves removing your bumper and using small hand tools. I am not responsible for any injuries, damages, or mistakes you make. Please read carefully and make sure you are comfortable before proceeding. This will require a little wiggling and a little finesse but I assure you, this is a very simple modification.***
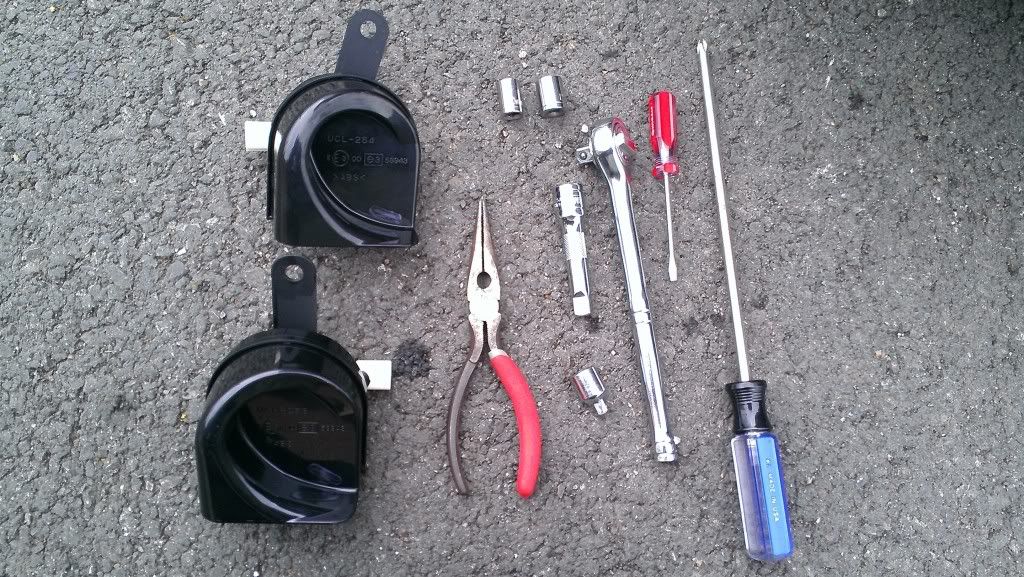
Items Needed:
1 High Horn
1 Low Horn
Socket Wrench
Extensions
12mm Socket
10mm Socket
Phillips Screwdriver
Flat-head Screwdriver (or prying tool)
Pliers; preferably needle-nose
STEP 1: Remove the bumper. We all know how to do this. Once done, you can see, and access, the horns.
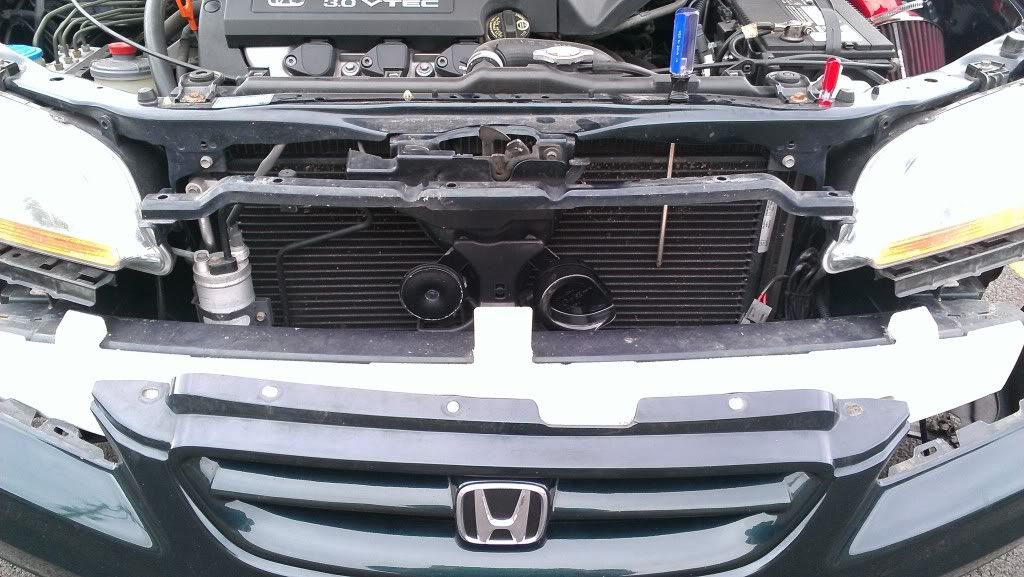
**NOTE: I already have installed one of the horns. Don't worry, yours should still have both the old ones.**
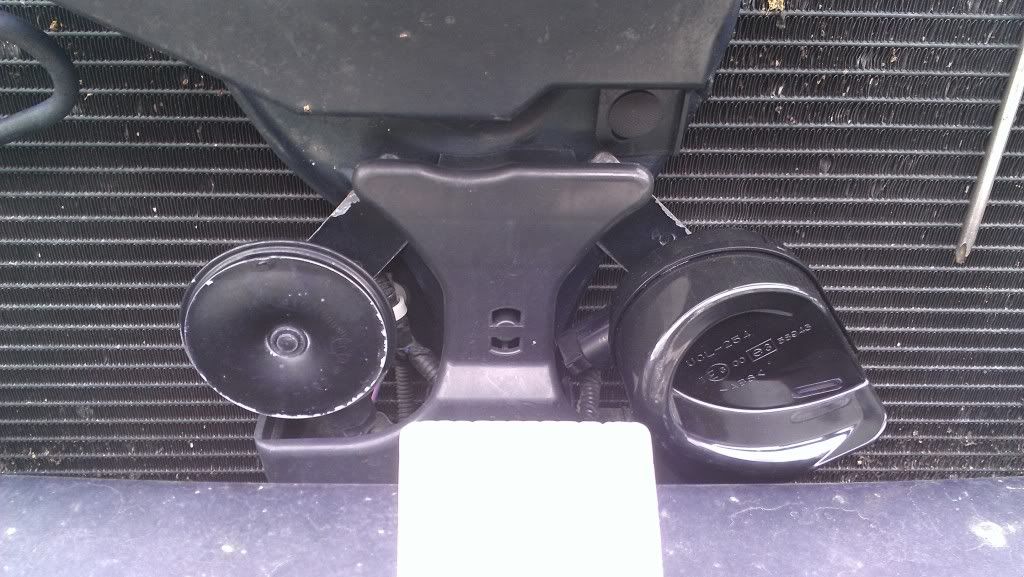
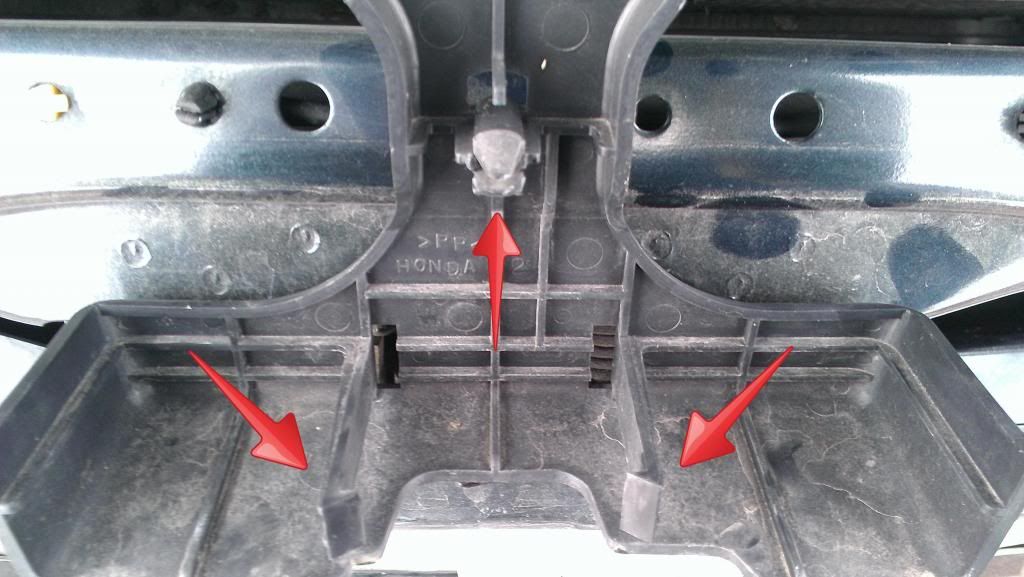
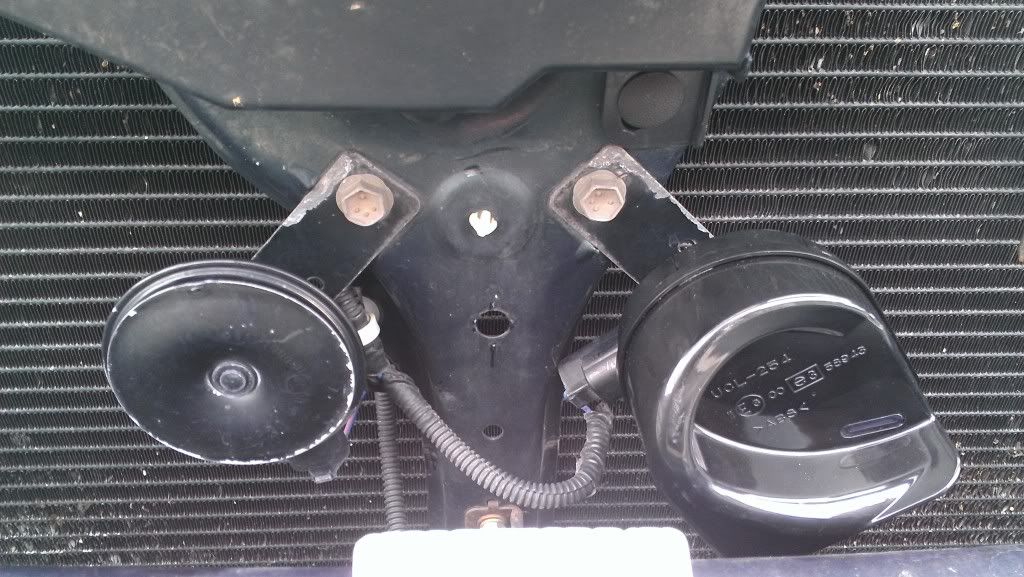
STEP 2: Before removing the horns, we need to remove that plastic piece between them. (It wont fit after the new horns are in and I don't know it's purpose anyway. Keep it just in case but it may be junk.) Here's what it looks like from behind. You'll have to reach behind it and undo the two side clips and give it a good pull with the pliers to pop out that middle plug.
STEP 3: With the plastic piece gone, you can now access the (2) 12mm bolts that attach the horns to the car.
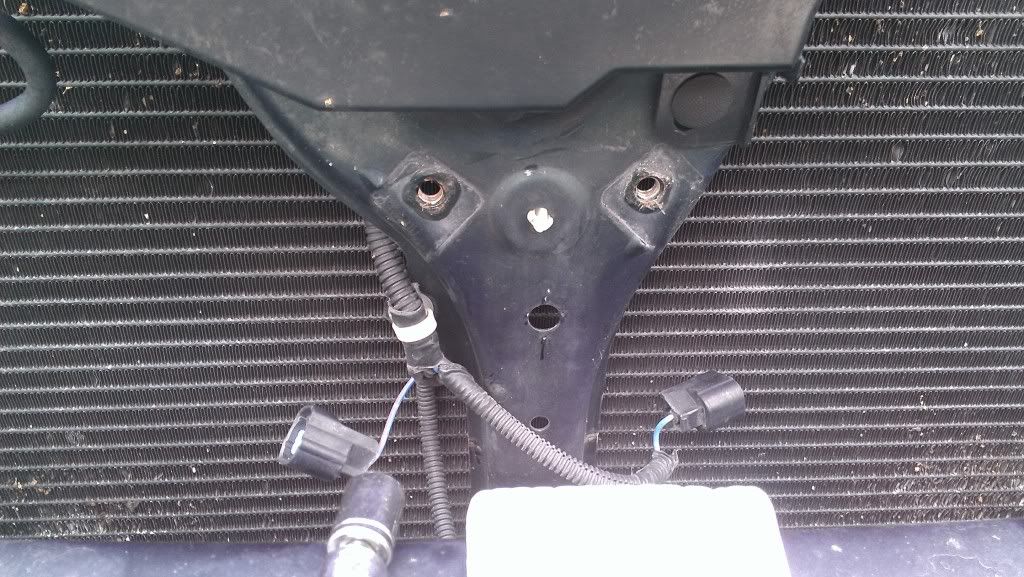
STEP 4: Remove the 12mm bolts and unplug your old horns. Looks like this when you've done so...
STEP 5: Plug the new horns in and bolt them on. Make note of which is which. Replace high with high, low with low. Just in case; High is on the PASSENGER SIDE, Low on the DRIVER SIDE.
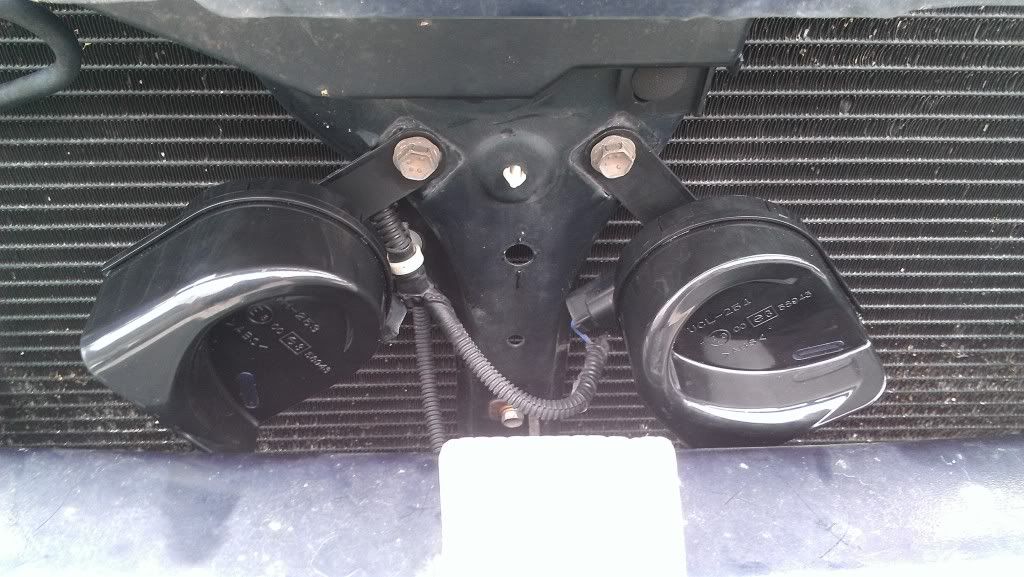
**NOTE: Each new horn will come with a plug and attaching arm. I found it best to line them up at a 90* angle. This will ensure plug clearance and so that water and debris don't gather or build-up inside the horns. The bolt on the back of the horns themselves are 10mm.**
STEP 6: Check that they work. Re-install the bumper. Enjoy.
Here's video from outside the car...
Video from inside the car...
Feel free to PM me or post any questions and don't forget to rep.")
PART NUMBERS:
38100-STK-A02 - HORN ASSY. (LOW)
38150-TA0-A01 - HORN ASSY. (HIGH)
Online they run $11-$12+shipping; dealership has them for $16-ish each. I suggest, and prefer, the dealer because I can get them same/next day and if I have return issues I can talk to someone in person.
-------------------------------------------------------------------------------------------
***DISCLAIMER: This DIY involves removing your bumper and using small hand tools. I am not responsible for any injuries, damages, or mistakes you make. Please read carefully and make sure you are comfortable before proceeding. This will require a little wiggling and a little finesse but I assure you, this is a very simple modification.***
Items Needed:
1 High Horn
1 Low Horn
Socket Wrench
Extensions
12mm Socket
10mm Socket
Phillips Screwdriver
Flat-head Screwdriver (or prying tool)
Pliers; preferably needle-nose
STEP 1: Remove the bumper. We all know how to do this. Once done, you can see, and access, the horns.
**NOTE: I already have installed one of the horns. Don't worry, yours should still have both the old ones.**
STEP 2: Before removing the horns, we need to remove that plastic piece between them. (It wont fit after the new horns are in and I don't know it's purpose anyway. Keep it just in case but it may be junk.) Here's what it looks like from behind. You'll have to reach behind it and undo the two side clips and give it a good pull with the pliers to pop out that middle plug.
STEP 3: With the plastic piece gone, you can now access the (2) 12mm bolts that attach the horns to the car.
STEP 4: Remove the 12mm bolts and unplug your old horns. Looks like this when you've done so...
STEP 5: Plug the new horns in and bolt them on. Make note of which is which. Replace high with high, low with low. Just in case; High is on the PASSENGER SIDE, Low on the DRIVER SIDE.
**NOTE: Each new horn will come with a plug and attaching arm. I found it best to line them up at a 90* angle. This will ensure plug clearance and so that water and debris don't gather or build-up inside the horns. The bolt on the back of the horns themselves are 10mm.**
STEP 6: Check that they work. Re-install the bumper. Enjoy.
Here's video from outside the car...
Video from inside the car...
Feel free to PM me or post any questions and don't forget to rep.
Last edited:
 Repped